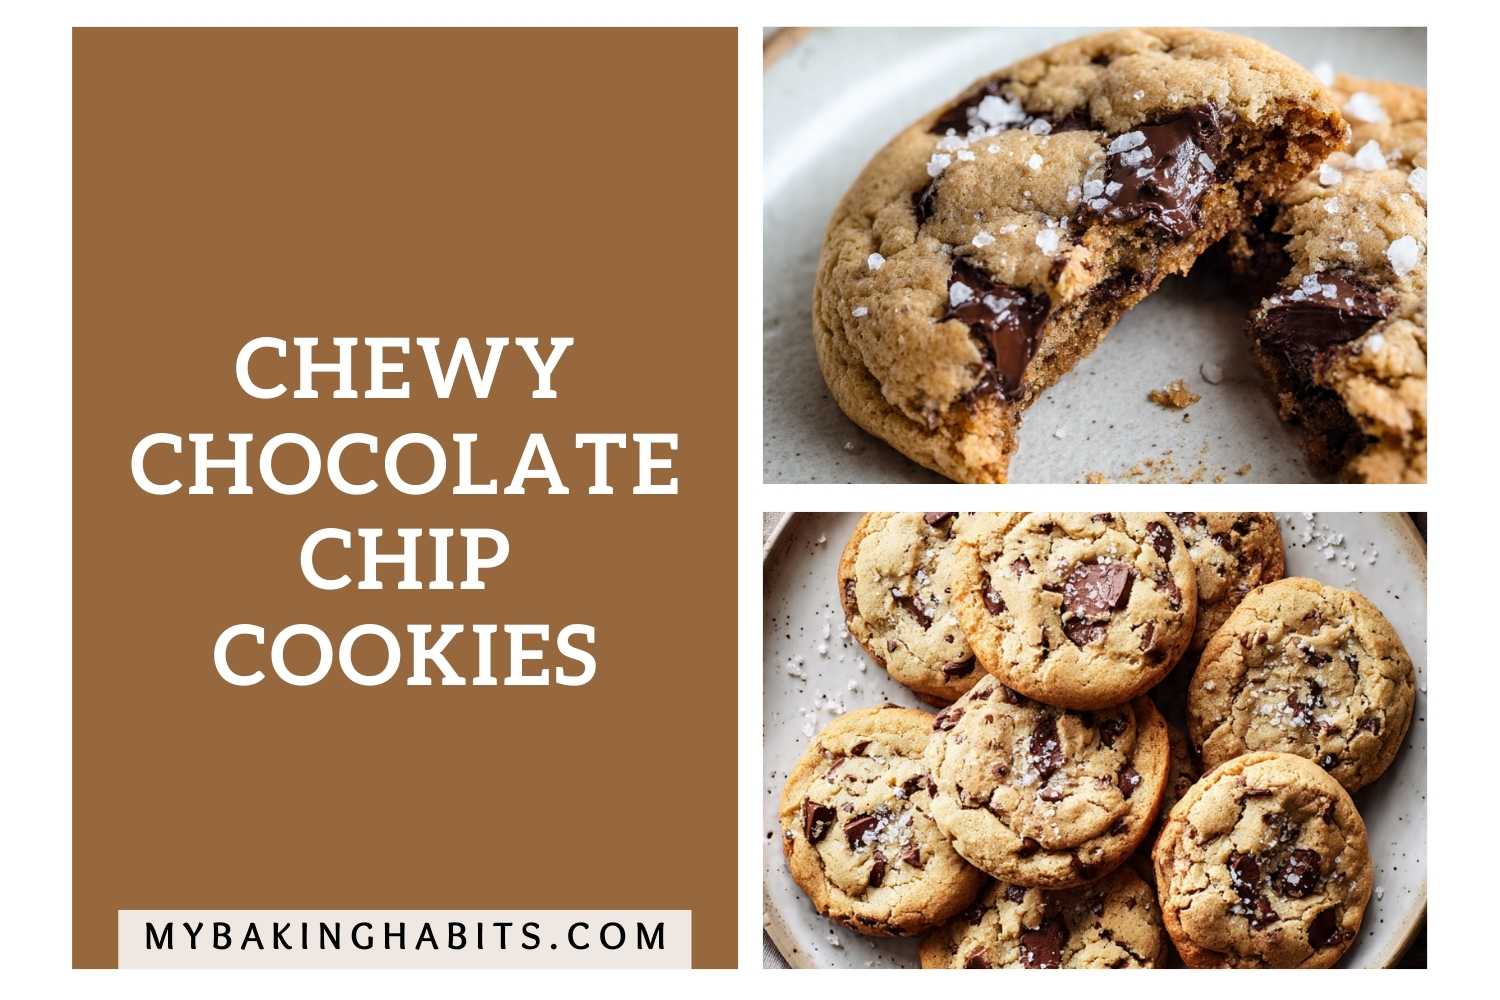
Chewy Chocolate Chip Cookies
I have made these chewy chocolate chip cookies across more than a dozen batches in my Los Angeles kitchen, adjusting one variable at a time until I understood exactly what each change produced. This is the version that stuck — and below I have written in every way it can go wrong so you do not have to find out yourself.
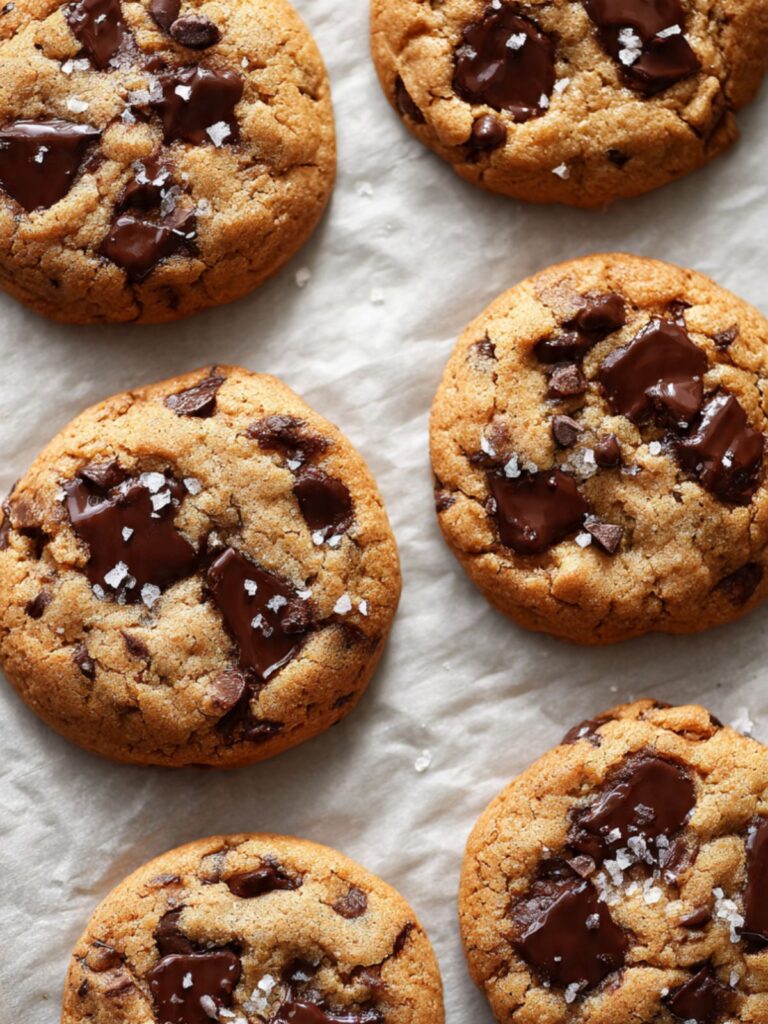
The center of a good chocolate chip cookie should feel like it resisted being fully baked. Not raw — just barely set, fudgy in a way that makes you pull apart the second half slowly. These deliver that. Thick, golden edges that hold their shape. A center that pools with melted dark chocolate and gives when you press it. Flaked sea salt on top that makes the chocolate taste more like chocolate.
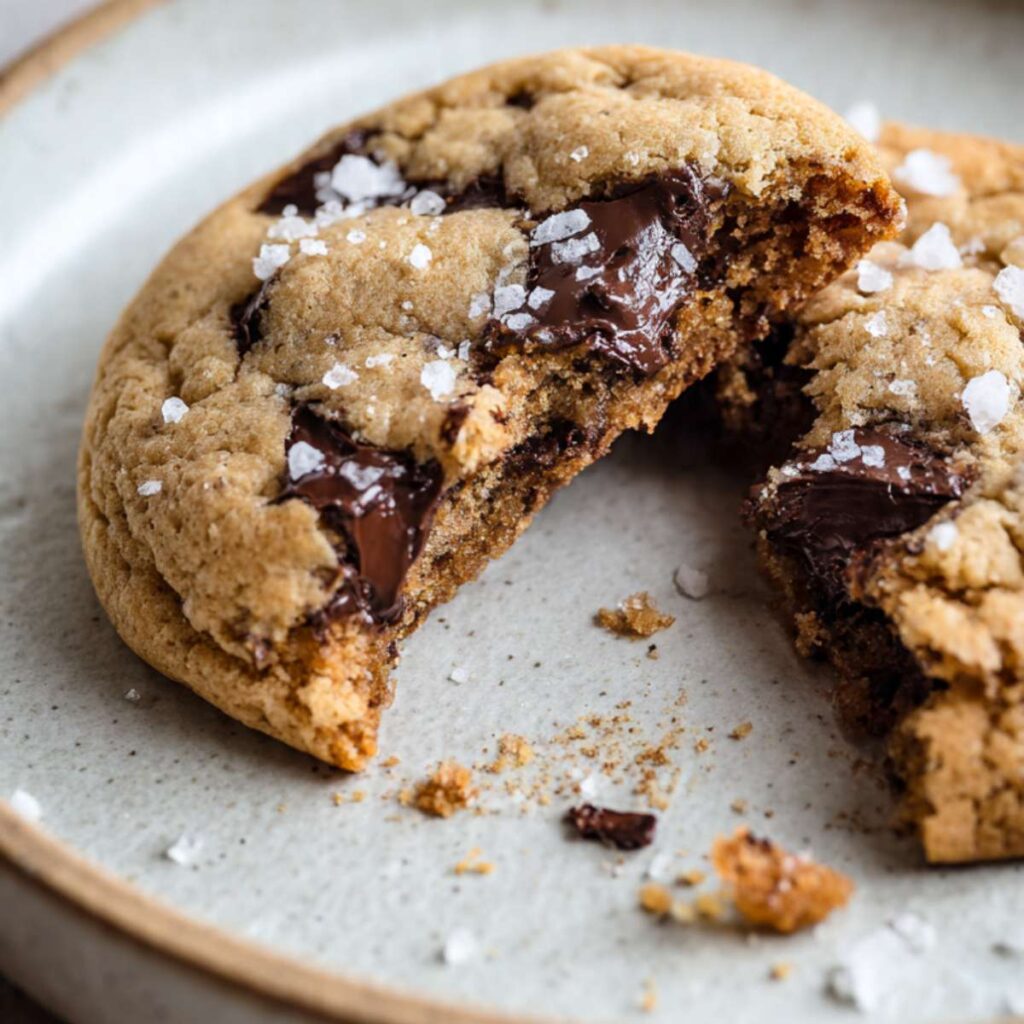
I tested this with melted butter versus softened creamed butter across six batches. The creamed butter version produced a taller, lighter cookie with a more cakey interior. The melted butter version produced a denser, chewier crumb with the fudgy center visible in the cross-section photo. Creamed butter incorporates air — melted butter does not. That air is exactly what I did not want here. The melted butter version is the one I kept.
I tested the egg ratio across four batches — 2 whole eggs, 2 whole eggs plus 1 yolk, and 3 whole eggs. Two whole eggs produced a cookie that was chewy but not fudgy. Three whole eggs produced a cookie with too much structure — the interior baked up firmer than the photos show. Two whole eggs plus one extra yolk hit the correct result: the extra yolk adds fat without adding the structural protein of a full egg white, which keeps the center dense and soft even when the cookie is fully baked through.
I tested baking temperature across three batches — 350°F, 375°F, and 400°F. At 350°F the cookies spread more before the edges set, producing a thinner cookie with less dome. At 400°F the edges browned too fast and the centers were still raw when the edges looked done. At 375°F the edges set quickly enough to hold the height while the centers finished through carryover heat. That is the temperature in this recipe.
No mixer. No chilling. One bowl and about 30 minutes from start to first cookie.
🗒 Luna’s Note: The extra egg yolk is the one thing I will not let anyone skip. It is responsible for that dense, almost brownie-like interior that separates these from every other chewy chocolate chip cookie I have tested. The white adds structure. The yolk adds fat and richness. They do not do the same thing.
| Prep Time | Cook Time | Total Time | Yield | Difficulty |
|---|---|---|---|---|
| 15 minutes | 12 minutes | 27 minutes | 12 large cookies | Easy |
| Calories | Fat | Carbs | Sugar | Protein | Sodium |
|---|---|---|---|---|---|
| ~420 kcal | ~22g | ~53g | ~34g | ~5g | ~210mg |
Macros are approximate and will vary based on ingredient brands and serving size.
Ingredients & Tools for Chewy Chocolate Chip Cookies Recipe
For the Cookie Dough
- 1 cup (227g) unsalted butter, melted and cooled to room temperature
- 1 cup (200g) dark brown sugar, packed
- ½ cup (100g) plain white granulated cane sugar
- 2 large eggs, room temperature
- 1 extra large egg yolk, room temperature
- 2 tsp pure vanilla extract
- 2½ cups (300g) all-purpose flour, spooned into the measuring cup and leveled — or weighed
- 1 tsp baking soda, checked for freshness
- 1 tsp Diamond Crystal kosher salt
For the Mix-Ins and Finish
- 1¾ cups (280g) dark chocolate chunks, 70% cacao — broken from a bar or bought as pre-cut chunks
- 1 tsp Maldon flaked sea salt, for topping
Before You Start
Gram weights take priority over volume in this recipe. A packed cup of flour can weigh anywhere from 120g to 160g depending on how it was scooped. At 300g, this dough has the exact flour-to-fat ratio that produces the thick, fudgy center visible in the photos. Too much flour and the center bakes firm instead of soft.
This entire recipe comes together with a large mixing bowl, a whisk, and a silicone spatula — no electric mixer needed at any stage. If you own a stand mixer, leave it in the cabinet. Using a mixer here over-aerates the dough and pushes the texture toward cakey rather than fudgy.
Position your oven rack in the middle of the oven before preheating. The top rack concentrates heat at the surface and burns the tops before the centers set. The bottom rack over-browns the bottoms before the interior is done. Middle rack only.
🗒 Luna’s Note: I melt the butter first, before I do anything else, and set it aside to cool while I measure everything out. By the time the butter is measured and the rest of the ingredients are ready, it has cooled enough to use. If the butter is still warm when the eggs go in, the eggs will begin to cook. The dough will look fine but the cookies will bake up tighter and less fudgy.
Butter: must be fully melted and cooled — warm to the touch but not hot. Test it against the inside of your wrist. If it feels hot rather than warm, wait 10 more minutes. The visual check: the butter should look opaque and slightly thickened at the edges of the bowl, not clear and liquid. Browned butter can be used here for a deeper, nuttier flavor — see the brown butter chocolate chip cookies article for the full technique.
Eggs and yolk: must be at room temperature. Cold eggs do not emulsify cleanly into melted butter and can cause the fat to separate, producing greasy cookies that spread unevenly. Set them out 30 minutes before baking, or place them in a bowl of warm water for 10 minutes.
Flour: weigh it. If you are measuring by volume, spoon the flour into the measuring cup with a separate spoon and level it with a straight edge — never scoop directly from the bag. Direct scooping compacts the flour and can add 20–30g per cup without you realizing it. At 300g this dough is calibrated. Anything over 320g will produce a drier, firmer cookie.
Baking soda freshness test: drop ¼ tsp into a small bowl of hot water with a few drops of vinegar. If it bubbles actively within 2 seconds, it is fresh. If it fizzes weakly or not at all, replace it — flat baking soda produces cookies that do not lift or crackle correctly.
Granulated cane sugar: use plain white granulated cane sugar — not coconut sugar, not raw sugar, not turbinado. These substitutes have different crystal structures and moisture contents that change how the surface crackle forms during baking. The white sugar in this recipe is responsible for the fine crinkled surface visible in the photos. Substituting it removes that mechanism.
Chocolate chunks: use dark chocolate at 70% cacao, either broken from a bar or bought as pre-cut chunks. Standard chocolate chips contain stabilizers that prevent full melting. Chunks melt into pools. If only chips are available, use the best quality you can find — Ghirardelli 60% bittersweet chips are the closest substitute.
Flaked sea salt: Maldon is the standard here. The large flat crystals do not dissolve into the dough surface during baking — they partially embed and stay intact, giving a distinct salty crunch against the chocolate. Fine sea salt or table salt will not produce the same result.
Pan: use a light-colored aluminum half-sheet pan lined with parchment paper. If you use a dark non-stick pan without adjusting the oven temperature, the bottoms will overbrown and potentially scorch before the centers have finished setting — the dark surface absorbs radiant heat significantly faster than light aluminum.
Necessary Tools
Required:
- Large mixing bowl
- Medium mixing bowl
- Kitchen scale (strongly recommended — gram weights are more accurate than volume)
- Whisk
- Sturdy silicone spatula
- Light-colored aluminum half-sheet baking pan (Nordic Ware or equivalent)
- Parchment paper
- Cookie scoop — 3-tablespoon / large size (approximately 60–65g per scoop)
- Wire cooling rack
Optional but recommended:
- Oven thermometer — most home ovens run 15–25°F off their displayed temperature. Luna’s oven runs 15°F hot. At 375°F on the dial, confirm actual temperature before the first pan goes in.
How to Make Chewy Chocolate Chip Cookies
Step 1: Preparing Your Pan and Oven for an Even Bake
Position your oven rack in the middle position and heat the oven to 375°F (190°C). Do not start mixing the dough until the oven is fully preheated — a cookie going into an under-temperature oven will spread flat before the edges have a chance to set. Set a timer and wait for the full preheat signal.
Line your light-colored aluminum half-sheet pan with parchment paper and set it aside. A dark pan absorbs more heat and will over-brown the bottoms before the centers are set. If you only have a dark pan, reduce the oven temperature by 25°F (15°C) and start checking at 9 minutes.
The pan should be at room temperature — never warm from a previous batch. A warm pan starts melting the dough before it goes in the oven and causes excessive spread. If you are baking in batches, let the pan cool completely between rounds or use a second pan.
Your oven is ready when the preheat indicator signals and you have waited an additional 5 minutes — most home ovens signal before they have fully stabilized at temperature. If you have an oven thermometer, confirm 375°F (190°C) before the first pan goes in.
Step 2: Combining the Melted Butter and Both Sugars Until Glossy and Unified
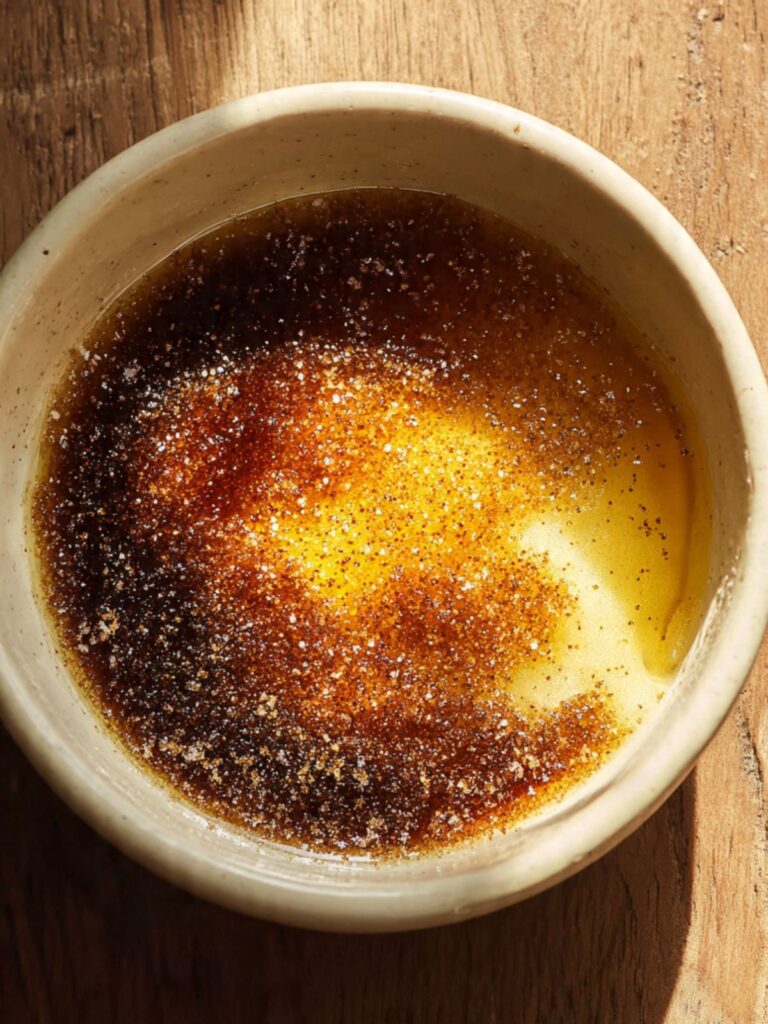
In your large mixing bowl, add your 1 cup (227g) unsalted butter, melted and cooled, your 1 cup (200g) packed dark brown sugar, and your ½ cup (100g) plain white granulated sugar.
The dark brown sugar does two things here: its molasses content binds water molecules and keeps the finished cookie moist for days after baking — this is the hygroscopic property of brown sugar and the primary driver of chew in this recipe. The granulated white sugar drives surface crackle and spread — it dissolves during baking and recrystallizes as the cookie cools, creating that fine crinkled surface visible in the photos.
Using your whisk, stir the mixture together in wide circular strokes from the bottom of the bowl upward — approximately 30 strokes — until the sugars are fully dissolved into the butter and no visible sugar granules remain.
The mixture should look thick, smooth, and glossy — darker than the butter alone, with a slight sheen from the dissolved sugars. If you can still see sugar crystals catching the light, keep whisking for another 15 strokes. This step fully incorporates the sugars before the eggs go in, which is what produces the shiny crackled surface on the finished cookie.
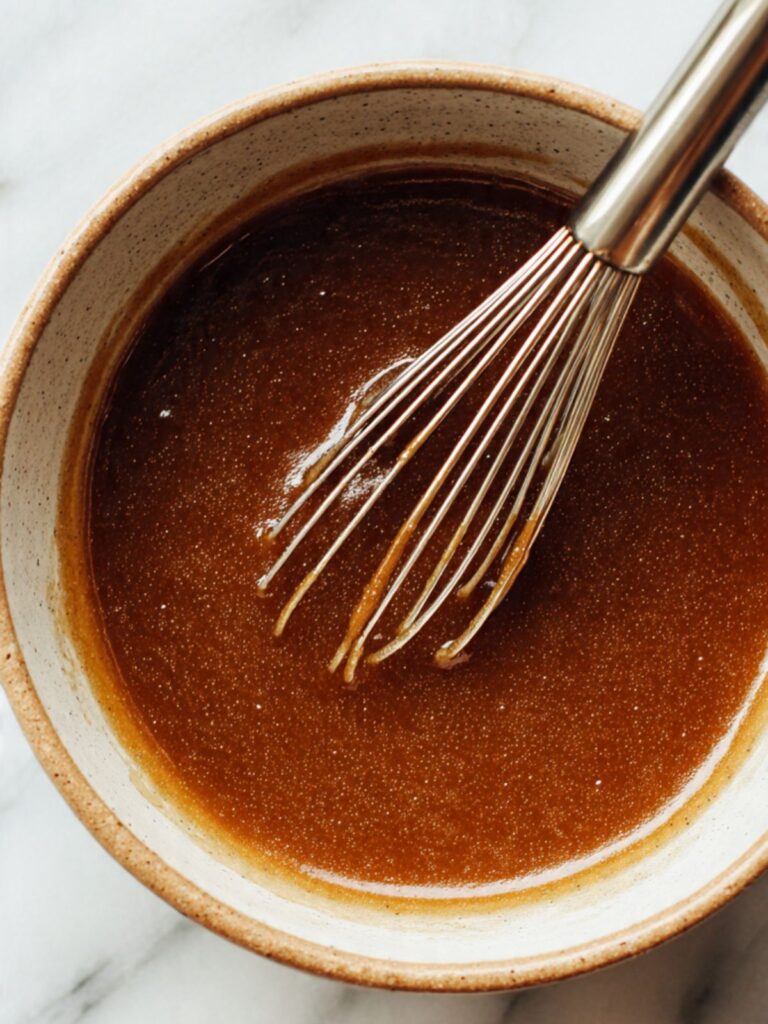
Do not rush this step by moving to the eggs while the mixture still looks grainy — under-dissolved sugar produces a cookie with a rough, matte surface instead of the crackled finish shown in the photos.
Step 3: Adding the Eggs and Yolk to Build a Fudgy, Emulsified Dough
Add your 2 large eggs (room temperature), 1 extra large egg yolk (room temperature), and 2 tsp pure vanilla extract directly to the butter-sugar mixture.
The extra yolk is what separates these from a standard chewy cookie. Egg whites add structure and set. Egg yolks add fat and richness — the additional yolk pushes the fat content past the threshold where the center bakes firm, keeping it dense and fudgy even when the cookie is fully baked through. This is the same mechanism used in fudgy brownie recipes. The vanilla extract is pure — imitation vanilla contains artificial compounds that break down at high heat and leave a flat, slightly chemical aftertaste in baked goods.
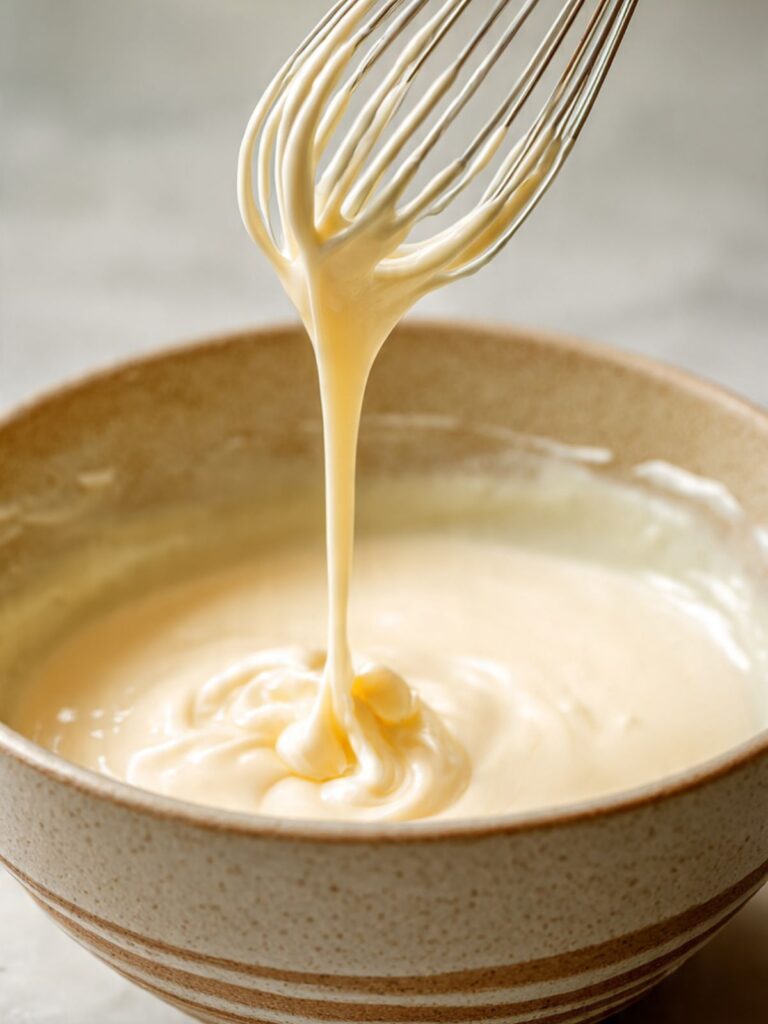
Whisk vigorously for 60 full seconds. Set a timer — 60 seconds feels longer than it is. You are building an emulsion between the egg fat and the butter fat, and you need friction and time to do it.
The mixture should look noticeably lighter in color, slightly thickened, and almost ribbony when you lift the whisk — it should fall back into the bowl in a slow, cohesive stream rather than splashing. If it still looks thin and separated, whisk for another 20 seconds. As you can see in the cross-section photo, the interior of these cookies is dense and fudgy — that texture begins right here in this step.
🗒 Luna’s Note: I always whisk the eggs and yolk into the butter-sugar mixture before adding vanilla. Vanilla added too early can get lost in the fat before the emulsion forms. Adding it with the eggs means it distributes evenly through the whole batch.
Step 4: Adding the Dry Ingredients Without Overdeveloping the Gluten
In your medium mixing bowl, whisk together your 2½ cups (300g) all-purpose flour, 1 tsp baking soda (checked for freshness), and 1 tsp Diamond Crystal kosher salt until evenly combined — about 10 strokes.
Pre-whisking the dry ingredients distributes the baking soda and salt evenly before they hit the wet mixture. Baking soda that clumps in one spot produces uneven lift — some cookies from the same batch will dome correctly and others will stay flat. In this recipe, the baking soda reacts with the natural acidity in the dark brown sugar’s molasses content — this reaction is what produces the slight lift and surface crackle on the finished cookie. It is a mild reaction compared to recipes that use buttermilk or cocoa, which is why the cookies dome gently rather than puffing dramatically.
Add the dry ingredient mixture to the wet ingredients all at once. Switch from your whisk to your sturdy silicone spatula. Fold from the bottom of the bowl upward in slow, deliberate strokes — not stirring in circles. Count your strokes. Stop the moment no dry flour streaks remain — approximately 12 to 15 strokes from when you begin.
Do not continue folding once the flour is incorporated — the edges of these cookies will look set in the oven but the centers will bake up dense and tight rather than soft and fudgy if the gluten is overdeveloped at this stage. Gluten forms the moment flour contacts liquid and strengthens with every additional fold or stir.
The dough should look thick, slightly shaggy at the edges, and hold its shape when you press the spatula against it — not wet and flowing, not stiff and dry. It will look slightly under-mixed compared to what you might expect. That is correct. You will finish incorporating when you fold in the chocolate.
Step 5: Folding In the Chocolate Chunks for Maximum Pocket Coverage
Add your 1¾ cups (280g) dark chocolate chunks (70% cacao) to the dough.
Fold the chunks in using the same bottom-upward stroke — 8 to 10 deliberate folds until the chunks are evenly distributed throughout the dough. The act of folding in the chunks will finish incorporating any remaining flour streaks from the previous step. This is intentional — it gives the gluten no extra development beyond what the chocolate fold provides.
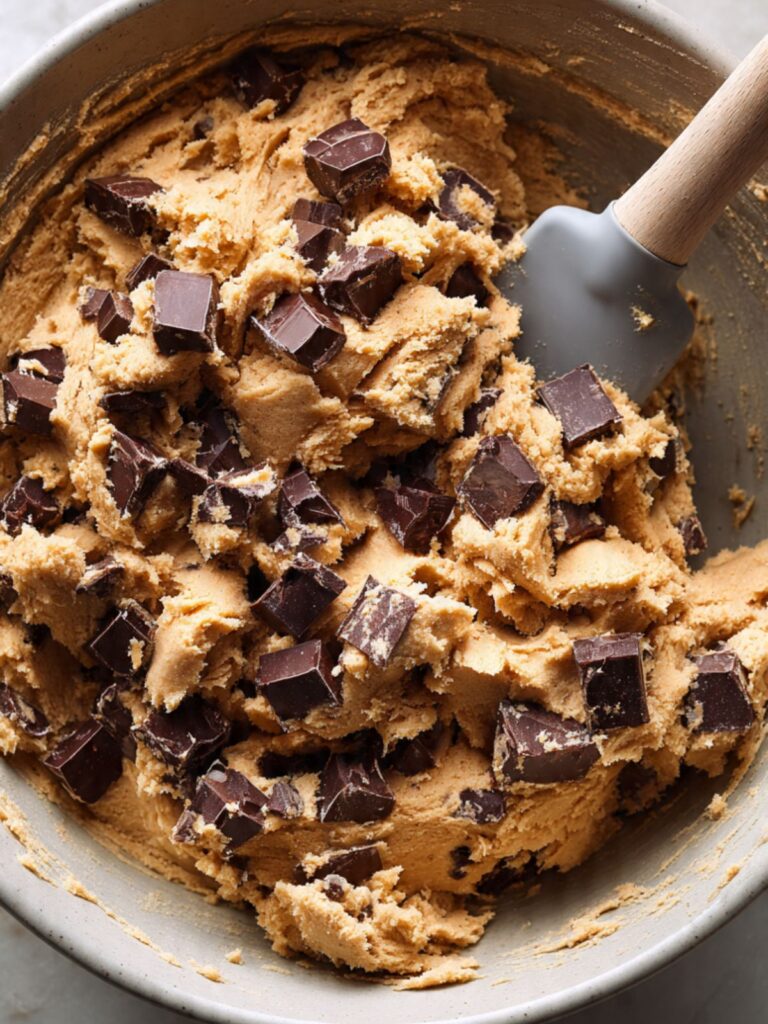
Reserve approximately 20 to 25 chunks — about 2 tablespoons worth — and set them aside. These go on top of the portioned dough balls before baking and are responsible for the generous chocolate coverage visible on the surface of every cookie in the photos. Without this step, the surface chocolate is whatever happened to land on top during folding, which is inconsistent.
The finished dough should look thick and cohesive, studded heavily with chocolate pieces, and hold a mounded shape when you scoop it — it should not spread or slump in the bowl. If the dough feels very soft or warm, let it sit at room temperature for 5 minutes before scooping — the butter may still be slightly warm.
Step 6: Portioning the Dough to Bakery Size and Spacing for Even Spread
Using your 3-tablespoon cookie scoop, portion the dough onto your prepared parchment-lined pan. Each scoop should weigh approximately 60 to 65g — weigh your first scoop on your kitchen scale and use it as the calibration reference for the rest of the batch. This recipe yields exactly 12 cookies at this portion size.
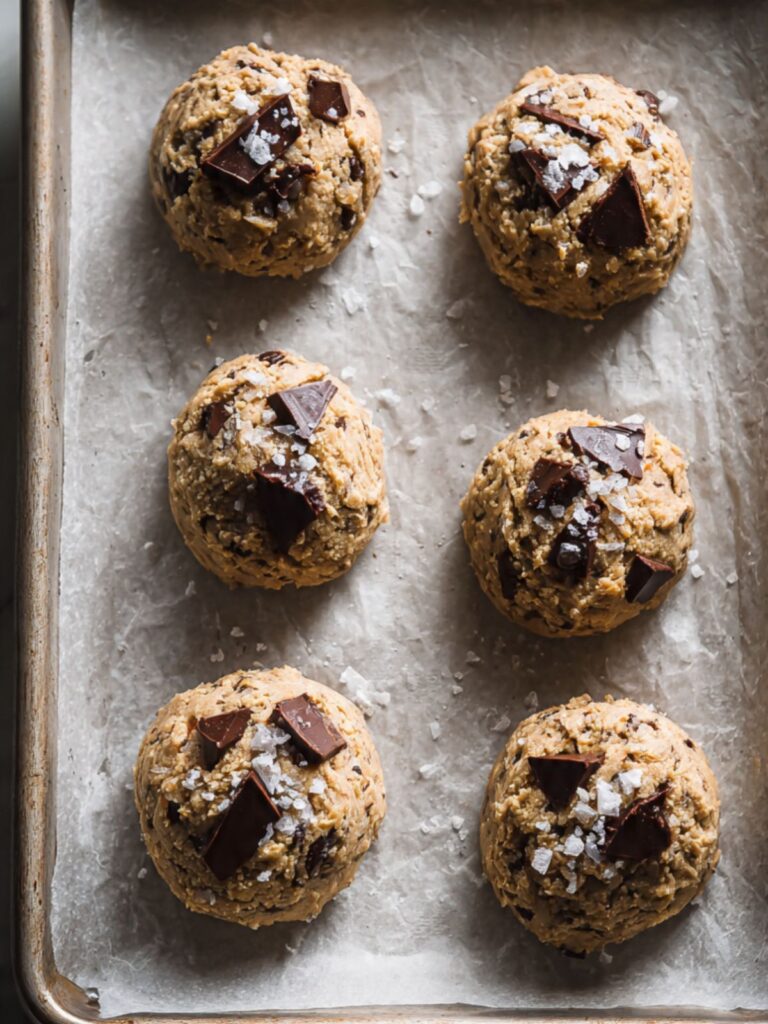
Space the dough balls at least 3 inches (7.5cm) apart — these cookies spread to approximately 3 to 3.5 inches in diameter and need room. At 3 inches of spacing, you will fit 6 cookies per standard half-sheet pan. Bake in 2 batches.
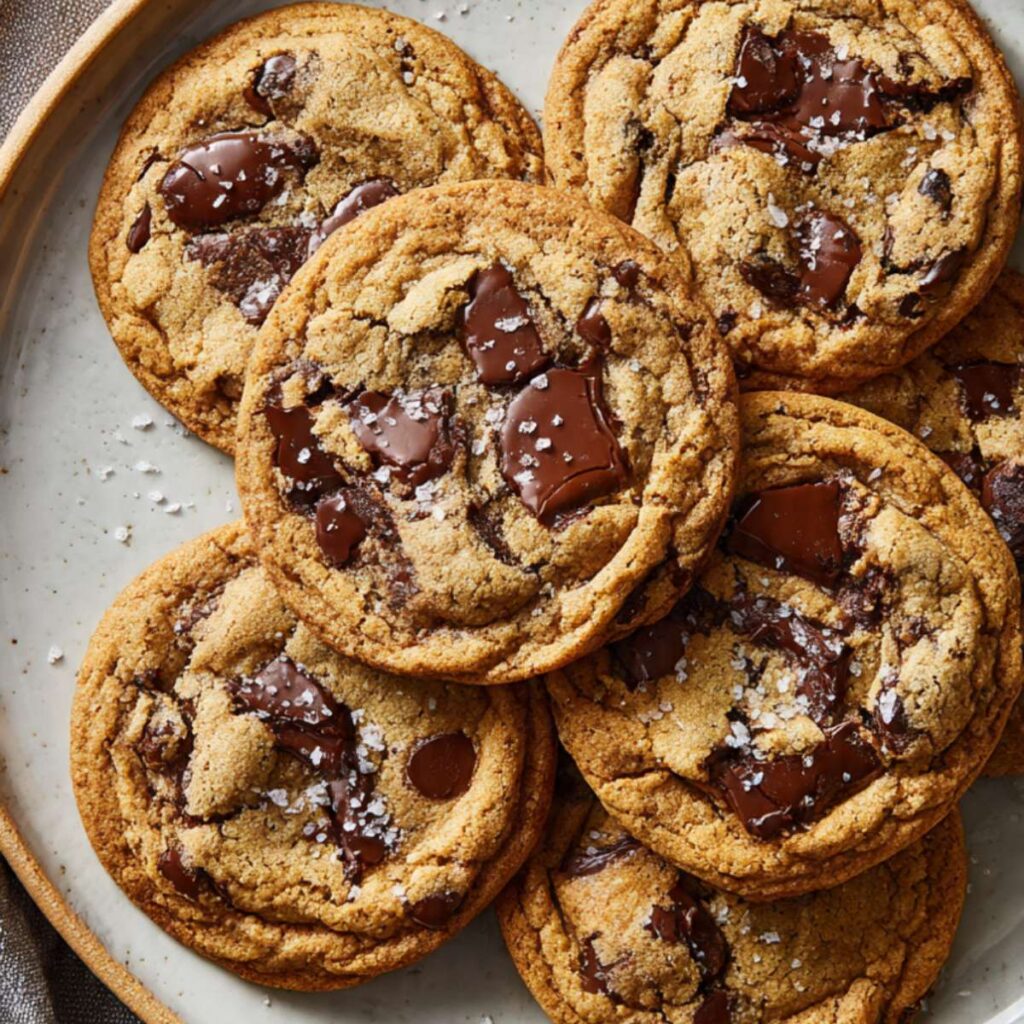
Press 3 to 4 of your reserved chocolate chunks onto the top of each dough ball, pressing them in gently so they sit proud but do not sink into the center. Then press a generous pinch of Maldon flaked sea salt onto the top of each dough ball before the pan goes into the oven. This is a pre-bake application, not a post-bake finish — the salt crystals are pressed in firmly enough that they partially embed into the dough surface as the cookie spreads and sets, which locks them in place. Maldon’s large flat crystal structure survives oven heat without fully dissolving, which is why the crystals remain visible and intact on the finished cookie exactly as shown in the overhead photo. Fine salt applied pre-bake would dissolve completely and disappear.
As you can see in the overhead photo, every cookie in this batch has visible salt crystals and chocolate chunks on the surface — this coverage is only achievable when both are applied before baking, not after.
Each dough ball should look like a thick, roughly domed mound — not a flat disc, not a smooth sphere. The rough, slightly irregular surface is what produces the crackled finish during baking.
Step 7: Baking to Fudgy Centers and Set Golden Edges
Place the pan on the middle rack of your preheated 375°F (190°C) oven. Set a timer for 10 minutes and do not open the oven door before it goes off.
Bake for 10 to 12 minutes total. Start checking at exactly 10 minutes. The cookies are done when the edges look set and lightly golden and the centers still look slightly underdone, puffy, and matte — not shiny, not wet, but not fully firm either. Pull the pan at this moment. Do not wait for the centers to look done in the oven — they will continue cooking on the hot pan after you pull them out.
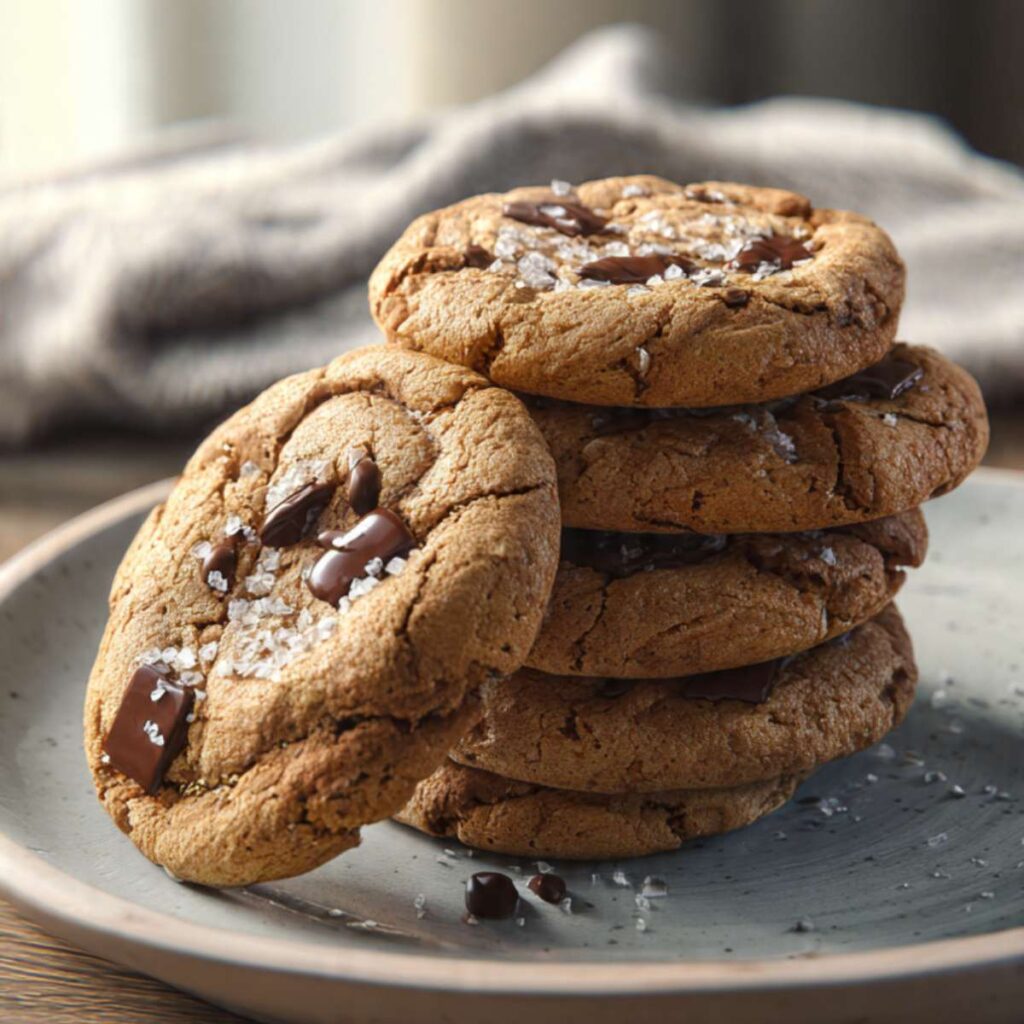
Do not overbake these — the edges will look set and the cookies will look almost underdone in the center, and that is exactly right. If you wait until the centers look fully baked in the oven, the cookies will be firm and dry by the time they cool. The fudgy interior visible in the broken cookie photo is only achievable if the pan comes out when the centers still look unfinished.
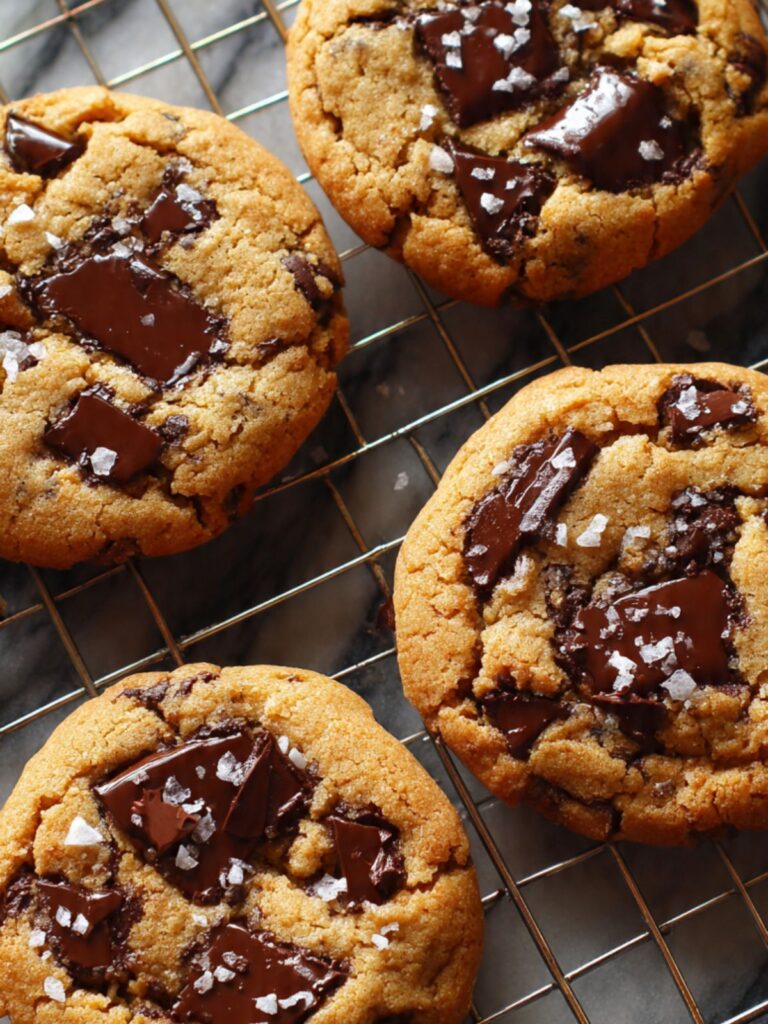
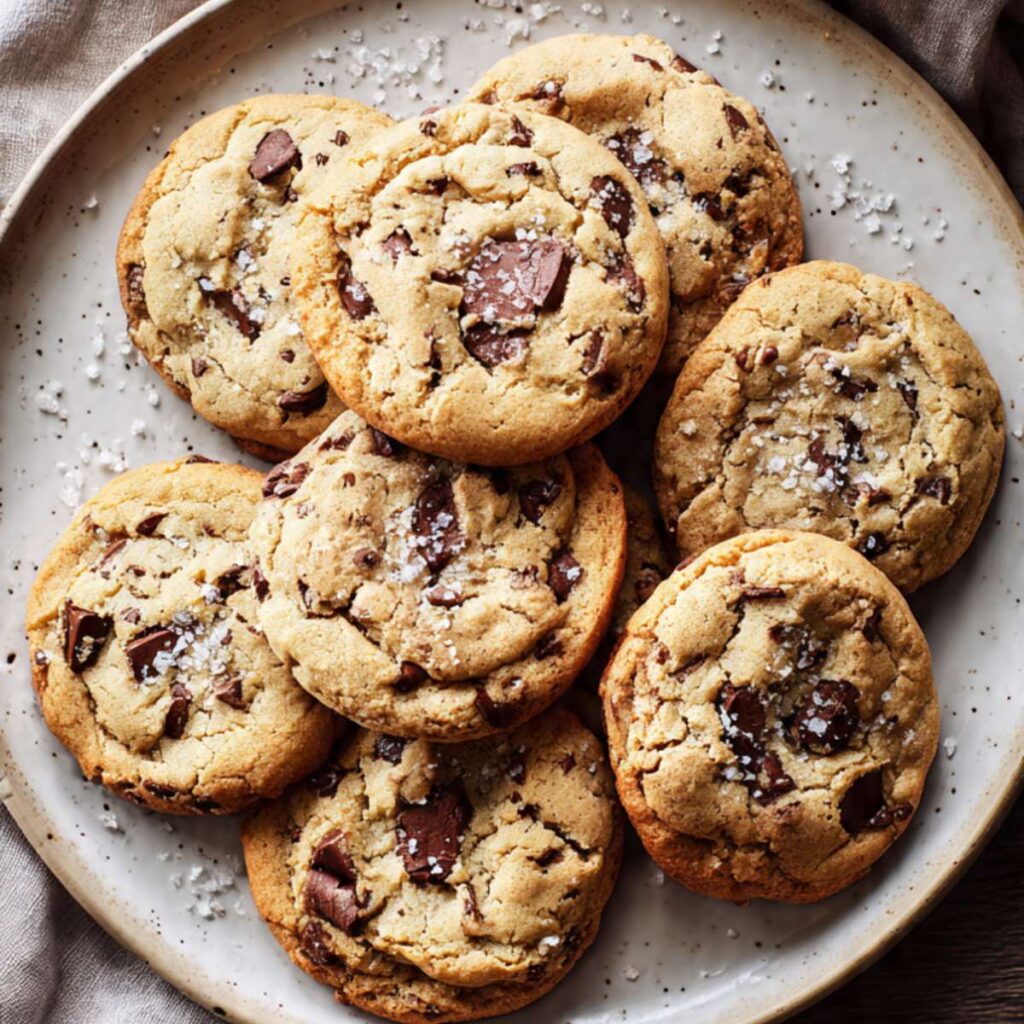
The correctly baked cookie looks exactly like what is visible in the stacked photos — deep golden at the edges with a slightly domed, matte center that has lost its raw sheen but still looks soft. If the centers look fully set and the surface has gone from matte to dry, the cookies have gone 1 to 2 minutes too long.
Step 8: Resting on the Pan for Carryover Heat to Finish the Centers
Leave the cookies on the hot pan for exactly 5 minutes after pulling from the oven. Do not move them. Set a timer.
The hot pan continues to conduct heat into the base of each cookie during this window. This carryover heat is what sets the centers without the dry heat of the oven continuing to bake them. Moving the cookies before 5 minutes breaks the structural base before it has fully set — the bottoms will crack and the centers will collapse inward. Waiting longer than 8 minutes starts to over-crisp the bottoms from prolonged contact with the hot pan.
After exactly 5 minutes, transfer the cookies to your wire cooling rack using a thin spatula. They will look slightly underdone and very soft at this point — that is correct. They will firm into their final texture as they cool on the rack.
The cookies on the rack should hold their shape without collapsing but still press slightly when touched in the center — like a set brownie rather than a firm cookie. That give is what you are looking for.
Allow the cookies to cool on the rack for at least 15 minutes before eating. The chocolate pools inside need this time to partially set — biting into a cookie before 15 minutes means the interior chocolate is still fully liquid and will burn your mouth. After 15 minutes, the interior is soft and gooey rather than molten.
The Science Behind Chewy Chocolate Chip Cookies
Why Melted Butter Produces a Chewier Cookie Than Creamed Butter
Melted butter produces a chewier, denser cookie because it changes how gluten develops in the dough. When butter is creamed with sugar, the process incorporates air into the fat — those air pockets expand in the oven and produce a lighter, more cakey crumb. Melted butter contains no trapped air. The fat coats the flour proteins more completely before mixing begins, which limits gluten development and produces a tighter, denser crumb structure. The result is a cookie that chews rather than crumbles. Every soft and chewy chocolate chip cookie recipe that delivers a genuinely fudgy interior relies on this mechanism — melted butter is not a shortcut, it is the correct tool for this specific texture.
Why Brown Sugar Is the Primary Driver of Chew
Dark brown sugar contains approximately 6.5% molasses by weight. Molasses is hygroscopic — it actively attracts and holds water molecules from the surrounding environment, including the moisture inside the cookie itself. A cookie made with all brown sugar stays softer and moister for longer than one made with all white sugar because the molasses is continuously preventing moisture loss. The high dark brown sugar ratio in this recipe — 200g brown to 100g white — is a deliberate decision to maximize chew and extend shelf life. The trade-off is surface texture: all-brown-sugar cookies do not develop the same crackled crust as cookies with white sugar. The 100g of granulated white sugar in this recipe provides enough recrystallization during baking to produce the crackle finish visible in the photos while keeping the interior soft.
What the Extra Egg Yolk Actually Does
A standard cookie recipe uses 2 whole eggs. This recipe uses 2 whole eggs plus 1 extra yolk. The difference is fat and emulsification. Egg whites are primarily water and protein — they add structure and set. Egg yolks are primarily fat and lecithin — they add richness, emulsify the butter into the dough more completely, and lower the temperature at which the interior sets during baking. The extra yolk means the center of these cookies reaches the temperature needed to set at a lower point — which is why the interior looks and feels fudgy even when the cookie is technically fully baked. This is the same principle that makes fudgy brownie recipes use more yolks or whole eggs than cakey brownie recipes. Skipping the extra yolk produces a cookie that is chewy but not fudgy — a meaningful difference in the final result.
Why Dark Chocolate Chunks Melt Differently Than Standard Chips
Standard chocolate chips are formulated to hold their shape during baking. Manufacturers achieve this by adding stabilizers — typically a small amount of coconut oil, palm fat, or additional cocoa butter — that raise the melting point of the chocolate. The result is a chip that softens but does not fully melt, which is why standard chips look intact in a baked cookie. Dark chocolate chunks at 70% cacao contain a higher ratio of cocoa solids to fat and no stabilizers. They melt fully at baking temperatures, which is what creates the pools of liquid chocolate visible in the cross-section photo. The higher cacao percentage also means less sugar in the chocolate itself, which balances the sweetness of the dough and lets the chocolate flavor read as distinct rather than sweet. For this recipe — and for best chewy chocolate chip cookie results generally — chunks are not interchangeable with standard chips if the melted interior is the goal.
Why the Salt on Top Does Something the Salt in the Dough Cannot
The Diamond Crystal kosher salt in the dough seasons the full batch evenly — it dissolves into the wet ingredients and distributes throughout every layer of every cookie. The Maldon flaked sea salt pressed on top before baking does something categorically different. Flaked salt does not dissolve into the dough during baking. The large flat crystals sit on the surface and partially embed as the cookie spreads, leaving intact salt crystals that you encounter as individual hits of salinity against the chocolate and the sweet dough. This contrast — the moment of salt against melted dark chocolate — is not replicable by increasing the salt in the dough. The dough salt and the surface salt are doing different jobs. Using only one of them produces a less complete cookie.
🗒 Luna’s Note: In my Los Angeles kitchen, I keep two salt containers on the counter at all times — Diamond Crystal for cooking and baking, Maldon for finishing. I use Maldon on every cookie that has chocolate in it. The combination changed how I think about seasoning baked goods entirely.
Why Pulling the Cookies Early Is the Most Important Step
Carryover cooking is the reason the pull moment matters more than the bake time. When a cookie comes out of the oven, the pan is still at 375°F (190°C). Heat continues to transfer from the pan into the base of the cookie for the full 5-minute rest period. During this window, the center temperature rises and the structure sets without the dry oven heat continuing to evaporate moisture from the interior. A cookie pulled when the center looks underdone will finish setting on the pan and arrive at the correct fudgy texture. A cookie left in the oven until the center looks fully set will have the carryover heat push it past done — the interior will be firm rather than fudgy by the time it cools.
The Maillard reaction — the browning reaction between amino acids and reducing sugars that creates the deep golden color and complex flavor — is already complete at the edges before the center looks set. There is no baking reason to wait for the center to match the edges. Pull early, rest on the pan, and the carryover does the rest. If you want to explore how browning butter before using it amplifies the Maillard reaction further, the brown butter chocolate chip cookies article covers that technique in full.
Chewy Chocolate Chip Cookies Troubleshooting & Pro-Tips
You Used the Wrong Chocolate or Substituted the Sugar
Symptom: The cookies taste flat and uniformly sweet with no distinct chocolate flavor, the interior looks set rather than fudgy with melted pools, or the surface is smooth and matte with no crackle.
Cause: Standard chocolate chips with stabilizers will not melt into the liquid pools visible in the cross-section photo — the stabilizers raise the chocolate’s melting point and the chips hold their shape during baking. Substituting coconut sugar, raw sugar, or turbinado for the plain white granulated cane sugar removes the recrystallization mechanism that produces surface crackle — those sugars have different crystal structures that do not behave the same way at baking temperature.
Fix: There is no mid-bake fix for either substitution. The next batch must use 70% cacao dark chocolate chunks and plain white granulated cane sugar exactly as written.
Prevention: Break a chocolate bar into irregular chunks or buy pre-cut dark chocolate chunks. Do not substitute the white granulated cane sugar with any less-refined sugar — the crystal structure of plain white sugar is what drives the crackle finish. If you used chips and want the melted interior, Ghirardelli 60% bittersweet chips are the closest functional substitute available in most grocery stores.
Your Pan Produced Scorched Bottoms or Uneven Bake
Symptom: The bottoms of the cookies are deeply browned or scorched while the tops remain pale and underdone-looking, or one side of the batch baked faster than the other.
Cause: A dark or thin pan absorbs radiant heat from the oven element significantly faster than a light-colored aluminum pan and transfers that heat directly into the base of the cookie before the top has time to bake through. An oven with a hot spot — common in home electric ovens — will bake one side of the pan faster than the other. Baking on the bottom rack rather than the middle rack compounds both problems.
Fix: If scorched bottoms are the result from your current pan, stack two pans together — one inside the other — for the next batch. The air gap between the two pans insulates the bottom and slows heat transfer significantly. If hot spots are the issue, rotate the pan 180 degrees at the 6-minute mark of the bake time.
Prevention: Use a light-colored aluminum half-sheet pan on the middle rack, lined with parchment. If using a dark pan, reduce oven temperature by 25°F (15°C) and start checking at 9 minutes. Confirm oven rack is in the middle position before preheating — top rack burns tops, bottom rack burns bottoms.
Your Cookies Spread Too Flat and Thin
Symptom: The cookies spread into wide, lacy discs during baking — thin edges, no dome, little to no height in the center.
Cause: The most common cause is butter that was too warm when the dough came together. Melted butter that has not cooled sufficiently begins softening the dough before it even reaches the oven, and the fat spreads aggressively the moment heat is applied. A warm mixing bowl, a warm kitchen, or a warm pan from a previous batch can produce the same result. A second cause is too little flour — if the dough was measured by volume without spooning and leveling, it is easy to come up 20 to 30g short, which shifts the fat-to-flour ratio enough to cause excessive spread.
Fix: If the dough looks very soft or feels warm when you scoop it, place the entire bowl in the refrigerator for 10 to 15 minutes before portioning. Do not let it chill longer than 20 minutes or the butter will solidify unevenly and the cookies will not spread correctly in the other direction.
Prevention: Cool the melted butter until it is warm to the touch but not hot — test it against your wrist. Weigh the flour. Let the pan cool fully between batches. In a warm kitchen above 75°F (24°C), consider chilling the portioned dough balls directly on the pan for 10 minutes before they go into the oven.
Your Cookies Are Firm and Dry Instead of Fudgy
Symptom: The cookies look correct coming out of the oven but cool into firm, dry, cakey rounds rather than the soft, fudgy result shown in the photos.
Cause: Overbaking is the primary cause. If the centers looked fully set and dry before you pulled the pan, the carryover heat pushed them past the correct texture during the 5-minute rest. A secondary cause is too much flour — a dense, stiff dough bakes faster and sets firmer. A third cause is skipping the extra egg yolk, which removes the fat content that keeps the center fudgy even when fully baked through.
Fix: There is no fix for an overbaked cookie. The next batch must come out earlier. Set a timer for 10 minutes and pull the pan the moment the edges look set and golden and the centers still look matte and slightly puffy. The centers will look underdone. Pull them anyway.
Prevention: Pull at 10 minutes and check visually — not by touch, not by color of the center. The edge is your indicator, not the center. Weigh the flour. Include the extra yolk. If your oven runs hot, reduce the temperature by 25°F (15°C) and use an oven thermometer to confirm.
Your Cookies Have No Surface Crackle
Symptom: The baked cookies have a smooth, matte surface instead of the fine crackled finish visible in the photos.
Cause: Surface crackle forms when the plain white granulated cane sugar dissolves during baking and recrystallizes as the cookie cools. Two things prevent this: the oven was not fully preheated when the pan went in, or the white sugar ratio was reduced or substituted. A cold oven means the cookie spreads slowly and the surface dries before the sugar has fully dissolved — the recrystallization cannot happen on a surface that dried too early. Substituting coconut sugar, raw sugar, or brown sugar for the full white sugar portion removes the mechanism entirely.
Fix: Always allow the full preheat plus 5 additional minutes before the pan goes in. Use plain white granulated cane sugar — no substitutes for the white sugar portion if crackle is the goal.
Prevention: Wait for full oven temperature. Use the exact sugar types and quantities in the recipe. Do not reduce the white sugar below 100g in this formulation — that ratio is the minimum required to produce visible crackle alongside the high brown sugar content.
Your Cookies Did Not Rise and Look Dense and Compressed
Symptom: The cookies baked flat without any dome and look compressed and dense rather than thick with a slight rise.
Cause: The baking soda has lost its potency. Baking soda that has been open for more than 6 months, stored near heat or moisture, or compressed in a container loses its leavening strength. A secondary cause is overmixing after the flour was added — excessive gluten development creates a tight, resistant structure that inhibits the lift the baking soda produces in reaction with the brown sugar’s molasses.
Fix: Replace the baking soda and test a single cookie before baking the full batch. To test: scoop one dough ball, bake it for 11 minutes at 375°F (190°C), and evaluate the result before committing the rest of the batch.
Prevention: Test baking soda freshness before every batch — drop ¼ tsp into hot water with a few drops of vinegar and confirm active bubbling within 2 seconds. Store baking soda in a sealed container away from the stove. Stop folding the flour the moment no dry streaks remain — 12 to 15 strokes maximum.
Pro-Tips
Weigh every dough ball to the same gram weight. Once you have a scoop that hits 60 to 65g, weigh it on your kitchen scale and use that number as your target for every subsequent ball. Cookies from the same batch that are different sizes will bake unevenly — the smaller ones will be overbaked and firm by the time the larger ones reach the correct fudgy center. Consistent portioning is the difference between a batch where every cookie is identical and one where half are right and half are not.
Press extra chunks on top after scooping, not before. Pressing reserved chunks into the top of the portioned dough ball gives you control over surface coverage. Chunks folded into the dough sit wherever they landed during mixing — some cookies will have three visible pieces on top and some will have none. The reserved topping chunks solve this entirely. Three to four chunks per ball, pressed firmly enough to stay in place when the dough spreads.
Humidity and altitude adjustments: In high-humidity environments above 70% relative humidity, the dough may feel stickier than expected and cookies may spread more than shown in the photos — refrigerate the portioned dough balls for 15 minutes before baking. At altitude above 3,500 feet (1,065m), reduce baking soda by ⅛ tsp and increase oven temperature by 15°F (8°C) — leavening over-reacts at altitude and can cause the cookies to rise then collapse before the edges set.
How to Store Chewy Chocolate Chip Cookies
Room Temperature
Store baked cookies in a hard-sided lidded container with a tight-fitting lid — not a zip-lock bag, which does not create a complete seal and allows the cookies to flatten and dry out faster than a rigid container. Do not use a container with a loose or decorative lid. The seal is the mechanism.
Layer the cookies in a single layer if possible, or separate layers with a sheet of parchment paper. Do not stack them directly on top of each other without separation — the weight of the top cookies compresses the soft centers of the ones below and changes the texture.
Day 1: Texture is at peak — fudgy center, set edges, distinct salt crystals on top.
Day 2: Centers remain soft, salt crystals begin to absorb moisture from the cookie and soften slightly. Still excellent.
Day 3: Texture softens uniformly throughout — less contrast between edge and center, still chewy and flavorful.
Day 4–5: Cookies are noticeably softer throughout. The high brown sugar content keeps them from going stale quickly. Eat by day 5.
Refrigerator
Do not refrigerate baked cookies. The cold, dry air of a refrigerator accelerates starch retrogradation — the process by which baked starches firm and dry out — and a refrigerated cookie will be noticeably harder and less chewy than a room-temperature-stored cookie within 24 hours. If your kitchen runs very warm above 80°F (27°C) and the chocolate is blooming or the cookies feel greasy, refrigeration is acceptable as a heat management measure — store in the hard-sided lidded container and bring each cookie to room temperature for 20 minutes before eating. Do not eat directly from the refrigerator — the cold firms the chocolate pools and removes the fudgy texture entirely.
Freezer — Baked Cookies
Baked cookies freeze well for up to 2 months. Allow them to cool completely on the wire rack — at least 1 hour — before freezing. Place them in a single layer on the parchment-lined pan and freeze until solid, approximately 1 hour. Transfer to a zip-lock freezer bag or hard-sided freezer container, pressing out as much air as possible before sealing.
To thaw: remove from the freezer and place on a wire rack at room temperature for 30 to 45 minutes. Do not microwave to thaw — the chocolate will overheat and the cookie texture will turn gummy.
For a freshly-baked texture from frozen: place the thawed cookie on a parchment-lined pan and warm in a 300°F (150°C) oven for 4 to 5 minutes. The centers will soften and the chocolate will re-melt slightly. Remove and cool for 3 minutes before eating.
Freezer — Unbaked Dough Balls
Unbaked dough balls freeze better than baked cookies and produce a result closer to fresh-baked. Portion the dough into balls, press the reserved chocolate chunks and flaked sea salt onto the tops, and place on a parchment-lined pan. Freeze until solid — approximately 2 hours. Transfer to a zip-lock freezer bag. Frozen dough balls keep for up to 3 months.
To bake from frozen: do not thaw. Place the frozen dough balls directly on a parchment-lined pan, spaced 3 inches (7.5cm) apart. Bake at 375°F (190°C) for 13 to 15 minutes — 3 to 4 minutes longer than the fresh dough bake time. The edges should look set and golden and the centers should still look slightly underdone when you pull the pan. Rest on the pan for 5 minutes as usual.
🗒 Luna’s Note: I almost always freeze half the batch as unbaked dough balls. Twelve large cookies is too many for two people in one sitting, and a cookie baked straight from frozen on a Tuesday night is indistinguishable from one baked fresh. The frozen dough has become the version I make most often.
Serving Suggestion
Serve these at room temperature or slightly warm — 20 to 30 seconds in the microwave on 50% power brings them back to fresh-baked texture without overheating the chocolate. The flaked sea salt on top is most distinct when the cookie has fully cooled — the crystals soften slightly when the cookie is warm.
Pair with a glass of cold whole milk or a strong black coffee. The fat in the milk coats the palate between bites and resets the chocolate flavor. Black coffee amplifies the 70% cacao bitterness in a way that makes the sweetness of the dough read as more complex and less sweet.
These are the cookie I make when someone asks for something that feels considered without being complicated — a dinner party where dessert should not overshadow the meal, or a night when the craving is specific and a lesser cookie will not satisfy it.
Frequently Asked Questions About Chewy Chocolate Chip Cookies
What makes chocolate chip cookies chewy?
Chewiness in a chocolate chip cookie comes from three specific variables working together: melted butter instead of creamed butter, a higher ratio of brown sugar to white sugar, and an extra egg yolk. Melted butter limits gluten development and produces a denser crumb structure. Brown sugar’s molasses content is hygroscopic — it holds moisture inside the cookie after baking, which is what keeps the texture soft for days. The extra yolk adds fat that keeps the center fudgy even when the cookie is fully baked through. Remove any one of these three and the texture shifts noticeably toward cakey or crisp.
Should I use melted or softened butter for chewy cookies?
Melted butter produces chewier cookies. Softened butter that is creamed with sugar incorporates air, which creates a lighter, more cakey crumb structure during baking. Melted butter coats the flour proteins before mixing begins and limits gluten development, which results in a tighter, denser crumb that chews rather than crumbles. For the best chewy chocolate chip cookie result, melt the butter fully and allow it to cool to room temperature before adding the sugars — warm butter causes excessive spread and a less fudgy interior.
Can I make chewy chocolate chip cookies without chilling the dough?
Yes — this recipe requires no chilling. The combination of melted butter, high brown sugar content, and the correct flour-to-fat ratio produces cookies that bake correctly from room-temperature dough without refrigeration. Chilling is typically required when a recipe uses softened or creamed butter, which softens further as it sits and causes excessive spread if not firmed up before baking. With melted butter already fully liquid at mixing, chilling would not change the bake outcome significantly. If your kitchen is above 80°F (27°C), refrigerate the portioned dough balls for 10 minutes before baking as a heat management step. For a comparison of how chilling affects texture in a smaller format, the small batch chocolate chip cookies article covers that variable in detail.
Can I make these chocolate chip cookies ahead of time?
Yes — two ways. The baked cookies keep in a hard-sided lidded container at room temperature for up to 5 days, with the fudgy center and chewy texture holding well through day 3. For longer make-ahead, freeze the unbaked dough balls: portion, press chocolate chunks and flaked sea salt on top, freeze solid on a parchment-lined pan, then transfer to a freezer bag for up to 3 months. Bake from frozen at 375°F (190°C) for 13 to 15 minutes — no thawing needed. The from-frozen result is indistinguishable from a fresh-baked cookie.
Can I double this chewy chocolate chip cookies recipe?
Yes — this recipe doubles cleanly. Multiply all ingredients by 2 with one exception: use only 1½ tsp of baking soda rather than 2 tsp. Leavening does not scale linearly — doubling the baking soda produces a soapy, metallic aftertaste and causes the cookies to over-rise then collapse. Bake in two separate batches on two separate pans rather than crowding one pan — crowding raises the ambient humidity around the cookies and causes them to spread more and take longer to set. Bake time per batch remains the same at 10 to 12 minutes.
Why are my chocolate chip cookies flat and crispy instead of chewy?
Flat, crispy cookies are almost always a butter temperature problem. If the melted butter was still warm when it went into the dough, the fat began softening the mixture before baking even started — the cookie spread aggressively in the oven before the edges had a chance to set, producing a flat, thin, crispy result. A secondary cause is too little flour — even 20g short of the correct amount shifts the fat-to-flour ratio enough to cause excessive spread, so spoon-and-level or weigh to 300g. A third cause is a warm pan from a previous batch. Cool the melted butter until warm to the touch but not hot, weigh the flour, and let the pan return to room temperature between batches.
Can I use chocolate chips instead of chocolate chunks?
You can, but the interior texture will be different. Standard chocolate chips contain stabilizers that prevent full melting — they soften during baking but hold their shape rather than pooling into the liquid chocolate pockets visible in the cross-section photo. If chips are your only option, use the best quality available — Ghirardelli 60% bittersweet chips perform closer to chunks than standard semi-sweet chips because of their higher cacao content and lower stabilizer ratio. Do not use milk chocolate chips — the higher sugar and lower cacao content removes the contrast between the dough sweetness and the chocolate, and the emulsification of the dough is not designed around milk chocolate’s different fat profile.
More Cookies You’ll Love
If these chewy chocolate chip cookies are what you make when the craving is specific, these are the recipes I reach for when I want to go further in the same direction.
Homemade Chocolate Chip Cookies — the foundational version, written with the same level of detail as this one. If you want to understand the full range of what changes between one chocolate chip cookie recipe and the next, start here.
Peanut Butter Chocolate Chip Cookies — peanut butter replaces the dairy butter entirely, which changes the fat profile and the flavor in a way that is genuinely different from a standard cookie with peanut butter added. Dense, fudgy, and intensely flavored.
Chocolate Chip Cookie Bars — the same dough concept pressed into a pan and baked as bars. The interior-to-edge ratio shifts entirely — more fudgy center per bite, less crisp edge. A different experience from the same starting point.

Chewy Chocolate Chip Cookies
Ingredients
Equipment
Method
- Position the oven rack in the middle and preheat to 375°F (190°C), then line a light-colored aluminum half-sheet pan with parchment paper and set aside.
- In a large mixing bowl, whisk together the melted and cooled butter, packed dark brown sugar, and granulated white sugar for approximately 30 strokes until smooth, glossy, and no visible sugar granules remain.
- Add the 2 room-temperature eggs, extra egg yolk, and pure vanilla extract to the butter-sugar mixture and whisk vigorously for a full 60 seconds until the mixture looks slightly lighter in color, thickened, and ribbony when the whisk is lifted.
- In a medium bowl, whisk together the all-purpose flour, baking soda, and Diamond Crystal kosher salt until evenly combined, then add the dry ingredients to the wet ingredients all at once and fold with a silicone spatula using slow bottom-upward strokes for approximately 12 to 15 strokes until no dry flour streaks remain — do not overmix.
- Add the dark chocolate chunks to the dough and fold in using 8 to 10 deliberate strokes until evenly distributed, reserving 20 to 25 chunks to press onto the tops of the dough balls before baking.
- Using a 3-tablespoon cookie scoop, portion the dough into 12 balls of approximately 60 to 65g each, place them at least 3 inches (7.5cm) apart on the prepared pan, press 3 to 4 reserved chocolate chunks onto the top of each ball, and finish with a generous pinch of Maldon flaked sea salt on each.
- Bake on the middle rack at 375°F (190°C) for 10 to 12 minutes until the edges look set and lightly golden and the centers still look slightly underdone, puffy, and matte — pull the pan at this moment and do not wait for the centers to look fully done.
- Leave the cookies on the hot pan for exactly 5 minutes without moving them, then transfer to a wire cooling rack and allow to cool for at least 15 minutes before eating.