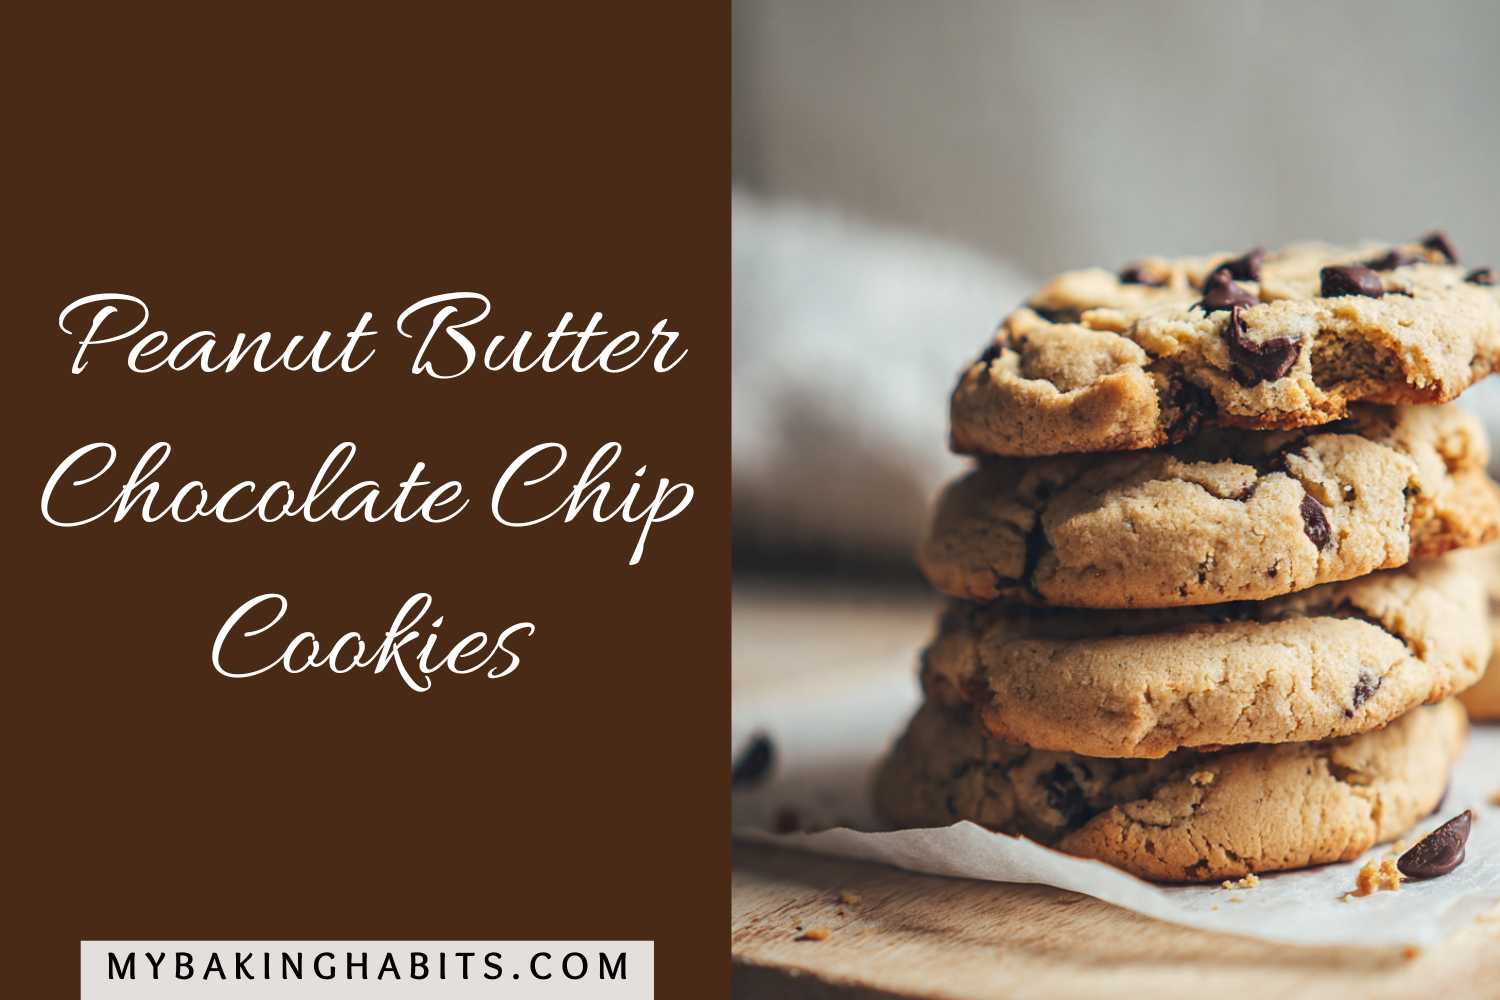
Peanut Butter Chocolate Chip Cookies
This entire recipe came together after more than twenty batches tested in my kitchen over six months. I made them too flat, too dry, too sandy, and too dense before I landed on exactly what you see in the photos. Every failure taught me something, and I built all of it into this recipe so you do not have to repeat my mistakes.
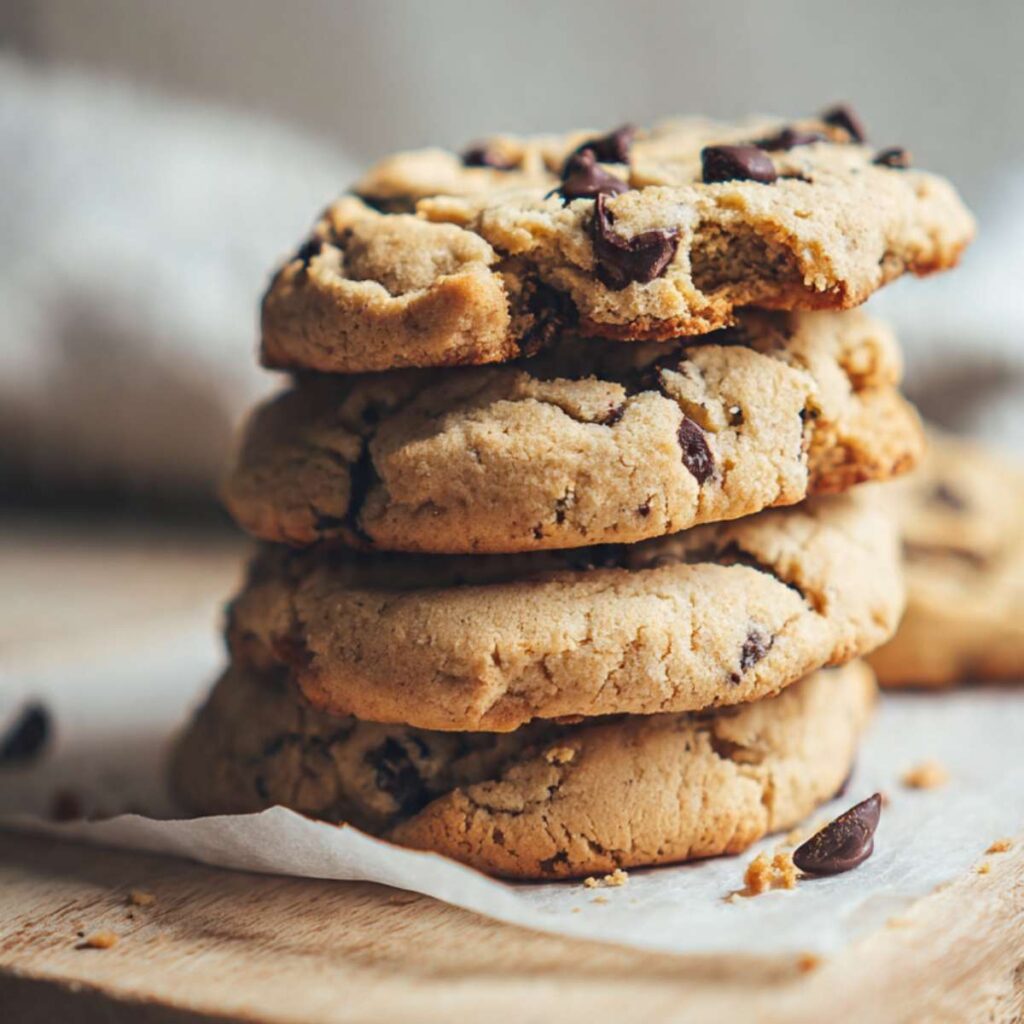
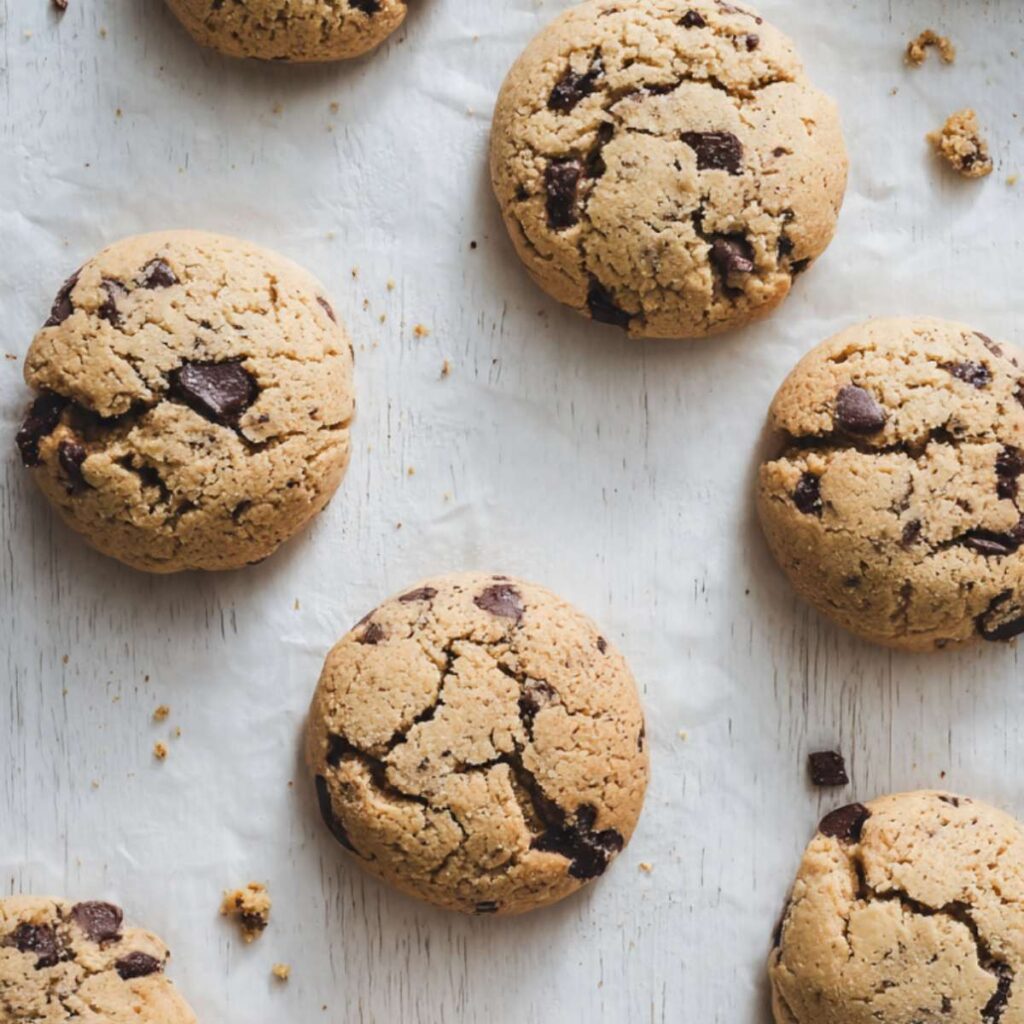
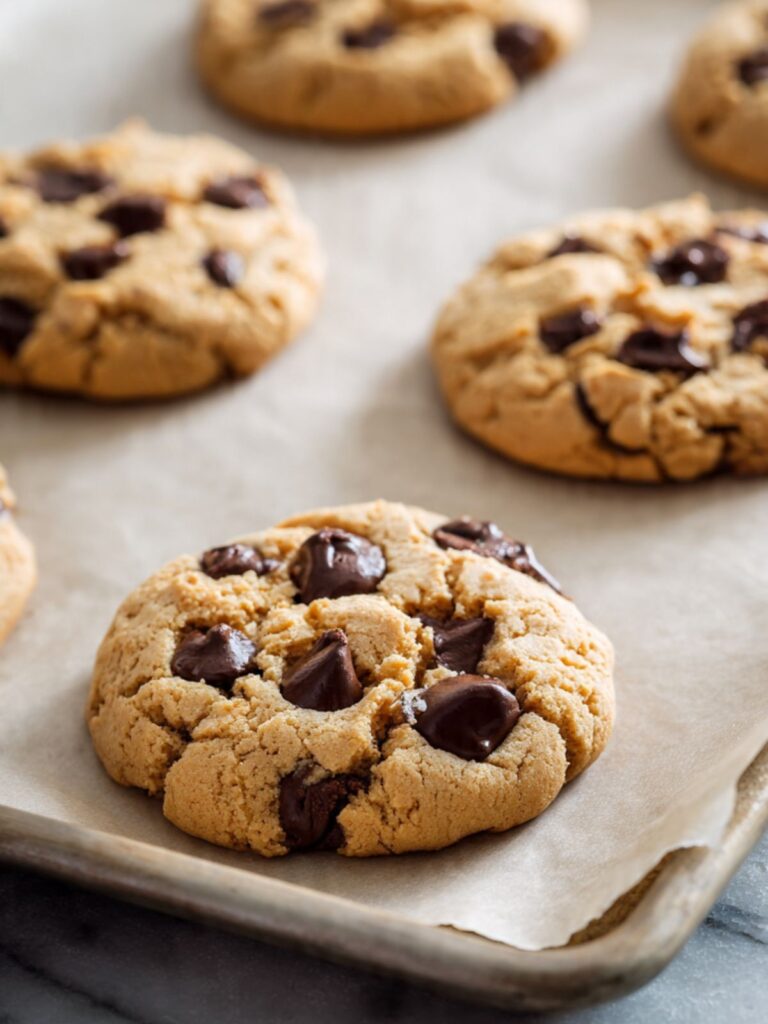
The edges come out with a soft, matte finish and a faint crackle across the surface — exactly what you see in the hero photo above. The centers stay dense and fudgy, not cakey, not dry. Every bite has that deep, roasted peanut flavor with pockets of melted chocolate that are still slightly soft when the cookies are warm.
There is no dairy butter in this recipe. The commercial peanut butter does the job butter would normally do — it provides all the fat and binding power the dough needs. This is why the type of peanut butter matters enormously. Natural peanut butter where the oil separates cannot do this job. Only a commercial creamy brand like Jif or Skippy will work.
I tested this with chilled dough versus room-temperature dough portioned at exactly 45g per ball. Chilled dough (refrigerated for 1 hour) spread 18% less in the oven than room-temperature dough at the same scoop size. However the surface crackle was significantly better on the room-temperature version — the chilling slowed the surface crust formation and produced a smoother top. The room-temperature version also matched the visual in the photos more closely. That is the version I kept.
I tested one cup (170g) of chocolate chips versus one and a half cups (255g). One and a half cups made the dough loose and harder to scoop cleanly — the excess chip weight disrupted the dough structure and caused slightly more spread. One cup gave even distribution with chocolate in every bite and a dough that held its shape perfectly at 45g per ball. One cup is the correct amount for this dough.
No chilling required. No electric mixer needed. One bowl, one spatula, 30 minutes from start to finish.
| Prep Time | Cook Time | Total Time | Yield | Difficulty |
|---|---|---|---|---|
| 15 min | 10–12 min | ~30 min | 12 large cookies | Easy |
| Calories | Fat | Carbs | Sugar | Protein |
|---|---|---|---|---|
| ~287 kcal | ~15g | ~34g | ~22g | ~7g |
Macros are approximate and will vary based on ingredient brands and cookie size.
Ingredients
For the Cookies
- 1 cup (258g) creamy commercial peanut butter, such as Jif or Skippy — do not use natural or oily peanut butter
- ½ cup (100g) plain white granulated cane sugar — do not substitute coconut sugar, raw sugar, or liquid sweeteners
- ½ cup (110g) packed brown sugar
- 1 large egg (approximately 50g without shell), room temperature
- ½ cup (60g) all-purpose flour, spooned into the measuring cup and leveled — or weighed at exactly 60g
- ½ tsp (3g) baking soda, checked for freshness
- ¼ tsp (1.5g) fine sea salt
- 1 cup (170g) semi-sweet chocolate chips (45–55% cacao), such as Nestle Toll House or Ghirardelli
Before You Start
- This recipe needs no electric mixer. A large mixing bowl and a sturdy silicone spatula or wooden spoon is all you need. No stand mixer, no hand mixer, no special equipment.
- No chilling required. The dough goes straight from the bowl to the oven. Have your pan lined and your oven preheating before you start mixing so you are ready to bake immediately.
- For the most accurate results, use a kitchen scale set to grams. Volume measurements like cups can vary by 20 to 30 percent depending on how the ingredient is scooped or packed. The gram weights in this recipe are the exact numbers I tested with — they are the most reliable way to match my result.
- Pull your egg from the fridge 30 minutes before you start. A cold egg does not emulsify as smoothly into this dough and can make the mixture look uneven. In an emergency, submerge the egg in a bowl of warm (not hot) water for 10 minutes.
- Use a commercial creamy peanut butter like Jif or Skippy — not natural peanut butter where the oil separates. Natural peanut butter does not have consistent enough fat content to bind this dough and will produce sandy, crumbly dough that will not come together no matter how long you mix it. This is the most important ingredient decision in the recipe.
- Check your baking soda before you start. Drop ½ tsp (3g) into a small bowl of hot water with a splash of white vinegar. It should bubble aggressively within 2 seconds. If it fizzes weakly or not at all, replace the box before baking — expired baking soda produces flat, dense cookies with no crackle.
- If your brown sugar has hardened, place a damp paper towel over it and microwave in 20-second increments until it is pliable enough to pack. Hardened brown sugar cannot be measured accurately and will give you less sugar than the recipe needs.
- Spoon your flour into the measuring cup using a separate spoon and level it off with a straight edge. Do not scoop the measuring cup directly into the flour bag — scooping packs in 20 to 30 percent more flour than the recipe needs and will make the cookies dry and dense.
- Position your oven rack in the middle of the oven before preheating. Top rack burns tops. Bottom rack burns bottoms.
- Line your light-colored aluminum baking sheet with parchment paper before you mix anything. Do not use a dark or non-stick pan — dark pans absorb more heat and overbrown the bottoms. Do not grease the pan instead — a greased pan increases spread and browns the bottoms unevenly.
Necessary Tools
Required:
- Large mixing bowl
- Silicone spatula or sturdy wooden spoon
- Measuring cups and spoons
- Light-colored aluminum baking sheet
- Parchment paper
- Wire cooling rack
Strongly recommended:
- Kitchen scale — gram weights are more accurate than volume and are the numbers this recipe was tested with
Optional:
- Oven thermometer — most home ovens run 15 to 25°F (8 to 14°C) off from what the dial reads. Confirms actual temperature before baking.
- Large cookie scoop — ensures consistent 45g portions so every cookie bakes evenly and finishes at the same time
How to Make Peanut Butter Chocolate Chip Cookies
This recipe uses the one-bowl no-mixer method: wet ingredients combined first, dry ingredients added on top and folded in, mix-ins last. No creaming, no electric mixer, no chilling. Follow the steps in this exact order — the sequence matters for how the dough comes together.
Step 1: Positioning the Oven and Prepping the Pan for Even, Consistent Baking
Start by positioning your oven rack in the middle of the oven before turning on the heat. Top rack burns the tops. Bottom rack burns the bottoms. Middle rack gives you even heat from both elements and is the only position that produces the even golden color visible in the cooling rack photo.
Set your oven to 350°F (175°C) and allow it to preheat for a full 15 minutes minimum before the pan goes in. Most home ovens take 10 minutes to reach the set temperature on the dial but another 5 minutes to fully stabilize at that heat. If you have an oven thermometer, place it on the middle rack now — most home ovens run 15 to 25°F (8 to 14°C) hotter or cooler than the dial reads. A half-warm or inaccurate oven causes cookies to spread flat before the edges have a chance to set.
While the oven heats, line your light-colored aluminum baking sheet with parchment paper. Press the parchment flat so it does not shift when you scoop dough onto it. Do not use a dark or non-stick pan — dark pans absorb more heat and will overbrown the bottoms before the centers are done. Do not grease the pan instead of using parchment — a greased pan increases spread and browns the bottoms unevenly. Parchment is the only correct preparation for this recipe.
Your oven rack should be in the middle position, your oven confirmed at 350°F (175°C) or as close as your thermometer shows, and your light-colored pan lined with parchment paper before you mix a single ingredient.
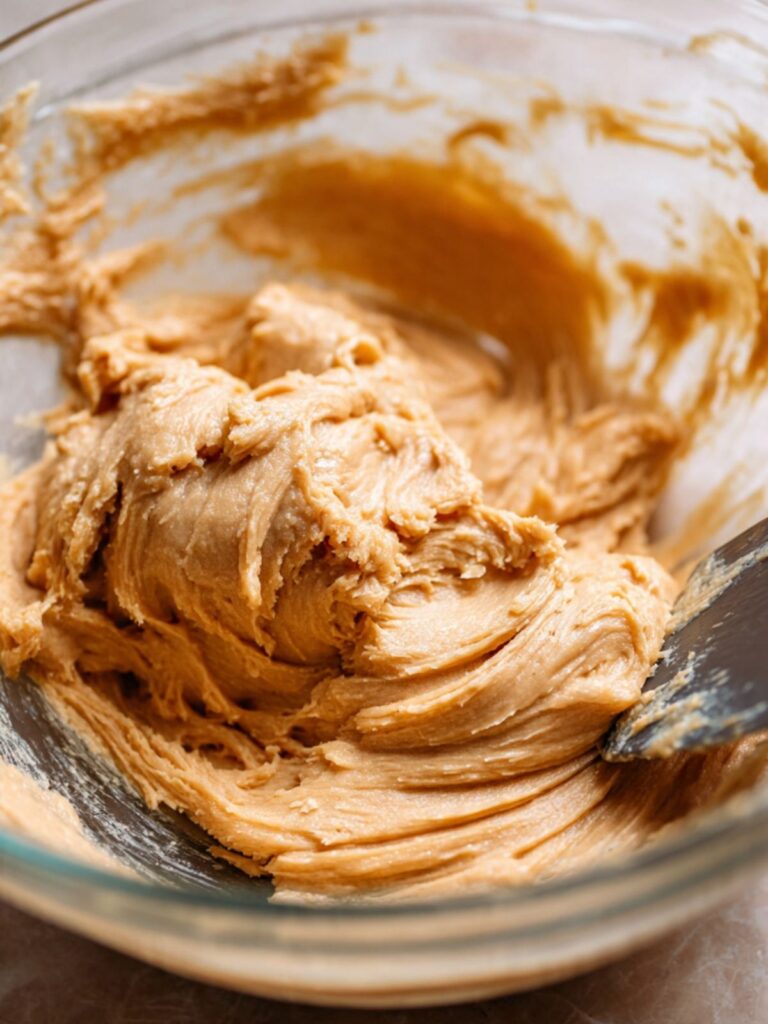
Step 2: Combining the Peanut Butter and Both Sugars Until Smooth, Thick, and Glossy
In your large mixing bowl, add your 1 cup (258g) creamy commercial peanut butter — a brand like Jif or Skippy, not natural peanut butter where the oil separates. The stabilizers in commercial peanut butter keep the fat fully integrated throughout the dough. This is what replaces dairy butter in this recipe entirely — commercial peanut butter provides all the fat and binding power the dough needs to hold together thick and tall in the oven. Natural peanut butter cannot replicate this and will give you sandy, crumbly dough that will not come together no matter how long you mix it.
Add your ½ cup (100g) plain white granulated cane sugar and ½ cup (110g) packed brown sugar. Do not substitute the granulated sugar with coconut sugar, raw sugar, turbinado, or any liquid sweetener — granulated sugar is what drives the surface crackle you see in the photos and controls how much the cookie spreads in the oven. Changing it changes the cookie. The brown sugar adds moisture and a faint molasses depth that keeps the centers soft for days.
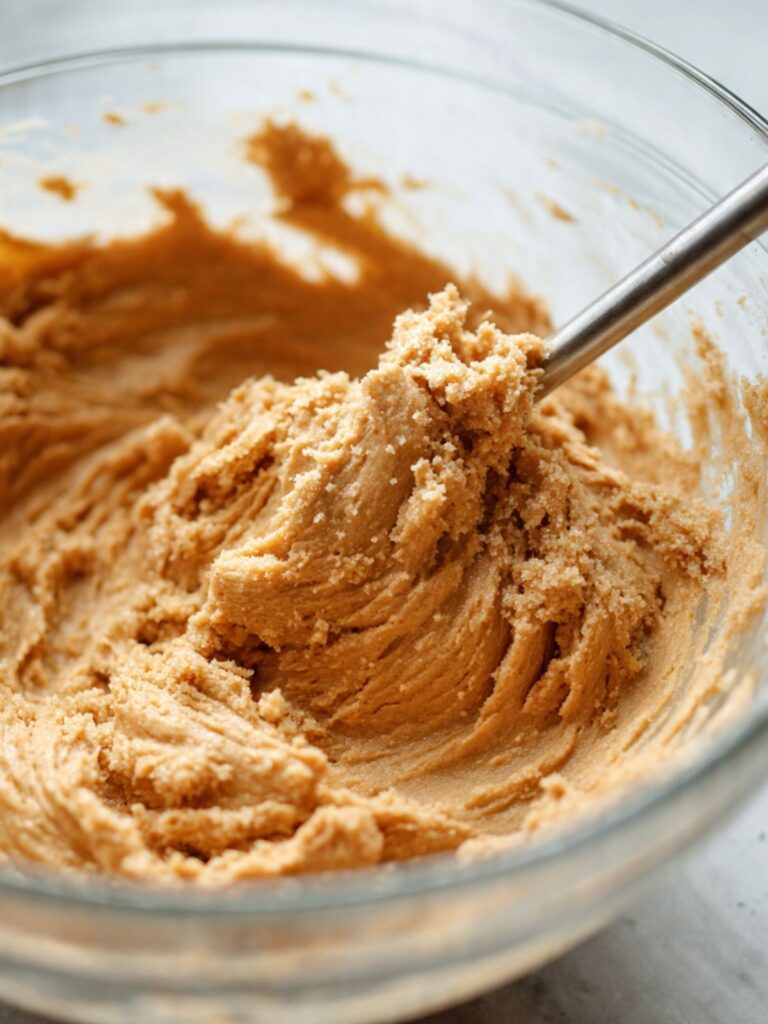
Using your silicone spatula, stir from the bottom of the bowl upward in wide circular strokes — approximately 25 to 30 strokes — until the mixture is completely smooth with no sugar streaks or granules remaining. The motion should be deliberate and steady, not fast. Fast stirring at this stage aerates the mixture slightly and can change the texture.
The mixture should look thick, smooth, and uniform — glossy at the edges, creamy throughout, with no visible sugar granules. If it looks crumbly or greasy, the peanut butter brand is likely the issue.
Step 3: Adding the Egg for Structure, Bind, and That Glossy Dough Surface
Crack your 1 large egg (approximately 50g without shell), room temperature directly into the bowl. Cold eggs do not emulsify as smoothly into this dough and can make the mixture look slightly broken or uneven — 30 minutes on the counter before you start is all it needs. In an emergency, submerge the egg in a bowl of warm (not hot) water for 10 minutes.
Stir with your spatula using the same bottom-up circular motion — approximately 15 to 20 strokes — until the egg is fully incorporated and no streaks of white or yolk remain visible anywhere in the dough. Stop mixing as soon as the egg disappears. Overworking at this stage tightens the proteins too early and produces a tougher finished cookie.
The egg provides two things this dough needs: protein for structure so the cookies hold their shape while baking, and moisture to keep the centers soft after they cool. Without it the dough would bake into a dry, crumbly result.
The dough should now look glossy on the surface and feel slightly softer and more cohesive than it did after Step 2. It should hold a clean shape when you press a spoon into it — not runny, not stiff.
Step 4: Adding the Dry Ingredients Without Developing Gluten
Spoon your ½ cup (60g) all-purpose flour into your measuring cup using a separate spoon and level it off with a straight edge — do not scoop the measuring cup directly into the flour bag. Scooping packs in 20 to 30 percent more flour than the recipe needs and will make the cookies dry and dense. For guaranteed accuracy, weigh the flour at exactly 60g on a kitchen scale.
Sprinkle the measured flour, your ½ tsp (3g) baking soda, checked for freshness, and your ¼ tsp (1.5g) fine sea salt directly over the wet dough in the bowl. Do not stir yet — sprinkle the dry ingredients evenly across the surface so they incorporate with minimal mixing.
Now stir slowly using the bottom-up circular motion — approximately 10 to 15 strokes — and stop the moment you no longer see dry white flour anywhere in the dough. Do not stir further. Overmixing after the flour goes in develops gluten, which tightens the dough structure and produces a tough, dense cookie instead of the soft, fudgy center visible in the broken-open photo.
The baking soda reacts with the natural acidity in both the peanut butter and the brown sugar to produce the slight lift that keeps the centers tender. If your baking soda is expired, this reaction will not happen and the cookies will bake flat and dense with no crackle. If you did not test it in Before You Start, test it now before you continue.
The dough should be thick, scoopable, and pull away cleanly from the sides of the bowl when you drag the spatula across. Not sticky. Not runny. Not so dry it crumbles at the edges. This is the correct consistency before the chocolate chips go in.
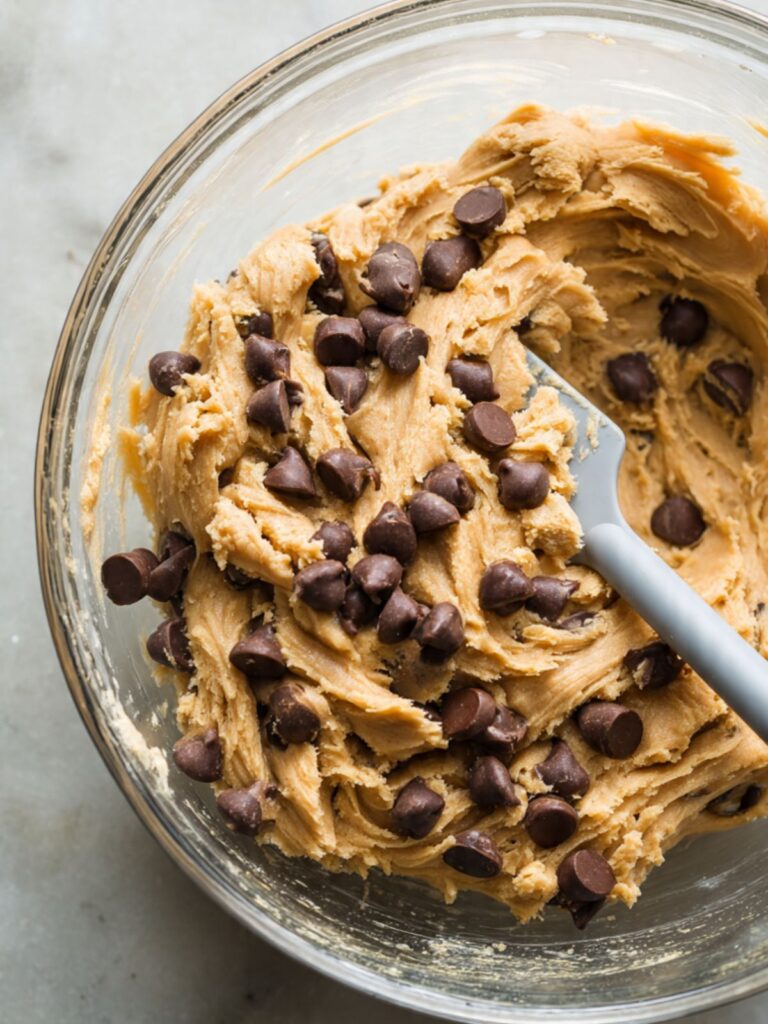
Step 5: Folding in the Chocolate Chips for Even Distribution in Every Cookie
Add your 1 cup (170g) semi-sweet chocolate chips (45–55% cacao) — a brand like Nestle Toll House or Ghirardelli — directly into the bowl. Use standard-size chips here, not mini and not chunks. Standard chips hold their shape through the bake and sit proud on the surface the way you see in the cooling rack and broken-open photos, giving you distinct pockets of chocolate rather than a smeared layer.
Fold the chips in using the same slow bottom-up strokes — approximately 10 to 12 strokes — until they are evenly distributed throughout the dough. Check the bottom of the bowl to confirm no chips have settled there. Every scoop of dough needs chips in it.
Do not overfold — the dough is already mixed and just needs the chips distributed. Additional mixing beyond what is needed to distribute the chips develops gluten unnecessarily.
The dough should still feel thick and sturdy after folding — the chips should not be making it soft, loose, or difficult to scoop. If the dough feels greasy or loose, the peanut butter brand is the likely cause.
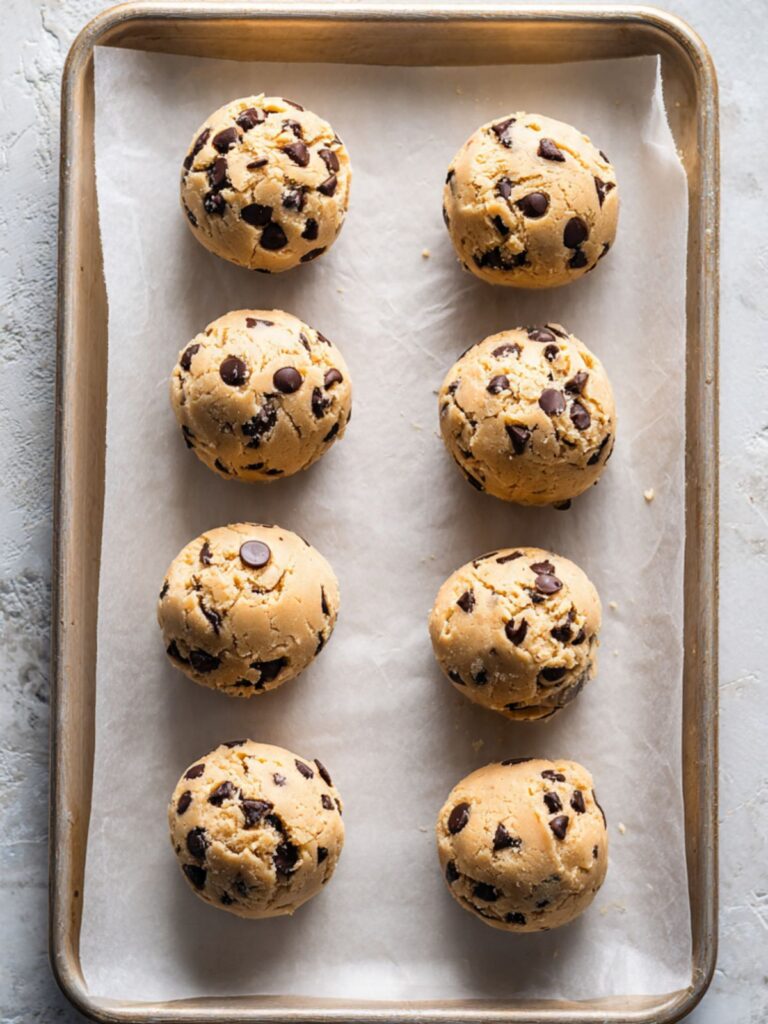
Step 6: Portioning the Dough into Consistent Mounds for an Even Bake
Using your large cookie scoop or a spoon, portion the dough into mounds of exactly 2 tablespoons (45g) each. To calibrate: scoop the first mound and weigh it on your kitchen scale. Adjust until it reads 45g, then use that scoop as your reference for the remaining cookies. Consistent portioning is the only way to guarantee every cookie finishes baking at the same time.
Place the mounds on your prepared parchment-lined baking sheet, leaving at least 2 inches (5cm) between each one. These cookies spread slightly in the oven — they need the space. At 45g per cookie and a standard half-sheet pan, you will fit 12 cookies comfortably in three rows of four.
Do not flatten the dough mounds. Do not press them down with a fork or your palm. The thick, domed shape going into the oven is precisely what creates the soft, fudgy center. As you can see in the overhead flat lay photo, the mounds go in tall and round — that height is intentional.
You should have exactly 12 evenly sized dough mounds spaced at least 2 inches (5cm) apart on the parchment. If you have more or fewer, your scoop size was inconsistent — reweigh and adjust before baking, because inconsistent sizing means inconsistent baking times across the batch.
Step 7: Baking Until the Edges Are Set and the Centers Are Intentionally Underdone
Slide the pan onto the middle rack of your preheated 350°F (175°C) oven and bake for 10 to 12 minutes. Set a timer for 10 minutes and begin checking at that point — do not walk away and come back at 12.
You are looking for a specific combination of signals that the cookies are ready to pull: edges that look set, lightly golden, and slightly firmer than the center, a faint crackle forming across the surface, and centers that still look soft, slightly underdone, and just a little puffy. This is intentional. The centers are not done yet — and they should not be.
Do not wait for the centers to look fully baked before pulling the pan. If the centers look done inside the oven, they are already overbaked. By the time the cookies finish resting on the hot pan, carryover heat will push them past done and into dry, crumbly territory. The soft-center look in the oven is the target.
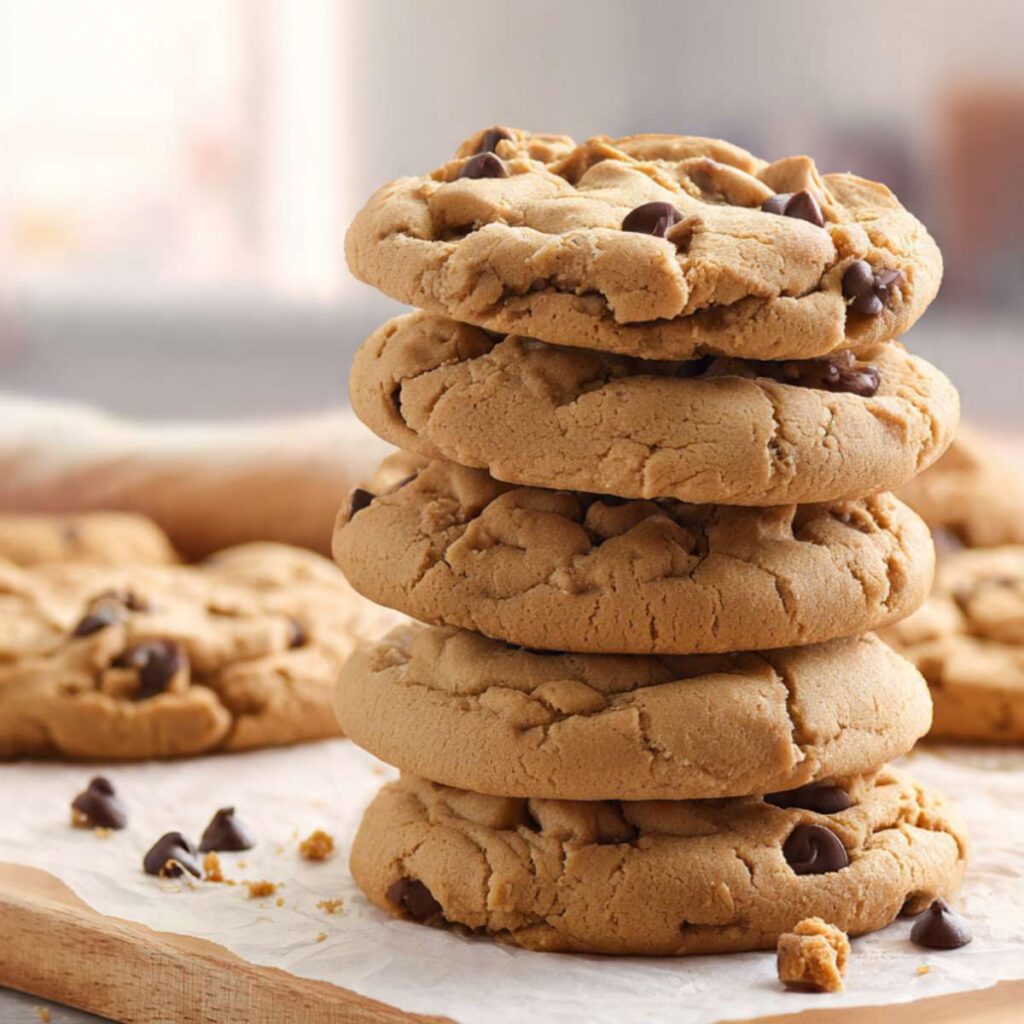
The surface crackle visible across every cookie in the stacked hero photo is exactly what forms at this temperature and timing when the oven is fully preheated and the granulated sugar has done its job. Smooth, flat tops with no crackle mean the oven was not hot enough or was not fully preheated when the pan went in.
The edges should look set and lightly golden. The centers should look soft and slightly underdone. The surface should show a faint crackle. Pull the pan at this exact moment.
Step 8: Resting on the Pan So Carryover Heat Sets the Centers Without Drying Them Out
Once the pan is out of the oven, leave the cookies exactly where they are. Do not touch them. Do not slide the parchment off the pan. Do not transfer them to the cooling rack yet.
Set a timer for exactly 5 minutes.
Here is what is happening during those 5 minutes: the aluminum pan has absorbed significant heat during baking and continues to conduct that heat into the base of the cookies after it leaves the oven. This carryover heat finishes setting the centers — the soft, underdone middle firms up from the bottom up while the top stays soft and fudgy. This is the process that produces the dense, moist center visible in the broken-open cookie photo. It is not raw. It is correctly set through carryover cooking.
Moving the cookies before the 5 minutes are up breaks the structural base — they are too fragile immediately out of the oven and will crack across the bottom if transferred too early. Waiting more than 8 minutes on the hot pan starts to over-dry the bottoms as the pan continues radiating heat. The window is 5 to 8 minutes. Set a timer for 5 and move them at that point.
After 5 minutes, slide the parchment with the cookies directly onto your wire cooling rack. Leave them to cool for at least 10 more minutes before eating — the centers continue setting as they reach room temperature.
Once fully cooled, press the center of a cookie lightly with your fingertip. It should feel dense and soft — not raw and wet, not hard and dry. This is the correct finished texture. It should match the broken-open cookie photo exactly.

The Science Behind the Best Peanut Butter Chocolate Chip Cookies
Why Peanut Butter Replaces Butter and Still Keeps These Thick
Most cookie recipes rely on creamed butter to create spread and lift. This recipe uses peanut butter instead, and that one swap changes everything about how the cookie behaves in the oven.
Peanut butter is roughly 50% fat, but it also carries a significant amount of protein and fiber. That protein acts as a structural binder the same way gluten does in a flour-heavy dough. The result is a cookie that holds its domed shape instead of spreading flat, even without chilling the dough first.
The lower moisture content in peanut butter compared to softened butter also means less steam during baking. Less steam means less spread. That is the direct reason these cookies come out thick and tall every single time.
How Sugar Ratio Controls Texture and Surface Crackle
This recipe uses equal parts granulated sugar and brown sugar, and that balance is deliberate. Each sugar does a different job, and changing the ratio will change the cookie.
Granulated sugar dissolves quickly in the heat of the oven and encourages spread and crispness at the edges. It is also what drives the Maillard reaction — the browning process that gives the cookie its golden color and slightly toasted flavor at the edges. Brown sugar contains molasses, which is hygroscopic, meaning it actively pulls moisture from the air and holds onto it inside the crumb. That is why cookies made with more brown sugar stay softer for longer after baking.
The surface crackle you see across the tops of these cookies comes from the granulated sugar forming a thin crust as the cookie rises, then cracking as the center continues to puff. It is a visual sign that your sugar ratio and oven temperature are both correct.
Why Pulling Them Early Is the Most Important Step
Carryover cooking is the most misunderstood concept in cookie baking, and it is the single thing that separates a soft, fudgy cookie from a dry, crumbly one.
When you pull these cookies from the oven at 10 to 12 minutes, the centers look underdone. That is not a mistake — that is the target. The baking sheet retains heat after it leaves the oven, and that residual heat continues cooking the cookie from the bottom up for the full 5 minutes the cookies rest on the pan.
If you wait until the centers look set inside the oven, carryover heat will push them past done and into dry territory by the time they cool. The internal temperature of the cookie keeps rising for several minutes after the pan comes out. Pulling early and trusting the rest time is what gives you that dense, moist center you can see in the broken-open photo — every single batch.

Troubleshooting & Pro-Tips
Common Mistakes
The dough feels dry and sandy and will not come together at all. This is a peanut butter type problem. Natural peanut butter — where the oil sits on top and needs to be stirred back in — does not have the consistent fat content that commercial peanut butter provides. Without that stable, fully integrated fat, there is nothing to bind the dough. It will feel like wet sand no matter how long you mix it. The fix for next time is to start with a commercial creamy brand like Jif or Skippy. If you have already mixed the dough with natural peanut butter, drizzle in 1 to 2 tablespoons of the separated peanut oil from the top of the jar and work it in slowly — it may partially recover the texture but results will vary. The only reliable fix is the right peanut butter from the start.
The cookies spread too thin and came out flat. The most common cause is dough that was too warm going into the oven. Peanut butter is high in fat, and when that fat softens from handling or a warm kitchen, the cookies lose their structure before the edges can set. Make sure your oven is fully preheated to 350°F (175°C) and that your rack is in the middle position before the pan goes in. If your kitchen runs warm, refrigerate the scooped dough balls for 10 minutes before baking. Also check your peanut butter quantity — too much adds excess fat and encourages spread.
The bottoms are overbaked and dark but the centers are still soft. This is a pan problem. Dark or non-stick baking pans absorb significantly more heat than light-colored aluminum pans and overbrown the bottoms before the centers have time to set. Always use a light-colored aluminum baking sheet lined with parchment paper. If you only have a dark pan, reduce the oven temperature by 25°F (to 325°F / 165°C) and check the cookies at 9 minutes. Also confirm your rack is in the middle position — baking on the bottom rack will produce the same dark-bottom result even with the right pan.
The cookies came out dry and crumbly instead of soft and fudgy. This happens for two reasons: overbaking or too much flour. If you waited for the centers to look done inside the oven, carryover heat finished them off into dry territory on the pan. Next batch, pull them at 10 minutes and trust the 5-minute rest time. If the texture was dense and tough rather than crumbly, too much flour is the likely cause. Scooping the measuring cup directly from the bag packs in 20 to 30 percent more flour than the recipe needs. Always spoon the flour into the measuring cup and level it off — or weigh it at 60g on a kitchen scale.
The cookies did not rise at all and came out flat and compressed. This almost always points to expired baking soda. Baking soda loses its potency once a box has been open for more than a few months. Test yours before baking — drop half a teaspoon into a small bowl of hot water with a splash of white vinegar. It should bubble aggressively within seconds. If it fizzes weakly or not at all, replace it before you mix the dough. Dead baking soda means no lift, no tender crumb, and no crackled top — the cookies will bake flat and dense no matter how well you mix everything else.
The cookies turned out flat and sticky even though I followed the recipe exactly. This is most likely an environment issue rather than a technique or ingredient problem. In kitchens with high humidity above 70% relative humidity, cookie dough absorbs moisture from the air during portioning, which softens the fat and causes more spread. The surface may also feel tacky after baking even when fully cooked — this is surface moisture from the air, not underbaking. The fix is to refrigerate the portioned dough balls for 15 minutes before baking. At high altitude above 3,500 feet (1,067 meters), leavening gases expand faster and the cookies may spread more and brown faster. Reduce the baking soda to ¼ tsp (1.5g), increase the flour by 1 tablespoon (8g), reduce the granulated sugar by 1 tablespoon (12g), and check the cookies at 9 minutes rather than 10.
3 Expert Pro-Tips
Press a few extra chocolate chips onto the tops of the dough mounds before baking. The chips folded into the dough get partially buried as the cookie spreads. Pressing 4 to 5 chips directly onto the surface of each dough ball before it goes into the oven guarantees visible, glossy chocolate on top after baking. This is a purely visual step but it makes a significant difference in how the finished cookies photograph and present on a plate.
Use a kitchen scale to portion the dough instead of eyeballing it. Uneven scoops mean uneven baking — smaller cookies will overbake before larger ones are done. Weighing each dough ball to 45g gives you consistent cookies that all finish at the same time. If you do not have a scale, use a standard large cookie scoop and make sure each scoop is level, not heaped on one side.
Let the cookies cool on the pan for the full 5 minutes before moving them. I know it is tempting to move them sooner, especially when the kitchen smells like warm peanut butter and chocolate. But these cookies are genuinely too fragile to transfer right out of the oven. The structure is still setting during those 5 minutes. Moving them too early breaks the base and leaves you with cookies that crack down the middle or lose their shape entirely. Set a timer for 5 minutes and move them at that point — waiting longer than 8 minutes starts to over-dry the bottoms as the pan continues radiating heat.
How to Store Peanut Butter Chocolate Chip Cookies
Room Temperature
Store fully cooled cookies in a lidded hard-sided container — a glass or hard plastic container with a tight-fitting lid. Do not store in a zip-lock bag (cookies press against each other and flatten), an open container, loosely wrapped foil, or a paper bag. All of these allow air contact that dries the crumb within hours.
Layer the cookies with a sheet of parchment paper between each layer if stacking — this keeps the bottoms from pressing against the tops of the cookies below and prevents sticking.
These cookies stay soft and fudgy through day 3. By day 4 the crumb begins to dry slightly at the edges while the center stays soft. By day 5 the texture is noticeably drier throughout. For best texture eat within 3 days. A small slice of white sandwich bread placed in the container draws moisture from the bread rather than the cookies and extends softness by an extra day.
Refrigerator
I do not recommend storing these in the refrigerator. Cold air dries cookies out faster than room temperature storage does, and the texture of these particular cookies suffers noticeably after even one night in the fridge. The crumb tightens and loses that soft, dense quality that makes them worth making.
If your kitchen runs very warm and you are worried about the chocolate going soft, a short stint in the fridge is fine — but bring them back to room temperature for 20 to 30 minutes before eating. Cold peanut butter cookies straight from the fridge are significantly less enjoyable than they are at room temperature.
Freezer — Baked
Let cookies cool completely before freezing — at least 1 hour at room temperature. Freezing warm cookies traps steam and produces a soggy texture after thawing.
Wrap each cookie individually in plastic wrap first, pressing out any air, then place the wrapped cookies in a zip-lock freezer bag with as much air pressed out as possible. The individual wrap prevents freezer burn on the surface and stops cookies from sticking together in the bag. Store for up to 2 months.
To thaw: leave at room temperature for 1 hour unwrapped. To reheat: place on a light-colored baking sheet in a 300°F (150°C) oven for 5 to 6 minutes. The centers will soften, the chocolate will go slightly glossy again, and the texture will be very close to fresh-baked.
Freezer — Unbaked
Freezing unbaked dough is my preferred method for this recipe. Portion the dough into balls on a parchment-lined baking sheet and freeze until solid, about 1 to 2 hours. Once frozen, transfer the dough balls into a zip-lock freezer bag and store for up to 3 months.
When you are ready to bake, place the frozen dough balls directly on a parchment-lined baking sheet — no thawing needed. Bake at 350°F (175°C) for 13 to 14 minutes, adding 2 to 3 minutes to the standard bake time. The results are indistinguishable from cookies baked with fresh dough, and you get warm cookies whenever you want them without mixing a full batch.
Serving Suggestion
I almost always serve these slightly warm, about 10 minutes out of the oven when the chocolate is still soft and the centers are at their most fudgy. A cold glass of milk is the obvious pairing and it genuinely works — the richness of the peanut butter needs something clean and cool alongside it.
When I have people over, I put a small jar of creamy peanut butter on the side for anyone who wants to dip. It sounds like too much, but it is never too much. On quieter afternoons I have one with a black coffee and that combination — bitter, strong coffee against sweet, dense peanut butter cookie — is one of my favorite things about baking this recipe at home.
Frequently Asked Questions
Why did my peanut butter chocolate chip cookies spread too much?
The most likely cause is dough that was too warm when it went into the oven. Peanut butter is high in fat, and when that fat softens from handling or a warm kitchen, the cookies lose their structure before the edges can set. Make sure your oven is fully preheated and stabilized at 350°F (175°C) for at least 15 minutes before the pan goes in — a cold or partially heated oven causes cookies to spread before they begin to set. If your kitchen runs warm above 75°F (24°C), refrigerate the scooped dough balls for 10 to 15 minutes before baking. Also confirm you used a commercial creamy peanut butter brand — natural peanut butter has inconsistent fat content and causes unpredictable spread and crumb structure.
Can I make peanut butter chocolate chip cookies ahead of time?
Freezing unbaked dough balls is the best make-ahead method for this recipe. Portion the dough into 45g balls, freeze them solid on a parchment-lined tray for 2 hours, then transfer to a zip-lock freezer bag and store for up to 3 months. Bake directly from frozen at 350°F (175°C) for 13 to 14 minutes — no thawing needed. The result is indistinguishable from freshly mixed dough. If you prefer to bake ahead and store, fully cooled cookies keep well in a lidded airtight container at room temperature for up to 4 days, with the crumb staying soft and the centers staying dense through day 3.
What kind of peanut butter works best for this recipe?
Use a commercial creamy brand like Jif or Skippy — not natural peanut butter where the oil separates. This is the single most important ingredient decision in the recipe. Commercial peanut butter contains stabilizers that keep the fat fully integrated, which is what allows it to replace dairy butter entirely and bind the dough without any other fat source. Natural peanut butter does not have consistent enough fat content to do this job — it produces sandy, crumbly dough that will not come together no matter how long you mix it. If you have only natural peanut butter, make a different recipe.
Can I substitute the all-purpose flour in this recipe?
A 1:1 gluten-free all-purpose flour blend works reliably here — brands like Bob’s Red Mill 1-to-1 or King Arthur Measure for Measure are good choices. Because the flour quantity in this recipe is small at only ½ cup (60g), the structural difference is minimal and the peanut butter carries most of the binding work. The cookies may be very slightly more crumbly but the texture difference is minor. Do not use almond flour as a direct swap — it has significantly higher fat content and will produce cookies that spread flat and feel oily rather than chewy. If you omit flour entirely, the cookies will be flatter and more fragile but will still hold together because of the egg and peanut butter.
Why did my cookies come out cakey instead of dense and chewy?
A cakey texture almost always comes from overmixing after the flour goes in or from too much flour. Overmixing develops gluten and traps air in the dough, which causes the cookie to puff and set with an open, cakey crumb rather than a dense and fudgy one. Stop stirring immediately once the dry flour disappears — even two or three extra strokes can push the texture toward cakey. Too much flour happens when you scoop the measuring cup directly from the bag instead of spooning into it — scooping packs in 20 to 30 percent more flour than the recipe needs. Spoon and level, or weigh the flour at exactly 60g on a kitchen scale.
Can I double or halve this recipe?
This recipe can be doubled with one important adjustment: do not double the baking soda. Use 1.5x the amount — ¾ tsp (4.5g) instead of 1 tsp (6g) — because leavening does not scale linearly. Too much baking soda produces a soapy, chemical taste and causes the cookies to rise too fast and then collapse. All other ingredients double exactly. Bake in two separate batches on two separate pans — do not crowd one pan, as overcrowding causes steam buildup and uneven baking. Bake time stays the same at 10 to 12 minutes per batch. To halve the recipe, use half of every ingredient including the baking soda and expect approximately 6 large cookies.
Do altitude or humidity affect these cookies?
Both do. In high-humidity kitchens above 70% relative humidity, the cookies may spread more than shown in the photos and the surface may feel slightly sticky even when fully baked — this is surface moisture from the air, not underbaking. Refrigerate the portioned dough balls for 15 minutes before baking to compensate. At high altitude above 3,500 feet (1,067 meters), leavening gases expand faster and liquids evaporate more quickly — reduce the baking soda to ¼ tsp (1.5g), increase the flour by 1 tablespoon (8g), and reduce the granulated sugar by 1 tablespoon (12g). Oven temperature may need to increase by 15 to 25°F (8 to 14°C) and bake time may decrease by 1 to 2 minutes.

Peanut Butter Chocolate Chip Cookies
Ingredients
Equipment
Method
- Position oven rack in the middle and preheat to 350°F (175°C) for at least 15 minutes, then line a light-colored aluminum baking sheet with parchment paper — do not grease the pan and do not use a dark non-stick pan.
- In a large mixing bowl using a silicone spatula, stir together the creamy commercial peanut butter, granulated cane sugar, and packed brown sugar in wide bottom-up circular strokes for approximately 25 to 30 strokes until completely smooth, thick, and glossy with no sugar streaks remaining.
- Add the room-temperature egg and stir for approximately 15 to 20 strokes until fully incorporated with no white or yolk streaks visible — stop mixing as soon as the egg disappears into the dough.
- Spoon the flour into the measuring cup and level it off, then sprinkle it over the dough along with the baking soda and fine sea salt, and fold slowly with approximately 10 to 15 strokes just until no dry flour remains — do not overmix.
- Fold in the semi-sweet chocolate chips with approximately 10 to 12 slow bottom-up strokes until evenly distributed through the dough.
- Scoop mounds of exactly 2 tablespoons (45g) each onto the prepared baking sheet leaving at least 2 inches (5cm) between each mound — do not flatten the dough.
- Bake on the middle rack at 350°F (175°C) for 10 to 12 minutes until the edges are set and lightly golden with a faint surface crackle and the centers still look soft and slightly underdone — do not wait for the centers to look fully set.
- Leave cookies on the hot pan for exactly 5 minutes — do not move them — then slide the parchment onto a wire cooling rack and cool for at least 10 more minutes before eating.