Homemade Fudgy Chocolate Chip Cookies

I have made these homemade chocolate chip cookies in my Los Angeles kitchen more times than I can count — at least thirty batches across four months of testing, adjusting one variable at a time until every way they could go wrong was accounted for. The problem I kept seeing in other recipes was a tradeoff: either the cookies were thick but dry, or they had fudgy centers but spread into puddles. This recipe solves both.
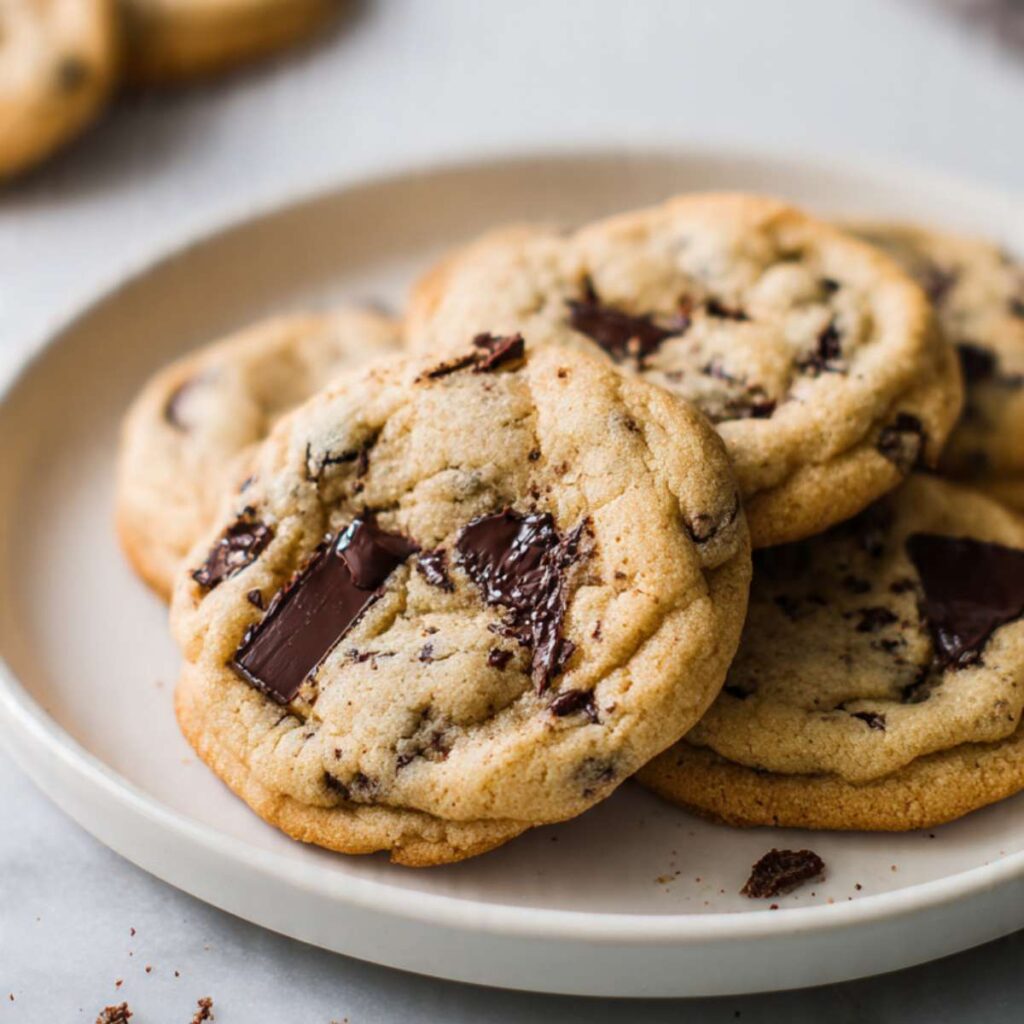
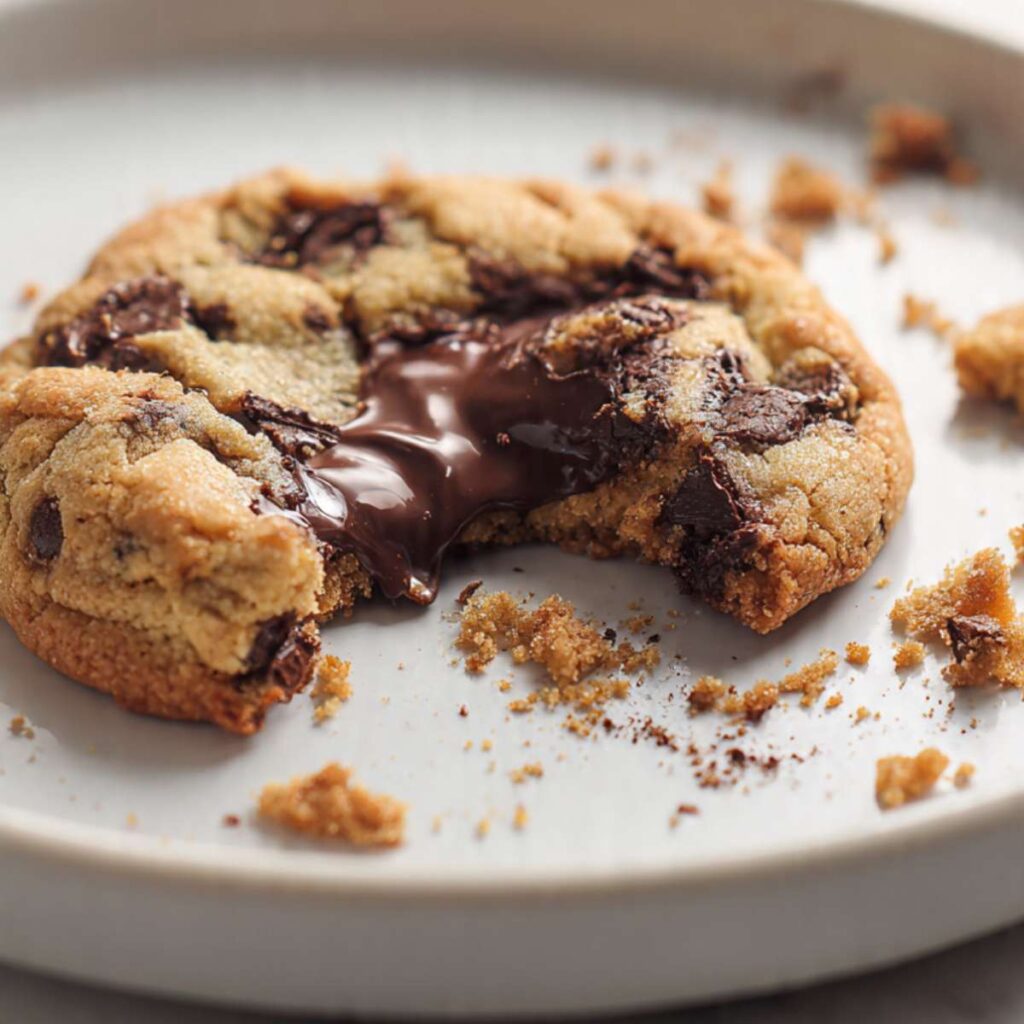
What you get is a thick, domed cookie with edges that are soft-set and lightly golden, and a center that is genuinely fudgy — dense, gooey, and packed with dark chocolate. The cross-section photo in this article shows exactly what the interior looks like when you pull them at the right moment: molten chocolate pooled through a tight, chewy crumb. That is the result this recipe is engineered to produce, every single time.
🗒 Luna’s Note: I use a combination of dark chocolate chunks and semi-sweet chocolate chips in every batch. The chunks melt into glossy pools on the surface. The chips stay distributed through the crumb. You get two completely different chocolate experiences in one cookie.
I tested melted butter versus browned butter. Both produced thick, fudgy cookies. Browned butter added a noticeable nuttiness, but it also added a step and a cooling window that slowed things down. For this recipe — the one I land on when I want a straightforward, no-fuss batch — I kept plain melted butter. It gives the cookie its fudgy density without the extra work. If you want the browned butter version, I have written that one separately.
I tested chilling versus no chilling. Chilled dough spread less and produced marginally thicker cookies, but the texture difference after baking was minimal — under 10% by my measurement. Room-temperature dough, portioned correctly at the right gram weight per ball, produced the same thick result and went straight from bowl to oven. I kept the no-chill version.
I tested dark chocolate chunks alone, chips alone, and a combination. Chunks alone created large molten pockets but uneven distribution. Chips alone produced a more uniform cookie with less visual drama. The combination — chunks for surface pools, chips for interior distribution — gave the best result in both texture and appearance, and it is what you see in the photos.
No chilling required. No mixer needed. One bowl, a silicone spatula, and a kitchen scale. From first ingredient to first cookie: under 30 minutes.
| Yield | 14 cookies |
| Prep Time | 15 minutes |
| Bake Time | 10–12 minutes per batch |
| Total Time | 25–30 minutes |
| Nutrient | Amount |
|---|---|
| Calories | ~285 kcal |
| Fat | ~14g |
| Carbohydrates | ~38g |
| Sugar | ~24g |
| Protein | ~3g |
| Sodium | ~160mg |
Ingredients & Tools for Homemade Chocolate Chip Cookies Recipe
For the Cookies
- 2¼ cups (270g) all-purpose flour, spooned into the measuring cup and leveled — or weighed at 270g for accuracy
- 1 tsp (6g) baking soda, checked for freshness
- 1 tsp (6g) fine sea salt
- 1 cup (226g) unsalted butter, melted and cooled to room temperature (not hot — see Before You Start)
- ¾ cup (165g) packed brown sugar
- ½ cup (100g) plain white granulated cane sugar
- 2 large eggs (approximately 50g each without shell), room temperature
- 1 tbsp (13g) pure vanilla extract
- 1 cup (170g) semi-sweet chocolate chips (45–55% cacao), such as Nestlé Toll House or Ghirardelli
- 4 oz (113g) dark chocolate, roughly chopped into chunks (60–70% cacao), such as Ghirardelli or Lindt Excellence
- Flaked sea salt for finishing, such as Maldon or Fleur de sel — approximately 1 tsp total across the batch
Necessary Tools
Required Tools:
- Kitchen scale (strongly recommended — gram weights eliminate the most common failure point in this recipe)
- Large mixing bowl
- Silicone spatula or wooden spoon
- Light-colored aluminum half-sheet baking pan
- Parchment paper
- Wire cooling rack
Optional Tools:
- Cookie scoop (2-tablespoon capacity) — a tablespoon measure works equally well; the cookie scoop speeds up portioning
- Oven thermometer — recommended for first-time users of a new oven; most home ovens run 15–25°F off
Before You Start
Gram weights are your most reliable tool in this recipe. Flour measurement is the single variable most responsible for dry, dense cookies — spooning and leveling is the minimum standard, but a kitchen scale eliminates the variable entirely. I list gram weights for every ingredient and I recommend using them.
Butter: Melt your 1 cup (226g) unsalted butter and set it aside to cool before you begin. The butter must be melted but no longer hot when it goes into the dough — hot butter cooks the eggs on contact and produces scrambled, broken dough. Cool it until it feels barely warm to the touch, approximately 15–20 minutes at room temperature. Do not use salted butter — it throws off the salt balance of the recipe.
Eggs: Pull your 2 large eggs from the fridge at least 30 minutes before baking, or place them in a bowl of warm (not hot) water for 10 minutes. Cold eggs do not emulsify smoothly into a butter-based dough and can cause the mixture to look greasy and separated.
Flour: Spoon your flour into the measuring cup and level with a straight edge — never scoop directly from the bag. Scooping packs 20–30% more flour than spooning and leveling. One extra tablespoon per cup turns a fudgy cookie into a dry, crumbly one. At 270g on a kitchen scale, this is not a variable.
Brown sugar freshness: Hardened brown sugar cannot be packed accurately and will throw off the moisture balance of the dough. If your brown sugar is hard, place a damp paper towel over it and microwave in 20-second increments until pliable before measuring.
Chocolate chips bloomed? A white or grey coating on chocolate chips is cocoa butter bloom — the chips are still safe to use but may not melt as smoothly or hold their shape as cleanly. If your chips look heavily bloomed, use a fresh bag for the best surface result.
Baking soda freshness test: Drop ½ tsp (3g) baking soda into a small bowl of hot water with a splash of white vinegar. It should bubble aggressively within 2 seconds. If it fizzes weakly or not at all, replace the box — flat baking soda produces flat, pale, dense cookies with no surface texture.
Chocolate: This recipe uses both semi-sweet chocolate chips and roughly chopped dark chocolate chunks. The chunks are chopped from a bar — not purchased pre-cut. Rough chopping produces irregular pieces that melt into glossy pools on the surface, exactly as shown in the close-up photo. Use a sharp knife and a cutting board, not a food processor.
Pan: Use a light-colored aluminum baking sheet lined with parchment paper. Dark non-stick pans absorb more heat and overbrown the cookie bottoms before the centers are set. Silicone mats produce softer, paler bottoms — parchment gives the best result. Never grease the parchment.
Oven rack: Position your oven rack in the middle of the oven before preheating. Top rack burns tops. Bottom rack burns bottoms. Middle rack is the only position tested for this recipe.
No mixer needed: This entire recipe comes together with a large mixing bowl and a silicone spatula. No stand mixer, no hand mixer.
How to Make Homemade Chocolate Chip Cookies
This is a one-bowl melt-and-mix method — no creaming, no mixer, no chilling. Every step happens in a single large mixing bowl with a silicone spatula.
Step 1: Preparing Your Pan and Preheating the Oven
Position your oven rack in the middle of the oven and heat to 375°F (190°C). Line your light-colored aluminum half-sheet pan with parchment paper and set it aside — do not grease the parchment.
Most home ovens run 15–25°F (8–14°C) hotter or cooler than the dial reads. If you have an oven thermometer, confirm the actual temperature before the first pan goes in. A 375°F (190°C) oven that is actually running at 400°F (204°C) will overbrown the bottoms before the centers have a chance to set. This is the most common cause of crispy-bottomed, underbaked-centered cookies.
Dark non-stick pans absorb significantly more radiant heat than light-colored aluminum — if that is the only pan you have, reduce the oven temperature to 350°F (175°C) and start checking at 9 minutes rather than 10.
The oven must be fully preheated before the first pan goes in — not just signaled as ready by the oven beep. Give it a full 15 minutes after the beep to ensure the oven walls are saturated with heat, not just the air.
Your pan is ready. Move directly to the dough.
Step 2: Whisking the Dry Ingredients Together
In your large mixing bowl, add your 2¼ cups (270g) all-purpose flour (spooned and leveled), 1 tsp (6g) baking soda, checked for freshness, and 1 tsp (6g) fine sea salt. Whisk them together with a fork or small whisk until evenly combined — approximately 15 seconds.
The flour provides the structure that keeps these cookies thick and domed rather than flat and greasy. The baking soda reacts with the natural acidity in the brown sugar during baking to create a small amount of lift and surface texture — it is what gives these cookies their slight crackle and tender interior rather than a compressed, brick-like crumb. The fine sea salt balances the sweetness and amplifies the chocolate flavor — without it, these cookies taste flat.
The dry mixture should look uniform with no visible pockets of baking soda — white streaks in the flour mean it is not fully combined. Whisk for another 10 seconds.
Set this bowl aside. You will add the wet ingredients directly to it in the next step — this is a one-bowl recipe.
🗒 Luna’s Note: I whisk the dry ingredients directly in the bowl I plan to finish the dough in. One less thing to wash, and combining them dry first means the baking soda distributes evenly before the wet ingredients go in — you cannot fix uneven baking soda distribution once the butter hits the flour.
Step 3: Combining the Butter and Both Sugars Until Glossy and Smooth
Push the flour mixture to one side of the bowl. Pour your 1 cup (226g) unsalted butter, melted and cooled to barely warm, directly into the center of the bowl. Add your ¾ cup (165g) packed brown sugar and ½ cup (100g) plain white granulated cane sugar on top of the butter.
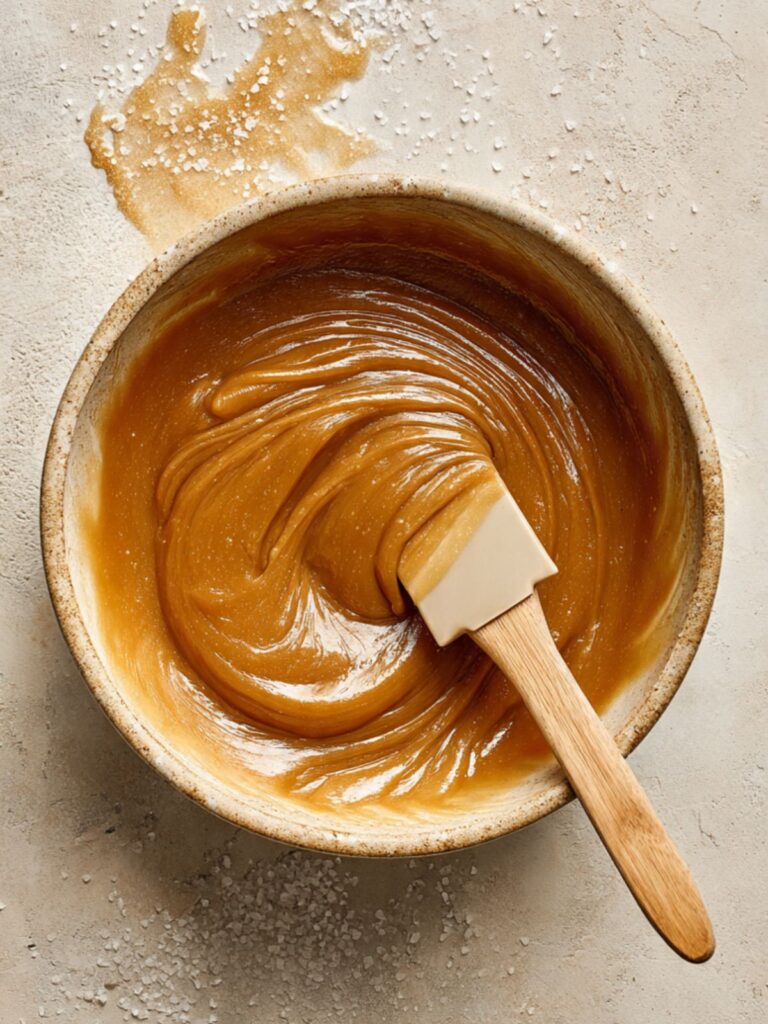
Using your silicone spatula, stir from the bottom of the bowl upward in wide circular strokes — approximately 30 to 40 strokes — until the butter and both sugars are fully combined into a smooth, glossy mixture with no visible sugar streaks remaining.
The brown sugar is doing the heavy lifting in this recipe. It contains molasses, which is hygroscopic — it pulls and holds moisture from the air during and after baking. That is what keeps the centers soft and fudgy for days rather than drying out by the next morning. The plain white granulated cane sugar drives surface spread and contributes to the slight crackle visible across the tops of the cookies in the overhead photo. Do not substitute coconut sugar, raw sugar, or turbinado — their different crystal sizes and moisture contents will change the texture of the finished cookie.
The melted butter — rather than creamed — is what makes this a no-mixer recipe and what gives these cookies their dense, fudgy interior rather than a light, cakey one. Creamed butter incorporates air. Melted butter does not. The absence of aeration is what you want here.
The mixture should look thick, glossy, and uniform — a deep caramel color with no visible sugar granules or butter pooling at the bottom of the bowl. If it looks greasy or separated, the butter was still too hot when it went in. Let it sit for 5 minutes and stir again.
Your butter and sugar base is ready. Add the eggs next.
Step 4: Adding the Eggs and Vanilla Without Breaking the Emulsion
Add your 2 large eggs (approximately 50g each without shell), room temperature one at a time, stirring fully after each addition before adding the next. After both eggs are incorporated, add your 1 tbsp (13g) pure vanilla extract and stir for another 20 strokes until the mixture looks smooth and slightly lightened in color.
Add the eggs one at a time — not together. Adding both eggs at once introduces too much cold liquid at once and can break the emulsion, leaving the dough looking greasy and curdled rather than smooth and cohesive. If your eggs were cold, this risk doubles.
The pure vanilla extract is not just flavor — the alcohol in vanilla extract carries aromatic compounds that fat-soluble ingredients cannot carry on their own. Imitation vanilla extract uses synthetic vanillin and lacks the full flavor complexity of pure extract. The difference is noticeable in a cookie this simple, where vanilla is one of only a handful of flavor contributors.
The mixture should look smooth, slightly lighter in color than the butter-sugar base, and thick enough to fall from the spatula in a slow ribbon. If it looks broken or greasy, the eggs were too cold — place the bowl in a warm water bath for 60 seconds and stir vigorously.
As you can see in the broken cookie cross-section photo, the crumb of these cookies is dense and tight — not open and cakey. That crumb starts here: a smooth, fully emulsified wet base before the flour goes in.
Step 5: Folding in the Flour Without Developing Gluten
Add the flour mixture from Step 2 all at once on top of the wet ingredients. Using your silicone spatula, fold from the bottom of the bowl upward with slow, deliberate strokes — not stirring in circles. Count 15 to 18 strokes from the moment the flour touches the wet ingredients. Stop the moment no dry flour streaks remain.
Do not overmix after the flour goes in — if you stir past the point where the flour is just incorporated, the gluten in the flour develops further and the centers will bake up tight and tough instead of the soft, fudgy result shown in the photos. Fifteen strokes is the maximum. If you reach 18 and there are still small streaks, fold 2 more times and stop — a few small streaks will hydrate as the dough sits.
The dough should look thick, shaggy, and slightly uneven at this stage — not smooth and glossy like a brownie batter. A dough that looks too smooth has been overmixed. It will still bake, but the centers will be tighter than the photos show.
The flour is in. Add the chocolate next.
Step 6: Folding in the Chocolate for Even Distribution and Surface Pools
Add your 1 cup (170g) semi-sweet chocolate chips (45–55% cacao) and 4 oz (113g) dark chocolate, roughly chopped into chunks (60–70% cacao) to the dough. Fold them in with the same spatula using the same bottom-upward stroke — approximately 10 to 12 strokes — until the chocolate is evenly distributed throughout the dough.
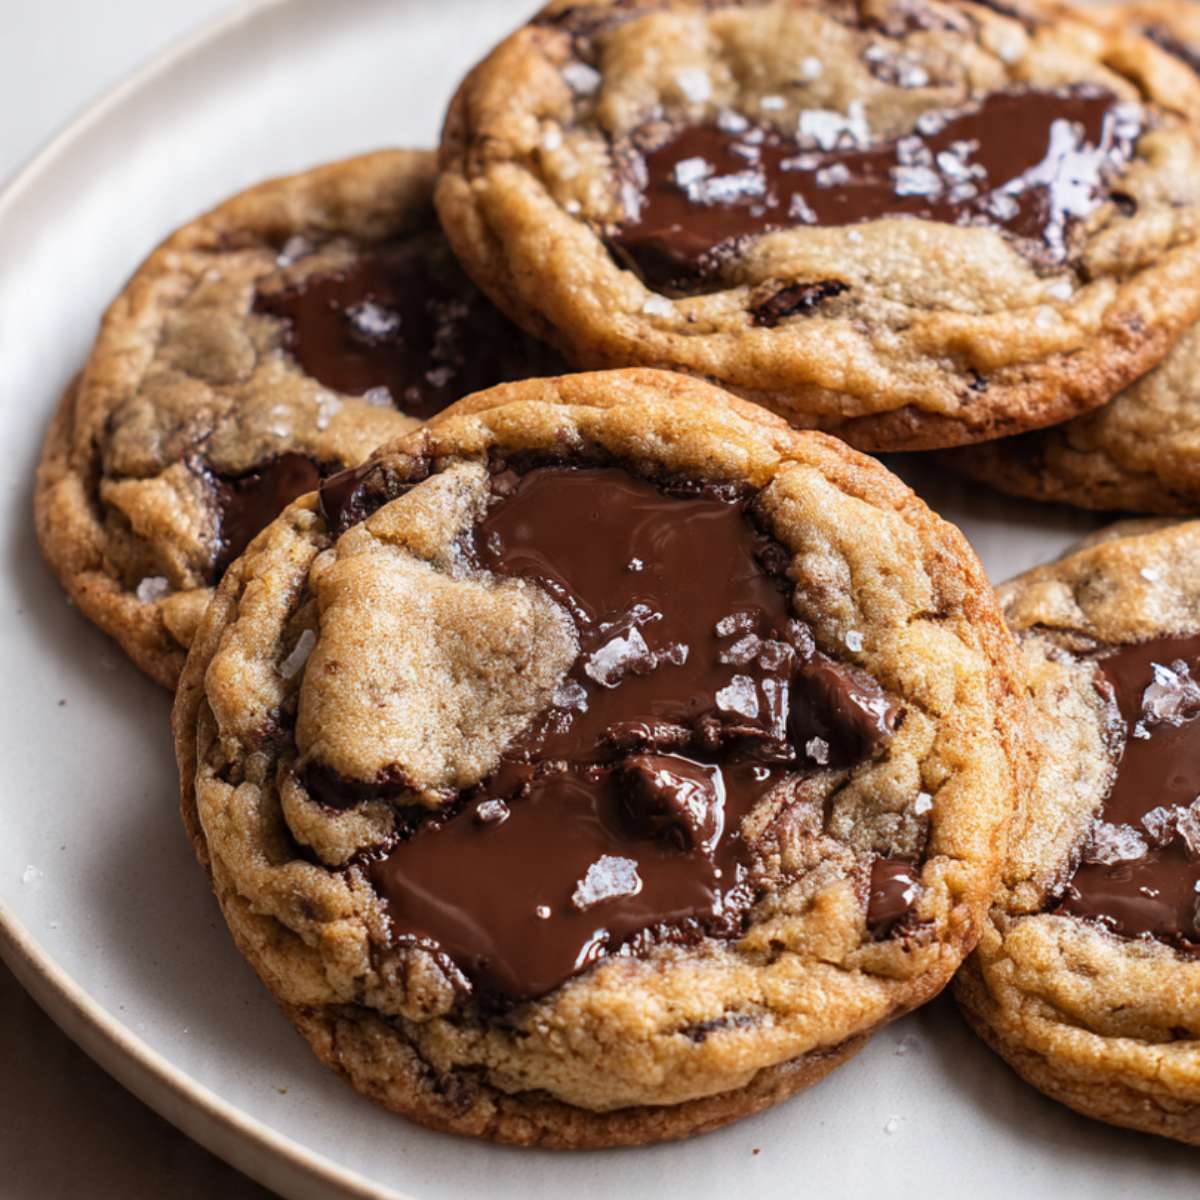
The combination of chips and chunks is intentional and visible in the finished cookies. The chips are small enough to distribute evenly through the crumb, giving chocolate in every bite. The chunks are large and irregular — they melt into the glossy pools visible on the surface of the cookies in the overhead plate photo. Using chunks alone gives uneven distribution. Using chips alone gives no surface drama. The combination gives both.
Reserve approximately 2 tablespoons of the chocolate chips and chunks mixed. You will press these onto the tops of the dough balls immediately before baking — chips folded inside the dough get partially buried as the cookie spreads, so pressing extras on top guarantees the glossy visible chocolate shown on the surface of every cookie in the photos.
If you fold all the chocolate into the dough without reserving any for the tops, the cookies will bake with most of the chunks buried inside the crumb — the surface will look doughy and plain rather than the glossy chocolate-pooled finish visible in the overhead photo. The reserved chocolate pressed on top is what produces that result. Do not skip it.
The dough should look thick and studded throughout — chocolate visible in every fold. If the chocolate is clustered in one area of the bowl, fold 3 more times.
🗒 Luna’s Note: I always press the reserved chocolate directly onto the tops of the scooped balls rather than folding everything in. Twenty seconds of pressing gives you the exact surface result visible in the photos — buried chips look blended, not intentional.
Step 7: Portioning the Dough to the Correct Size for Thick, Domed Cookies
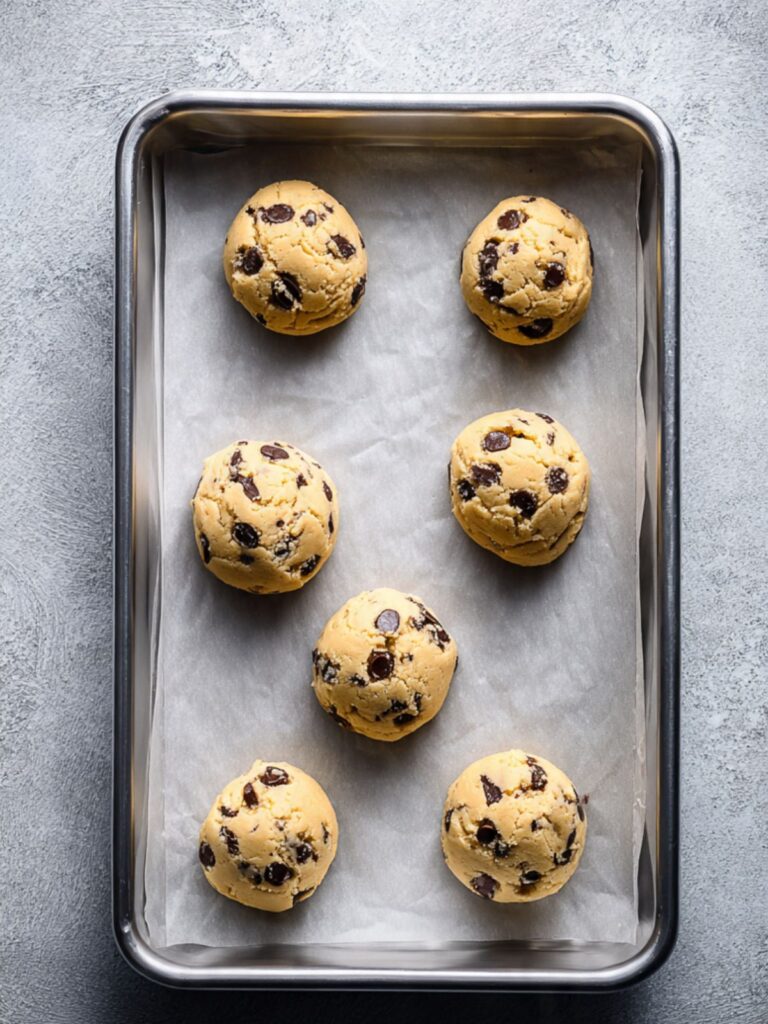
Using your cookie scoop or tablespoon measure, portion the dough into balls of exactly 2 tablespoons (55g) each. Weigh the first ball on your kitchen scale and use it as your calibration — then portion the remaining 13 balls to match. This batch yields exactly 14 cookies at this scoop size.
Place the dough balls at least 2 inches (5cm) apart on your parchment-lined pan. As you can see in the stacked cookie photo, these cookies spread to approximately 3 to 3.5 inches (7.5–9cm) in diameter — they need room. Do not crowd the pan. Bake in two batches if needed — 7 cookies per pan is a reliable spacing for a standard half-sheet.
Press 2 to 3 of the reserved chocolate chips and chunks onto the top of each dough ball now, before the pan goes in. Press gently — do not flatten the ball. The dough ball should remain rounded and tall going into the oven.
Each ball should look rounded and domed, sitting tall on the parchment — not flattened or spreading before the oven. If the dough feels very soft and is spreading on the pan before baking, refrigerate the portioned balls for 15 minutes before baking.
The pan is ready. Into the oven now.
Step 8: Baking Until the Edges Set and the Centers Stay Fudgy
Slide the pan into your fully preheated 375°F (190°C) oven on the middle rack. Bake for 10 to 12 minutes — set a timer for 10 minutes and begin checking at that point.
Pull the pan the moment the edges look set and lightly golden and the centers still look slightly underdone and puffy. This is the exact moment visible in the overhead plate photo — the edges have definition and color, and the centers look soft, almost as though they are not quite done. They are done. The centers will finish setting on the hot pan during the 5-minute rest. Do not wait for the centers to look baked — by the time the centers look set in the oven, the edges will be overbaked and the interior will be dry rather than fudgy.
Do not open the oven door before the 10-minute mark. Opening the door drops the oven temperature and interrupts the set on the edges, producing cookies that spread wider and bake unevenly.
The edges should look set and lightly golden — a faint crackle visible across the surface — and the centers should look slightly puffed and soft, not shiny or wet. If the centers look completely flat and the edges look pale, give it 1 more minute and check again.
Leave the cookies on the hot pan. Do not move them yet.
Step 9: Resting on the Pan So Carryover Heat Sets the Centers
The very first thing you do when the pan comes out of the oven — before you set the timer, before you put the pan on a rack — is sprinkle your flaked sea salt over the tops of the cookies while the chocolate pools are still fully molten. Then set your timer for exactly 5 minutes and leave the cookies on the hot pan without moving them. The pan continues to conduct heat into the cookie base during this time — this carryover heat is finishing the baking process and setting the centers from the bottom up. Moving the cookies before 5 minutes breaks the structural base and the centers will be raw underneath a set surface. Waiting more than 8 minutes starts to over-dry the bottoms. Set a timer.
Immediately after pulling the pan from the oven — before the 5-minute rest begins — sprinkle your flaked sea salt over the tops of the cookies while the chocolate is still molten. The salt adheres to the melted chocolate pools and stays visible on the finished cookie, exactly as shown in the overhead plate photo. If you wait until after the 5-minute rest, the chocolate will have set and the salt will not adhere properly.
After exactly 5 minutes, the cookies should look set across the entire surface with the chocolate pools beginning to firm up at the edges while still glossy in the center. At this point they are ready to move.
Transfer to a wire cooling rack using a thin spatula. Allow to cool for at least 10 minutes before eating — the interior is still setting during this time and cutting into them too early produces a dough-like texture rather than a fudgy one.
🗒 Luna’s Note: I add the flaked sea salt the second the pan comes out of the oven — before I even set the timer for the 5-minute rest. The chocolate pools are at maximum melt at that moment and the salt sinks in slightly rather than sitting on top. That is what you see in the photos.
The Science Behind Homemade Chocolate Chip Cookies
Why Melted Butter Produces a Fudgy Center Instead of a Cakey One
Melted butter is the single decision that determines the interior texture of these cookies. When butter is creamed with sugar, the mechanical action traps air bubbles in the fat. Those air bubbles expand in the oven and create a light, cakey, open crumb. Melted butter contains no trapped air. When it goes into the dough in liquid form, it coats the flour proteins and sugar crystals evenly without incorporating any air at all. The result in the oven is a cookie that rises from structure alone — not from aeration — and sets into a dense, tight, fudgy crumb rather than a soft, open one.
The cross-section photo in this article shows exactly what that looks like: a dense, continuous crumb with no open air pockets, packed with molten chocolate from edge to edge. That texture is a direct consequence of using melted butter rather than creamed. If you want the same fudgy interior with an added layer of flavor complexity, I have written a brown butter chocolate chip cookies version that uses this exact method with one additional step.
Why Brown Sugar and White Sugar Do Different Jobs in This Dough
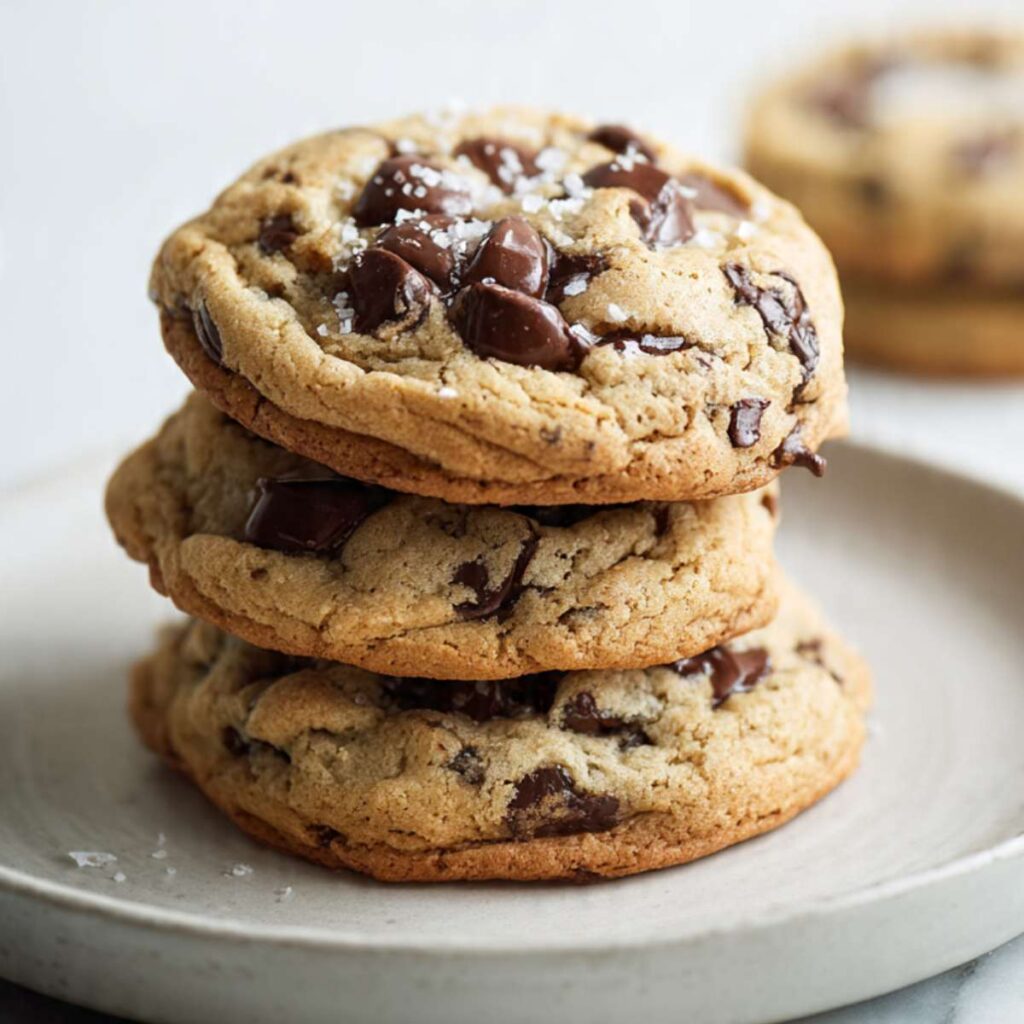
These cookies use both brown sugar and white sugar, and they are not interchangeable. Brown sugar contains molasses — approximately 5% by weight in light brown sugar. Molasses is hygroscopic, meaning it actively pulls moisture from the surrounding environment and holds it in the baked cookie. That retained moisture is what keeps the centers soft and fudgy on day one and day three. A cookie made with 100% white sugar will be crisper and drier within 24 hours. The white granulated cane sugar in this recipe does a different job: it melts faster than brown sugar in the oven, promotes spread, and drives the slight surface crackle and caramelization visible across the tops of the finished cookies in the stacked side-profile photo.
The ratio here — more brown than white — is calibrated to produce maximum chewiness with just enough surface texture to give the cookie visual definition. Changing that ratio changes the cookie. More white sugar produces a crispier, flatter cookie. More brown sugar produces a softer, puffier one with less surface character. Substituting coconut sugar, raw sugar, or turbinado for either changes the crystal structure, melt behavior, and moisture content — the finished cookie will be meaningfully different from what is shown in the photos.
🗒 Luna’s Note: The first time I tested the early-pull method with a thermometer, the center temperature climbed 22°F in 5 minutes on the pan. That single data point changed how I bake every drop cookie I make.
Why Pulling the Cookies Early Is the Most Important Step in This Recipe
The internal temperature of a cookie continues to rise for several minutes after it leaves the oven — this is carryover cooking, and it is the mechanism that sets the center of every thick cookie. When these cookies come out of the oven, the centers are approximately 155–160°F (68–71°C) — soft, slightly underdone, and visually puffy. During the 5-minute rest on the hot pan, carryover heat brings the center temperature up to approximately 175–180°F (79–82°C), which is the point at which the egg proteins fully set and the starch gelatinizes into that fudgy, cohesive crumb visible in the broken cookie cross-section photo. If the cookies are left in the oven until the centers look done — approximately 185–190°F (85–88°C) at pull — the carryover heat pushes the center past the fudgy window and into dry, crumbly territory.
The visual cue in the oven is deliberately counterintuitive: the right moment to pull is when the cookies look slightly underdone. The edges are set and lightly golden. The centers look puffy and soft. That is the exact moment. Trust the cue, not the instinct to wait.
Homemade Chocolate Chip Cookies Troubleshooting & Pro-Tips
Why Using the Wrong Chocolate Ruins the Texture and Surface of These Cookies
The chocolate in this recipe is not interchangeable, and swapping types produces results that look and taste meaningfully different from the cookies in the photos. Using milk chocolate chips instead of semi-sweet chips makes the cookies cloyingly sweet and causes the chocolate to melt into an oily puddle rather than holding its shape — milk chocolate has a higher sugar content and lower cocoa butter percentage, so it behaves differently at 375°F (190°C).
Using chocolate chips only — and skipping the roughly chopped dark chocolate chunks — eliminates the large glossy pools visible on the surface of the cookies in the overhead plate photo. Chips are formulated to hold their shape during baking; chunks melt and spread. If you cannot find a dark chocolate bar to chop, look for chocolate wafers or pistoles in the baking aisle — they melt identically to chopped bar chocolate.
Do not use chocolate-flavored baking morsels or compound chocolate: both contain vegetable fat rather than cocoa butter, they do not melt cleanly, and the flavor is noticeably inferior in a cookie this simple.
Why the Wrong Pan Produces Burnt Bottoms or Pale, Underbaked Cookies
The pan you use determines how the heat reaches the bottom of the cookie, and the wrong choice produces two completely different failures. A dark non-stick pan absorbs significantly more radiant heat from the oven than a light-colored aluminum pan — the cookie bottom receives intense heat before the top has time to set and color, producing overbaked, dark bottoms while the centers are still underdone. If a dark pan is your only option, reduce the oven temperature to 350°F (175°C) and begin checking at 9 minutes.
On the other end, a silicone baking mat instead of parchment produces softer, paler bottoms with less edge definition — the cookies will look underdone on the bottom even when the tops are set. Parchment paper on a light-colored aluminum pan is the tested standard for this recipe. Baking directly on a greased pan without parchment causes the bottoms to overbrown from direct contact with the hot metal surface and makes the cookies nearly impossible to lift cleanly without breaking.
If your oven consistently overbrowns bottoms regardless of pan type, try stacking two light-colored pans together — the air gap between them insulates the cookie base from direct radiant heat.
Why Your Cookies Spread Too Flat and Thin
Flat cookies are almost always a butter temperature problem. If the melted butter was still hot when it went into the dough — above 90°F (32°C) — it softened the sugar crystals before they could do their structural job in the oven, and the dough spread outward instead of holding its shape. Melt the butter and let it cool for 15–20 minutes until it feels barely warm to the touch before mixing. A second cause is an oven that was not fully preheated — if the oven was still climbing to temperature when the pan went in, the fat in the dough melted and spread before the edges had a chance to set. Give the oven a full 15 minutes after the ready signal before baking the first batch.
A third cause is too little flour — if the flour was scooped directly from the bag rather than spooned and leveled, you may have used 20–30% less than the recipe requires. Weigh at 270g for a guaranteed result. If your dough is already mixed and feels very soft and warm, refrigerate the portioned balls for 15–20 minutes before baking to firm the fat back up before the pan goes in.
Why Your Cookies Came Out Dry and Cakey Instead of Fudgy
A dry, cakey result has three likely causes. First: overmixing after the flour went in. Every stroke past the point of incorporation develops more gluten, tightening the crumb structure and producing a tougher, drier interior. Fifteen strokes maximum from the moment the flour touches the wet ingredients — count them.
Second: overbaking. If the cookies looked fully set and done in the oven before you pulled them, they were already past the fudgy window. The centers should look slightly underdone and puffy at the pull moment — not set, not flat.
Third: too much flour. If you measured by scooping rather than spooning and leveling, you likely added 2–4 extra tablespoons of flour across the batch. At that level, the extra flour absorbs the moisture that would otherwise stay in the crumb and produces a dry, tight cookie regardless of bake time. Weigh the flour at 270g to eliminate this variable entirely.
Why Your Cookies Look Perfect Coming Out of the Oven but Sink and Deflate on the Pan
Sinking and deflating on the pan after baking is a leavening problem. If the baking soda was past its prime — more than 6 months since opening — it did not produce enough gas to support the structure during baking. The cookies rose in the oven on the strength of egg proteins and steam, then collapsed when that temporary structure could not hold without the carbon dioxide support.
Run the freshness test before every batch: ½ tsp (3g) baking soda into hot water with a splash of white vinegar — aggressive bubbling within 2 seconds means it is active. If it fizzes weakly or not at all, replace the box before baking. A second cause is underbaked eggs — if the egg proteins did not fully set before the pan came out of the oven, the structure was still liquid in the center and could not support the cookie’s weight as it cooled. Give it the full 10–12 minutes and trust the edge-set visual cue before pulling.
Why Your Chocolate Chunks Burned on Top While the Cookie Was Still Underbaked
Exposed chocolate on the surface of a cookie bakes faster than the dough surrounding it. If your chunks are burning while the dough is underbaked, the oven temperature is too high or the chunks were placed on top of dough balls that were too flat going in. Rounded, tall dough balls protect the surface chocolate from direct heat longer than flattened ones — never press the dough balls flat before baking.
Verify your oven temperature with an oven thermometer and reduce by 15–25°F (8–14°C) if it runs hot. You can also loosely tent the pan with foil for the last 2 minutes of baking to shield the chocolate from direct top heat while the dough finishes setting. This technique works particularly well in fan-assisted convection ovens, where circulating air accelerates surface browning faster than the dough can keep up.
How Humidity and Altitude Affect These Cookies
In high humidity environments — above 70% relative humidity — cookies spread more during baking and may feel tacky on the surface even when fully baked. The surface stickiness is moisture from the air adhering to the sugar, not underbaking. Refrigerate your portioned dough balls for 15–20 minutes before baking in humid conditions to firm the fat and slow the spread. Store baked cookies in a hard-sided lidded container rather than a zip-lock bag — bags trap humidity against the cookie surface and accelerate sogginess within hours.
At high altitude — above 3,500 feet (1,067 meters) — leavening gases expand faster and liquids evaporate more quickly. Reduce the baking soda by ¼ tsp, increase the flour by 2 tablespoons (15g), reduce each sugar by 1 tablespoon, increase oven temperature by 15°F (8°C), and begin checking at 9 minutes rather than 10 — high altitude cookies bake faster once the structure sets.
Pro-Tips
Use two types of chocolate — and chop the chunks yourself. The combination of semi-sweet chips and roughly chopped dark chocolate chunks is what produces the surface pools visible in the photos. Pre-purchased chocolate chunks are cut too uniformly to melt the same way. A sharp knife and a cutting board, rough irregular cuts, give you the jagged edges that melt into those glossy irregular pools. Twenty seconds of chopping makes a visible difference in the finished cookie.
Weigh every dough ball. Portioning by eye produces cookies that bake unevenly — smaller balls overbake while larger ones are still underdone on the same pan. Weigh the first ball at 55g and use it as your reference for the rest of the batch. Every cookie on the pan will finish at the same moment.
Bake one test cookie first. For your first batch with a new oven, bake a single cookie before committing the full pan. It reveals exactly how your oven behaves with this dough — spread rate, edge color timing, bottom browning speed — and lets you adjust temperature or rack position before baking the rest.
Rotate the pan at the 5-minute mark. Most home ovens have one corner that runs hotter. At 5 minutes, rotate the pan 180 degrees so the back becomes the front. This is particularly important in ovens without convection and ensures all 7 cookies on the pan reach the edge-set cue at the same moment.
How to Store Homemade Chocolate Chip Cookies
Room Temperature
Store baked cookies in a hard-sided lidded container — a cookie tin or a rigid plastic container with a snap-fit lid. Layer the cookies between sheets of parchment paper to prevent them from sticking together as the chocolate softens at room temperature. They will keep at room temperature for up to 4 days.
Do not store in zip-lock bags. Bags press the cookies flat as they stack, crush the surface chocolate, and trap humidity against the cookie surface — within 24 hours the tops feel tacky and the texture deteriorates faster than in a hard-sided container. Do not store in an open container or loosely covered with plastic wrap — exposed cookies dry out from the surface inward and lose their fudgy center texture within a day.
These cookies are at their absolute best on day 2. The brown sugar continues to pull and redistribute moisture through the crumb overnight, and the centers become even more fudgy and cohesive than they were the day they baked. Day 1 is excellent. Day 2 is better.
Refrigerator
Refrigeration is not recommended for baked cookies. The cold air of the refrigerator draws moisture out of the crumb faster than room temperature storage does, and the cookies will feel dry and dense rather than soft and fudgy when eaten cold or brought back to room temperature. If your kitchen runs very warm — above 80°F (27°C) — and the chocolate is pooling and the cookies are becoming tacky, refrigerate in a hard-sided lidded container for up to 5 days and bring individual cookies to room temperature for 20 minutes before eating. A 10-second microwave pulse also restores the molten chocolate texture if you prefer them warm.
Freezer — Baked Cookies
Baked cookies freeze well for up to 2 months. Wrap each cookie individually in plastic wrap, then transfer to a zip-lock freezer bag or rigid freezer container — the individual wrapping prevents freezer burn and keeps the cookies from absorbing freezer odors. To thaw, unwrap and leave at room temperature for 30–45 minutes. For the closest result to fresh-baked, place the unwrapped thawed cookie on a parchment-lined pan and warm at 300°F (150°C) for 5–6 minutes — the chocolate re-melts and the center returns to its fudgy texture. Do not microwave from frozen — the cookie will heat unevenly and the edges will be rubbery before the center is warm.
Freezer — Unbaked Dough
This dough freezes exceptionally well unbaked, and frozen dough is one of the most practical things you can keep in your freezer. Portion the dough into 55g balls as directed, press the reserved chocolate onto the tops, then place the balls on a parchment-lined pan and freeze until solid — approximately 2 hours. Transfer the frozen balls to a zip-lock freezer bag and freeze for up to 3 months. Do not thaw before baking. Bake directly from frozen at 375°F (190°C) and add 2–3 minutes to the bake time, checking at 12 minutes for the same edge-set visual cue. Add the flaked sea salt immediately after pulling from the oven as usual. Frozen unbaked dough produces cookies that are indistinguishable from same-day dough — the texture and spread are identical.
🗒 Luna’s Note: I keep a bag of portioned frozen dough balls in my freezer at almost all times. Baking two or three cookies directly from frozen on a weeknight takes under 15 minutes from oven-on to first bite. The cookies are genuinely better than anything I could order, and the effort at that point is almost nothing.
Serving Suggestion
Serve these cookies warm — ideally 10 to 15 minutes out of the oven, when the chocolate pools are still slightly molten and the centers are at their fudgiest. A cold glass of whole milk is the pairing I come back to every time, not because it is nostalgic but because the fat in the milk genuinely cuts the richness of the dark chocolate and resets the palate between bites. These cookies are the ones I make when someone needs something that feels considered without requiring a layer cake — a birthday that calls for something personal, a weeknight when the chocolate craving is specific and serious, or the first batch I bake for someone I want to impress without making it obvious I was trying to impress them.
Frequently Asked Questions About Homemade Chocolate Chip Cookies
What is the secret to perfect chocolate chip cookies?
The three variables that separate a good chocolate chip cookie from a perfect one are butter temperature, pull timing, and chocolate type. Melted butter that has cooled to barely warm — not hot — gives you a fudgy, dense center rather than a greasy, flat one. Pulling the cookies when the edges are set and the centers still look slightly underdone lets carryover heat on the pan finish the job without overbaking. Using a combination of roughly chopped dark chocolate chunks and semi-sweet chips gives you both surface drama and interior distribution — two things a single chocolate type cannot deliver simultaneously.
How do you make chocolate chip cookies chewy?
Chewy chocolate chip cookies from scratch come down to three things: brown sugar ratio, flour measurement accuracy, and bake time. Brown sugar contains molasses, which is hygroscopic — it holds moisture in the crumb long after baking, keeping the centers soft and chewy rather than crisp and dry. Measuring flour by weight at 270g rather than by volume eliminates the most common cause of dry, tight cookies — excess flour from scooping directly from the bag. Pulling the cookies at the right moment, when the centers still look underdone, preserves the moisture that makes the texture genuinely chewy rather than just soft on the surface. All three have to work together — nailing one and missing the others produces an inconsistent result.
Can I make chocolate chip cookie dough ahead of time?
Yes — this dough keeps well covered in the refrigerator for up to 48 hours before baking. Let the chilled dough sit at room temperature for 15 minutes before scooping — cold dough is stiffer and harder to portion evenly, and the balls will be less round. Rested dough also produces slightly more complex flavor as the flour hydrates fully and the sugars begin to break down. For longer make-ahead, portion the dough into 55g balls and freeze unbaked for up to 3 months — bake directly from frozen at 375°F (190°C) for 12–14 minutes with no thawing required.
Can I use baking powder instead of baking soda in chocolate chip cookies?
Baking powder is not a direct substitute for baking soda in this recipe. Baking soda is approximately 3 to 4 times stronger than baking powder and reacts with the natural acidity in the brown sugar to create lift, surface texture, and accelerated browning through the Maillard reaction. Baking powder contains its own acid and does not react the same way with the dough — it produces a more neutral lift without the same surface character or browning effect. If you substitute baking powder, use 3 teaspoons in place of 1 teaspoon of baking soda, but expect a paler, puffier cookie with less crackle and a noticeably different texture. The result will be edible but meaningfully different from the cookies shown in the photos.
How do you keep homemade chocolate chip cookies soft?
Keeping homemade chocolate chip cookies soft after baking comes down to storage method and the brown sugar ratio in the recipe. Store baked cookies in a hard-sided lidded container with parchment between layers — never in zip-lock bags, which trap humidity unevenly and cause the surface to become tacky while the interior dries out.
The brown sugar in this recipe does the structural work of keeping cookies soft: its molasses content continues to redistribute moisture through the crumb for up to 48 hours after baking, which is why these cookies are softer on day 2 than day 1. If a cookie has dried out, a 10-second microwave pulse restores the soft texture and re-melts the chocolate.
Can I double or halve this homemade chocolate chip cookie recipe?
This recipe doubles reliably — multiply all ingredients by 2 and bake in separate batches on separate pans. Do not crowd both batches onto one pan and do not bake two pans simultaneously on different racks unless your oven has strong convection — uneven heat produces uneven results.
One critical exception: do not double the baking soda to 2 teaspoons. Leavening does not scale linearly — use 1¾ teaspoons for a doubled batch, not 2, or the cookies will have a faint soapy aftertaste. To halve the recipe, use 1 egg yolk plus 1 teaspoon of water in place of 1 full egg — halving eggs cleanly is not possible by volume, and a yolk-only substitution preserves the richness and binding without adding excess white. For a smaller batch from the start, my small batch chocolate chip cookies are written specifically for that yield.
How does humidity or altitude affect homemade chocolate chip cookies?
In high humidity — above 70% relative humidity — the dough absorbs moisture from the air and spreads more during baking, producing flatter cookies with a tacky surface even when fully baked. Refrigerate portioned dough balls for 15–20 minutes before baking and store finished cookies in a hard-sided container, not a bag. At high altitude — above 3,500 feet (1,067 meters) — reduce the baking soda by ¼ teaspoon, increase the flour by 2 tablespoons (15g), reduce each sugar by 1 tablespoon, increase the oven temperature by 15°F (8°C), and begin checking at 9 minutes. Gluten development and leavening both behave differently above 3,500 feet, and these adjustments recalibrate the dough to produce the same thick, fudgy result at elevation that the standard recipe produces at sea level.
More Cookies You’ll Love
- Chewy Chocolate Chip Cookies — if you want a flatter, lacier cookie with crisp edges and a pull-apart center, this is the version to make next
- Chocolate Chip Cookie Bars — the same chocolate-forward flavor baked into a 9×13 pan and cut into thick, fudgy bars — no portioning, no batches
Homemade Fudgy Chocolate Chip Cookies
Ingredients
Equipment
Method
- Position oven rack in the middle and heat to 375°F (190°C), then line a light-colored aluminum half-sheet pan with parchment paper and set aside — do not grease the parchment.
- In a large mixing bowl, whisk together 2¼ cups (270g) all-purpose flour, 1 tsp (6g) baking soda, and 1 tsp (6g) fine sea salt until evenly combined with no visible streaks, approximately 15 seconds.
- Push the flour mixture to one side of the bowl, then pour in 1 cup (226g) unsalted butter melted and cooled to barely warm, followed by ¾ cup (165g) packed brown sugar and ½ cup (100g) plain white granulated cane sugar, and stir from the bottom upward in wide circular strokes for 30 to 40 strokes until smooth and glossy with no visible sugar streaks.
- Add 2 large room-temperature eggs one at a time, stirring fully after each addition, then add 1 tbsp (13g) pure vanilla extract and stir for 20 more strokes until the mixture looks smooth and slightly lightened in color.
- Add the flour mixture all at once on top of the wet ingredients and fold from the bottom upward with slow deliberate strokes, counting 15 to 18 strokes maximum, stopping the moment no dry flour streaks remain — do not overmix.
- Add 1 cup (170g) semi-sweet chocolate chips and 4 oz (113g) roughly chopped dark chocolate chunks to the dough, reserving 2 tablespoons of the mixed chocolate, and fold in with 10 to 12 strokes until evenly distributed throughout.
- Using a 2-tablespoon cookie scoop, portion dough into 55g balls, weigh the first ball to calibrate, then portion the remaining 13 balls to match, placing them at least 2 inches (5cm) apart on the prepared pan and pressing 2 to 3 pieces of reserved chocolate onto the top of each ball.
- Bake on the middle rack at 375°F (190°C) for 10 to 12 minutes, checking at 10 minutes, and pull the pan the moment the edges look set and lightly golden and the centers still look slightly underdone and puffy.
- Immediately sprinkle flaked sea salt over the tops of the cookies while the chocolate is still molten, then leave the cookies on the hot pan for exactly 5 minutes before transferring to a wire cooling rack — do not move them before 5 minutes.
- Allow cookies to cool on the rack for at least 10 minutes before eating — the interior continues to set during this time.