
No-Bake Creamy Biscoff Icebox Cake

I have made this Biscoff icebox cake thirty-one times across four months of testing — in two different loaf pans, with three different chilling windows, and with both plain and stabilized whipped cream. I know exactly where it fails and I have fixed every version of that failure in the recipe below.
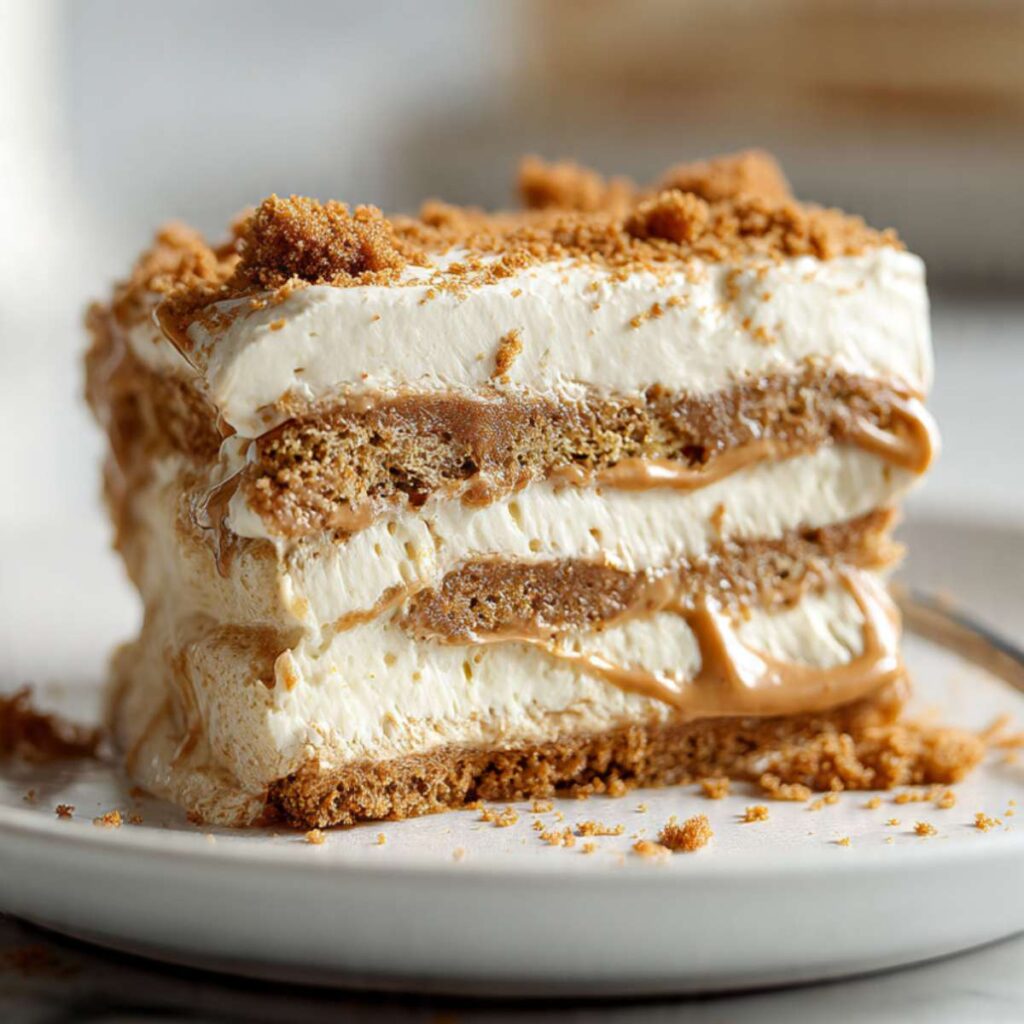
The result you are working toward is this: clean, defined layers of fully softened Biscoff cookies — dense, moist, and deeply spiced with caramelized brown sugar, warm cinnamon, and a faint clove note — separated by cold, light whipped cream that holds its shape when sliced but dissolves the moment it hits your tongue. The cookie butter ribboned between each layer melts slowly into the cream during the overnight chill, which is why every bite of cream in the finished cake carries that same Biscoff warmth even though the cream itself is plain. That flavor migration is the whole point of the between-layer butter — and it only happens with the full overnight rest.
There is no dairy butter in this recipe — the Lotus Biscoff cookie butter spread provides all the richness and fat beyond what the cream delivers, which is why the cookie butter type and temperature matter so much at every stage. One note for readers with dairy sensitivities: Lotus Biscoff cookie butter does contain trace dairy in some regional formulations — always check the label on your specific package before serving to anyone with a dairy allergy.
I tested plain lightly sweetened whipped cream against stabilized whipped cream made with a small amount of cream cheese. The stabilized version held its shape more rigidly and produced cleaner slices straight from the refrigerator — but it tasted noticeably heavier and competed directly with the Biscoff flavor rather than letting it come forward. Plain cream whipped to soft peaks melted into the cookie layers more naturally during the overnight chill and produced the silkier, more unified texture visible in the cross-section photos. Plain cream is the version I kept and the only version I recommend.
I tested overnight chilling — 8 to 10 hours — against a 4-hour refrigerator rest. At 4 hours, the cookie edges had softened but the centers were still firm and slightly chalky — visible as a distinct pale line through the middle of each cookie layer when sliced. At 8 hours, every layer was uniformly softened from edge to center, with the dense, cake-like texture and clean cut line you can see in the slice photos. The difference between these two timelines is not subtle. There is no shortcut, no workaround, and no way to speed the moisture migration that produces the correct result. The overnight rest is the recipe.
No baking. No stovetop. No special equipment beyond a hand mixer and a standard loaf pan. Twenty minutes of active work — then the refrigerator does everything else.
🗒 Luna’s Note: I make this the evening before I need it and pull it from the fridge right before I sit down to serve. That overnight window is the secret — I’ve tried to rush it and the cookie centers stay hard. You will always be able to tell the ones that didn’t wait long enough.
| Prep Time | Cook Time | Total Time | Yield | Difficulty |
|---|---|---|---|---|
| 20 minutes | 0 minutes | 20 minutes active + 8–10 hours chilling | 9 slices | Easy |
| Calories | Fat | Carbs | Sugar | Protein |
|---|---|---|---|---|
| ~421 kcal | ~30g | ~35g | ~21g | ~4g |
Ingredients & Tools for Biscoff Icebox Cake
For the Cake Layers
- 250g (approximately 32 cookies) Lotus Biscoff cookies (Speculoos) — the original rectangular caramelized spiced cookies only. Do not substitute with Biscoff sandwich cookies or other speculoos brands. The sandwich cookies contain a cream filling that changes how the layers soften and will not produce the clean, uniform layers visible in the slice photos.
- 2 cups (480ml) cold heavy whipping cream (36% fat or higher) — must be cold straight from the refrigerator. Cream below 36% fat will not whip to stable peaks and will collapse during chilling.
- ¼ cup (50g) plain white granulated cane sugar — do not substitute with powdered sugar, coconut sugar, or liquid sweeteners. Each changes the stability and mouthfeel of the whipped cream.
- ¼ cup (65g) Lotus Biscoff cookie butter spread (creamy, not crunchy) — for spreading between layers. Warm to spreadable consistency before using. Do not use crunchy — the texture pieces do not integrate smoothly between the cream and cookie layers.
For the Topping
- ¼ cup (65g) Lotus Biscoff cookie butter spread (creamy, not crunchy) — for drizzling over the finished cake. Warmed until just pourable.
- 5 Lotus Biscoff cookies, broken into halves and thirds — for decoration on top
- 5 Lotus Biscoff cookies, finely crushed — crush in a zip-lock bag with a rolling pin to fine crumbs, not large chunks. Large chunks slide off the cream surface and do not adhere.
Before You Start
Cream temperature is non-negotiable. Cold heavy whipping cream whips in 2–3 minutes and holds stable peaks. Cream that has been sitting at room temperature for more than 20 minutes will take significantly longer to whip, may never reach stable peaks, and will be more likely to collapse during the overnight chill. Keep it in the refrigerator until the exact moment you pour it into the bowl. Your mixing bowl and beaters can go into the freezer for 10 minutes before whipping — a cold bowl speeds up the process and produces more consistent peaks, especially in warm or humid kitchens.
Cookie type is the single most critical ingredient decision in this recipe. Use only Lotus Biscoff original rectangular cookies — the ones in the red packaging. These are the only cookies that soften correctly and uniformly overnight into a cake-like layer. Biscoff sandwich cookies contain a cream filling that changes how the layers absorb moisture and will not produce the clean, defined layers visible in the cross-section photos. Other speculoos brands have different starch and moisture ratios and soften at different rates. If the packaging does not say Lotus Biscoff and show the original rectangular embossed grid cookie, do not use it for this recipe.
Cookie butter consistency matters at two different stages. For spreading between the layers, the cookie butter needs to be just soft enough to spread without pressing into the cream beneath — 10–15 seconds in the microwave, stirred once, gets it there. For the topping, it needs to be slightly warmer and more fluid — 15–25 seconds depending on which finish you are going for (drizzle, glaze, or swirl — see Step 8). Do not overheat at either stage. Cookie butter that is too hot will melt the whipped cream on contact and collapse the layer structure.
For the most accurate results, use a kitchen scale set to grams. Volume measurements like cups and tablespoons can vary by 20–30% depending on how the ingredient is scooped or packed. The gram weights in this recipe are the numbers I tested with — they are the most reliable way to get the same result I got. The cream quantity in particular matters: 480ml of cold heavy cream produces enough volume, when whipped, to fill a standard 9×5 inch (23×13cm) loaf pan with 3 generous cream layers, a base layer, and a cream top. If you eyeball this quantity, your layer count will vary.
This recipe requires a hand mixer or stand mixer fitted with the whisk attachment to whip the cream to stable soft peaks. Whipping by hand with a balloon whisk is possible but takes 5–7 minutes of continuous vigorous whisking and produces less consistent peak stability — the cream is more likely to be uneven between soft and stiff in different parts of the bowl. Electric is faster, more consistent, and strongly recommended.
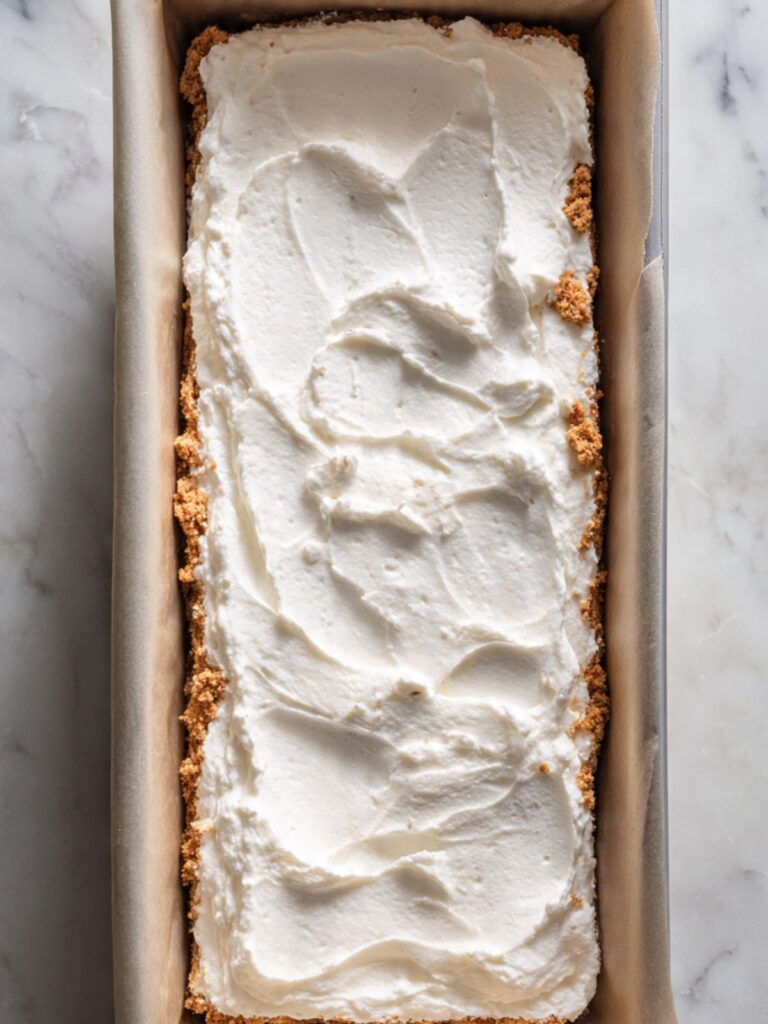
Parchment setup takes 60 seconds and is not optional. Cut a sheet of parchment long enough to cover the bottom of the 9×5 inch (23×13cm) loaf pan and both long sides, with at least 2 inches (5cm) of overhang on each long edge. Press it flat into the corners. Do not grease the pan before lining — grease shifts the parchment when you press cookie layers in. The overhang is your only handle for lifting the finished cake out cleanly. Without it, you cannot unmold the cake without cracking it.
No chilling shortcut exists. The cake must chill for a minimum of 8 hours — 10 hours is better, overnight is best. At 4 hours, the cookie centers are still firm and will crack when sliced. The full softening transformation — from crisp Biscoff cookie to dense, cake-like layer — requires the full overnight window. Plan your timeline before you start: if you begin assembly at 8pm, the cake will be ready by 6am at the earliest, and better by 8am.
This recipe requires no oven, no stovetop, and no heat beyond a microwave used briefly for warming the cookie butter. Clear counter space near your refrigerator before you start — you will be moving the assembled pan directly into the fridge immediately after the layering step, and you do not want to be carrying a full loaf pan across a cluttered kitchen.
One note for readers with dairy sensitivities: Lotus Biscoff cookie butter spread contains trace dairy in some regional formulations. Always check the label on your specific package before serving to anyone with a dairy allergy. The cookie butter is not dairy-free by default.
Necessary Tools
Required:
- Kitchen scale (strongly recommended — the cream quantity determines your layer thickness)
- 9×5 inch (23×13cm) standard loaf pan — glass, ceramic, or aluminum all work. See note below on pan material.
- Parchment paper — cut long enough for full overhang on both long sides
- Large mixing bowl — chilled if possible
- Hand mixer with whisk attachment, or stand mixer with whisk attachment
- Silicone spatula or offset spatula — for spreading cream layers evenly
- Sharp chef’s knife — for clean slices
- Cutting board
Optional:
- Oven thermometer — not needed here, but a refrigerator thermometer is useful if you have one. The refrigerator should be at or below 40°F (4°C) for optimal overnight setting.
- Zip-lock bag and rolling pin — for crushing the Biscoff cookie topping to fine crumbs
- Piping bag — if you want to pipe the cookie butter drizzle in clean ribbon lines as shown in the overhead photo rather than spooning it
Pan material note: Glass and ceramic pans hold cold better than aluminum, which helps the cream layers stay firm during the chilling period. If using a dark-coated aluminum loaf pan, the cake will set equally well — it just will not hold the cold quite as long once it comes out of the fridge for serving. Slice and serve quickly if using aluminum.
How to Make Biscoff Icebox Cake
This is a no-heat, layering method — no oven, no stovetop, no tempering. The only active technique in this recipe is whipping cream. Everything else is assembly and patience. A hand mixer or stand mixer fitted with the whisk attachment is required for whipping the cream — hand-whipping with a balloon whisk is possible but takes 5–7 minutes of continuous effort and produces less consistent peak stability. Every other step uses only a spatula and your hands.
Step 1: Preparing the Pan for Clean Lift-Out
In your 9×5 inch (23×13cm) loaf pan, lay a sheet of parchment paper across the bottom and up both long sides, pressing it firmly into the corners. The parchment must extend at least 2 inches (5cm) over each long edge — this overhang is the only way to lift the finished cake out cleanly without cracking it. The short ends of the pan do not need parchment coverage — the overhang on the long sides gives you enough grip.
Run your fingers along the bottom corners to press the parchment flat. Loose parchment that bubbles up on the sides will create uneven edges on your finished cake.
Your pan is prepared and ready. The parchment overhangs should be sitting flat over both long edges with no curling — this is the correct state before the cream goes in.
Do not grease the pan before laying the parchment — grease causes the parchment to shift when you press the cookie layers in, which creates uneven edges on the finished cake that will be visible in every slice.
Your pan is now ready. Set it aside while you prepare the cream.
Step 2: Whipping the Cream to Stable Soft Peaks

Pour your 2 cups (480ml) cold heavy whipping cream (36% fat or higher) into your large chilled mixing bowl. Add your ¼ cup (50g) plain white granulated cane sugar directly to the cream before you begin whipping — adding sugar after the cream has already started whipping can cause the cream to deflate slightly as you incorporate it.
The sugar here does two things: it lightly sweetens the cream to balance the richness of the Biscoff cookies, and the sugar granules help stabilize the foam structure as the cream whips. This is why plain white granulated cane sugar is the correct choice — powdered sugar adds cornstarch, which changes the mouthfeel, and liquid sweeteners add water, which destabilizes the foam.
Using your hand mixer or stand mixer fitted with the whisk attachment, begin on medium speed (speed 4 on a KitchenAid) for 1 minute, then increase to medium-high (speed 6) and whip for an additional 1–2 minutes, watching closely. You are whipping to soft peaks only — not stiff peaks.
The cream is ready when it holds a gentle, drooping peak when you lift the beater — the tip of the peak curls over softly rather than standing straight up. The surface should look smooth and glossy, not grainy or clumped. If you tilt the bowl slightly, the cream should move slowly — not pour freely, not stay completely fixed.
Do not walk away from the mixer at this stage. The difference between soft peaks and overwhipped cream is approximately 20–30 seconds at medium-high speed. Overwhipped cream looks grainy and separated, will not spread smoothly between the cookie layers, and cannot be fixed once it has gone too far.
Stop the mixer the moment the peak droops. You will use all of this cream immediately — do not refrigerate it between steps or it will begin to stiffen and become harder to spread evenly.
🗒 Luna’s Note: I always stop the mixer 10 seconds earlier than I think I need to, then check the peak by hand with a spatula. You can always whip for another 5 seconds — you cannot unwhip.
Step 3: Spreading the Base Cream Layer
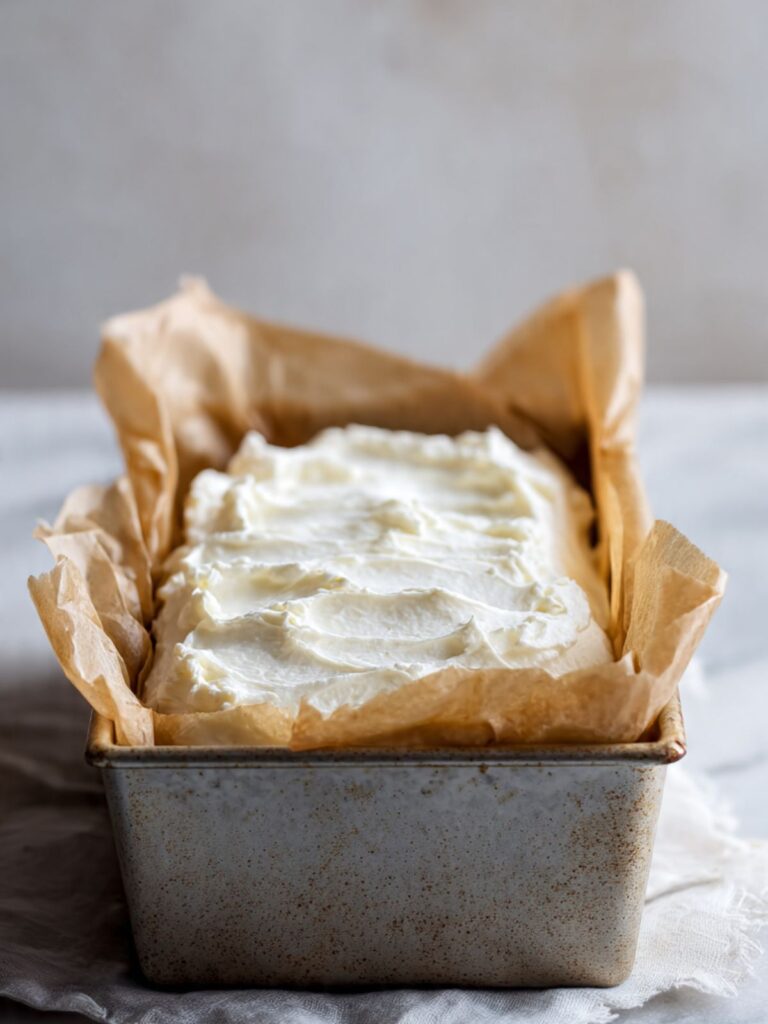
Using your silicone spatula or offset spatula, scoop approximately 3–4 tablespoons (45–60g) of whipped cream into the bottom of your prepared loaf pan. Spread it into an even, thin layer that fully covers the bottom of the pan — you are aiming for approximately ¼ inch (6mm) thickness.
Do not make this base layer too thick — a thick base layer pushes the first cookie row upward and reduces the number of layers you can fit in the pan, producing a cake that is predominantly cream at the bottom with fewer cookie layers than shown in the cross-section photos.
The base cream layer is ready when it covers the full parchment surface with no dry patches and you can faintly see the parchment color through the thinner spots — this is the correct thickness before the first cookie row goes in.
Step 4: Laying the First Cookie Layer
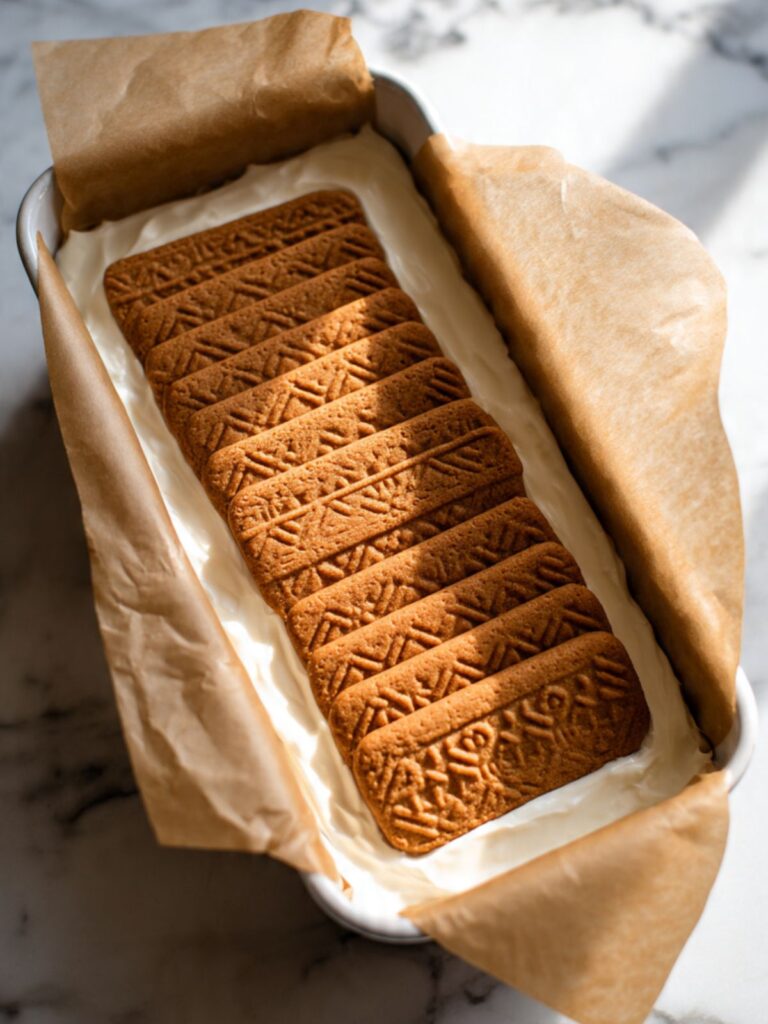
Place your Lotus Biscoff cookies (Speculoos) in a single, even layer directly on top of the base cream. Fit them as closely together as possible — you are looking for minimal gaps, not zero gaps. A standard 9×5 inch (23×13cm) loaf pan fits approximately 8 cookies per row in a two-column arrangement, depending on cookie orientation.
If you need to fill gaps at the ends of the pan, break a cookie to size and press the piece in. The broken edges will not be visible in the finished cake — every layer softens uniformly overnight.
The cookies should lie flat and level. Press each one gently into the cream layer beneath — just enough to make contact, not enough to push through.
The first cookie layer is complete when the pan shows a flat, single-level grid of Biscoff cookies with no large gaps and no overlapping pieces — this is the correct state before the cookie butter goes on.
Do not press the cookies down hard into the cream — pressing too firmly pushes the base cream up around the cookie edges and creates uneven cream distribution in the finished layers, visible as thick cream pockets at the sides and thin spots in the center when sliced.
Step 5: Adding the Cookie Butter Between-Layer Spread
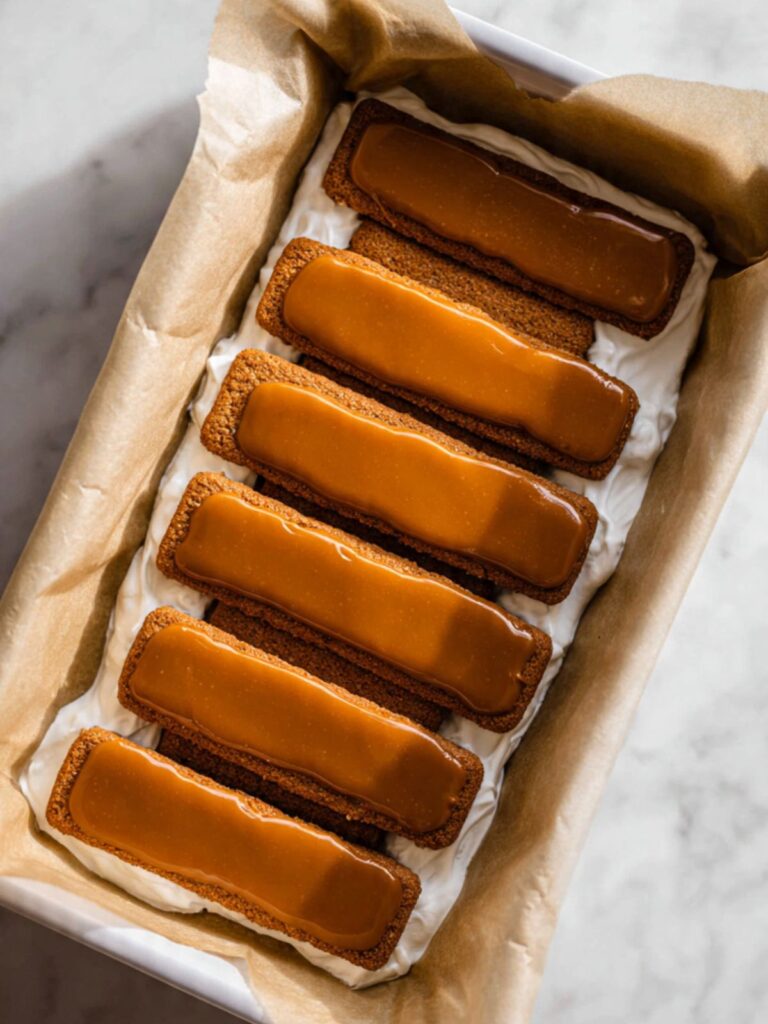
Warm your ¼ cup (65g) Lotus Biscoff cookie butter spread (creamy) in the microwave for 10–15 seconds, then stir once with a spoon until smooth and spreadable. It should move easily off a spoon but not be so thin it runs — think of the consistency of a warm peanut butter that has been slightly loosened.
Using the back of a spoon or your offset spatula, spread the warmed cookie butter in a thin, even layer directly over the top of the cookie layer. Cover the cookies fully — edge to edge. Use approximately one-third of the cookie butter per cookie layer if you are building 3 cookie layers, or divide evenly across however many layers your pan allows.
The cookie butter between the layers is what creates the amber ribboning you can see along the edges of each layer in the close-up slice photo — it melts slightly into the whipped cream during the overnight chill and becomes part of the layer structure rather than sitting as a separate element.
The cookie butter layer should be thin and even — you should be able to see the cookie texture beneath it faintly through the spread. If it pools in the center or runs to the edges, it is too warm. Let it cool for 30 seconds and try again.
Do not apply cookie butter that is too hot. Hot cookie butter will melt the cream layer beneath it and compromise the structure. If you feel resistance when spreading, the cookie butter is the right temperature — it should glide without force.
Step 6: Building the Cream and Cookie Layers
Spoon a generous layer of whipped cream — approximately ½ cup (120ml) of cream volume — over the cookie butter layer. Spread it evenly with your offset spatula, working from the center outward, until the cookies are fully covered and the cream surface is level.
Then repeat: lay another row of Biscoff cookies over the cream, press gently, spread a thin layer of cookie butter, then add another cream layer. Continue this sequence — cookies, cookie butter, cream — until you have used all your cookies and the pan is nearly full.
Finish with a final layer of whipped cream on top. This top cream layer should be slightly thicker than the between-layer cream — approximately ½ inch (1.25cm) — because this is the surface that will hold the cookie butter drizzle and cookie decoration.
Each cream layer should fully cover the cookies beneath it with no cookie edges or corners breaking through the surface. The layers visible in the cross-section photos are clean and defined — that definition comes from each cream layer being fully sealed before the next cookie row goes on.
🗒 Luna’s Note: I use an offset spatula for the cream layers and the back of a regular spoon for the cookie butter. The offset spatula lets me keep the cream level without pressing down. A regular spoon gives me enough control on the cookie butter without over-spreading.
Do not rush the layering. Take 30 seconds on each cream layer to make sure it is fully even before adding the next cookie row. Uneven cream layers produce uneven slices.
Step 7: Chilling the Cake Overnight
Cover the pan with plastic wrap — press it lightly against the surface of the top cream layer so no skin forms on the cream surface during chilling. Do not press the wrap down hard enough to disturb the surface.
Place the covered pan in the refrigerator on a flat, level shelf. The cake must chill for a minimum of 8 hours. Ten hours is better. Overnight — 8 to 10 hours — is the target.
During this time, the moisture from the whipped cream slowly penetrates the Biscoff cookies, softening them from firm and crisp to dense, moist, and cake-like throughout. This transformation does not happen in 4 hours — at 4 hours, the cookie edges are soft but the centers are still firm and will crack when sliced.
After 8 hours, the top cream surface should feel completely firm when you press the plastic wrap gently — not jiggly, not wet-feeling. The pan should feel set and solid when you lift it. If the cream surface gives significantly under gentle pressure, give it another hour.
Do not move the pan during the chilling period. Vibration during setting disrupts the layer structure. Place it in the back of the refrigerator where it will not be bumped.
Step 8: Adding the Cookie Butter Topping — Three Finish Options
Once the cake is fully set, choose your topping finish before unmolding. The photos in this article show three variations — all use the same base ingredients, just applied differently.
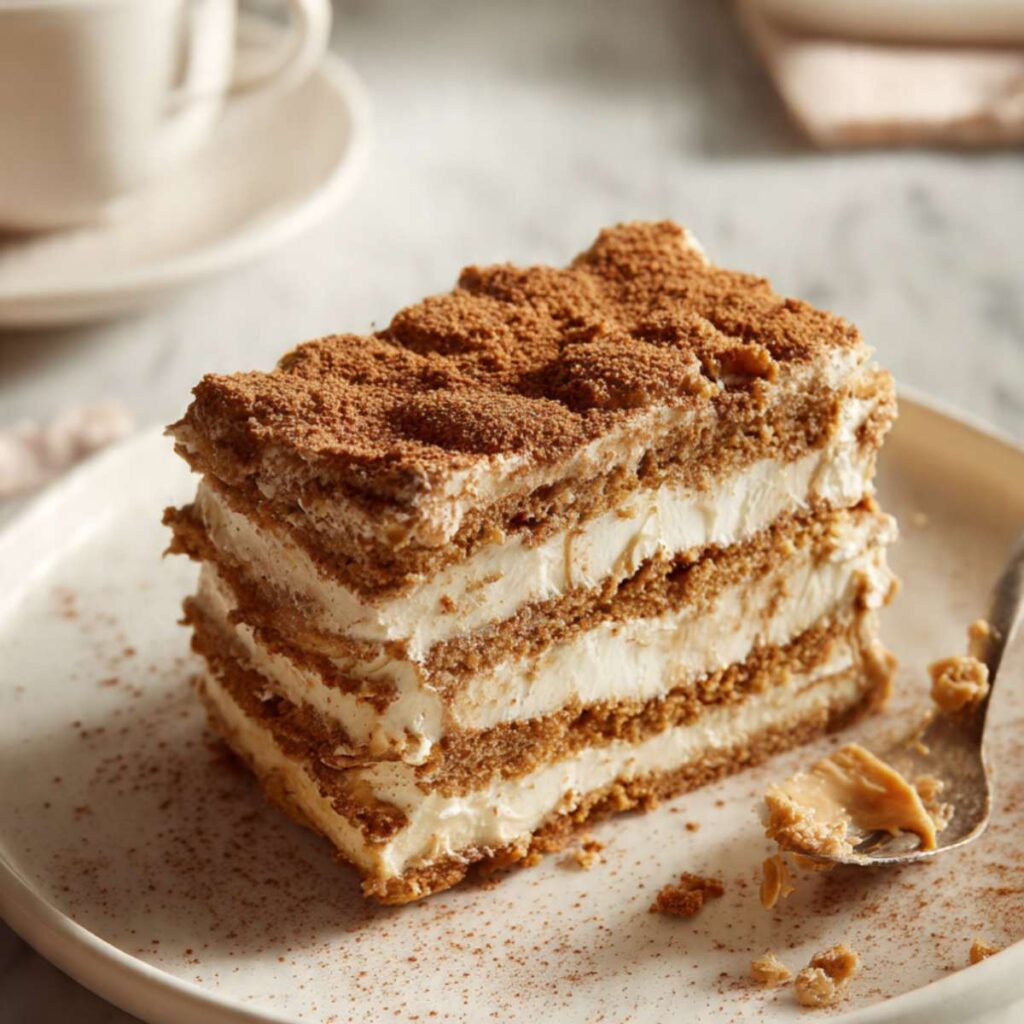
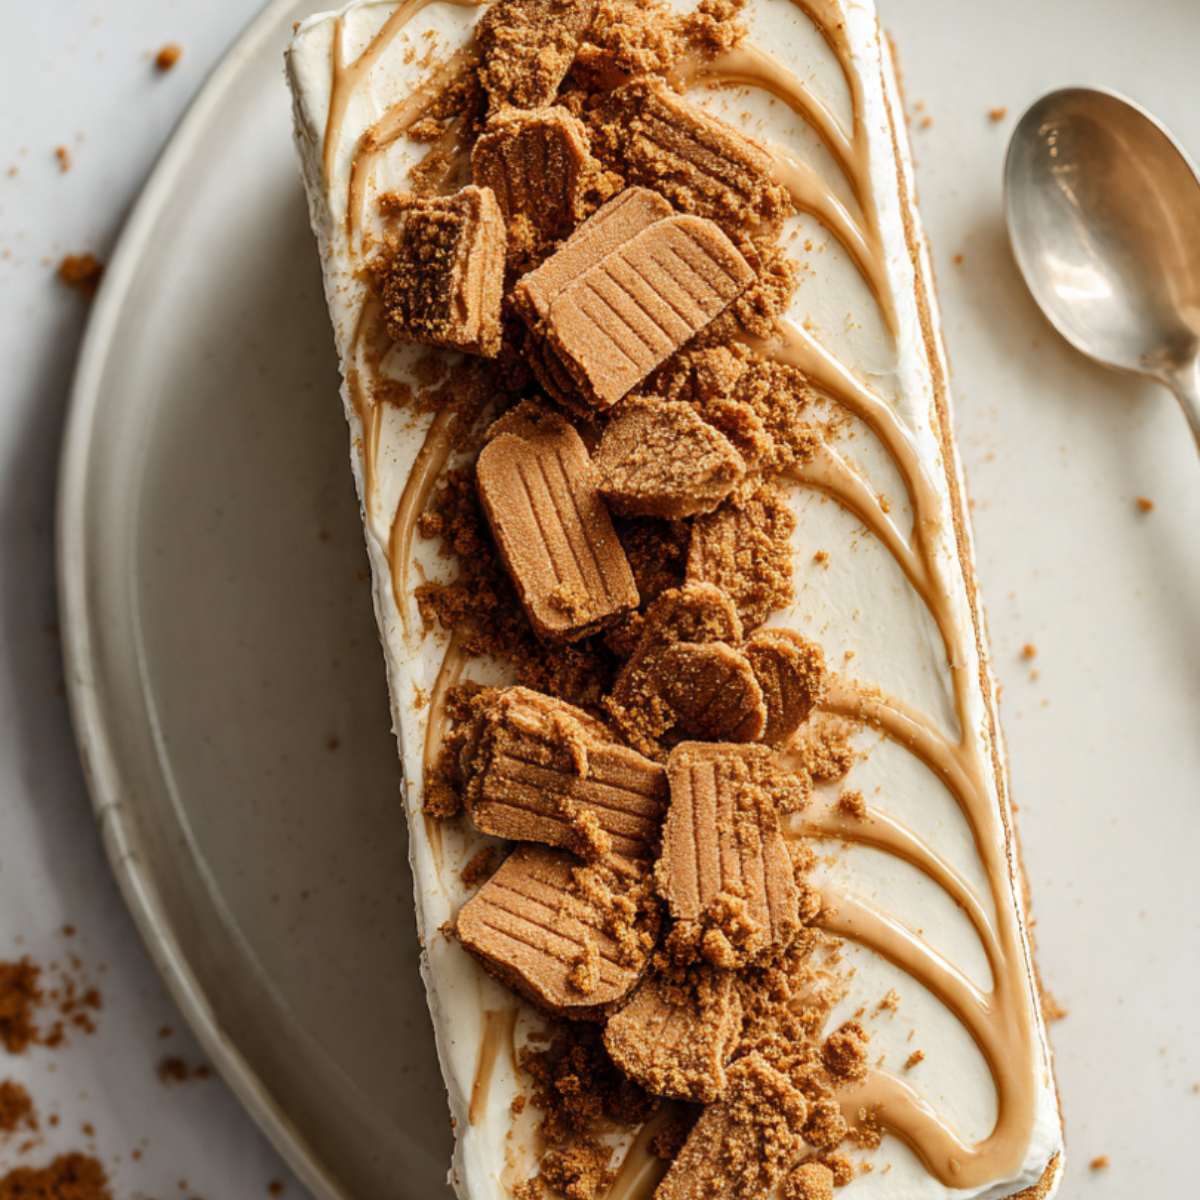
Option A — Cookie Butter Drizzle (shown in the overhead hero photo): Warm your ¼ cup (65g) Lotus Biscoff cookie butter spread (creamy) in the microwave for 15–20 seconds, stirring until just pourable — it should fall off a spoon in a thin, steady ribbon. Transfer to a small piping bag or zip-lock bag with one corner snipped. Pipe in long, sweeping ribbon lines lengthwise across the white cream top — approximately 5–6 lines across the width. This produces the caramel ribbon pattern on the white cream surface visible in the overhead photo. Scatter finely crushed Biscoff crumbs between the ribbons, then rest broken whole cookie pieces across the surface without pressing them in.
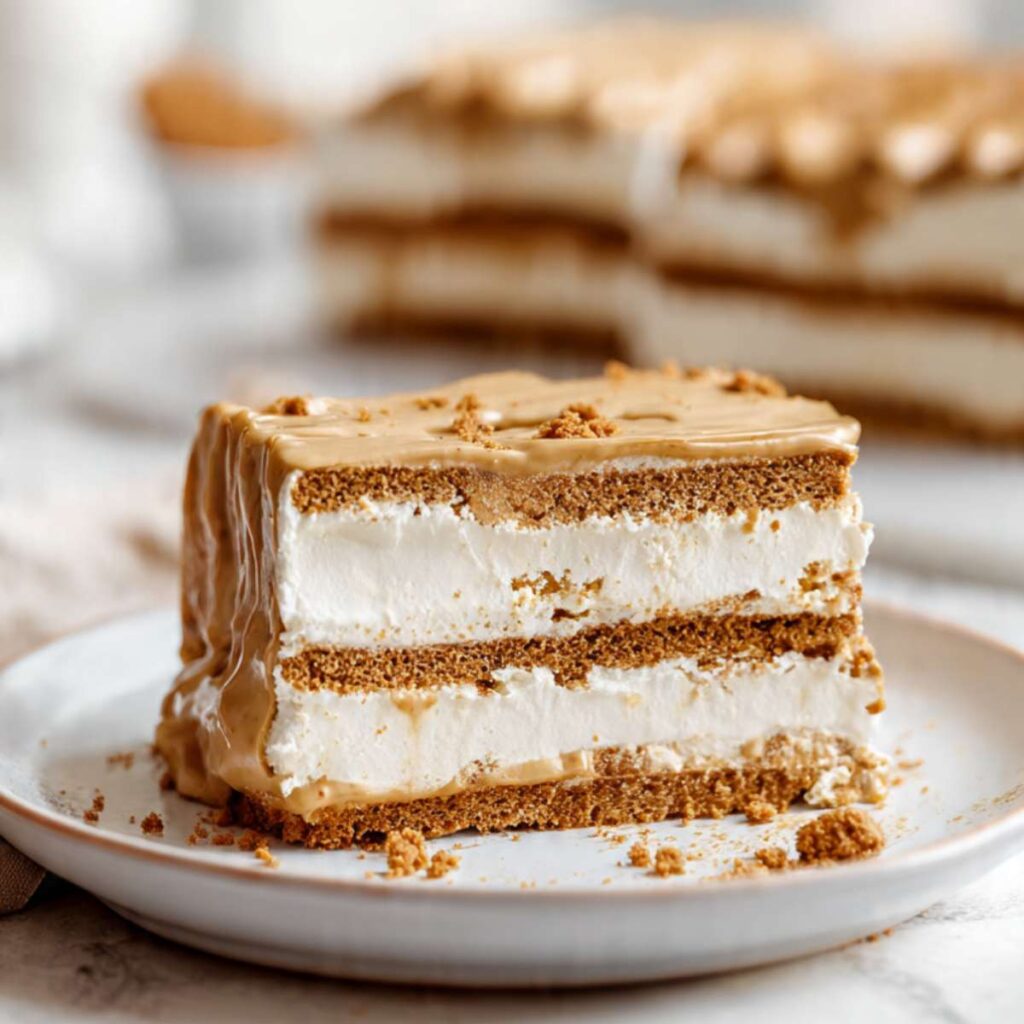
Option B — Full Cookie Butter Glaze (shown in the close-up slice photo with the amber-covered top): Warm your ¼ cup (65g) Lotus Biscoff cookie butter spread (creamy) in the microwave for 20–25 seconds, stirring until fully fluid and pourable. Pour it directly over the top cream surface and use an offset spatula to spread it to the edges in an even, fully covering layer — the cream top should not be visible through the glaze. Work quickly before the cookie butter begins to firm. This produces the smooth, fully glazed amber top visible in the slice cross-section showing a solid cookie butter top layer. Allow the glaze to firm for 5 minutes in the refrigerator before unmolding and slicing.
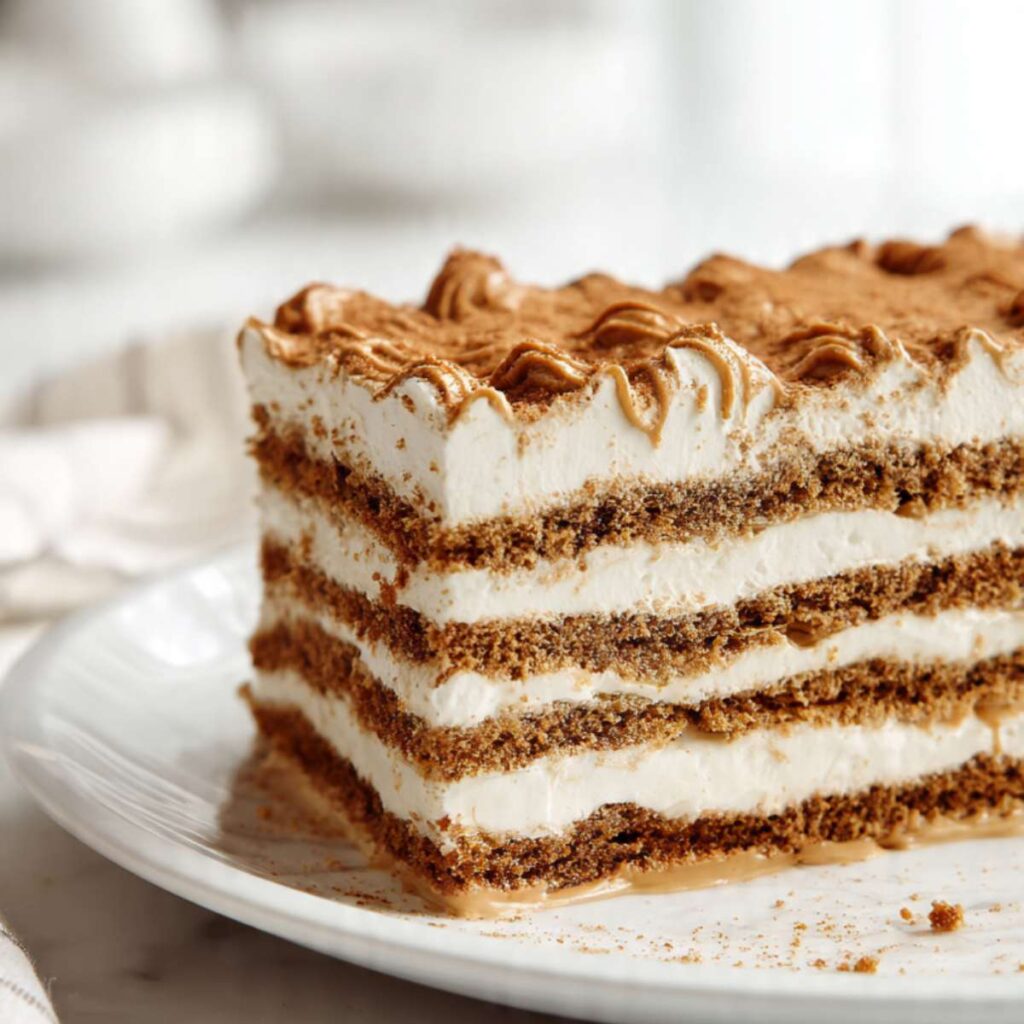
Option C — Cookie Butter Swirl (shown in the tall multi-layer slice photo): Warm your ¼ cup (65g) Lotus Biscoff cookie butter spread (creamy) until softened but not fully fluid — 10 seconds in the microwave, stirred once. Transfer to a piping bag fitted with a round tip (Wilton #12) or a zip-lock bag with a small corner snipped. Pipe small dollops or swirls across the cream top surface, spaced evenly. Dust generously with finely crushed Biscoff crumbs over the entire surface. This produces the dotted swirl and dense crumb finish visible in the tall layered slice photo.
For all three options: Add cookie decorations and crumbs immediately before serving — not before the final refrigeration — as cookie pieces begin to soften within 30 minutes of contact with the cream.
The top decoration should be applied directly to the cold, set cream surface fresh from the refrigerator — working on a warm cake will cause the cookie butter to sink into the cream rather than sitting on the surface.
Step 9: Unmolding and Slicing for Clean Layers
Grip both parchment overhangs firmly and lift the cake straight up and out of the loaf pan in one smooth motion. Place it on a cutting board with the parchment still attached to the bottom — do not peel the parchment away until after slicing.
This recipe yields 9 slices from a 9×5 inch (23×13cm) loaf pan at 1 to 1.5 inch (2.5–4cm) slice thickness. The math: a 9-inch (23cm) loaf divided into 9 slices = 1 inch (2.5cm) each. If you prefer thicker slices at 1.5 inches (4cm), the yield is 6 slices. Score the top surface lightly before slicing to confirm your portion width before the knife goes through.
Using a sharp chef’s knife, slice the cake into pieces approximately 1 to 1.5 inches (2.5–4cm) thick. Wipe the blade clean with a damp cloth between every cut. A blade that carries cream and cookie butter from the previous cut will drag through the next slice and compress the layers.
Serve immediately, cold, straight from the cutting board onto plates.
Each slice should show clean, defined alternating bands of dark golden-brown softened cookie and white cream, with the cookie butter visible as amber ribboning at the layer edges — as seen in the slice cross-section photos. If the layers look compressed or the cream has merged with the cookie layers, the cake needed more chilling time.
🗒 Luna’s Note: I wipe the knife after every single cut, even when I’m in a hurry. That one habit is the difference between slices that look like the photos and slices that look like they were dragged through.
The Science Behind Biscoff Icebox Cake
Why the Cookies Transform Overnight: Moisture Migration and Starch Gelatinization
Lotus Biscoff cookies are a low-moisture, high-starch product — they are crisp and snappy straight from the package because their starch granules are in a dry, rigid state. When the cookies are sandwiched between layers of whipped cream and sealed in the refrigerator, moisture from the cream slowly migrates into the cookie structure through a process called osmosis. The starch granules absorb this moisture and swell — a process called starch gelatinization — which is the same mechanism that makes a dry pasta noodle tender when it cooks in boiling water, just happening slowly and at cold temperatures over many hours.
The result in this cake is the dense, moist, cake-like cookie layer visible in every cross-section photo — uniform from edge to center, with no remaining crunch. At 4 hours, this process is incomplete and the cookie centers are still dry and rigid. At 8–10 hours, every starch granule across every cookie layer has absorbed enough moisture to fully transform. This is why overnight chilling is non-negotiable in this recipe and why no amount of pressing or additional cream can speed the process up.
🗒 Luna’s Note: I think about it like soaking dried pasta in cold water versus boiling it. Cold water works — it just takes all night. That’s exactly what’s happening between the cream and the Biscoff layers.
Why Soft Peaks Beat Stiff Peaks: Fat Crystal Stability in Whipped Cream
When heavy cream is whipped, the mechanical action forces air bubbles into the liquid fat and causes the fat molecules to partially crystallize around each bubble — forming a foam structure that holds its shape. At soft peaks, the fat crystal network is strong enough to hold the air in place but flexible enough that the cream can still flow slowly when the pan is tilted. At stiff peaks, the fat crystal network has been pushed further — it holds rigidly, but the foam has lost much of its flexibility.
For an icebox cake, soft peak cream is the correct target for two reasons. First, it spreads between the cookie layers without tearing or dragging, which produces the clean, even cream bands visible in the slice photos. Second, and more importantly, soft peak cream retains enough residual liquid fat to slowly release moisture into the adjacent cookie layers during the overnight chill — driving the starch gelatinization described above. Stiff peak cream has driven off too much of that mobile liquid fat and produces slower, less complete cookie softening. If you want a no bake chocolate oatmeal cookies style no-bake result where the base stays firm, stiff peaks work — but for a fully softened icebox cake, soft peaks are the mechanism.
Why Cookie Butter Between the Layers Changes the Texture: Fat as a Flavor Carrier
Cookie butter spread is approximately 35–40% fat, with the remainder being finely ground Biscoff cookie crumbs suspended in palm oil and sugar. When a thin layer of warmed cookie butter is spread over each cookie row before the cream goes on, two things happen during the overnight chill. First, the fat in the cookie butter acts as a partial moisture barrier — it slows the rate at which cream moisture penetrates the cookie layer from the top, which means the cookie softens more gradually and retains slightly more structural integrity than it would with cream contact on both sides. This is why the cookie layers in this recipe hold their shape when sliced rather than dissolving completely into the cream. Second, fat is the primary carrier of flavor compounds — the caramelized spice notes in Biscoff cookies are fat-soluble, meaning they dissolve into and travel through fat rather than water. The cookie butter layer between each row slowly releases these flavor compounds into the adjacent cream layer during chilling, which is why every bite of the cream tastes of Biscoff even though the cream itself contains only sugar. This is the same principle that makes a rich pastry cream taste more intensely of vanilla when the bean has been steeped in the warm cream fat.
Biscoff Icebox Cake Troubleshooting & Pro-Tips
Common Mistakes
Using the Wrong Biscoff Cookie Type
Symptom: The layers do not soften uniformly overnight. The cookie centers stay firm or the layers collapse into the cream rather than holding their shape when sliced.
Cause: Biscoff sandwich cookies contain a cream filling that has a different moisture content and density than the original plain cookies. Other speculoos brands have varying starch ratios and moisture levels. Neither softens at the same rate as original Lotus Biscoff rectangular cookies.
Immediate fix: If you have already assembled with the wrong cookie and the layers have not softened correctly after 10 hours, there is no fix — the cake will need to be served as-is. The texture will be edible but not correct.
Prevention: Use only Lotus Biscoff original rectangular cookies in the red packaging. Check the ingredient list if you are unsure — original Biscoff cookies list caramelized sugar and cinnamon as primary flavor contributors. There is no filling and no cream layer inside the cookie itself.
Using the Wrong Pan Size
Symptom: Too few layers, cream layers that are too thick relative to the cookie layers, or a cake that does not slice into clean defined portions.
Cause: A pan that is wider than 9×5 inches (23×13cm) spreads the cream too thin across a larger surface area, reducing the cream-to-cookie ratio per layer. A smaller pan produces fewer cookies per layer and thicker cream layers that take longer to set firmly.
Immediate fix: If the pan is already filled and the layers look thinner than expected, add one additional cookie and cream layer before chilling if the pan depth allows.
Prevention: Use a standard 9×5 inch (23×13cm) loaf pan. If you only have a larger pan — an 8×8 inch (20×20cm) square pan, for example — double the recipe quantities to maintain the correct ratio.
Overwhipping the Cream
Symptom: The cream looks grainy or separated in the bowl. It tears and drags when you try to spread it between the cookie layers instead of gliding smoothly. The finished cream layers look rough and uneven in the slice.
Cause: Overwhipped cream has pushed the fat crystal network past the soft peak stage into a partially broken state. The fat globules begin to clump together and the liquid whey separates out — this is the first stage of accidentally making butter.
Immediate fix: Add 1–2 tablespoons (15–30ml) of fresh cold heavy cream to the overwhipped bowl and fold gently with a spatula — this can sometimes smooth it back to a spreadable consistency if caught early. If the cream looks truly grainy and separated, it cannot be rescued and you will need to start with a fresh batch.
Prevention: Whip on medium-high speed and stop the moment the peaks droop softly when the beater is lifted. Set a timer for 2 minutes from the start of medium-high speed and check every 15 seconds after that. Never walk away from the mixer during this stage.
Cookie Butter Too Hot When Applied
Symptom: The whipped cream layer beneath the cookie butter melts on contact, creating a wet, collapsed layer. The finished slice shows merged layers rather than defined bands.
Cause: Cookie butter that is too hot carries enough heat to melt the fat crystal network in the adjacent whipped cream, collapsing the foam structure before the layers have a chance to set.
Immediate fix: If this has already happened during assembly, place the pan in the freezer for 10 minutes to re-firm the cream before continuing with the next layer.
Prevention: Warm cookie butter in 10-second microwave increments and test the temperature on your wrist before spreading — it should feel barely warm, not hot. The correct consistency is fluid enough to spread without force but not so thin it runs off the spatula.
Cake Not Setting Properly After Chilling
Symptom: The cake feels soft and jiggly when lifted after 8 hours. The layers collapse when you try to unmold or slice.
Cause: Either the cream was not whipped to stable enough peaks before assembly, the refrigerator temperature is above 40°F (4°C), or the chilling time was genuinely insufficient.
Immediate fix: Return the pan to the refrigerator for an additional 2–3 hours. If the refrigerator is warm, place the pan in the coldest zone — typically the back of the lowest shelf — or transfer it to a different refrigerator if available.
Prevention: Whip the cream to solid soft peaks before assembly. Confirm your refrigerator is at or below 40°F (4°C) — a refrigerator thermometer is a worthwhile investment for any no-bake dessert. Plan your timeline so the cake has a full 10 hours if possible.
Layers Sliding When Slicing
Symptom: The cookie and cream layers shift horizontally when the knife goes through, producing slices where the layers are misaligned.
Cause: Either the cake was not chilled long enough, the knife is dragging cream and cookie butter from previous cuts, or the cake has warmed too much before slicing.
Immediate fix: Return the sliced portion to the refrigerator for 20 minutes to re-firm before continuing. Wipe the knife blade completely clean between every cut.
Prevention: Slice the cake cold — directly from the refrigerator — with a sharp, clean blade. Wipe between every cut. Work quickly so the cake does not warm significantly during the slicing process.
Humidity and Altitude Note
In high humidity environments, whipped cream loses stability faster because the moisture in the air is absorbed into the foam structure, weakening the fat crystal network. If you are working in a humid kitchen, chill your mixing bowl and beaters in the freezer for 15 minutes before whipping, and work quickly during assembly — minimize the time the cream sits at room temperature between whipping and layering.
At high altitude, cream whips faster due to lower air pressure and can go from soft peaks to overwhipped in seconds. Reduce your mixer speed to medium (one speed lower than usual) and check the peaks every 30 seconds from the 90-second mark onward.
Expert Pro-Tips
Freeze the loaf pan for 10 minutes before assembly. A pre-chilled pan keeps the base cream layer firm while you build the upper layers, which prevents the bottom cream from softening and shifting as you press each cookie row in. This is especially helpful in warm kitchens.
Use a ruler or bench scraper to level each cream layer. Drag a straight-edged bench scraper across the top of each cream layer before placing the next cookie row — this guarantees even layer thickness throughout the cake and produces the clean, defined cross-section visible in the slice photos.
Score the top surface lightly before refrigerating. After applying the final cream top layer, use the tip of a knife to score 9 light, shallow lines across the surface where you plan to slice. This gives you a guide when slicing the cold, set cake and ensures even portions without guessing.
Add a thin smear of cookie butter directly onto each Biscoff cookie before placing it in the pan, before spreading the between-layer cookie butter on top. Pressing the cookie directly against the cookie butter side facing down — butter-side against the cream — creates a double-sided moisture barrier that slows the cream penetration from below, giving the bottom cookie layer the same softening rate as the middle layers. Without this step, the bottom layer tends to soften faster and can become slightly soggy by day two. This is the single technique that keeps all layers uniform throughout the full 3-day storage window.
How to Store Biscoff Icebox Cake
Room Temperature
This cake cannot be held at room temperature. The whipped cream begins to lose structural integrity within 30 minutes of leaving the refrigerator, and the cookie layers — which have absorbed significant moisture overnight — will begin to weep and collapse as the cream warms. Slice and serve directly from the refrigerator. Return any unserved portion to the refrigerator within 15 minutes of slicing.
Do not use a domed cake stand or covered plate at room temperature as a short-term holding solution — the trapped warmth accelerates the cream breakdown faster than open air would.
Refrigerator
Store the cake in the loaf pan with plastic wrap pressed lightly against the cut surface to prevent the exposed cream from drying out or absorbing refrigerator odors. Do not store in a fully sealed airtight container — trapped moisture condenses on the cream surface and creates a wet, slick finish that changes the texture.
The cake holds well in the refrigerator for up to 3 days. On day one, the cream is at its lightest and the cookie layers have their ideal softened-but-structured texture. By day two, the cookie layers have absorbed additional moisture and become slightly softer and denser — still delicious, with a more unified, almost mousse-like quality throughout. By day three, the distinction between the cream and cookie layers begins to fade as moisture continues to migrate. The cake is still safe and enjoyable on day three but will not slice as cleanly.
Do not store for longer than 3 days. Beyond day three, the cream begins to break down and the cake loses both texture integrity and flavor brightness.
🗒 Luna’s Note: Day two is genuinely my favorite. The layers have melded just enough that every bite has cream and cookie in the same mouthful without any effort. I make this specifically so I can have a slice the next morning with coffee.
Freezer — Made and Set
This cake does not freeze well in its assembled, decorated form. Whipped cream ice-crystallizes during freezing and separates on thawing — the cream layers will weep and the texture will be grainy and wet rather than smooth and light. Do not freeze the finished decorated cake.
If you want to freeze a portion, freeze undecorated slices only — before adding the cookie butter drizzle and cookie topping. Wrap individual slices tightly in plastic wrap, then place in a zip-lock freezer bag with the air pressed out. Freeze for up to 4 weeks. Thaw overnight in the refrigerator — never at room temperature. Add the cookie butter drizzle and cookie decoration after thawing, immediately before serving.
Expect a slight change in cream texture after freezing and thawing — the cream will be slightly denser and less airy than fresh. The flavor remains intact.
Freezer — Unbaked / Unset
This recipe does not have an unbaked freeze option in the traditional sense — there is no dough or batter to freeze. However, you can freeze the assembled, undecorated cake before the overnight chill if you need to prepare further in advance. Assemble all layers through Step 6, cover tightly with plastic wrap pressed against the top cream surface, then wrap the entire pan in a second layer of plastic wrap and freeze for up to 2 weeks.
To use: transfer the pan from the freezer to the refrigerator and allow it to thaw and set simultaneously for 12–14 hours — longer than the standard overnight chill because the frozen layers need time to both thaw and complete the moisture migration process. Add the cookie butter drizzle and decoration after unmolding, immediately before serving.
Serving Suggestion
I serve this straight from the refrigerator in thick slices — approximately 1 to 1.5 inches (2.5–4cm) each — on cold plates. Cold plates keep the cream firm for an extra few minutes, which matters when you are serving a table rather than one person at a time. A small drizzle of extra warmed cookie butter alongside each slice on the plate is the only addition I ever make. This cake is rich enough that it does not need whipped cream on the side, a scoop of ice cream, or any other accompaniment — the contrast between the cold cream and the warm spice notes in the Biscoff layers is the whole point, and adding more elements muddies it.
This is my quiet-evening dessert. The kind of thing I make on a Sunday, forget about overnight, and pull out Monday evening without any effort. It belongs at a dinner party where you want to look like you spent the afternoon baking but actually spent twenty minutes and went to bed early.
Frequently Asked Questions About Biscoff Icebox Cake
How long does a Biscoff icebox cake need to chill?
A Biscoff icebox cake needs a minimum of 8 hours of refrigerator chilling time — overnight is the target. The chilling period is not resting time for the cream alone. It is the window during which moisture from the whipped cream migrates into the dry starch structure of each Biscoff cookie layer, softening them from crisp and snappy to dense and cake-like throughout. At 4 hours, the cookie edges are soft but the centers are still firm and will crack when sliced. At 8 hours, the transformation is complete across every layer. If your refrigerator runs warm — above 38°F (3°C) — add an extra hour to be safe.
Can I make Biscoff icebox cake ahead of time?
Yes — and this is genuinely one of the best make-ahead desserts in the no-bake category. Assemble the full cake through the layering step, cover with plastic wrap pressed against the cream surface, and refrigerate for up to 24 hours before adding the cookie butter drizzle and cookie decoration. Add the topping immediately before serving — not before chilling — because the broken cookie pieces on top begin to soften within 30 minutes of contact with the cream and will lose their textural contrast if left overnight. The cake itself holds well in the refrigerator for up to 3 days after assembly, though the layer definition is sharpest on day one and day two.
Can I use Cool Whip instead of heavy cream for icebox cake?
You can, but the texture and flavor of the finished cake will be noticeably different. Cool Whip is a stabilized whipped topping made with hydrogenated vegetable oil rather than dairy fat — it holds its structure more rigidly than freshly whipped heavy cream and does not release moisture into the adjacent cookie layers at the same rate. The result is cookies that soften more slowly and less completely, with a slightly waxy mouthfeel in the cream layers rather than the clean, light dairy finish that freshly whipped heavy cream (36% fat or higher) produces. If Cool Whip is the only option available, use it — the cake will still set and slice — but the texture will be denser and the cookie softening will be less uniform than what you see in the slice photos.
Why did my icebox cake not set properly?
An icebox cake that does not set after 8–10 hours has one of three causes: the cream was not whipped to stable soft peaks before assembly, the refrigerator temperature is above 40°F (4°C), or the chilling time was genuinely insufficient. Whipped cream that was under-whipped — still pourable rather than holding a peak — does not have the fat crystal network needed to maintain the layer structure during chilling and will produce a collapsed, wet result. Check your refrigerator temperature with a thermometer — many home refrigerators run 3–5°F warmer than their dial setting. If the cake is still soft after 10 hours, return it to the coldest zone of the refrigerator — typically the back of the lowest shelf — for an additional 2 hours before attempting to unmold.
How do you store Biscoff icebox cake?
Store the cake in its loaf pan with plastic wrap pressed lightly against any cut surfaces, refrigerated at or below 40°F (4°C). The cake holds well for up to 3 days — day one and day two produce the best texture and cleanest slices. Do not store at room temperature and do not use a fully sealed airtight container, which traps condensation against the cream surface. If you enjoy the flavor profile of Biscoff in other formats, the layering technique used here is similar in principle to what makes oatmeal cream pies work — a soft cream filling absorbing into a spiced cookie over time produces a unified texture that neither component achieves alone.
Can I double the recipe for a larger pan?
Yes, with one adjustment. The cream quantity scales linearly — double the heavy cream, double the sugar, and the whipping process works identically. The cookie butter also scales directly. The one element that does not scale linearly is the chilling time — a larger, thicker cake in a 9×13 inch (23×33cm) pan takes longer for moisture to migrate all the way through the center layers. Add 2–3 hours to the minimum chilling time when doubling into a larger pan. A 9×13 pan will yield approximately 15–18 portions at standard slice thickness and requires approximately 10–12 hours minimum chilling rather than 8.
Does altitude or humidity affect Biscoff icebox cake?
Yes — humidity affects whipped cream stability more than any other variable in this recipe. In high-humidity kitchens (above 70% relative humidity), whipped cream absorbs moisture from the air faster, which weakens the fat crystal network and causes the cream layers to lose structure more quickly during both assembly and chilling. Chill your mixing bowl and beaters in the freezer for 15 minutes before whipping, work quickly during layering, and add an extra hour to the minimum chilling time. At high altitude — above 3,500 feet (1,067 meters) — cream whips significantly faster due to lower air pressure and can go from soft peaks to overwhipped in under 30 seconds. Reduce your mixer speed by one setting and begin checking peaks every 20 seconds from the 90-second mark.
What does Biscoff taste like?
Lotus Biscoff cookies taste of caramelized brown sugar with a distinct warm spice note — primarily cinnamon, with background hints of ginger, nutmeg, and clove, though the exact spice blend is proprietary. The flavor profile is often described as a cross between a gingersnap and a caramel wafer, with a cleaner, less sharp finish than a traditional gingersnap. The cookie butter spread amplifies these same flavor notes in a smoother, richer format — think of it as the cookie ground into a paste with added fat and sugar, similar in concept to how peanut butter relates to roasted peanuts. In this cake, the Biscoff flavor deepens overnight as the fat-soluble spice compounds from the cookie butter layers migrate into the adjacent cream, which is why the cream itself tastes strongly of Biscoff by the time the cake is served.
More No-Bake Desserts You’ll Love
- Chocolate Chip Cookie Cake — a giant soft-centered cookie baked in a round pan and decorated like a cake, for when you want something celebration-worthy without the layers
- Oreo Poke Cake — a tender chocolate cake soaked with cream and loaded with crushed Oreos, built for the refrigerator just like this icebox cake
No-bake Biscoff Icebox Cake
Ingredients
Equipment
Method
- Line a 9×5 inch (23×13cm) loaf pan with parchment paper, pressing it flat against the bottom and sides with at least 2 inches (5cm) of overhang on both long edges — do not grease the pan before lining.
- Pour 2 cups (480ml) cold heavy whipping cream and ¼ cup (50g) plain white granulated cane sugar into a large chilled mixing bowl and whip on medium speed for 1 minute, then medium-high for 1–2 minutes until the cream holds soft, drooping peaks — stop immediately when peaks droop softly and do not stand straight up.
- Spread 3–4 tablespoons (45–60g) of whipped cream in a thin, even layer across the bottom of the lined pan to create a base for the first cookie layer.
- Place a single layer of Lotus Biscoff cookies over the base cream, fitting them as closely together as possible and breaking cookies to fill any gaps at the ends — press each cookie gently into the cream below without pushing through.
- Warm ¼ cup (65g) Lotus Biscoff cookie butter spread in the microwave for 10–15 seconds, stir until smooth, and spread a thin, even layer over the cookie layer — the cookie butter should be spreadable but not runny, and should cover the cookies edge to edge.
- Spread a generous layer of whipped cream — approximately ½ cup (120ml) volume — evenly over the cookie butter layer using an offset spatula, working from center outward until the cookies are fully covered and the surface is level.
- Repeat steps 4 through 6 — cookie layer, cookie butter spread, cream layer — until the pan is full, finishing with a final cream layer on top approximately ½ inch (1.25cm) thick.
- Press plastic wrap lightly against the top cream surface to prevent skin formation, then refrigerate on a flat, level shelf for a minimum of 8 hours — overnight, 8 to 10 hours, is the target for fully softened, cake-like cookie layers.
- Once the cake is fully set, warm the remaining ¼ cup (65g) Lotus Biscoff cookie butter spread in the microwave for 15–20 seconds until just pourable, then drizzle in long sweeping ribbon lines across the top cream surface using a piping bag or spoon.
- Scatter the finely crushed Biscoff cookie crumbs across the top surface, then press the broken whole Biscoff cookie pieces gently into the cream so they rest on the surface without sinking — decorate immediately before serving, not before chilling.
- Grip both parchment overhangs and lift the cake straight up and out of the loaf pan onto a cutting board, then slice into 9 pieces approximately 1 to 1.5 inches (2.5–4cm) thick using a sharp knife wiped clean between every cut — serve immediately, cold.
Notes
rectangular cookies in the red packaging — not
sandwich cookies, not other speculoos brands.
Sandwich cookies contain a cream filling that
changes the softening rate and layer texture. – Heavy cream: Must be 36% fat or higher and cold
straight from the refrigerator. Cream below 36%
fat will not whip to stable peaks. – Cookie butter: Use creamy, not crunchy. Warm in
10-second microwave increments — too hot will melt
the cream layers on contact. – Cookie butter between layers: Divide the ¼ cup
(65g) evenly across however many cookie layers
your pan produces — approximately one-third per
layer for a 3-layer build. – Storage: Store in the loaf pan with plastic wrap
pressed against cut surfaces, refrigerated, up to
3 days. Do not store at room temperature. – Freeze: Freeze undecorated individual slices only,
wrapped tightly in plastic wrap then a zip-lock
freezer bag, up to 4 weeks — thaw overnight in
the refrigerator and decorate after thawing. – Make ahead: Assemble through the layering step up
to 24 hours in advance — add cookie butter drizzle
and cookie decoration immediately before serving
only. – Scaling: The recipe doubles cleanly into a 9×13
inch (23×33cm) pan — add 2–3 hours to minimum
chilling time for the larger, thicker build. – Altitude: At high altitude, cream whips faster —
reduce mixer speed by one setting and check peaks
every 30 seconds from the 90-second mark onward. – Allergens: Contains wheat (Biscoff cookies), dairy
(heavy cream, cookie butter), soy (cookie butter).
Check packaging for current allergen information
as formulations vary by region. – Tip: Chill your mixing bowl and beaters in the
freezer for 10 minutes before whipping the cream —
a cold bowl produces faster, more stable peaks
especially in warm kitchens.