Oreo Poke Cake Recipe (Dark Chocolate)
This is an oreo poke cake built in two layers — and the first time I made it, I did not know that. I poured the filling into holes on a single slab, cut a slice, and got cream-filled tunnels running through a dry cake rather than the thick, integrated white layer visible in that cross-section. I made it again the same week.
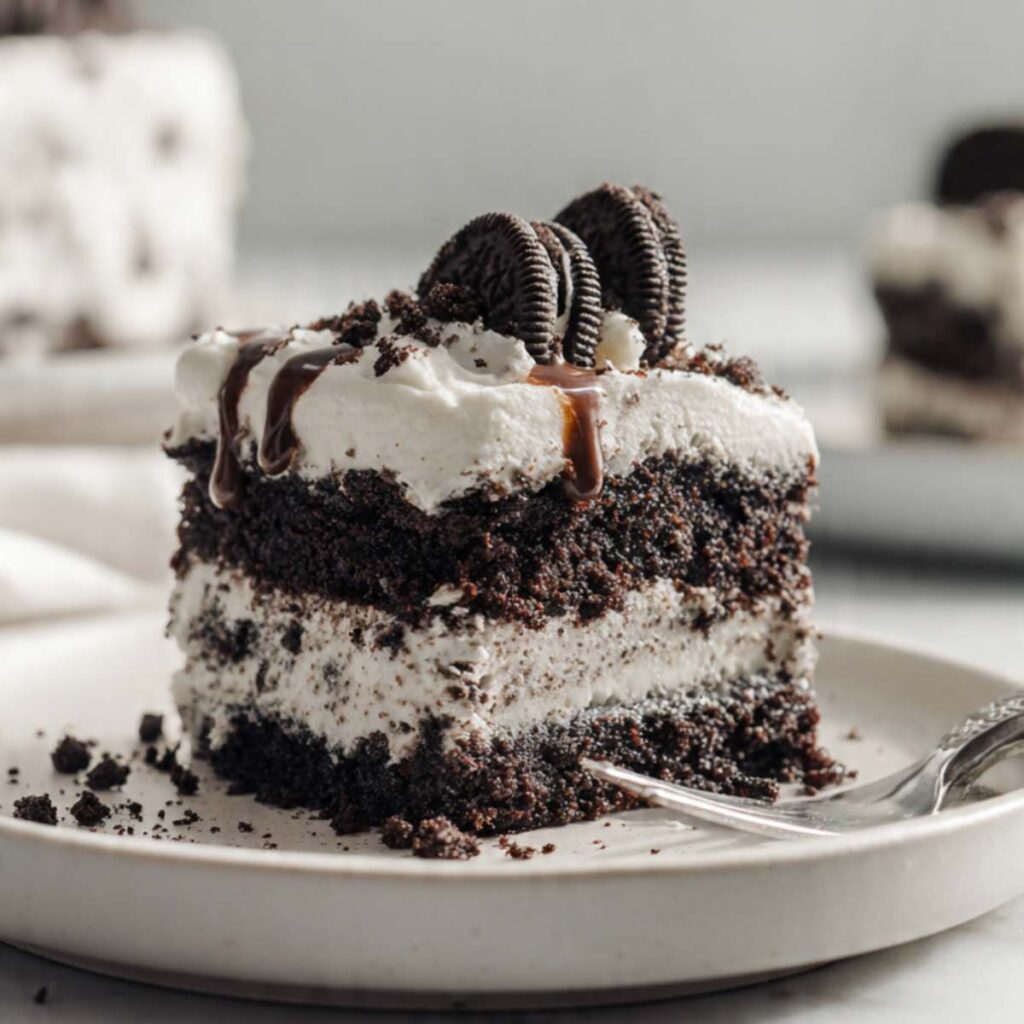
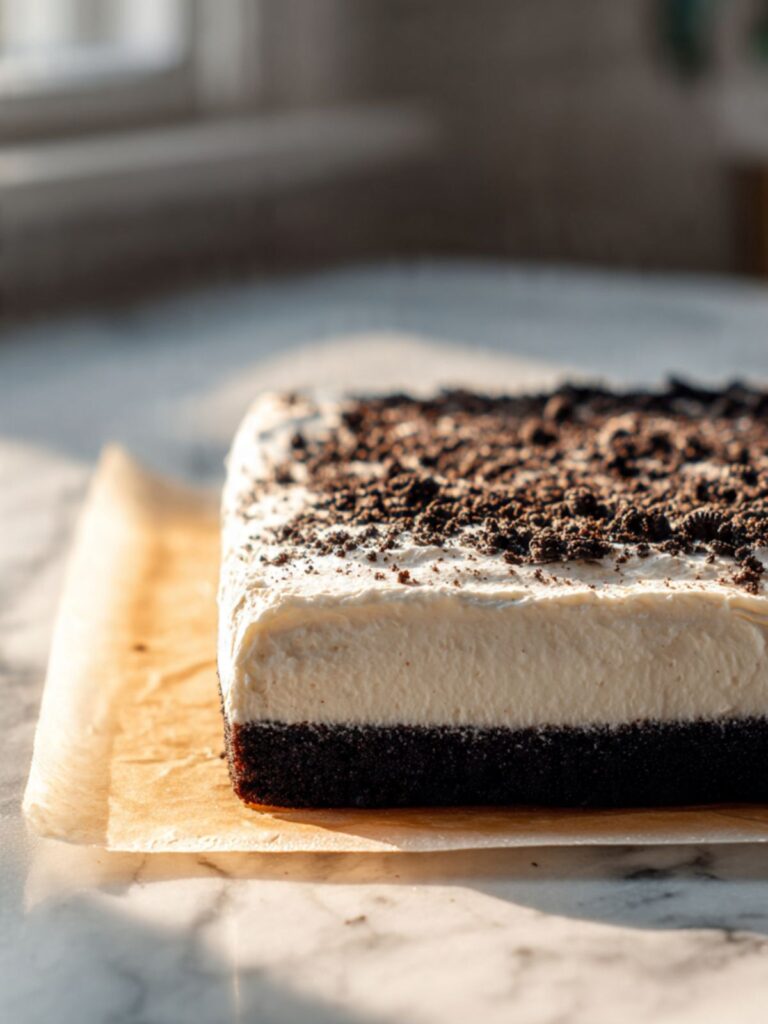
The variable I changed: the assembly method entirely. Instead of a single slab with holes, I baked one 9×13 pan of dark chocolate cake, cooled it completely, split it horizontally into two even layers with a serrated knife, spread the Oreo cream filling between them, and placed the top layer back on. The difference was immediate. The filling held as a clean, even layer between two firm cake layers — exactly the cross-section in these photos, with the coarse Oreo pieces visible in the white filling and the moist, near-black crumb at the cut face of each layer. I kept the two-layer version. The single-slab method is not wrong, but it is not what you see in these images, and this site is about getting you the result shown.
The second thing I tested: whether this batter needed a mixer. I made the cake with a stand mixer and again with a large bowl and a whisk. The results were identical. The one-bowl, whisk-only version is what I use now. A stand mixer adds equipment and dishes without adding anything to the cake.

The batter itself is a one-bowl recipe — no electric mixer needed for that stage. A hand mixer or stand mixer is required only for the whipped cream topping. If you only own a hand mixer, you are fully equipped for this recipe.
The cake base is a scratch devil’s food built on Dutch-process cocoa and hot strong coffee. Box mix will work — I will tell you exactly how — but the scratch version produces the near-black crumb visible in the photos in a way box devil’s food rarely does without intervention. The coffee blooms the cocoa and gives the chocolate a low, roasted quality. It does not make the cake taste like coffee.
🗒 Luna’s Note: I keep Dutch-process cocoa and natural cocoa in separate labeled jars because swapping them in this recipe is not a minor adjustment — it changes the leavening balance, the color, and the crumb structure. They are not interchangeable here without rewriting the recipe around the swap.
The Oreo cream filling is instant vanilla pudding, cold whole milk, cold heavy whipping cream, and crushed Oreos — half ground fine, half left in coarse pieces. The fine crumbs dissolve into the filling and flavor the whole layer. The coarse pieces stay distinct. That contrast is what you are seeing in the photos. A uniform fine crumb throughout loses it.
I prefer a generous hand with the whipped cream topping. Not piped, not shaped — just spread thick and finished with a free-form chocolate drizzle and whole Oreos pressed in. This is the cake I bring when someone asks me to bring dessert and I want the pan to come home empty. It has done that every time.
| Prep Time | Cook Time | Total Time | Yield | Difficulty |
|---|---|---|---|---|
| 30 minutes | 35 minutes | ~3 hours 35 minutes | 12 slices (one 9×13 inch / 23x33cm pan) | Easy |
| Calories | Fat | Carbs | Sugar | Protein |
|---|---|---|---|---|
| ~430 kcal | ~20g | ~60g | ~40g | ~5g |
Macros are approximate and will vary based on ingredient brands and serving size.
Ingredients & Tools
For the Chocolate Cake
- 2 cups (240g) all-purpose flour (spooned into the measuring cup and leveled — or weighed at 240g)
- 1¾ cups (350g) plain white granulated cane sugar
- ¾ cup (75g) Dutch-process cocoa powder (not natural cocoa — see Before You Start)
- 2 teaspoons baking soda, checked for freshness
- 1 teaspoon baking powder, checked for freshness
- 1 teaspoon fine sea salt
- 2 large eggs (approximately 50g each without shell), room temperature
- 1 cup (240ml) whole milk (3.5% fat), room temperature
- 1 cup (240ml) neutral-flavored oil such as vegetable oil or canola oil
- 1 tablespoon pure vanilla extract
- 1 cup (240ml) hot strong brewed coffee (or hot water — coffee deepens flavor without tasting like coffee)
For the Oreo Cream Filling
- 1 package (3.4 oz / 96g) instant vanilla pudding mix
- 1 cup (240ml) whole milk (3.5% fat), cold — reduced from 1½ cups to produce a thicker, spreadable filling that holds between two cake layers without running
- ½ cup (120ml) heavy whipping cream (36% fat minimum), cold
- 16 Oreo cookies, crushed — half into fine crumbs, half into coarse pieces (see Before You Start)
For the Whipped Cream Topping
- 2 cups (480ml) heavy whipping cream (36% fat minimum), cold
- 3 tablespoons (23g) powdered sugar (also called confectioners sugar or icing sugar), sifted
- 1 teaspoon pure vanilla extract
- 1 tablespoon (8g) cornstarch (also called cornflour outside the US) — stabilizes the whipped cream so it holds overnight in the fridge
For the Finish
- ¼ cup (60ml) chocolate fudge sauce or ganache, warmed to pourable consistency
- 10–12 whole Oreo cookies, for garnish
- 2 tablespoons crushed Oreo crumbs, for topping
Before You Start
Read this section before you begin — these are the details that determine whether this cake works.
Scale over volume. For the most accurate results, use a kitchen scale set to grams. Volume measurements like cups and tablespoons can vary by 20–30% depending on how the ingredient is scooped or packed. The gram weights in this recipe are the numbers I tested with — they are the most reliable way to get the same result I got.
Dutch-process cocoa is non-negotiable. Natural cocoa is acidic and reacts with baking soda. Dutch-process cocoa is neutralized — it does not react with baking soda in the same way. This recipe’s leavening balance is written specifically for Dutch-process. Substituting natural cocoa without adjusting the leavening produces a dense, flat cake with an acidic edge. If you only have natural cocoa, reduce baking soda to 1 teaspoon and add 1 teaspoon white vinegar to the milk. The color will be slightly lighter.
Eggs and milk at room temperature. Cold eggs and cold milk do not emulsify smoothly into the batter and can cause the mixture to look broken or separated. Pull eggs and milk from the fridge 30 minutes before you begin, or place the eggs in a bowl of warm (not hot) water for 10 minutes in an emergency. The eggs are ready when the shell feels neutral to the touch — not cool, not cold. If you crack one into a small bowl, it should feel loose and slightly fluid, not firm and gelatinous from the cold.
Hot coffee is the blooming agent. The hot liquid blooms the Dutch-process cocoa, deepening color and intensifying chocolate flavor. It does not make the cake taste like coffee. If you are serving this to children or caffeine-sensitive guests, hot water works — the flavor will be slightly less deep but still very good.
Cold dairy for the filling and topping. The instant pudding filling and the whipped cream both require cold dairy to set correctly. Pull the heavy cream and milk for the filling from the fridge only when you are ready to use them. Do not use the same milk pulled out for the cake batter — that has been sitting at room temperature and will not set the pudding correctly.
The filling must be thick, not pourable. This recipe uses less milk in the filling than a standard poke cake because the filling is spread between two cake layers, not poured into holes. A pourable filling will squeeze out from between the layers when the top cake is placed and will not hold the clean layer visible in the cross-section photos. The filling at correct consistency holds a soft peak on a spoon and spreads like a thick frosting, not like a liquid.
Crush the Oreos in two stages. Process half the cookies into fine crumbs and break the other half into coarse pieces by hand or with a few pulses. The fine crumbs dissolve into the filling and flavor the entire layer. The coarse pieces stay distinct and give the interior the cookies-and-cream texture visible in the cross-section. A uniform fine crumb throughout loses that textural contrast.
Freshness check — baking soda. Drop ½ tsp (3g) of baking soda into a small bowl of hot water with a splash of white vinegar. It should bubble aggressively within 2 seconds. If it fizzes weakly or not at all, replace the box.
Freshness check — baking powder. Drop 1 tsp (4g) into ½ cup (120ml) hot water. It should bubble immediately and vigorously.
The cake batter requires no electric mixer — a large mixing bowl and a whisk are all you need for that stage. A hand mixer or stand mixer fitted with the whisk attachment is required only for the whipped cream topping. Never whip cream by hand — you will not get the volume or stability the topping needs.
Oven rack position. Position your oven rack in the middle of the oven before preheating. Top rack burns tops. Bottom rack burns bottoms.
Pan note. This recipe was tested in a 9×13 inch (23x33cm) light-colored aluminum baking pan lined with parchment and lightly greased. Dark non-stick pans absorb more heat and will overbrown the bottom layer — reduce oven temperature by 25°F (15°C) if that is what you have. Glass pans retain heat differently and require the same temperature reduction. The parchment lining is critical: you need to lift the fully cooled cake out of the pan cleanly in order to split it into two horizontal layers. Without parchment, the bottom tears when you attempt to remove it.
Layer splitting note. The baked cake must be completely cool — at room temperature for at least 1 hour, then refrigerated for 30 minutes — before you attempt to split it horizontally. A warm cake crumbles when the knife goes through. A cold, firm cake splits cleanly. Use a long serrated knife and slow, even strokes — do not press down, draw the knife through with a sawing motion.
Necessary Tools
- Kitchen scale (strongly recommended — gram weights are more accurate than volume)
- Large mixing bowl
- Whisk
- 9×13 inch (23x33cm) light-colored aluminum baking pan
- Parchment paper
- Wire cooling rack
- Long serrated knife or cake leveler (for splitting the baked cake into two horizontal layers)
- Wooden spoon handle or thick chopstick (for poking holes in the bottom layer)
- Offset spatula or large spoon (for spreading filling and topping)
- Hand mixer or stand mixer fitted with the whisk attachment (for whipped cream only)
- Sharp knife and bench scraper (for clean cuts when serving)
- Oven thermometer (optional but recommended — most ovens run 15–25°F / 8–14°C off their dial)
How to Make Oreo Poke Cake
Step 1: Oven Preheated to Temperature, Pan Lined and Ready
Preheat your oven to 350°F (175°C) with the rack positioned in the middle of the oven. Top rack burns tops. Bottom rack burns bottoms. Most home ovens run 15–25°F (8–14°C) off their dial setting — if you have an oven thermometer, confirm the actual temperature before the pan goes in.
Line your 9×13 inch (23x33cm) light-colored aluminum baking pan with parchment paper, leaving a 1-inch overhang on both long sides. Lightly grease the parchment and the exposed short sides of the pan with butter or non-stick spray. The parchment overhang is not optional here — you will use it to lift the fully cooled cake out of the pan in one piece before splitting it into two layers. A cake that cannot be lifted cleanly cannot be split cleanly.
The pan should look fully lined with no bare aluminum visible on the bottom, parchment lying flat with no large air pockets underneath, and a clean overhang on both long sides that you can grip with both hands. Set it aside while you make the batter.
Your preheated oven and prepared pan are ready — move directly to the dry ingredients.
Step 2: Dry Ingredients Evenly Combined with No Cocoa Clumps
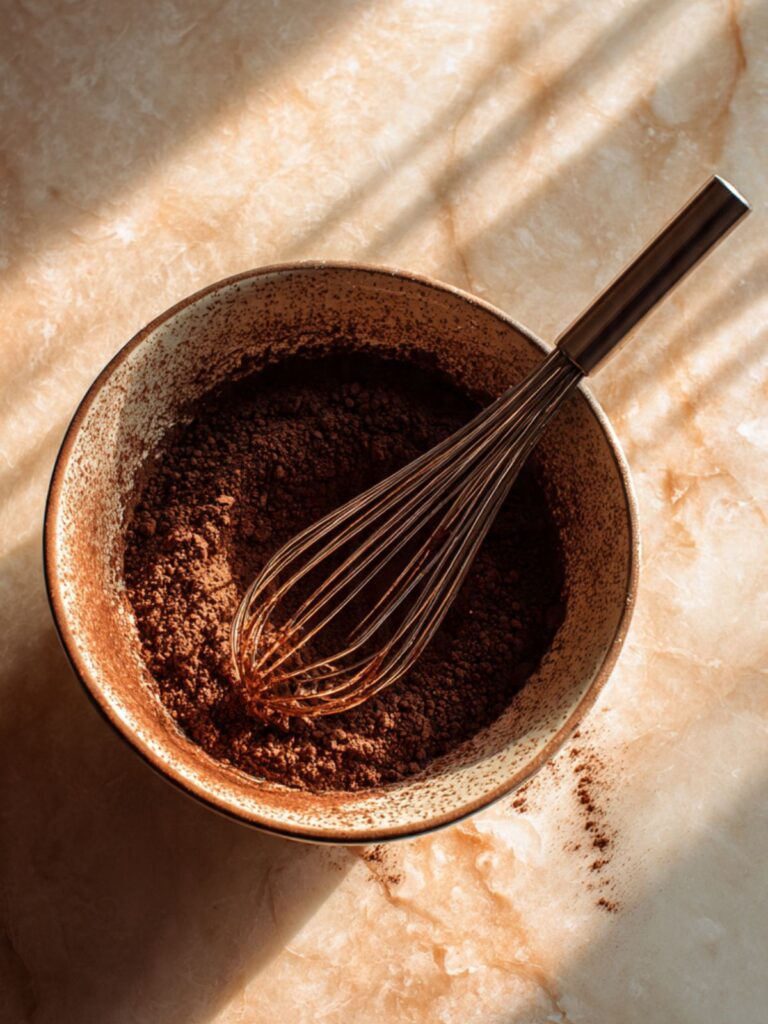
This recipe uses a one-bowl, whisk-only method for the cake batter — no creaming, no mixer — followed by a two-layer horizontal split and a spread-and-stack assembly for the filling. In a large mixing bowl, whisk together the 2 cups (240g) all-purpose flour, 1¾ cups (350g) plain white granulated cane sugar, ¾ cup (75g) Dutch-process cocoa powder, 2 teaspoons baking soda, 1 teaspoon baking powder, and 1 teaspoon fine sea salt. Whisk for a full 60 seconds — not a quick stir. You are breaking up cocoa clumps and distributing the leavening evenly through the flour. A clump of undistributed baking soda bakes into a soapy, bitter pocket that no amount of filling or topping masks.
The dry mixture should look uniformly dark — nearly black — with no visible pale flour streaks and no cocoa clumps anywhere including at the bottom edge of the bowl. Run your whisk through the bottom and check before moving on. Make a well in the center.
Your dry ingredients are evenly combined — add the wet ingredients directly into the well in the next step.
Step 3: Wet Ingredients Incorporated and Batter Just Combined
Into the well in the center of the dry ingredients, add the 2 large room-temperature eggs, 1 cup (240ml) room-temperature whole milk, 1 cup (240ml) neutral oil, and 1 tablespoon pure vanilla extract. Whisk from the center outward, gradually pulling the dry ingredients into the wet until just combined — approximately 30 strokes. The batter will look slightly lumpy and uneven at this stage. That is correct.
Do not keep mixing to chase the lumps. Overmixing after the flour is incorporated develops gluten and produces a tough, tight crumb — one that is significantly harder to split cleanly into two even horizontal layers and that does not absorb the filling at the cut edges the way an open crumb does.
⚠ Baker's Warning: A smooth, fully uniform batter at this stage means it has been overmixed. The gluten has tightened and the crumb will bake up dense rather than open and moist. Stop at 30 strokes even if the batter still looks uneven. The hot coffee in the next step smooths the remaining lumps — do not do that work now.
The batter should look thick, dark, and slightly uneven — not smooth, not glossy, not runny. Hold this state and move immediately to adding the coffee.
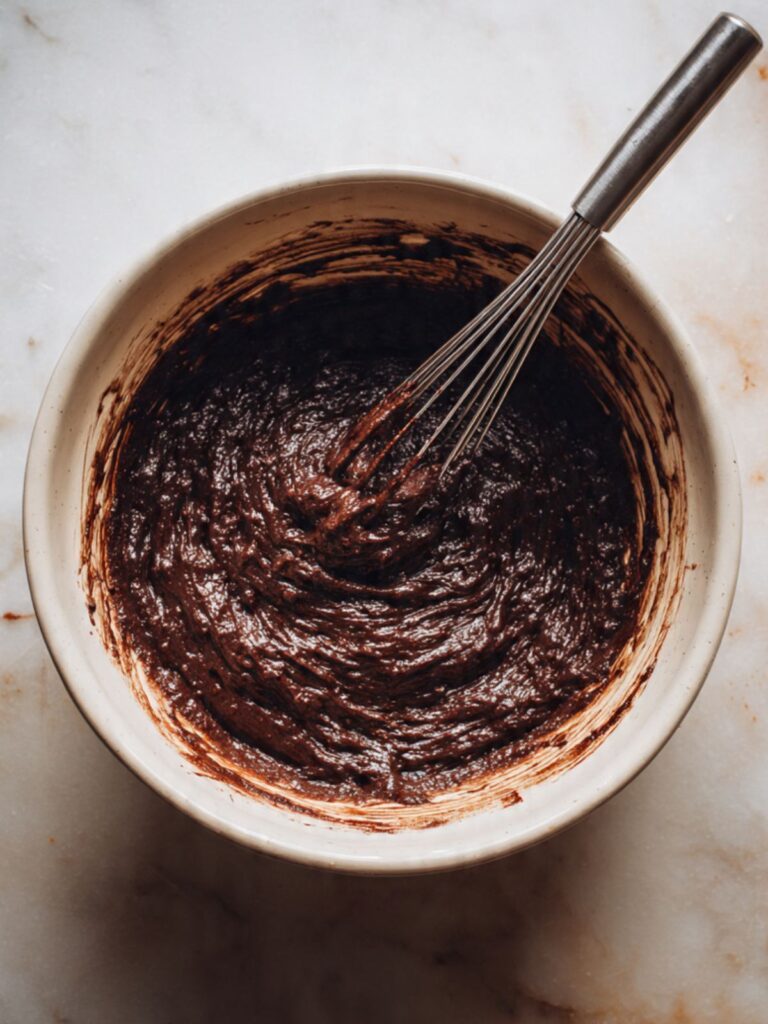
Step 4: Coffee Blooms the Cocoa and Batter Reaches Final Consistency
With the batter in the bowl, pour 1 cup (240ml) of hot strong brewed coffee in a slow, steady stream around the edge of the bowl while whisking gently. The hot liquid will thin the batter noticeably and the color will deepen from dark brown to near-black — this is the Dutch-process cocoa blooming, and it is exactly what you want. Whisk just until the coffee is fully incorporated and no streaks remain. The finished batter is quite thin. This is correct.
A thinner batter produces the open, porous crumb structure that makes this cake so moist after assembly. A batter that looks like brownie batter at this stage will not develop the open crumb the two-layer format needs — the filling cannot grip into a dense, closed crumb at the cut edges the way it grips into an open one.
🗒 Luna’s Note: The thinness of this batter surprises people every single time. I have had readers message me convinced something went wrong at this step. Nothing is wrong. This is the consistency you need.
The finished batter should look glossy, very dark — almost black — and pourable, closer in consistency to a thick pancake batter than a standard cake batter. If it still looks stiff after the coffee is fully incorporated, whisk for 10 more seconds. Pour it directly into the prepared pan.
Your batter is ready — pour and bake immediately.
Step 5: Cake Baked Through with Open Moist Crumb
Pour the batter into the prepared 9×13 inch (23x33cm) pan and use an offset spatula to spread it into an even layer reaching all four corners. The batter is thin enough that it largely self-levels — you are just nudging it into the corners.
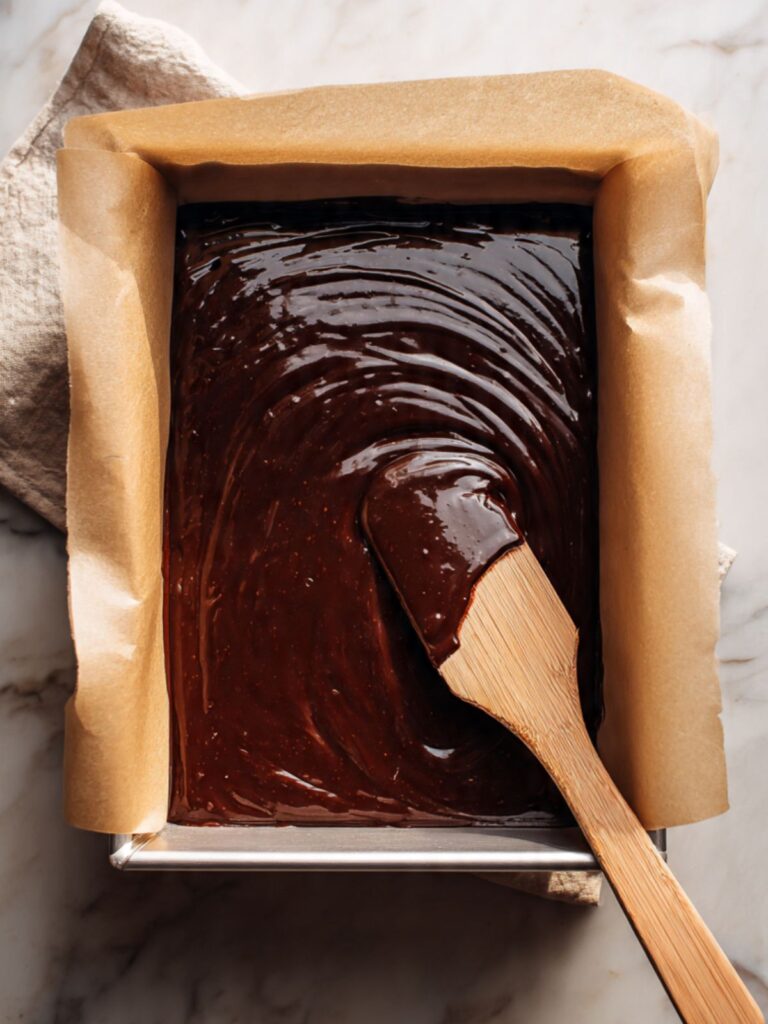
Bake at 350°F (175°C) for 32–35 minutes. Start checking at 32 minutes. The cake is done when a toothpick inserted into the center comes out with moist crumbs clinging to it — not wet batter, not completely clean. A completely clean toothpick means the cake has gone slightly past peak moisture. Do not open the oven door before 28 minutes — the sudden temperature drop causes the center to deflate before the crumb structure has set, producing a sunken middle that makes the horizontal split uneven.
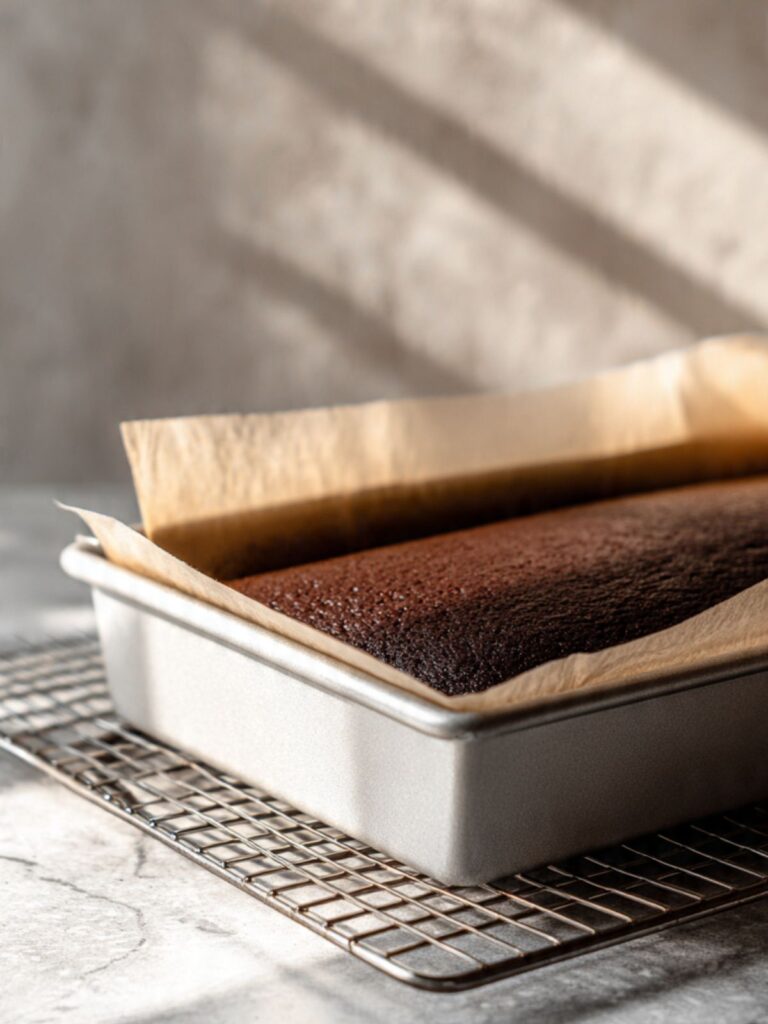
The finished cake should look very dark — near-black — with set edges that have just begun to pull away from the sides of the pan and a center that no longer jiggles when you shake the pan gently. The surface will look matte, not shiny. At this cocoa ratio, color is not a reliable doneness cue — rely on the toothpick and the jiggle test.
Remove the pan from the oven and place it on a wire cooling rack. Leave the cake in the pan for exactly 10 minutes — during this time, carryover heat from the pan continues to set the crumb structure without the oven drying it further. After 10 minutes, use the parchment overhang to lift the cake out of the pan and place it directly on the wire rack. Cool at room temperature for at least 1 hour, then refrigerate for 30 minutes before splitting. This cooling sequence is for the pre-split stage only — it is separate from the post-assembly refrigeration rules in the storage section.
⚠ Baker's Warning: A cake split before it is fully cold will crumble rather than cut — you will get ragged, torn layers at the cut face rather than the clean, even split visible in the cross-section photos. The 1-hour room temperature rest plus 30 minutes in the refrigerator is not optional. Set a timer for both.
Your baked cake is cooling — do not touch it until it is completely cold and firm.
Step 6: Cake Split Into Two Even Horizontal Layers
This is the step that determines whether your finished slices look like the photos. Remove the fully cooled cake from the refrigerator and place it on a flat, stable surface.

Using a long serrated knife, score a shallow guide groove around the entire perimeter of the cake at the halfway point — approximately 1 inch (2.5cm) from the top — before committing the full cut. This groove keeps the blade at the correct height as you saw inward and prevents it from drifting up or down through the interior. Then, using slow, steady horizontal sawing strokes with almost no downward pressure, cut through the cake following that guide line. Rotate the cake slightly after every few strokes to maintain an even depth rather than cutting straight through from one side. A cake leveler makes this significantly easier and produces a more consistent split — if you own one, use it.
Lift the top layer off carefully using both hands or a wide offset spatula slid underneath for support. Place it cut-side up on a piece of parchment nearby — you will flip it cut-side down when reassembling.
⚠ Baker's Warning: If the top layer cracks during lifting, the cake was not cold enough or the knife angled downward during cutting rather than staying horizontal. A cracked top layer is still usable — the whipped cream topping covers surface cracks entirely — but the cross-section will show the break at the cut face of each slice. Refrigerate both layers for 10 more minutes and use a wider spatula on the next attempt.
Both cut faces should look like what is visible in the cross-section photos — near-black, visibly moist crumb with a clean, even cut surface and no ragged or torn sections along the split line. That clean cut face is the foundation of the layer definition you see in the finished slice.
Your two cake layers are ready — poke the bottom layer immediately in the next step.
Step 7: Bottom Layer Poked and Filling Anchor Points Set
Leave the bottom cake layer on its wire rack or transfer it to a parchment-lined baking sheet for stability. Using the handle of a wooden spoon or a thick chopstick, poke holes across the entire surface of the bottom layer spaced approximately 1 inch (2.5cm) apart in even rows. Push each hole down to about ¾ of the depth of the bottom layer — not all the way through to the bottom, but deep enough to anchor the filling. You should end up with approximately 20–25 holes across the surface.
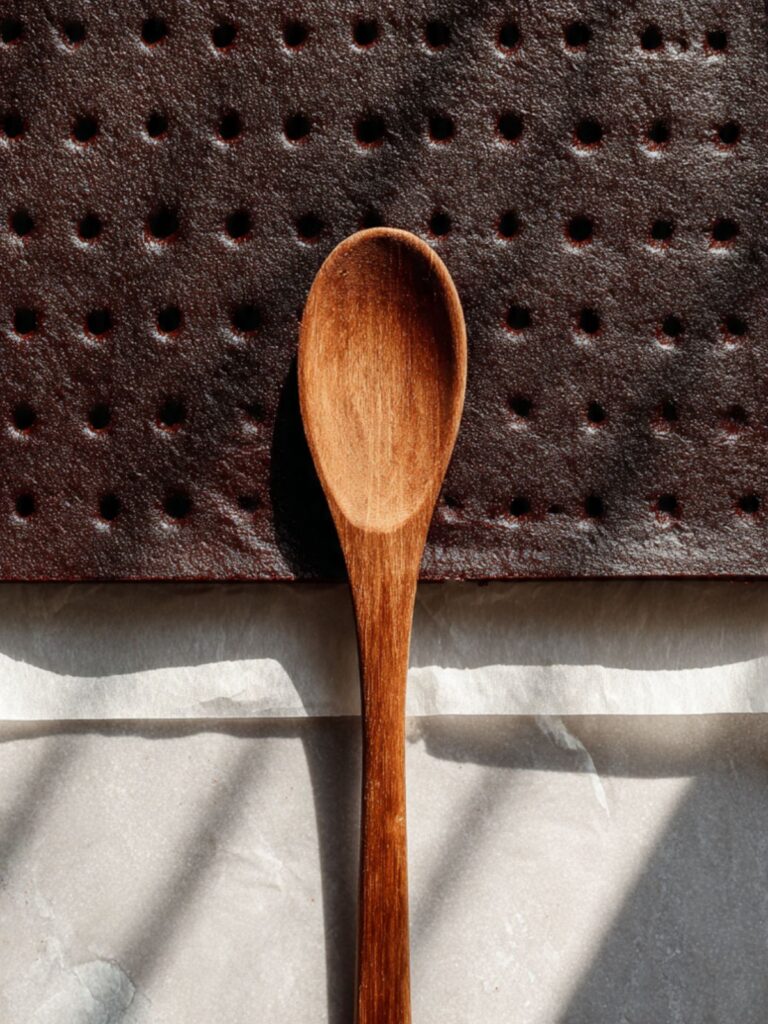
The holes serve a specific structural purpose in this two-layer format. Each hole is a channel the filling locks into as it is spread — giving the assembled cake a mechanical grip between the bottom layer and the filling that prevents shifting during assembly, refrigeration, and slicing. Without these anchor points, the filling sits on the smooth cake surface and shifts when the top layer is placed.
The holes should look deep and evenly spaced with no large bare patches between them. If you see areas with no holes, go back and add them — the filling needs anchor points across the full surface, not just the center.
Your bottom layer is poked and ready — make the filling immediately and keep it moving.
Step 8: Filling Spread, Layers Assembled, and Cake Chilling
In a medium bowl, whisk together the 1 package (3.4 oz / 96g) instant vanilla pudding mix and 1 cup (240ml) cold whole milk for a full 2 minutes until the mixture is thick and holds its shape on a spoon — not pourable, not liquid. Add the ½ cup (120ml) cold heavy whipping cream and whisk for another 30 seconds to loosen to a spreadable consistency. Fold in the crushed Oreos — the fine crumbs and the coarse pieces — with a spatula. Work quickly. Instant pudding thickens further as it sits, and you want it spreadable, not set, when it goes onto the cake.
Spoon the filling onto the center of the bottom cake layer and spread it in an even layer all the way to the edges using an offset spatula. The filling layer should be approximately ¾ inch (2cm) thick and cover the surface completely with no bare patches of cake showing through. Press the filling gently into the poked holes as you spread — you will feel the spatula dip slightly into each hole as the filling settles in. As you can see in the cross-section of both photos, the filling sits as a distinct, even white band between the two dark cake layers — that clean definition comes directly from a filling spread to full coverage at this step with no bare patches left at the edges.
Now carefully lift the top cake layer and flip it cut-side down onto the filling. Lower it straight down — do not slide it into position. Sliding drags the filling and creates an uneven layer. Press very gently across the entire surface of the top layer to make full contact with the filling. Do not press hard — you are seating the top layer level, not compressing the filling.
⚠ Baker's Warning: If the filling is thin and pourable rather than thick and spreadable, it will squeeze out from the sides when the top layer goes on and the layers will slide when the cake is cut. This happens when too much milk was used or the pudding was not given the full 2 minutes to thicken. If the filling has already squeezed out, refrigerate the assembled cake immediately without pressing on it further — the filling will re-firm as it chills.
The assembled cake should look level across the top with the filling layer just visible at the edges — a clean white line between the two dark cake layers exactly as shown in the cross-section photos.
Refrigerate the assembled cake uncovered for a minimum of 2 hours — or overnight. The filling must be completely set and cold before the whipped cream topping goes on. Applying the topping to an incompletely set cake causes the whipped cream to slide and the filling layer to shift beneath it.
Your assembled cake is chilling — make the whipped cream topping after the 2-hour minimum has passed.
Step 9: Whipped Cream Whipped to Stiff Peaks and Stable
The whipped cream on this cake needs to hold its structure for up to 48 hours in the refrigerator. Plain whipped cream deflates within a few hours. The cornstarch in this topping prevents that.
In the bowl of a stand mixer fitted with the whisk attachment — or in a large bowl using a hand mixer — combine 2 cups (480ml) cold heavy whipping cream, 3 tablespoons (23g) sifted powdered sugar, 1 teaspoon pure vanilla extract, and 1 tablespoon (8g) cornstarch. The bowl and beaters must be cold — place them in the freezer for 10 minutes before whipping if your kitchen is warm. Whip on medium speed for 1 minute to begin building structure, then increase to high speed and whip for 2–3 minutes until stiff peaks form. Watch closely in the final 30 seconds — the line between stiff peaks and over-whipped, broken cream is very narrow at high speed.
⚠ Baker's Warning: Over-whipped cream looks curdled and slightly yellow at the edges — if the cream begins to look chunky or separated rather than smooth and glossy, you have gone past stiff peaks into broken cream. There is no recovery. Stop at stiff peaks — the cream holds a firm peak that stands straight up when the beater is lifted with no drooping at the tip.
Correctly whipped cream looks thick, bright white, and glossy — it holds a stiff peak that stands straight without drooping and the bowl can be turned upside down without the cream moving. Use it immediately.
Your whipped cream is ready — apply it to the chilled assembled cake now.
Step 10: Cake Topped, Garnished, and Ready to Slice
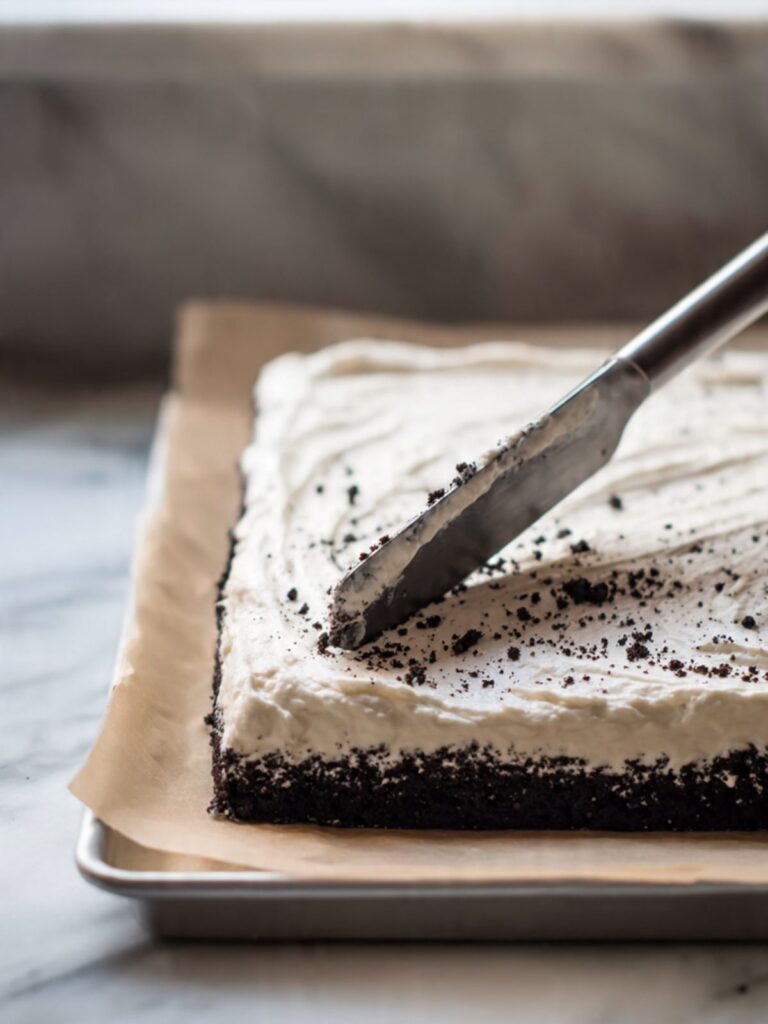
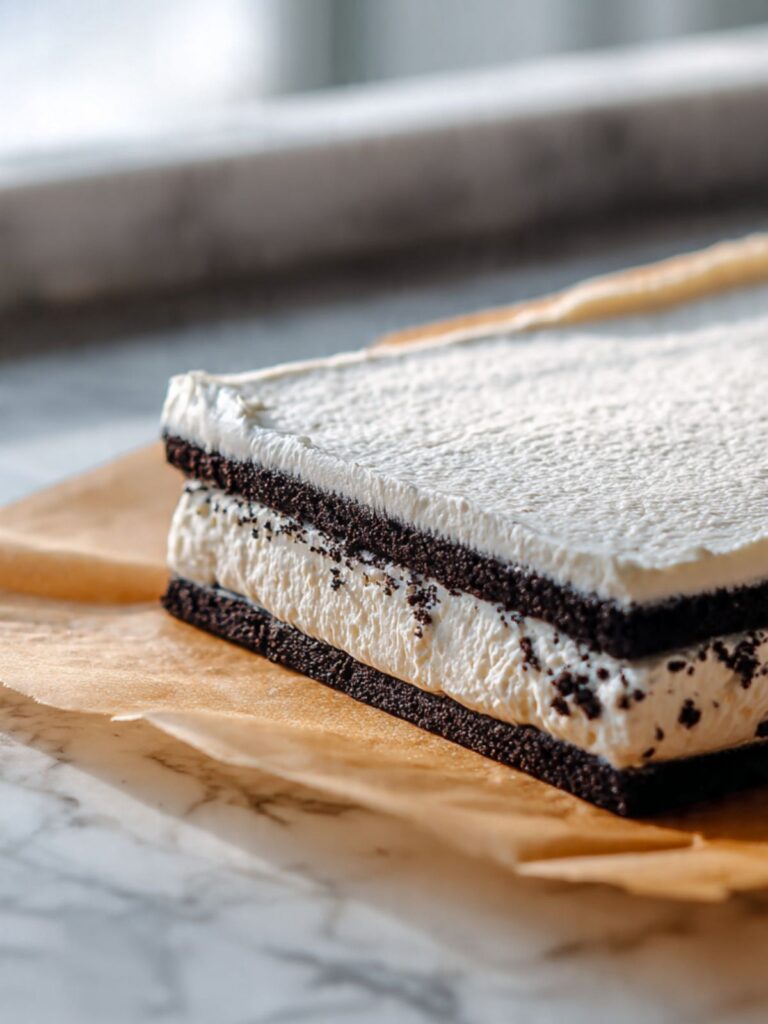
Remove the chilled assembled cake from the refrigerator. Using an offset spatula, spread the stabilized whipped cream in an even, generous layer across the entire surface of the cake, working it all the way to the edges. The layer should be approximately ¾ inch (2cm) thick — which is exactly the topping depth visible in both photos. Do not press down hard with the spatula or you will compress the filling layer beneath and cause the layers to shift.
Drizzle the ¼ cup (60ml) warmed chocolate fudge sauce over the whipped cream in a free-form pattern. The loose, natural drizzle visible in both photos is not carefully piped — it is poured from a spoon in a slow back-and-forth motion across the surface. Immediately press the whole Oreo cookies into the whipped cream at evenly spaced intervals across the top, pushing firmly enough that they hold their position when the cake is moved. Scatter the 2 tablespoons of crushed Oreo crumbs over the entire surface.

As you can see in the close-up cross-section photo, the finished slice shows a very generous whipped cream layer above the top cake layer, with the chocolate drizzle running freely across it and the Oreo cookies pressed upright into the cream — the drizzle is free-form and the Oreo placement does not need to be precise. This is a pan cake meant to feed a crowd, not a plated dessert.
The finished cake should look level across the top with an even cream layer, chocolate drizzle distributed across the full surface, and the Oreo garnish pressed firmly enough that it will not shift when the pan is moved to the refrigerator. Refrigerate for at least 30 minutes before slicing to let the topping firm up against the cake surface.
For clean cuts, run a sharp knife under hot water, wipe it dry, and slice with one single downward motion — do not drag the knife sideways through the cream layer. Wipe the blade clean between every cut. A 9×13 pan cut into 3 columns and 4 rows yields exactly 12 slices at approximately 3×3 inches (7.5×7.5cm) each — approximately 175–180g per slice on a kitchen scale.
Your oreo poke cake is finished — refrigerate until ready to serve.
The Science Behind Oreo Poke Cake
Why Hot Coffee Transforms Dutch-Process Cocoa
The near-black color of this cake is not just about quantity of cocoa. It is about what happens to Dutch-process cocoa when hot liquid hits it.
Cocoa powder contains flavor compounds — primarily pyrazines and aldehydes — that are bound inside fat molecules at room temperature. When liquid above 190°F (88°C) contacts the cocoa, the heat breaks those fat bonds and releases the compounds into the batter, producing a dramatically more intense chocolate flavor and a deeper color than the same quantity of cocoa mixed with cold liquid would ever give you. This is called blooming, and it is the single most important technique decision in this recipe.
Hot water blooms the cocoa. Hot coffee does more. Coffee contains its own aromatic compounds that layer with the cocoa’s flavor rather than diluting it — the result is a low, roasted bass note underneath the chocolate that stops the cake from tasting one-dimensionally sweet. The caffeine is undetectable at this ratio. What remains is depth.
The reason Dutch-process specifically is required connects directly to leavening chemistry. Natural cocoa sits at pH 5–6 — acidic enough to react with baking soda and produce carbon dioxide lift. Dutch-process has been alkalized to pH 7–8 and does not trigger that reaction. This recipe uses both baking soda and baking powder, balanced for the neutral pH of Dutch-process. Swap in natural cocoa and the acid-base ratio shifts — baking soda reacts too aggressively, the cake rises fast and collapses before the structure sets, and the crumb turns tight and dense rather than the open, porous texture the two-layer assembly depends on. You can see the result this chemistry is working toward in the cross-section photos — that near-black, visibly moist crumb at the cut face of each layer. That is Dutch-process cocoa bloomed in hot coffee. Nothing else produces it the same way.
Why the Poke Method Still Matters in a Two-Layer Cake
Most people think of the poke method as a single-slab technique — holes poked through an entire cake so filling can saturate from top to bottom. In this recipe the poke step is applied only to the bottom layer, and it serves a completely different purpose.
When the cake bakes, the starch granules in the flour absorb water from the batter and swell into a solid matrix — the structure that gives the cake its body. This process completes as the cake cools. A fully set, unmodified cake surface is relatively smooth and offers little physical grip for a spread filling. The filling sits on top of the crumb rather than anchoring into it, and when the top layer is placed and pressed down, the filling shifts. It squeezes toward the edges. The layer definition you see in the photos — that clean, even white band running the full width of the slice — does not happen on a smooth unmodified surface.
The poked holes change this. Each hole is a channel that the filling drops into as it is spread. The filling locks into those channels rather than sitting purely on the surface, giving the assembled cake a mechanical grip between the bottom layer and the filling that prevents shifting during assembly, refrigeration, and slicing. The 20–25 holes at ¾ depth across the bottom layer are not decorative and they are not a gesture toward the traditional poke cake method. They are the reason the cross-section in these photos looks the way it does — filling that holds its position cleanly rather than compressing unevenly when the knife goes through.
For a closer look at how the same cocoa chemistry operates in a completely different format with no poke step and no layering, see my chocolate dump cake — the contrast between what structure does and does not need to accomplish in each recipe is worth understanding.
Why Stabilized Whipped Cream Holds Where Plain Cream Fails
The first time I assembled this cake for a party, I used plain whipped cream and made it the morning of. By the time I set it on the table three hours later, the topping had deflated into a thin, wet layer sitting in a puddle around the base of the cake. I did not understand why until I looked at what plain whipped cream actually is — and why it cannot stay the way it starts.
Plain whipped cream is an unstable foam. When heavy cream is whipped, the fat globules partially coalesce around air bubbles and form a network that holds the foam structure — but only temporarily. At refrigerator temperature over several hours, those fat globules continue to coalesce past the point of foam stability. The water in the cream begins to drain out of the network — a process called syneresis — and the cream deflates. This is not a technique failure. It is what plain whipped cream does given enough time, regardless of how well it was whipped.
Cornstarch solves this by providing a secondary physical structure. The starch granules partially hydrate in the cream and create a more rigid scaffolding between the fat globules, slowing the rate at which the foam collapses. At 1 tablespoon (8g) per 2 cups of cream — the ratio used in this recipe — the cornstarch extends the stable life of the topping from 2–4 hours to 24–36 hours without changing the flavor or the light texture. The cream still whips. It still peaks. It still tastes like whipped cream. It just stays that way long enough to matter on a refrigerated sheet cake that is better on Day 2 than Day 1.
Cold equipment matters for the same mechanical reason. Firmer fat globules at the start of whipping coalesce more easily around air bubbles — the foam builds faster and with less risk of tipping into over-whipped, broken cream. Ten minutes in the freezer for the bowl and beaters costs nothing and removes one of the most common whipped cream failure points before it has a chance to happen.
🗒 Luna’s Note: I always use cornstarch over gelatin for stabilizing whipped cream on a sheet cake. Gelatin-stabilized cream sets firmer — more mousse-like — and I find it changes the texture of the topping in a way that feels wrong against the soft pudding filling beneath it. Cornstarch keeps it light. That is the distinction that matters here.
Troubleshooting & Pro-Tips About Oreo Poke Cake
Common Mistakes
Wrong cocoa type produces a flat, dense cake with no lift
The symptom is a finished cake that baked up noticeably lower than the pan depth, has a tight, dense crumb rather than the open, moist texture visible in the photos, and tastes slightly acidic or metallic underneath the chocolate flavor. The cause is natural cocoa used in place of Dutch-process. Natural cocoa is acidic and reacts aggressively with the baking soda in this recipe — the leavening fires too fast during baking, the cake rises rapidly and then collapses before the structure sets, and the crumb never develops the open pore structure the poke and layer method depends on. The fix if this has already happened: the cake cannot be corrected after baking — it will not split cleanly into two even layers and the filling will compress the crumb rather than sitting between two firm layers. Start again with Dutch-process cocoa. Prevention: confirm the cocoa tin says Dutch-process or alkalized before opening — natural cocoa tins typically say unsweetened natural cocoa or simply unsweetened cocoa with no alkalization mention.
Dark or glass pan produces an overbaked, dry bottom layer
The symptom is a bottom cake layer with a noticeably drier, denser band across the base when sliced, while the center and top of the crumb look correct. In a two-layer assembly this is especially visible because the bottom layer is exposed at the cut face — the dark, dry band at the base of the bottom layer shows clearly in the cross-section. The cause is a dark non-stick pan or a glass pan used instead of light-colored aluminum. Dark pans absorb significantly more radiant heat from the oven element and transfer it directly into the base of the cake, baking the bottom faster than the interior. Glass pans retain heat longer and produce the same effect. The fix: the bottom layer of an overbaked cake is still usable — the filling and the moisture from the pudding layer will soften it during the refrigerator rest. Prevention: use a light-colored aluminum pan as specified. If you only own dark or glass pans, reduce oven temperature by 25°F (15°C) and start checking the cake at 28 minutes rather than 32.
The filling squeezes out from between the layers during assembly
The symptom is filling pushing out from the sides of the cake when the top layer is placed, the layers sliding against each other when the assembled cake is moved, and an uneven filling layer visible in the cross-section when sliced — thicker at one end, thinner or absent at the other. The cause is filling made too thin — either too much milk used, or the pudding not given the full 2 minutes to thicken before the cream was added, or the filling applied to a cake layer that was not fully cold. Warm cake softens the pudding filling on contact and it loses viscosity immediately. The fix if the filling has already squeezed out: use an offset spatula to press the escaped filling back against the sides and refrigerate immediately — do not press on the top layer. The filling will re-firm as it chills. Prevention: use exactly 1 cup (240ml) of milk — not 1½ cups — whisk for the full 2 minutes before adding cream, and ensure both cake layers are completely cold before assembly.
The top cake layer cracks or breaks during splitting or lifting
The symptom is a visible crack or split running through the top layer when it is lifted away from the bottom layer after splitting. In a finished slice, this shows as an irregular break line across the top layer rather than the clean, even layer visible in the photos. The cause is almost always one of two things: the cake was not cold enough when the split was attempted, or the serrated knife angled downward during cutting rather than staying perfectly horizontal. A warm cake crumbles under the knife rather than splitting cleanly. The fix: a cracked top layer can still be placed over the filling — the whipped cream topping covers surface cracks entirely and the slice will look correct from the outside. The cross-section will show the crack but only on the cut face of the slice. Prevention: refrigerate the fully room-temperature-cooled cake for 30 minutes before splitting, use a long serrated knife with slow sawing strokes and no downward pressure, and score the perimeter first as a guide before committing the full cut.
The whipped cream topping deflates and weeps within a few hours
The symptom is a pool of thin liquid collecting around the base of the cream layer and the topping losing its height and structure, leaving a flat, wet surface where a thick, domed cream layer should be. This happens when plain unsupported whipped cream is used, when the cream or bowl was not cold enough when whipped, or when the topping was applied to a cake that was not fully chilled — warm filling beneath radiates heat upward into the cream and begins the deflation process immediately. The fix for already-deflated cream: there is no recovery — scrape it off, make a fresh batch with cold equipment and the cornstarch stabilizer, and reapply to the re-chilled cake. Prevention: always use the cornstarch stabilization as written, always whip in a cold bowl with cold cream straight from the refrigerator, and always ensure the assembled filled cake has chilled for the full 2-hour minimum before the topping is applied.
The leavening freshness test fails
If your baking soda does not bubble aggressively in hot water with vinegar, or your baking powder does not bubble immediately in hot water alone, replace both before baking. Expired leavening in a scratch cake this size produces a flat, dense result with no lift — the cocoa weight alone is enough to suppress a cake with weakened leavening, and a flat cake cannot be split into two even horizontal layers of equal thickness. Do not attempt the recipe with suspect leavening.
High altitude and humidity adjustments
At high altitude above 3,500 feet (1,067 meters): reduce baking soda to 1½ teaspoons and baking powder to ¾ teaspoon, increase flour by 2 tablespoons (15g), reduce sugar by 2 tablespoons (25g), and increase hot coffee by 2 tablespoons (30ml). Bake time may decrease by 3–5 minutes — start checking at 28 minutes. A high-altitude cake also has a slightly more fragile crumb structure — refrigerate for the full 30 minutes before splitting rather than attempting to split at room temperature. In high humidity above 70% relative humidity: the whipped cream topping is more vulnerable to deflation — add an additional ½ teaspoon cornstarch to the whipped cream and refrigerate the finished cake immediately after garnishing.
Expert Pro-Tips
Score the perimeter of the cake before committing the full horizontal cut. Run the tip of your serrated knife around the entire edge of the cake at the halfway point, making a shallow guide groove approximately ½ inch (1.2cm) deep all the way around before you begin the full cut. This groove keeps the knife at the correct height as you saw inward and prevents the blade from drifting up or down through the interior of the cake. It takes 30 extra seconds and is the single most reliable technique for a level split on a 9×13 sheet cake.
Warm the chocolate sauce to exactly pourable consistency before drizzling. A sauce that is too cold clumps and drags across the whipped cream rather than flowing freely. A sauce that is too hot melts the cream on contact and creates a brown-stained surface rather than a clean drizzle. Ten seconds in the microwave, stir, ten more seconds if needed — the sauce should run off a spoon in a thin, slow stream before it goes on the cake.
Chill the knife between cuts for the cleanest cross-section slices. Run the blade under very cold water, shake off the excess, and wipe it dry before each cut. A warm knife melts the cream layer on contact and drags the Oreo crumbs across the surface of the slice, obscuring the clean layer definition visible in the photos. Cold blade, single downward motion, wipe between every cut — this is the only reliable way to get a clean cross-section showing all three distinct layers.
Crush the Oreos in two stages for filling with real textural contrast. Process half into fine crumbs and leave the other half as coarse broken pieces — either by hand or with a few brief pulses. The fine crumbs dissolve into the pudding and flavor the entire filling layer. The coarse pieces stay distinct and give you the cookies-and-cream texture visible in the cross-section photos — individual dark Oreo pieces in a white cream background. A uniformly fine crumb throughout flavors the filling but loses the contrast entirely.
Frequently Asked Questions About Oreo Poke Cake
Can I make oreo poke cake ahead of time?
Yes — and I actively recommend it. This cake is better made the night before serving than assembled and served the same day. The filling needs a minimum of 2 hours to set between the layers, but overnight refrigeration produces a noticeably more integrated result where the pudding layer has fully firmed and the two cake layers have settled into a stable, cohesive structure that slices more cleanly. Assemble the cake completely through the whipped cream topping and garnish, cover loosely with tented plastic wrap, and refrigerate up to 24 hours before serving. The stabilized whipped cream topping holds well for up to 36 hours in the refrigerator without deflating.
Can I use a box mix instead of making the cake from scratch?
Yes, with one important adjustment. Use a standard 15.25 oz devil’s food cake mix and prepare it according to the package directions, but substitute hot strong brewed coffee for any water called for in the instructions — this blooms the cocoa in the mix and deepens the color and flavor significantly. The crumb will be slightly less dark than the scratch version and the texture slightly lighter, but it will still split into two even horizontal layers and hold the filling cleanly between them.
One exception: box mixes with added pudding in the mix — not the same as adding pudding to the filling — produce a denser, more compact crumb that is harder to split cleanly even when fully cold. Avoid pudding-in-the-mix varieties specifically.
Do not use a cake mix that already contains pudding in the mix — it produces a denser, more compact crumb that is harder to split cleanly and does not hold the filling layer as distinctly. Bake time follows the package instructions for a 9×13 pan.
How do I split the cake into two even layers without it breaking?
The two non-negotiables are temperature and tool. The cake must be completely cold — room temperature for at least 1 hour, then refrigerated for 30 minutes — before the knife goes in. A warm cake crumbles rather than splits because the crumb structure has not fully firmed. Use a long serrated knife, not a straight blade — the serrated edge saws through the crumb without tearing it the way a smooth blade does. Score a shallow guide groove around the entire perimeter at the halfway point first, then follow that groove inward with slow horizontal sawing strokes and no downward pressure. If you own a cake leveler, use it — it removes the guesswork from maintaining a level cut across a 9×13 surface. A cracked top layer is still usable; the whipped cream topping covers surface breaks completely.
Why is my poke cake filling not absorbing?
The filling shifts or squeezes out for one of two reasons: it was made too thin, or it was spread onto a cake layer that was not fully cold. Instant pudding filling continues to thicken as it sits — whisk the pudding mix and cold milk for the full 2 minutes before adding the heavy cream, and use exactly 1 cup (240ml) of milk rather than more. At correct consistency the filling holds a soft peak on a spoon and spreads like a thick frosting. If it runs off the spoon, it is too thin to hold between layers and will squeeze out under the weight of the top cake. For a related look at how moisture and filling behave differently across cookies-and-cream style recipes, see my cookies and cream cookies article.
Can I double or halve this oreo poke cake recipe?
You can halve it. Use an 8×8 inch (20x20cm) pan, reduce all ingredients by half, and reduce baking soda to ¾ teaspoon and baking powder to ½ teaspoon — leavening does not scale linearly and using the full halved amount produces a slightly over-leavened cake that domes in the center and is uneven to split horizontally. Bake time reduces to approximately 24–28 minutes — start checking at 24 minutes. Doubling is not recommended in a single pan — a doubled batter in one larger pan bakes unevenly and the center will not cook through before the edges overbake. To double the yield, make two separate 9×13 pans as independent batches.
How does altitude or humidity affect this cake?
At high altitude above 3,500 feet (1,067 meters), leavening gases expand faster and the cake rises too quickly before the crumb structure sets, which can produce a fragile, uneven interior that crumbles when you attempt to split it horizontally. Reduce baking soda to 1½ teaspoons and baking powder to ¾ teaspoon, add 2 tablespoons (15g) extra flour, reduce sugar by 2 tablespoons (25g), and increase the hot coffee by 2 tablespoons (30ml). Refrigerate the fully cooled cake for the full 30 minutes — not less — before splitting, as high-altitude crumb structure is more delicate than at sea level.
In high humidity above 70% relative humidity, the whipped cream topping is at higher risk of deflating — add an extra ½ teaspoon of cornstarch to the stabilized whipped cream and refrigerate the assembled cake immediately after garnishing.
Why did my cake sink in the middle?
A sunken center is almost always an oven temperature problem, and in a two-layer assembly it creates a second consequence beyond just appearance — an uneven baked surface makes the horizontal split uneven, producing one layer that is thicker at the edges and one that is thicker in the center. The scratch batter in this recipe is heavy with cocoa and liquid and needs a correctly calibrated 350°F (175°C) to set the crumb structure before the leavening gases escape. An oven running 15–20°F lower than its dial shows produces a center that appears set on the surface but has not cooked through, and it collapses as it cools. Confirm your oven temperature with an oven thermometer before baking.
The second most common cause is opening the oven door before 28 minutes — the temperature drop deflates the structure before it has set. A slightly sunken cake can still be split and filled — the whipped cream topping will disguise the depression on the finished surface.
More Cakes You’ll Love
- Biscoff Icebox Cake — Layers of Biscoff cookies and spiced cream that set overnight in the refrigerator into a sliceable, no-bake cake with a caramelized cookie flavor in every bite.
- Chocolate Mug Cake — A single-serving chocolate cake ready in 90 seconds when the craving hits and making a full pan is not the answer.

Oreo Poke Cake
Ingredients
Equipment
Method
- Step 1: Preheat oven to 350°F (175°C) with the rack in the middle position, line a 9×13 inch (23x33cm) light-colored aluminum pan with parchment paper leaving a 1-inch overhang on both long sides, then lightly grease the parchment and exposed short sides — the parchment overhang is essential for lifting the cooled cake out of the pan cleanly before splitting into two layers.
- Step 2: In a large mixing bowl whisk together the flour, plain white granulated cane sugar, Dutch-process cocoa powder, baking soda, baking powder, and fine sea salt for a full 60 seconds until uniformly dark with no cocoa clumps and no pale flour streaks visible anywhere in the mixture including at the bottom of the bowl.
- Step 3: Add the room-temperature eggs, room-temperature whole milk, neutral oil, and pure vanilla extract into the center of the dry ingredients and whisk from the center outward for approximately 30 strokes until just combined — the batter will still look slightly lumpy and uneven, which is correct, and overmixing at this stage produces a tight crumb that is difficult to split cleanly into two even layers.
- Step 4: Pour the hot strong brewed coffee in a slow steady stream around the edge of the bowl while whisking gently until fully incorporated — the batter will thin noticeably and deepen to a near-black color as the Dutch-process cocoa blooms, and the finished batter should look glossy, very dark, and pourable like a thick pancake batter.
- Step 5: Pour the batter into the prepared pan, spread to the corners with an offset spatula, and bake at 350°F (175°C) for 32–35 minutes until a toothpick inserted in the center comes out with moist crumbs — not wet batter and not completely clean — then leave the cake in the pan on a wire rack for exactly 10 minutes before using the parchment overhang to lift it out, and cool completely at room temperature for at least 1 hour followed by 30 minutes in the refrigerator before splitting — this cooling sequence is for the pre-split stage only and is separate from the post-assembly storage rules.
- Step 6: Place the fully cold cake on a stable flat surface, score a shallow guide groove around the entire perimeter at the halfway point with a serrated knife, then use slow horizontal sawing strokes with no downward pressure to split the cake into two even layers, lift the top layer off carefully using both hands or a wide offset spatula slid underneath for support, and place it cut-side up on a piece of parchment nearby.
- Step 7: Using the handle of a wooden spoon, poke holes across the entire surface of the bottom cake layer spaced approximately 1 inch (2.5cm) apart and pushed down to about ¾ of the depth of the layer — approximately 20–25 holes total — to create anchor points that grip the filling and prevent it from shifting when the top layer is placed.
- Step 8: Whisk the instant vanilla pudding mix and 1 cup (240ml) cold whole milk together for 2 full minutes until thick and spoonable — not pourable — then add the cold heavy whipping cream and whisk 30 seconds to a spreadable consistency, fold in the crushed Oreo fine crumbs and coarse pieces, then spread the filling in an even ¾-inch (2cm) layer across the entire surface of the bottom cake layer pressing gently into the poked holes with an offset spatula until the surface is fully covered with no bare patches.
- Step 9: Carefully lower the top cake layer cut-side down straight onto the filling without sliding it, press very gently across the surface to seat it level, and refrigerate the assembled cake uncovered for a minimum of 2 hours or overnight until the filling is completely set and cold before applying the topping.
- Step 10: Combine the cold heavy whipping cream, sifted powdered sugar, pure vanilla extract, and cornstarch in a cold bowl and whip with a hand mixer or stand mixer on medium then high speed for 2–3 minutes until stiff peaks form — stop immediately at stiff peaks, do not over-whip.
- Step 11: Spread the stabilized whipped cream in a generous even layer approximately ¾ inch (2cm) thick across the entire chilled assembled cake, drizzle the warmed chocolate fudge sauce in a free-form pattern over the cream, press whole Oreo cookies firmly into the cream at evenly spaced intervals, scatter the crushed Oreo crumbs across the surface, refrigerate for at least 30 minutes to firm the topping, then slice with a hot-water-warmed knife wiped clean between every cut — 3 columns by 4 rows yields exactly 12 slices at approximately 3×3 inches (7.5×7.5cm) each, approximately 175–180g per slice.