
Soft Sugar Free Sugar Cookies

The problem with sugar-free cut-out cookies is not the sweetener — it is treating the sweetener like a 1:1 swap. I have baked sugar free sugar cookies in my LA kitchen across more than twenty test batches, and the version you are reading right now is the one that finally produced the clean-edged hearts, stars, and rounds you see in the photos.
I tested erythritol at three cream ratios: standard (1:1 by volume with butter), reduced (¾ cup to ½ cup butter), and increased (1¼ cup to ½ cup butter). The reduced ratio produced a flat, pale cookie with almost no structure — the butter dominated and the dough spread before the edges had time to set. The increased ratio produced a gritty, dense cookie with an overwhelming cooling effect on the palate. The 1:1 ratio — 192g erythritol to 113g butter — is the version I kept. It creams properly, produces a dough with enough body to roll and cut cleanly, and bakes to the soft, matte-surfaced cookie shown in every photo.
I tested chill time at four durations: no chill, 30 minutes, 1 hour, and 2 hours. No chill produced cookies that spread and lost their shape entirely within the first 3 minutes of baking — the hearts were unrecognizable. The 30-minute chill improved shape retention but the star points still softened and rounded. The 1-hour chill produced clean edges and held every cut precisely through the full bake. The 2-hour chill produced marginally cleaner edges with no other difference. One hour minimum is the rule. Two hours is better.
🗒 Luna’s Note: I always weigh my erythritol instead of measuring by volume. It packs and sifts inconsistently, and even a few grams off in either direction changes how the dough creams. A kitchen scale is the single most important tool for this recipe.
The texture is soft with a slight density — not crispy, not cakey. The crumb is fine and tight, the way a well-made cut-out sugar cookie should be. The edges hold their shape exactly as cut because the dough is chilled before rolling. These are cookies you can frost or decorate — or eat plain with a light dusting of granulated erythritol on top, which is exactly what you see in the photos.
One thing to know before you start: this recipe requires a mixer — stand or hand — for the creaming step. Creaming cold butter by hand does not produce the right result. The dough must chill for at least one hour before rolling. Skipping the chill means the shapes spread and blur in the oven — the hearts and stars in the photos only happen with fully chilled dough. No refined sugar. No corn syrup. A well-tested recipe that actually works.
| Prep Time | Chill Time | Cook Time | Total Time | Yield | Difficulty |
|---|---|---|---|---|---|
| 20 min | 1 hour | 10–12 min | 1 hr 45 min | 24 cookies | Intermediate |
| Calories | Fat | Carbs | Sugar | Protein |
|---|---|---|---|---|
| ~88 kcal | ~5g | ~9g | ~0g | ~1g |
Macros are approximate and will vary based on ingredient brands and serving size. Erythritol contributes 0 net carbs and 0 calories — it is not metabolized. Sugar column reflects refined sugar content only: 0g.
Ingredients & Tools
For the Cookies
- 2¼ cups (270g) all-purpose flour, spooned into the measuring cup and leveled — do not pack
- 1 cup (192g) granulated erythritol — see note below
- ½ tsp (3g) fine sea salt
- ½ tsp (2g) baking powder, checked for freshness
- ¼ tsp (1g) cream of tartar
- ½ cup (113g) unsalted butter, softened to 65–68°F (18–20°C) — not melted, not cold
- 1 large egg, room temperature
- 1½ tsp (7.5ml) pure vanilla extract — not imitation
Optional Finish
- 2–3 tbsp (24–36g) granulated erythritol, for dusting on top before baking

Ingredient Notes
Erythritol: Use a brand with a fine, consistent crystal size — Swerve Granular or Anthony’s Granulated Erythritol both work reliably. Do not use powdered erythritol here — it lacks the structure needed for creaming. Do not use monk fruit blends with erythritol as the base unless the blend is 100% erythritol-equivalent in sweetness — blends vary and will change the dough behavior. Erythritol has a mild cooling effect on the palate when eaten at room temperature. This is normal and fades slightly when the cookies are eaten at room temperature after a full cool.
Butter: Must be softened to 65–68°F (18–20°C). Press your finger into the stick — it should leave a clean indent without the butter collapsing or feeling greasy. Too warm and the cookies spread. Too cold and the erythritol will not cream in properly and the dough will feel grainy and stiff.
Flour: All-purpose only. Spoon into the measuring cup and level with a straight edge — never scoop directly from the bag. Scooping compacts the flour and adds 20–30% more than the recipe requires. Use a kitchen scale if you have one: 270g is exact.
Cream of tartar: This is not optional. It stabilizes the dough and contributes a very faint tang that rounds out the flat sweetness of erythritol. Without it, these cookies taste noticeably one-dimensional.
Egg: Room temperature. Cold eggs do not incorporate evenly into creamed butter and can cause the mixture to look curdled. Pull it from the fridge 30 minutes before you start.
Necessary Tools
- Kitchen scale (strongly recommended — gram weights take priority over volume in this recipe)
- Stand mixer with paddle attachment, or hand mixer with beaters
- Large mixing bowl (if using hand mixer)
- Silicone spatula, for scraping the bowl
- Plastic wrap, for chilling the dough
- Rolling pin
- Cookie cutters in your preferred shapes
- Light-colored aluminum baking sheet — not dark, not insulated
- Parchment paper (not foil, not a greased pan)
- Thin metal spatula or small offset spatula, for transferring cut cookies
- Wire cooling rack
Optional:
- Oven thermometer — recommended. Most home ovens run 15–25°F off. Confirms actual baking temperature before the first pan goes in.
- Ruler — for checking dough thickness at multiple points during rolling
Before You Start
- Gram weights take priority over volume in this recipe. Erythritol and flour both measure inconsistently by volume. Use a scale.
- Butter must be at 65–68°F before you begin. This is not approximate — under-softened butter will not cream properly with erythritol, and over-softened butter causes spread.
- Pull your egg from the fridge at least 30 minutes before starting.
- Clear space in your refrigerator for a full sheet of dough wrapped in plastic. The dough needs a flat, undisturbed surface to chill evenly.
- Do not preheat the oven until the dough has finished chilling. Position your oven rack in the middle of the oven before preheating. Top rack burns the tops. Bottom rack burns the bottoms. Middle rack is the only correct position for these cookies.
- Light-colored aluminum pans only. Check your baking powder for freshness before mixing begins. Drop ½ tsp into a small cup of hot water — if it bubbles vigorously within 10 seconds, it is active. If it sits flat with no reaction, it is dead and your cookies will bake dense and flat. Replace it before proceeding. Baking powder loses potency after 6–12 months even in a sealed container.
How to Make Sugar Free Sugar Cookies
Step 1: Whisking the Dry Ingredients Together
In a medium mixing bowl, whisk together your 2¼ cups (270g) all-purpose flour, spooned and leveled, ½ tsp (2g) baking powder, ¼ tsp (1g) cream of tartar, and ½ tsp (3g) fine sea salt. The baking powder provides the faint lift that keeps these cookies from baking dense and flat — check the freshness date before it goes in. The cream of tartar is doing structural and flavor work simultaneously: it slows the spread of the dough in the oven and adds a faint tang that counteracts the one-dimensional sweetness of erythritol. Whisk for approximately 20 strokes until the mixture is fully uniform and no streaks of any single ingredient remain.
The dry mix should look pale, uniform, and completely streak-free — if you can still see pockets of any single ingredient, whisk for another 10 strokes.
⚠️ Do not add the erythritol to the dry bowl — erythritol goes into the butter during creaming, not into the flour mixture. Adding it here will change how it interacts with the fat and produce a dough that does not cream correctly. Set the dry bowl aside.
Your dry ingredients are ready — move directly to the creaming step without letting them sit open for more than a few minutes.
Step 2: Creaming the Butter and Erythritol Until Pale and Smooth
In the bowl of your stand mixer fitted with the paddle attachment — or in a large mixing bowl if using a hand mixer — add your ½ cup (113g) unsalted butter, softened to 65–68°F (18–20°C) and your 1 cup (192g) granulated erythritol. Beat on medium speed (speed 4 on a KitchenAid) for 3 full minutes. Set a timer — do not estimate.
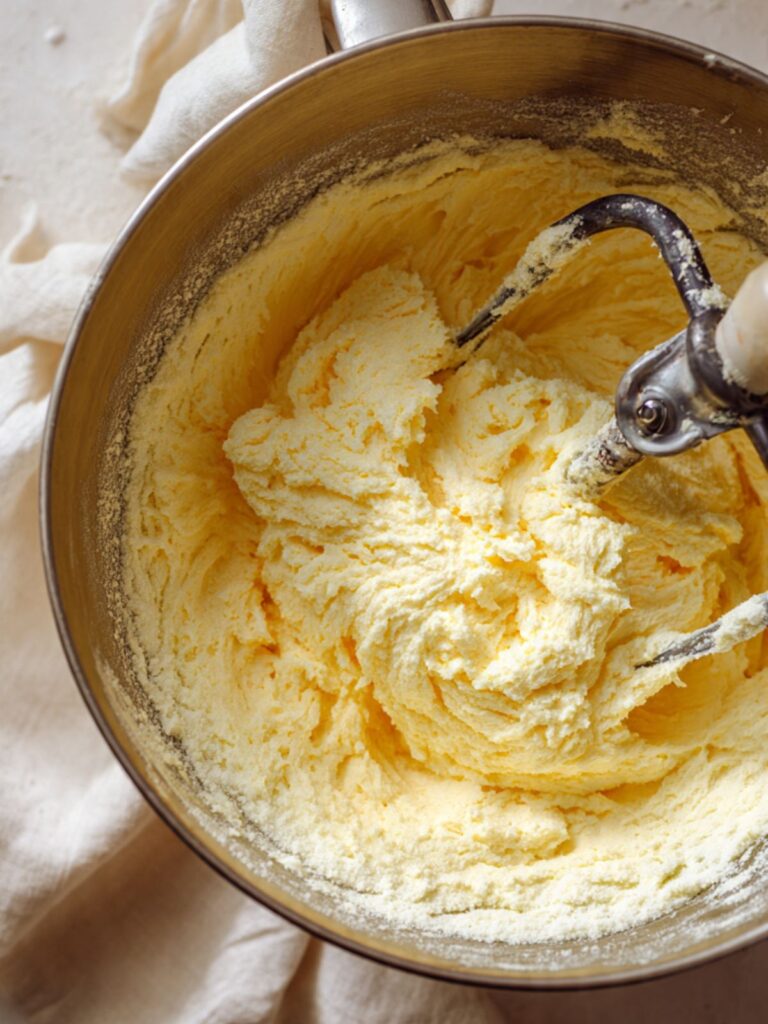
Erythritol does not cream into butter exactly the way cane sugar does. Cane sugar dissolves partially during creaming and creates a smooth, fluffy mass. Erythritol does not dissolve — it stays granular throughout. What you are looking for instead is a pale, cohesive mixture where the erythritol crystals are fully coated in butter and the mixture has lightened slightly in color and taken on a slightly fluffy texture. After 3 minutes, stop the mixer and scrape down the sides and bottom of the bowl completely with a silicone spatula. Return to medium speed for 1 more minute.
The creamed mixture should look pale yellow to nearly white, slightly fluffy, and hold together when pressed between your fingers — if it still looks greasy and yellow with visible uncoated crystals, beat for another 60 seconds and check again.
⚠️ Do not over-cream past 5 minutes total — incorporating too much air into a cookie dough that needs to hold its shape causes the cookies to puff unevenly in the oven and lose their cut-out definition.
The butter and erythritol are ready — the egg goes in next.
Step 3: Adding the Egg and Vanilla
With the mixer on low speed, add your 1 large egg, room temperature and your 1½ tsp (7.5ml) pure vanilla extract. Increase to medium speed and beat for 1 minute until fully incorporated. Stop the mixer and scrape down the sides and bottom of the bowl — erythritol tends to settle at the base of the bowl and the scrape is not optional here.
The vanilla is doing more than flavoring. In a recipe with no cane sugar, vanilla carries a disproportionate amount of the overall flavor profile. Do not reduce it.
The mixture should look smooth, slightly glossy, and fully cohesive — no visible streaks of egg white, no separation, no greasy sheen. If it looks broken or curdled, the egg was too cold. Continue beating on medium for another 60 seconds — it will come back together.
🗒 Luna’s Note: I always crack my egg into a small bowl before adding it to the mixer. Erythritol dough is less forgiving than standard sugar cookie dough — if a shell fragment goes in, fishing it out of this mixture is genuinely difficult.
Your wet mixture is ready — add the dry ingredients in the next step.
Step 4: Adding the Dry Ingredients Without Overworking the Dough
With the mixer on the lowest speed, add the dry ingredient mixture in two additions — half first, let it incorporate for about 15 seconds, then add the second half. Once the second addition goes in, mix only until no dry flour streaks remain — approximately 20 to 30 seconds on low. Stop the mixer immediately when the dough comes together.
Overmixing after the flour goes in develops gluten. In a standard cookie this creates toughness. In a sugar-free cut-out cookie it creates a dough that springs back aggressively when rolled, fights the cookie cutters, and produces cookies with ragged rather than clean edges.
The dough should look shaggy and slightly rough at first, then pull together into a cohesive mass that clears the sides of the bowl — if it looks wet or slack, the butter was too warm. If it looks crumbly and will not hold together when pressed, add 1 tsp (5ml) of cold water and mix for 10 more seconds.
⚠️ If your dough crumbles apart when you press a handful together, erythritol is almost certainly the cause — it does not bind moisture the way cane sugar does. Add cold water 1 teaspoon at a time, mixing briefly after each addition, until the dough just holds together when pressed.
The dough is mixed — divide and wrap it now.
Step 5: Dividing, Wrapping, and Chilling the Dough
Turn the dough out onto a clean surface and divide it into two equal portions. Flatten each portion into a disc approximately ¾ inch (2cm) thick — a disc chills faster and more evenly than a ball, and it is easier to roll out cold. Wrap each disc tightly in plastic wrap and refrigerate for a minimum of 1 hour. Two hours is better. Do not skip this step.
The chilling step is doing two things simultaneously: it firms the butter back up so the cookies hold their shape in the oven, and it gives the flour time to fully hydrate, which makes the dough easier to roll and less prone to cracking at the edges.
The dough discs should feel firm and cold all the way through when you press the center — if the center still feels soft, give it another 20 minutes in the fridge before rolling.
⚠️ Do not chill the dough as a single ball — the exterior will be cold but the center will still be soft, and you will end up rolling one portion of properly chilled dough and one portion of under-chilled dough from the same batch.
🗒 Luna’s Note: I always chill my dough overnight when I have time. The cookies from a 12-hour chill are noticeably better — the edges are cleaner, the dough rolls without cracking, and the flavor has more depth. If you are planning ahead, the wrapped discs keep in the fridge for up to 3 days.
The dough is chilling — preheat the oven now, 20 minutes before the dough comes out.
Step 6: Preheating the Oven and Preparing the Baking Surface
Position your oven rack in the middle position. Heat the oven to 325°F (163°C). The lower temperature is deliberate — standard sugar cookies bake at 350°F (175°C), but erythritol-sweetened doughs are more prone to over-browning on the bottom before the centers are fully set. 325°F (163°C) gives the cookies time to bake through evenly without the bases going too dark.
Most home ovens run 15–25°F (8–14°C) hotter or cooler than the dial setting. If you have an oven thermometer, place it on the middle rack and confirm the actual temperature before the first pan goes in. A 25°F (14°C) difference in either direction will change your bake time and your results.
Line your light-colored aluminum baking sheet with parchment paper. Do not grease the pan — greasing changes how the cookie base spreads. Do not use foil — foil conducts heat differently than parchment and causes the bottoms to over-brown. Do not use a dark pan — dark pans absorb heat faster and will brown the bottoms before the centers are set.
The oven should be at full temperature for at least 15 minutes before the first pan goes in — an under-preheated oven causes spreading in the first 2 minutes of baking, before the fat has time to set.
The oven is ready — roll and cut the first disc now.
Step 7: Rolling, Cutting, and Transferring the Cookies

Cut your shapes as close together as possible to minimize scraps. Press the cutter straight down with firm, even pressure and lift cleanly — do not twist the cutter, which drags the edges and blurs the shape definition. Use a thin metal spatula or small offset spatula to transfer each cut cookie directly to the parchment-lined baking sheet, spacing them 1½ inches (4cm) apart. These cookies spread minimally — you can fit more per pan than a standard drop cookie.
For a yield of 24 cookies at approximately 2½ inches (6.5cm) across, each cut cookie should weigh approximately 18–20g before baking. Weigh the first cookie you cut on your kitchen scale and use it as your calibration piece — if it reads noticeably under or over, adjust your rolling thickness before cutting the remaining cookies. Consistent weight means consistent bake time across the entire batch.

As you can see in the overhead photo, the hearts, stars, and rounds all maintain their exact cut shape — this only happens when the dough is fully chilled and rolled to a consistent ¼ inch (6mm) thickness throughout.
If the dough softens while you are cutting — it will feel slightly tacky and the shapes will start to lose definition — slide the parchment with the cut cookies on it directly into the fridge for 10 minutes before baking. Do not bake soft dough.
If desired, sprinkle a light, even layer of granulated erythritol over each cookie before baking — this creates the fine sparkle visible on the cookies in the photos.
⚠️ Gather dough scraps, press them gently together, re-wrap in plastic, and refrigerate for 10 minutes before re-rolling. Do not re-roll warm scraps — the cookies from warm scrap dough will spread more than the first-cut cookies.
Your cut cookies are on the pan — bake them now.
Step 8: Baking to Pale, Set Edges with Soft Centers
Place the pan on the middle rack of your preheated 325°F (163°C) oven. Bake for 10 to 12 minutes. Start checking at the 10-minute mark.
Pull the pan the moment the edges look set and just barely beginning to turn the faintest golden — the centers should still look very slightly soft and matte. Do not wait for the centers to look done. Do not wait for obvious browning. Erythritol-sweetened cookies do not develop the same golden-brown color as cane sugar cookies during baking — the visual cue is edge-set, not color change.
As you can see in the close-up photo showing the bitten cookie, the interior crumb is pale cream, fine, and tight — not doughy, not cakey. That crumb comes from pulling at exactly the right moment and allowing carryover heat to finish the job on the pan.
The edges should look firm and set, the surface should look matte and dry, and the centers should look ever so slightly softer than the edges — this is the correct pull moment. Cookies that look fully done in the oven will be over-dry and slightly hard once cooled.
⚠️ Do not open the oven door before 9 minutes — the temperature drop in the first minutes of baking is when the shape sets. An early door opening causes the edges to lose definition before they firm up.
Leave the cookies on the hot pan — do not move them yet.
Step 9: Cooling on the Pan, Then the Rack
Leave the baked cookies on the hot pan for exactly 5 minutes after pulling from the oven. Do not move them. The pan continues to conduct heat into the cookie base during this window — this is carryover cooking, and it finishes the centers without the oven drying them out. Erythritol-sweetened cookies are more fragile straight from the oven than standard sugar cookies — they firm up significantly as they cool and the erythritol re-crystallizes.

After 5 minutes, use your thin metal spatula to transfer each cookie to a wire cooling rack. Let them cool completely — at least 20 minutes — before stacking, storing, or eating. The texture improves noticeably as the cookies cool fully. A warm sugar-free sugar cookie has a slightly grainy texture on the surface as the erythritol re-crystallizes. At full room temperature, that texture smooths out and the cookie firms into its final texture.
After 5 minutes on the pan, the cookies should feel firm enough to lift cleanly with a spatula without bending — if they still feel fragile and flex when lifted, give them 2 more minutes on the pan before moving.
Do not stack warm cookies — they will stick together as the erythritol re-crystallizes on contact with another warm surface.
Bake the second disc while the first batch cools, following the same steps from Step 7.
The Science Behind Sugar Free Sugar Cookies
Why Erythritol Behaves Differently Than Cane Sugar in Cookie Dough

Erythritol is a sugar alcohol that occurs naturally in small amounts in some fruits. In baking, it registers at approximately 70% of the sweetness of cane sugar but contributes zero metabolized calories and zero net carbs because the body absorbs it in the small intestine and excretes it unchanged. The baking behavior difference is significant and worth understanding before you bake. Cane sugar is hygroscopic — it actively attracts and holds moisture from the surrounding dough. This moisture retention is what keeps a standard sugar cookie soft for days after baking. Erythritol is not hygroscopic in the same way. It does not pull moisture into the dough structure, which means these cookies dry out faster than standard sugar cookies and must be stored correctly from the moment they are fully cooled. The other major difference is that erythritol does not melt during baking the way cane sugar does. In a standard sugar cookie, the sugar partially melts and then re-solidifies as the cookie cools, creating the slight surface sheen and crispness at the edges. Erythritol stays crystalline throughout the bake, which is why these cookies have a matte surface rather than a glossy one — exactly as shown in the photos.
Why This Dough Must Be Chilled and Cane Sugar Dough Often Does Not
In a standard cut-out sugar cookie made with cane sugar, the sugar helps create a dough that is firm enough to roll without chilling — the dissolved sugar adds body and structure. Erythritol does not dissolve into the dough the same way. The dough stays slightly more butter-forward in its structure, which means the fat needs to be physically firmed back up by refrigeration before the dough can hold a clean cut edge. A warm erythritol dough rolls softly and the shapes spread and blur in the oven. A cold erythritol dough rolls cleanly, holds the cutter impression through the entire bake, and produces the clean-edged hearts and stars visible in the photos. The one-hour minimum chill is structural, not optional. You can also see this mechanic at work in my cut out sugar cookies recipe — the same chilling principle applies, for slightly different reasons.
Why the Oven Temperature Is Lower Than a Standard Sugar Cookie
Standard sugar cookie recipes typically bake at 350°F (175°C). This recipe bakes at 325°F (163°C). The reason is browning behavior. Cane sugar caramelizes during baking and contributes to edge color in a controlled, gradual way. Erythritol does not caramelize. Without the caramelization buffer, the butter and flour in the dough reach over-browning temperature faster than in a standard sugar cookie — particularly on the bottom where the pan conducts direct heat. The lower oven temperature gives the cookies enough time to bake through completely before the bases over-brown. If you bake these at 350°F (175°C), the bottoms will be noticeably darker than the tops and the overall texture will be dryer than what the photos show.
Why Cream of Tartar Is Non-Negotiable in This Recipe
Cream of tartar — potassium bitartrate — is an acidic byproduct of wine fermentation. In standard snickerdoodle and sugar cookie recipes, it contributes a faint tang and helps control spread by slightly acidifying the dough. In this recipe it is doing additional work. Erythritol on its own produces a sweetness that can read as flat or chemical at the back of the palate — a known characteristic of sugar alcohols. The acidity of cream of tartar counteracts this by introducing a counterpoint flavor that rounds out the sweetness profile and makes the cookie taste more complete. It also helps the baking powder activate at the right moment during baking, contributing to the faint lift visible in the interior crumb in the photos. Removing it produces a cookie that tastes noticeably one-dimensional.
Why These Cookies Firm Up as They Cool
The texture change between a warm sugar-free sugar cookie and a fully cooled one is more pronounced than in a standard sugar cookie, and it surprises a lot of bakers the first time. Warm from the oven, the surface feels slightly gritty and the cookie feels softer than expected. As the cookie cools to room temperature, the erythritol re-crystallizes within the dough structure and the cookie firms and smooths noticeably. This is the re-crystallization behavior of erythritol — the same property that causes erythritol to leave a cooling sensation on the palate. Do not judge the texture of these cookies warm. The final texture — fine, tight crumb, smooth surface, soft but not fragile — only appears once the cookie has cooled fully on the rack for at least 20 minutes.
🗒 Luna’s Note: I always taste-test one cookie from the cooling rack at the 20-minute mark and again at the 40-minute mark. The flavor difference between those two points is noticeable — the cooling effect of the erythritol fades and the vanilla comes forward as the cookie reaches full room temperature. The 40-minute cookie is always the better one.
Sugar Free Sugar Cookies Troubleshooting & Pro-Tips
Why Your Cookies Taste Wrong Before You Even Bake Them
Symptom: The dough looks and feels off from the start — it will not hold together properly, the texture feels wrong when pressing it between your fingers, or after baking the cookies have a sharp medicinal aftertaste or a cooling sensation so intense it is unpleasant rather than faint.
Cause: The wrong sweetener was used. This recipe is engineered specifically around granulated erythritol — not powdered erythritol, not liquid stevia, not liquid monk fruit, not xylitol, and not a monk fruit blend unless erythritol is the first and primary ingredient on the label. Powdered erythritol has a finer particle density than granulated and does not cream into butter the same way — it produces a dough that feels too smooth and fine, and cookies that bake to a slightly chalky, dry result. Liquid sweeteners add moisture without contributing any structure — the dough will not hold together and cut shapes are impossible. Xylitol superficially resembles erythritol in a dough but has a stronger cooling effect on the palate and behaves differently during baking. Monk fruit blends vary so widely between brands that behavior is genuinely unpredictable unless you confirm the label.
Fix: If already baked with the wrong sweetener, the batch cannot be corrected. Identify exactly which sweetener was used, then refer to the FAQ section on sweetener substitutions for guidance on which alternatives work and the specific adjustments each requires.
Prevention: Use granulated erythritol only. Check the label before adding anything to the bowl — the word “granulated” must appear on the packaging. Swerve Granular and Anthony’s Granulated Erythritol are the two most reliably consistent brands for this recipe. Weigh at 192g rather than measuring by volume — erythritol packs and sifts inconsistently and a volume measurement introduces more error than with any other ingredient in this recipe.
Why Your Cookie Bottoms Over-Browned While the Tops Stayed Pale
Symptom: The tops of the cookies look exactly right — pale cream, matte, set edges — but the bottoms are noticeably darker, ranging from deep golden to dark brown, and the texture on the bottom is dry and slightly hard when bitten.
Cause: The pan conducted too much heat too quickly. This happens when a dark-colored pan was used, when the oven was running hotter than the dial setting, or when the rack was positioned too low. Erythritol-sweetened doughs are more sensitive to bottom heat than cane sugar doughs because erythritol does not dissolve into the dough the way cane sugar does — dissolved sugar in a standard dough buffers the base against direct pan heat. Without that buffer, bottom heat reaches the flour and butter directly and the base overbrowns before the top has registered any color change at all.
Fix: Cookies already baked with dark bottoms cannot be reversed. The top and interior are still fully edible. For the next batch, switch to a light-colored aluminum pan if you used a dark one. Reduce oven temperature by 10°F (5°C) if your oven thermometer confirms the oven is running hot. Move the rack to the middle position if it was lower.
Prevention: Light-colored aluminum baking sheet only, middle rack position, and a confirmed oven temperature with an oven thermometer before the first pan goes in. Never use a dark non-stick pan, an insulated baking sheet, or a glass pan for these cookies.
Why Your Cookies Spread and Lost Their Shape
Symptom: The hearts, stars, or rounds spread in the oven and the edges blurred — the cookies look like vague rounded blobs rather than the defined cut shapes visible in the photos. The star points softened and merged. The heart indent filled in.
Cause: The dough was not cold enough when it went into the oven. Butter that is still soft from the creaming step begins melting in the first 2–3 minutes of baking, before the cookie edges have time to set. Once the butter melts, the shape is gone — the structure cannot recover. This happens when the dough was under-chilled, when the cut cookies sat on the counter too long between cutting and baking, when the oven was under-preheated and the cookies spent extra time in low heat before the edges set, or when the dough was rolled at the wrong thickness — cookies rolled thinner than ¼ inch (6mm) spread faster because there is less dough mass to hold the shape.
Fix: For any unbaked cut cookies still on the counter, slide the parchment directly into the fridge for 10 minutes before baking. Confirm the oven is at full 325°F (163°C) with an oven thermometer before the next pan goes in. Check rolling thickness — ¼ inch (6mm) is the minimum.
Prevention: Chill the dough for the full 1-hour minimum — 2 hours is better. Work with one disc at a time and keep the second disc refrigerated until needed. If the dough softens during cutting, refrigerate the cut shapes on their parchment for 10 minutes before baking. Never bake soft dough regardless of how much time it adds to the process.
Why Your Cookies Taste Flat or Have an Unpleasant Aftertaste
Symptom: The cookies are the right shape and the right texture visually but the flavor is one-dimensional, hollow, or slightly medicinal — a flat sweetness that does not taste like a proper sugar cookie, with a lingering aftertaste at the back of the palate that was not expected.
Cause: Three specific variables produce this result. First: the cream of tartar was omitted or reduced. Cream of tartar is doing active flavor work in this recipe — it introduces a counterpoint acidity that rounds out the characteristic flat sweetness of erythritol and makes the finished cookie taste complete rather than hollow. Without it, erythritol’s one-dimensional sweetness is fully exposed. Second: the vanilla extract was reduced or imitation vanilla was used. In a recipe with no cane sugar, vanilla is not a background note — it is the primary flavor carrier. Imitation vanilla introduces a chemical compound called vanillin that reads as artificial and compounds erythritol’s already-present aftertaste. Third: the cookies were tasted warm. Erythritol produces its strongest cooling effect and flattest flavor profile when warm — the flavor rounds out and the cooling effect fades significantly as the cookie reaches full room temperature.
Fix: If the cookies are already baked, let them cool fully on the rack for at least 40 minutes before evaluating the flavor. A cookie tasted at 10 minutes and a cookie tasted at 40 minutes are noticeably different. If the flavor is still flat after full cooling, the cream of tartar or vanilla was the issue and must be corrected in the next batch.
Prevention: Measure the cream of tartar precisely at ¼ tsp (1g) — no less. Use pure vanilla extract at the full 1½ tsp (7.5ml). Taste one cookie only after it has cooled completely on the rack.
Why Your Dough Crumbled and Would Not Hold Together
Symptom: The dough fell apart when pressed together after mixing, cracked severely along the edges when rolled, and the cookie cutters produced broken shapes rather than clean cuts — pieces fell away from the cut edge when the cutter was lifted.
Cause: Erythritol does not bind moisture into the dough the way cane sugar does. This recipe has less moisture-binding capacity than a standard sugar cookie dough by design, which means errors that would be minor in a cane sugar dough become more consequential here. If the butter was even slightly under-softened, if the egg was cold when it went in, or if the flour was over-measured by even a tablespoon, the dough will be drier than it needs to be and will not hold together under pressure.
Fix: Add cold water 1 teaspoon (5ml) at a time to the crumbling dough, mixing briefly on low speed after each addition, until the dough just holds together when a small handful is pressed firmly. Do not add more than 3 teaspoons (15ml) total — beyond this the dough becomes too wet and the cookies will spread. Re-wrap and chill for 20 minutes after adding any water before attempting to roll again.
Prevention: Confirm butter temperature is 65–68°F (18–20°C) before beginning — press a finger into the stick, it should leave a clean indent without collapsing. Pull the egg from the fridge 30 minutes before starting. Weigh the flour at exactly 270g rather than measuring by volume.
Why Your Cookies Baked Flat and Dense with No Lift
Symptom: The cookies held their cut shape but baked flatter and denser than expected — the interior crumb visible in the photos is fine and slightly open, but yours is compressed and almost solid. The cookie feels heavier than it looks when picked up.
Cause: The baking powder was expired or inactive. Baking powder loses its leavening power gradually after opening — most brands remain reliable for 6 to 12 months, but heat and humidity accelerate degradation. Inactive baking powder produces no carbon dioxide during baking. The small but necessary amount of lift that keeps these cookies from feeling dense and compressed disappears entirely, and no other ingredient in this recipe compensates for it.
Fix: The already-baked batch cannot be corrected. Test the remaining baking powder before the next batch: drop ½ tsp into a small cup of hot water. Vigorous bubbling within 10 seconds means it is active and reliable. No visible reaction means it is dead — replace it before baking. Do not use baking soda as a substitute — baking soda requires an acidic ingredient to activate, and while cream of tartar is present in this recipe, the ratio is calibrated for baking powder, not baking soda.
Prevention: Check the freshness of your baking powder at the start of every bake. Write the opening date on the container lid with a permanent marker. Replace any container older than 12 months regardless of how much remains, and regardless of whether the seal appears intact.
Why Your Cookies Have a Gritty Surface Texture
Symptom: The surface of the cooled cookies feels rough or slightly sandy when touched — not smooth the way the cookies look in the photos. Running a finger across the top of a cookie produces a faint gritty sensation rather than the matte-smooth surface visible in the images.
Cause: Erythritol re-crystallization on the cookie surface. As erythritol cools after baking, crystals that did not fully integrate into the dough matrix during mixing migrate toward the surface and re-form as visible microcrystals. This is a known physical property of erythritol and it is more pronounced in three specific situations: when a coarse-crystal erythritol brand was used rather than a fine-crystal one, when the cookies cooled too quickly in a cold environment rather than at room temperature, and when warm cookies were stacked directly against each other and the surface erythritol pressed against another warm erythritol surface and fused during re-crystallization.
Fix: The texture cannot be reversed in a baked cookie. It does not affect flavor — it is a surface texture issue only. For the next batch, switch to a fine-crystal brand (Swerve Granular or Anthony’s), cool entirely on a wire rack at room temperature, and do not stack until fully cooled.
Prevention: Weigh erythritol at 192g for consistent crystal distribution throughout the dough. Cool on a wire rack at room temperature for a minimum of 20 minutes before handling — not in the fridge, not in a cold kitchen, and not stacked. Store with parchment paper between every layer.
Altitude and Humidity Note
At high altitude above 3,500 feet (1,067m), reduce baking powder to ⅜ tsp and increase flour by 1 tablespoon (8g). Cookies set faster at altitude — start checking at 9 minutes rather than 10. The lower air pressure causes baked goods to rise faster and set sooner, so the visual pull cues (set edges, matte surface) will appear earlier than they would at sea level. In high-humidity environments, erythritol absorbs ambient moisture more readily than cane sugar, which can make the dough stickier than expected during rolling even after a full chill. If the dough feels tacky despite proper chilling, lightly dust the top sheet of parchment with flour before rolling — use the minimum amount needed and brush off any excess before cutting.
Expert Pro-Tips
Roll the dough between two sheets of parchment paper rather than on a floured surface — extra flour toughens the dough and changes the texture of the finished cookie. The parchment method requires zero extra flour and produces a cleaner, more tender result on every batch.
Use a ruler to check dough thickness at three points — center, midway, and near the edge — every time you roll. Erythritol doughs are denser than cane sugar doughs and the edges roll thinner than the center without it being visible to the eye. Uneven thickness within a single pan means some cookies overbake before others are done.
Press cookie cutters straight down with firm, even pressure and lift cleanly without twisting. Twisting the cutter drags the cut edge and blurs the shape definition. The clean heart and star edges visible in the photos are a direct result of a straight-down, straight-up cut motion every time.
If decorating with royal icing or a glaze, wait until the cookies have fully cooled and reached complete room temperature — at least 40 minutes on the rack, not just slightly warm. Icing applied to a cookie that still has residual warmth absorbs unevenly into the surface as the erythritol continues to re-crystallize beneath it, producing a matte, sunken finish rather than a clean set.
Chill the second dough disc in the freezer for the last 10 minutes while the first batch bakes — this brings it to an even colder starting temperature and produces the cleanest possible cut edges on the second round of cookies.
How to Store Sugar Free Sugar Cookies

Room Temperature Storage
Store fully cooled cookies in a rigid airtight container — not a zip-lock bag, not a loosely covered plate, not a container with a hinged lid that does not seal completely. Erythritol-sweetened cookies lose moisture faster than standard sugar cookies because erythritol does not hold moisture in the dough structure the way cane sugar does. A container that is not truly airtight will produce noticeably drier cookies within 24 hours.
Place a sheet of parchment paper between each layer of cookies. Do not stack directly — erythritol re-crystallizes on the cookie surface as it sits, and stacking without separation causes the surfaces to bond slightly and peel when separated. A glass container with a rubber-sealed lid works better than a plastic container for this recipe — glass does not absorb or transfer odors, and the rubber seal maintains a tighter closure than most plastic snap lids.
At room temperature, these cookies keep well for up to 4 days. Day 1 and Day 2 are the best — the texture is at its softest and the flavor is at its fullest. By Day 3 the cookie firms slightly and the erythritol cooling effect becomes marginally more noticeable. By Day 4 the texture is still acceptable but the cookie has dried noticeably at the edges.
Do not store at room temperature beyond 4 days.
Refrigerator
Refrigeration is not recommended for these cookies. Cold air accelerates erythritol re-crystallization on the surface and the texture becomes noticeably grittier after 24 hours in the fridge. The cooling effect of erythritol on the palate is also more pronounced when the cookies are eaten cold. If you need to store beyond 4 days, freeze instead of refrigerate.
Freezer
These cookies freeze well. Place fully cooled cookies in a single layer on a parchment-lined baking sheet and freeze uncovered for 1 hour until solid — this flash-freeze step prevents the cookies from sticking together or deforming when stored together. Once solid, transfer to a zip-lock freezer bag or a rigid freezer-safe airtight container with parchment between layers. Freeze for up to 2 months.
To thaw, remove from the freezer and place in a single layer on a wire rack at room temperature for 30 to 45 minutes. Do not thaw in the microwave — the erythritol re-crystallizes unevenly under microwave heat and produces a gritty, dry result. Do not thaw in the fridge — see the refrigerator note above.
Freezing unbaked dough: The dough discs freeze well before rolling and cutting. Wrap each disc tightly in plastic wrap, then in a layer of foil, and freeze for up to 3 months. Thaw overnight in the refrigerator — not on the counter. Roll and cut directly from the fridge once thawed. Do not thaw at room temperature — the dough will over-soften unevenly.
Make-Ahead
The dough keeps in the refrigerator, wrapped tightly in plastic, for up to 3 days before rolling. This is the most practical make-ahead option — mix the dough the night before, refrigerate overnight, and roll and bake the next day. Overnight-chilled dough is noticeably easier to roll than one-hour-chilled dough and produces cleaner cut edges.
Serving Suggestion
Serve these cookies at full room temperature — never straight from the fridge and never warm from the oven. The texture and flavor of an erythritol-sweetened cookie are at their best between 20 and 60 minutes after coming off the cooling rack, when the erythritol has fully re-crystallized and the cooling effect has mellowed.
I serve these alongside a cup of black tea or a lightly sweetened coffee — the slight bitterness of either drink counteracts the erythritol cooling effect and makes the vanilla flavor in the cookie read as warmer and fuller. These are the cookies I make when someone at the table is managing blood sugar and I want them to have something that feels genuinely indulgent rather than like a compromise. Set out a small dish of granulated erythritol for anyone who wants to add a little extra sweetness on top — it dissolves slightly on the tongue and adds a pleasant texture contrast.
🗒 Luna’s Note: I always make a double batch when I know I am going to freeze half. The dough takes the same amount of active time whether I am making one batch or two, and having a stash of frozen unbaked discs means I can have fresh-baked sugar free sugar cookies in under 90 minutes on any given day without starting from scratch.
Frequently Asked Questions About Sugar Free Sugar Cookies

Can you make sugar cookies without sugar?
Yes — sugar free sugar cookies made with granulated erythritol produce a soft, tender cut-out cookie with clean edges and a fine crumb that holds its shape through baking. The texture and flavor are not identical to a cane sugar cookie — erythritol does not dissolve or caramelize the way cane sugar does — but the result is a genuinely satisfying cookie, not a compromise. The key differences to expect: a matte surface rather than a glossy one, a slightly firmer texture at room temperature, and a mild cooling effect on the palate that fades as the cookie reaches full room temperature after 40 minutes on the rack.
What is the best sugar substitute for sugar cookies?
Granulated erythritol is the most reliable sugar substitute for cut-out sugar cookies because it behaves closest to cane sugar during the creaming step and does not cause excessive spreading during baking. Allulose is a workable alternative — it produces a slightly softer, more moist cookie but browns faster and requires reducing the oven temperature to 300°F (149°C) to prevent over-browning on the bottom. Monk fruit sweetener blended with erythritol works if erythritol is the first and primary ingredient on the label — confirm this before using. Do not use xylitol, which has a stronger cooling effect and behaves unpredictably in this dough. Do not use liquid sweeteners like stevia drops or liquid monk fruit — they add moisture without structure and the dough will not hold together or hold a cut edge. If you enjoy decorating cookies, my sugar cookies with frosting article includes a full section on icing and glaze options that work specifically with erythritol-based cookies.
Do sugar free sugar cookies taste the same as regular sugar cookies?
No — and it is worth being direct about this rather than overselling the result. Sugar free sugar cookies made with erythritol taste very good, but they do not taste identical to a cane sugar cookie. The differences are specific: the sweetness is slightly less complex, erythritol produces a mild cooling sensation on the palate that most people find faint at full room temperature but noticeable when the cookie is still warm, and the surface is matte rather than slightly glossy. Vanilla reads as the dominant flavor note rather than being balanced against the caramel-adjacent depth that cane sugar contributes. Most people who taste these cookies at full room temperature — at least 40 minutes after coming off the rack — describe them as genuinely satisfying. The expectation gap is the main issue. Go in expecting an identical cookie and you will notice every difference. Go in expecting a well-made cookie that contains no refined sugar and you will not be disappointed.
How do you keep sugar free sugar cookies from spreading?
Sugar free sugar cookies spread when the dough is too warm when it goes into the oven. Four specific controls prevent it. First: chill the dough for a minimum of one hour — two hours is better — so the butter is fully firm before baking. Second: work with one disc at a time and keep the second disc refrigerated until needed. Third: if the cut cookies soften on the counter during cutting — the surface will feel slightly tacky — slide the parchment with the cut shapes directly into the fridge for 10 minutes before the pan goes in. Fourth: confirm the oven is at full 325°F (163°C) before baking — an under-preheated oven gives the butter time to melt before the edges can set, causing spreading regardless of how cold the dough was when it went in.
Can diabetics eat sugar free sugar cookies?
Sugar free sugar cookies made with granulated erythritol contain no refined sugar and erythritol contributes zero net carbs because it passes through the body without being metabolized — it does not raise blood glucose or insulin levels in most people, making it one of the better-tolerated sweeteners for diabetic baking. These cookies do contain all-purpose flour, which contributes carbohydrates from starch — approximately 9g of total carbohydrates per cookie at the 24-cookie yield in this recipe. People managing blood sugar should account for the flour-based carbohydrates when calculating intake. Always consult a healthcare provider or registered dietitian about specific dietary needs — this recipe is written from a baking perspective, not a medical one.
Can you make sugar free sugar cookies ahead of time?
Yes — and the make-ahead options for this recipe are genuinely practical. The dough keeps tightly wrapped in plastic in the refrigerator for up to 3 days before rolling, and overnight-chilled dough produces cleaner cut edges than one-hour-chilled dough because the flour has more time to fully hydrate and the butter firms more completely. To freeze unbaked dough, wrap each disc tightly in plastic wrap then a layer of foil and freeze for up to 3 months — thaw overnight in the refrigerator and roll directly from the fridge once fully thawed, do not thaw at room temperature. Baked cookies store in a rigid airtight container at room temperature for up to 4 days, or flash-freeze in a single layer for one hour then transfer to a freezer-safe container for up to 2 months.
Can you double this sugar free sugar cookie recipe?
Yes — this recipe doubles reliably with one important adjustment. Use the same creaming time (4 minutes total at medium speed) and the same mixing instructions throughout. The critical adjustment is the baking powder: a double batch uses 1 tsp (4g) baking powder — do not simply double the ¼ tsp stated in the single recipe, as leavening does not scale linearly and the correct amount for a double batch is 1 tsp, not 1 tsp. For a triple batch, use 1¼ tsp (5g) — not 1½ tsp — excess baking powder produces a bitter, chemical taste in the finished cookie that no other adjustment can correct. Bake time per pan remains the same regardless of batch size: 10 to 12 minutes at 325°F (163°C). What changes is the number of pans baked, not the time on each one.
More Cookies You’ll Love
If you enjoyed these sugar free sugar cookies, here are three more recipes from the blog worth trying next.
Shortbread Cookies Recipe — A buttery, crisp, three-ingredient cookie with a fine, sandy crumb. No eggs, no leavening, no fuss. The technique is similar to this recipe in how precisely the butter temperature matters.
Snickerdoodle Cookies — Thick, soft, cinnamon-sugared drop cookies with a slight tang from cream of tartar — the same ingredient doing the same flavor-rounding work it does in this recipe. A natural next bake if you liked these.
Molasses Cookies — Deeply flavored, chewy, and warmly spiced. A completely different flavor profile from these sugar free sugar cookies but the same care around dough temperature and bake timing.

Soft Sugar Free Sugar Cookies
Ingredients
Equipment
Method
- In a medium bowl, whisk together 2¼ cups (270g) all-purpose flour, ½ tsp (2g) baking powder, ¼ tsp (1g) cream of tartar, and ½ tsp (3g) fine sea salt until fully uniform with no streaks, approximately 20 strokes — set aside.
- In the bowl of a stand mixer fitted with the paddle attachment (or a large bowl with a hand mixer), beat ½ cup (113g) softened unsalted butter and 1 cup (192g) granulated erythritol on medium speed for 3 minutes, scrape down the bowl completely, then beat for 1 more minute until the mixture is pale, slightly fluffy, and cohesive.
- With the mixer on low, add 1 large room-temperature egg and 1½ tsp (7.5ml) pure vanilla extract, increase to medium speed, and beat for 1 minute until fully incorporated and smooth — scrape down the bowl again before proceeding.
- With the mixer on the lowest speed, add the dry ingredient mixture in two additions, mixing only until no dry flour streaks remain — approximately 20 to 30 seconds total — then stop the mixer immediately.
- Turn the dough out onto a clean surface, divide into two equal portions, flatten each into a ¾ inch (2cm) disc, wrap tightly in plastic wrap, and refrigerate for a minimum of 1 hour — 2 hours is better.
- Position the oven rack in the middle position and heat to 325°F (163°C) — allow at least 15 minutes of full preheat before baking — then line a light-colored aluminum baking sheet with parchment paper.
- Remove one dough disc from the refrigerator and roll between two sheets of parchment paper to exactly ¼ inch (6mm) thickness, cut shapes with cookie cutters pressing straight down without twisting, and transfer to the prepared baking sheet spaced 1½ inches (4cm) apart — if desired, sprinkle lightly with granulated erythritol before baking.
- Bake on the middle rack at 325°F (163°C) for 10 to 12 minutes, pulling the pan the moment the edges look set and the surface looks matte and dry — do not wait for browning or for the centers to look fully done.
- Leave cookies on the hot pan for exactly 5 minutes, then transfer to a wire cooling rack and cool completely for at least 20 minutes before stacking, storing, or eating — repeat with the second dough disc.