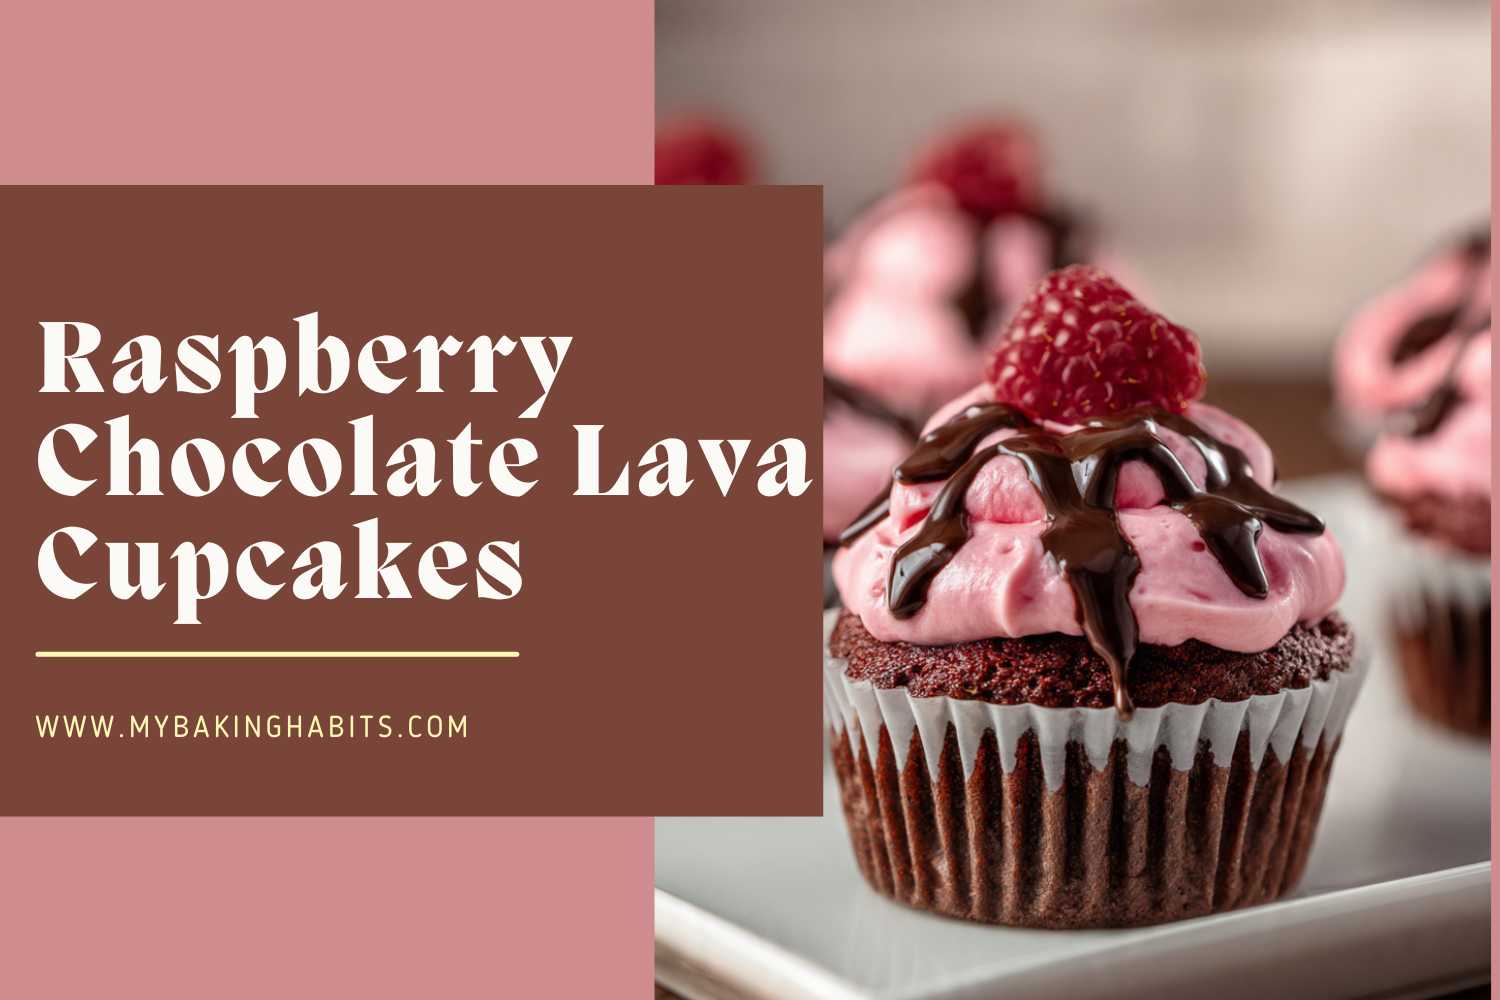
Fudgy Raspberry Chocolate Lava Cupcakes
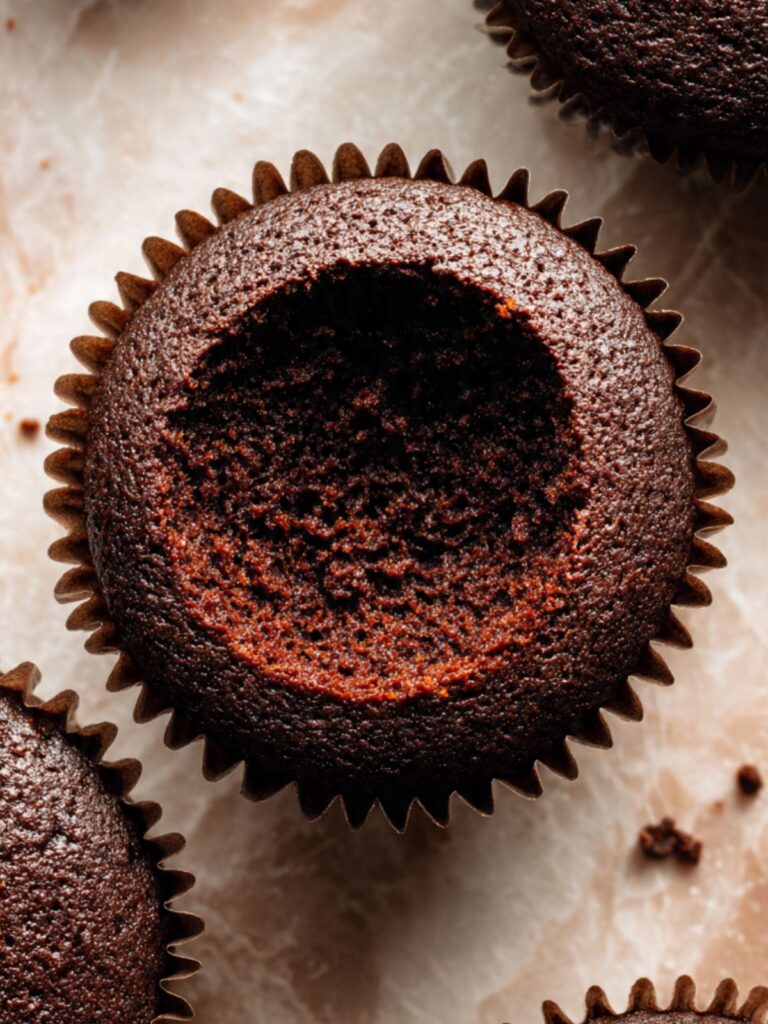
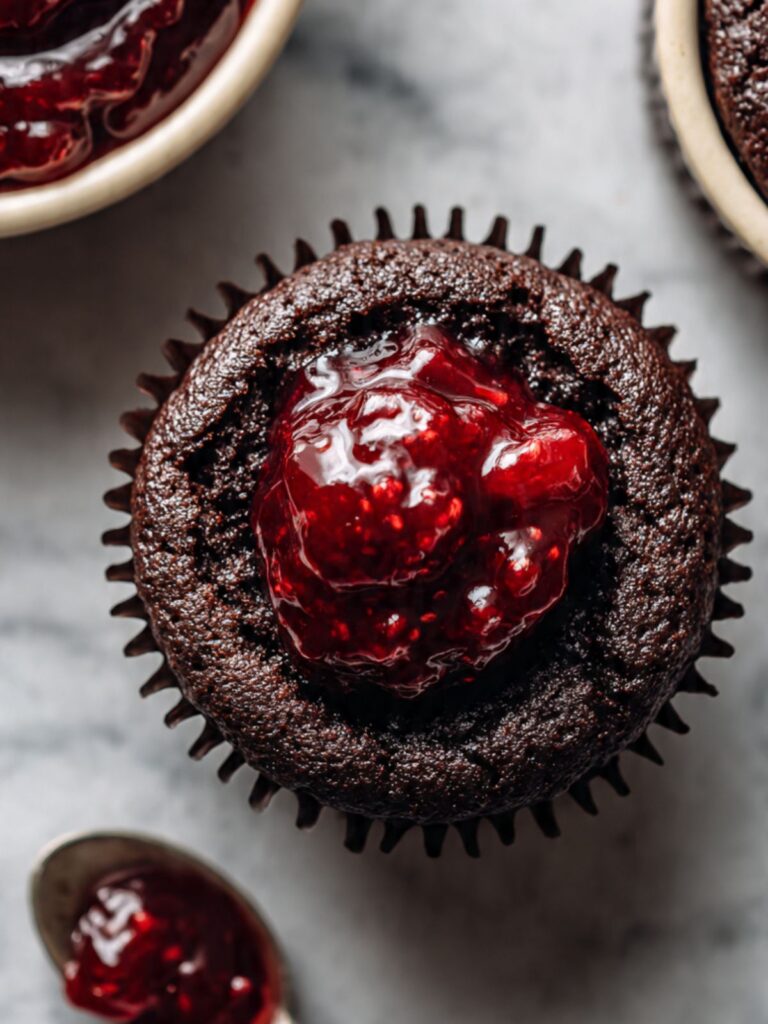
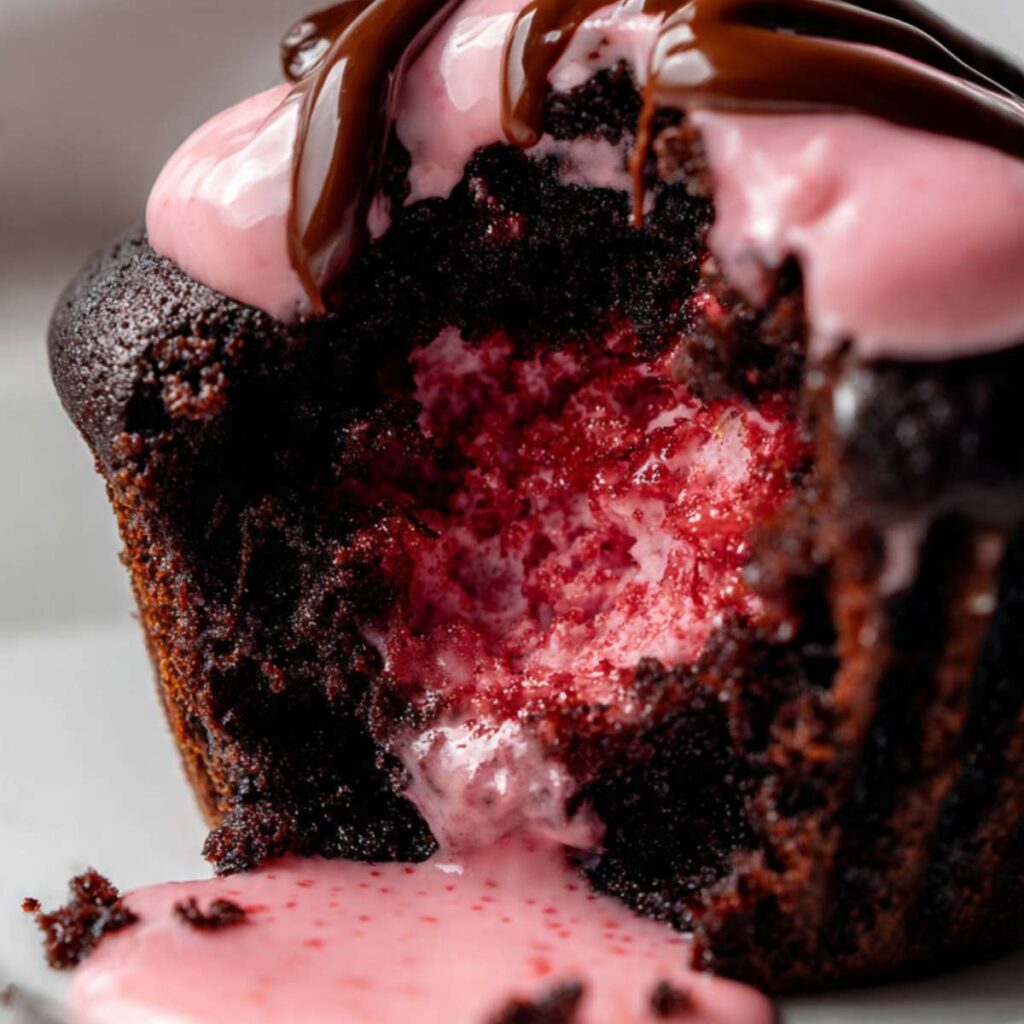
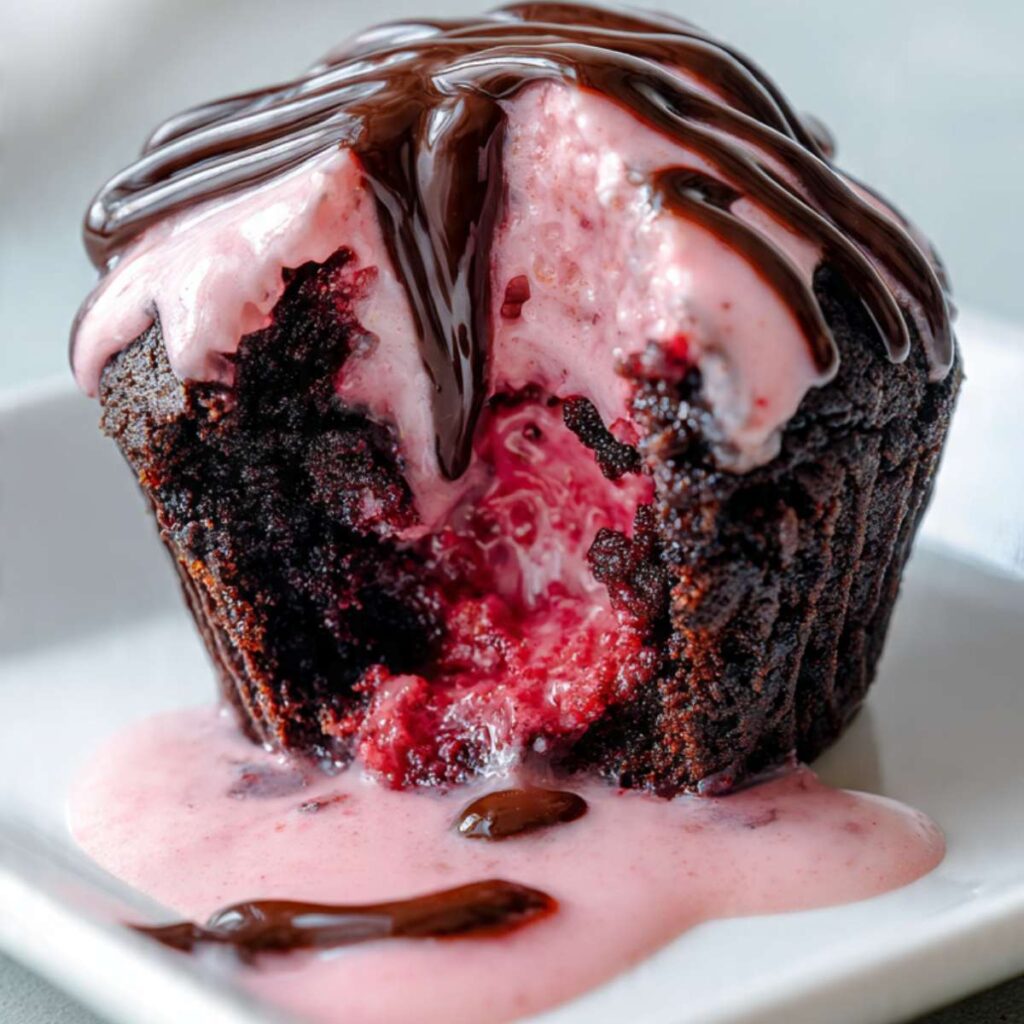
The first time I cut into one of these and the raspberry filling pooled out onto the plate, I knew I had the ratio right. That took four test batches to get there — the first three used too little filling and the center just looked like a moist crumb, not the molten pour you see in the cross-section photos above.
These are not the kind of chocolate cupcakes that happen to have a little jam hidden inside. The base is dense and fudgy — made with Dutch-process cocoa and hot coffee to deepen the chocolate flavor past what a standard cupcake batter can reach. The raspberry compote inside is seeded, jammy, and abundant enough that it genuinely flows when the cupcake breaks open. The frosting is a raspberry buttercream — not pink-tinted vanilla, but butter whipped with actual raspberry jam until the fruit flavor comes through in every bite. The ganache drizzle on top is the thing that ties it together: bitter, glossy, and heavy enough to pool in the grooves of the frosting.
No chilling required. No mixer needed for the cupcake batter — it is a one-bowl melt-and-mix. You will need a hand mixer for the frosting. The filling comes together on the stovetop in about 8 minutes.
🗒 Luna’s Note: I tested the filling ratio twice — once with 1 tablespoon of compote per cupcake and once with 1.5 tablespoons. The 1.5 tablespoon version is what produces the pour you see in the photos. Do not skimp on the fill.
The thing I adjusted most across batches was the cocoa. On batch two I used natural cocoa — the one I already had in my pantry — thinking the difference would be minimal. The cupcakes baked up reddish-brown and the flavor was brighter and more acidic than what I wanted. Switching to Dutch-process cocoa gave me the near-black color you see in the images and a deeper, more roasted chocolate flavor that holds up against the raspberry. Dutch-process and natural cocoa are not interchangeable in this recipe — the leavening depends on it.
| Yield | Prep Time | Cook Time | Additional Time | Total Time | Difficulty |
|---|---|---|---|---|---|
| 12 standard cupcakes | 35 minutes | 20 minutes | 25 minutes (compote + cooling) | ~80 minutes | Intermediate |
| Calories | Carbohydrates | Sugar | Fat | Protein |
|---|---|---|---|---|
| ~600 kcal | ~83g | ~53g | ~29.5g | ~5.3g |
Ingredients & Tools
For the Chocolate Cupcake Base
- 1½ cups (180g) all-purpose flour, spooned into the measuring cup and leveled — or weighed at 180g
- ½ cup (50g) Dutch-process cocoa powder (not natural cocoa — see Before You Start)
- 1 cup (200g) plain white granulated cane sugar
- ½ cup (100g) packed brown sugar — press firmly into the cup until level with the rim
- 1 tsp (6g) baking soda, checked for freshness
- ½ tsp (2g) baking powder, checked for freshness
- ½ tsp (3g) fine sea salt
- ½ cup (113g) unsalted butter, melted and cooled to room temperature
- 2 large eggs (approximately 50g each without shell), room temperature
- ½ cup (120ml) whole milk (3.25% fat), room temperature
- ½ cup (120ml) hot brewed coffee or hot water (coffee deepens the chocolate flavor — it will not make the cupcakes taste like coffee)
- 1 tsp (5ml) pure vanilla extract
For the Raspberry Compote Fill
- 2½ cups (300g) fresh raspberries (frozen work — do not thaw, use directly from frozen)
- ¼ cup (50g) plain white granulated cane sugar
- 1 tbsp (15ml) fresh lemon juice
For the Raspberry Buttercream
- 1 cup (226g) unsalted butter, softened to 65–68°F (18–20°C) — see Before You Start
- 3 cups (360g) powdered sugar, sifted before measuring
- ¼ cup (60g) seedless raspberry jam (not raspberry preserves — jam has a smoother consistency that blends into the buttercream cleanly)
- 2 tbsp (30ml) heavy whipping cream (36% fat minimum)
- Pinch of fine sea salt
For the Chocolate Ganache Drizzle
- 2 oz (60g) semi-sweet chocolate, finely chopped (45–55% cacao) — bar chocolate melts more smoothly than chips
- ¼ cup (60ml) heavy whipping cream (36% fat minimum)
For the Garnish
- 12 fresh whole raspberries
- Dark chocolate shavings — use a vegetable peeler drawn across a cold dark chocolate bar (optional but shown in the photos)
Before You Start
Dutch-process cocoa is not optional in this recipe. Dutch-process cocoa has been alkalized, which neutralizes its natural acidity. This does two things: it produces the near-black color you see in the photos, and it changes how the leavening behaves. This recipe uses baking soda alongside baking powder — the baking soda reacts with the small amount of acidity still present in the brown sugar and eggs. If you swap in natural cocoa, the leavening chemistry shifts, the cupcakes will dome unevenly, and the color will be reddish-brown instead of dark. Use Dutch-process. Brands to look for: Valrhona, Cacao Barry Extra Brute, or King Arthur Bensdorp.
Freshness checks — do these now, before anything else:
- Baking soda: drop ½ tsp (3g) into a small bowl of hot water with a splash of white vinegar. It should bubble aggressively within 2 seconds. Weak or no bubbling means replace the box.
- Baking powder: drop 1 tsp (4g) into ½ cup (120ml) hot water. It should bubble immediately and vigorously. If it does not, buy a fresh can before proceeding.
Temperature prep — start this 60–90 minutes before baking:
- Butter for the cupcake base: melted and cooled to room temperature. It should feel neutral on your wrist — neither warm nor cold. Warm melted butter added to eggs causes the eggs to cook slightly and produces a greasy, dense crumb.
- Butter for the frosting: softened to 65–68°F (18–20°C). Press your finger into it — it should leave a clean indent without feeling greasy or slick. If it slides through, the butter is too warm and will produce a loose, soupy buttercream that will not hold its piped shape on the cupcake. Pull frosting butter from the fridge 60–90 minutes before you plan to make the buttercream — in a warm kitchen (above 75°F / 24°C), check it at 45 minutes.
- Eggs: pulled from the fridge 30 minutes before baking, or placed in a bowl of warm (not hot) water for 10 minutes. Cold eggs do not emulsify smoothly into melted butter and the batter will look broken and curdled.
- Whole milk: set on the counter 20 minutes before baking.
- Heavy whipping cream (for ganache): remove from the refrigerator 20 minutes before making the ganache. Cold cream poured over chopped chocolate creates a temperature shock that can cause the ganache to seize before it has a chance to melt evenly.
Brown sugar: Press your fingers into the packed brown sugar before measuring. If it has hardened into a solid block, it cannot be packed accurately and the moisture measurement will be off. To rescue hardened brown sugar, place it in a microwave-safe bowl, lay a damp paper towel directly on the surface, and microwave in 20-second increments until soft and pliable — usually 40 to 60 seconds total. Let it cool for 2 minutes before packing and measuring.
Gram weight priority: Use a kitchen scale set to grams. Volume measurements vary by 20–30% depending on how ingredients are scooped. The gram weights in this recipe are the numbers I tested with — they are the most reliable way to get the result you see in the photos.
Flour measuring method: If you are using cups, spoon the flour into the measuring cup with a separate spoon and level the top with a straight edge. Never scoop the measuring cup directly into the flour bag — this packs 20–30% more flour and produces dry, dense cupcakes.
Pan preparation: Line a standard 12-cup aluminum muffin tin with dark cupcake liners and spray the top surface of the pan lightly with non-stick spray. Do not grease the inside of the liners — the batter needs to cling to the liner walls as it rises. Greased liners produce cupcakes that pull away from the paper while baking and collapse inward at the sides. If your muffin tin is dark non-stick rather than standard aluminum, reduce the oven temperature by 25°F (14°C) — dark pans absorb more heat and will over-brown the exterior of the cupcake base before the center has fully set, producing a dry, tight crumb around a still-raw center.
Oven rack: Position in the center of the oven before preheating. Most home ovens run 15–25°F (8–14°C) off. If you have an oven thermometer, confirm the actual temperature before the tin goes in.
Mixing method: One-bowl melt-and-mix for the cupcake base — no mixer needed for the batter. You will need a hand mixer for the raspberry buttercream.
Necessary Tools
Required:
- Standard 12-cup aluminum muffin tin
- Dark cupcake liners (shown in the photos) or white/silver foil liners
- Large mixing bowl
- Medium saucepan (for the compote)
- Hand mixer (for the buttercream)
- Piping bag fitted with a large round tip or Wilton 1M star tip
- Cupcake corer or small sharp paring knife (for hollowing the fill cavity)
- Whisk
- Silicone spatula
- Kitchen scale (strongly recommended)
- Fine mesh sieve (for sifting powdered sugar)
Optional but useful:
- Oven thermometer
- Instant-read thermometer (to check butter temperature for frosting)
- Vegetable peeler (for chocolate shavings garnish)
- Small offset spatula
How to Make Raspberry Chocolate Lava Cupcakes
Method type: one-bowl melt-and-mix (cupcake base) + stovetop reduction (raspberry compote) + hand mixer creamed butter (raspberry buttercream) + stovetop ganache
Step 1: Making the Raspberry Compote Fill First
In your medium saucepan, combine your 2½ cups (300g) fresh raspberries (or frozen, used directly from frozen), ¼ cup (50g) plain white granulated cane sugar, and 1 tbsp (15ml) fresh lemon juice. The lemon juice is not just for flavor — its acidity brightens the raspberry color and helps the compote set to the right jammy consistency rather than a thin, watery syrup that will drain out of the cupcake cavity.
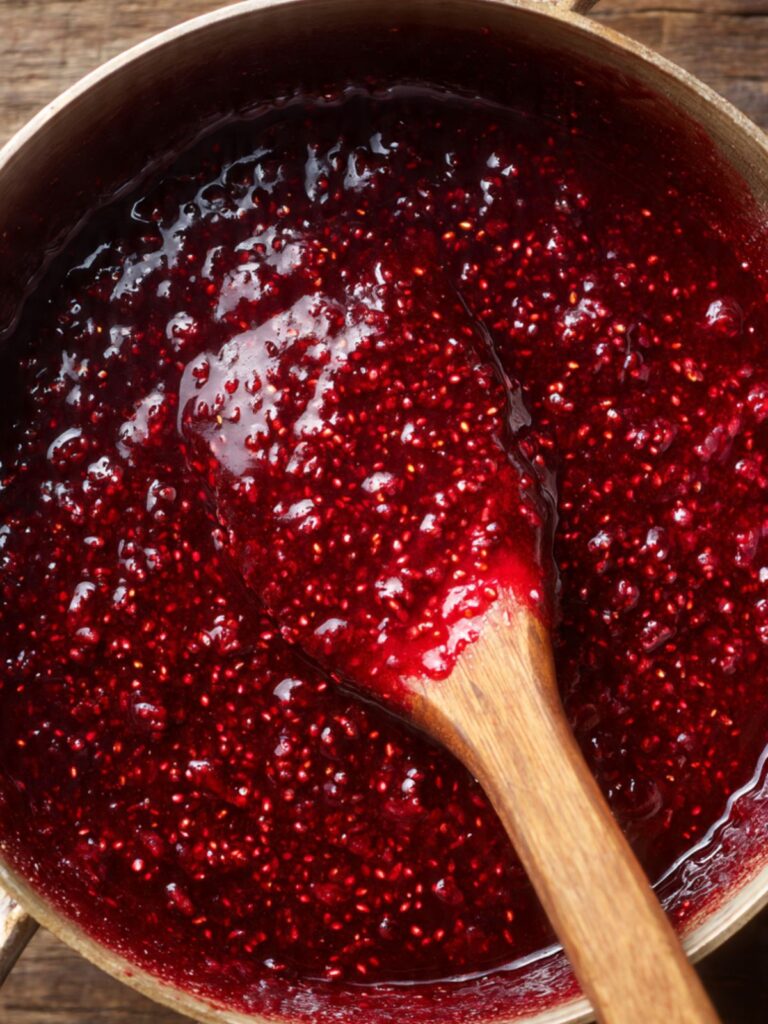
Place the saucepan over medium heat and stir with your silicone spatula, breaking the raspberries down as they soften — approximately 2 to 3 minutes from the time the mixture starts bubbling. Once bubbling, reduce the heat to medium-low and continue stirring every 30 seconds for 5 to 6 more minutes, until the compote thickens enough to coat the back of the spatula and holds its shape briefly when you drag a line through it.
The compote should look deep ruby red, glossy, and thick enough that it moves slowly when you tilt the pan — not watery, not stiff like jam. You should still see seeds and small fruit pieces throughout.
Do not cook it past this point — overcooked compote sets solid when it cools and will not flow when the cupcake is broken open. Pour it into a small bowl and press a piece of plastic wrap directly against the surface to prevent a skin from forming. Set aside to cool completely — at least 30 minutes at room temperature — before filling the cupcakes.
🗒 Luna’s Note: I always make the compote first, before I even preheat the oven. By the time the cupcakes are baked and cooled, the compote is exactly the right temperature to fill with — thick but still spoonable.
The compote is done cooling when it no longer steams and holds a mound shape briefly on a spoon — move to Step 2.
Step 2: Prepping the Pan and Preheating the Oven
Position your oven rack in the center of the oven and heat to 350°F (175°C). Line your standard 12-cup aluminum muffin tin with dark cupcake liners and spray the top surface of the pan lightly with non-stick spray. Do not grease the liners themselves — the batter needs to cling to the liner walls as it rises. Greased liners produce cupcakes that pull away from the paper while baking and collapse inward at the sides.
The pan should be fully lined and ready before the batter comes together — this batter moves quickly once mixed and should go into the oven without sitting.
Confirm your oven has reached full temperature before the tin goes in — the initial blast of heat is what drives the dome on these cupcakes.
Step 3: Whisking the Dry Ingredients Together
In your large mixing bowl, whisk together your 1½ cups (180g) all-purpose flour (spooned and leveled), ½ cup (50g) Dutch-process cocoa powder, 1 cup (200g) plain white granulated cane sugar, ½ cup (100g) packed brown sugar, 1 tsp (6g) baking soda, checked for freshness, ½ tsp (2g) baking powder, checked for freshness, and ½ tsp (3g) fine sea salt.
Whisk for a full 30 seconds — not a quick stir. The cocoa powder has a tendency to clump and an under-whisked dry mix produces pockets of dense, unincorporated cocoa in the finished cupcake. The two sugars need to be fully distributed through the flour before the wet ingredients go in.
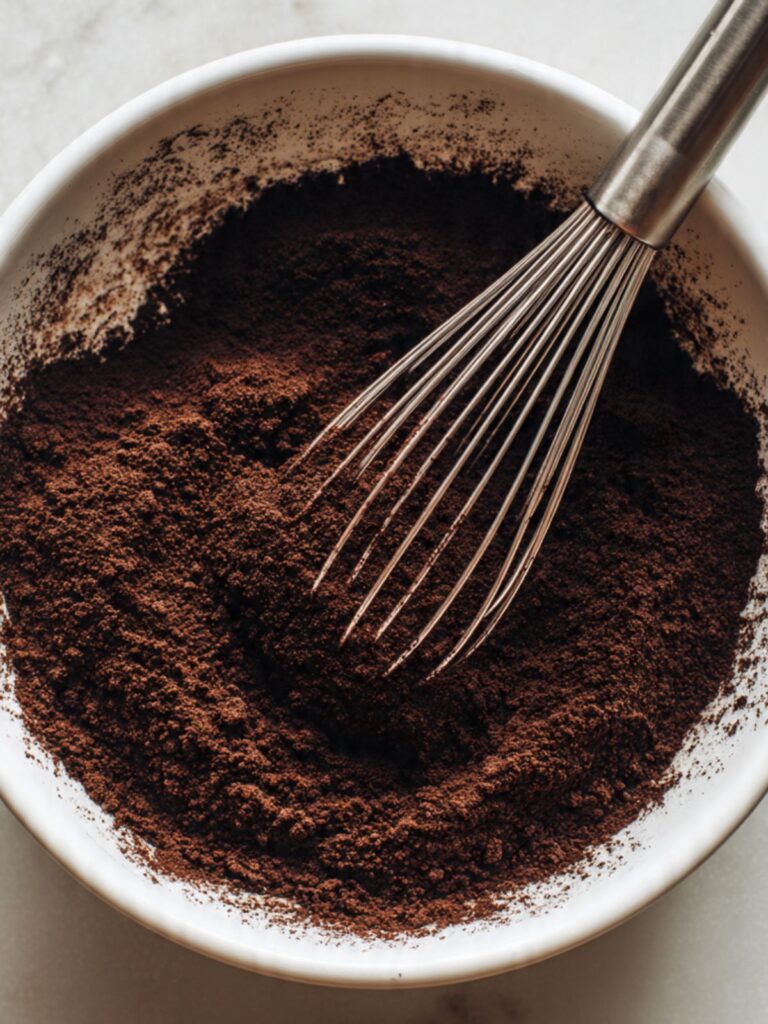
The dry mix should look completely uniform — a consistent dark brown-black color throughout with no streaks of lighter flour or clumps of cocoa visible anywhere in the bowl.
The baking soda reacts with the small amount of residual acidity in the brown sugar and cocoa — this is what creates the lift in these cupcakes. If your baking soda did not pass the freshness test in Before You Start, the cupcakes will bake flat and dense. Move to Step 4 with your dry mix ready in the bowl.
Step 4: Combining the Wet Ingredients
In a separate medium bowl or large measuring jug, whisk together your ½ cup (113g) unsalted butter, melted and cooled to room temperature, 2 large eggs (approximately 50g each without shell), room temperature, ½ cup (120ml) whole milk, room temperature, and 1 tsp (5ml) pure vanilla extract until fully combined — about 15 strokes.
Now add your ½ cup (120ml) hot brewed coffee or hot water to the wet mixture and whisk immediately for another 5 strokes. The hot liquid blooms the cocoa in the dry mix when the two are combined — this is the step that deepens the chocolate flavor beyond what a cold or room-temperature liquid can achieve. Do not let the hot liquid sit — add it to the wet mix and move directly to the next step.
The wet mixture should look smooth, uniform, and slightly glossy — no visible butter separation or egg streaks. If the butter looks like it has separated into oily pools, the butter was still too warm when mixed with the eggs. Whisk vigorously for 10 more seconds.
The wet mix is ready the moment it looks uniform — pour it into the dry bowl immediately.
Step 5: Bringing the Batter Together Without Overmixing
Pour the wet mixture into the bowl of dry ingredients all at once. Using your silicone spatula, fold from the bottom of the bowl upward in slow, wide strokes — not stirring in circles. Count your strokes. Stop folding the moment no dry flour streaks remain visible — this typically takes 18 to 22 strokes from the first fold. Do not mix beyond this point.
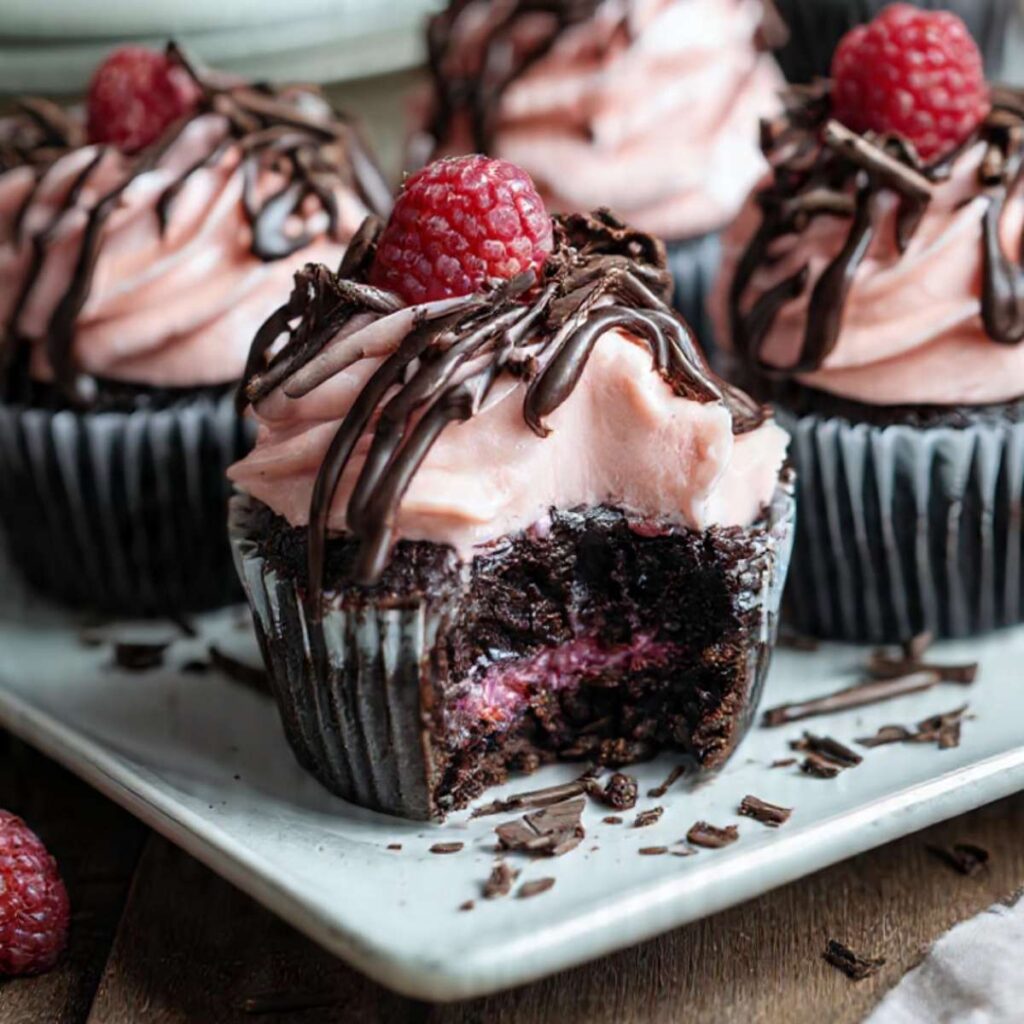
As you can see in the cross-section photos, the finished cupcakes have a dense, tight, fudgy crumb — not an open, cakey structure. That texture comes from minimal mixing. Overmixing develops the gluten in the flour and produces a tough, rubbery crumb with a peaked, cracked top instead of the smooth dome shown in the photos.
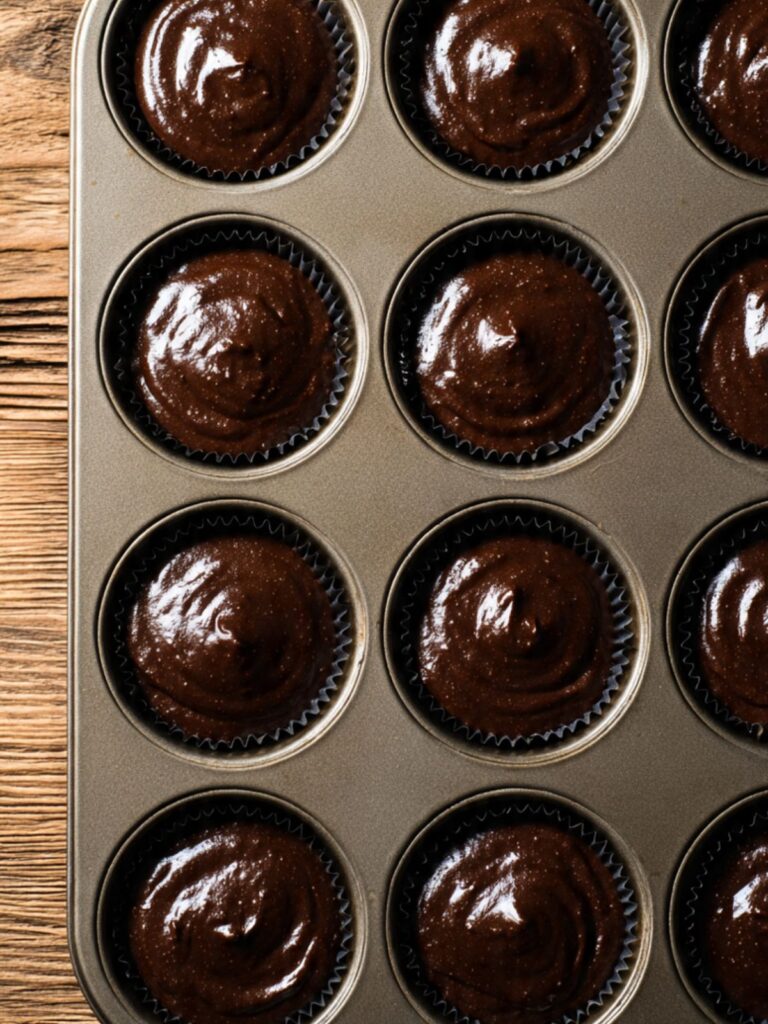
The batter should look thick, dark, and glossy — it will be thinner than a standard cupcake batter because of the hot liquid. This is correct. Do not add more flour.
Do not overmix after the flour disappears — the cupcake edges will bake up tough and the centers will dome to a peak and crack rather than the smooth, even top shown in the hero image. Move directly to portioning — do not let this batter sit.
Step 6: Portioning the Batter and Baking
Using a large cookie scoop or a ¼ cup (60ml) measure, portion the batter evenly across all 12 lined cups. Each cup should be filled to approximately two-thirds full — weigh the first portion at approximately 65g and use that as your reference for the remaining 11. Two-thirds full is the exact fill level that produces the smooth domed top visible in the hero image. Underfilling produces flat tops. Overfilling causes batter to spill over the liner and bake onto the pan.
Place the tin on the center rack of your oven preheated to 350°F (175°C) and bake for 18 to 20 minutes. Start checking at 18 minutes. The cupcakes are done when the tops spring back when lightly pressed in the center and a toothpick inserted in the center comes out with moist crumbs — not wet batter, not completely clean. A completely clean toothpick means overbaked.
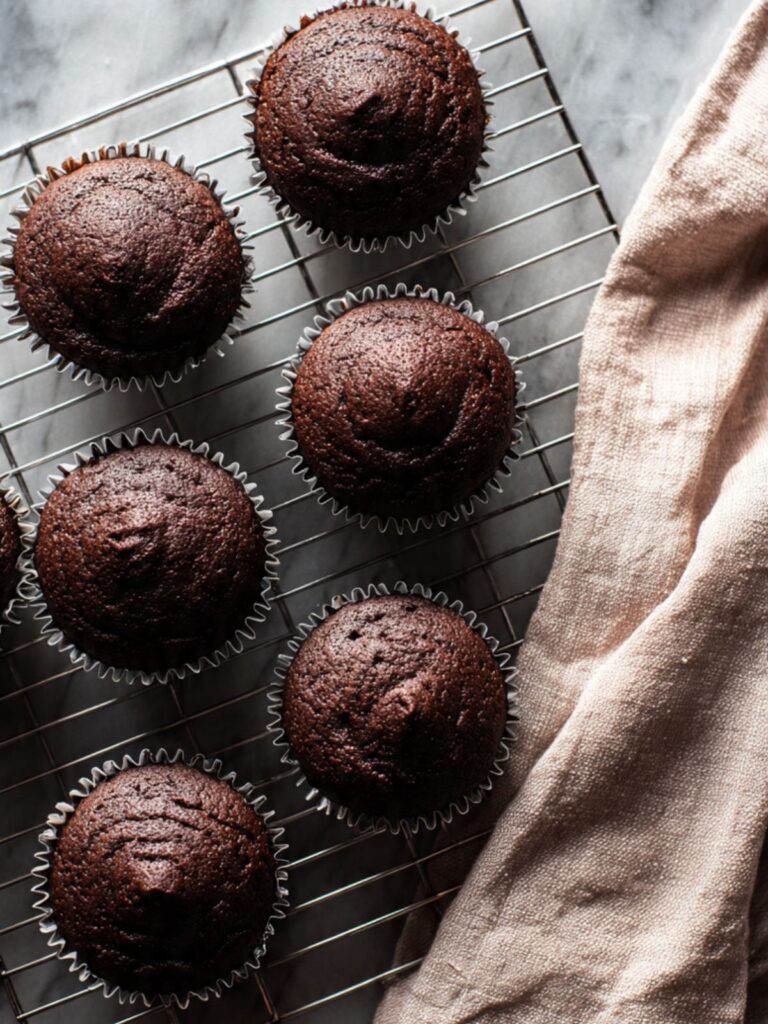
The tops should look fully domed, set, and matte — not shiny or wet-looking at the center. The edges of the liner will look dry and the cupcake will have pulled very slightly from the liner wall.
Do not open the oven door before 16 minutes — the sudden temperature drop can cause the centers to sink before the structure has set. Leave the tin on the center rack for the full bake time.
Step 7: Cooling Before Filling
Remove the tin from the oven and leave the cupcakes in the pan for exactly 5 minutes — set a timer. The pan conducts residual heat into the cupcake base during this time, finishing the structure without the oven drying out the crumb. Moving them before 5 minutes risks collapsing the base. Waiting longer than 8 minutes starts to steam the bottoms inside the liner and makes them soggy.
After 5 minutes, transfer the cupcakes to a wire rack using a thin spatula or by tipping them gently. Cool completely at room temperature — minimum 45 minutes — before coring and filling. Filling a warm cupcake melts the compote into the crumb rather than holding it in the center cavity. The compote will not pool when the cupcake is broken open if the base is still warm.
The cupcakes are ready to fill when they feel completely room temperature on the bottom — press your palm gently to the base of one. No warmth at all means ready.
🗒 Luna’s Note: While the cupcakes cool, I make the buttercream. By the time the frosting is done, the cupcakes are at the right temperature and the whole process flows without any waiting around.
The cupcakes are cooled and ready — move to the buttercream while they finish cooling on the rack.
Step 8: Making the Raspberry Buttercream
In a large bowl, using your hand mixer fitted with the beaters, beat your 1 cup (226g) unsalted butter, softened to 65–68°F (18–20°C) on medium-high speed for 3 full minutes — set a timer and do not estimate. The butter should visibly lighten in color from deep yellow to pale cream and nearly double in volume during this time. Under-beaten butter produces a dense, yellow frosting that does not pipe cleanly and will slide off the cupcake rather than holding its shape.
Reduce the mixer to low speed and add your 3 cups (360g) powdered sugar, sifted, one cup at a time, waiting for each addition to be mostly incorporated before adding the next. Adding all the powdered sugar at once creates a cloud of fine sugar that does not incorporate evenly and leaves gritty pockets in the finished frosting.
Once all the powdered sugar is in, the mixture may look dry, crumbly, or slightly curdled at this stage — this is normal. Add your ¼ cup (60g) seedless raspberry jam, 2 tbsp (30ml) heavy whipping cream (36% fat minimum), and a pinch of fine sea salt. Beat on medium-high speed for a further 2 minutes. The jam and cream provide the moisture the buttercream needs to come together — within 30 to 45 seconds of beating on medium-high, the curdled, broken appearance will resolve into a smooth, cohesive frosting. If it still looks separated after 60 seconds of medium-high beating, add heavy cream ½ tsp (2.5ml) at a time — no more than 2 additional teaspoons (10ml) total — and beat for another 30 seconds after each addition.
The frosting should look pale pink, smooth, and glossy — not grainy, not yellow, not loose. It should hold a stiff peak that stays upright for 5 seconds when you lift the beater. If it looks too stiff after the full 2 minutes, add heavy cream ½ tsp at a time. If it looks loose and will not hold a peak, add powdered sugar 1 tbsp at a time.
Do not use butter that is too warm for the frosting — above 68°F (20°C), butter loses its ability to hold air and the frosting will look smooth in the bowl but will not hold its piped shape and will begin to slide off the cupcakes within minutes of piping. If this happens, refrigerate the entire bowl for 10 to 15 minutes, then beat again on medium speed for 60 seconds before piping. Move to filling the cupcakes.
Step 9: Coring and Filling the Cupcakes
Using a cupcake corer or a small sharp paring knife, remove a cylinder of cake from the center of each fully cooled cupcake — approximately ¾ inch (2cm) wide and 1 inch (2.5cm) deep. Do not core all the way to the base — leave at least ½ inch (1.2cm) of cake at the bottom to act as a floor for the filling. A cored-through bottom means the compote drains to the liner and does not pool in the center when the cupcake is broken open.
Eat the cake cores or set them aside — they are not replaced before frosting.
Using a small spoon, fill each cavity with approximately 1½ tablespoons (22ml) of the cooled raspberry compote. Press the compote gently into the cavity — do not leave it mounded above the top of the cupcake or the frosting will not sit flat over the fill point.
As you can see in the cross-section images, the compote fills the entire cavity and reaches close to the cupcake surface — this is the fill level that produces the molten pour when the cupcake is broken open. A half-filled cavity produces a moist crumb, not a lava effect.
🗒 Luna’s Note: I always overfill by just a little — a slight dome of compote above the cavity edge is fine. The frosting covers it completely and the extra volume is exactly what makes the filling pour out dramatically when cut.
The cupcakes are filled — move directly to frosting.
Step 10: Piping the Frosting and Finishing
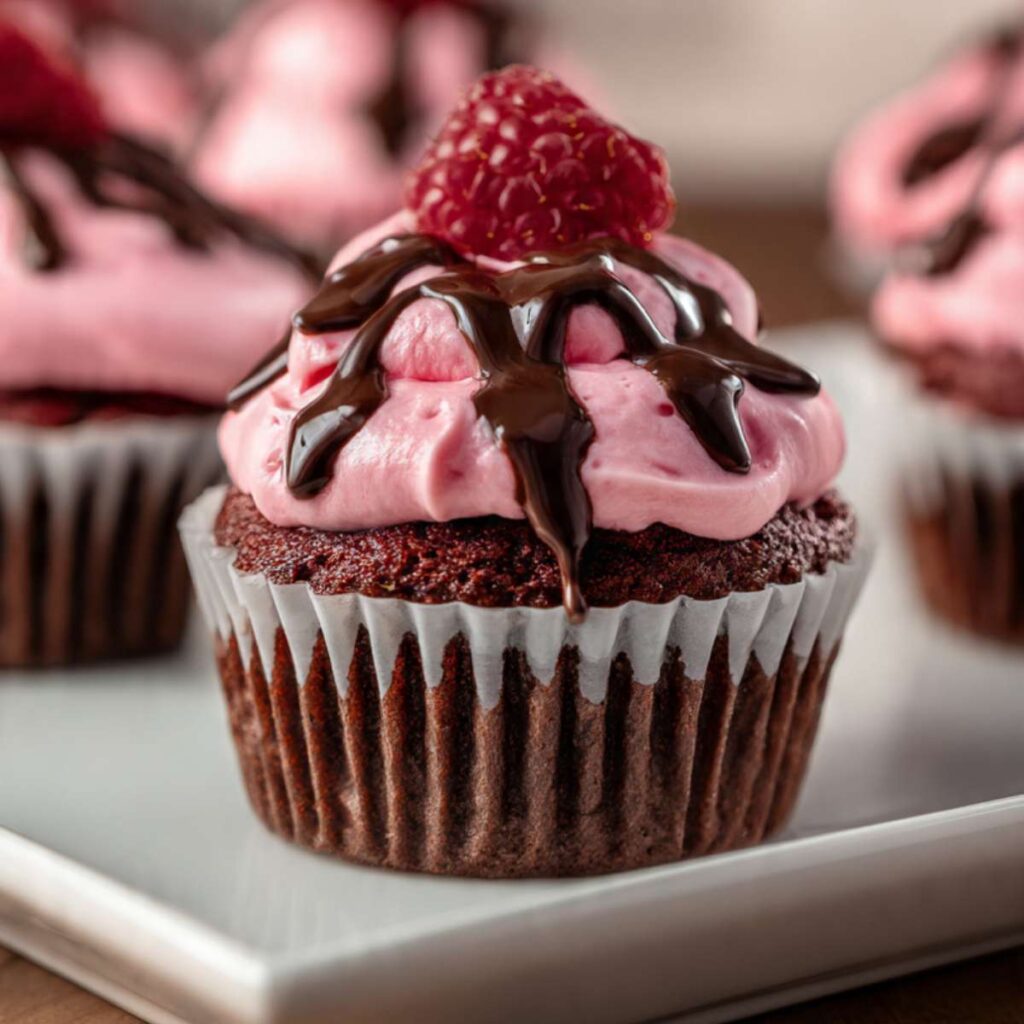
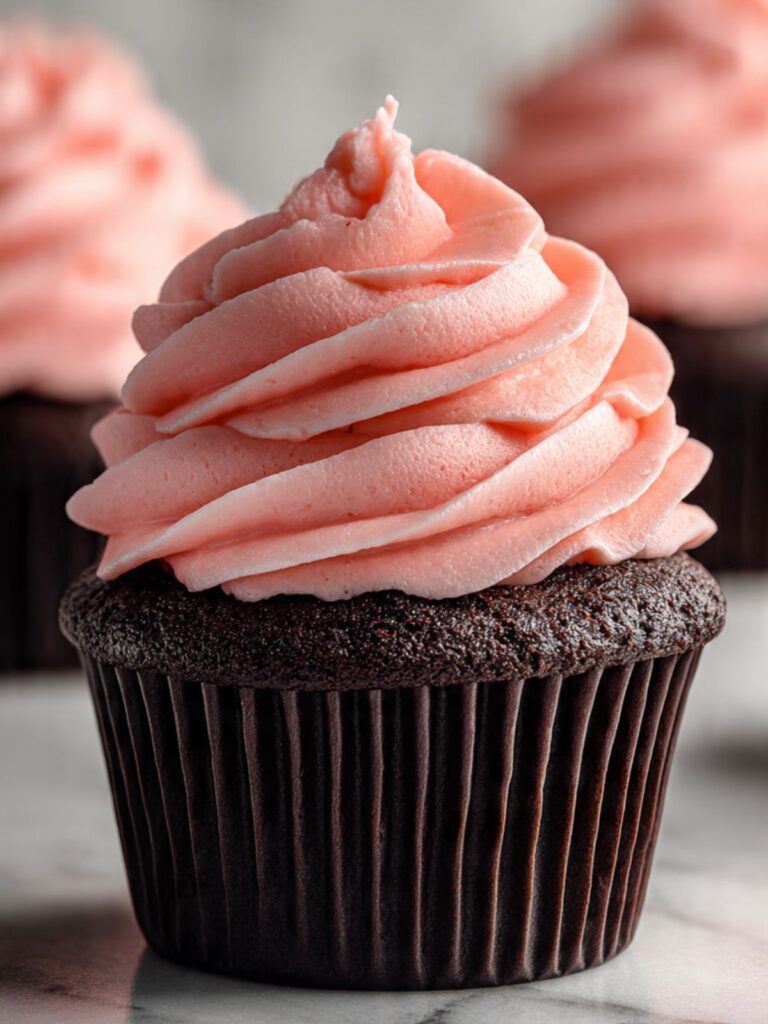
Transfer the raspberry buttercream to your piping bag fitted with a large round tip or Wilton 1M star tip. Starting at the outer edge of each cupcake, pipe a generous dome of frosting using a slow spiral motion inward and upward — building height as you move toward the center. Finish with a slight peak at the top. The frosting dome in the photos is approximately 1.5 to 2 inches (4 to 5cm) tall — do not be conservative with the frosting.
To make the chocolate ganache drizzle: place your 2 oz (60g) finely chopped semi-sweet chocolate (45–55% cacao) in a small heatproof bowl. Heat your ¼ cup (60ml) heavy whipping cream in a small saucepan over medium heat until it just begins to steam and small bubbles form at the edges — do not boil. Pour the hot cream over the chopped chocolate and let it sit undisturbed for 90 seconds, then stir slowly from the center outward until completely smooth and glossy. Let the ganache cool for 3 to 4 minutes until it is thick enough to drizzle but still pourable — test it on a spoon. If it runs off immediately like water, wait another minute.
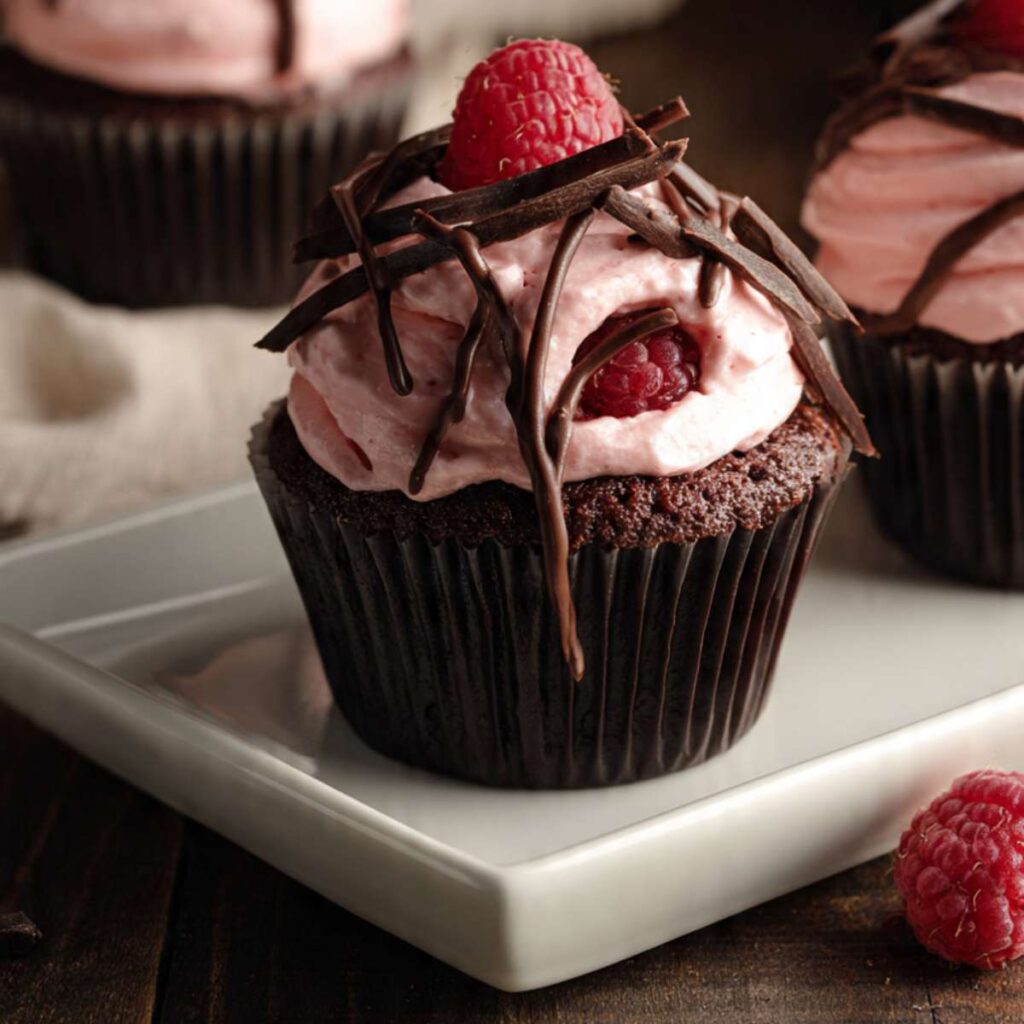
Using a spoon, drizzle the ganache freely over each frosted cupcake in a back-and-forth motion — the ganache should pool slightly in the grooves of the frosting as shown in the photos. Top each cupcake with one fresh whole raspberry pressed gently into the frosting at the center. Finish with dark chocolate shavings scattered around the raspberry — draw a cold vegetable peeler firmly across a dark chocolate bar and let the shavings fall directly onto the frosted cupcakes.
The finished cupcakes should look exactly like the hero image — a tall dome of pink frosting, heavy chocolate ganache drizzle pooled in the grooves, one fresh raspberry at the peak, and scattered dark chocolate shavings across the surface.
The cupcakes are complete — do not refrigerate before serving if possible. Serve at room temperature within 2 hours of frosting for the best texture and the most dramatic lava effect when broken open.
The Science Behind Raspberry Chocolate Lava Cupcakes
Why Dutch-Process Cocoa Produces That Near-Black Color and Deep Flavor
Dutch-process cocoa has been treated with an alkalizing agent — typically potassium carbonate — that neutralizes the natural acidity present in raw cacao. This process does two things that directly affect what you see and taste in these cupcakes. First, the alkalization darkens the cocoa particles significantly. Raw cacao is naturally reddish-brown because its pigments are pH-sensitive — in an acidic environment, they read as red. Raising the pH toward neutral shifts those same pigments toward dark brown and eventually near-black. This is exactly why the cupcake base in the photos looks almost black rather than the reddish-brown you get from natural cocoa. Second, the alkalization mellows the sharp, acidic bite of natural cocoa and produces a rounder, deeper chocolate flavor — the kind that reads as bitter and roasted rather than bright and fruity.
The leavening consequence is the reason you cannot swap cocoa types without adjusting the recipe. Baking soda requires an acid to activate — in a natural cocoa recipe, the cocoa itself provides that acid. Dutch-process cocoa has had its acid neutralized, so it cannot activate baking soda on its own. This recipe uses both baking soda and baking powder: the baking powder provides lift independent of pH, and the baking soda reacts with the small residual acidity in the brown sugar and eggs. Remove the Dutch-process cocoa and replace it with natural cocoa without adjusting the leavening and you will get an unevenly leavened, peaked, cracked cupcake top that does not match the smooth dome in the photos. For a deeper dive into how cocoa type affects chocolate baking, the same mechanism is at work in my hot chocolate cupcakes.
🗒 Luna’s Note: I keep both Dutch-process and natural cocoa in my pantry specifically because they are not interchangeable. I label the containers. Grabbing the wrong one has cost me a full batch more than once.
How Hot Coffee Transforms Chocolate Flavor Beyond What Ingredients Alone Can Do
The hot brewed coffee in this recipe is not a flavoring agent — you will not taste coffee in the finished cupcake. It is a chemistry tool. Cocoa powder contains hundreds of flavor compounds, most of them locked inside the cocoa solids in forms that are not fully soluble at room temperature. Hot liquid — whether coffee or water — dissolves and activates these compounds more completely than cold liquid can, a process sometimes called blooming. The result is a chocolate flavor that is noticeably deeper, more complex, and more rounded than the same recipe made with room-temperature milk alone.
Coffee specifically adds a second layer to this blooming effect. Coffee shares many of the same aromatic compounds as chocolate — both are produced through fermentation and roasting, both contain pyrazines and furans that read on the palate as bitter, toasted, and dark. When coffee is added to a chocolate batter, it does not introduce a new flavor so much as amplify the existing chocolate notes, pushing the roasted, bitter edge of the Dutch-process cocoa further forward. The effect is most noticeable in the first bite and in the back-of-the-palate finish. Readers who find the coffee flavor detectable are usually using a very strongly brewed espresso — standard brewed coffee or even instant coffee dissolved in hot water produces no detectable coffee taste in the finished cupcake.
Why the Raspberry Compote Creates a Lava Effect Instead of Just a Moist Crumb
The lava effect in these cupcakes depends on three variables working together: fill volume, fill consistency, and cupcake temperature at serving. Each one can independently eliminate the pour if it is wrong.
Fill volume is the most commonly underestimated. A tablespoon of compote in a standard cupcake cavity produces a moist pocket — enough to taste but not enough to flow. The 1½ tablespoon fill used in this recipe is the minimum needed to create the pooling visible in Images 2 and 5. The compote needs enough volume to behave like a liquid under the slight pressure of breaking open the cupcake — too little and it is absorbed into the crumb walls before it can move.
Compote consistency determines whether the fill flows or stays put. Overcooked compote sets to a jam-like solid as it cools and will not move when the cupcake is broken open, regardless of fill volume. The correct endpoint — coating the back of a spatula and moving slowly when the pan is tilted — produces a compote that stays pourable at room temperature but is thick enough not to drain through the cupcake crumb during storage. This balance is why the cooking time matters: 5 to 6 minutes at medium-low heat after the first bubble, no longer.
Serving temperature is the variable most readers overlook. The raspberry compote in these cupcakes is not thermally molten the way a chocolate lava cake is — it does not require heat to flow. But a refrigerated cupcake served cold has compote that has firmed significantly and crumb walls that have tightened around the fill. Bringing the cupcake to room temperature for 20 to 30 minutes before serving is what allows the compote to loosen back to its pourable consistency. A cold cupcake broken open produces a set, thick center — not the dramatic pour shown in the photos. For readers interested in how similar filling techniques work across cupcake styles, my cookie dough cupcakes use the same cavity-fill method with a different filling entirely.
Raspberry Chocolate Lava Cupcakes Troubleshooting & Pro-Tips
Common Mistakes
My cupcakes look reddish-brown instead of dark chocolate black. You used natural cocoa instead of Dutch-process. Natural cocoa is acidic — its pigments stay in a red-brown pH range regardless of bake time or temperature. Dutch-process cocoa has been alkalized, which shifts those same pigments toward near-black. This is not a fixable problem after baking. For the next batch, source Dutch-process cocoa specifically — Valrhona, Cacao Barry Extra Brute, or King Arthur Bensdorp are the most widely available. Confirm the label says “Dutch-process” or “alkalized” before buying. Natural cocoa and Dutch-process look nearly identical in the bag.
My cupcakes have dark, tough exteriors with an undercooked center. You used a dark non-stick muffin tin at the standard 350°F (175°C). Dark pans absorb significantly more radiant heat than standard aluminum pans — the exterior of the cupcake bakes faster than the interior can keep up, producing a dry, over-browned shell around a center that never fully set. The fix is simple: reduce the oven temperature by 25°F (14°C) to 325°F (163°C) when using a dark pan, and add 2 to 3 minutes to the bake time. Check doneness at 20 minutes with the toothpick test rather than at 18 minutes. If your liners are greased on the inside, this also prevents the batter from clinging to the liner walls as it rises — the cupcake pulls away early and collapses inward at the sides. Never grease the inside of a cupcake liner. The liner itself is the non-stick surface; spray only the top flat surface of the muffin tin pan.
My cupcake tops peaked and cracked instead of doming smoothly. Two causes: overmixing the batter or the oven running too hot. Overmixing develops gluten, which creates a tight network that forces the batter upward through the center as it sets — producing a peaked, cracked dome instead of the smooth round shown in the photos. Count your strokes from the moment the wet ingredients meet the dry — stop at 22 strokes maximum, the moment no flour streaks remain. If the batter is correctly mixed and the tops still crack, check your oven temperature with an oven thermometer. An oven running 25°F (14°C) hot sets the exterior of the cupcake too quickly, trapping rising gas that then forces through the top. Drop the temperature by 15–25°F (8–14°C) and test again.
My cupcakes sank in the center after coming out of the oven. The most common cause is underbaking — the center structure had not fully set when the cupcakes came out of the oven. A toothpick that comes out with wet batter (not moist crumbs) means the center is still raw and will collapse as it cools. The second most common cause is opening the oven door before 16 minutes — the sudden temperature drop causes partially set centers to deflate before the egg proteins have coagulated enough to hold the structure. Bake to the toothpick-with-moist-crumbs standard and do not open the door early.
My raspberry compote is too thick and will not flow when the cupcake is broken open. The compote was cooked past the correct endpoint. Once compote cools below 80°F (27°C) it continues to set — overcooking by even 2 to 3 minutes produces a texture closer to firm jam than pourable compote. You can rescue overcooked compote by warming it gently in a small saucepan over low heat with 1 to 2 teaspoons (5 to 10ml) of water, stirring constantly until it loosens to the spatula-coating consistency. Let it cool back to room temperature before filling. For the next batch, pull the compote off the heat the moment it coats the back of the spatula and holds a line — do not wait for it to look thick in the pan, it will thicken further as it cools.
My raspberry compote leaked through the bottom of the cupcake. The core went too deep. The base floor of the cupcake cavity needs to be at least ½ inch (1.2cm) thick to contain the compote. A cupcake cored all the way through has no floor and the compote drains directly to the liner. If this happened, the cupcakes are still edible but the lava effect will not work — the compote is already absorbed into the liner. For the next batch, insert the corer only 1 inch (2.5cm) deep and stop. Press your fingertip to the base of the core hole before filling — you should feel solid cake, not air.
My buttercream is yellow and dense instead of pale pink and fluffy. The butter was not beaten long enough before adding the powdered sugar, or the butter was too cold. Under-beaten butter does not aerate properly — the fat stays dense and yellow rather than lightening and expanding. Beat the softened butter on medium-high speed for a full 3 minutes before adding anything else — set a timer. If the butter is below 65°F (18°C) when you start, it will not cream properly regardless of how long you beat it. In a cold kitchen, warm the bowl briefly by setting it over a pan of warm water for 30 seconds, then beat.
My buttercream is too soft and sliding off the cupcakes. The butter was too warm when beaten — above 68°F (20°C), butter loses its ability to hold air and the frosting will look smooth in the bowl but will not hold a piped shape. Refrigerate the buttercream bowl for 10 to 15 minutes, then beat again on medium speed for 60 seconds. If the kitchen is warm, work quickly after piping — the frosting will begin to soften at room temperature above 75°F (24°C).
My ganache seized and turned grainy instead of smooth. Water got into the chocolate before the cream was added, or the cream was boiled rather than just steamed. A single drop of water causes chocolate to seize — it binds the cocoa particles together into a grainy, stiff mass. Make sure the bowl, spoon, and all equipment are completely dry before the chocolate goes in. The cream should be heated until it steams and small bubbles form at the edges — not a rolling boil. Boiling cream can cause the ganache to break into a greasy, separated mass. If the ganache seized, add 1 teaspoon (5ml) of warm heavy cream and stir vigorously — this sometimes rescues a mild seize. A severe seize requires starting over.
My cupcakes are dry and dense instead of moist and fudgy. Too much flour is the most common cause — scooping the measuring cup directly into the flour bag packs 20–30% more flour than spooning and leveling. One extra tablespoon of flour per cup turns a moist cupcake into a dry, crumbly one. Always spoon the flour into the cup and level with a straight edge, or weigh at 180g. Overbaking is the second cause — a toothpick that comes out completely clean means the cupcakes stayed in the oven too long. Pull them the moment the toothpick comes out with moist crumbs.
My altitude is above 3,500 feet and the cupcakes are doming then collapsing. At high altitude, lower air pressure causes leavening gases to expand faster and more aggressively than at sea level. The cupcake rises quickly, then collapses before the structure sets. Reduce the baking soda by ¼ tsp (1.5g), reduce the plain white granulated cane sugar by 2 tablespoons (25g), and increase the oven temperature by 15–25°F (8–14°C). The higher temperature sets the structure faster to catch the rise before it collapses.
Expert Pro-Tips
Use a kitchen scale for the compote fill. 1½ tablespoons (22ml) is the target per cupcake — but tablespoon measures for thick compote are inconsistent. Weigh the total compote after cooking, divide by 12, and portion by weight. Consistent fill weight means consistent lava effect across every cupcake in the batch.
Chill the ganache bowl before drizzling if your kitchen is warm. In a kitchen above 75°F (24°C), ganache loosens quickly and will run completely off the frosting rather than pooling in the grooves. Let the ganache cool to a honey-like consistency — thick enough to drizzle in a controlled stream — before spooning it over the cupcakes.
Make the chocolate shavings over parchment. Draw a cold vegetable peeler firmly across a room-temperature dark chocolate bar and let the shavings fall onto a sheet of parchment. Refrigerate the shavings for 5 minutes before scattering — cold shavings hold their curl and do not melt on contact with the warm frosting.
Humidity note. In high-humidity environments, powdered sugar absorbs moisture from the air and the buttercream will soften faster than expected. Add an extra ½ cup (60g) of sifted powdered sugar to compensate, and pipe in a cool room if possible. Store frosted cupcakes in a single layer in an airtight container rather than loosely covered.
How to Store Raspberry Chocolate Lava Cupcakes
Room Temperature Storage
Frosted and filled cupcakes can be stored at room temperature for up to 24 hours in a single layer inside a tall airtight container — the container needs to be tall enough that the lid does not press against the frosting domes. Do not use plastic wrap directly over frosted cupcakes — it drags through the frosting and collapses the piped shape. Do not stack the cupcakes at any point during storage.
At room temperature, the compote stays at its loosest and most pourable consistency — this is the ideal storage condition if you are serving within the day. The ganache drizzle will firm slightly as it sits but will not harden completely at room temperature above 68°F (20°C).
Day 1: frosting is at peak texture — smooth, fluffy, holds its shape. Compote is fully pourable. Day 2 (if stored correctly): frosting begins to dry slightly at the surface but the interior stays creamy. Compote is still present but slightly more absorbed into the crumb walls. The lava effect is less dramatic by day 2 — still delicious, but the pour is reduced.
Beyond 24 hours at room temperature, the raspberry compote begins to weep moisture into the crumb and the cupcake base softens unevenly. Move to refrigerator storage after the first day.
Refrigerator Storage
Refrigerate frosted cupcakes in a single layer in a tall airtight container for up to 4 days. The cold temperature firms the buttercream significantly and thickens the raspberry compote — refrigerated cupcakes served cold will not produce the lava pour. This is not a flaw; it is a temperature effect.
To restore the lava effect after refrigeration: remove the cupcakes from the fridge and bring them to room temperature for 25 to 30 minutes before serving. Set them on the counter, uncovered, and let the compote loosen naturally. Do not microwave to speed this up — microwaving melts the buttercream and heats the compote unevenly, producing a hot spot in the center surrounded by cold crumb.
The ganache drizzle will harden in the refrigerator but softens back to its original texture within 15 to 20 minutes at room temperature.
🗒 Luna’s Note: I always pull refrigerated cupcakes out 30 minutes before I plan to serve them. Setting a timer is the only reliable way I have found to actually remember to do this — it is easy to forget when you are getting everything else ready.
Freezer Storage
Freeze the cupcake bases unfrosted and unfilled for best results. Frosted, filled cupcakes do not freeze well — the raspberry compote weeps on thawing and the buttercream develops an icy, grainy texture that does not fully recover even after coming to room temperature.
To freeze the cupcake bases: bake and cool completely, then wrap each cupcake individually in plastic wrap and place in a zip-lock freezer bag. Freeze for up to 2 months. Thaw at room temperature for 1 to 2 hours before filling and frosting — do not thaw in the microwave.
The raspberry compote freezes well separately. Pour cooled compote into a small freezer-safe container, leaving ½ inch (1.2cm) of headspace, and freeze for up to 2 months. Thaw overnight in the refrigerator and warm gently in a small saucepan over low heat before using — stir until it returns to its spatula-coating consistency.
The raspberry buttercream freezes well. Transfer to a zip-lock freezer bag, press out all air, and freeze for up to 1 month. Thaw in the refrigerator overnight, then bring to room temperature and beat with the hand mixer on medium speed for 60 to 90 seconds until smooth and fluffy before piping.
Serving Suggestion
Serve these cupcakes at room temperature — not cold, not warm. The compote needs to be at room temperature to pour, the buttercream needs to be at room temperature to be soft and creamy rather than firm and cold, and the ganache needs to be at room temperature to have the glossy, slightly yielding texture visible in the photos.
The pairing I come back to every time I make these is a double shot of espresso alongside — the bitterness of the coffee cuts through the sweetness of the raspberry buttercream and makes the chocolate flavor in the cupcake base read darker and more complex than it does on its own. A glass of cold whole milk is the other direction entirely and works just as well if coffee is not your preference.
These cupcakes are the right choice for any occasion where you want the drama of a reveal — a dinner party dessert, a Valentine’s Day treat, or a birthday where a full layer cake feels like too much. The cross-section moment when someone breaks one open at the table is the payoff.
Frequently Asked Questions About Raspberry Chocolate Lava Cupcakes
Can I double this recipe?
This recipe doubles cleanly for the cupcake base and raspberry compote — simply multiply every ingredient by two. The one exception is the baking soda: do not double it proportionally. Leavening does not scale linearly — too much baking soda produces a metallic, soapy taste and causes the cupcakes to rise too fast and collapse. For a double batch, use 1¾ tsp (10.5g) of baking soda instead of the full 2 tsp (12g) the doubling math would suggest. Bake in two tins on the same center rack if your oven fits both, or bake sequentially — the second tin of batter can sit at room temperature while the first bakes without affecting the result.
Can I use raspberry jam instead of fresh raspberries for the filling?
You can use a good-quality seedless raspberry jam as a direct fill without cooking — spoon it straight into the cored cavity at room temperature. The texture will be smoother and less chunky than the seeded compote visible in the cross-section photos, and the flavor will be sweeter and less bright since commercial jam is higher in sugar and lower in fresh fruit than a homemade compote. If you use jam, choose a high-fruit-content brand — look for raspberries listed as the first ingredient on the label. Avoid raspberry preserves, which contain large fruit pieces that do not fill the cavity evenly and can block the pour. The lava effect still works with jam — the consistency is slightly thicker at room temperature but still pourable when the cupcake is broken open.
How do I fill cupcakes without a special tool?
A cupcake corer makes the cleanest cavity but is not required. A small sharp paring knife works just as well — insert the tip at a slight inward angle about ¾ inch (2cm) from the center of the cupcake top, cut a circle approximately ¾ inch (2cm) in diameter, and lift the core out in one piece by sliding the knife under the base of the cut circle at approximately 1 inch (2.5cm) depth. The goal is a clean-walled cavity with a solid floor — not a tunnel or a ragged tear. A melon baller also works for removing the core cleanly once the initial cut is made with a knife. Whatever tool you use, leave at least ½ inch (1.2cm) of cake at the base to contain the filling.
Can I make these ahead of time?
The cupcake bases can be baked up to 2 days ahead and stored unfilled and unfrosted at room temperature in an airtight container, or frozen for up to 2 months. The raspberry compote can be made up to 3 days ahead and refrigerated in an airtight container — warm gently before filling. The raspberry buttercream can be made up to 3 days ahead and refrigerated, or frozen for up to 1 month — bring fully to room temperature and beat again before piping. Assemble — core, fill, frost, drizzle, garnish — no more than 4 to 6 hours before serving for peak presentation. Cupcakes that sit filled and frosted overnight lose some of the lava effect as the compote absorbs into the crumb walls.
Can I use natural cocoa instead of Dutch-process?
Natural cocoa will not produce the same result in this recipe and is not a recommended substitution. Dutch-process cocoa is alkalized, which produces the near-black color and deep roasted flavor visible in the photos — natural cocoa is acidic and produces a reddish-brown color and a brighter, sharper chocolate flavor. Beyond color and flavor, the swap changes the leavening chemistry: this recipe relies on baking powder as the primary leavening agent precisely because Dutch-process cocoa cannot activate baking soda on its own. If you substitute natural cocoa, reduce the baking powder by ¼ tsp (1g) and add ¼ tsp (1.5g) more baking soda to account for the additional acidity — but be aware the color, flavor, and texture will still differ from what you see in the photos. For the result shown, use Dutch-process.
Why are my cupcakes sinking in the middle?
Cupcakes sink in the middle for three reasons: underbaking, opening the oven door too early, or too much leavening. Underbaking is the most common — the center has not set before the cupcake comes out of the oven, and it collapses as it cools. Always bake to the toothpick-with-moist-crumbs standard, not by time alone, since every oven runs differently. Opening the oven door before 16 minutes causes a sudden temperature drop that deflates the partially set center before the egg proteins have coagulated enough to hold the structure — keep the door closed for the first 16 minutes of every bake. Too much leavening causes the cupcake to rise faster than the structure can support, then fall — if your baking soda and baking powder are both fresh and measured precisely, this is unlikely, but always use level measurements, never heaping. For more cupcake troubleshooting across different recipes, my snickerdoodle cupcakes article covers the same sinking issue from a different leavening angle.
How do I store frosted cupcakes?
Store frosted and filled cupcakes in a single layer in a tall airtight container — tall enough that the lid clears the frosting domes without touching. At room temperature, they keep well for up to 24 hours with the compote at its most pourable. Refrigerate for up to 4 days — remove from the fridge 25 to 30 minutes before serving to bring the compote back to room temperature and restore the lava pour. Never store frosted cupcakes under plastic wrap pressed directly against the frosting — it collapses the piped shape and drags through the surface. Never stack them.
How does altitude or humidity affect these cupcakes?
Above 3,500 feet, lower air pressure causes the leavening gases in the batter to expand faster than at sea level — the cupcakes rise quickly, then collapse before the egg structure sets. Reduce the baking soda by ¼ tsp (1.5g), reduce the plain white granulated cane sugar by 2 tablespoons (25g), and increase the oven temperature by 15 to 25°F (8 to 14°C) to set the structure faster. In high-humidity environments, the buttercream absorbs moisture from the air and softens faster than expected — add an extra ½ cup (60g) of sifted powdered sugar to the frosting, pipe in the coolest room available, and store the finished cupcakes in an airtight container rather than loosely covered. The raspberry compote is not significantly affected by humidity or altitude.
More Cupcakes You’ll Love
If these raspberry chocolate lava cupcakes hit the right note, these are the ones to make next:
- Strawberry Crunch Cupcakes — bright strawberry cupcakes with a strawberry cream cheese frosting and a golden Oreo crunch coating. The fruit-forward cupcake for when raspberry is not the direction.

Fudgy Raspberry Chocolate Lava Cupcakes
Ingredients
Equipment
Method
- Combine raspberries, sugar, and lemon juice in a medium saucepan over medium heat, breaking down the fruit with a spatula for 2 to 3 minutes until bubbling, then reduce to medium-low and cook for 5 to 6 more minutes until the compote coats the back of a spatula and moves slowly when the pan is tilted — do not overcook. Transfer to a bowl, press plastic wrap directly on the surface, and cool completely for at least 30 minutes.
- Position oven rack in the center, preheat to 350°F (175°C), and line a standard 12-cup aluminum muffin tin with cupcake liners, then spray the top surface of the pan lightly with non-stick spray.
- Whisk flour, Dutch-process cocoa, both sugars, baking soda, baking powder, and salt together in a large bowl for a full 30 seconds until completely uniform with no cocoa clumps.
- In a separate bowl, whisk together the melted cooled butter, room-temperature eggs, room-temperature milk, and vanilla until smooth, then add the hot coffee or hot water and whisk for 5 more strokes.
- Pour the wet mixture into the dry ingredients and fold with a silicone spatula using slow upward strokes from the bottom of the bowl — count 18 to 22 strokes and stop the moment no flour streaks remain. Do not overmix.
- Portion the batter evenly into the 12 lined cups, filling each approximately two-thirds full (approximately 65g per cup), and bake at 350°F (175°C) for 18 to 20 minutes until the tops spring back when pressed and a toothpick inserted in the center comes out with moist crumbs — not wet batter, not completely clean.
- Leave cupcakes in the pan for exactly 5 minutes after removing from the oven, then transfer to a wire rack and cool completely for at least 45 minutes before filling.
- Beat the softened butter on medium-high speed with a hand mixer for 3 full minutes until pale and fluffy, then add the sifted powdered sugar one cup at a time on low speed, followed by the seedless raspberry jam, heavy cream, and pinch of salt, then beat on medium-high for 2 more minutes until smooth, pale pink, and holding a firm peak.
- Using a cupcake corer or small sharp paring knife, remove a cavity from the center of each cooled cupcake approximately ¾ inch (2cm) wide and 1 inch (2.5cm) deep, leaving at least ½ inch (1.2cm) of cake at the base, then fill each cavity with approximately 1½ tablespoons (22ml) of the cooled raspberry compote.
- Transfer the buttercream to a piping bag fitted with a large round tip or Wilton 1M star tip and pipe a generous dome of frosting over each filled cupcake starting from the outer edge and spiraling inward and upward.
- Make the ganache by pouring heated cream (steamed, not boiled) over finely chopped chocolate in a dry heatproof bowl, let sit 90 seconds, then stir slowly from the center outward until smooth and glossy — cool for 3 to 4 minutes until thick but pourable, then drizzle freely over each frosted cupcake.
- Top each cupcake with one fresh whole raspberry pressed gently into the frosting at the center, scatter dark chocolate shavings over the surface, and serve at room temperature for the best lava effect.