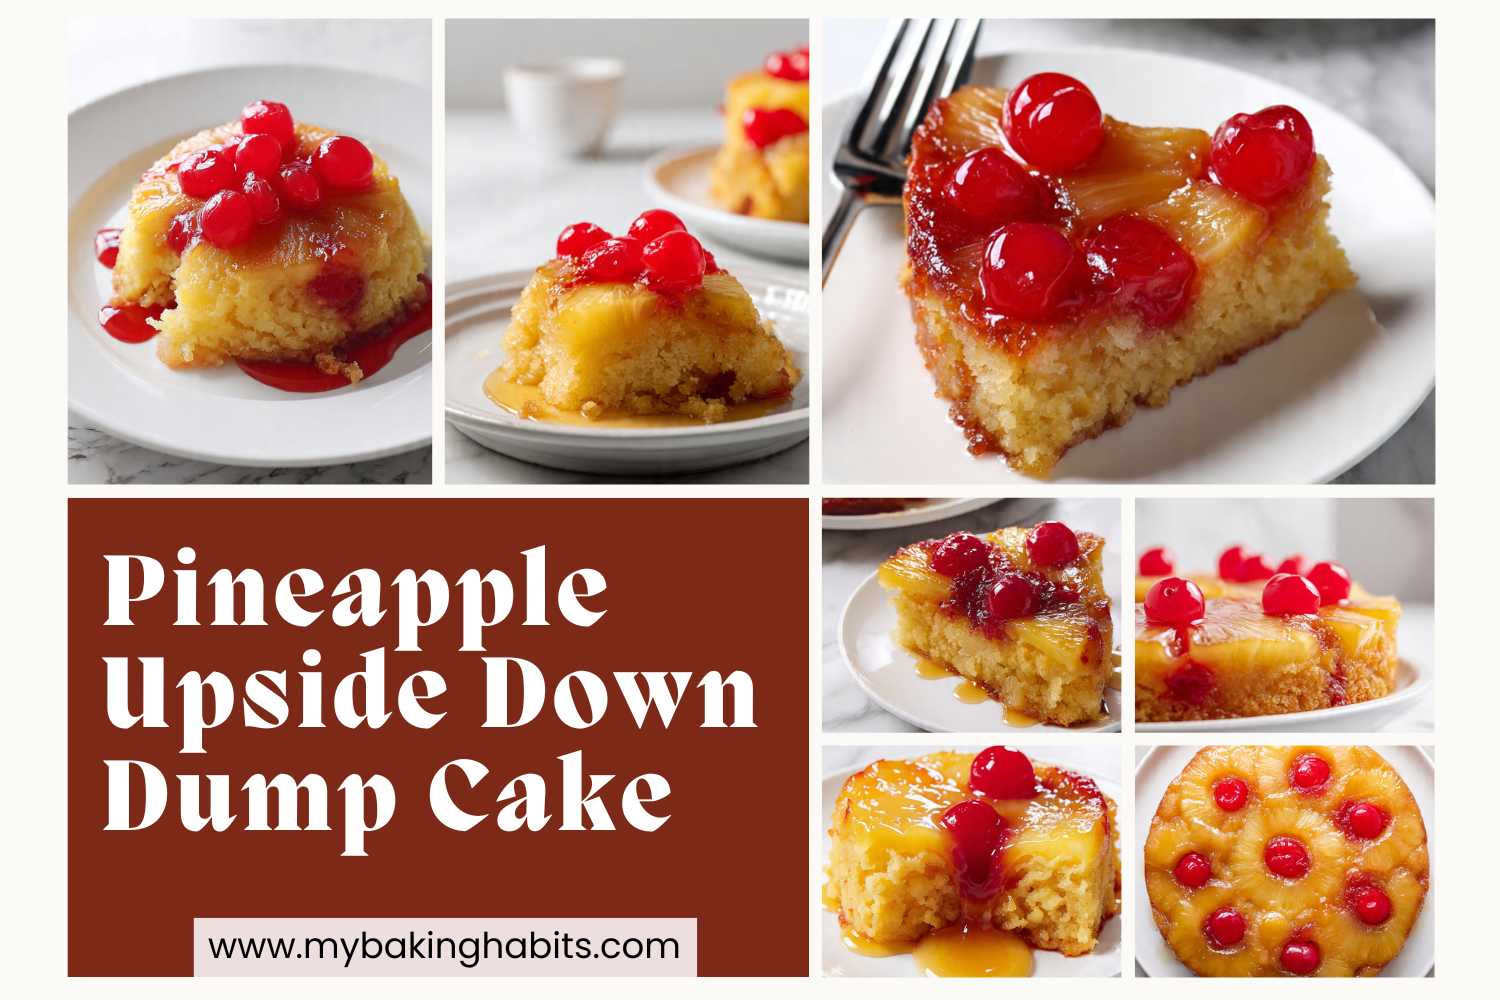
Pineapple Upside Down Dump Cake

I have made this pineapple upside down dump cake more times than I can count — and I mean that in the best way. It started as the dessert I threw together for a last-minute dinner when I had a box of yellow cake mix, a can of pineapple, and thirty minutes. Then I made it again because everyone asked for it. Then I tested it a dozen more times to nail the exact brown sugar and butter ratio that produces that deep amber caramel glaze without turning gummy or burning at the edges. This is the version I kept.
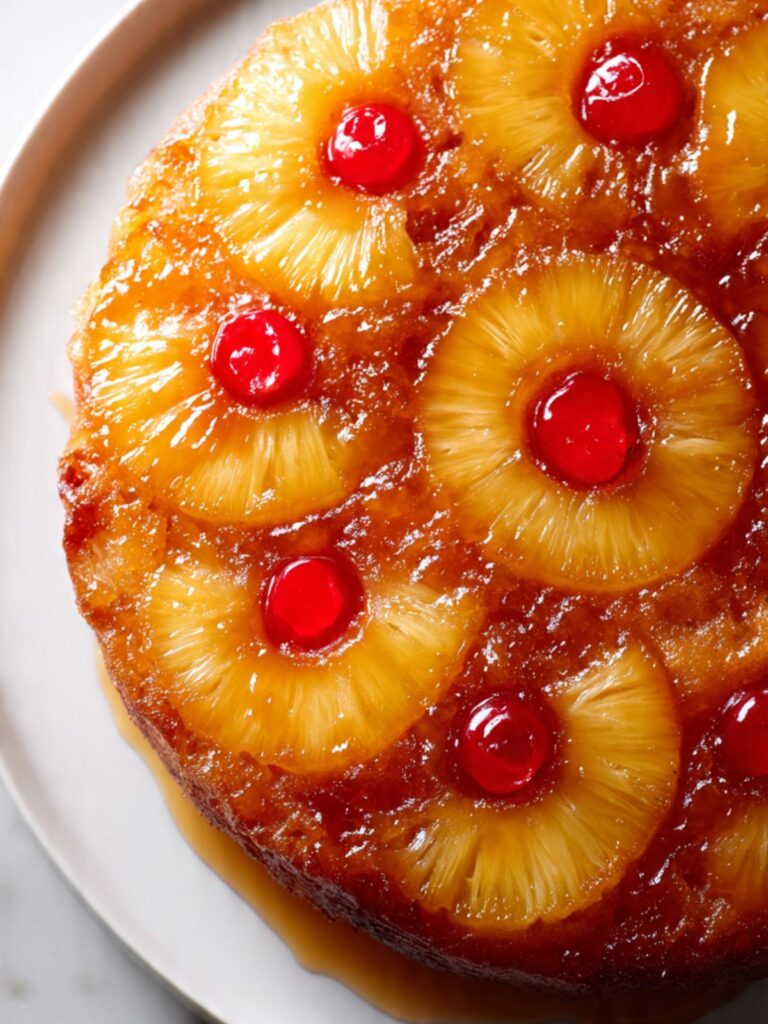
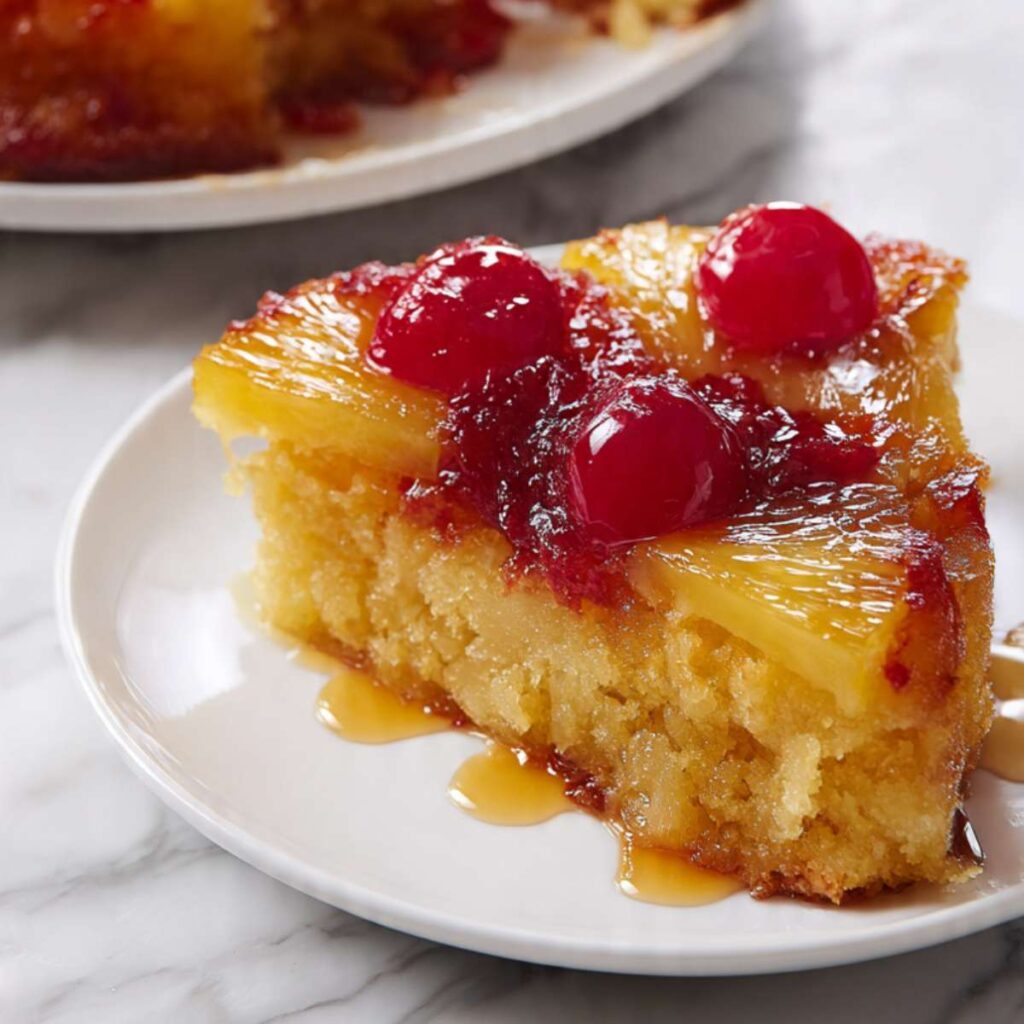
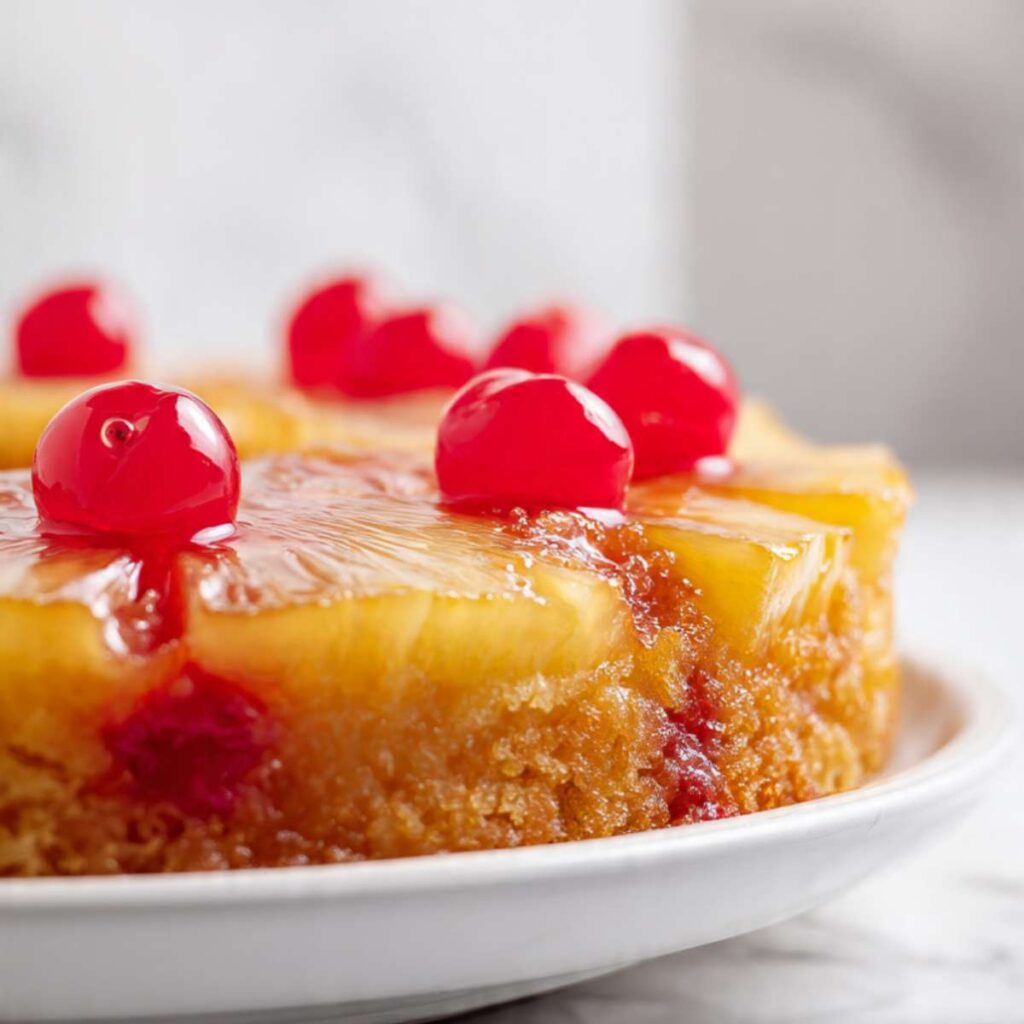
What you get is a tender, buttery yellow cake with a lacquered caramel top studded with golden pineapple rings and glossy maraschino cherries. The brown sugar and butter melt together in the base of the pan during baking and transform into a thick, pourable caramel glaze that coats every pineapple ring and drips down the sides when you invert the cake. The cake itself is moist and soft with a crumb that soaks up just enough of that syrup to taste intentional without going soggy.
I tested this with pineapple juice in the batter versus water as the mixing liquid. Pineapple juice won without a contest. The juice adds a subtle tropical brightness to the cake crumb that water completely misses — and since you are draining the can anyway, it costs nothing extra. The batter mixed with juice also produced a slightly more golden crumb color that matched the caramel topping better visually. That version is what I kept.
I tested the butter-to-brown-sugar ratio in the base across three variations. Equal parts (¼ cup each) produced a thin, pale glaze that looked underdressed compared to what you see in these photos. Bumping the brown sugar to ½ cup with ⅓ cup butter gave the deep amber pooling glaze visible in the slice photos — thick enough to set when cool but still fluid enough to drip beautifully when the cake is warm. That is the ratio I landed on.
No mixer required. No chilling. No layering technique to learn. The whole thing comes together in one pan — you build the topping directly in the baking pan, pour the batter over the top, and the oven does the rest. From opening the box to pulling the cake from the oven is under an hour.
🗒 Luna’s Note: I always let this cake sit in the pan for exactly 10 minutes after pulling from the oven before inverting. I set a timer. In my warm LA kitchen, that 10-minute window is what keeps the caramel layer fluid enough to release cleanly without leaving half the pineapple rings stuck to the pan.
| Prep Time | Cook Time | Total Time | Yield | Difficulty |
|---|---|---|---|---|
| 10 min | 40–45 min | 55 min | 8 slices | Easy |
| Calories | Fat | Carbs | Sugar | Protein |
|---|---|---|---|---|
| ~420 kcal | ~18g | ~63g | ~43g | ~3g |
Macros are approximate and will vary based on ingredient brands and serving size.
Ingredients
For the Caramel Topping
- ⅓ cup (75g) unsalted butter, cut into small pieces — salted butter will throw off the salt balance of the caramel and make the glaze taste sharp rather than round and sweet
- ½ cup (110g) packed dark brown sugar — pack it firmly into the measuring cup; loose brown sugar produces a thin, pale glaze instead of the deep amber layer visible in the photos. Dark brown sugar gives a deeper caramel flavor than light brown sugar — either works, but dark is what I tested with
- 1 can (20 oz / 567g) sliced pineapple rings in juice — do not use pineapple in syrup (too sweet, throws off the caramel balance) and do not use fresh pineapple (fresh contains bromelain, an enzyme that prevents the cake from setting correctly). Drain and reserve the juice — you will use it in the batter
- 1 jar (10 oz / 283g) maraschino cherries, drained and patted dry — drain thoroughly and press gently between paper towels. Wet cherries release excess liquid into the caramel layer and prevent a clean set
For the Cake Batter
- 1 box (15.25 oz / 432g) yellow cake mix — use the dry mix straight from the box. Do not prepare it according to the package directions. Betty Crocker Super Moist or Pillsbury Moist Supreme are the brands I tested with — both produced the tender, even crumb visible in the cross-section photos
- 3 large eggs (approximately 50g each without shell), room temperature — cold eggs do not emulsify smoothly into the batter and can produce a slightly curdled, uneven texture. Pull them from the fridge 30 minutes before you start
- ¾ cup (180ml) pineapple juice reserved from the can — this replaces the water called for on the back of the cake mix box. If your can yields less than ¾ cup juice, top up with water to reach the full amount
- ½ cup (113g) unsalted butter, melted and cooled slightly — this replaces the oil called for on the box. Butter produces a richer, more flavorful crumb than neutral oil. Cooled slightly means warm to the touch but not steaming — hot butter scrambles the eggs when they meet in the batter
Before You Start
Temperature prep: Pull your eggs from the refrigerator 30 minutes before mixing. Room temperature eggs emulsify into the batter smoothly and produce a more even crumb. In a rush, place the uncracked eggs in a bowl of warm (not hot) water for 10 minutes.
Butter prep — two separate quantities: This recipe uses butter in two places — the caramel base (cold, cut into pieces) and the batter (melted and cooled). Measure and prepare both before you start. For the melted butter: melt it in a small saucepan or microwave, then set it aside while you prepare the pan so it has time to cool. Hot melted butter poured directly into a batter with eggs will begin to cook the eggs before they mix in — the result is a streaky, uneven batter that bakes up with a slightly rubbery texture.
Brown sugar freshness: If your brown sugar has hardened into a brick, place it in a microwave-safe bowl with a damp paper towel draped over the top and microwave in 20-second increments until it is pliable enough to pack. Do not use hardened sugar directly — you cannot pack it accurately and the glaze will be uneven.
Cake mix freshness check: Check the expiration date printed on the end of the cake mix box before opening. Expired cake mix contains degraded leavening — the cake will not rise correctly and the crumb will be flat and dense regardless of how carefully everything else is done. Even within the printed date, store the box in a cool, dry pantry — not above the stove or in a humid cabinet. Humidity shortens the effective life of the leavening inside the mix faster than the printed date accounts for.
No chilling required: This recipe requires no chilling at any stage — the batter goes straight from the bowl into the pan. Have everything prepped and ready before you start mixing because the batter should be poured over the fruit immediately after it comes together.
Serving plate — have it ready before you start: Before you begin assembling the pan, set out the plate you will use for inversion. It must be flat and at least 11 inches (28cm) across — wider than the 9-inch pan by at least 1 inch on every side. A standard dinner plate works. Discovering mid-inversion that your plate is too small is the kind of mistake that costs you the caramel layer.
Pan prep: Use a 9-inch (23cm) round light-colored aluminum cake pan. Do not use a dark non-stick pan — it absorbs more heat, which burns the brown sugar base before the cake bakes through. Do not use a springform pan — the caramel base is liquid when it goes in and will leak. Do not line with parchment before adding the caramel base — the butter and sugar need direct contact with the metal pan to caramelize correctly. You will grease only the sides of the pan lightly with butter or non-stick spray to help the cake release cleanly.
Oven position: Position your oven rack in the middle of the oven before preheating. Top rack scorches the caramel topping. Bottom rack burns the base before the center sets.
Gram weight priority: The gram weights in this recipe are what I tested with and are more reliable than volume measurements. Use a kitchen scale set to grams for the most consistent result, particularly for the brown sugar — packing density varies significantly by hand.
Mixing method: This entire recipe comes together with a large mixing bowl and a whisk or silicone spatula — no electric mixer needed.
Necessary Tools
Required:
- 9-inch (23cm) round light-colored aluminum cake pan
- Large mixing bowl
- Whisk or sturdy silicone spatula
- Small saucepan or microwave-safe bowl (for melting butter)
- Measuring cups and spoons
- Kitchen scale (strongly recommended — gram weights are more reliable than volume)
- Wire cooling rack
- Large flat serving plate or cake board for inverting — must be wider than 9 inches
Optional:
- Oven thermometer (recommended — most home ovens run 15–25°F off and a brown sugar base is sensitive to temperature variation)
- Rubber spatula for scraping any caramel left in the pan after inverting
How to Make Pineapple Upside Down Dump Cake
Step 1: Preheating the Oven and Building the Caramel Base
This entire recipe comes together with a bowl and a whisk — no electric mixer needed at any stage. Position your oven rack in the middle of the oven and heat to 350°F (175°C). Most home ovens run 15–25°F (8–14°C) off — if you have an oven thermometer, confirm the actual temperature before the pan goes in. A brown sugar caramel base is more sensitive to temperature swings than a standard cake batter — too hot and the sugar scorches before the cake sets, too cool and the glaze stays pale and thin instead of the deep amber layer you see in the photos.
While the oven preheats, lightly grease only the sides of your 9-inch (23cm) round light-colored aluminum cake pan with butter or non-stick spray. Leave the bottom completely ungreased — the butter pieces you add next need direct contact with the metal to begin caramelizing. Do not use a dark non-stick pan — it absorbs heat too aggressively and will burn the sugar before the cake bakes through. Do not use a springform pan — the caramel base is liquid when it goes in and will leak through the seam before it ever reaches the oven.
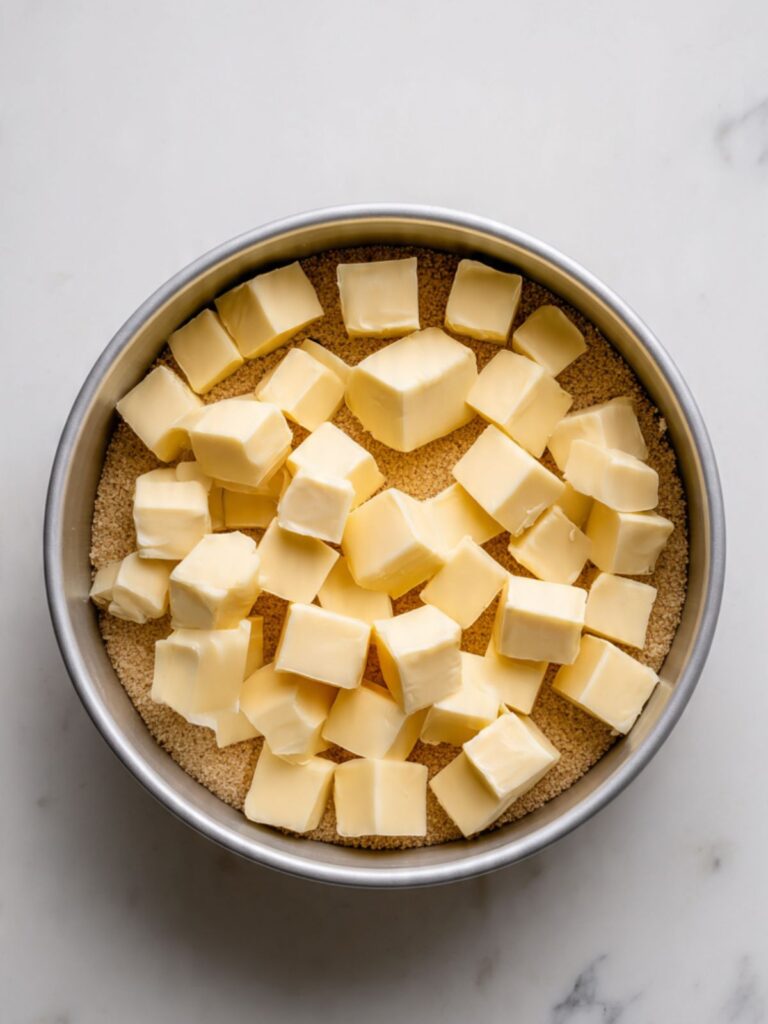
Scatter your ⅓ cup (75g) unsalted butter, cut into small pieces evenly across the bottom of the pan in a single layer. Then sprinkle your ½ cup (110g) packed dark brown sugar evenly over the butter pieces, covering the entire base of the pan as uniformly as possible. The dark brown sugar is what drives the deep amber caramel glaze visible in the photos — its molasses content caramelizes against the hot metal during baking and produces the complex, slightly bitter-edged sweetness that distinguishes a real caramel from plain sugar syrup. Do not stir the sugar and butter together. Do not press anything down. The dry sugar and cold butter pieces go in as-is and the oven does the work.
Do not try to melt the butter on the stovetop first before adding it to the pan. Pre-melted butter hits the sugar all at once — the rapid moisture evaporation pushes the caramel past its ideal temperature range before the batter above it has time to set. Cold butter pieces release their water slowly as they melt, which keeps the sugar caramelizing at a controlled rate throughout the bake.
The base should look like an even, pale brown layer of sugar with butter pieces distributed throughout — not mixed, not melted, not clumped to one side.
Place the pan in the refrigerator while you prepare the fruit — keeping the base cold for 5 minutes helps the butter and sugar stay exactly where you placed them during assembly. Your oven is preheating and your caramel base is set — move to the fruit arrangement now.
Step 2: Arranging the Pineapple Rings and Cherries for a Clean Caramel Pattern
Open your 1 can (20 oz / 567g) sliced pineapple rings in juice and drain the contents through a fine mesh strainer or colander set over a bowl or large measuring cup — you need the juice for the batter, so pour it carefully and do not discard it. Measure the reserved juice now. If the can yields less than ¾ cup (180ml), top it up with water to reach the full amount and set it aside. Pat the drained pineapple rings gently but firmly between two layers of paper towel. Press down — you want to remove surface moisture, not just blot it. Wet rings release steam during baking that interrupts the caramel layer directly beneath them, creating soft, pale patches in the glaze instead of the even amber coverage shown in the overhead photo.
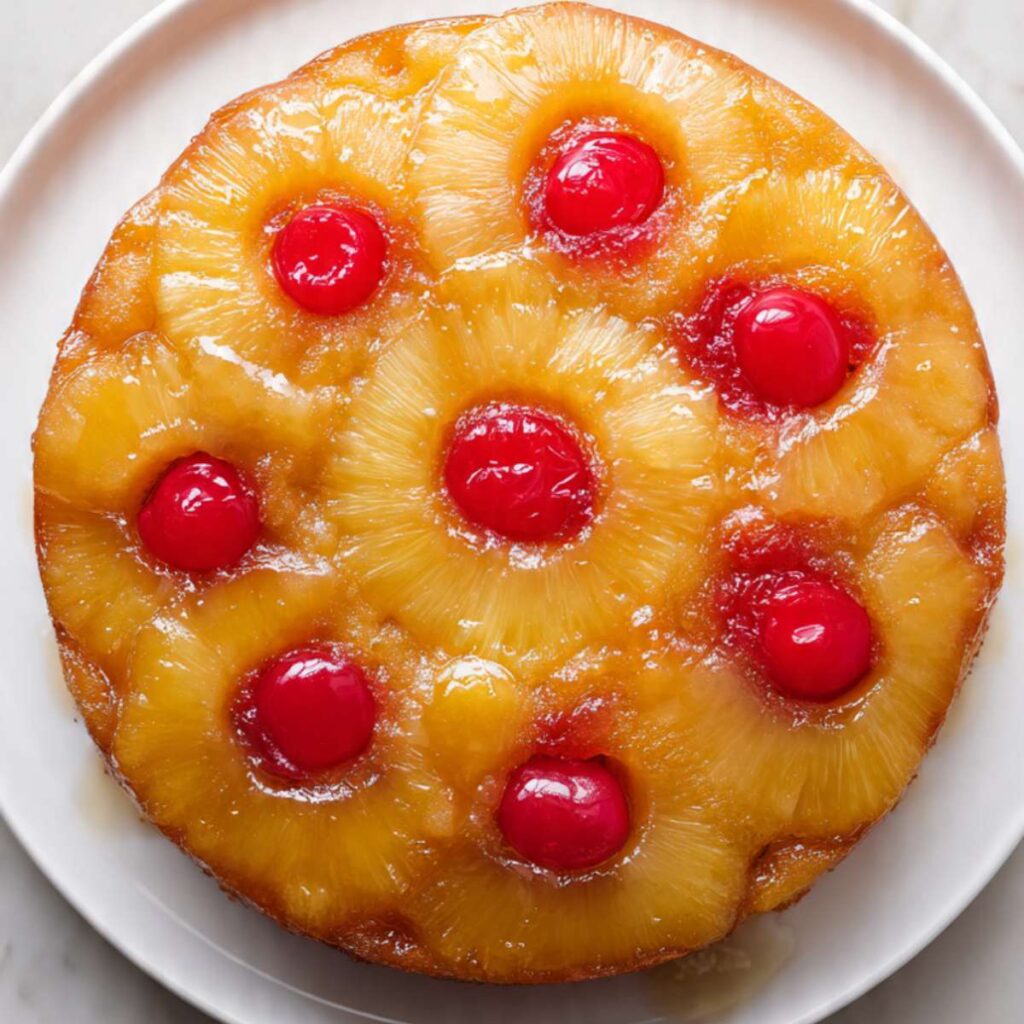
Remove the pan from the refrigerator. Place one pineapple ring flat in the center of the brown sugar base. Arrange the remaining rings around the center ring, fitting them as snugly as possible without overlapping. As you can see in the overhead photo above, the rings tile across the full base with their edges nearly touching — this tight arrangement is what produces the defined, clean ring pattern visible after inverting. Any small gaps between rings will fill with caramel during baking, which is fine, but the more coverage the rings provide, the more structured the finished topping will look.
Drain your 1 jar (10 oz / 283g) maraschino cherries and press them firmly between two layers of paper towel until no more red liquid transfers onto the paper. Do not skip this step — maraschino cherries are packed in a heavily dyed syrup, and any residual syrup on the cherry surface leaches into the caramel layer during baking, clouding the clean amber color you see in the photos into a murky red-brown. Once dry, place one cherry in the center hole of each pineapple ring. Tuck additional cherries into the gaps between rings wherever they fit naturally. Take 30 extra seconds to center each ring hole before placing the cherries — a ring that sits off-center produces a lopsided cherry that throws off the symmetry of the finished overhead pattern.
The arranged pan should show full pineapple ring coverage across the base with a cherry precisely centered in each ring hole and additional cherries filling the visible gaps — it should look exactly like the overhead photo above.
The fruit layer is set. Pour the batter directly over it in the next step without disturbing the arrangement.
Step 3: Mixing the Batter — One Bowl, No Mixer
In your large mixing bowl, pour your ¾ cup (180ml) pineapple juice reserved from the can. Add your 3 large eggs (approximately 50g each without shell), room temperature and your ½ cup (113g) unsalted butter, melted and cooled slightly. The melted butter replaces the oil called for on the back of the cake mix box — butter produces a richer, more flavorful crumb with a warmer golden color than neutral oil, and it is what gives the cake interior the moist, buttery character visible in the cross-section of the slice in the hero photo — you can see how the crumb pulls apart in soft, irregular layers rather than compressing into a tight, uniform mass. The pineapple juice replaces the water the box instructions call for — it adds a subtle tropical brightness to the crumb that water completely misses and costs you nothing since you drained the can anyway.
Using your whisk, beat the liquid ingredients together with brisk, vigorous strokes for approximately 20 to 30 seconds until the eggs are fully broken up and the mixture looks smooth, pale yellow, and uniform. If you see streaks of unincorporated egg white or pools of separated butter sitting on the surface, whisk for another 10 seconds and check again.
Add your 1 box (15.25 oz / 432g) yellow cake mix — the dry powder straight from the box, not prepared according to the package directions. Set your whisk aside and switch to your silicone spatula. Fold the dry mix into the liquid ingredients using slow, deliberate strokes from the bottom of the bowl upward — not stirring in circles, which knocks air out of the batter and overworks the gluten. Count approximately 40 to 50 strokes from the moment the powder touches the liquid. Stop as soon as no dry streaks of cake mix remain visible anywhere in the bowl.
Do not overmix after the dry mix goes in. Overmixing develops the gluten past the point the recipe is designed for — the crumb will bake up dense and slightly rubbery rather than the soft, open texture shown in the hero photo cross-section. Small lumps in the batter at this stage are acceptable and will smooth out during baking. A batter that looks slightly uneven is far better than one that has been beaten smooth.
The finished batter should look thick, smooth, and pourable — like a slightly thicker-than-standard pancake batter. A ribbon of batter dropped from the spatula should hold its shape on the surface for 2 seconds before dissolving back into the bowl.
Pour the batter over the fruit immediately — do not let it rest.
Step 4: Pouring the Batter Over the Fruit Without Disturbing the Arrangement
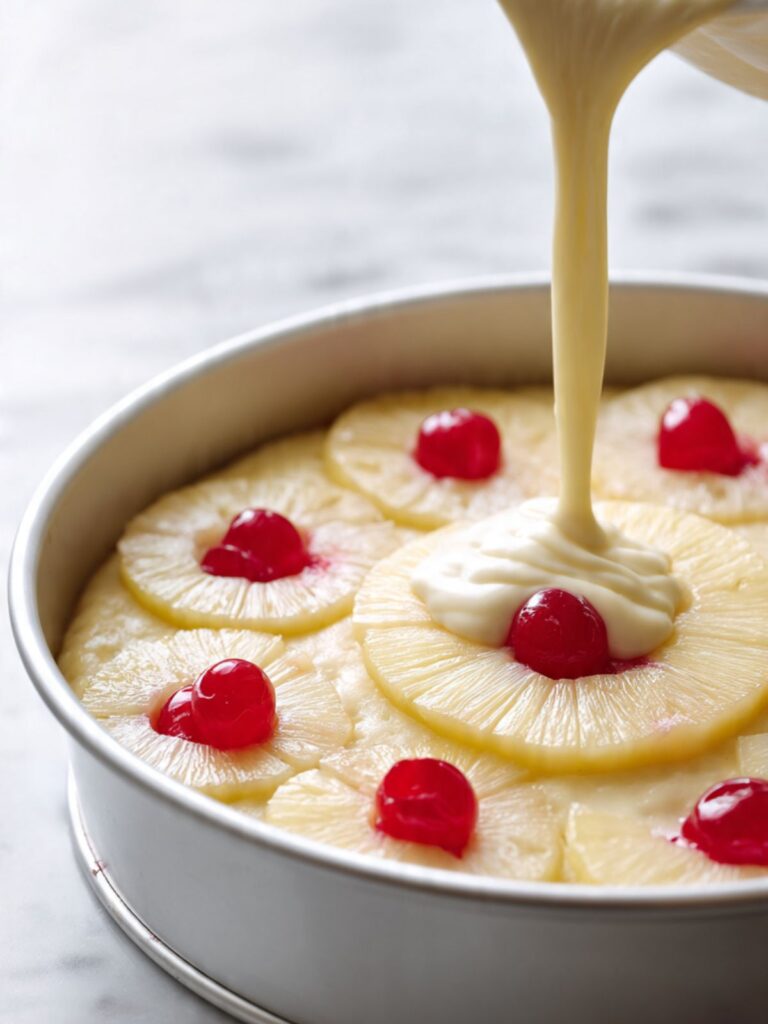
Working carefully to avoid disturbing the pineapple and cherry arrangement below, pour your batter slowly and evenly over the fruit layer. Start at the center of the pan and pour in a slow, steady circular motion moving outward toward the edges. Starting at the center distributes the batter’s weight gradually rather than concentrating it in one spot, which is what dislodges cherries from the ring holes. Use your silicone spatula to gently coax the batter to the edges of the pan if needed, bringing it level across the surface with light strokes — do not press down or drag.
The batter will sit approximately 1 to 1.5 inches (2.5–4cm) above the fruit layer. This is correct. The fruit and caramel base are underneath and the oven will handle the rest. Do not tap the pan on the counter to level the batter — tapping shifts the fruit arrangement below.
This recipe uses a fully mixed batter, not the dry-mix dump method where cake mix powder is poured directly over fruit and butter slices are layered on top. Do not add additional butter poured over the batter surface. The butter is already incorporated into the batter — adding extra on top will make the surface greasy and prevent the top of the cake (which becomes the bottom after inverting) from baking through evenly.
Place the pan on the middle rack of your 350°F (175°C) oven. Set a timer for 40 minutes and do not open the oven door before that mark — the sudden temperature drop deflates the partially set structure and the center will sink into a depression before it has a chance to set.
The pan should show a smooth, even layer of pale yellow batter sitting level in the pan with no fruit visible on the surface — the entire pineapple and cherry arrangement is hidden underneath the batter at this stage.
Set your timer and do not open the oven until it goes off.
Step 5: Baking Until the Toothpick Comes Out Clean and the Edges Pull Away
Bake at 350°F (175°C) for 40 to 45 minutes. Start checking at the 40-minute mark. Insert a wooden toothpick into the center of the batter, angling it to avoid hitting a pineapple ring. The cake is done when the toothpick comes out clean or with just a few moist crumbs clinging to it — no wet batter, no raw streaks.
The visual cues at correct doneness: the top surface of the cake — which is the bottom of the finished cake after inversion — should be deep golden brown and pulling slightly away from the sides of the pan. Along the edges of the pan you will see the caramel layer beginning to bubble up between the cake and the pan wall — this is the caramel doing exactly what it should as it reaches serving temperature. The surface of the cake should spring back lightly when pressed in the center with a fingertip.
Do not pull the cake early because the top surface looks golden. The caramel layer underneath is still fully liquid at this point and the cake needs its full bake time to develop enough structural integrity to survive inversion. A toothpick with wet batter on it means the center has not set — return the pan to the oven for 5 more minutes and retest.
Do not chase a completely dry toothpick either. A bone-dry toothpick means the cake has gone past its ideal moisture point — the crumb will be tighter and drier than the moist, pull-apart texture visible in the slice photos. A few moist crumbs on the toothpick is the exact pull point.
At correct doneness: the top surface is deep golden brown, the edges are pulling from the pan sides, caramel is visibly bubbling at the pan edge, and the toothpick comes out with a few moist crumbs — not wet batter, not completely clean.
Remove the pan from the oven and set it on a wire cooling rack immediately. Do not invert yet — move to Step 6.
Step 6: The 10-Minute Rest and Inverting the Cake
Set a timer for exactly 10 minutes the moment the pan comes out of the oven and place it on the wire rack. Do not skip this rest and do not guess the timing — the 10-minute window is the most precise step in this recipe and both sides of it produce a different problem.
Immediately out of the oven, the caramel layer at the base of the pan is fully liquid — approximately 200–220°F (93–104°C) — with the consistency of thin syrup. If you invert now, the caramel has almost no surface tension and will run straight off the cake entirely rather than coating the pineapple rings. As the pan rests on the wire rack, the caramel cools and thickens — transitioning from thin syrup to the thick, glossy, coating consistency visible dripping down the sides of the cake in the slice photos. Waiting past 15 minutes pushes the caramel toward the crystallization threshold — it begins to bond to the metal pan rather than releasing from it, and the pineapple rings tear away from the cake on inversion instead of coming with it.
At the 8-minute mark, before your timer goes off, run a thin offset spatula or butter knife gently around the inside edge of the pan in one slow continuous pass. You are looking for any spot where the caramel has gripped the pan side — loosen it with the spatula before the flip rather than after. This takes 20 seconds and prevents torn edges.
🗒 Luna’s Note: I do this at the 8-minute mark every single time, even when I am confident the sides greased well. The one time I skipped it, two pineapple rings stayed in the pan. The spatula pass costs nothing and the insurance is worth it every time.
When your timer goes off, place your large flat serving plate face-down directly over the top of the pan. The plate must be flat — a rimmed plate or bowl will not sit flush — and it must be at least 11 inches (28cm) wide so the caramel that drips outward on inversion stays on the plate rather than running off the edge. Using oven mitts or folded kitchen towels because the pan is still hot, hold the plate firmly against the pan with both hands. In one confident, single motion, flip the pan and plate together so the pan ends up on top and the plate is on the bottom. Set the assembly on your counter.
Leave the flipped pan sitting on the plate for 30 full seconds without lifting it. Gravity needs this time to pull the caramel and cake away from the pan base. After 30 seconds, lift the pan straight up and away in one smooth motion — do not tilt or slide it. If any pineapple rings or cherries remain adhered to the pan bottom, use your spatula to lift them off immediately and reposition them on the cake while the caramel is still warm and tacky enough to hold them.
The finished cake should look exactly like the overhead photo — a full concentric ring of golden pineapple with a cherry precisely centered in each ring hole, the entire surface lacquered with the deep amber caramel glaze, with caramel dripping slightly at the base just as visible in the slice photos.
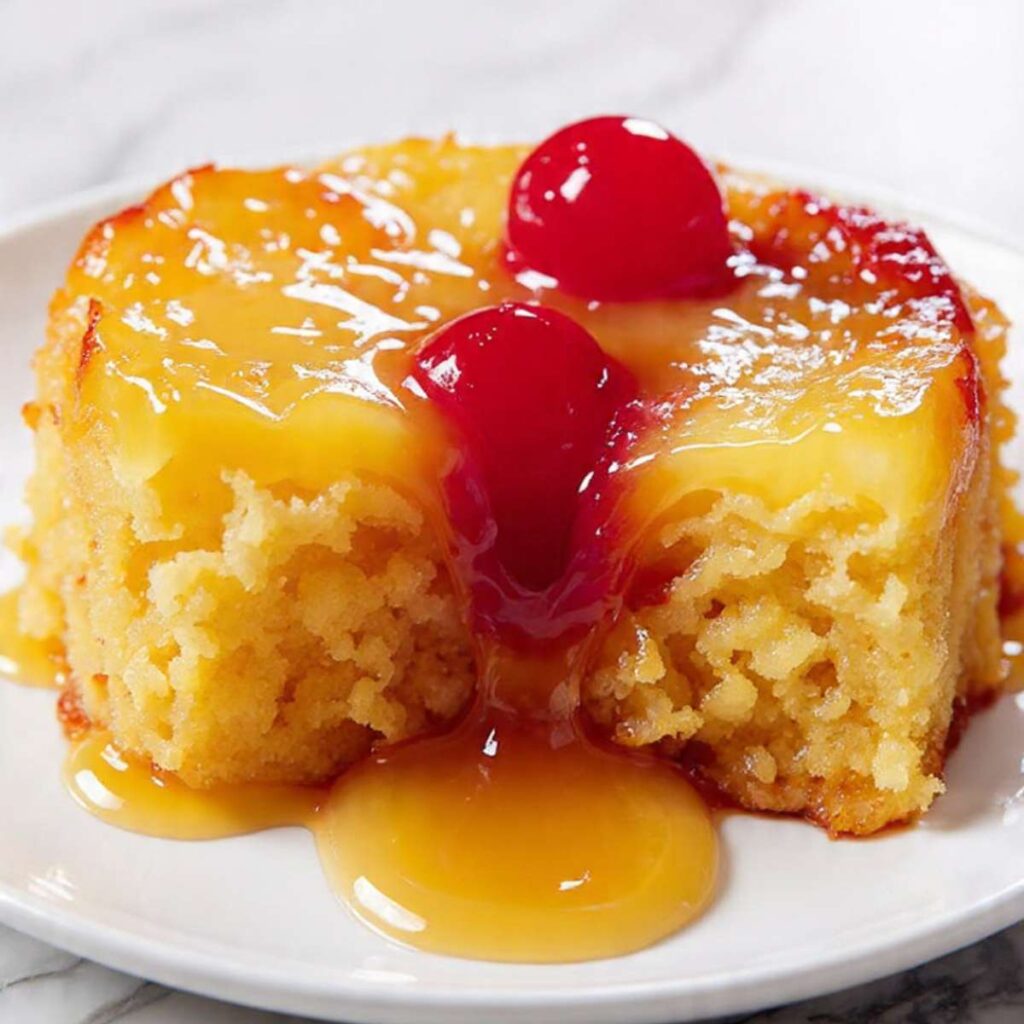
Spoon any caramel that has pooled on the plate back over the top of the cake before serving — that pooled caramel is the most concentrated, deeply flavored part of the glaze and belongs on the cake, not left on the plate. Serve warm.
The Science Behind Pineapple Upside Down Dump Cake
Why the Brown Sugar and Butter Caramelize Into a Glaze Instead of Just Melting
The deep amber layer that coats the pineapple rings in this cake is not simply melted butter and dissolved sugar — it is the result of two simultaneous chemical processes happening at the bottom of the pan during baking. The first is caramelization: when the packed dark brown sugar reaches temperatures above 320°F (160°C) in direct contact with the hot metal pan, the sugar molecules break down and recombine into hundreds of new flavor compounds — this is what produces the complex, slightly bitter-edged sweetness that distinguishes a caramel glaze from plain sugar syrup. The second process is the Maillard reaction between the milk solids in the butter and the amino acids present in the brown sugar’s molasses content, which deepens the color from pale amber to the dark, lacquered finish visible in the photos.
The reason the butter goes in cold and in pieces — rather than pre-melted — is that cold butter releases its water content slowly as it melts during baking. That gradual water release keeps the sugar from scorching before the cake batter above it insulates the base. Pre-melted butter hits the sugar all at once and the rapid evaporation pushes the caramel past its ideal temperature range before the cake has time to bake through. This is why pan temperature and oven calibration matter more in this recipe than in a standard cake — the caramel layer is working on a narrower temperature window than the batter above it.
This same caramelization principle is what makes the peach dump cake work — the fruit layer underneath acts as a buffer that keeps the sugar from overcooking while the batter sets above it.
Why Canned Pineapple Works and Fresh Pineapple Does Not
Fresh pineapple contains an active enzyme called bromelain — a protease that breaks down protein structures. Cake batter relies on egg proteins coagulating during baking to build the crumb structure that holds the cake together. When fresh pineapple comes into contact with raw batter, the bromelain begins digesting the egg proteins before they have a chance to set in the oven. The result is a cake center that never fully firms up — it stays wet, dense, and structurally weak even after the full bake time. No amount of additional baking fixes it because the enzyme continues working as long as the pineapple is raw.
Canned pineapple has been heat-processed during canning, which permanently denatures the bromelain — the enzyme is destroyed by the high temperatures of the canning process and is no longer active. This is why the recipe specifies canned pineapple rings in juice, not fresh, and not frozen — frozen pineapple retains active bromelain until it is fully cooked through, which does not happen reliably in a dump cake bake time. The juice from the can is also bromelain-free and safe to use in the batter, which is why it produces a stable, properly set crumb despite being pineapple-flavored.
Why the Inversion Timing Determines the Finish on the Caramel Layer
The 10-minute rest before inverting is not a cooling step — it is a viscosity window. Immediately out of the oven, the caramel layer at the base of the pan is fully liquid, approximately 200–220°F (93–104°C), with the consistency of thin syrup. At this temperature it has almost no surface tension and will run straight off the cake if inverted. As the pan rests on the wire rack, the caramel cools and its viscosity increases — sugar syrup thickens significantly as it drops from 200°F toward 150°F (66°C), transitioning from pourable liquid to a thick, coating consistency that can cling to the surface of the pineapple rings and set into the glossy lacquered finish visible in the photos.
Waiting past 15 minutes pushes the caramel toward the crystallization threshold — as the sugar cools further, it begins to set against the metal pan rather than releasing from it. This is the mechanism behind pineapple rings sticking to the pan after inversion — the caramel has already begun to bond to the metal surface instead of staying bonded to the fruit. The 10-minute window exists because it is when the caramel has lost enough heat to be viscous and coating but not so much heat that it has begun to re-solidify. Setting a timer is the only reliable way to hit this window consistently — estimating by feel almost always runs long in a warm kitchen.
Pineapple Upside Down Dump Cake Troubleshooting & Pro-Tips
The cake mix produced a flat, dense result with no rise
The box of yellow cake mix was past its expiration date, or it was stored in a humid environment that degraded the leavening agents inside the mix. Boxed cake mix contains baking powder and baking soda pre-blended into the dry mix — unlike loose leavening, you cannot test its potency separately. The only reliable check is the expiration date printed on the box end. Expired cake mix produces a cake that spreads flat rather than rising, with a dense, gummy crumb that no amount of additional baking will correct. Fix: there is no recovery once the cake is baked with expired mix. Prevention: check the expiration date on the box before opening, and store unopened cake mix in a cool, dry pantry — not above the stove or in a humid cabinet. Use within 12 months of purchase even if the printed date has not passed, as humidity degrades leavening faster than the date assumes.
The brown sugar base burned at the edges before the cake baked through
A dark non-stick pan was used, the oven rack was positioned too low, or the oven was running significantly hotter than the set temperature. Dark pans absorb radiant heat more aggressively than light-colored aluminum and can push the caramel base past its caramelization point before the batter above it has had time to set. A springform pan will leak the liquid caramel base before baking even begins — burned, sticky mess on the oven floor. Burned caramel tastes bitter and cannot be corrected after baking. Fix: if edges are darkening rapidly before the 30-minute mark, tent the top of the pan loosely with foil for the remaining bake time. Prevention: always use a light-colored aluminum cake pan, never a springform, position the rack in the middle of the oven, and use an oven thermometer to confirm actual oven temperature before the pan goes in.
The pineapple rings stuck to the pan and tore when inverted
The caramel cooled past its release window before the pan was flipped. Once the caramel drops below approximately 140°F (60°C), it begins bonding to the metal pan surface rather than staying bonded to the fruit — when you invert at this point, the rings pull away from the cake instead of releasing cleanly with it. If this happens, use a thin offset spatula or butter knife to lift the stuck rings off the pan immediately while any residual warmth remains, then press them back onto the cake surface while the caramel on the cake is still tacky enough to hold them. Work fast — the window to reattach is narrow. Prevention: set a timer for 10 minutes the moment the pan comes out of the oven, run a thin knife around the inside edge at the 8-minute mark, and flip at exactly 10 minutes every time.
The caramel topping is pale, thin, and watery rather than deep amber and glossy
The brown sugar was not packed firmly enough, the quantity was undermeasured, or light brown sugar was used instead of dark. Light brown sugar contains less molasses than dark brown sugar — molasses drives both the deep color and the complex caramel flavor visible in the photos. A loose cup of brown sugar can measure 30–40% less than a firmly packed one, producing a glaze too thin to coat the pineapple rings properly. Fix: cannot be corrected after baking. Prevention: pack the brown sugar firmly into the measuring cup by pressing it down with the back of a spoon until it holds the shape of the cup when turned out, and use dark brown sugar for the deepest result.
The cake center is wet, dense, and did not set properly
Fresh pineapple was used instead of canned, the batter was significantly overmixed, or the cake was underbaked. Fresh pineapple contains active bromelain that prevents egg proteins from coagulating — the cake center will never fully set regardless of bake time if fresh pineapple is the cause. If overmixing is the cause, the dense texture cannot be corrected after baking but will still be edible. If underbaking is the cause, return the pan to the oven immediately for 5-minute increments and re-test with a toothpick each time — this only works if the cake has not yet been inverted. Prevention: always use canned pineapple in juice, fold the batter only until no dry streaks remain, and confirm doneness with a toothpick before removing from the oven.
The batter mixed unevenly and the finished cake has dense, doughy pockets
The butter was too hot when it was added to the batter, or the eggs were still cold. Hot butter begins cooking the egg proteins on contact before mixing begins, producing coagulated streaks in the batter that do not smooth out during baking. Cold eggs resist emulsification and create uneven fat distribution throughout the batter. Fix: cannot be corrected once baked. Prevention: melt the butter and set it aside for at least 5 minutes before it touches the eggs, and pull the eggs from the refrigerator 30 minutes before mixing.
The cherries bled red dye into the caramel layer and the topping looks murky
The maraschino cherries were not drained and patted dry before placing. Maraschino cherries are packed in a heavily dyed syrup — any residual syrup on the surface of the cherry leaches into the caramel layer during baking and clouds the amber color. Fix: the discoloration is aesthetic only — the cake is still edible. Prevention: drain the cherries in a fine mesh strainer, then press them firmly between two layers of paper towel until no more liquid transfers.
The cake sank in the center after coming out of the oven
The oven door was opened before the 40-minute mark, the oven temperature was too low, or the cake was underbaked before being removed. Opening the oven door before the structure sets causes a sudden temperature drop that collapses the partially set crumb — the center sinks into a depression that no amount of additional baking will fully recover. Prevention: do not open the oven door before 40 minutes, confirm oven temperature with a thermometer, and always test with a toothpick before removing.
High altitude and humidity note
At high altitude (above 3,500 feet / 1,067 meters), leavening gases in the cake mix expand faster — check the cake at 35 minutes as bake time may shorten slightly, and confirm doneness with a toothpick rather than surface color alone. In high humidity (above 70% relative humidity), the brown sugar base may take longer to caramelize and the finished caramel surface may feel tacky even when fully set — this is the hygroscopic nature of brown sugar absorbing ambient moisture, not underbaking. Confirm doneness with a toothpick.
Expert Pro-Tips
Pat every piece of fruit completely dry before it goes into the pan. Both the pineapple rings and the maraschino cherries carry surface moisture that creates steam pockets during baking, interrupting the caramel layer directly beneath the fruit and producing soft, pale patches in the glaze where you want deep, even amber. Two firm presses between paper towels per ring and per cherry is all it takes.
Use a plate that is at least 2 inches wider than your pan on every side. A plate that is exactly 9 inches across gives you no margin for the caramel drip that flows outward the moment the pan is lifted. The caramel visible pooling around the cake base in the slice photos is not a flaw — it is the glaze doing its job. A wider plate contains it cleanly and doubles as part of the presentation.
Run a thin knife or offset spatula around the inside edge of the pan at the 8-minute rest mark — before you flip. Even with greased sides, a small section of caramel occasionally grips the pan edge. Loosening it before inversion prevents torn edges and keeps the ring pattern intact. One slow pass around the perimeter is enough.
Serve this cake warm, not hot and not cold. Warm caramel is fluid, glossy, and pourable — the consistency shown in the photos. Cold caramel firms into a dull, sticky layer that loses its visual appeal entirely and becomes difficult to cut cleanly. If the cake has cooled completely, place individual slices in a 300°F (150°C) oven for 8–10 minutes to bring the caramel back to serving consistency.
Arrange the pineapple rings with the holes centered as precisely as possible. The cherry placement depends entirely on the ring holes being centered — a ring that sits off-center produces a lopsided cherry position that throws off the symmetry of the finished overhead pattern visible in the hero photo. Take 30 extra seconds during assembly to center each ring before placing the cherries.
How to Store Pineapple Upside Down Dump Cake
Room Temperature
Pineapple upside down dump cake can be stored at room temperature for up to 2 days. Place the cake on its serving plate and cover it loosely with a dome cake cover or a large inverted bowl — do not wrap it tightly in plastic wrap. Tight wrapping traps moisture against the caramel surface and turns the glossy glaze into a sticky, wet layer that transfers onto the plastic and pulls away from the pineapple rings when unwrapped. Do not store in a zip-lock bag for the same reason — the caramel layer needs airflow to maintain its set texture.
Room temperature storage works best when your kitchen stays below 75°F (24°C). In a warm kitchen, the caramel layer softens significantly and the pineapple rings begin to weep additional juice into the cake base. If your kitchen runs warm — as mine does in Los Angeles through most of the year — refrigerate after the first day.
Day 1: caramel is glossy, fluid at room temperature, and slices cleanly.
Day 2: caramel has firmed slightly but is still cohesive and flavorful. The cake crumb stays moist due to the pineapple juice in the batter. Beyond day 2 at room temperature: the pineapple rings begin to soften further and the caramel layer starts to absorb into the cake crumb, losing its distinct layered character.
Refrigerator
Refrigerating this cake is recommended if you are keeping it beyond 2 days or if your kitchen runs warm. Store the cake loosely covered on its plate — a large plate with plastic wrap tented loosely over the top works well, or transfer slices to a lidded hard-sided container with a layer of parchment between any stacked pieces to prevent the caramel surfaces from fusing together.
Refrigerated pineapple upside down dump cake keeps well for up to 5 days. The caramel layer will firm considerably in the refrigerator — this is expected and does not indicate a problem. Before serving refrigerated cake, bring individual slices to room temperature for 20 to 30 minutes, or warm them in a 300°F (150°C) oven for 8 to 10 minutes until the caramel returns to a glossy, slightly fluid consistency. Do not microwave — microwave reheating makes the caramel layer bubble unevenly and the cake crumb steams rather than warms, producing a wet, gummy texture.
Freezer — Baked
Pineapple upside down dump cake freezes adequately but with some texture trade-offs worth knowing. The cake crumb freezes and thaws well. The caramel and pineapple layer, however, releases additional moisture during thawing that softens the caramel glaze and can make the pineapple rings slightly more translucent than fresh. The result is still delicious — just visually less polished than the fresh-baked cake.
To freeze: cut the fully cooled cake into individual slices. Wrap each slice tightly in plastic wrap, pressing the wrap directly against all surfaces including the caramel top. Place the wrapped slices in a zip-lock freezer bag or lidded freezer-safe container. Freeze for up to 6 weeks — beyond 6 weeks the pineapple develops an off-flavor from prolonged freezer exposure.
To thaw: transfer slices from the freezer to the refrigerator the night before serving and allow to thaw overnight — approximately 8 hours. Do not thaw at room temperature from frozen — the outside warms and the center stays icy, which causes uneven moisture release into the caramel. Once thawed, warm in a 300°F (150°C) oven for 8 to 10 minutes before serving.
Freezer — Unbaked
This recipe does not support freezing in its unbaked state. The dump cake assembly — caramel base, arranged fruit, and poured batter — does not hold up to freezing before baking. The pineapple rings release liquid as they freeze and thaw, which floods the caramel base and prevents it from caramelizing correctly during baking. The batter also partially hydrates during freezing contact with the wet fruit layer, which affects the final crumb texture. Assemble and bake this recipe fresh — the active time is only 10 minutes, which makes same-day preparation straightforward.
Serving Suggestion
I serve this cake warm — pulled from the oven, rested the full 10 minutes, inverted, and brought to the table while the caramel is still running slightly at the edges. The moment the caramel is glossy and fluid is the best moment to eat this cake, and I plan around it rather than making it ahead when I can help it.
For a dinner party, I time the cake to come out of the oven 15 minutes before I want to serve dessert — the rest and inversion fill the first 10 to 12 minutes, and by the time slices are plated the caramel has settled into exactly the consistency shown in the photos. A scoop of vanilla bean ice cream placed directly on the warm caramel top is the pairing I come back to every time — the contrast between the cold, creamy ice cream and the warm, sticky caramel is the reason this cake gets requested again and again.
🗒 Luna’s Note: I always pour any caramel that pooled on the serving plate back over the top of the cake slices before bringing them to the table. That pooled caramel is the most concentrated, deeply flavored part of the whole dessert — spooning it over each slice rather than leaving it on the plate is the detail that makes the difference between a good slice and a great one.
Frequently Asked Questions About Pineapple Upside Down Dump Cake
Can I use fresh pineapple instead of canned?
Fresh pineapple does not work in this recipe. Fresh pineapple contains an active enzyme called bromelain that breaks down egg proteins during baking — the cake center will not set correctly and will stay wet and dense no matter how long it bakes. Canned pineapple has been heat-processed during canning, which permanently deactivates the bromelain. Always use canned pineapple rings in juice — not fresh, not frozen, and not canned in syrup, which makes the caramel layer overly sweet and unbalanced.
How do I keep a pineapple upside down cake from sticking?
The two most reliable prevention steps are greasing the sides of the pan thoroughly before assembly and inverting within the 10-minute rest window. The sides of the pan are where sticking most commonly occurs — the caramel migrates up the pan walls during baking and grips any ungreased surface. The base releases naturally because the butter in the caramel layer acts as its own release agent against the metal. Inverting within 10 minutes ensures the caramel is still fluid enough to release from the pan rather than having begun to re-solidify against it. Running a thin knife around the inside edge of the pan at the 8-minute mark before flipping adds an additional layer of insurance on the sides.
Can I make pineapple upside down cake ahead of time?
Yes, with the best results coming from same-day baking. The cake can be baked up to 24 hours ahead and stored loosely covered at room temperature or refrigerated. Reheat the whole cake in a 300°F (150°C) oven for 12 to 15 minutes before serving to bring the caramel back to its glossy, fluid consistency — cold caramel loses its visual appeal and becomes difficult to cut cleanly. If you are making it for a dinner party, baking it the same day and timing the inversion 15 minutes before dessert is the approach that produces the result shown in the photos. For a similar make-ahead dump cake option, the pumpkin dump cake holds its texture particularly well overnight and is worth bookmarking for the colder months.
Can I make pineapple upside down cake in a 9×13 pan?
Yes, with adjustments. A 9×13 inch (23x33cm) light-colored aluminum pan produces a thinner cake with a wider caramel surface — more pineapple coverage but a shorter cake crumb layer. Use the same quantities of brown sugar and butter for the base but increase to 2 cans of pineapple rings to cover the larger surface area, and use 1.5 jars of maraschino cherries. The batter from one box of cake mix will be thinner across the larger pan — reduce bake time to 30 to 35 minutes and start checking at 28 minutes. The inversion technique and rest time remain the same. Do not use a glass 9×13 pan — glass retains heat longer and will scorch the caramel base before the center sets.
Why is my pineapple upside down cake soggy?
Sogginess in pineapple upside down dump cake comes from one of three sources: the pineapple rings were not patted dry before placement and released excess moisture into the caramel layer during baking, the cake was underbaked and the center crumb never fully set, or the cake was stored tightly wrapped which trapped steam against the caramel surface and softened it. The fix depends on the cause — if the sogginess is in the topping layer only, warming the cake in a 300°F (150°C) oven for 10 minutes will help the caramel firm back up. If the sogginess is in the cake crumb itself, the cake was underbaked and cannot be fully corrected after the fact. Always pat the fruit dry, confirm doneness with a toothpick, and store loosely covered rather than wrapped tight.
Can I double this pineapple upside down dump cake recipe?
You can double this recipe across two 9-inch round pans — do not attempt to fit a doubled batch into one pan. Double all ingredients proportionally. The bake time for each pan remains the same at 40 to 45 minutes — do not increase bake time because you have doubled the recipe. If baking both pans simultaneously, rotate them between the middle and upper-middle rack at the 20-minute mark to ensure even baking. The leavening in boxed cake mix does not require adjustment when doubling since you are using two separate boxes rather than scaling a single recipe — the leavening ratio in each box is already calibrated for that quantity of batter.
How does altitude or humidity affect this recipe?
At high altitude (above 3,500 feet / 1,067 meters), the leavening in the cake mix activates faster and the batter rises more quickly — start checking the cake at 35 minutes rather than 40, and confirm doneness with a toothpick rather than visual cues alone since the surface color develops faster at altitude. The caramel layer is not significantly affected by altitude. In high humidity (above 70% relative humidity), the brown sugar base takes slightly longer to reach caramelization temperature and the finished caramel surface may feel tacky even when fully set — this is the hygroscopic nature of brown sugar absorbing ambient moisture from the air, not a flaw in the recipe. Store the cake in a cool, dry spot and the surface will firm appropriately within a few hours of baking.
More Cakes You’ll Love
- Chocolate Dump Cake — a fudgy, brownie-adjacent dump cake made with canned cherry pie filling and boxed chocolate cake mix, no mixer required and ready in under an hour

Pineapple Upside Down Dump Cake
Ingredients
Equipment
Method
- Position oven rack in the middle and heat to 350°F (175°C), then lightly grease only the sides of a 9-inch (23cm) round light-colored aluminum cake pan with butter or non-stick spray.
- Scatter the ⅓ cup (75g) unsalted butter pieces evenly across the bottom of the pan, then sprinkle the ½ cup (110g) packed dark brown sugar evenly over the butter in a single layer — do not stir or press down.
- Place the pan in the refrigerator while you prepare the fruit — approximately 5 minutes.
- Drain the canned pineapple rings and reserve the juice in a measuring cup, then pat the rings dry between paper towels and arrange them in a single layer across the brown sugar base — one ring in the center, remaining rings fitted snugly around it.
- Drain the maraschino cherries and pat them dry between paper towels, then place one cherry in the center hole of each pineapple ring and tuck additional cherries into the gaps between rings.
- In a large mixing bowl, whisk together the ¾ cup (180ml) reserved pineapple juice, 3 room temperature eggs, and ½ cup (113g) melted and cooled butter until smooth and uniform — approximately 20 to 30 seconds.
- Add the full box of dry yellow cake mix and fold with a silicone spatula using slow strokes from the bottom of the bowl upward — approximately 40 to 50 strokes — until no dry streaks remain; do not overmix.
- Pour the batter slowly and evenly over the fruit layer starting at the center and working outward, then use the spatula to spread it gently to the edges without disturbing the fruit arrangement below.
- Bake at 350°F (175°C) for 40 to 45 minutes until a toothpick inserted in the center comes out clean or with a few moist crumbs and the top surface is deep golden brown and pulling from the pan sides.
- Remove from oven and set on a wire rack for exactly 10 minutes — set a timer — then run a thin knife around the inside edge of the pan, place a large flat serving plate face-down over the pan, and flip in one confident motion; lift the pan straight up and reposition any fruit that shifted.
- Serve warm with any caramel that pooled on the plate spooned back over the slices.