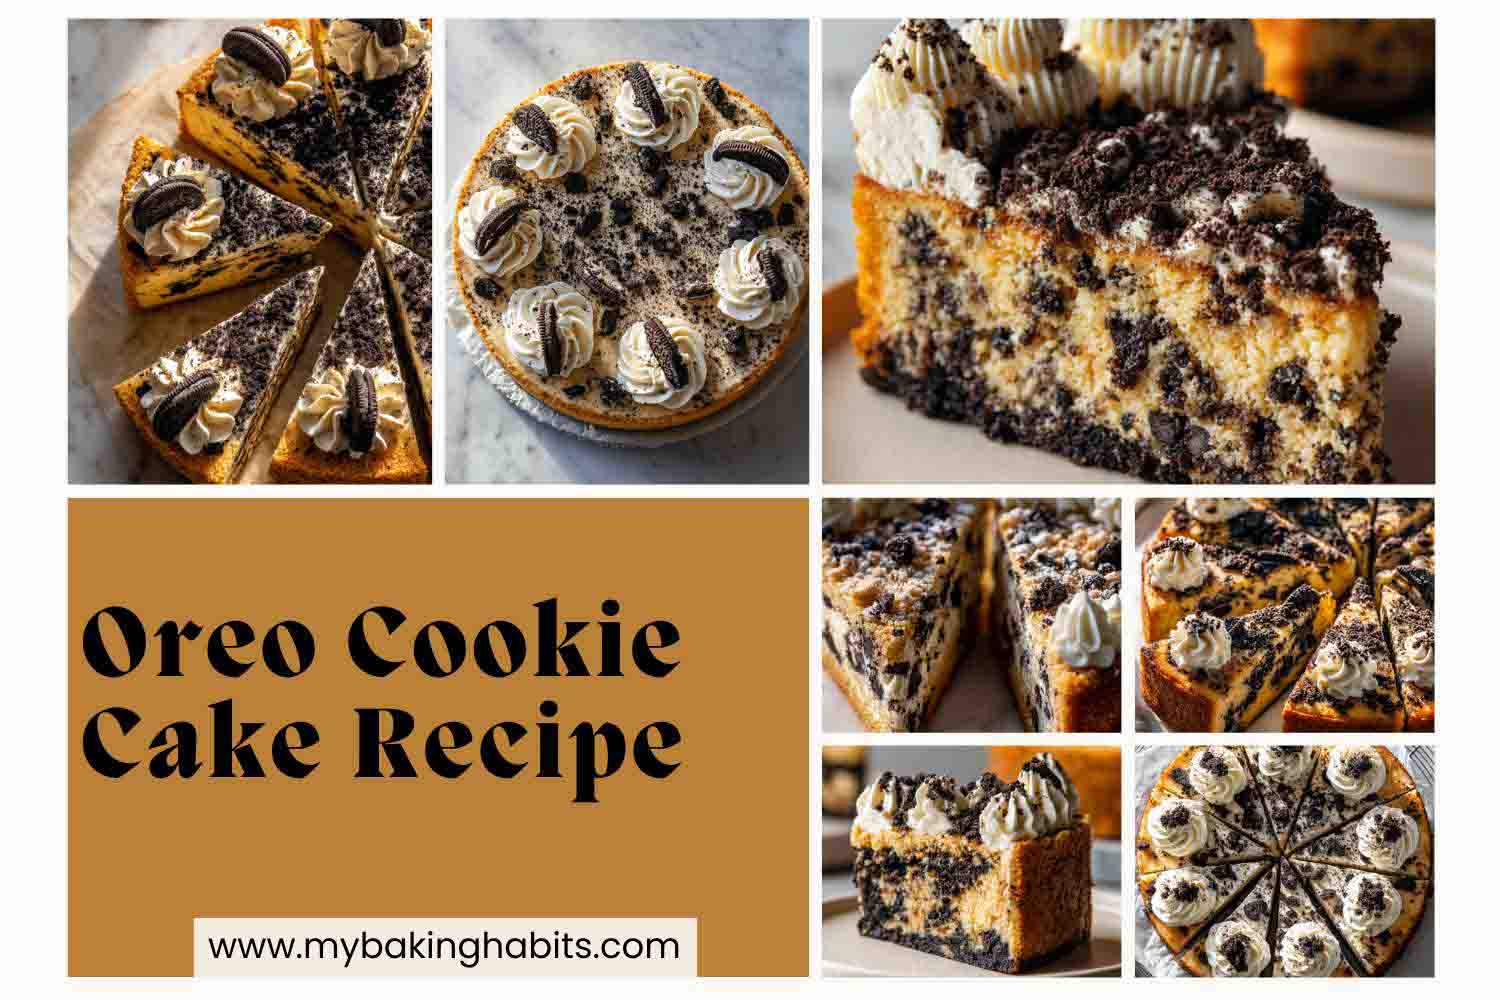
Thick & Creamy Oreo Cookie Cake
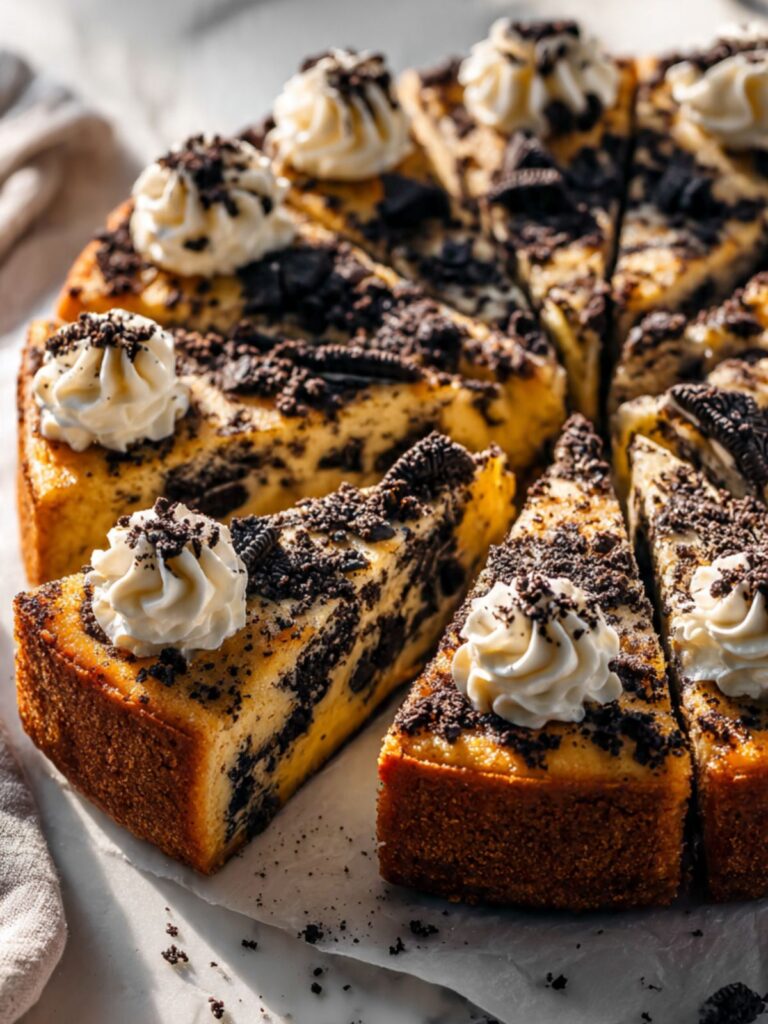
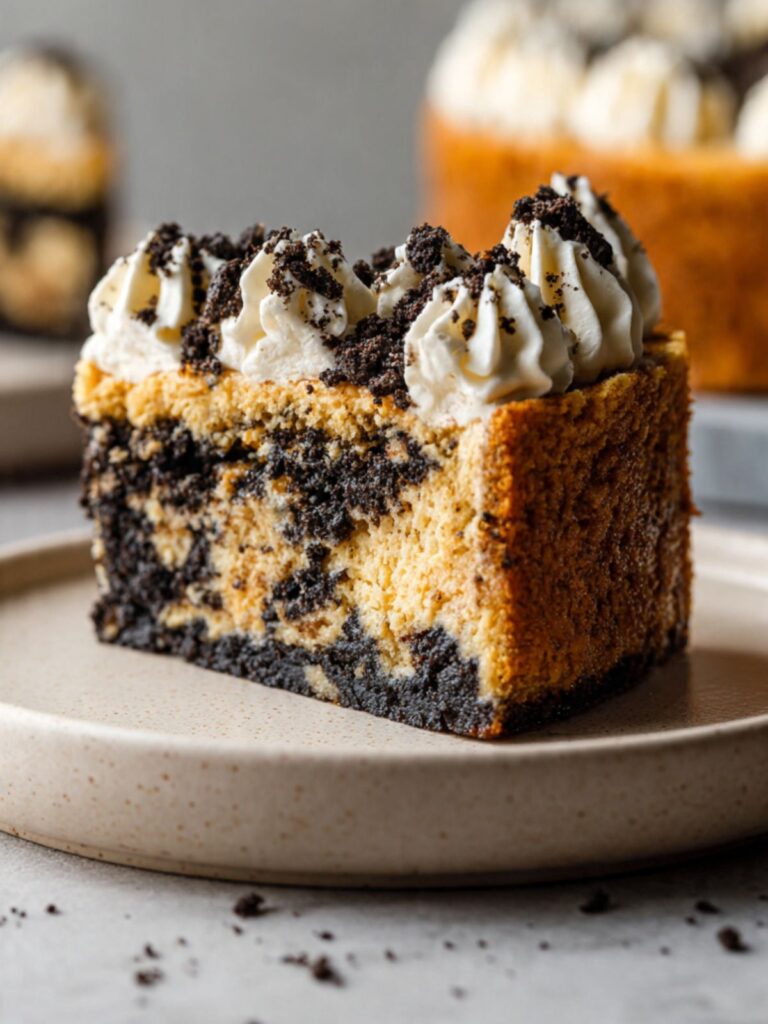
The thing most people misunderstand about an Oreo cookie cake is that it is not a chocolate cake with Oreo pieces thrown in. The cream cheese in the batter is doing the structural work here — it is what gives every slice that dense, creamy interior you can see in the cross-section photo above, where the crumb is tight and the Oreo pieces are distributed all the way through, not just scattered on top. I tested this with and without cream cheese in the batter. Without it, the cake is fine. With it, the cake is something else entirely.
I have made this recipe eleven times across three months of testing, and the version that finally locked in is the one where the Oreo crust is thick enough to hold a clean slice, the batter has enough sour cream to stay moist through the full bake, and the whipped cream is piped the same day the cake is served. The first three batches had a soggy crust. The problem was pressing it while it was still warm from the oven and filling it immediately. Fifteen minutes of chill time after pressing the crust changes everything.
The texture promise: the edges of each slice come out with a deep golden exterior, the interior is dense and creamy with Oreo crumble throughout — not cakey, not hollow, not dry. The Oreo crust base holds firm under the knife. The whipped cream rosettes are light against the dark crumble on top, exactly as shown in the angled slice photo.
🗒 Luna’s Note: I use a 9-inch springform pan for this recipe because the slices are taller and hold their shape better when plated. A 10-inch pan produces thinner slices that are harder to garnish cleanly with the whole Oreo on top.
I tested this with full-fat block cream cheese versus whipped cream cheese from a tub. The tub version has a higher water content and the batter was noticeably looser — the baked slices were slightly wet at the center even when the edges were fully set. Full-fat block cream cheese only. I would not substitute it.
I also tested the Oreo quantity in the batter — 12 crushed Oreos versus 16. Twelve produced a pale batter with occasional dark flecks. Sixteen produced the dense, Oreo-streaked interior visible in the cross-section photo. The cream filling from the Oreos stays in — do not scrape it out. It adds sweetness and acts as an additional fat source in the batter.
This recipe uses a stand mixer or hand mixer, one large mixing bowl, and a 9-inch springform pan. No water bath required. No chilling the batter before baking. The crust needs 15 minutes in the fridge before filling — that is the only wait before the oven.
Recipe Overview & Nutrition Table
| Yield | 10 slices |
| Pan Size | 9-inch (23cm) springform pan |
| Prep Time | 25 minutes |
| Chill Time (crust) | 15 minutes |
| Bake Time | 50–55 minutes |
| Cooling Time | 1 hour in oven + 2 hours at room temperature + 4 hours refrigerated |
| Total Time | Approximately 8 hours (mostly hands-off) |
| Difficulty | Intermediate |
| Storage | Refrigerated, loosely covered, up to 5 days |
| Calories | Total Fat | Saturated Fat | Carbohydrates | Sugar | Protein | Sodium |
|---|---|---|---|---|---|---|
| 520 kcal | 32g | 18g | 52g | 34g | 7g | 340mg |
Nutrition calculated including Oreo crust, cake batter, and whipped cream topping. Values are estimates — actual values depend on specific brands used.
Ingredients & Tools for Oreo Cookie Cake Recipe
For the Oreo Crust
- 24 Oreo cookies, whole (cream filling left in) — approximately 270g
- 5 tablespoons (70g) unsalted butter, melted
For the Oreo Cake Batter
- 8 oz (226g) full-fat block cream cheese — not whipped, not low-fat, softened to room temperature for 60–90 minutes
- ½ cup (113g) unsalted butter, softened to room temperature for 60–90 minutes — not melted, not cold
- 1 cup (200g) granulated white sugar
- 3 large eggs, room temperature — warm water bath 10 minutes if cold
- 1 teaspoon pure vanilla extract — not imitation
- 1½ cups (190g) all-purpose flour, spooned into the measuring cup and leveled — or weighed
- 1½ teaspoons baking powder — check freshness before using
- ¼ teaspoon fine sea salt
- ½ cup (120g) full-fat sour cream, room temperature — not low-fat, not Greek yogurt
- 16 Oreo cookies, roughly crushed into uneven pieces — cream filling left in
For the Whipped Cream Topping
- 1½ cups (360ml) heavy whipping cream — cold, straight from the refrigerator
- 3 tablespoons (23g) powdered sugar, sifted
- 1 teaspoon pure vanilla extract
For Garnish
- 10 whole Oreo cookies
- 3–4 Oreo cookies, crushed into fine crumble — for scattering across the top surface
Before You Start
Read this entire section before touching an ingredient.
This recipe requires a stand mixer fitted with the paddle attachment, or a hand mixer with a large mixing bowl. Mixing the cream cheese and butter by hand will not produce the smooth, lump-free batter this recipe requires — use an electric mixer.
For the most accurate results, use a kitchen scale set to grams. Volume measurements like cups and tablespoons can vary by 20–30% depending on how the ingredient is scooped or packed. The gram weights in this recipe are the numbers I tested with — they are the most reliable way to get the same result I got.
Every dairy ingredient in the cake batter — cream cheese, butter, eggs, and sour cream — must be at full room temperature before mixing begins. Cold cream cheese will not beat smooth regardless of how long you mix it, and lumps that form at this stage will bake into the finished cake. Pull everything from the refrigerator at least 60–90 minutes before you begin. Press your finger into the butter and cream cheese — they should indent easily with no resistance.
The heavy whipping cream for the topping must stay cold until you are ready to whip it. Cold cream whips faster and holds its shape longer. Do not pull it from the refrigerator until the cake is fully cooled and ready to garnish.
Room temperature timing at a glance:
| Ingredient | Time needed |
|---|---|
| Full-fat block cream cheese | 60–90 minutes |
| Unsalted butter (batter) | 60–90 minutes |
| Large eggs | 30 minutes (or 10-minute warm water bath) |
| Full-fat sour cream | 30 minutes |
To test baking powder freshness: drop ½ teaspoon into a small bowl of hot water. If it fizzes actively, it is still good. If it sits flat with no reaction, it is expired — expired baking powder will not give the cake enough lift and the interior will be dense and flat. Replace it before baking.
To measure flour correctly: spoon the flour into your measuring cup using a separate spoon and level the top with a straight edge. Do not scoop the measuring cup directly into the flour bag — scooping compresses the flour and packs in 20–30% more than the recipe needs, which produces a thick, dry, tough crumb. If you have a kitchen scale, weigh the flour at 190g — this is always more accurate than any volume measurement.
Necessary Tools
- 9-inch (23cm) springform pan — the removable sides are required for clean unmolding; do not substitute a standard round cake pan
- Stand mixer with paddle attachment or hand mixer
- Large mixing bowl (if using hand mixer)
- Medium mixing bowl — for the crust and for crushing Oreos
- Whisk attachment — for whipping cream (stand mixer or hand mixer)
- Food processor or zip-lock bag + rolling pin — for crushing Oreo cookies
- Rubber spatula or silicone spatula — for folding and scraping
- Kitchen scale — strongly recommended
- Wire cooling rack
- Thin knife or offset spatula — for running around the pan edge after baking
- Piping bag fitted with an open star tip (Wilton 1M) — for whipped cream rosettes
- Parchment paper — cut to fit the base of the springform pan
- Oven thermometer (strongly recommended — most home ovens run 15–25°F/8–14°C off from the dial reading; an off oven is the most common cause of both underbaking and surface cracking in this recipe)
How to Make Oreo Cookie Cake
Step 1: Prepare the Pan and Crush the Oreos
Preheat your oven to 325°F (165°C). Position the rack in the middle of the oven — not the bottom, not the top. Most home ovens run 15–25°F (8–14°C) off from the dial setting. If you have an oven thermometer, confirm the actual temperature before the pan goes in.
Cut a circle of parchment paper to fit the base of your 9-inch (23cm) springform pan. Press it flat against the bottom, then latch the sides closed over it. Do not grease the sides — the batter needs to grip the pan walls to rise evenly. If you grease the sides, the cake will pull away from the edges during baking and the structure will be uneven.
Place 24 whole Oreo cookies — cream filling left in — into a zip-lock bag and crush with a rolling pin until you have fine, even crumbs with no large chunks remaining. Alternatively, pulse in a food processor for 10–12 seconds. You need the crumbs fine enough that the crust holds together when pressed. Coarse crumbs will produce a crust that crumbles when you slice.
For the 16 Oreos going into the batter, crush them roughly by hand into uneven pieces — aim for a range of sizes from roughly a pea to about a quarter of a cookie. You want variation, not uniformity. Those larger pieces are what create the visible dark pockets throughout every slice. Do not use the food processor for these — it will grind them too fine and you will lose the texture contrast. This is intentional. Uneven pieces create the varied dark pockets visible throughout every slice. Set these aside separately from the crust crumbs.
Your pan is lined and both sets of crushed Oreos are ready — move immediately to pressing the crust.
Step 2: Press the Oreo Crust and Chill
Pour the fine Oreo crumbs into a medium bowl. Add 5 tablespoons (70g) of melted unsalted butter and stir until every crumb is coated and the mixture looks like wet sand. There should be no dry patches and no pooling butter — if it looks dry, the crumbs were not fine enough.
Transfer the mixture into the prepared springform pan. Use the flat bottom of a measuring cup or a straight-sided glass to press the crumbs firmly and evenly across the base. Press hard — a crust that is not compacted firmly will absorb moisture from the batter and turn soggy during baking. Work the crumbs right to the edge of the pan, keeping the thickness as even as possible across the whole base.
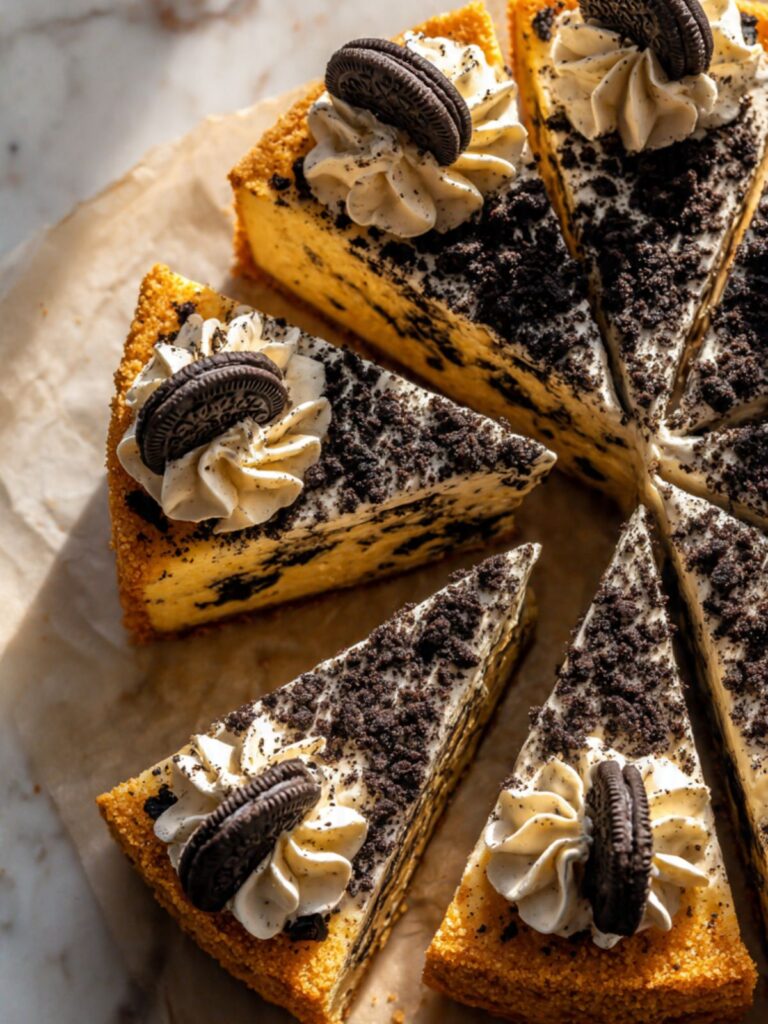
🗒 Luna’s Note: I press the crust up the sides of the pan by about half an inch. It gives each slice a defined dark edge at the base that looks intentional when plated — exactly as you can see on the outside edge of each slice in the photos.
Place the pan in the refrigerator for exactly 15 minutes. Do not skip this step and do not fill the crust while it is warm. A chilled crust firms up before the batter goes in, which prevents it from absorbing moisture and turning soft during the bake. Set a timer.
The crust is chilled and firm — start the batter now.
Step 3: Cream the Butter, Cream Cheese, and Sugar Until Smooth and Pale
In the bowl of your stand mixer fitted with the paddle attachment — or a large bowl with a hand mixer — combine the 8 oz (226g) of softened full-fat block cream cheese and ½ cup (113g) of softened unsalted butter. Beat on medium speed for 2 full minutes until the mixture is completely smooth and no lumps remain. Stop the mixer and scrape down the sides and bottom of the bowl with a silicone spatula — lumps hide at the bottom and the paddle misses them.
Add 1 cup (200g) of granulated white sugar. Beat on medium speed for another 3 minutes until the mixture is pale, fluffy, and noticeably increased in volume. The color should shift from pale yellow to almost white. This aeration step matters — undermixed batter at this stage produces a dense, heavy slice rather than the creamy, structured interior shown in the photos.
⚠️ If the mixture looks curdled or lumpy at any point, your cream cheese or butter was too cold. Do not continue mixing at high speed hoping it will come together — it will not. Stop, transfer the bowl to sit in a warm spot for 10 minutes, then beat again on low speed until smooth.
The mixture should look pale, cohesive, and fluffy — add the eggs next.
Step 4: Add the Eggs, Vanilla, and Sour Cream
Add the 3 room-temperature eggs one at a time, beating on low speed after each addition and waiting until each egg is fully incorporated before adding the next. Do not rush this step. Adding all three eggs at once overwhelms the emulsion — the batter will look broken and greasy, and no amount of additional mixing will fully fix it.
Add 1 teaspoon of pure vanilla extract with the third egg.
Scrape down the bowl sides and bottom after the last egg goes in. Add ½ cup (120g) of room-temperature full-fat sour cream and mix on low speed for 20 seconds just until combined. The sour cream loosens the batter slightly and adds the moisture that keeps the interior creamy rather than dry. Do not overmix at this stage — the batter should look smooth and slightly thick.
The batter will look dense and creamy at this point — add the dry ingredients next.
Step 5: Add the Dry Ingredients
In a separate medium bowl, whisk together 1½ cups (190g) of all-purpose flour, 1½ teaspoons of baking powder, and ¼ teaspoon of fine sea salt. Whisking the dry ingredients together before adding them distributes the baking powder and salt evenly — uneven distribution means some bites will taste flat and others will taste of leavening.
Add the flour mixture to the batter in two additions, mixing on low speed after each. Stop mixing the moment the flour disappears into the batter — 15 to 20 seconds per addition is enough. Overmixing after the flour goes in develops gluten and produces a tough, dense crumb instead of the tender, creamy texture this recipe is built for.
⚠️ The batter will look thick and stiff at this point — this is correct. A loose, pourable batter means either too much liquid was added or the flour was under-measured. Thick batter holds the Oreo pieces in suspension during baking rather than letting them sink.
The flour is incorporated — fold in the crushed Oreos now.
Step 6: Fold In the Crushed Oreos and Fill the Pan
Add the 16 roughly crushed Oreo pieces to the batter. Switch from the mixer to a silicone spatula and fold by hand — do not use the mixer for this step. Fold with slow, wide strokes, turning the bowl as you go, until the Oreo pieces are evenly distributed throughout the batter. Aim for 12 to 15 folds maximum. The batter should show dark Oreo pieces throughout with no large dry flour pockets remaining.
Remove the springform pan from the refrigerator. Spoon the batter over the chilled Oreo crust in large dollops, then use the spatula to spread it evenly to the edges. The batter is thick — take your time pressing it gently into an even layer. Tap the pan firmly on the counter three times to release any large air pockets trapped under the batter.
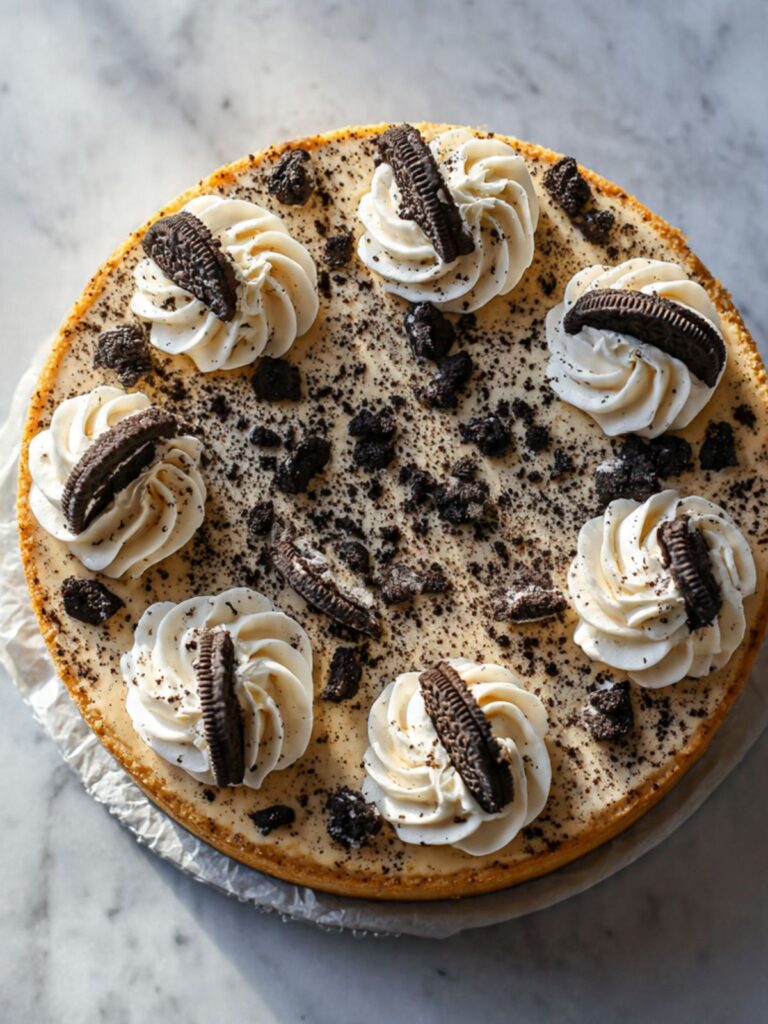
🗒 Luna’s Note: I scatter a small handful of extra Oreo crumble across the top of the batter right before it goes into the oven. It gives the top surface a slightly textured, crackled look after baking — visible on the top of the whole cake in the overhead photo.
The pan is filled and level — it goes into the oven now.
Step 7: Bake Until the Edges Are Set and the Center Has a Slight Jiggle
Place the pan on the middle rack of the preheated 325°F (165°C) oven. Bake for 50 to 55 minutes. Start checking at the 50-minute mark.
The cake is done when the edges are fully set and pulling very slightly from the pan sides, the top surface is deep golden with a dry, matte finish, and the center — approximately a 2-inch (5cm) circle — still has a very slight jiggle when you gently shake the pan. This is correct and intentional. The center will finish setting during the cooling phase. If you bake until the center is completely firm, the interior will be dry and tight rather than creamy.
⚠️ Do not open the oven door before the 45-minute mark. Opening the door early causes a sudden temperature drop that can cause the top to sink in the center. Set a timer and leave it.
The deep amber-golden sides visible on the outside of each slice in the photos develop gradually across the full bake time — this is the Maillard reaction working on the butter and sugar in the cream cheese batter against the pan walls. The sides will look noticeably darker than the top surface before the interior is done. This is correct. Do not pull the cake early because the sides look dark — the interior needs the full 50 to 55 minutes regardless of the side color. The doneness signal is the center jiggle, not the side color.
The cake looks set at the edges with that slight center movement — begin the cooling sequence now.
Step 8: Cool the Cake — Do Not Rush This Step
Turn the oven off. Leave the cake inside the oven with the door cracked open approximately 2 inches for 1 full hour. This gradual temperature drop is what prevents the top from cracking. A cake moved from a hot oven to a cold kitchen contracts too quickly and the top splits. Set a timer for 60 minutes and do not move it.
After 1 hour, remove the cake from the oven. Run a thin knife or offset spatula around the inside edge of the springform pan immediately — this releases the cake from the sides before any contraction causes sticking. Do not unlatch the springform ring yet.
Place the pan on a wire cooling rack and cool at room temperature for 2 full hours. Then transfer to the refrigerator, still in the springform pan, uncovered, for a minimum of 4 hours — overnight is better. The cake must be fully cold before the whipped cream goes on. A warm cake will melt the rosettes within minutes.
🗒 Luna’s Note: I always make this cake the day before I plan to serve it. An overnight refrigeration produces a firmer, cleaner slice and a more settled flavor. Day-of baking is possible but the 4-hour minimum chill is non-negotiable.
The cake is fully chilled and ready — unlatch the springform ring and add the topping now.
Step 9: Whip the Cream and Garnish
Remove the chilled cake from the refrigerator. Unlatch and remove the springform ring, leaving the cake on the pan base. If the parchment is visible at the edges, carefully slide a thin spatula between the parchment and the base and transfer the cake to a flat serving plate or cake board.
Pour 1½ cups (360ml) of cold heavy whipping cream into a clean, cold mixing bowl. Add 3 tablespoons (23g) of sifted powdered sugar and 1 teaspoon of pure vanilla extract. Beat with the whisk attachment on medium-high speed until stiff peaks form — approximately 2 to 3 minutes. Watch it closely after 90 seconds. Cream that is overwhipped turns grainy and then buttery. Stiff peaks mean the cream holds its shape when the whisk is lifted but the tip curls slightly — it should not look dry or separated.
Fit a piping bag with a Wilton 1M open star tip. Fill the bag two-thirds full with whipped cream — overfilling makes the bag hard to control. Pipe one rosette per slice by holding the tip straight down, applying steady pressure, and releasing before lifting — this creates the tight, defined swirl visible on each slice in the photos. Aim for 10 evenly spaced rosettes around the top of the cake.
Scatter crushed Oreo crumble generously over the rosettes and across the top surface of the cake. Press one whole Oreo cookie gently into each rosette at a slight angle.
⚠️ If the whipped cream rosettes look soft or are not holding their shape, the cream was not cold enough or was not whipped to stiff peaks. Return the piping bag to the refrigerator for 10 minutes and re-pipe.
The cake is garnished and ready to slice — serve immediately or refrigerate uncovered for up to 2 hours before serving.
The Science Behind Oreo Cookie Cake
Why Full-Fat Block Cream Cheese Changes the Entire Structure
I kept getting a result that was too close to a standard butter cake — pleasant, but not the dense, creamy interior I was after. I tried increasing the butter. I tried reducing the flour. Neither variable moved the texture in the direction I wanted. What finally changed it was understanding what cream cheese actually does in a batter versus what butter does, and why the type of cream cheese matters as much as the quantity.
Full-fat block cream cheese contains approximately 33% fat and a relatively low water content. When beaten into softened butter, it creates a fat matrix that is denser and more stable than butter alone — the proteins in the cream cheese set during baking and contribute to a tight, cohesive crumb that holds its shape cleanly when sliced. This is protein coagulation: the cream cheese proteins solidify in the heat and become part of the cake’s structure, which is why every slice in the photos holds a clean edge without crumbling.
Whipped cream cheese from a tub contains added air and stabilizers and has a higher water content. That extra water turns to steam during baking, which opens up the crumb and produces a lighter, more aerated texture — exactly the opposite of what this recipe requires. The block cream cheese is not interchangeable with the tub version here. The structure of the finished cake depends on it.
How the Oreo Crust Stays Firm Instead of Soggy
I noticed early in testing that the crust behaved completely differently depending on when I filled it. A crust pressed and filled immediately — even after the butter had fully combined with the crumbs — turned soft and almost paste-like at the base of the finished cake. A crust chilled for 15 minutes before filling held a clean, firm base all the way through the bake. Understanding why changed how I think about Oreo crusts across every recipe.
When melted butter coats crushed Oreo crumbs and the mixture is pressed into the pan, the butter is still in a liquid state and has not yet crystallized. A liquid-fat crust has no structural integrity — the crumbs are held together only by surface tension. When batter is poured over an unchilled crust, the weight of the batter compresses the soft crumbs and the liquid butter migrates upward into the batter, leaving the crust under-fat, crumbly, and porous. Refrigerating for 15 minutes allows the butter to crystallize — fat crystallization locks the crumbs together into a cohesive layer that resists compression and moisture migration. The result is the firm, defined dark base visible at the bottom of each slice.
If you want to read more about how fat behavior affects texture in baked goods, my chocolate chip cookie cake article covers the same fat crystallization mechanism in a different context.
Why the Oven Temperature and Cooling Sequence Prevent Cracking
Baked cream cheese cakes crack for two reasons: too much air incorporated into the batter, and too-rapid temperature change during or after baking. This recipe addresses both directly — and the cooling sequence is not optional decoration around the recipe, it is a functional step that finishes the bake.
At 325°F (165°C), the cake bakes slowly enough that the proteins in the eggs and cream cheese coagulate gradually and evenly from the edges inward. A higher temperature — 350°F (175°C) or above — causes the outer edges to set and contract before the center has finished cooking. That differential contraction is what creates the crack. Baking at 325°F closes that timing gap. The second mechanism is cooling: when the oven is turned off and the door cracked, the cake temperature drops by only a few degrees per minute rather than the 20–30 degree drop that happens when it is moved to a room-temperature counter. This slow drop allows the center to finish setting through carryover heat without the structural stress that causes surface splitting. The 1-hour oven-rest is doing active work — it is not just waiting.
Oreo Cookie Cake Troubleshooting & Pro-Tips
Common Mistakes
The cake batter is lumpy and the texture is uneven after baking
The cause is almost always cream cheese that was not fully softened before beating. Cold block cream cheese does not break down under the paddle — it stays in firm pieces that get coated by the butter and sugar rather than fully incorporated. Those pieces bake into dense, slightly wet pockets surrounded by lighter batter.
Fix if already baked: The flavor is not affected. Slice and serve — the irregular texture is only noticeable if you are looking for it. Pipe extra whipped cream over the top to shift attention to the garnish.
Prevention: Pull the cream cheese from the refrigerator 60–90 minutes before mixing. Press your finger into it before you begin — it should indent completely with no resistance. If you are short on time, unwrap the block, cut it into eight pieces, and rest them on a plate at room temperature for 30 minutes. Do not microwave cream cheese to soften it — microwave heat is uneven and partially melts the outer edges while the center stays cold, which produces the same lump problem.
The Oreo crust is soft, wet, or pulls away from the base of each slice
This is a pan preparation failure. Either the crust was not pressed firmly enough, was not chilled before filling, or the springform pan has a small leak that allowed oven moisture to reach the crust base.
Fix if already baked: The flavor is not affected. Serve the slices on small plates and let guests know the base is soft — present it as a deconstructed Oreo layer rather than a firm crust. A drizzle of melted chocolate over the base of each slice before plating distracts effectively.
Prevention: Press the crust with firm, even pressure using the flat base of a measuring cup — you should feel resistance when pressing. Refrigerate for the full 15 minutes before adding batter. Check the springform pan seal before baking by holding it up to the light — visible gaps in the latch mechanism mean moisture can enter. Wrap the outside base of the pan in a single layer of heavy-duty aluminum foil as insurance.
The top of the cake cracked during baking
Cracking is caused by one of three things: the batter was overmixed after the eggs were added and incorporated too much air, the oven temperature was too high, or the cake was moved from the oven to a cold counter before the gradual cooling step was completed.
Fix if already baked: A cracked top does not affect flavor at all. Cover it completely with the whipped cream topping — pipe the rosettes close together and scatter Oreo crumble generously to fill any visible lines. No one will know.
Prevention: Add eggs on the lowest mixer speed and stop the moment each one disappears into the batter. Verify your oven temperature with an oven thermometer before baking — many home ovens run hotter than the dial reads. Complete the full 1-hour oven-rest with the door cracked before removing the cake.
The center of the cake is wet, sunken, or does not hold its shape when sliced
The cake was underbaked or was removed from the refrigerator and sliced before it was fully cold. A warm cream cheese cake looks set on the outside but the interior has not fully firmed up — it will collapse under the knife.
Fix if already baked: If the cake is still in the pan and the center looks visibly wet, return it to a 300°F (150°C) oven for 10–15 minutes, then restart the full cooling sequence. If it has already been sliced and the center is too soft to serve cleanly, press the slices into individual serving glasses, layer with extra whipped cream and Oreo crumble, and serve as a deconstructed Oreo parfait.
Prevention: Bake to the correct visual doneness — edges fully set, center with a 2-inch (5cm) jiggle only. Complete the full cooling sequence: 1 hour in the oven, 2 hours at room temperature, minimum 4 hours refrigerated. Do not slice until the cake is fully cold all the way through.
The whipped cream rosettes are soft, melting, or will not hold their shape
The heavy cream was not cold enough when whipped, was not whipped to stiff peaks, or the cake surface was still slightly warm when the cream was piped.
Fix if already piped: Scrape the rosettes off gently with an offset spatula, return the cream to a cold bowl, and re-whip for 30 seconds on high speed. If the cream has already started to separate and looks grainy, it cannot be recovered — make a fresh batch.
Prevention: Keep the heavy cream in the refrigerator until the exact moment you are ready to whip it. Chill the mixing bowl in the freezer for 10 minutes before whipping — a cold bowl maintains the cream temperature during whipping. Whip to stiff peaks, not soft peaks. Stiff peaks hold their shape when the whisk is lifted and the tip stands straight or curls slightly — soft peaks slump immediately.
The cake is dry and the crumb is tight and tough
Overmixing after the flour was added developed too much gluten, or the cake was baked beyond the correct doneness and dried out in the oven.
Fix if already baked: Slice the cake thinly and serve with a generous spoonful of softly whipped cream alongside — the cream provides the moisture the cake is missing. Alternatively, brush each slice lightly with a simple syrup (equal parts sugar and water, heated until dissolved and cooled) before plating.
Prevention: Mix on low speed after adding flour and stop the moment it disappears into the batter. Check doneness at the 50-minute mark — do not rely on a fixed time without checking the visual cues. The center should still jiggle slightly. Pull it at that moment.
The cake sticks to the springform pan sides and tears when the ring is removed
The knife or offset spatula was not run around the edge immediately after baking, before the cake cooled and contracted against the pan walls.
Fix if already happened: Use a thin, flexible palette knife to carefully work between the torn edges and the pan. Press any torn pieces gently back against the cake surface — the whipped cream topping will cover most surface damage cleanly.
Prevention: Run a thin knife around the inside edge of the pan within 5 minutes of pulling it from the oven, while it is still warm and before contraction begins. Do this even if you plan to chill the cake in the pan — it releases the bond before the cake fully sets against the sides.
Expert Pro-Tips
Freeze the Oreo cookies for 10 minutes before crushing them for the crust. Cold Oreos crush into finer, more even crumbs than room-temperature ones, which tend to produce uneven pieces. Finer crumbs compact more tightly and produce a crust that holds a cleaner edge when sliced — exactly the defined dark base visible at the bottom of each slice in the photos.
Use a sharp knife wiped clean between every cut for the cleanest slices. The Oreo pieces in the batter are firm and create drag as the knife passes through. A warm, clean knife — run briefly under hot water and wiped dry before each cut — passes through the cream cheese interior without tearing. Wipe the blade clean after every single cut. This is the single technique that makes the difference between a clean plated slice and a smeared one.
Pipe the whipped cream rosettes starting from the outside edge and working inward. Place the first rosette at the 12 o’clock position, then work around the cake evenly. Starting from the center makes spacing uneven. Outside-in gives you a reference point for equal spacing, which produces the symmetrical garnish pattern visible in the overhead photo of the whole cake.
🗒 Luna’s Note: I do not use store-bought whipped topping for this recipe. It pipes but it does not hold the defined swirl shape that makes the garnish look intentional. Fresh whipped cream piped with a 1M tip holds its structure for hours in the refrigerator and looks completely different on the plate.
How to Store Oreo Cookie Cake
Room Temperature
This cake cannot be stored at room temperature once the whipped cream topping has been applied. The whipped cream will soften and collapse within 1 to 2 hours outside the refrigerator, and the cream cheese interior will begin to soften in a way that affects both texture and food safety. If you are transporting the cake or setting it out for a party, keep it refrigerated until 15 minutes before serving and return any unserved portions to the refrigerator within 1 hour.
If the cake has not yet been garnished with whipped cream, it can sit at room temperature for up to 2 hours during the cooling phase — but no longer.
Refrigerator
Store the garnished cake loosely covered in the refrigerator for up to 5 days. Do not wrap it tightly in plastic wrap or press a lid directly against the whipped cream rosettes — the pressure will flatten them. Instead, use a large cake dome or tent a sheet of aluminum foil over the top, leaving space between the foil and the cream. The foil protects the surface without crushing the garnish.
For uncut cake: leave it on the springform base or transfer to a flat plate before covering and refrigerating.
For cut cake: press a small piece of plastic wrap directly against the exposed interior of each cut edge to prevent the cream cheese from drying out. Then cover the whole cake loosely as above.
The flavor of this cake is noticeably better on Day 2. The Oreo pieces in the interior soften slightly overnight and their flavor deepens into the cream cheese crumb in a way that does not happen on the day of baking. If you can make this cake the day before serving, do it.
Freezer — Baked Cake (Without Whipped Cream)
The cake freezes well without the whipped cream topping. Do not freeze a garnished cake — whipped cream does not survive freezing and will weep and collapse on thawing.
To freeze: cool the cake completely, then refrigerate for the full 4-hour minimum before freezing. Remove it from the springform pan and wrap the whole cake tightly in two layers of plastic wrap, then one layer of aluminum foil. Freeze for up to 2 months.
To thaw: transfer the wrapped cake to the refrigerator the night before serving and thaw overnight — approximately 8 to 10 hours. Do not thaw at room temperature. Unwrap once fully thawed and add the whipped cream topping just before serving.
The texture after freezing and thawing is very close to fresh — the cream cheese interior holds up well. The Oreo crust base is slightly softer after thawing than it is fresh, but it is still fully intact and sliceable.
Freezer — Individual Slices
Individual slices freeze better than a whole cake for portion control. Slice the ungarnished cake into 10 portions, place each slice on a small piece of parchment paper, and freeze uncovered on a flat tray for 1 hour until the surface is firm. Transfer each frozen slice into its own zip-lock freezer bag, pressing out as much air as possible before sealing. Freeze for up to 2 months.
To thaw: remove slices from the freezer bag, place on a plate, and thaw in the refrigerator for 4 to 5 hours. Pipe fresh whipped cream and add garnish immediately before serving.
Serving Suggestion
Serve this cake cold — pulled straight from the refrigerator, not left to come to room temperature first. The cream cheese interior slices cleanest and holds its shape best when fully cold. I have served it at room temperature and the slices are softer, almost mousse-like at the center. Some people prefer that. I do not — the cold version is firmer, the Oreo crust has more snap, and the contrast between the cold creamy interior and the whipped cream on top is sharper.
🗒 Luna’s Note: I serve this with a strong black coffee. The bitterness cuts through the sweetness of the Oreo crust and the cream in a way that nothing else does. It is also the only dessert I make that my younger sister requests by name every time she visits — she has been asking for it since the third test batch, which is the only recipe feedback I need.
This is the cake I bring when I want to bring something that looks more difficult than it is. The garnish — the rosettes, the whole Oreos, the crumble scattered across the top — does most of the visual work. The actual construction is straightforward once the cooling time is factored in. Plan for the day before.
On Day 2 the Oreo pieces throughout the interior have softened into the cream cheese crumb and the flavor is deeper and more cohesive than Day 1. Day 1 is good. Day 2 is better. Day 3 is still excellent. By Day 4 the whipped cream has begun to weep slightly into the top surface — still edible, but the presentation suffers. Serve within 3 days of garnishing for the best result.
One honest note: this is not a cake to make and serve in the same afternoon unless you start early. The cooling and refrigeration sequence is approximately 7 hours, most of it hands-off — but it cannot be rushed without the interior paying the price. Plan for the day before, or start baking the morning of a dinner and serve it that evening.
Frequently Asked Questions About Oreo Cookie Cake
Can I make Oreo cookie cake ahead of time?
Yes — this cake is better made ahead. Bake it, complete the full cooling sequence, and refrigerate overnight before adding the whipped cream. The overnight rest allows the Oreo pieces to soften into the cream cheese crumb and the flavors to meld together. Add the whipped cream topping no more than 2 hours before serving for the cleanest presentation.
Why did my Oreo cookie cake crack on top?
Cracking is caused by overmixing after the eggs were added, an oven that ran too hot, or moving the cake to a cold counter before completing the oven-rest. Add eggs on the lowest mixer speed and stop the moment each one disappears. Complete the full 1-hour oven rest with the door cracked — this gradual temperature drop is what prevents the surface from splitting.
Can I use a regular cake pan instead of a springform pan?
A standard round cake pan will not work for this recipe. The cake is too dense and tall to invert cleanly — the Oreo crust base will break apart and the cream cheese interior will not release without tearing. A 9-inch springform pan with a removable base is required. The removable sides allow the cake to be unmolded without any inversion or pressure on the structure.
Can I substitute the sour cream in Oreo cookie cake?
Full-fat sour cream can be swapped 1:1 with full-fat plain Greek yogurt at room temperature — the acidity in both ingredients tenderizes the gluten and keeps the crumb moist. Do not use low-fat versions — the lower fat content produces a wetter, looser batter that will not set cleanly. Do not substitute milk or cream — they lack the fat and acidity this recipe needs.
How do I get clean slices from Oreo cookie cake?
The cake must be fully cold — straight from the refrigerator — before cutting. Use a sharp chef’s knife run briefly under hot water and wiped completely dry before each cut. The heat helps the blade pass through the dense cream cheese interior without dragging, and wiping it clean prevents Oreo crumble from smearing across the next cut. Never use a serrated knife.
How does Oreo cookie cake do at high altitude or in high humidity?
At high altitude above 3,500 feet (1,067 meters), reduce baking powder by ¼ teaspoon, increase flour by 1 tablespoon (8g), and raise the oven temperature by 15°F (8°C) — leavening expands faster at altitude and the extra flour compensates. In high humidity above 70%, the Oreo crust crumbs absorb moisture from the air faster — press, chill, and fill the crust immediately without leaving it uncovered.
Can I double this Oreo cookie cake recipe?
Yes — bake the doubled batch in two separate 9-inch springform pans, not one larger pan. The bake time stays the same because the batter depth per pan is unchanged. Use only 1.5 times the baking powder — not double — because leavening does not scale linearly and doubling it produces a soapy, over-risen result. All other ingredients double exactly.
More Oreo Recipes You’ll Love
If you made this Oreo cookie cake and want to keep baking in the same flavor territory, these are the recipes I would make next.
Oreo Poke Cake — A lighter, faster Oreo dessert that uses a boxed cake base soaked with cream filling and topped with whipped topping and crushed Oreos. Ready in under 2 hours including cooling.
Biscoff Icebox Cake — A no-bake layered dessert with a cookie base and a whipped cream filling. If the whipped cream topping on this Oreo cake was your favorite part, the icebox cake is built entirely around that element.

Thick & Creamy Oreo Cookie Cake Recipe
Ingredients
Equipment
Method
- Preheat oven to 325°F (165°C). Line the base of a 9-inch springform pan with parchment paper. Do not grease the sides.
- Crush 24 Oreo cookies into fine crumbs using a food processor or zip-lock bag and rolling pin. Combine with 5 tablespoons (70g) melted butter and stir until all crumbs are evenly coated. Press firmly into the base of the prepared pan using the flat bottom of a measuring cup. Refrigerate for 15 minutes.
- Roughly crush 16 Oreo cookies into uneven pieces by hand. Set aside.
- In the bowl of a stand mixer fitted with the paddle attachment, beat the softened cream cheese and softened butter on medium speed for 2 minutes until completely smooth with no lumps. Scrape down the bowl sides and bottom.
- Add the granulated sugar and beat on medium speed for 3 minutes until pale and fluffy.
- Add the eggs one at a time on low speed, waiting until each is fully incorporated before adding the next. Add the vanilla extract with the third egg. Scrape down the bowl. Add the sour cream and mix on low speed for 20 seconds until just combined.
- In a separate bowl, whisk together the flour, baking powder, and salt. Add to the batter in two additions on low speed, mixing only until the flour disappears — approximately 15 to 20 seconds per addition. Do not overmix.
- Fold the roughly crushed Oreo pieces into the batter by hand using a silicone spatula — 12 to 15 folds maximum.
- Remove the chilled crust from the refrigerator. Spoon the batter over the crust, spread evenly to the edges, and tap the pan firmly on the counter three times to release air pockets.
- Bake on the middle rack at 325°F (165°C) for 50 to 55 minutes, until the edges are fully set and pulling slightly from the pan sides and the center has a slight 2-inch jiggle when the pan is gently shaken. Do not open the oven before the 45-minute mark.
- Turn off the oven. Leave the cake inside with the door cracked open for 1 hour. Remove from the oven, run a thin knife around the inside edge of the pan immediately, and cool on a wire rack for 2 hours at room temperature. Refrigerate uncovered in the springform pan for a minimum of 4 hours or overnight.
- Remove the chilled cake from the refrigerator. Unlatch and remove the springform ring. Transfer to a serving plate.
- Whip the cold heavy cream, sifted powdered sugar, and vanilla extract together using the whisk attachment on medium-high speed until stiff peaks form — approximately 2 to 3 minutes. Do not overwhip.
- Fit a piping bag with a Wilton 1M open star tip. Pipe one rosette per slice around the top of the cake. Scatter crushed Oreo crumble over the rosettes and across the top surface. Press one whole Oreo cookie gently into each rosette.
- Serve immediately or refrigerate loosely covered for up to 2 hours before serving.