
Hot Chocolate Mug Cake Recipe
There is a version of this mug cake that comes out rubbery and dense, with a fully cooked center that tastes like a dry chocolate sponge someone microwaved too long. I made that version six times before I understood what I was actually trying to build.
The molten center is not a happy accident. It is the whole point — and it requires pulling the mug out of the microwave at the exact right second. Thirty seconds too long and you have cake. Thirty seconds too short and you have warm batter. The window is narrow. Once I understood that, the recipe became very simple: everything else just has to be in service of hitting that window consistently.
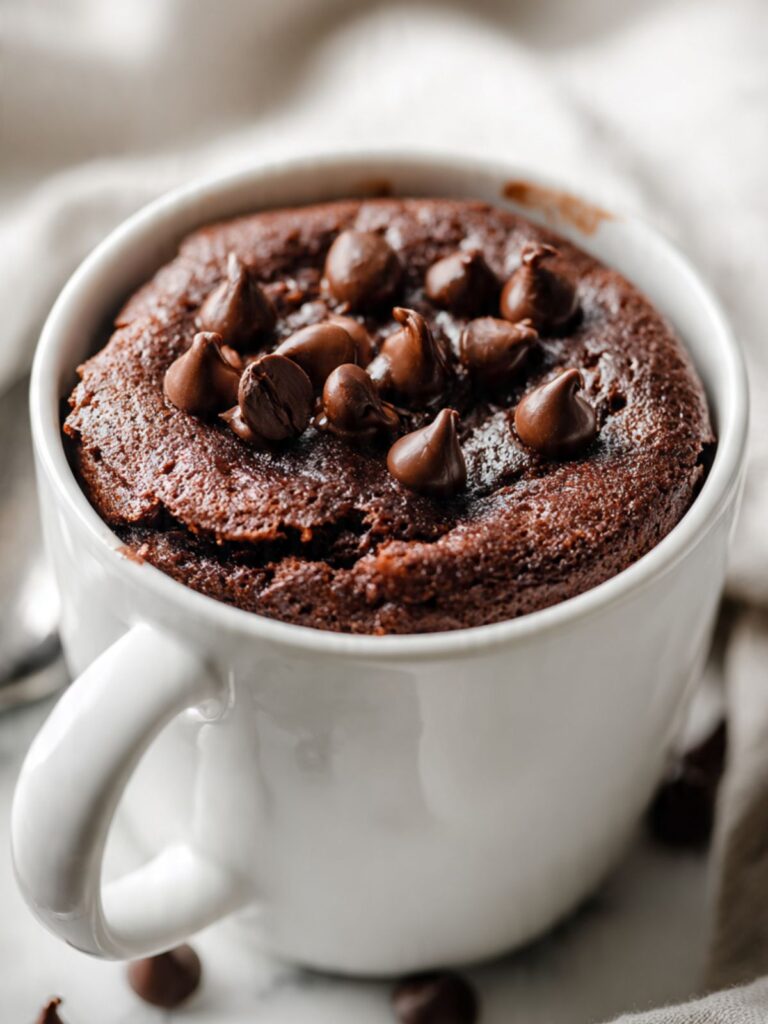
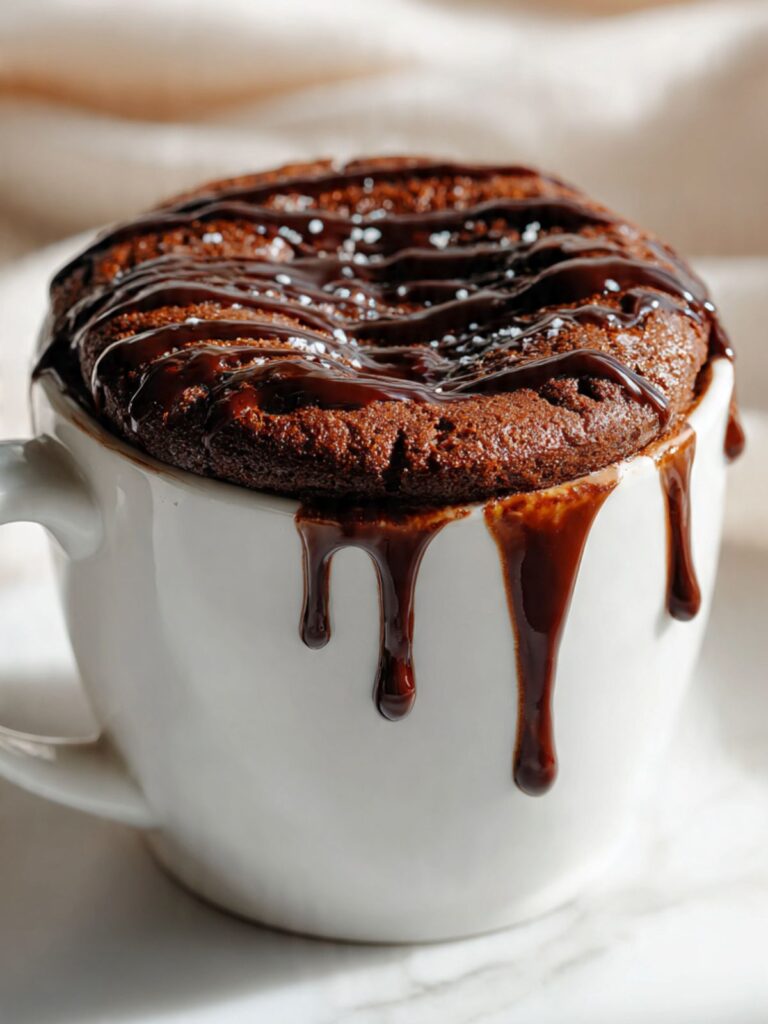
This is what I worked out across testing: a batter built on Dutch-process cocoa for depth and color, just enough baking powder to lift the edges while leaving the center liquid, and chocolate chips pushed into the surface that partially melt into the dome so every bite has a pocket of chocolate. The chocolate sauce and flaked sea salt on top are not optional — they are the finish that makes this taste intentional instead of improvised.
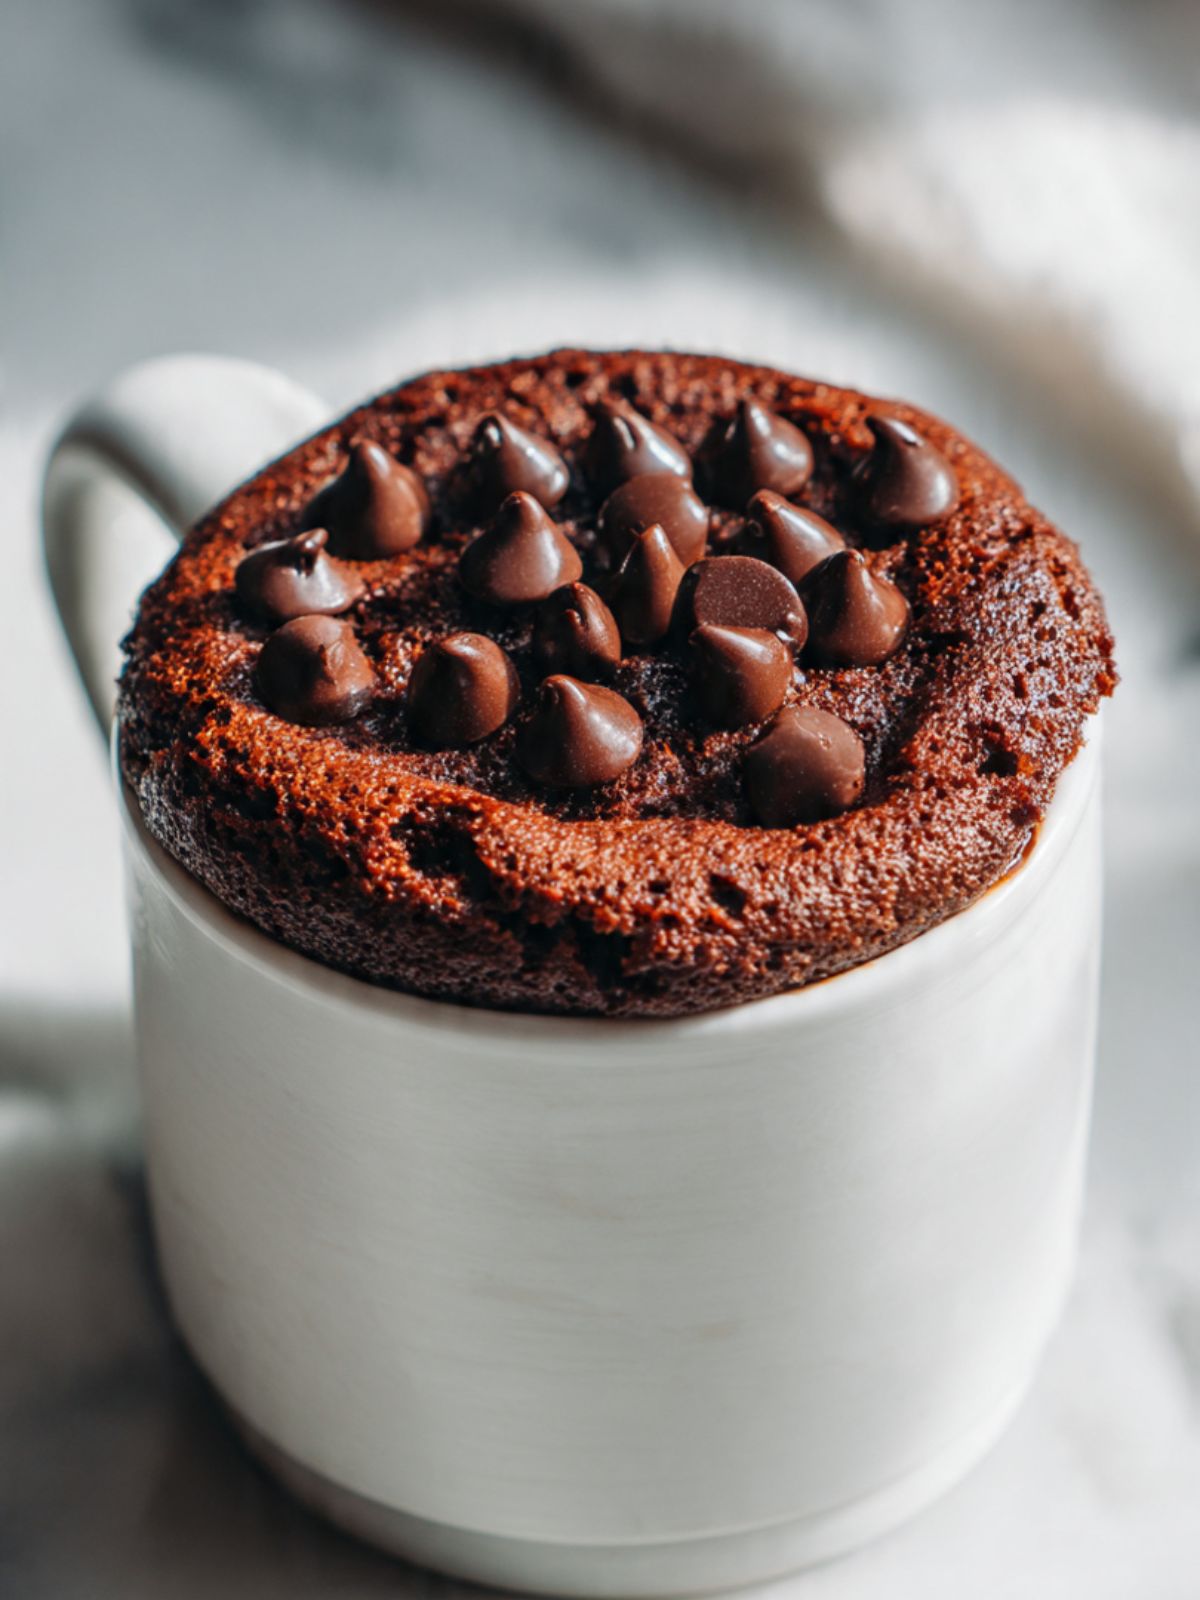
The result you are looking at in these photos is what I pull out of the microwave every time I want something real at 10pm on a Tuesday. One mug. One fork. No waiting.
🗒 Luna’s Note: This is not a recipe I share. It is the one I make for myself, in my own kitchen, when I do not want to make a full cake and I do not want to wait. That is the arrangement.
| Prep Time | Cook Time | Total Time | Yield | Difficulty |
|---|---|---|---|---|
| 5 min | 60–90 seconds | 7 min | 1 mug cake | Easy |
| Calories | Fat | Carbs | Sugar | Protein | Sodium |
|---|---|---|---|---|---|
| ~693 kcal | ~34g | ~101g | ~52g | ~10g | ~160mg |
Macros are approximate and will vary based on ingredient brands, chocolate chip type, and amount of chocolate sauce used.
Ingredients & Tools for Hot Chocolate Mug Cake Recipe
For the Mug Cake Batter
- 4 tablespoons (30g) all-purpose flour, spooned and leveled — do not scoop directly from the bag; packed flour makes the cake dense and dry
- 3 tablespoons (18g) Dutch-process cocoa powder, sifted — not natural cocoa powder; Dutch-process is alkalized and produces the deep, dark color and smooth chocolate flavor visible in the photos; natural cocoa will give you a lighter, slightly bitter result and the baking powder reaction will be off
- 3 tablespoons (36g) plain white granulated cane sugar — not brown sugar, not coconut sugar, not raw sugar; granulated cane sugar controls structure and lift; substitutions change the moisture balance and the texture of the center
- ¼ teaspoon (1g) baking powder, checked for freshness — not baking soda; baking powder is pre-buffered and works in a neutral batter; to test freshness, drop ¼ teaspoon into hot water — it should bubble immediately; flat batter means dead leavening
- 3 tablespoons (45ml) whole milk (3.5% fat), room temperature — not skim, 1%, or 2%; not plant-based milk; reduced fat content changes the moisture balance and accelerates center set time; cold milk straight from the fridge can stiffen the melted butter and create a broken, grainy batter
- 2 tablespoons (28g) unsalted butter, melted and cooled slightly — not salted butter, which throws off the salt balance; cool the melted butter for 2–3 minutes before adding it to the batter; hot butter added directly to the egg will begin to cook it
- 1 large egg yolk (from a large egg, approximately 50g whole egg without shell), room temperature — yolk only; do not use the white; a whole egg adds enough protein to set the center completely during microwave cooking and eliminates the molten interior; room temperature yolk emulsifies more smoothly into the melted butter than a cold one
- ½ teaspoon (2ml) pure vanilla extract — not imitation vanilla; Nielsen-Massey or similar pure extract; imitation vanilla has an artificial aftertaste that is more noticeable in small-batch recipes like this one
For the Chocolate Chip Layer
- 2 tablespoons (21g) semi-sweet chocolate chips (45–55% cacao), divided — such as Ghirardelli Semi-Sweet or Nestlé Toll House; 1 tablespoon stirred into the batter, 1 tablespoon pressed onto the surface after cooking; do not use bittersweet (60%+) chips for the surface — they have less sugar and will not soften and adhere to the dome in the same way; do not use chocolate chunks or chopped chocolate — too heavy, sink rather than sit
For the Topping (Mandatory — Not Optional)
- 1 tablespoon (20g) chocolate sauce — store-bought (Hershey’s or Ghirardelli chocolate sauce); OR make a quick ganache: microwave 1 tablespoon (15g) semi-sweet chocolate chips (45–55% cacao) with 1 tablespoon (15ml) heavy whipping cream (36% fat minimum) for 20 seconds, then let sit 60 seconds and stir smooth — do not stir immediately or the ganache will seize; ganache produces a thicker, richer drip than chocolate sauce; both work, ganache looks closer to what is shown in the photos
- 1 pinch (approximately 0.5g) flaked sea salt — Maldon or any large-flake sea salt; the flakes must be visible as individual crystals on the surface; fine table salt, Morton kosher salt, and Diamond Crystal kosher salt all dissolve on contact and disappear — they cannot substitute for flaked sea salt in the topping
Before You Start
This entire recipe comes together with one large mug and a fork — no electric mixer needed. The method is melt-and-mix: wet ingredients combine first, dry ingredients fold in second. The order matters because hot butter added out of sequence can begin cooking the egg yolk before the batter is formed.
Mug size matters more than almost any other variable in this recipe. Use a standard 11–12oz (325–355ml) ceramic mug — the kind a regular coffee mug is. A mug that is too small will overflow as the batter rises; a mug that is too large will produce a thin, flat cake that overcooks before the center has a chance to set. Check your mug volume by filling it with water and measuring — 11 to 12oz is the target range.
Microwave wattage is the primary variable for timing. This recipe was tested in a 1000-watt microwave. If your microwave is 700 watts, add 15–20 seconds. If it is 1200 watts, subtract 10 seconds. The first time you make this, pull the mug out at 60 seconds and assess — you can always add time, you cannot undo it.
Microwave placement: Always place the mug in the dead center of the turntable — not off to the side. Microwave energy is not uniform across the turntable surface. A mug placed off-center receives uneven radiation, which produces one side of the cake more done than the other and makes the timing window even harder to judge accurately.
Chocolate sauce prep: Warm your chocolate sauce or ganache before the cake goes into the microwave, not after. By the time the cake is done, the chips are on, and the 60-second rest is complete, you want the sauce ready to pour immediately. The topping window — from the moment the chips go on to the moment the sauce needs to be poured — is approximately 90 seconds. Pre-warming removes one variable from that window.
Egg yolk temperature: Pull your egg from the refrigerator 20–30 minutes before you start, or place the whole egg (uncracked) in a small bowl of warm water for 5 minutes. A cold egg yolk added to warm melted butter creates a slightly grainy, uneven batter.
Butter cooling window: Melt your butter in the mug itself or in a small bowl. Give it 2–3 minutes to cool before adding the egg yolk. If the butter is hot enough to steam, it is too hot.
Flour measuring: Spoon the flour into your measuring spoon using a separate spoon and level it with a straight edge. Do not scoop the spoon directly into the flour bag — this packs in more flour than intended and produces a dense, cakey result with no molten center. For guaranteed accuracy, weigh the flour at exactly 30g on a kitchen scale. Gram weight always takes priority over volume in this recipe.
Baking powder freshness check: Drop ¼ teaspoon of your baking powder into a small bowl of hot water. If it bubbles vigorously, it is active. If nothing happens, buy a new container — flat leavening produces a dense sponge with no lift at the edges.
Cocoa powder note: Dutch-process cocoa does not bubble when it hits liquid the way natural cocoa does. This is correct behavior — it is not a sign that your baking powder is dead. The leavening comes from the baking powder alone in this recipe, not from any acid-base reaction.
Necessary Tools
Required:
- 11–12oz (325–355ml) ceramic mug — the baking vessel and serving vessel; see mug size note above; never use a plastic mug or a mug with metallic trim in the microwave
- Kitchen scale (strongly recommended) — 30g of flour weighed is more accurate than 4 tablespoons scooped; gram weights are what this recipe was tested with
- Fork — for mixing the batter directly in the mug; a fork incorporates dry ingredients more evenly than a spoon and is the right tool for this volume of batter
- Small bowl or ramekin — for melting and cooling the butter before adding to the batter; melting butter in the mug and then attempting to cool it while dry ingredients are waiting creates a timing problem
- Measuring spoons — for dry ingredients; use standard flat-topped measuring spoons, not heaping
- Microwave — 900–1200 watt range; see wattage note in Before You Start
Optional:
- Oven thermometer — not applicable here, but a microwave watt-check (run 1 cup of water for 1 minute, it should reach approximately 150–160°F / 65–71°C) can confirm your wattage if the label is missing
- Small whisk — can substitute for the fork if you prefer; same function, slightly more thorough incorporation for the cocoa powder
- Piping bag or zip-lock bag with corner snipped — for a more controlled chocolate sauce drizzle like the one visible in the photos; a spoon drizzle works fine but produces a less defined drip pattern
How to Make Hot Chocolate Mug Cake
Step 1: Melting the Butter and Preparing Your Mug
In your small bowl or ramekin, place your 2 tablespoons (28g) unsalted butter and microwave in 15-second bursts, stirring between each, until fully melted — approximately 20–30 seconds total depending on your microwave. The butter is melted and ready when it is completely liquid with no solid white chunks remaining. Set it aside and let it cool for 2–3 minutes before you use it.
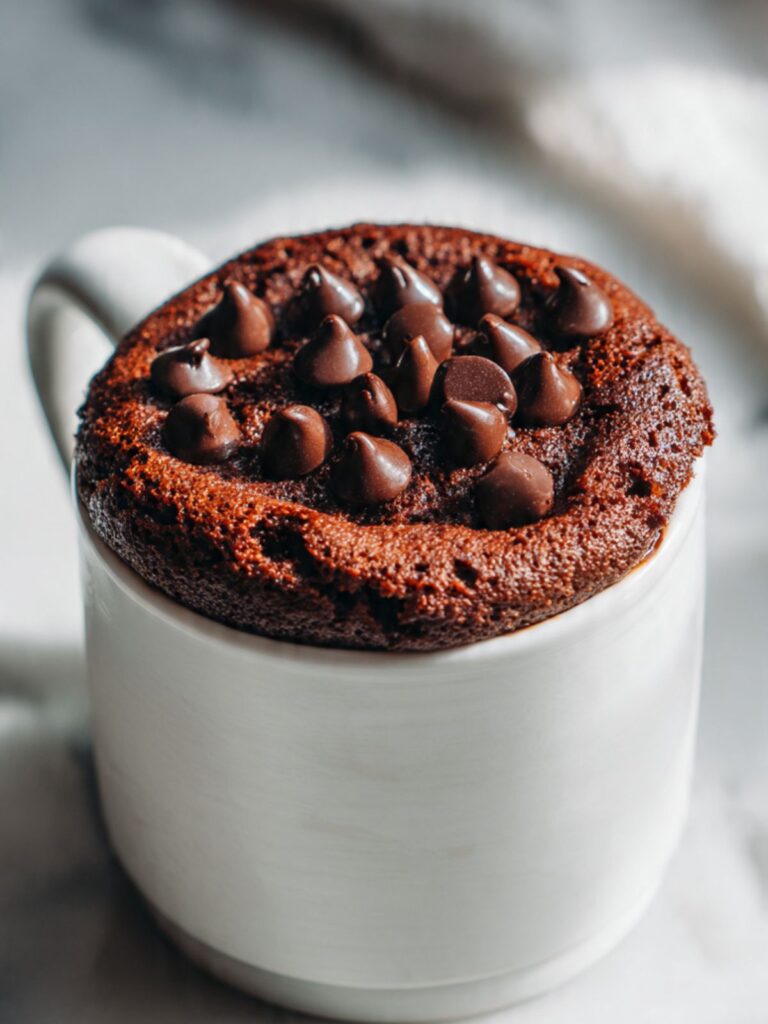
While the butter cools, prepare your 11–12oz (325–355ml) ceramic mug by checking that it is dry and clean. No grease, no parchment, no liner — a ceramic mug needs no preparation for this recipe. The cake will contract slightly from the walls as it cooks, as visible in the finished photos where the edges have pulled cleanly inward.
The butter must be warm, not hot. If it is steaming when you touch the outside of the bowl, wait another minute. Hot butter added directly to a raw egg yolk begins to cook it — the yolk will seize into small cooked curds that leave white streaks through the finished cake and affect the texture of the center.
🗒 Luna’s Note: I melt the butter in a small ramekin rather than in the mug itself. Melting it in the mug means I have to wait for the mug to cool before I can hold it comfortably, and the timing in this recipe is tight enough that I do not want to be managing a hot vessel.
Step 2: Combining the Wet Ingredients Until Smooth and Emulsified
Into your cooled melted butter, add your 1 large egg yolk (room temperature) and ½ teaspoon (2ml) pure vanilla extract. Using your fork, whisk these three together directly in the ramekin — approximately 20 quick strokes in a tight circular motion until the mixture looks uniform and slightly thickened, with no streaks of yolk visible.
The egg yolk is doing two things here: it is emulsifying the fat from the butter into the liquid batter so the finished cake has a cohesive, tender crumb rather than a greasy one, and it is contributing the richness that keeps the center molten rather than dry. A whole egg would add too much protein and set the center fully during cooking. The yolk alone gives you the richness without the set.
Now add your 3 tablespoons (45ml) whole milk, room temperature and stir with the fork until the mixture is fully combined — another 10 strokes. The wet mixture should look smooth, slightly glossy, and uniform in color — no separation between the butter fat and the milk, no streaks of yolk. If you see the butter floating in a separate layer on top, the milk was too cold and caused the fat to re-solidify. Warm the mixture for 5 seconds in the microwave and stir again.
Step 3: Adding the Dry Ingredients Without Overmixing
Pour your wet ingredient mixture into your 11–12oz ceramic mug. Add directly on top: your 4 tablespoons (30g) all-purpose flour, spooned and leveled, 3 tablespoons (18g) Dutch-process cocoa powder, sifted, 3 tablespoons (36g) granulated sugar, and ¼ teaspoon (1g) baking powder.
Do not stir yet. Using your fork, begin folding the dry ingredients into the wet from the bottom of the mug upward — press the fork down to the base of the mug, drag it up through the batter, and fold over. Approximately 25–30 strokes, working around the full circumference of the mug, until no dry flour or cocoa streaks remain.
Fold from the bottom of the mug upward in approximately 25–30 strokes until no dry flour or cocoa streaks remain.
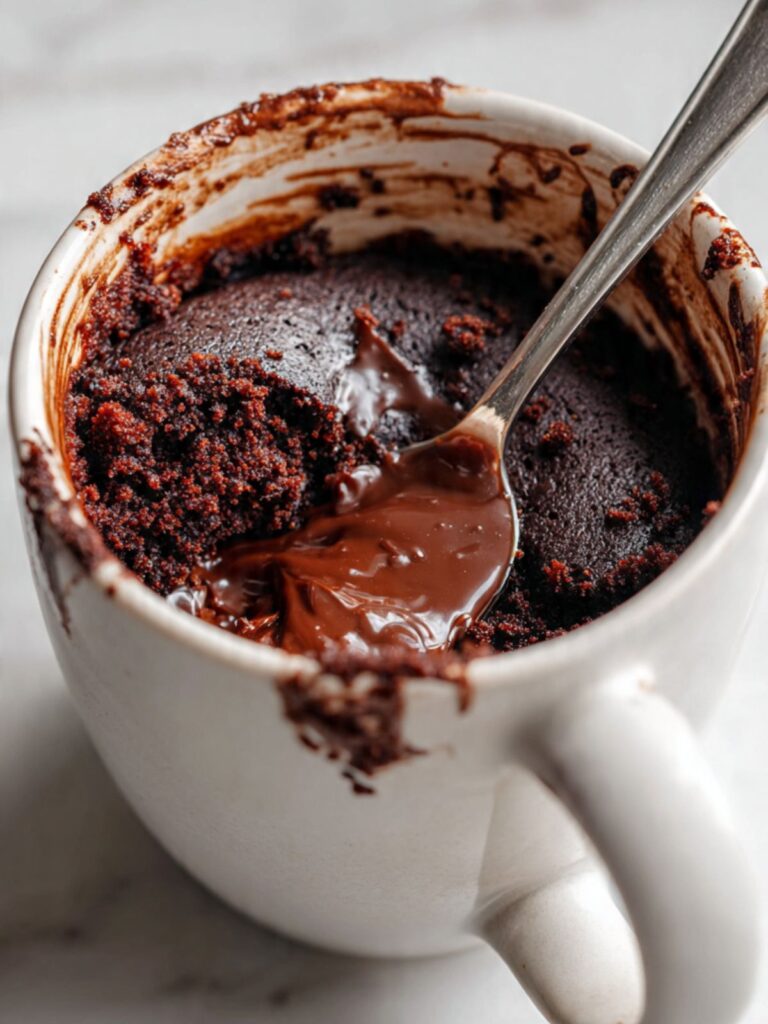
⚠ Baker’s Warning: Stop folding the moment the dry streaks disappear. A batter that has been stirred past this point — especially in tight circles rather than bottom-up folds — will develop gluten and produce a rubbery, chewy cake instead of the tender, open crumb visible in the spoon-in photo. The cake will look the same going into the microwave. The difference shows up on the fork.
The batter should look thick, dark, and glossy — almost like a loose brownie batter. If it looks pale brown or sandy, your cocoa was not Dutch-process. If it looks dry and stiff, your flour was packed. Neither can be corrected at this stage.
🗒 Luna’s Note: Sifting the cocoa powder directly over the wet ingredients before folding prevents cocoa lumps from forming in the batter. Dutch-process cocoa clumps more than natural cocoa because it is denser. A sifted, lump-free batter incorporates in fewer strokes — which means less gluten development and a more tender result.
Step 4: Folding in the First Chocolate Chips
Add 1 tablespoon (approximately 10g) of your semi-sweet chocolate chips directly into the batter. Using your fork, fold them in with 5–6 slow strokes — just enough to distribute them through the batter without breaking them or overmixing the batter further.
The chocolate chips inside the batter serve a different function from the ones on top. During microwaving, the chips in the batter partially melt and create pockets of liquid chocolate within the sponge — they become part of the molten interior, intensifying the lava effect at the center. The chips on the surface, added later, stay more intact and give the visual finish shown in the topped photos.
The batter should fill your mug no more than halfway. Microwave batter rises significantly — up to 1.5cm above the mug rim at peak — before settling back slightly. A mug more than halfway full will overflow. If your mug looks more than half full at this point, transfer some batter to a second mug rather than risk overflow.
⚠ Baker’s Warning: If the batter is sitting above the halfway point of the mug when you look at it straight on, do not put it in the microwave. The batter will rise to at least 1.5cm above the rim during cooking — if the starting point is already above halfway, the overflow is guaranteed. The result is batter on your microwave floor and a partially cooked cake in the mug. Split into two mugs and microwave separately rather than risk it.
Step 5: The Microwave Cook — Hitting the Molten Window
This is the most important step in the recipe. Read it fully before you start the microwave.
Place your filled mug in the center of the microwave turntable. Microwave on full power for 60 seconds — then stop and assess before adding any more time.
At 60 seconds in a 1000-watt microwave, open the door and nudge the mug gently. The edges should look set and matte, pulled slightly away from the mug walls. The surface should be domed and dry-looking across the outer ring. The center — approximately the inner 1.5 inches — should still look slightly wet, darker than the edges, and should jiggle very slightly when the mug is nudged. This is the correct state. Pull it now.
If the center still looks completely liquid and unset at 60 seconds, microwave in 10-second increments only, checking after each. You are looking for that narrow window where the edges are firm and the center is just barely set on the surface but still liquid underneath — exactly as visible in the spoon-in photo where the outer sponge is fully formed and the center runs like warm ganache when broken.
Do not microwave to the point where the entire surface looks dry and matte. That means the center has set and you have a fully baked cake, not a molten one. It is still edible — it will be denser and drier than intended, but it is not ruined. Serve it with extra chocolate sauce and call it a single-serve chocolate cake.
The cake will continue cooking from carryover heat for approximately 30 seconds after it leaves the microwave. Factor this in — pulling it when the center looks slightly underdone is correct, not a mistake.
🗒 Luna’s Note: The first time I made this I gave it 90 seconds because the center looked too wet at 60. I ended up with a completely set, slightly dry chocolate sponge. The second time I pulled it at 65 seconds and the center was perfect. I now set my microwave timer for 60 seconds and treat everything after that as optional time added in 10-second increments only.
Step 6: Adding the Surface Chocolate Chips Before the Final Seconds
Immediately after pulling the mug from the microwave — while the surface is still hot and slightly soft — scatter your remaining 1 tablespoon (approximately 10g) semi-sweet chocolate chips across the domed surface of the cake, pressing each one very lightly so they sit at the surface rather than rolling off.
The residual heat from the just-cooked cake will soften the bases of the chips and partially melt them into the surface — giving the appearance visible in the photos where the chips look glossy-based and anchored into the dome rather than just sitting on top. If the cake has cooled too much before you add the chips, they will not adhere and will slide off when you pick up the fork.
The chips should look slightly melted at their bases but still hold their teardrop shape — soft-set and glossy, not fully collapsed. This happens in approximately 60–90 seconds of residual heat contact. Do not microwave again after adding the surface chips — additional heat will fully melt them into an unrecognizable mass.
Step 7: Finishing with Chocolate Sauce and Flaked Sea Salt
Allow the cake to rest for 60 seconds after adding the surface chips. This brief rest lets the carryover cooking complete and the structure of the edges firm up slightly so the cake holds its dome when you add the toppings.
Drizzle your 1 tablespoon (20g) chocolate sauce or ganache across the surface in a back-and-forth motion, allowing it to run over the edges of the mug in the heavy drip pattern visible in the photos. The sauce should be fluid enough to flow — if you are using ganache and it has thickened, microwave it for 5 seconds and stir before drizzling.
Immediately finish with 1 pinch of flaked sea salt scattered across the sauced surface. The salt must go on while the sauce is still warm and slightly tacky — this is what makes the flakes adhere to the surface rather than sliding off. Maldon flakes are large enough to be visible as individual crystals, exactly as shown.
The finished cake should look like what you see in the drizzled photo: a domed chocolate surface with a glossy sauce coat, defined drip lines down the side of the mug, and visible white salt crystals on top. If your sauce pooled rather than dripped, it was too thin. If it set immediately on contact, it was too cold. Both are cosmetic issues only — the cake underneath is correct.
Serve immediately. The molten center begins to set as the cake cools. This is not a recipe that waits.
The Science Behind Hot Chocolate Mug Cake
Dutch-Process Cocoa and What It Actually Does to Your Batter
I used natural cocoa powder in my first three test batches of this recipe. The color was wrong — reddish-brown instead of the deep, near-black mahogany visible in the finished cake — and the flavor was sharper and more acidic than I wanted. What I did not understand at the time was that cocoa type is not just a flavor variable. It is a chemistry variable that changes how the entire batter behaves.
Natural cocoa powder is acidic (pH 5–6). Dutch-process cocoa has been treated with an alkalizing agent to neutralize that acidity, bringing it to a near-neutral pH of 7–8. This matters in two ways. First, the alkalization darkens the cocoa particles — this is the direct cause of the deep mahogany color you see in the photos, not a difference in chocolate intensity.
Second, in a batter that uses baking powder as its only leavening agent (as this one does), the neutral pH of Dutch-process cocoa does not interfere with the baking powder’s rising mechanism. Natural cocoa’s acidity, by contrast, can partially react with the baking powder and throw off the balance between lift and set — which in a mug cake means the difference between a domed edge and a flat, sunken surface. The formula for this recipe was developed and tested with Dutch-process cocoa specifically. Substituting natural cocoa is not a neutral swap.
🗒 Luna’s Note: Droste, Cacao Barry Extra Brut, and King Arthur’s Double-Dutch Dark are the three Dutch-process cocoas I keep testing with. The Double-Dutch Dark produces the darkest color of the three — closest to what you see in the photos. If you want that near-black interior crumb, that is the one.
Why an Egg Yolk Instead of a Whole Egg Controls the Molten Center
The molten center in this recipe is not achieved by underbaking a standard mug cake batter. It is engineered by controlling the protein content of the batter precisely — and the single egg yolk is the mechanism that makes this work.
Egg whites are approximately 90% water and 10% protein. When heat is applied, those proteins denature and coagulate — they set firm, the same way the white of a fried egg turns opaque and solid. In a small, fast-cooking format like a microwave mug cake, a full egg white adds enough protein to set the center completely during the 60–90 second cook time. The result is a fully baked, dense sponge with no molten interior. The egg yolk, by contrast, is approximately 50% fat and water with a much lower protein ratio. It emulsifies the batter — binding the butter fat and the milk into a cohesive mixture — without contributing enough protein to set the center before the edges are done. The yolk provides richness, structure at the edges where heat is highest, and a liquid, ganache-like center where heat penetration is lowest.
This is why the spoon-in photo shows a clean, firm sponge at the perimeter and a running, glossy liquid core — two different textures produced by the same batter at the same cook time, because the heat gradient across a small mug in a microwave is significant. If you want a fully set cake, add the whole egg. You will get it. You will also lose the molten center entirely. For a related recipe that uses a whole egg and produces a fully baked result, my chocolate mug cake shows that version.
How Microwave Heat Creates Lift Without an Oven
Steam leavening is the primary rising mechanism in microwave baking — and understanding it explains both why this cake domes so dramatically above the mug rim and why timing is so unforgiving compared to oven baking.
In a conventional oven, heat enters the batter from the outside in — edges and bottom first, center last. This gradual heat transfer gives leavening gases time to form slowly, the structure time to set progressively, and the baker a relatively wide window to pull the bake at the right moment. Microwave energy works differently. Microwave radiation excites water molecules throughout the entire batter simultaneously — heating from within rather than from the surface. The water in the milk and butter converts to steam almost instantly and uniformly, which is what produces the rapid, dramatic vertical lift visible in the domed photos. The baking powder contributes additional lift by releasing carbon dioxide gas as it heats, but in a microwave the steam is the primary driver.
This is also why the timing window is so narrow: because the entire batter heats at once, the transition from underdone to overdone happens in seconds rather than minutes. The 10-second increment rule in the method step exists because of this physics — a full additional minute is not a safe increment when the entire batter is already at cooking temperature.
🗒 Luna’s Note: The first time I understood why microwave timing is so unforgiving in this recipe, I stopped guessing and started treating the 60-second mark as a mandatory checkpoint rather than a finish line. I set a separate timer for 60 seconds. When it goes off, I stop the microwave regardless of what the display says. That single habit change is what makes the result consistent every time.
Hot Chocolate Mug Cake Troubleshooting & Pro-Tips
Common Mistakes
The center baked through completely and there is no molten interior
The most common cause is using whole milk powder, a plant-based milk substitute, or a low-fat milk in place of whole milk — the reduced fat content changes the moisture balance of the batter and accelerates the set time of the center. The second cause is whole egg instead of egg yolk only. A whole egg adds enough protein to set the center fully at 60–90 seconds of microwave time regardless of wattage. The third and most frequent cause is simply too much microwave time.
The fix if this has already happened: the cake is still edible — serve it with a generous pour of warm chocolate sauce over the top and a scoop of vanilla ice cream alongside. The sauce restores the moisture the overbaking removed. For the next batch, confirm you are using egg yolk only, whole milk, and pull the mug at 60 seconds before assessing.
The mug overflowed during cooking and the cake spilled over the sides
The mug was too small or was filled more than halfway before cooking. A standard 8–10oz mug is too small for this batter — the volume of rise during microwave cooking exceeds the available headspace and the batter climbs the walls and spills.
The immediate fix: the cake inside the mug is still fully usable — scoop it into a bowl, add the toppings, and serve it as a deconstructed chocolate pudding.
For the next batch, measure your mug volume before filling. Pour water in and measure — you need 11–12oz (325–355ml) minimum. Fill the batter only to the halfway point of the mug. If your batter volume exceeds half of your mug’s capacity, split it between two mugs and microwave each separately.
The cake came out rubbery and dense with a tight, chewy crumb
This is an overmixing failure. Once the dry ingredients hit the wet ingredients in the mug, the batter should be folded with the minimum number of strokes needed to eliminate dry streaks — approximately 25–30. Stirring aggressively in circles rather than folding from the bottom up develops gluten in the flour, and gluten development in a small mug cake produces a tough, rubbery result rather than a tender one. The same symptom can also come from flour that was packed into the measuring spoon rather than spooned and leveled — too much flour tightens the crumb.
There is no fix once the cake is baked. For the next batch, fold rather than stir, count your strokes, and weigh the flour at 30g rather than measuring by volume.
The surface did not dome — the cake came out flat or slightly sunken in the center
Two causes: dead baking powder or a microwave that ran too long and collapsed the structure. Test your baking powder freshness before mixing — drop ¼ teaspoon into hot water and look for immediate vigorous bubbling. Flat or slow bubbling means the leavening is spent and needs to be replaced.
The second cause is opening the microwave door and closing it again during cooking — the sudden pressure change can deflate the batter mid-rise in the same way opening an oven door too early collapses a cake. Start the microwave, do not open it before 60 seconds, and assess only when the timer ends. A sunken cake is still edible — fill the depression with extra ganache or a spoonful of Nutella and serve it as a filled chocolate cup.
The cake did not lift at all and came out flat and dense throughout
Dead baking powder is the cause. Baking powder loses its potency within 6–12 months of opening — sometimes faster in humid storage conditions — and a batch made with spent leavening will produce a flat, dense sponge with no dome and no edge-to-center textural gradient at all. Test your baking powder before mixing: drop ¼ teaspoon into a small bowl of hot water. It should bubble vigorously within 2 seconds. If the reaction is weak, slow, or absent, replace the container before baking.
There is no fix once the cake is made — flat leavening cannot be corrected after the batter is mixed. A completely flat mug cake is still edible; stir the whole thing together with a spoon in the mug, add a scoop of ice cream on top, and serve it as a warm chocolate pudding.
The chocolate chips on the surface slid off or did not adhere to the dome
The chips were added too late — after the surface had cooled below the temperature needed to partially melt the chip bases. The surface needs to be hot and slightly tacky when the chips go on, which means adding them within 10–15 seconds of pulling the mug from the microwave. If the chips have already slid off, press them back on and microwave the mug for exactly 5 seconds — just enough to re-soften the surface without cooking the interior further.
For the next batch, have the second tablespoon of chips measured and ready in a small dish before the mug goes into the microwave so there is no delay between pulling and topping.
The chocolate sauce pooled in the center instead of dripping over the edges
The sauce was too thick or the cake surface was not domed enough to allow the sauce to run. Chocolate sauce straight from the refrigerator, or ganache that has cooled to room temperature, is too viscous to drip. Warm the sauce in the microwave for 10 seconds and stir before drizzling — it should be fluid enough to pour in a thin stream.
If you are making a quick ganache from chocolate chips and cream, use equal weights of each and let it sit for 60 seconds after microwaving before stirring — over-stirred ganache seizes and thickens prematurely.
The batter looks grainy or broken after mixing the wet ingredients
The butter was too hot when the egg yolk was added. Hot butter — above approximately 90°F (32°C) — begins to partially cook the proteins in the egg yolk, causing them to seize into small curds that create a grainy, broken-looking batter. This batter will still bake into a cake but the texture of the finished crumb will be slightly uneven and less tender than it should be.
The fix if it has already happened: add ½ teaspoon of warm milk and stir vigorously — this sometimes re-emulsifies a slightly broken mixture. For the next batch, cool the melted butter for a full 2–3 minutes before adding the egg yolk, and test the bowl temperature with your hand — warm to the touch is correct, hot is too much.
Humidity and Altitude
At high altitude (above 3,500 feet / 1,067m), reduce the baking powder to ⅛ teaspoon. Lower atmospheric pressure causes leavening gases to expand more aggressively — too much baking powder at altitude produces a batter that rises so fast it overflows before the edges can set, then collapses back into a dense, sunken result. Cook time may also need to be reduced by 5–10 seconds since microwave energy behaves slightly differently at altitude.
In high humidity environments (above 70% relative humidity), cocoa powder and baking powder both absorb ambient moisture, which reduces the potency of the leavening and causes the cocoa to clump more than usual. Sift the cocoa before adding it regardless of humidity, and store the dry ingredient pre-mix in the refrigerator in a sealed glass jar rather than at room temperature.
Expert Pro-Tips
Measure your mug before your first bake. Fill your intended mug with water and pour it into a liquid measuring cup. If it reads less than 11oz (325ml), find a larger mug before you start. This single check prevents the most common catastrophic failure — overflow — before it happens.
Use a kitchen scale for the flour and cocoa, not measuring spoons. 30g of flour and 18g of cocoa powder weighed on a scale are exact. Four tablespoons of flour scooped from a bag can vary by as much as 10g depending on how settled the flour is. In a recipe this small, a 10g error in flour is a 33% deviation from the intended ratio — the difference between a molten center and a fully set one.
Pre-mix the dry ingredients in a small bowl before adding them to the mug. Baking powder and cocoa powder both clump, and in a narrow mug it is harder to work out those clumps without overmixing the batter. Whisking the flour, cocoa, sugar, and baking powder together for 10 seconds in a separate small bowl before adding them to the wet ingredients means fewer strokes needed in the mug and a more evenly leavened result.
Learn your microwave’s behavior on the first batch before committing. Pull the mug at exactly 60 seconds, note the state of the center, and record how many additional seconds you needed. Your microwave, your mug, and your batter temperature will produce a consistent result every time once you know that number. Mine takes 65 seconds. Yours may take 70 or 75. The number does not change between batches once you find it.
Warm the chocolate sauce before you start mixing the batter, not after. By the time the cake is done and the chips are on, you want the sauce ready to pour immediately. A 10-second microwave warm-up on the sauce takes less than a minute but is easy to forget in the sequence. Getting the timing right on the toppings matters — the window for the chips adhering and the sauce dripping cleanly is only about 90 seconds after the mug comes out of the microwave.
How to Store Hot Chocolate Mug Cake
Room Temperature
This cake is designed to be eaten immediately — within 5 minutes of coming out of the microwave, while the center is still liquid and the sauce is still warm. That is not a preference. It is the architecture of the recipe. The molten center begins to set as the cake cools, and by the time the mug has reached room temperature — approximately 20–30 minutes after baking — the center will have firmed into a dense, fudgy mass rather than the running liquid chocolate visible in the spoon-in photo. The cake is still edible at that point. It is not what this recipe is.
If you need to hold the cake for 10–15 minutes before eating — if you are finishing the sauce or waiting for someone — cover the mug loosely with a small plate or a square of foil, not plastic wrap. Plastic wrap pressed onto a hot, domed surface traps steam and softens the top of the cake into a gummy layer. The loose cover slows cooling without creating condensation on the surface.
Do not store a baked mug cake at room temperature for more than 2 hours. It contains a raw egg yolk that has been cooked to approximately 160°F at the edges but potentially less at the center. The food safety window at room temperature is 2 hours maximum.
Refrigerator
A fully baked mug cake can be covered with a small plate and refrigerated for up to 24 hours, but the result when reheated is not equivalent to a freshly made one. The center will have fully set during refrigeration. To reheat, microwave the covered mug for 20–25 seconds at 50% power — this warms the cake through without overcooking the edges. The center will soften but will not return to a fully liquid molten state. Add fresh chocolate sauce and flaked salt after reheating.
Refrigerating is not recommended as a regular practice for this recipe. The fresh version takes 7 minutes start to finish. Make it fresh.
Freezer — Baked
Freezing a baked mug cake is not recommended. The egg yolk-based batter, once frozen and thawed, separates and produces a gummy, uneven texture on reheating. The molten center does not survive the freeze-thaw cycle regardless of reheating method.
Freezer — Unbaked Batter
The dry ingredients for this recipe can be pre-mixed and store in a small zip-lock freezer bag pressed flat to remove all air, or in a small glass jar with a tight-fitting lid, at room temperature for up to 1 month — do not use a loosely sealed bag or an open container; cocoa powder and baking powder both absorb ambient moisture and the leavening will go flat before you use it — flour, cocoa, sugar, and baking powder measured and combined, ready to pour. When you want a mug cake, add the wet ingredients directly to the mug, pour in the dry mix, fold, and microwave. This is the closest thing to a make-ahead version of this recipe and it works well. Label the bag with the wet ingredient list so you do not have to remember it.
Do not pre-mix the wet ingredients and store them — raw egg yolk stored with melted butter and milk creates a food safety risk. The dry mix only.
Serving Suggestion
Serve the mug cake directly in the mug, immediately after the sauce and salt go on. I do not plate this. The mug is the vessel and the presentation — the drip down the white ceramic side is part of what makes it look like the photos.
The one accompaniment I use with this is a single scoop of vanilla bean ice cream placed directly on top of the sauced surface, added right before I sit down. The ice cream melts into the warm chocolate sauce and creates a second layer of liquid on top of the molten cake underneath. Cold ice cream against a hot molten cake is one of those combinations that does not need improvement. A strong black coffee alongside — no sugar — cuts the sweetness in a way that makes the chocolate flavor sharper and more distinct.
This is not a recipe for a dinner party or a celebration. It is a single-serve, 7-minute dessert for a specific moment — the one where you want something real and you want it now. I make it on weeknights. I make it alone. That is what it is for.
Day 1 versus Day 2: there is no Day 2 for this recipe, by design. The molten center — the entire reason to make this — exists only in the first 5 minutes after it comes out of the microwave. A reheated version on Day 2 is a warm chocolate cake with a dense center. It is fine. It is not this.
This does not travel. Do not attempt to make it in one kitchen and serve it in another. Make it where you are eating it.
Frequently Asked Questions About Hot Chocolate Mug Cake
Can I make hot chocolate mug cake ahead of time?
The baked cake cannot be made ahead — the molten center sets within 20–30 minutes of coming out of the microwave and does not return to a liquid state on reheating. What you can prepare ahead is the dry ingredient mix: combine the flour, cocoa powder, sugar, and baking powder in a sealed jar or small zip-lock bag and store at room temperature for up to 1 month. When you are ready to bake, add the wet ingredients directly to the mug, pour in the dry mix, fold, and microwave. The bake itself takes under 2 minutes.
Can I use natural cocoa powder instead of Dutch-process?
You can, but the result will be noticeably different in two ways. Natural cocoa is acidic and will partially react with the baking powder, reducing the lift at the edges and producing a flatter, less domed surface. The color will shift from deep mahogany to a reddish-brown. If you use natural cocoa, replace the baking powder with ¼ teaspoon of baking soda instead — baking soda is a base that neutralizes the acidity in natural cocoa and restores the leavening balance. The flavor will be slightly sharper and more bitter than the Dutch-process version. The molten center mechanics remain the same regardless of cocoa type.
Why did my mug cake turn out rubbery?
Rubbery texture in a mug cake is almost always a gluten development problem caused by overmixing. When the dry ingredients are stirred aggressively into the wet batter — especially in circular motions — the gluten proteins in the flour form long, elastic networks that produce a chewy, tough crumb instead of a tender one. The fix is to fold rather than stir, using a bottom-up motion with a fork, and stop at approximately 25–30 strokes. A secondary cause is excess flour from packing the measuring spoon — weigh the flour at exactly 30g to eliminate this variable entirely.
How do I know when the mug cake is done?
Pull the mug at 60 seconds and assess. The edges should look matte and set, pulled slightly away from the walls. The center should still look slightly darker, slightly wet, and jiggle gently when nudged. That jiggle is the molten center — it is correct. Carryover heat continues cooking the cake for 30 seconds after it leaves the microwave, so the slightly underdone pull is intentional.
Can I substitute the egg yolk with something else?
Replace it with 1 tablespoon (15ml) of full-fat sour cream or full-fat plain Greek yogurt. Both provide fat and partial emulsification to keep the batter cohesive, though the center will be slightly less glossy and the crumb slightly less rich. Do not use a flax egg, chia egg, or aquafaba — all three add water or fiber that changes the moisture balance and eliminates the molten center entirely.
How does altitude or humidity affect this mug cake?
At high altitude (above 3,500 feet / 1,067m), reduce the baking powder to ⅛ teaspoon — leavening gases expand more aggressively at lower air pressure and the cake can dome too rapidly, overflow, or collapse before the edges set. The cook time may also need to be reduced by 5–10 seconds. In high humidity environments, the dry ingredient pre-mix should be used within 2 weeks rather than 1 month — cocoa powder and baking powder both absorb ambient moisture and lose potency faster in humid conditions. If your kitchen runs above 70% relative humidity, store the dry mix in the refrigerator in a sealed jar instead.
Can I double this recipe to make two mug cakes at once?
Make two separate mugs rather than doubling the batter into one large vessel. A doubled batter in a single mug will overflow regardless of mug size — the volume of rise during microwave cooking makes a single-serve mug cake fundamentally unscalable upward in the same vessel. Two separate mugs microwaved one after the other gives you two correct cakes. Note that leavening does not scale linearly — if you are pre-mixing the dry ingredients in bulk for multiple batches, measure the baking powder separately for each batch rather than doubling it into a combined mix, or the leavening ratio per serving will be off. For a crowd-sized chocolate dessert, my chocolate dump cake serves 12 from a single pan with minimal effort.
More Chocolate Recipes You’ll Love
- Hot Chocolate Cupcakes — a full-batch version of the hot chocolate flavor profile with a whipped ganache frosting and the same Dutch-process cocoa depth
Hot Chocolate Mug Cake Recipe
Ingredients
Equipment
Method
- Melt 2 tablespoons (28g) unsalted butter in a small bowl in the microwave in 15-second bursts until fully liquid, then set aside and cool for 2–3 minutes until warm but not hot.
- Add 1 large egg yolk (room temperature) and ½ teaspoon (2ml) pure vanilla extract to the cooled melted butter and whisk together with a fork for approximately 20 strokes until smooth, uniform, and no yolk streaks remain.
- Add 3 tablespoons (45ml) whole milk, room temperature, to the butter and egg yolk mixture and stir with a fork for 10 strokes until fully combined and no fat separation is visible.
- Pour the wet ingredient mixture into your 11–12oz (325–355ml) ceramic mug, then add 4 tablespoons (30g) all-purpose flour spooned and leveled, 3 tablespoons (18g) Dutch-process cocoa powder sifted, 3 tablespoons (36g) granulated sugar, and ¼ teaspoon (1g) baking powder directly on top of the wet ingredients.
- Using a fork, fold the dry ingredients into the wet from the bottom of the mug upward in approximately 25–30 strokes until no dry flour or cocoa streaks remain — fold, do not stir in circles.
- Add 1 tablespoon (approximately 10g) semi-sweet chocolate chips to the batter and fold in with 5–6 slow strokes until distributed; confirm the batter fills the mug no more than halfway.
- Place the mug in the center of the microwave turntable and microwave on full power for 60 seconds, then stop and assess — edges should look set and matte with the center still slightly wet and jiggly; if needed, microwave in 10-second increments only until edges are firm and center is just barely set on the surface.
- Immediately after removing from the microwave, scatter remaining 1 tablespoon (approximately 10g) semi-sweet chocolate chips across the hot domed surface, pressing each one lightly so the residual heat partially melts the bases and anchors them in place.
- Allow the cake to rest for 60 seconds, then drizzle 1 tablespoon (20g) chocolate sauce or warmed ganache across the surface in a back-and-forth motion allowing it to drip over the mug edges, then immediately finish with 1 pinch of flaked sea salt scattered across the warm sauced surface.
- Serve immediately in the mug while the center is still molten — the liquid center begins to set as the cake cools.