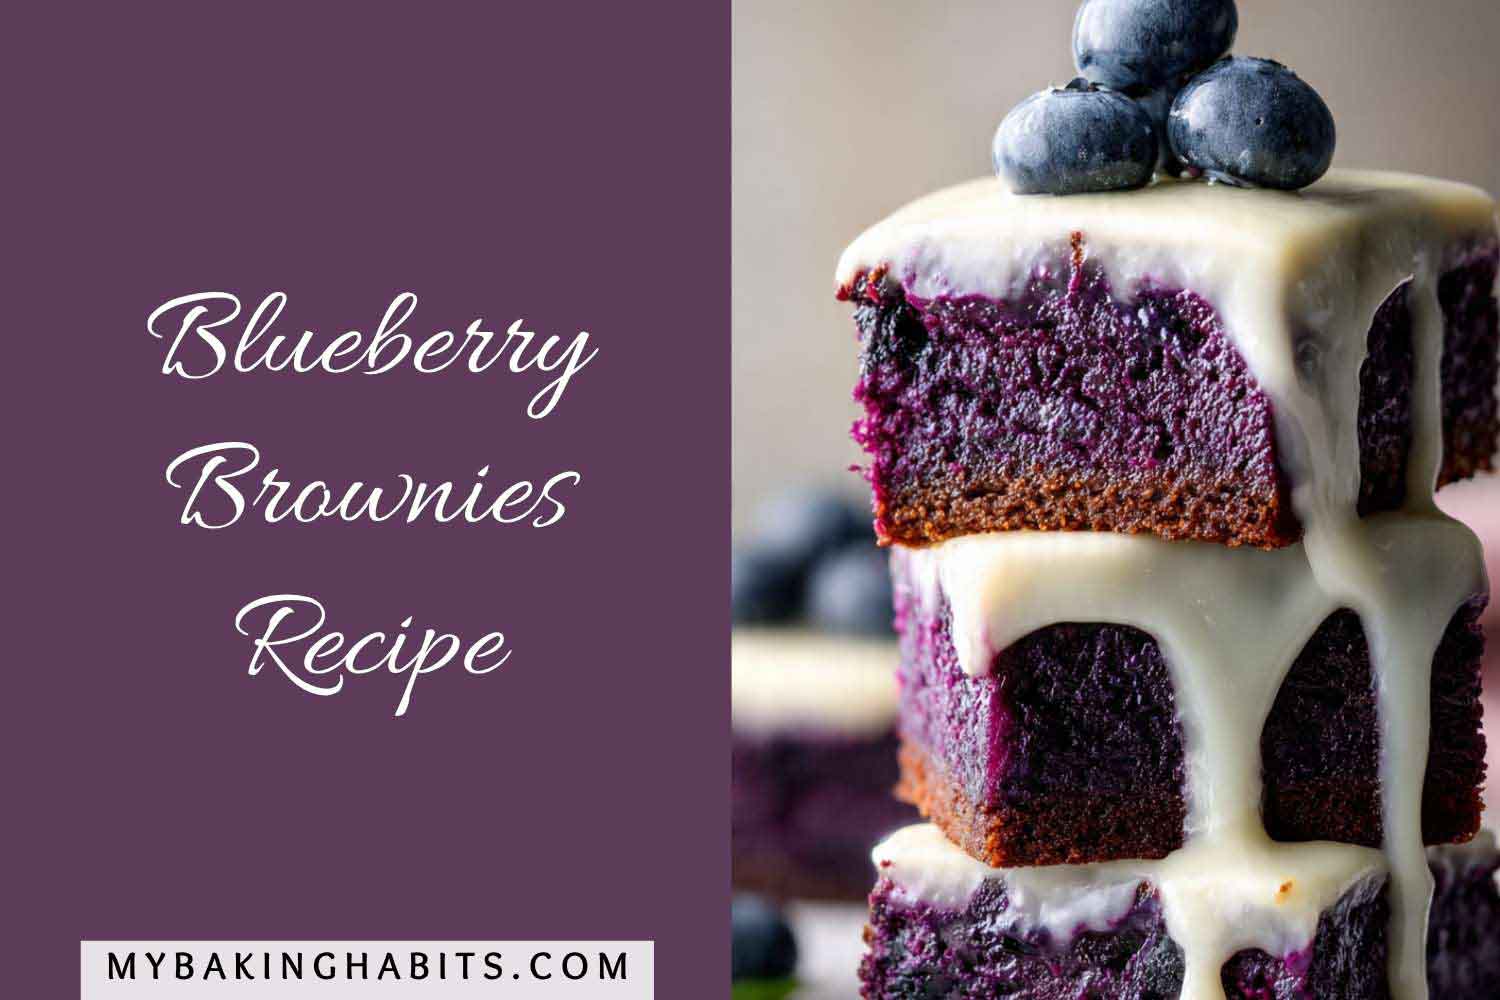
Fudgy Blueberry Brownies Recipe
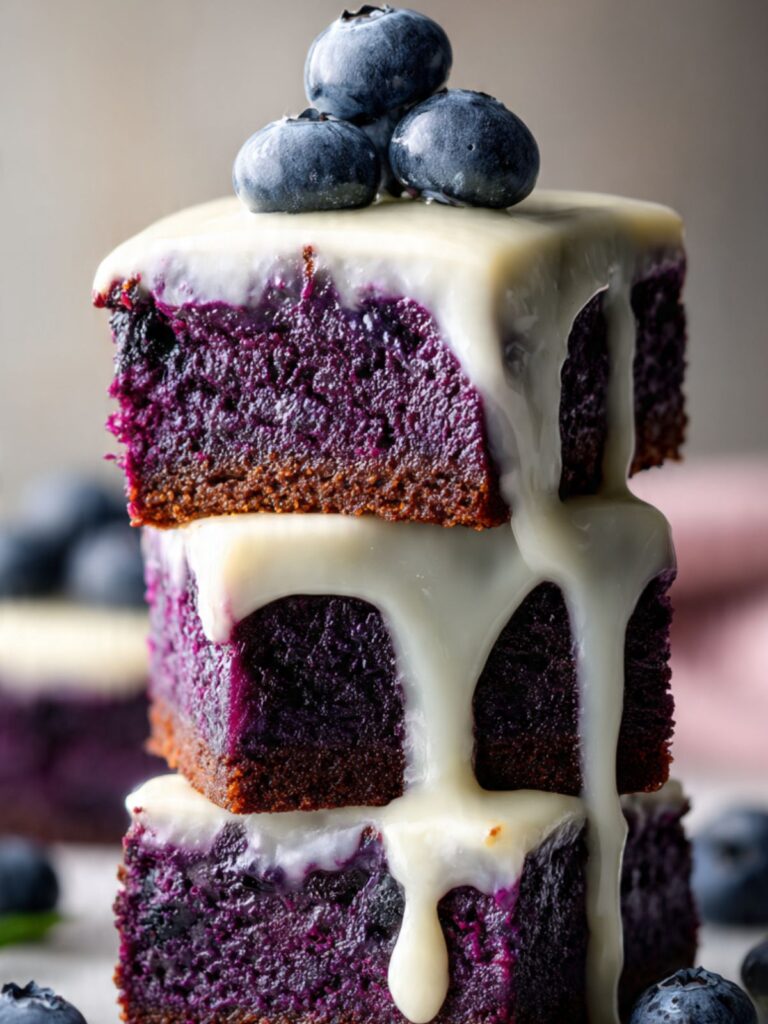
Most people assume the purple color is a gimmick. It is not — and I know that because I made eleven batches of these before the crumb, the glaze formula, and the pull point were all correct at the same time. It is what happens when you replace the fat-and-chocolate base of a traditional brownie with a high-ratio blueberry puree, and it tells you something real about the batter before it ever goes into the oven — how much moisture is in there, how the crumb will set, and exactly why these need to come out earlier than instinct says.
I have made a lot of fruit-based bars that looked promising in theory and came out tasting like a failed muffin. These are not that. The crumb is dense and moist-set — closer to a fudgy brownie than a cake bar — with concentrated blueberry flavor in every bite and a cream cheese glaze that is thick enough to hold the fresh blueberries on top without sinking them.
The first three batches I tested came out dry. Not wrong in flavor, but dry — the kind of dry where the crumb crumbles when you try to stack them. I thought it was a flour ratio issue. It was a baking time issue. Blueberry puree holds moisture differently than melted chocolate does, and the visual cues I was used to from standard brownies — a set surface, edges pulling from the pan — were misleading me to overbake by four minutes every single time. Batch four, I pulled them earlier. That was the batch.
I tested the puree two ways: raw blueberries blended cold, and blueberries cooked briefly on the stovetop before blending. The cooked version produced a deeper, more concentrated color and a richer flavor — the raw version had a slightly brighter, more acidic note that got muted during baking anyway. The cooked-and-cooled puree is the one I kept. The raw version is easier, but the result is noticeably flatter in flavor.
I tested the glaze across three formulas: a thin powdered sugar drizzle, a white chocolate ganache, and a cream cheese glaze. The drizzle disappeared into the top of the bar within an hour. The white chocolate ganache set too firm and cracked when the bars were stacked. The cream cheese glaze is the right choice — it has enough body to stay opaque, enough tang to cut the sweetness of the bar, and it stays pliable enough that the bars stack cleanly.
No mixer required for these. No chilling. One bowl for the batter, one bowl for the glaze. The batter comes together in about ten minutes and bakes in 30 to 35. The total active time is under 20 minutes.
🗒 Luna’s Note: The lemon juice in this batter is doing real work — blueberry pigment is pH-sensitive, and a small amount of acid keeps it a vivid magenta-purple instead of a dull grey-blue. Don’t skip it.
| Prep Time | Cook Time | Total Time | Yield | Difficulty |
|---|---|---|---|---|
| 15 min | 32 min | ~1 hr 45 min (includes cooling) | 16 bars | Easy |
| Calories | Fat | Carbs | Sugar | Protein | Sodium |
|---|---|---|---|---|---|
| ~215 kcal | ~9g | ~32g | ~22g | ~3g | ~105mg |
Macros are approximate and will vary based on ingredient brands and exact serving size. Calculated per bar based on a 4×4 cut from one 8×8 pan.
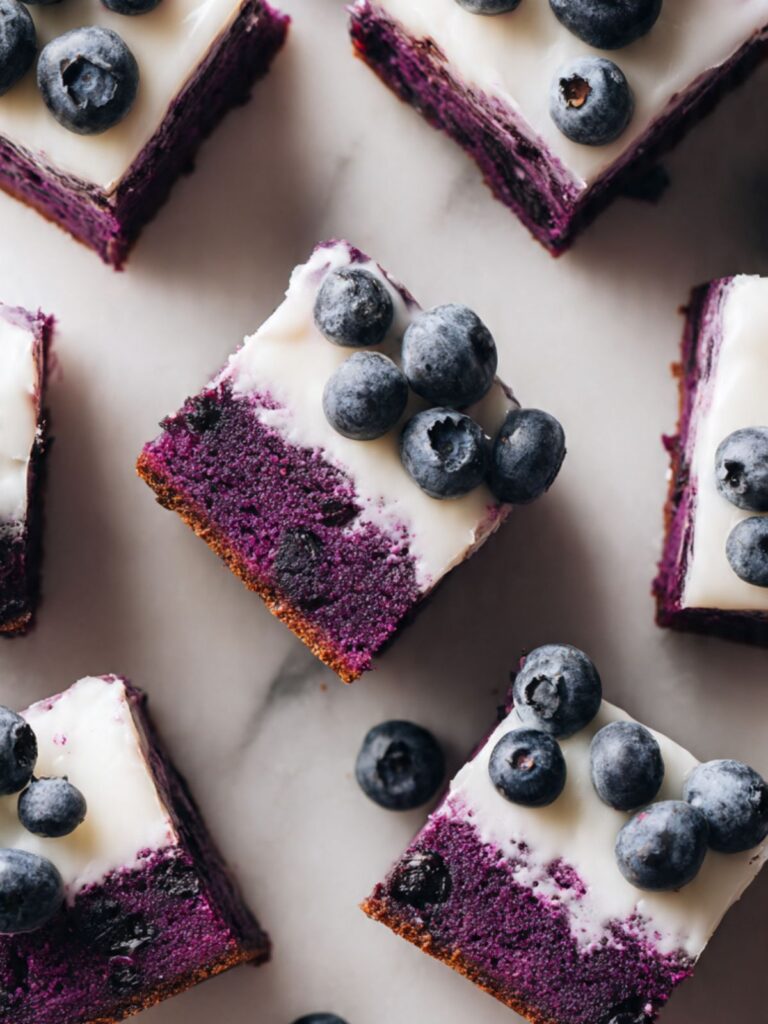
Ingredients & Tools for Blueberry Brownies Recipe
For the Blueberry Bars
- 2 cups (240g) fresh blueberries, rinsed and completely dried — used to make the puree. Do not substitute frozen here; frozen blueberries release excess water when blended and thin the batter in a way that changes the set. Pat dry after rinsing — any surface moisture dilutes the puree concentration.
- ½ cup (113g) unsalted butter, melted and cooled to room temperature — unsalted only. Salted butter adds an unpredictable amount of sodium that throws off the balance of the glaze. Melt it and let it cool for at least 15 minutes before it touches the eggs — hot butter scrambles eggs.
- 1 cup (200g) plain white granulated cane sugar — do not substitute coconut sugar, raw sugar, or turbinado. Those have higher moisture content and different crystal structures that change how the batter sets. White sugar is what keeps the crumb clean and the color vivid.
- 2 large eggs, room temperature — 30 minutes out of the fridge, or place in a bowl of warm water for 10 minutes — large, not medium or extra-large. Room temperature eggs incorporate more evenly into the batter. Cold eggs added to a warm butter mixture will seize and look broken.
- 1 tablespoon (15ml) fresh lemon juice — freshly squeezed, not bottled. The acid preserves the blueberry pigment during baking, keeping the crumb magenta-purple rather than grey-blue. Bottled lemon juice has a flat, slightly metallic note that is detectable in a batter this simple.
- 1 teaspoon pure vanilla extract — pure, not imitation. Imitation vanilla has a synthetic sharpness that is especially noticeable in fruit-forward batters where vanilla is a background note rather than a primary flavor.
- 1½ cups (180g) all-purpose flour, spooned and leveled — spoon the flour into your measuring cup and level with a straight edge. Do not scoop directly from the bag — scooping packs 20–30% more flour than the recipe needs and will produce a dry, dense bar instead of the moist-set crumb shown in the photos.
- 1 teaspoon baking powder, checked for freshness — baking powder, not baking soda. This recipe has no significant acid component in the dry ingredients to activate baking soda. The baking powder is minimal — it provides a small amount of lift without fighting the dense, fudgy structure.
- ¼ teaspoon fine sea salt — fine sea salt, not kosher or table salt. Volume measurements for salt vary significantly by type. Fine sea salt is the default in all Luna’s recipes.
For the Cream Cheese Glaze
- 4 oz (113g) full-fat block cream cheese, softened to room temperature — block cream cheese only, not spreadable tub cream cheese and not low-fat. Tub cream cheese has a higher water content and produces a glaze that is too thin and will not hold the fresh blueberries on top. Low-fat cream cheese produces a grainy glaze. The cream cheese needs 60 to 90 minutes at room temperature — do not microwave it.
- 1 cup (120g) powdered sugar (also called confectioners sugar or icing sugar), sifted — always sift. Unsifted powdered sugar contains lumps that do not dissolve into the glaze even with vigorous mixing and produce a streaky, uneven finish.
- 2–3 tablespoons (30–45ml) whole milk (3.5% fat) — start with 2 tablespoons and add more to reach the right consistency. The glaze should be thick enough to hold a slow drip off a spoon — not pourable, not stiff. Skim or 2% milk adds excess water without the fat needed for a stable, opaque glaze.
- ½ teaspoon pure vanilla extract
For the Garnish (yields 16 bars from one 8×8 pan)
- ½ cup (75g) fresh blueberries, rinsed and completely dried — applied after the glaze is set. They must be completely dry or they will slide off the glaze surface and bleed into it.
Before You Start
Temperature prep: Pull the cream cheese from the fridge 60 to 90 minutes before you start. It should feel completely soft when pressed — no resistance, no cold spots. If it still feels firm in the center, give it more time. Do not microwave it. The eggs need 30 minutes at room temperature. The eggs are ready when they feel neutral to the touch — neither cold nor warm. If they still feel cool from the fridge after 30 minutes, the warm water bath method is more reliable: submerge them in warm (not hot) water for 10 minutes, then dry before cracking.
A fast method: place them in a bowl of warm (not hot) water for 10 minutes. The butter can be melted right before you start — just make sure it has cooled to room temperature (below 90°F / 32°C) before it goes into the batter.
Puree prep: The blueberry puree is made first and needs a few minutes to cool before going into the batter. Plan for this — the puree cooks for about 5 minutes on the stovetop, then needs 10 to 15 minutes to cool to room temperature.
Flour measuring: Spoon the flour into your measuring cup using a separate spoon and level it off with a straight edge. Do not scoop the cup directly into the flour bag — scooping packs in 20–30% more flour than the recipe needs and will make the bars dry and dense. For guaranteed accuracy, weigh at 180g on a kitchen scale. Gram weight always takes priority over volume in this recipe.
Gram weight priority: For the most consistent results, use a kitchen scale set to grams. The gram weights in this recipe are what I tested with — they are the most reliable way to match my result.
Mixing method: This entire recipe comes together with a large mixing bowl and a silicone spatula — no electric mixer needed. The batter requires gentle folding, not aggressive mixing. The glaze is made the same way.
No chilling required — the batter goes straight from the bowl into the pan.
Pan prep: Use a light-colored aluminum 8×8 inch (20×20cm) baking pan. Dark non-stick pans absorb more heat and will overbrown the already-caramelizing bottom before the center sets — the result is a burnt base and an undercooked interior. Line with parchment paper, leaving at least 1 inch (2.5cm) of overhang on two opposite sides. Without the parchment overhang you will not be able to lift the bars out of the pan cleanly and the edges will break on removal.
Oven position: Position your oven rack in the middle of the oven before preheating. Top rack burns the top surface through the glaze. Bottom rack burns the already-dark base before the center sets.
Leavening freshness check: Drop 1 teaspoon (4g) of the baking powder into ½ cup (120ml) of hot water. It should bubble immediately and vigorously. If it fizzes weakly or produces no bubbles, replace the tin before continuing — expired baking powder produces flat, dense bars.
Necessary Tools
Required:
- Kitchen scale (strongly recommended — gram weights are more accurate than volume)
- Small saucepan (for cooking the blueberry puree)
- Blender or immersion blender (for pureeing the cooked blueberries)
- Large mixing bowl
- Medium mixing bowl (for the glaze)
- Silicone spatula
- Light-colored aluminum 8×8 inch (20×20cm) baking pan
- Parchment paper with overhang
- Wire cooling rack
Optional:
- Oven thermometer (recommended — most home ovens run 15–25°F / 8–14°C off from the dial setting)
- Fine mesh sieve (for straining seeds from the puree if a smoother crumb is preferred)
- Offset spatula (for spreading the glaze evenly)
How to Make Blueberry Brownies
This recipe uses a one-bowl melt-and-mix method — no creaming, no whipping, no mixer. The order of ingredients matters: the puree goes in warm but not hot, the butter must be cooled before the eggs go in, and the flour is folded in last with the minimum number of strokes needed to combine it. Overmixing after the flour goes in is the primary way this batter goes wrong.
Step 1: Cooking and Pureeing the Blueberries Until Deeply Concentrated
In your small saucepan over medium heat, add your 2 cups (240g) fresh blueberries, rinsed and completely dried. Cook, stirring occasionally with your silicone spatula, for 4 to 6 minutes — the berries will release their juice, begin to burst, and the liquid will reduce slightly. You are looking for a thick, jammy consistency where most of the berries have broken down and the mixture bubbles slowly at the edges. Remove from heat and let it cool for 2 minutes in the pan, then transfer to your blender or use an immersion blender directly in the pan. Blend until completely smooth — approximately 30 seconds on high speed. You should have approximately ¾ cup (180ml) of deep purple puree. If you prefer a seed-free crumb, pass the puree through a fine mesh sieve now, pressing with the back of a spoon to extract as much liquid as possible. Set the puree aside and allow it to cool to room temperature — approximately 10 to 15 minutes. The puree should feel no warmer than room temperature when you touch the bottom of the bowl before it goes into the batter — if it is still warm, wait. A warm puree added to the butter and eggs will begin to cook the eggs before baking begins.
Do not skip the stovetop step and blend the berries raw — the cooked puree has a deeper, more concentrated flavor and a more vivid, stable color than raw blended berries, which produce a brighter but flatter result that fades more during baking. The cooled puree is what goes into the bowl next.
Step 2: Combining the Butter, Sugar, and Cooled Blueberry Puree
In your large mixing bowl, add your ½ cup (113g) unsalted butter, melted and cooled to room temperature and 1 cup (200g) plain white granulated cane sugar. Whisk together with your silicone spatula using approximately 20 wide circular strokes from the bottom of the bowl upward, until the mixture looks uniform and the sugar has partially dissolved into the butter — about 60 seconds. Add your cooled blueberry puree and your 1 tablespoon (15ml) fresh lemon juice. The lemon juice is not optional — blueberry pigment is pH-sensitive, and the acid is what keeps the crumb magenta-purple in the oven rather than shifting to a dull grey-blue. Stir again for another 15 strokes until the mixture is fully combined and a uniform deep purple.
The mixture at this stage should look glossy, smooth, and uniformly colored — no streaks of butter sitting separate from the puree, no visible sugar crystals pooled at the bottom of the bowl.
Do not add the puree if it is still warm — and do not use butter that has not fully cooled. Either condition introduces heat at the wrong moment. The visible result: the mixture will look broken and greasy rather than smooth and glossy, with the fat visibly separating from the puree in streaks. If this happens, let the bowl sit for 5 minutes before stirring again — the mixture usually comes back together as the temperature equalizes.
Do not worry if the mixture looks very dark at this point. It deepens further in the oven. That is the correct color.
Step 3: Adding the Eggs and Vanilla Without Breaking the Emulsion
Using your silicone spatula, add your 2 large eggs, room temperature one at a time directly into the purple butter mixture in the large bowl. Add the first egg and stir vigorously for 20 strokes until it is fully incorporated before adding the second — adding both at once risks an uneven emulsion that produces a greasy, streaky batter. After the second egg is fully incorporated, add your 1 teaspoon pure vanilla extract and stir for another 10 strokes. The vanilla is a background note here — the blueberry is the primary flavor — but it rounds out the sweetness in a way that is noticeable when it is missing.
🗒 Luna’s Note: I always crack my eggs into a small bowl before adding them to the batter. One shell fragment in a blueberry batter this dark is nearly impossible to find and fish out. Thirty seconds of prevention.
The batter after the eggs should look thick, silky, and deeply purple — with a slight sheen from the fat. If it looks broken or greasy with visible pools of butter, the eggs were too cold or the butter was still warm when they went in. If this happens, keep stirring — it usually comes back together within 30 additional strokes. If it does not, the batter will still bake, but the crumb will be slightly greasier than the result shown in the photos.
The egg addition is complete. Add the dry ingredients next — this is the step where overmixing becomes the primary risk.
Step 4: Folding in the Dry Ingredients Without Developing Gluten
Add your 1½ cups (180g) all-purpose flour, spooned and leveled, 1 teaspoon baking powder, checked for freshness, and ¼ teaspoon fine sea salt directly on top of the wet mixture in the bowl. Do not stir them into the wet ingredients separately — add all three dry ingredients at once on top, then fold in with your silicone spatula using slow, deliberate strokes from the bottom of the bowl upward. Count your strokes. Stop at 20 to 25 strokes — the moment no dry flour streaks remain. The baking powder provides a minimal lift that keeps the crumb from being completely flat and compressed, but its job is subtle here — this is not a leavening-forward recipe. The fine sea salt sharpens every other flavor in the batter.
Do not mix in circles. Circular mixing develops gluten faster than the folding motion and produces a tougher, more bread-like crumb instead of the dense, tender result visible in the photos.
The finished batter should look thick, scoopable, and uniformly purple — similar in consistency to a thick brownie batter. If it looks thin and pourable, the puree was too liquid or the flour was undermeasured. If it looks stiff and dry, the flour was overpacked. Either way, note it for next time — this batch will still bake, but the texture will be slightly off from the target.
This is the complete batter. Pour it into the prepared pan now — do not let it sit.
Step 5: Baking Until the Edges Are Deep and the Center Is Just Set
Preheat your oven to 350°F (175°C). Confirm with an oven thermometer if you have one — most home ovens run 15 to 25°F (8 to 14°C) off from the dial setting, and this recipe has a narrow doneness window. Pour the batter into your parchment-lined light-colored aluminum 8×8 inch (20×20cm) pan and spread it into an even layer using your silicone spatula or offset spatula, making sure the batter reaches the corners and the surface is level. An uneven surface bakes unevenly — the thin corners will overbake while the thick center is still underdone.
Bake on the middle rack at 350°F (175°C) for 30 to 35 minutes. Start checking at 30 minutes. The doneness cues for these bars are specific — they are not the same as a standard brownie:
- The edges will be deep mahogany-brown and visibly pulling away from the sides of the parchment by 2 to 3mm
- The surface will be matte and fully set — no wet sheen
- The center will feel firm when you press it very lightly with one finger, but will give very slightly — like a set gelatin, not a rigid cake
Do not wait for the center to look golden or fully firm like a cake. The moment it passes from a soft jiggle to a firm-but-giving set is the moment to pull them. Waiting past this point by even 4 minutes produces a dry, crumbly bar instead of the moist-set dense crumb shown in the stacked shot. I overbaked the first three batches because I was waiting for a visual cue that never comes with this recipe.
As you can see in the overhead shot showing the bars cut in the pan, the edges are a deep mahogany-brown all the way around — that deep color at the perimeter is the correct target. The interior remains vivid purple under the glaze because it was pulled at the right moment.
Pull the pan from the oven and set it on your wire cooling rack. Do not attempt to remove the bars from the pan at this point.
Step 6: Cooling Completely So the Crumb Finishes Setting
Set the pan on your wire cooling rack and leave the bars in the pan undisturbed for a minimum of 2 hours at room temperature. This is not just a patience step — it is the final phase of baking. Carryover heat from the pan continues conducting into the bar base for the first 15 to 20 minutes after it comes out of the oven, and the starch gelatinization process — the mechanism that gives the crumb its dense, set structure — continues for up to 90 minutes after that. Cutting or glazing before 2 hours produces bars with a gummy, collapsed center texture even though they are technically fully baked. Do not cut them early. Do not glaze them warm.
The bars are ready to glaze when the pan feels completely neutral to the touch — no warmth from the bottom when you press your palm against the exterior of the pan. If there is any residual warmth, wait another 20 minutes. For the cleanest edges, after the 2-hour room temperature cool, transfer the pan to the refrigerator for 30 minutes before lifting and slicing. Cold bars cut sharper and the crumb holds together under the knife with noticeably less smearing.
While the bars are cooling, make the glaze.
Step 7: Making the Cream Cheese Glaze to the Right Consistency
In your medium mixing bowl, add your 4 oz (113g) full-fat block cream cheese, softened to room temperature. Using your silicone spatula, beat it against the side of the bowl for 30 to 40 strokes until it is completely smooth with no lumps — if you can feel any resistance or see any white lumps, keep working it. Lumpy cream cheese at this stage produces a lumpy glaze that no amount of liquid will fix.
Add your 1 cup (120g) powdered sugar, sifted in two additions. Add half, fold until combined, then add the second half and fold again. Adding all the powdered sugar at once produces a cloud of fine sugar that does not incorporate cleanly. Add your ½ teaspoon pure vanilla extract and stir to combine. Now add your whole milk (3.5% fat) one tablespoon at a time, stirring after each addition.
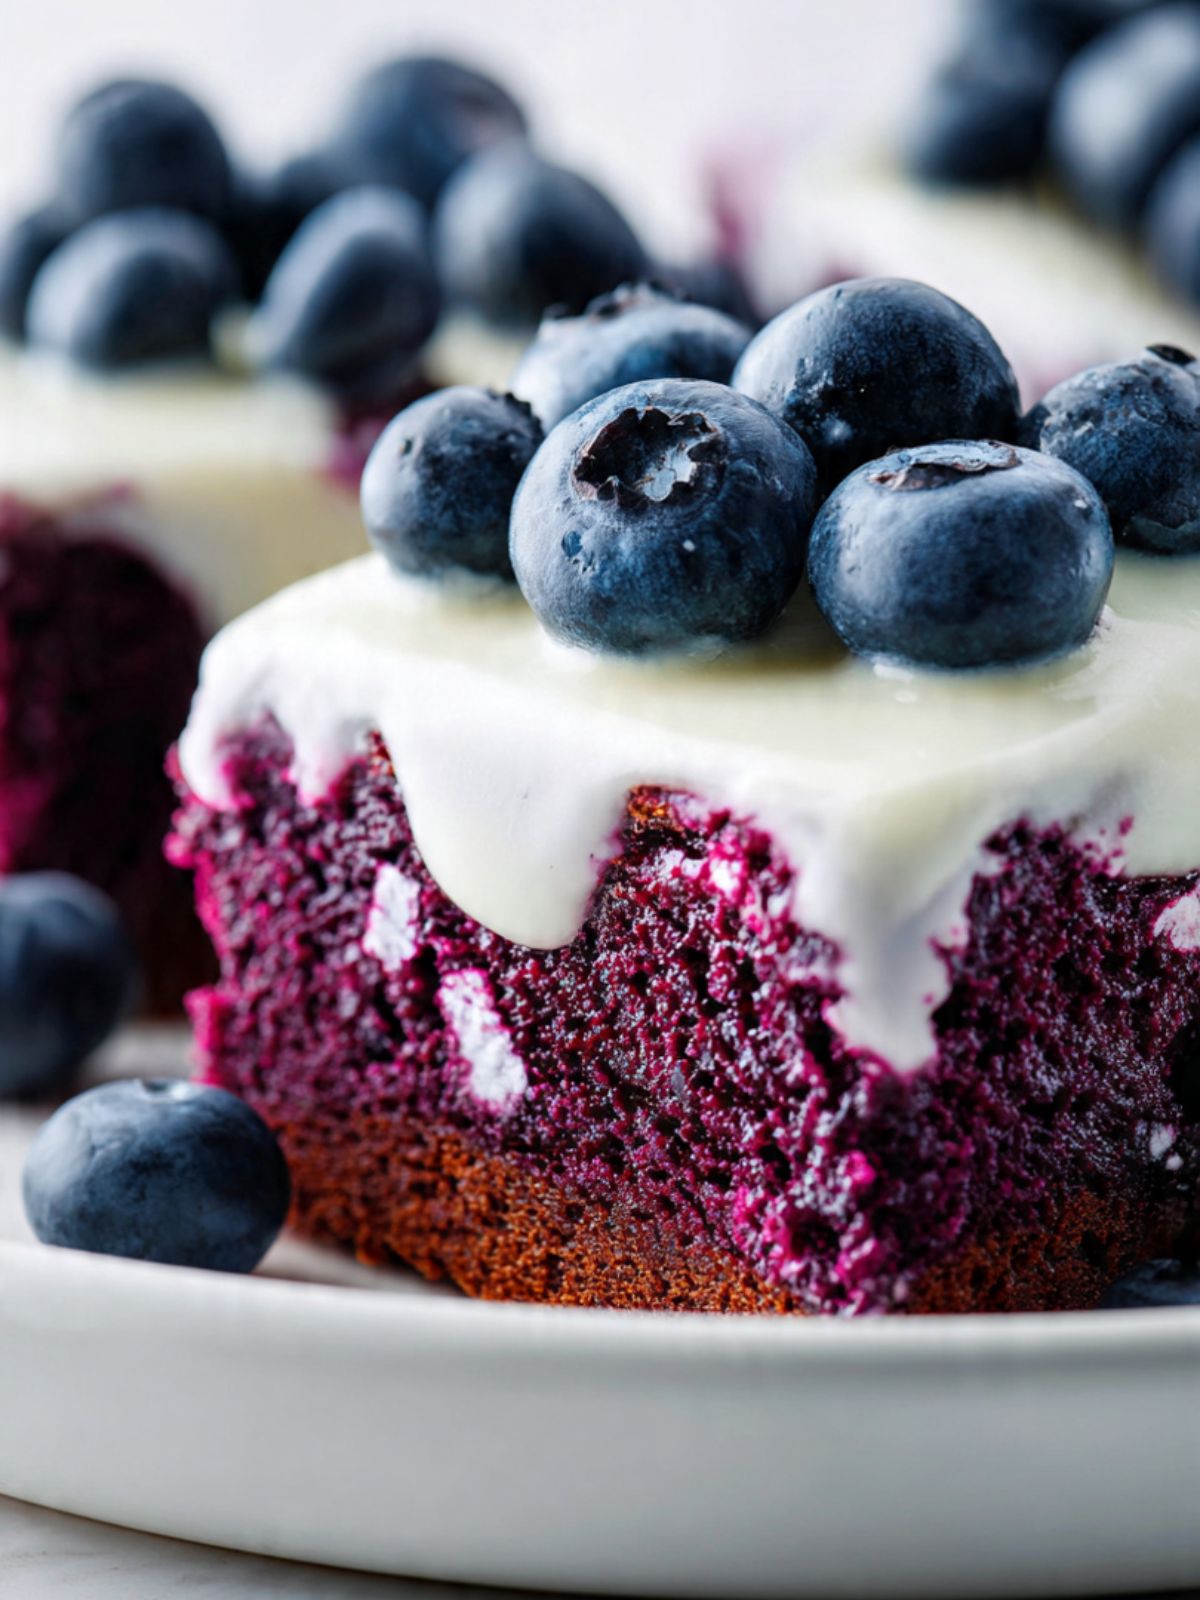
The target consistency: the glaze should fall off your spatula in a slow, thick ribbon and hold its shape for 2 to 3 seconds before settling flat. If it pours off the spatula like liquid, it is too thin — add powdered sugar a tablespoon at a time to correct it. If it holds a stiff peak and does not move, add milk one teaspoon at a time. The glaze visible in the photos — thick, opaque white with a slow side-drip — is the target.
🗒 Luna’s Note: I always make the glaze slightly thicker than I think I need. It thins marginally when it hits the cool surface of the bars and spreads on its own. If you start too thin, it runs off the sides entirely before it sets.
The glaze is complete. Use it immediately — it begins to firm as it sits.
Step 8: Glazing, Garnishing, and Cutting for Clean Edges
Lift the cooled bars from the pan using the parchment overhang and set them on a flat surface. Pour the cream cheese glaze directly onto the center of the bar slab and spread it to the edges using your offset spatula or the back of a spoon, allowing a small amount to drip naturally over the sides. Do not force the drip — if the glaze is at the right consistency, it will find the edges on its own.
Scatter your ½ cup (75g) fresh blueberries, rinsed and completely dried over the surface of the glaze immediately after spreading — within 60 seconds of application. The glaze sets faster than it looks like it is setting. Fresh blueberries must be completely dry because surface moisture causes them to slide on the tacky glaze and bleed purple juice into the white surface within minutes — this is the same moisture behavior that makes frozen or wet berries unsuitable here regardless of how good they look. Press each berry very gently with one finger directly downward so it sits flat and secure with a small depression in the glaze around its base.
As you can see in the overhead pan photo showing the full glazed slab before any pieces are removed, the glaze covers the entire surface evenly and the blueberries are distributed across all four sections — this is what to aim for before cutting so each bar gets garnish coverage.
Allow the glaze to set for 15 minutes at room temperature, then refrigerate for 20 minutes. Lift the slab from the refrigerator, use a sharp knife wiped clean with a damp cloth between every single cut, and cut into a 4×4 grid for 16 bars at approximately 2.5×2.5 inches (6×6cm) each — weigh the first cut bar if you want to calibrate: each bar should weigh approximately 75 to 85 grams including the glaze. A 3×3 cut yields 9 larger bars at approximately 130 to 145 grams each. A dirty knife drags the purple crumb into the white glaze on the cut face and produces smeared edges instead of the clean white-on-purple cross-section visible in the overhead photo showing the full slab with one piece removed. Wipe between every cut without exception.
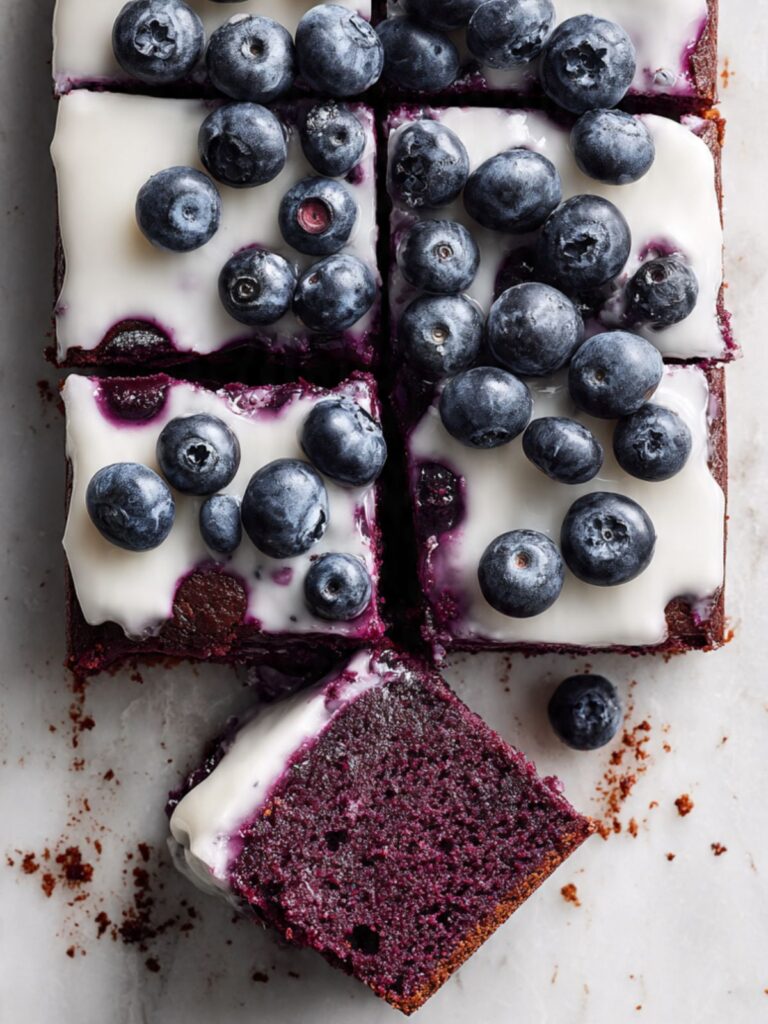
The bars are ready to serve immediately after cutting, or can be refrigerated for up to 3 days.
The Science Behind Blueberry Brownies
Why Pulling These Earlier Than Instinct Says Produces the Fudgy Result

I kept overbaking the first batches because the surface was telling me lies. The top looked matte and set, the edges were pulling from the pan, and the center felt firm-ish under my finger — every signal I had learned from standard brownies was saying “done.” What I did not understand yet was that blueberry puree holds moisture in the crumb differently than melted chocolate does. In a traditional brownie, the high fat content from chocolate and butter acts as a moisture reservoir — the crumb stays dense and fudgy even when baked to a firm internal set. In a fruit-puree-based bar, the moisture is water-based, and it exits the crumb quickly once the internal temperature crosses the right threshold. Four extra minutes past the correct pull point and the bars go from moist-set to dry and crumbly — not slightly drier, noticeably wrong.
The mechanism is protein coagulation combined with starch gelatinization. The eggs in this batter coagulate — set — between 145°F and 160°F (63°C and 71°C). The starch in the flour gelatinizes slightly above that range. When both processes complete at the correct internal temperature, the crumb is set but retains most of its moisture. When the bars stay in the oven past this point, the water-based moisture from the blueberry puree evaporates faster than the fat-based moisture in a chocolate brownie would. The result the reader can see in the cross-section photo — dense, deeply purple, moist-looking — is only achievable at the correct pull point. The doneness cue is the slight give when the center is pressed, not the visual signals borrowed from other brownie recipes.
Pull earlier than you think. Set a timer at 30 minutes and check every two minutes from that point. The window between correct and overbaked is narrow.
How Blueberry Pigment Behaves in Heat and Why Lemon Juice Matters
Blueberries get their color from a class of pigments called anthocyanins. These pigments are pH-sensitive — meaning the color they produce changes depending on whether the environment around them is acidic or alkaline. In an acidic environment, anthocyanins produce vivid reds and purples. In an alkaline or neutral environment, they shift toward blue, grey, and eventually green at high pH levels.
Most batter environments are slightly alkaline — flour, baking powder, eggs, and butter all contribute to a mildly alkaline base that would push the blueberry pigment toward a dull grey-blue during baking. The tablespoon of lemon juice shifts the batter pH toward acidic, which locks the anthocyanins into their red-purple form throughout the bake. The result is the vivid magenta-purple crumb visible in every cross-section photo rather than the grey-blue crumb that develops when the lemon juice is omitted. This is also why white granulated sugar is specified over alternatives like coconut sugar or brown sugar — both have trace mineral content that can affect the pH of the batter slightly, and white sugar keeps the chemistry clean.
This is also why frozen blueberries are not used for the puree in this recipe. Frozen berries have already had their cell walls broken by the freezing process, which releases more juice — including more of the pigment — before the batter is assembled. The result is a wetter puree with less structural integrity and a crumb that tends toward the grey end of the spectrum even with lemon juice present. Fresh berries, cooked briefly and pureed, give a more concentrated pigment and a more stable color result.
Why the Cream Cheese Glaze Holds Where Other Glazes Failed
A thin powdered sugar glaze — the kind made with just powdered sugar and milk — has too little fat and too much sugar to stay opaque and stable on a bar this moist. The moisture from the bar migrates upward through the glaze layer and dissolves it from underneath within an hour of application, leaving a thin, translucent film instead of the thick white layer visible in the photos. This is the same reason royal icing softens on soft cookies over time — the moisture from the baked good attacks the sugar structure of the glaze.
Cream cheese changes this. The fat content in full-fat block cream cheese creates a physical barrier between the bar’s moisture and the powdered sugar in the glaze. The fat molecules coat the sugar particles and slow the rate at which moisture can dissolve them, which is why the glaze stays opaque and stable for days rather than hours. The cream cheese also contributes protein structure — the same coagulated proteins that give cream cheese its firm, spreadable texture — which holds the glaze together as a cohesive layer rather than letting it flow and thin. This is why tub cream cheese and low-fat cream cheese both fail here: tub cream cheese has a higher water content that removes this fat barrier, and low-fat cream cheese has insufficient fat to create it.
The tang of the cream cheese is also doing flavor work. Blueberry bars made with a pure sugar glaze taste one-dimensional — all sweetness, no contrast. The lactic acid in the cream cheese cuts through the sweetness of both the glaze and the bar in the same way sour cream cuts through a sweet cake. If you want to see how cream cheese glaze works on another bar format, the chocolate chip cookie bars on this site use a similar principle with a different flavor application.
Blueberry Brownies Troubleshooting & Pro-Tips
Common Mistakes
1. Using frozen blueberries for the puree instead of fresh
Symptom: The batter looks thin and watery, the baked bars have a greyish-blue crumb instead of vivid purple, and the texture is wetter and less set than the photos show.
Cause: Frozen blueberries have already had their cell walls broken by the freezing process. When blended, they release significantly more water than fresh berries, thinning the puree and diluting both the color stability and the structural integrity of the batter. The excess water also throws off the flour-to-moisture ratio, producing a bar that never fully sets in the center.
Fix: If the batter already looks too thin before baking, add 1 to 2 tablespoons (8 to 16g) of flour and fold in gently. It will not fully correct the color but will help the set. For the next batch, use fresh blueberries only.
Prevention: Use fresh blueberries, rinsed and completely dried, every time. If fresh are unavailable, cook frozen berries on the stovetop first to drive off the excess moisture before blending — this takes 8 to 10 minutes instead of 4 to 6 and requires a longer reduction. The color will still be slightly less vivid than fresh.
2. Using a dark non-stick pan instead of light-colored aluminum
Symptom: The bottom of the bars is burnt and bitter, the edges are almost black, and the center is simultaneously overbaked and dry — even though the top surface looks correct.
Cause: Dark non-stick pans absorb significantly more radiant heat than light-colored aluminum. The bottom of the batter reaches a much higher temperature faster, caramelizing and then burning the already-dark blueberry sugar before the center has time to set properly. The temperature differential between the overcooked bottom and the underdone center produces the worst possible result from a single bake.
Fix: There is no fixing burnt bottoms after the fact. If the bottom layer is bitter and charred, slice it off with a sharp knife before glazing — the interior may still be salvageable for a crumble topping or mixed into vanilla ice cream.
Next batch: light-colored aluminum pan only.
Prevention: Use a light-colored aluminum 8×8 inch (20×20cm) pan lined with parchment. If you only own a dark pan, reduce the oven temperature to 325°F (165°C) and increase the bake time by 5 to 8 minutes, checking doneness by press rather than visual cue.
3. Baking powder expired or not tested for freshness
Symptom: The bars bake up flatter than expected, with a denser, more compressed crumb that lacks the slight lift that keeps the texture from feeling heavy and brick-like. The surface may look normal but the interior will feel more leaden than the moist-set result shown in the photos.
Cause: Baking powder loses its leavening power after 6 to 12 months once opened. Unlike baking soda, baking powder contains its own acid and does not require an acidic ingredient to activate — but it does require potency. Expired baking powder produces little to no carbon dioxide during baking, removing the minimal lift this recipe relies on to keep the crumb from being completely flat.
Fix: There is no fix once the bars are baked with expired leavening — the flat, dense texture is baked in. Serve them as-is with extra glaze for richness, or press pieces into ramekins and serve as blueberry brownie pots with a scoop of vanilla ice cream. The flavor is unaffected.
Prevention: Test freshness before every use: drop 1 teaspoon (4g) into ½ cup (120ml) hot water. Vigorous immediate bubbling = potent. Weak fizz or no reaction = replace the tin.
4. Overbaking past the correct pull point
Symptom: The bars are dry and crumbly when cut, the crumb looks tight and compressed rather than moist and dense, and the stacked bars crack at the edges instead of holding cleanly.
Cause: Unlike chocolate brownies where fat-based moisture protects the crumb from drying out past the correct internal temperature, the water-based moisture in a fruit-puree bar evaporates quickly once the internal temperature exceeds the correct set point. Four minutes past the right pull produces a noticeably different texture.
Fix: Overbaked bars that are dry and crumbly: press the warm bars into ramekins or small bowls, top with a scoop of vanilla ice cream, and serve as a warm blueberry crumble bowl. The texture works better deconstructed than as a freestanding bar.
Prevention: Start checking at 30 minutes. Press the center lightly — it should give very slightly, like set gelatin, not spring back like cake. Pull the moment it passes from soft jiggle to firm-but-giving set. Never wait for a visual golden signal — it does not come with this recipe.
5. Cutting the bars before they have fully cooled
Symptom: The centers collapse and look gummy or undercooked when the knife goes through, the crumb sticks to the knife and smears, and the bars do not hold their shape as freestanding squares.
Cause: The starch gelatinization process — the mechanism that gives the crumb its set, dense structure — continues for up to 90 minutes after the pan comes out of the oven. Cutting into the bars during this window interrupts the process and releases the still-soft interior, which has not yet finished firming.
Fix: If the bars are already cut and the centers have collapsed into a gummy mess, they are not salvageable as freestanding bars. Press the pieces into small ramekins or glasses, top with a scoop of vanilla ice cream and a few fresh blueberries, and serve as blueberry brownie sundaes. The flavor is completely correct — only the structure is compromised. For next time: cool at room temperature for the full 2 hours, then refrigerate 30 minutes before cutting.
Prevention: Cool at room temperature for a minimum of 2 hours, then refrigerate for 30 minutes before cutting. Use a sharp knife wiped clean between every cut.
6. Lumpy cream cheese glaze
Symptom: The glaze has visible white lumps that do not dissolve even after adding more milk, and the finished surface looks bumpy and uneven rather than the smooth opaque finish shown in the photos.
Cause: The cream cheese was not at full room temperature before mixing, or it was not beaten smooth before the powdered sugar was added. Cold cream cheese does not soften under mixing pressure — it breaks into lumps that coat themselves in powdered sugar and become impossible to dissolve without heat.
Fix: Transfer the lumpy glaze to a microwave-safe bowl and microwave in 10-second increments, stirring between each, until the lumps soften — then beat vigorously. Do not overheat or the glaze will become too thin. This works for cream cheese lumps but not for powdered sugar lumps, which require straining through a fine mesh sieve.
Prevention: Give the cream cheese 60 to 90 minutes at room temperature — no shortcuts. Beat it alone until completely smooth before any powdered sugar touches it. Always sift the powdered sugar before adding.
7. Glaze too thin — runs off the bars completely
Symptom: The glaze pours off the sides of the bar slab in a thin stream rather than sitting as a thick opaque layer, and the finished surface is translucent rather than the stark white shown in the photos.
Cause: Too much liquid added during glaze preparation, or the cream cheese was not full-fat block, or the bars were still slightly warm when the glaze was applied — residual heat from the bars thins the glaze on contact.
Fix: Add sifted powdered sugar one tablespoon at a time to the glaze bowl, stirring between additions, until the consistency thickens to a slow ribbon. If the bars were warm, refrigerate the glazed slab for 20 minutes — the glaze may firm slightly even at thin consistency once cold.
Prevention: Add liquid to the glaze one tablespoon at a time and test the consistency on the back of a spoon before applying. The bars must be fully cooled to room temperature — or refrigerator cold — before the glaze goes on.
8. Bars crumble when cut even after full cooling
Symptom: The bars hold their shape when whole but fall apart along the cut line when sliced, and the edges crumble rather than cut cleanly.
Cause: The flour was overmeasured — scooping directly from the bag packs 20 to 30% more flour than the recipe needs, producing a crumb that is too dry to hold together under a knife even when fully baked and cooled.
Fix: Salvage note — crumbled blueberry brownie pieces are excellent pressed into the base of a glass with vanilla yogurt and fresh blueberries as a layered parfait. The crumb texture works well in that application.
Prevention: Spoon and level the flour or weigh at 180g on a kitchen scale. Never scoop directly from the bag.
High humidity and altitude note
In high humidity climates (above 70% relative humidity), the surface of the glaze may feel tacky even after setting — this is moisture absorption from the air, not underset glaze. Refrigerate the glazed bars until serving and add the fresh blueberry garnish immediately before serving rather than before refrigerating.
At high altitude (above 3,500 feet / 1,067 meters), reduce the baking powder by ⅛ teaspoon, increase the flour by 1 tablespoon (8g), and reduce the sugar by 1 tablespoon (12g). Check for doneness starting at 27 minutes — leavening gases expand faster at altitude and the bars may set more quickly than the stated time range.
Expert Pro-Tips
1. Cook the puree until it is genuinely thick. The natural temptation is to pull it off the heat as soon as the berries burst — this produces a thin, watery puree that throws off the batter consistency. The correct puree coats the back of a spoon and does not run immediately when the spoon is tilted. Give it the full 4 to 6 minutes and let it reduce properly. A thicker puree means a more concentrated flavor and a more stable batter.
2. Refrigerate before cutting, every time. Even with the full 2-hour room temperature cool, a 30-minute refrigerator rest before cutting produces dramatically cleaner edges. The cream cheese glaze firms up in the cold, the crumb tightens slightly, and the knife passes through the bar rather than dragging through it. The difference between a room-temperature cut and a cold cut is visible in the cross-section.
3. Press the fresh blueberry garnish into the glaze within the first 60 seconds of application. The glaze sets faster than it looks like it is setting — especially in a cool kitchen or if the bars were refrigerator-cold when glazed. Berries placed on fully set glaze sit proud and unstable. Berries placed on tacky glaze sink slightly and hold. Press each berry gently with one finger directly downward — not at an angle — so it sits flat and secure.
How to Store Blueberry Brownies
Room Temperature
These bars can be stored at room temperature for up to 24 hours after glazing — but only if your kitchen is cool (below 70°F / 21°C) and the bars are covered. The cream cheese glaze is the limiting factor. Place the cut bars in a single layer in a hard-sided lidded container with a sheet of parchment paper beneath them to prevent the glaze from sticking to the container base. Do not stack them at room temperature — the glaze is soft enough that stacked bars will fuse together and the blueberry garnish will transfer to the underside of the bar above it. Do not use zip-lock bags — the soft glaze will adhere to the plastic and pull away from the bar when you open the bag.
If your kitchen runs warm — above 70°F (21°C) — skip room temperature storage entirely and refrigerate from the start. Cream cheese glaze in a warm kitchen softens to the point where it slides off the bar surface.
Refrigerator
Refrigeration is the correct storage method for these bars. Place cut bars in a single layer in a hard-sided lidded container — not airtight sealed, which traps condensation on the glaze surface and makes it tacky. A container with a lid that sits loosely, or a plate covered with a sheet of plastic wrap with a small gap at one edge, works well. They keep in the refrigerator for up to 4 days.
The bars actually improve between Day 1 and Day 2. On the day they are made, the blueberry flavor is present but slightly raw-tasting at the edges of each bite — the lemon juice note is detectable as a separate element. By Day 2, the flavors have knit together: the blueberry deepens, the lemon recedes into the background, and the cream cheese glaze firms to a texture that is closer to a set cheesecake layer than a poured glaze. Day 3 and Day 4 are still good. Day 5 is not.
Pull the bars from the refrigerator 15 to 20 minutes before serving. The crumb firms significantly when cold and the glaze loses its soft texture straight from the fridge — a short rest at room temperature brings both back to the right consistency.
🗒 Luna’s Note: I actually prefer these on Day 2, straight from the fridge, with about 10 minutes of counter time. The glaze is somewhere between firm and soft at that point — it holds its shape when you pick the bar up but gives when you bite into it. Day 1 warm is good. Day 2 cold-then-rested is better.
Freezer — Baked
These bars freeze well, but the fresh blueberry garnish does not. Freeze the bars without the garnish if possible — if they are already garnished, the berries will become soft and weep purple juice onto the glaze when thawed.
To freeze: place cut bars in a single layer on a parchment-lined baking sheet and freeze uncovered for 1 hour until the glaze is firm and will not smear. Then wrap each bar individually in plastic wrap, place the wrapped bars in a zip-lock freezer bag, press out as much air as possible, and freeze for up to 2 months.
To thaw: unwrap and place on a plate in the refrigerator overnight. Do not thaw at room temperature — the glaze softens unevenly and the condensation from temperature change makes the surface wet and sticky. After thawing overnight, let them rest at room temperature for 15 minutes before serving. Add fresh blueberry garnish after thawing if the original garnish was frozen with the bars.
The texture after freezing and thawing is 90% of the fresh result. The crumb holds well. The glaze firms slightly more than fresh but returns to close to its original texture after the room temperature rest.
Freezer — Unbaked
The unbaked batter does not freeze well — blueberry puree separates from the fat and egg structure when frozen and thawed, and the baked result from a freeze-thaw batter is uneven and greasy. Do not freeze the unbaked batter. Bake first, then freeze.
Serving Suggestion
Serve these at room temperature or slightly cool — not warm from the oven, and not straight from the refrigerator. The sweet spot is 15 to 20 minutes out of the fridge: the crumb has loosened slightly from its cold-set firmness, the glaze has softened to that halfway point between pliable and firm, and the blueberry flavor is fully present in a way it is not when the bar is very cold.
I serve these with a strong black coffee — no milk, no sugar. The bitterness cuts through the cream cheese glaze in a way that milk-based drinks do not, and it makes the blueberry flavor sharper rather than muffling it. A cup of Earl Grey works for the same reason — the bergamot in the tea and the lemon in the bar are complementary in a way that is not obvious until you try it.
This is the recipe I bring when someone asks me to bring something and I want it to be remembered. The color does the work before anyone takes a bite — people stop when they see the cross-section. It is a useful recipe for that reason.
One honest limitation: these do not travel well unglazed and uncut. The slab is fine — it is sturdy. But cut bars with the cream cheese glaze are fragile in transit. If you are transporting these, cut them at the destination, not before you leave. Bring the glaze in a sealed jar and apply on arrival. The bars without glaze travel as well as any brownie.
Frequently Asked Questions About Blueberry Brownies
Can I make blueberry brownies ahead of time?
Yes — and these are genuinely better made a day ahead. Bake and cool the bars completely, apply the glaze, and refrigerate overnight uncovered for the first hour to let the glaze set, then loosely covered for the remainder. The blueberry flavor deepens significantly between Day 1 and Day 2 as the fruit compounds in the puree continue to develop — the lemon note that is detectable on the day of baking recedes into the background and the overall flavor becomes more cohesive and concentrated. Add the fresh blueberry garnish on the day of serving rather than the night before, as refrigerated garnish berries lose their surface bloom overnight. If you are baking for an event, bake two days ahead, refrigerate, and add garnish the morning of.
Can I use frozen blueberries instead of fresh?
Partially — with significant adjustments. Frozen blueberries can work for the puree if you extend the stovetop reduction time to 8 to 10 minutes to drive off the additional water released by their broken cell walls. Do not use them directly from frozen without the extended reduction — the excess moisture will thin the batter and produce a bar that does not set correctly and has a grey-blue crumb instead of vivid purple. The color will still be slightly less stable than fresh even with the extended reduction, because the freezing process damages the anthocyanin pigment structure that the lemon juice is working to preserve. Do not use frozen blueberries for the garnish under any circumstances — thawed frozen berries weep purple juice onto the glaze within minutes of application and the surface becomes streaked and wet. For the puree in a pinch, frozen works with adjustments. For everything else, fresh only.
Why did my blueberry brownies come out cakey instead of fudgy?
The most common cause is overbaking. These bars have a narrow doneness window — the difference between moist-set and dry-cakey is approximately 4 minutes of bake time in most ovens. Unlike chocolate brownies where fat-based moisture from the chocolate protects the crumb from drying out quickly, the water-based moisture in a blueberry puree batter evaporates fast once the internal temperature exceeds the correct set point. The second most common cause is too much flour — if the measuring cup was scooped directly into the flour bag rather than spooned and leveled, the batter had 20 to 30% more flour than the recipe calls for, which produces a drier, tighter crumb regardless of bake time. Weigh at 180g next time and pull the bars at the first sign of center set — firm-but-giving under light finger pressure, not springy like cake.
You can also check out the chocolate chip cookie brownies recipe on this site for another example of how the pull point changes the texture entirely in a similarly dense bar.
How do I know when blueberry brownies are done?
Pull these when the edges are deep mahogany-brown and pulling away from the parchment by 2 to 3mm, the surface is matte and fully set with no wet sheen, and the center gives very slightly — like set gelatin — under light finger pressure. Do not wait for the center to feel firm like a cake or to look golden — neither of those signals applies to this recipe. The toothpick test is unreliable here because the moist-set crumb will always produce moist crumbs on the toothpick even when correctly done, so a clean toothpick means overbaked, not correctly baked. Start checking at 30 minutes and check every 2 minutes from that point. The correct pull moment and the overbaked moment are close together in this recipe — checking frequently is not optional.
Can I double this blueberry brownies recipe?
Yes, with adjustments. Multiply all ingredients by 2 except the baking powder — use 1½ teaspoons rather than 2 teaspoons. Baking powder does not scale linearly: doubling it produces a bar with a slightly bitter, soapy aftertaste from excess leavening salts, and the minimal lift it provides in this recipe does not require the full doubled amount. Bake the doubled batch in two separate 8×8 inch (20×20cm) pans rather than one 9×13 inch pan — a 9×13 pan produces a thinner bar that bakes faster and dries out more easily, and the edge-to-center ratio changes the texture profile. Two pans, same temperature, same time range. Check both pans at 30 minutes — ovens with hot spots may produce one pan slightly ahead of the other.
How do high altitude and humidity affect these bars?
At high altitude (above 3,500 feet / 1,067 meters), leavening gases expand faster and liquid evaporates more quickly during baking. Reduce the baking powder by ⅛ teaspoon, increase the flour by 1 tablespoon (8g), reduce the sugar by 1 tablespoon (12g), and begin checking for doneness at 27 minutes rather than 30. The bars may also need 2 to 3 tablespoons of additional blueberry puree to compensate for increased moisture loss during baking — if the batter looks noticeably stiffer than described, add puree one tablespoon at a time until it loosens to the correct thick-but-scoopable consistency. In high humidity climates (above 70% relative humidity), the cream cheese glaze will absorb moisture from the air and become tacky on the surface — refrigerate the glazed bars immediately after the glaze sets rather than leaving them at room temperature, and add the fresh blueberry garnish just before serving.
Can I substitute the cream cheese glaze with something simpler?
Yes, but each substitute changes the result meaningfully. A simple powdered sugar glaze — 1 cup (120g) sifted powdered sugar whisked with 2 to 3 tablespoons of whole milk — works and is faster, but it will not stay opaque for more than a few hours as the moisture from the bar migrates upward and dissolves it from underneath. It also provides no flavor contrast to the sweetness of the bar. A white chocolate ganache — 4 oz (113g) white chocolate melted with 2 tablespoons (30ml) heavy whipping cream (36% fat minimum) — sets firmer than the cream cheese glaze and holds longer, but it cracks when the bars are stacked and has a much sweeter flavor profile with no tang. The cream cheese glaze is the correct choice for texture, stability, and flavor contrast. If dairy is a concern, a coconut cream-based glaze using full-fat canned coconut cream in place of the milk and a dairy-free cream cheese block works with nearly identical results — the tang will be slightly different but the structure holds.
More Bars You’ll Love
- Brookie Recipe — a brownie base layered with chocolate chip cookie dough, baked together in one pan. For when you cannot decide between the two.
- Nestle Toll House Cookie Bars — the classic bar cookie made exactly as intended, with the original ratio and the right pan. Reliable in a way that matters when you need it to be.

Fudgy Blueberry Brownies Recipe
Ingredients
Equipment
Method
- In a small saucepan over medium heat, cook 2 cups (240g) fresh blueberries for 4 to 6 minutes, stirring occasionally, until the berries burst and the mixture thickens to a jammy consistency, then remove from heat and cool for 2 minutes before blending completely smooth — strain through a fine mesh sieve if a seed-free crumb is preferred — and cool to room temperature, approximately 10 to 15 minutes.
- Preheat oven to 350°F (175°C) and line a light-colored aluminum 8×8 inch (20×20cm) baking pan with parchment paper leaving at least 1 inch (2.5cm) of overhang on two opposite sides.
- In a large bowl, whisk together ½ cup (113g) melted cooled unsalted butter and 1 cup (200g) plain white granulated cane sugar for approximately 60 seconds until uniform, then add the cooled blueberry puree and 1 tablespoon (15ml) fresh lemon juice and stir until fully combined and deeply purple.
- Add 2 large room-temperature eggs one at a time, stirring vigorously for 20 strokes after each addition until fully incorporated, then add 1 teaspoon pure vanilla extract and stir to combine.
- Add 1½ cups (180g) all-purpose flour spooned and leveled, 1 teaspoon baking powder, and ¼ teaspoon fine sea salt directly on top of the wet mixture and fold with a silicone spatula using slow strokes from the bottom of the bowl upward — count 20 to 25 strokes and stop the moment no dry flour streaks remain.
- Pour the batter into the prepared pan, spread into an even layer reaching the corners, and bake on the middle rack at 350°F (175°C) for 30 to 35 minutes, checking from 30 minutes — pull when the edges are deep mahogany-brown and pulling from the parchment, the surface is matte and set, and the center gives very slightly under light finger pressure like set gelatin.
- Set the pan on a wire rack and cool at room temperature for a minimum of 2 hours, then refrigerate for 30 minutes before glazing and cutting.
- While the bars cool, make the glaze: beat 4 oz (113g) softened full-fat block cream cheese in a medium bowl until completely smooth with no lumps, add 1 cup (120g) sifted powdered sugar in two additions folding until combined, add ½ teaspoon pure vanilla extract, then add 2 to 3 tablespoons (30–45ml) whole milk one tablespoon at a time until the glaze falls in a slow thick ribbon from the spatula and holds its shape for 2 to 3 seconds before settling flat.
- Lift the cooled bars from the pan using the parchment overhang, pour the glaze onto the center and spread to the edges allowing a natural drip over the sides, then immediately press ½ cup (75g) fresh dried blueberries gently into the tacky glaze surface.
- Allow the glaze to set for 15 minutes at room temperature, refrigerate for 20 minutes, then cut into a 4×4 grid for 16 bars using a sharp knife wiped clean with a damp cloth between every cut.