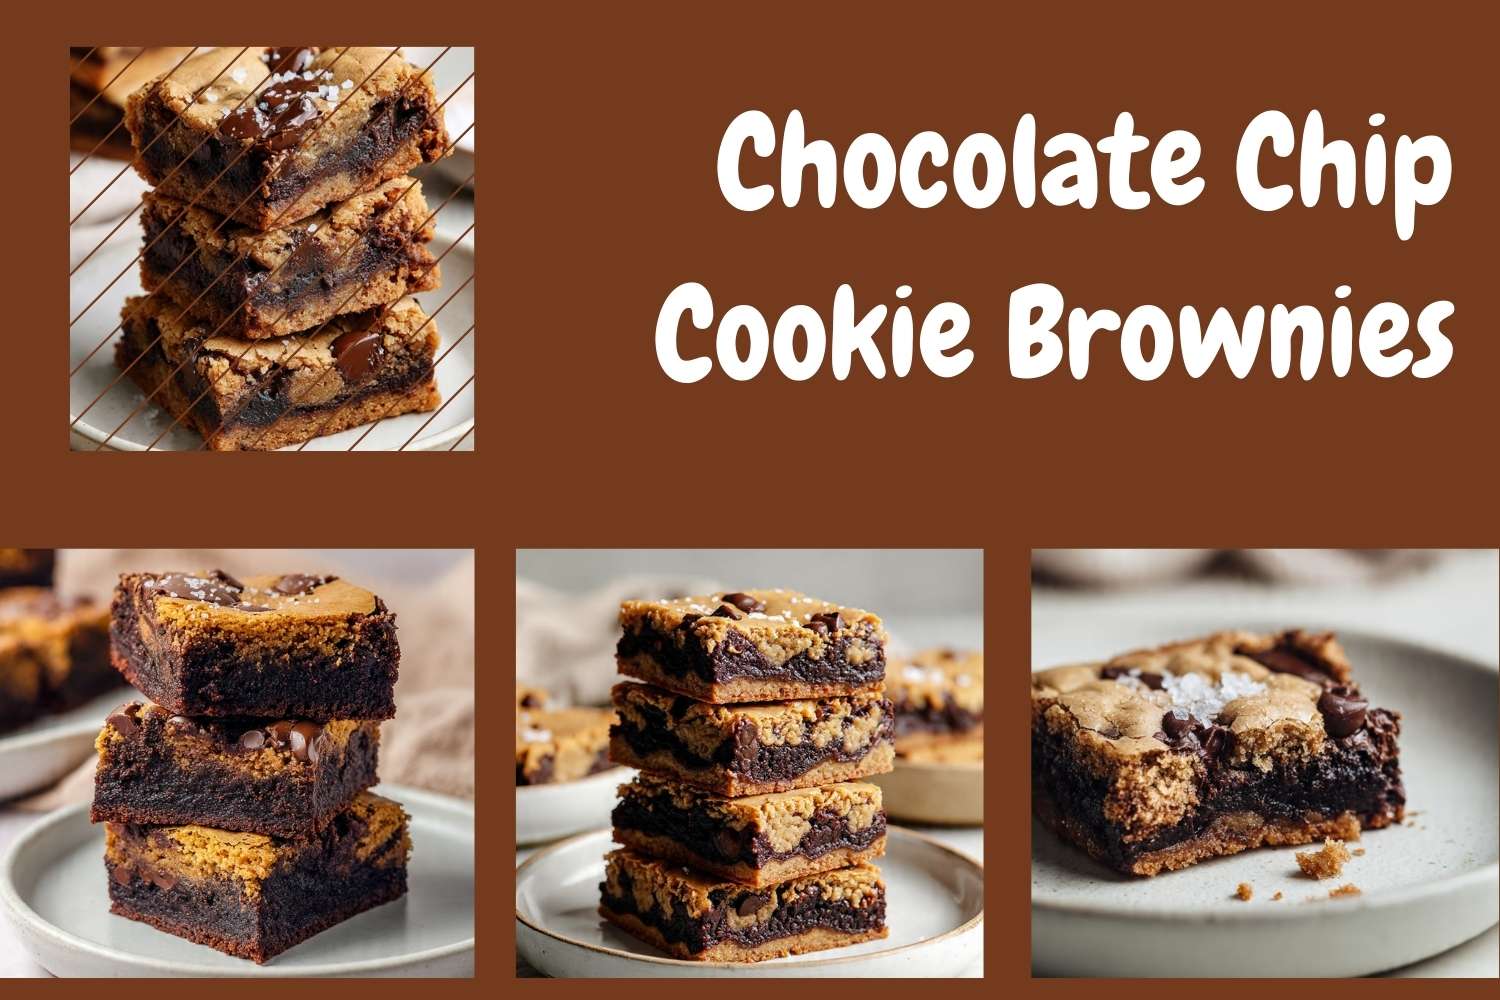
Chocolate Chip Cookie Brownies
The first batch I made of these, I used the same brownie batter I always use and just pressed cookie dough on top. The top baked up golden. The brownie underneath was dry and overcooked. The problem was that the brownie layer — exposed to full oven heat from below and insulated by the cookie dough above — needed more fat and less flour than a standalone brownie to stay fudgy under those conditions. Four more batches to figure that out. This is batch five.
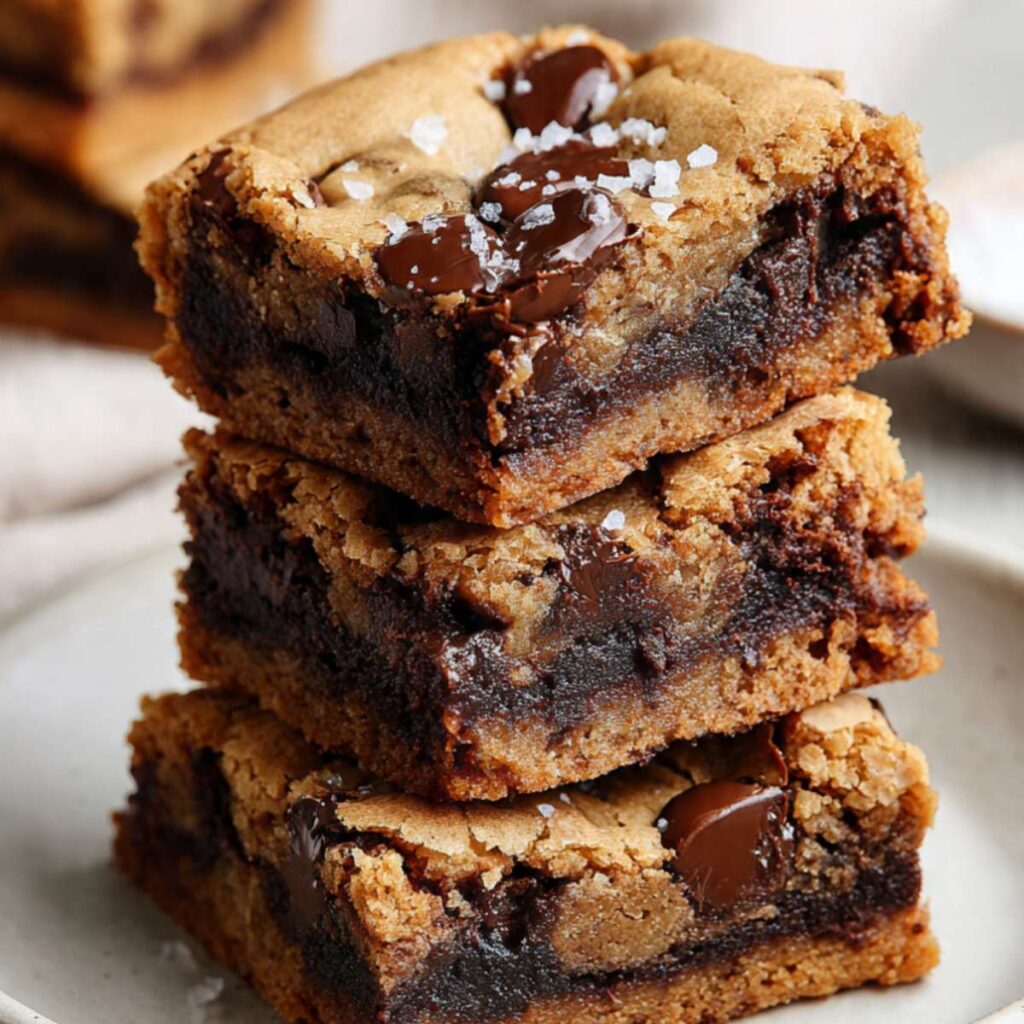
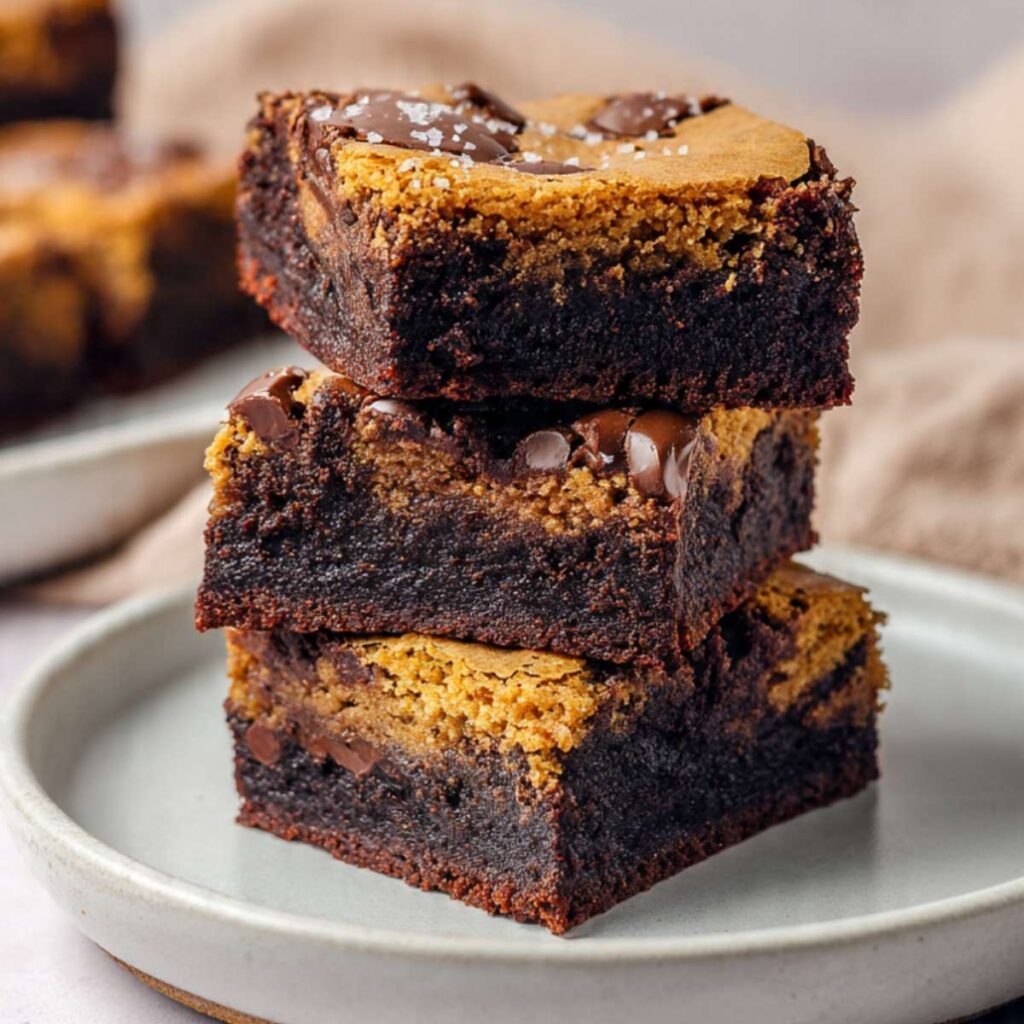
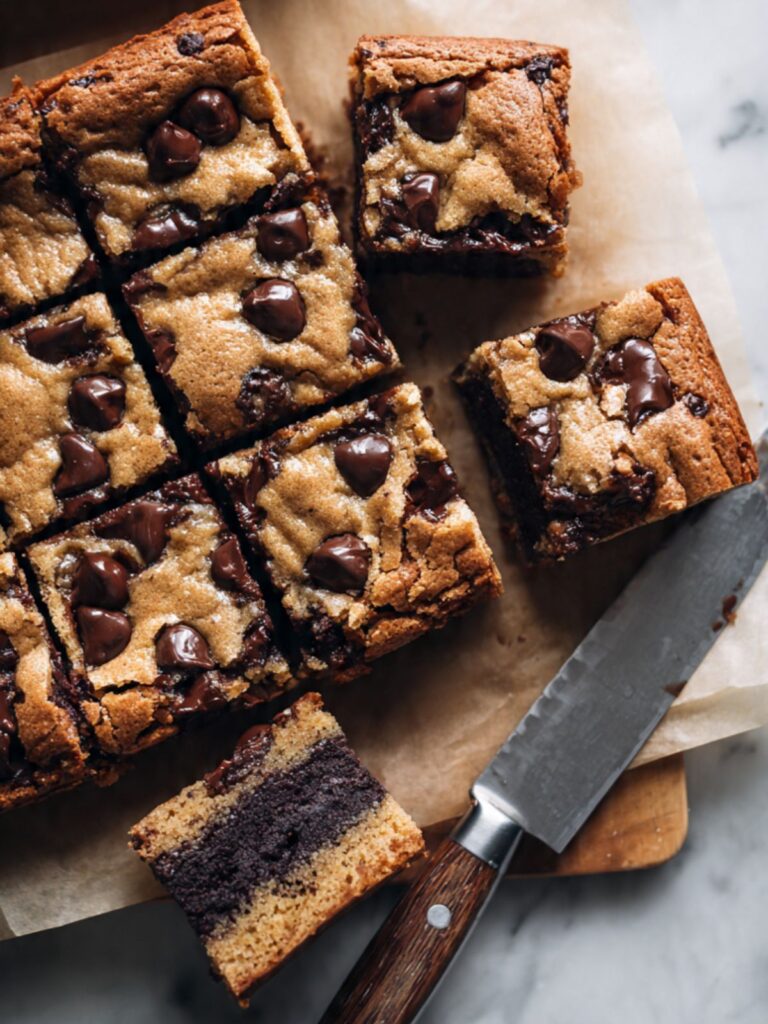
These chocolate chip cookie brownies are two things at once: a dense, fudgy brownie and a golden, chewy chocolate chip cookie bar, baked together in one pan so the layers partially merge at the seam. The brownie interior stays dark and gooey. The cookie top sets with a slight crackle and melted chocolate chips pooling across the surface. Flaked sea salt goes on the moment they come out of the oven.
No mixer. No chilling. No separate bowl for each component that you then have to wash — one bowl for the brownie batter, one for the cookie dough, and they go into a 9×13 inch pan in layers.
🗒 Luna’s Note: I make these when I cannot decide between a brownie and a cookie and I am not interested in making both. That is genuinely the origin of this recipe in my kitchen.
I tested the brownie layer with both all-purpose flour and a reduced flour version. Standard brownie ratios produce a cakey, dry center when covered by cookie dough — the steam has nowhere to go and the structure sets too tight. Reducing the flour by two tablespoons and adding an extra tablespoon of oil produced the dense, fudgy, nearly molten center visible in the cross-section photos. I kept the lower-flour version. The all-purpose flour batch looked fine from the top and was disappointing the moment the knife went through.
I tested the cookie layer with brown sugar only versus a combination of brown and white sugar. Brown sugar only produced a softer, more matte top — still good, but the slight surface crackle in the photos requires some white sugar in the mix. The combination gave that golden crackled top with crisp set edges and a chewy, dense interior. I use ¾ cup brown sugar to ¼ cup white sugar. That is the ratio.
The assembly matters more than most bar recipes. The cookie dough goes in two stages: roughly two-thirds pressed into the bottom of the parchment-lined pan, then the brownie batter poured over, then the remaining cookie dough dotted across the top. This produces the layered cross-section in the photos — golden cookie at the top and bottom with the dark brownie running through the center. Dropping all the cookie dough on top produces a thick cookie crust over a single brownie slab, which is a different and less interesting result.
| Yield | 16 bars (4×4 cut from a 9×13 inch pan) |
| Prep Time | 20 minutes |
| Bake Time | 28–32 minutes |
| Cool Time | 2 hours minimum before cutting |
| Total Time | ~2 hours 55 minutes (including cooling) |
| Pan Size | 9×13 inch (23x33cm) light-colored aluminum pan |
| Method | Melt-and-mix (brownie) + one-bowl (cookie dough) |
| Difficulty | Easy — no mixer required |
| Serving Size | 1 bar (approximately 2×2 inches) |
| Calories | Fat | Carbs | Sugar | Protein | Sodium |
|---|---|---|---|---|---|
| ~344 kcal | ~17g | ~46g | ~31g | ~4g | ~66mg |
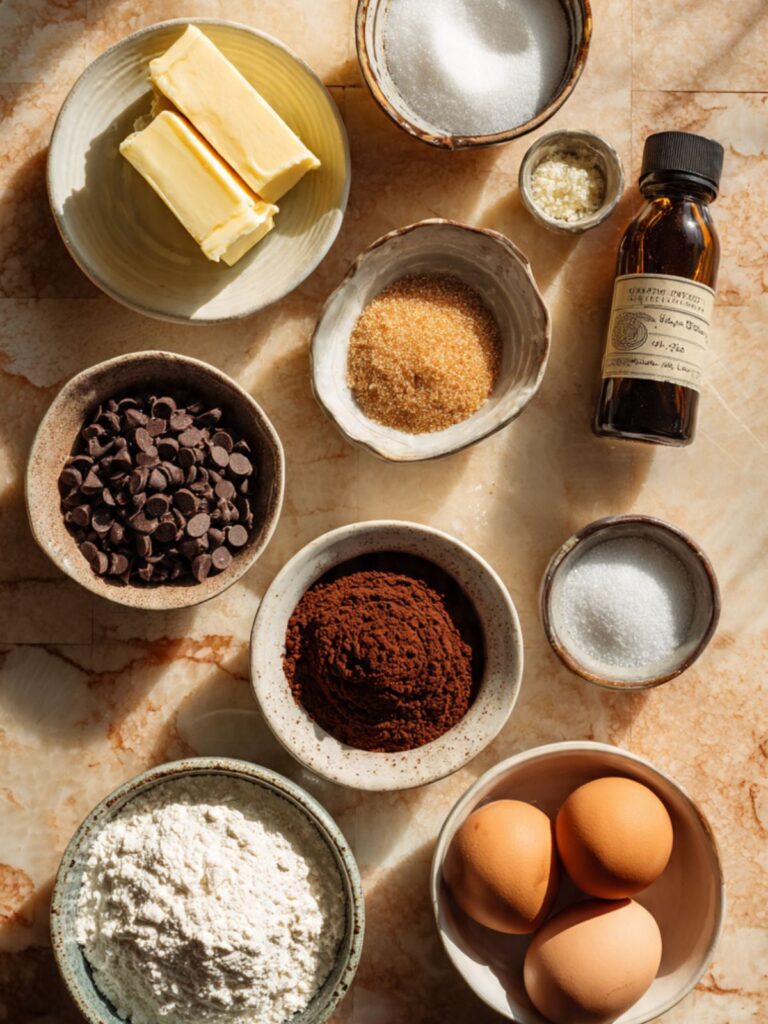
Ingredients & Tools
For the Brownie Layer
- ½ cup (113g) unsalted butter, melted and cooled to room temperature — not hot
- 1 tbsp (14g) neutral oil, such as vegetable or canola oil
- 1 cup (200g) plain white granulated cane sugar — not brown sugar, not coconut sugar
- 2 large eggs + 1 large egg yolk, room temperature (30 minutes out of the fridge)
- 1 tsp pure vanilla extract — not imitation
- ½ cup (50g) Dutch-process cocoa powder, sifted — see Before You Start
- ¾ cup (90g) all-purpose flour, spooned into the measuring cup and leveled — or weighed at 90g
- ½ tsp fine sea salt
For the Cookie Dough Layer
- ½ cup (113g) unsalted butter, melted and cooled to room temperature — not hot
- ¾ cup (165g) packed brown sugar — packed firmly, not spooned loosely. If your brown sugar has hardened into clumps, break it up completely and press it through your fingers before packing — hard chunks will not dissolve during baking and leave dry, gritty pockets in the finished bar.
- ¼ cup (50g) plain white granulated cane sugar
- 1 large egg + 1 large egg yolk, room temperature (30 minutes out of the fridge)
- 1 tsp pure vanilla extract — not imitation
- 1¼ cups (150g) all-purpose flour, spooned into the measuring cup and leveled — or weighed at 150g
- ½ tsp baking soda, checked for freshness
- ½ tsp fine sea salt
- 1 cup (170g) semi-sweet chocolate chips (45–55% cacao) — I use Ghirardelli or Guittard; see Before You Start
For the Finish
- Flaked sea salt for topping — Maldon brand or equivalent large-crystal flaked salt. Fine sea salt will not give the same visible finish or burst of flavor. This is not optional.
Before You Start
Read this section fully before you begin. Several steps in this recipe have narrow windows and cannot be corrected after the fact.
Butter temperature: Both layers use melted butter. Melt it, then let it cool until you can hold your hand comfortably against the bowl — approximately 10 minutes at room temperature. Butter that is still hot when the eggs go in will scramble them. You will not be able to tell from the outside of the batter. The bars will bake up greasy and dense in the wrong way.
Eggs at room temperature: Pull your eggs from the fridge 30 minutes before you begin. Cold eggs added to melted butter cause the fat to seize and the batter to look broken and grainy. Room temperature eggs emulsify smoothly. To speed this up, place uncracked eggs in a bowl of warm (not hot) water for 10 minutes.
Dutch-process cocoa — do not substitute natural cocoa: Dutch-process cocoa has been alkalized, which neutralizes its natural acidity. This is why the brownie layer in these bars is so dark — nearly black — and why the flavor is deep and smooth rather than sharp. Natural cocoa is acidic and reacts with baking soda; this brownie layer has no leavening agent, so natural cocoa will produce a noticeably lighter color and a slightly bitter, sharper flavor. If you only have natural cocoa, the bars will still bake — but the interior will not match the photos.
Chocolate chips: Semi-sweet chips at 45–55% cacao give the best balance of chocolate flavor and sweetness in these bars. Milk chocolate chips will make the bars very sweet and the chocolate flavor will be muted. Dark chocolate chips (70%+) will give a more intense result — not wrong, but noticeably less sweet. I use Ghirardelli semi-sweet. I have tested Guittard and it is equally good.
Baking soda freshness check: Drop ¼ tsp into a small bowl of hot water. If it bubbles vigorously, it is active. If nothing happens, the baking soda is dead and the cookie dough layer will not develop its slight lift and crackle. Replace it before proceeding.
Brown sugar check: Pack the brown sugar firmly into the measuring cup — loose brown sugar under-measures significantly. If the sugar has hardened, break up all clumps completely before measuring. A single hard chunk that survives into the batter will not dissolve during baking.
Gram weights are the tested numbers. Volume measurements like cups and tablespoons can vary by 20–30% depending on how the ingredient is scooped or packed. If you have a kitchen scale, use it — the gram weights in this recipe are the numbers I baked and tested with.
No electric mixer needed. This entire recipe comes together with two large mixing bowls, a whisk, and a silicone spatula. No stand mixer, no hand mixer. Do not attempt to use a mixer — it will overdevelop the gluten in both batters and the texture will be wrong in both layers.
No chilling required. Both batters go straight from the bowl into the pan. This is not a recipe where chilling improves the result — the layered construction holds its shape without it.
Oven rack position: Set your rack to the middle position before preheating. The middle rack ensures even heat distribution across the full depth of the pan — a rack too low will overbrown the bottom cookie layer before the brownie interior sets.
Pan preparation: Line your 9×13 inch (23x33cm) light-colored aluminum pan with parchment paper, leaving a 2-inch (5cm) overhang on both long sides. The overhang is your lifting handle — without it, you cannot remove the bars cleanly from the pan and the edges will break. Grease the short sides of the pan that parchment does not cover.
Do not use a dark non-stick pan. Dark pans absorb more heat and will overbrown the bottom cookie layer before the brownie interior sets. Light-colored aluminum only. If you only have a glass or ceramic pan, reduce the oven temperature by 25°F (14°C) and add 3–5 minutes to the bake time.
Necessary Tools
- 9×13 inch (23x33cm) light-colored aluminum baking pan
- Parchment paper with overhang on both long sides
- Two large mixing bowls
- Silicone spatula
- Whisk
- Kitchen scale (strongly recommended)
- Wire cooling rack
- Sharp chef’s knife for cutting
- Offset spatula (for spreading the brownie layer evenly)
- Oven thermometer (optional but recommended — most home ovens run 15–25°F off)
How to Make Chocolate Chip Cookie Brownies
Step 1: Preparing the Pan and Preheating the Oven
This recipe uses two methods running in parallel: the melt-and-mix method for the brownie layer and the one-bowl melt method for the cookie dough layer. Both are no-mixer methods — a whisk and a silicone spatula handle everything. Position your oven rack in the middle position and heat your oven to 350°F (175°C).
Most home ovens run 15–25°F (8–14°C) off — if you have an oven thermometer, confirm the actual temperature before the pan goes in. A cold or low oven will produce a cakey, dry brownie layer instead of the fudgy interior shown in the photos.
Line your 9×13 inch (23x33cm) light-colored aluminum pan with parchment paper, pressing it into the corners and leaving a 2-inch (5cm) overhang on both long sides. Grease the two short exposed sides with butter or non-stick spray. Set the pan aside while you make both batters.
The pan should look like a sling — parchment covering the bottom and both long sides, with handles you can grip when the bars are cool. If you skipped the overhang, the bars will not lift cleanly and the edges will crack when you try to remove them.
⚠️ Do not start the batters until the oven is fully preheated — both batters come together quickly and the pan should go in within 10 minutes of assembly.
This is the only prep step — move directly to the brownie batter now so both components are ready to layer while the batter is still fluid.
Step 2: Making the Brownie Batter
In your first large mixing bowl, whisk together your ½ cup (113g) melted and cooled unsalted butter and 1 tablespoon (14g) neutral oil until combined. Add your 1 cup (200g) plain white granulated cane sugar and whisk vigorously for 60 full seconds — the mixture will look pale and slightly thickened as the sugar begins to dissolve into the fat. This step builds the base structure of the brownie layer.
Add your 2 large eggs and 1 large egg yolk, one at a time, whisking each fully before adding the next. Add your 1 tsp pure vanilla extract and whisk to combine.
The batter should look smooth, glossy, and slightly ribbony when you lift the whisk — not grainy, not broken, not separated. If you see fat pooling at the sides of the bowl in an oily ring and the batter looks curdled and split — yellow and white separated — your butter was still hot when the eggs went in and the emulsion has broken. There is no fix at this stage. The bars will still bake but will have a greasier texture than intended. Let the bowl cool completely next time before adding any eggs.
Sift your ½ cup (50g) Dutch-process cocoa powder directly into the bowl — do not skip sifting, cocoa forms hard lumps that will not dissolve during baking and will leave bitter dry pockets in the finished bar. Add your ¾ cup (90g) all-purpose flour (spooned and leveled) and ½ tsp fine sea salt. Switch to your silicone spatula and fold gently until no dry streaks remain — approximately 15–20 strokes. Do not whisk at this stage.
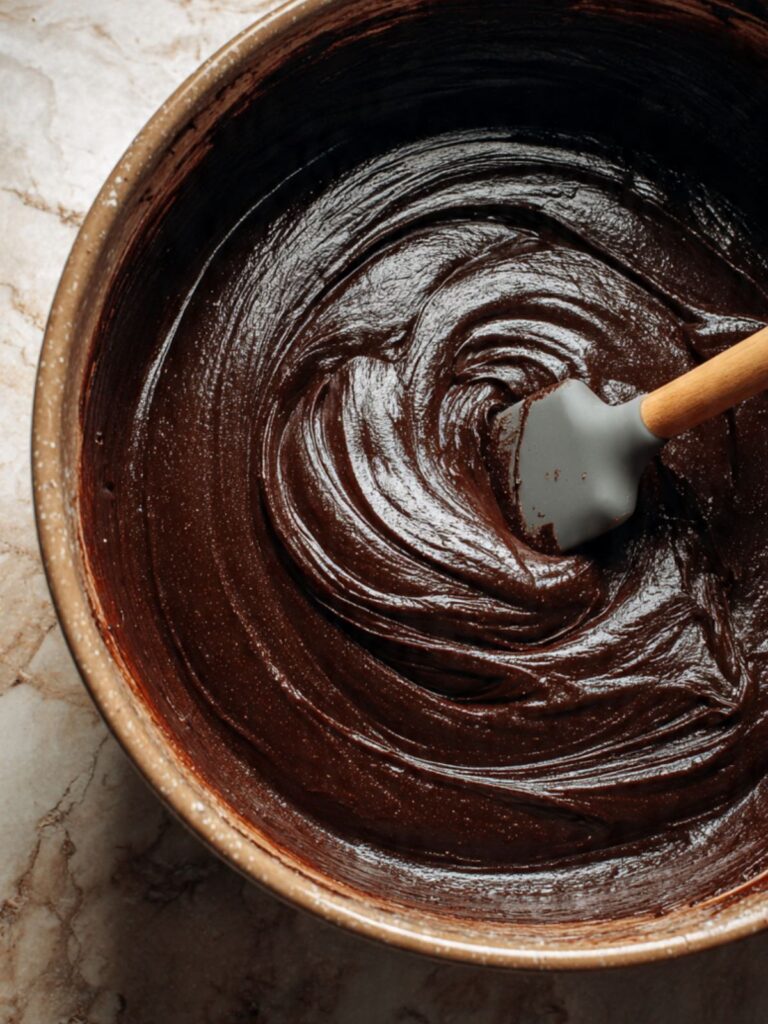
The brownie batter should look thick, dark, and glossy — nearly black from the Dutch-process cocoa — and should fall from the spatula in a slow, heavy ribbon. If it looks dry or paste-like, your flour measurement was too high. Re-weigh next time.
⚠️ Do not overmix after the flour goes in — the bars will look fine on top but the texture will be tough and rubbery rather than the dense, yielding fudgy interior visible in the cross-section photos. Set the brownie batter aside and make the cookie dough immediately.
Step 3: Making the Cookie Dough
In your second large mixing bowl, whisk together your ½ cup (113g) melted and cooled unsalted butter, ¾ cup (165g) packed brown sugar, and ¼ cup (50g) plain white granulated cane sugar until smooth and fully combined — approximately 45 seconds of whisking. The mixture will look dark, glossy, and slightly grainy from the sugar crystals.
Add your 1 large egg and 1 large egg yolk and whisk until fully incorporated. Add your 1 tsp pure vanilla extract and whisk to combine.
The mixture should look smooth, thick, and glossy — similar to a caramel sauce in consistency. If it looks broken or greasy, the butter was too warm. Let the bowl sit for 5 minutes and whisk again — it will usually come back together.
Add your 1¼ cups (150g) all-purpose flour (spooned and leveled), ½ tsp baking soda (freshness-checked), and ½ tsp fine sea salt directly into the bowl. Switch to your silicone spatula and fold until just combined and no dry streaks remain. Fold in your 1 cup (170g) semi-sweet chocolate chips (45–55% cacao) with the final few strokes.
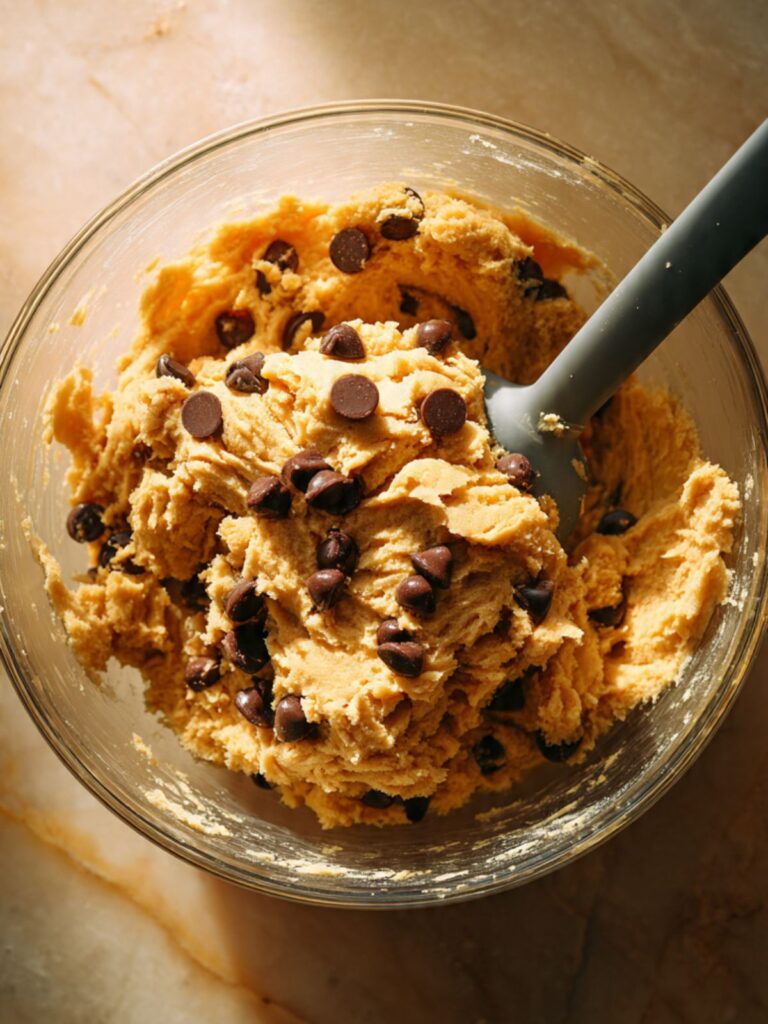
The cookie dough should look thick enough to hold its shape when scooped — not pourable like batter, not stiff like cold refrigerated dough. It will be soft and slightly sticky. This is correct.
🗒 Luna’s Note: I always hold back about ¼ cup of chocolate chips from the fold-in and press them onto the top surface right before the pan goes into the oven. It takes 20 seconds and every bar looks like it has intentional chocolate on top rather than chips that sank during baking.
⚠️ Do not overmix the cookie dough after the flour goes in — the top crust will bake up tough and dense rather than the soft, slightly crackled golden surface visible in the photos.
Step 4: Layering the Two Batters in the Pan
This step is where these bars become what they are. The order and distribution of the layers determines the cross-section visible in the photos — golden cookie at the top and bottom with the dark brownie running through the center.
Take approximately two-thirds of the cookie dough (roughly 400g if you are weighing) and press it evenly into the bottom of your prepared pan using your fingers or the back of a spoon. Work it to the edges and into the corners — the layer will be thin, approximately ¼ inch (6mm). It does not need to be perfectly smooth.
Pour the entire brownie batter over the cookie dough base and spread it evenly to the edges using your offset spatula. The brownie layer will be approximately ½ inch (12mm) thick.
Drop the remaining cookie dough in rough tablespoon-sized pieces across the top of the brownie batter, distributing them as evenly as possible. Do not press them in — leave them sitting on the surface. They will spread and partially merge with the brownie layer during baking.
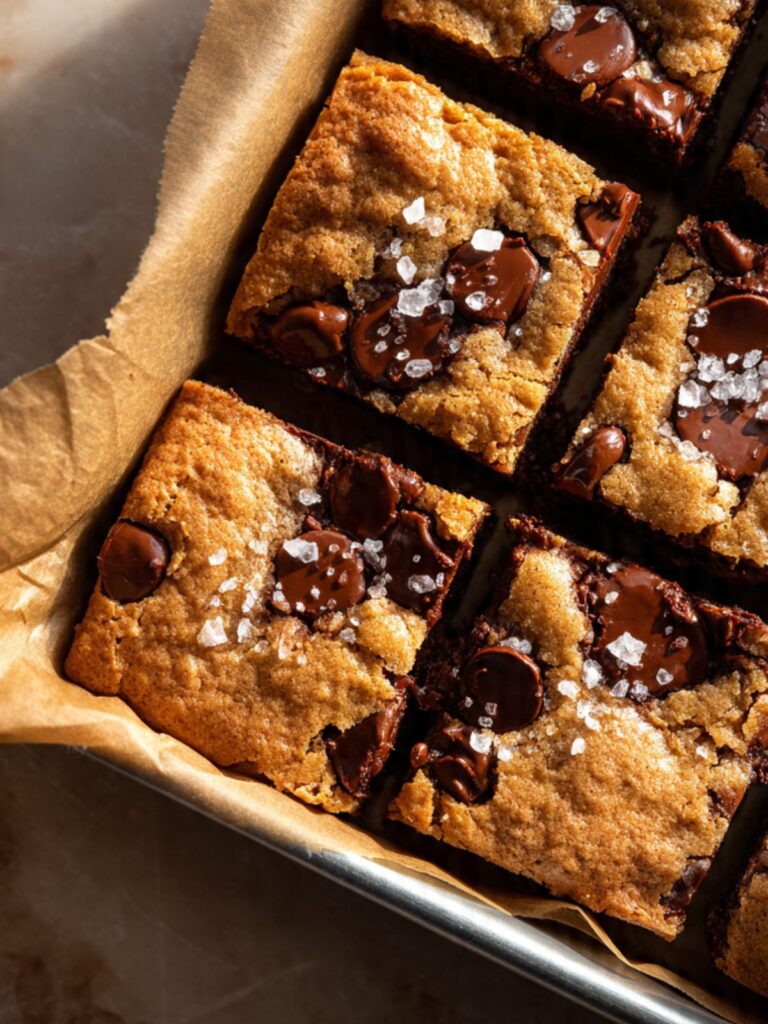
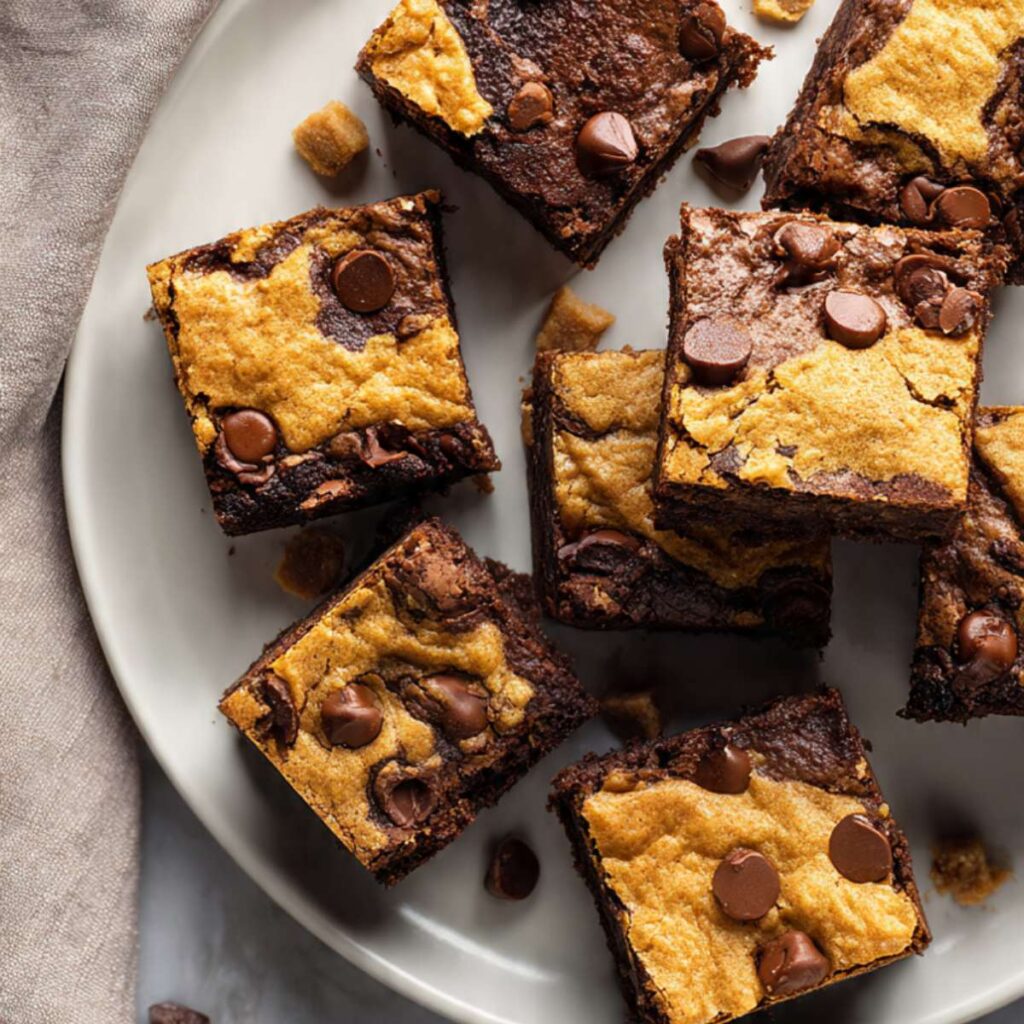
As you can see in the overhead photo showing the cut bars on the plate, the cookie dough pieces on top bake into golden amber islands across the surface, with dark brownie visible between them — this is the exact look you are building at this stage. If your top layer looks like solid cookie dough with no brownie visible between the pieces, space the dough pieces further apart.
Press your reserved chocolate chips across the top surface of the cookie dough pieces. Scatter them so each bar will have chips visible on its surface after cutting.
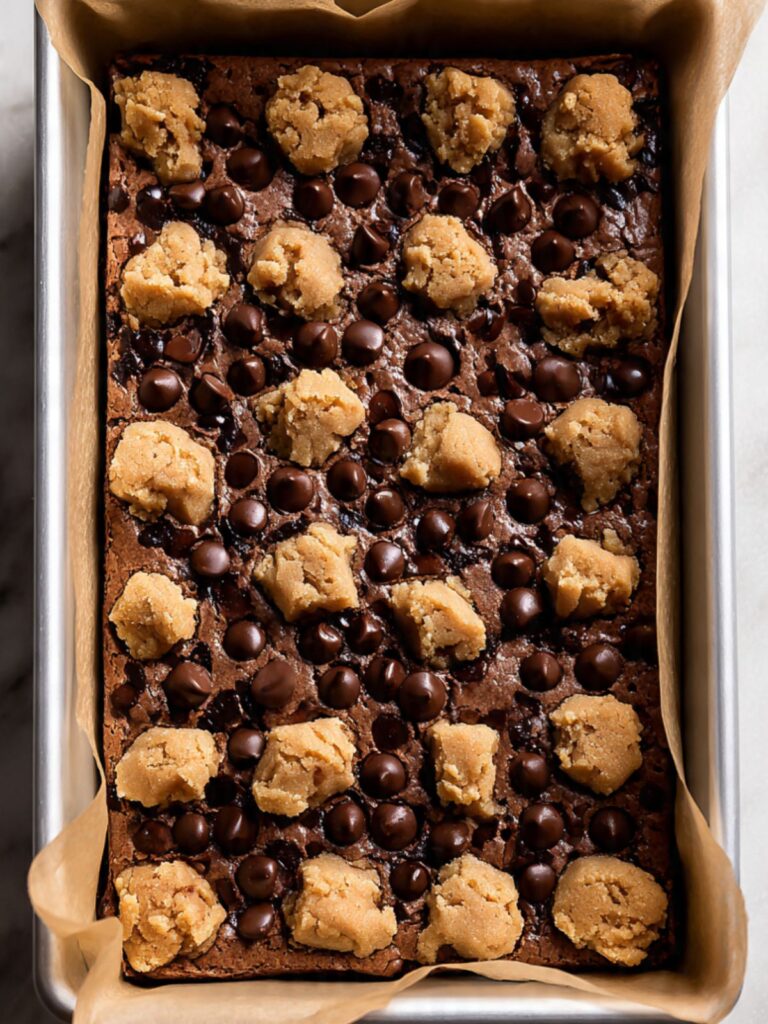
The assembled pan should show a patchwork of golden cookie dough pieces over a dark brownie layer, with the brownie visible in the gaps. This is correct. Set the pan aside and move directly to the oven.
Step 5: Baking Until the Cookie Top Is Set and Golden
Slide the pan onto the middle rack of your fully preheated 350°F (175°C) oven. Set a timer for 28 minutes.
At 28 minutes, open the oven and assess: the cookie dough pieces on top should look golden amber and set at the edges, the brownie visible between them should look matte rather than wet and shiny, and the entire pan should have lost its liquid jiggle when you nudge it gently. The center may still look very slightly underdone compared to the edges — this is correct and intentional.
Pull the pan the moment the top cookie layer looks set and golden and a toothpick inserted into the cookie dough portion (not the brownie portion) comes out with moist crumbs but no wet batter. The brownie portion will still look fudgy and almost underdone on the toothpick — this is correct. Do not bake until the toothpick from the brownie layer comes out clean, or the bars will be dry.
If the top looks pale and the center still jiggles at 28 minutes, return the pan for 2 minutes at a time, checking after each addition. Most ovens finish these bars between 28 and 32 minutes total.
⚠️ Do not overbake — the cookie top will continue to set as the pan cools, and the brownie layer finishes cooking through carryover heat after the pan leaves the oven. Bars that look perfectly done in the oven will be slightly overdone after cooling. Pull them when the top looks set but the interior still reads fudgy.
🗒 Luna’s Note: I set two timers for this recipe — one at 26 minutes to start watching closely, and one at 32 minutes as my absolute ceiling. Anything past 32 minutes in my oven and the brownie layer loses that gooey interior.
Step 6: Adding the Flaked Sea Salt and Cooling Before Cutting
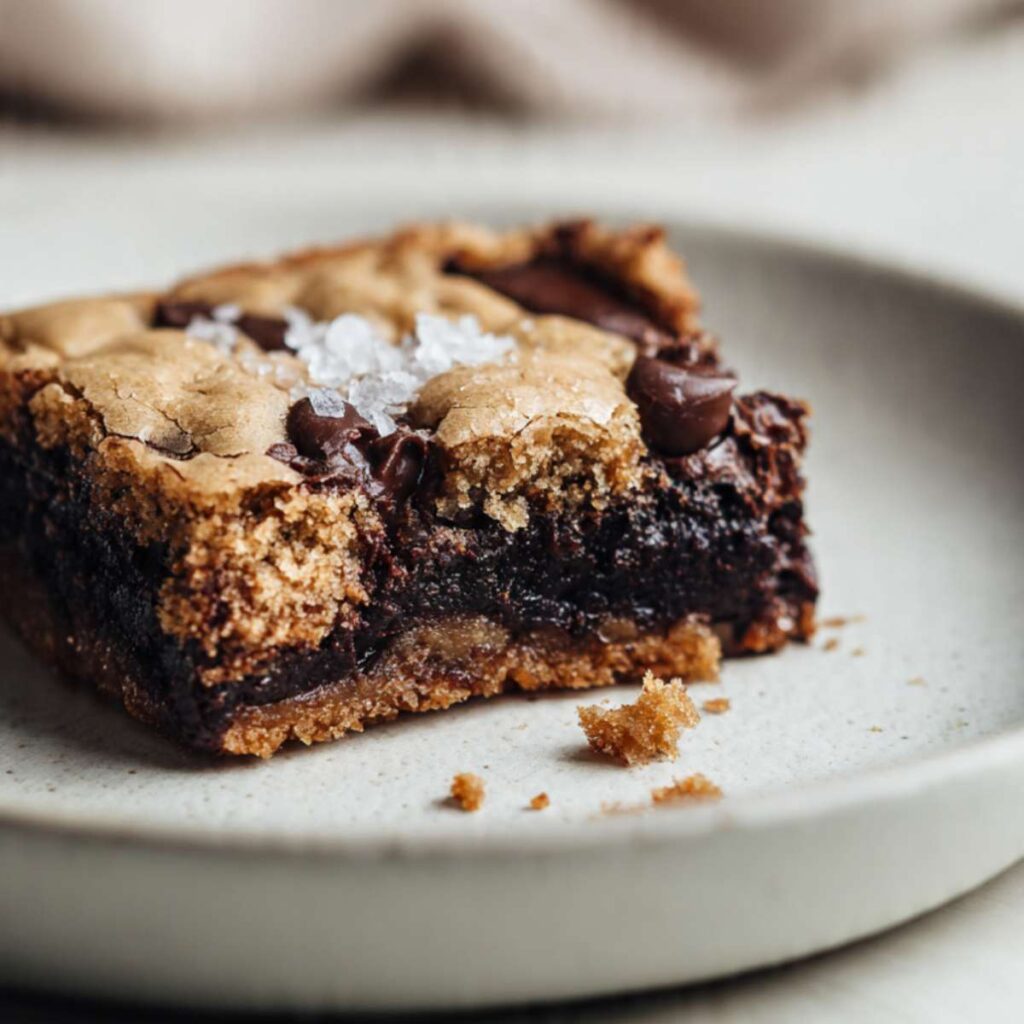
The moment the pan comes out of the oven — immediately, while the surface is still hot — scatter a generous pinch of flaked sea salt across the entire top surface. The residual heat from the bars will help the salt crystals adhere slightly to the surface. If you wait until the bars are cool, the salt sits loose on top and slides off when cut.
As you can see in the close-up photo of the single bar on the plate, the flaked salt crystals are large, white, and clearly visible against the golden cookie surface — use enough that you can see them from a normal serving distance. One small pinch is not enough for a 9×13 pan.
Place the pan on your wire cooling rack and leave it undisturbed at room temperature for a minimum of 2 full hours before cutting. During this time, the brownie layer is finishing its set through carryover heat and then cooling into its final fudgy texture. The cookie layer is also setting its structure.
Do not cut before 2 hours — the brownie center will still be molten underneath the set surface and will collapse into a gummy, structureless mess when the knife goes through. The bars will look done from the outside at 45 minutes. They are not done inside.
For the cleanest cuts: after the 2-hour room temperature cool, refrigerate the pan for 30 minutes. Lift the entire slab out of the pan using the parchment overhang and place it on a cutting board. Use a sharp chef’s knife, wiped clean with a damp cloth between every cut. Cut into a 4×4 grid: 4 cuts across the long side (9 inches / 23cm), 4 cuts across the short side — yielding 16 bars, each approximately 2¼ × 2¼ inches (5.7 × 5.7cm). Each bar weighs approximately 65–70g. If you want smaller bars, cut 4×5 for 20 bars — reduce the listed calories to approximately ~275 kcal per bar at that size.
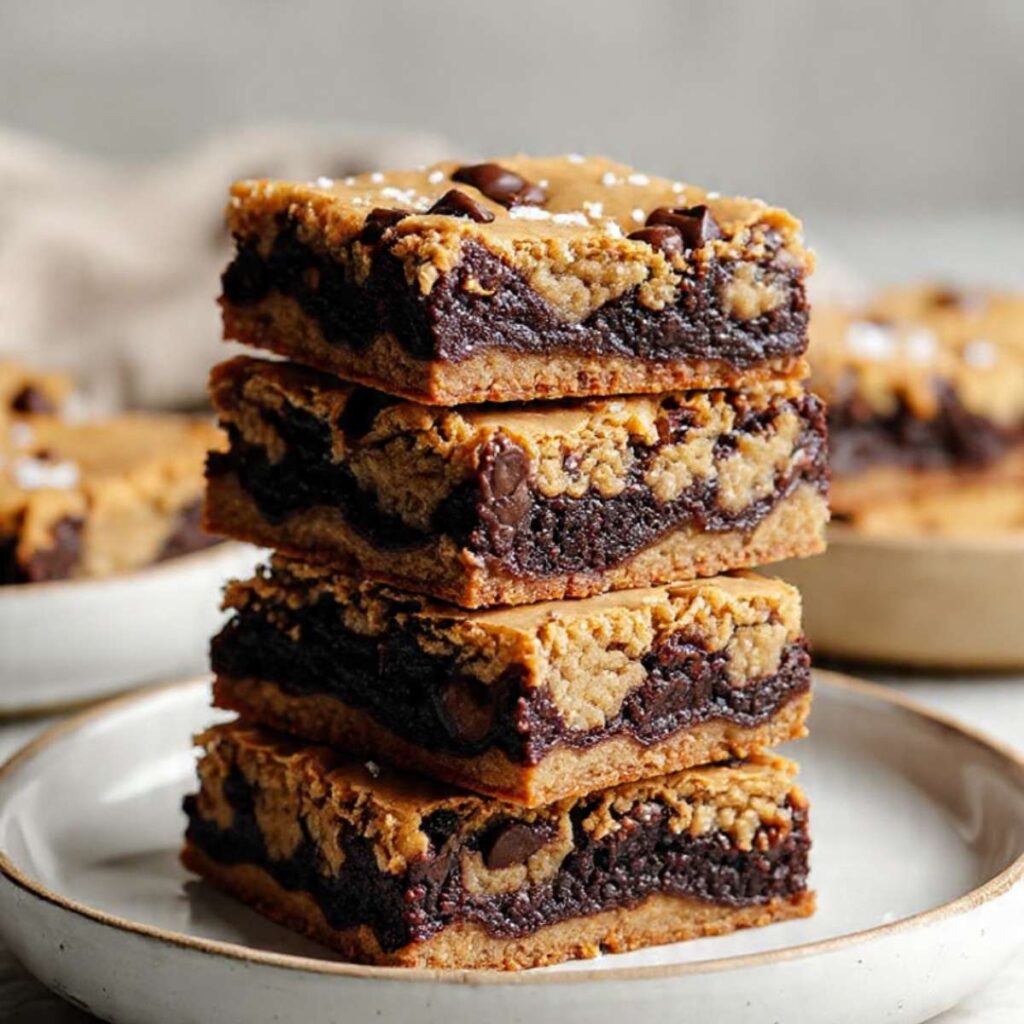
The finished bars should look exactly like the stacked photos — golden cookie top with visible flaked salt and melted chip pools, dark fudgy brownie interior visible at the cut edges, thin golden cookie base at the bottom.
The Science Behind Chocolate Chip Cookie Brownies
Why These Bars Look Underdone When They Are Correctly Done — Carryover Cooking
This is the one moment in this recipe where baker instinct will be wrong, and it is the moment most likely to produce an overbaked result. When you pull the pan at 28–30 minutes, the brownie center will read fudgy and almost raw on the toothpick. The cookie top will look set and golden. Your instinct will say: put it back. Do not.
The pan itself is still hot when it leaves the oven. For 15 to 20 minutes after the door closes, the pan continues conducting heat upward through the brownie layer — a process called carryover cooking. The protein in the eggs coagulates and the starch in the flour gelatinizes during this window, setting the brownie layer into its final dense, fudgy texture without the oven drying it out. If you wait for the brownie toothpick to come out clean in the oven, carryover cooking then takes it past fudgy into dry and cakey — exactly what you were trying to avoid.
The additional 30-minute refrigerator rest before cutting accelerates the final set by dropping the fat temperature quickly, which firms the chocolate and butter into that dense, clean-slicing texture. A bar cut warm releases liquid fat and collapses at the center. The same bar cut cold holds a clean edge.
Pull at the correct moment. Trust the cooling time. The oven is not where these bars finish.
Why the Brownie Layer Needs Less Flour — and Why the Oil Is Not Optional
A standard brownie recipe is designed for an open, exposed top surface — heat enters from the bottom of the pan, rises through the batter, and exits as steam from the top. When cookie dough covers the brownie batter, that top surface is sealed. The steam has nowhere to go. In a standard brownie, this trapped steam pushes the structure open and produces a cakey, over-aerated crumb with a dry, tight interior.
Two adjustments fix this. First: reducing the flour lowers the gluten network density so the brownie layer cannot set too tight under pressure from the sealed top. Second: adding one tablespoon of neutral oil alongside the butter keeps the interior soft and yielding after cooling — butter re-solidifies as it cools, but oil does not. Without the oil, the brownie layer firms up significantly more during the cooling period and loses that nearly-molten quality visible in the cross-section photos. This is also why the brownie batter in this recipe looks slightly looser and more fluid than a standard brownie batter — it is supposed to.
🗒 Luna’s Note: I tested the oil addition by making the recipe without it on the same day. The no-oil batch was good. The oil batch was the one I photographed. The difference in the interior texture at room temperature is significant enough that I would not skip it.
If you try this recipe with a standard brownie batter from another recipe and find the interior dry and tight, these two adjustments — minus 2 tablespoons of flour, plus 1 tablespoon of oil — are the fix.
How Sugar Chemistry Controls Both the Color and the Texture You See
Both layers in this recipe are doing specific sugar work, and the results are visible in the photos. In the brownie layer, granulated white sugar is the only sweetener — no brown sugar. White sugar dissolves cleanly and does not add moisture, which keeps the brownie layer dense and fudgy rather than sticky or caramelized. It also drives the slight sheen on the brownie interior visible at the cut edges — a high white sugar ratio, when whisked vigorously with the fat before eggs go in, produces a slightly glossy, smooth-set interior through a process called sugar syrup integration.
In the cookie dough layer, the ratio is ¾ cup brown sugar to ¼ cup white sugar, and both are doing different jobs. Brown sugar contains molasses, which is hygroscopic — it draws ambient moisture and holds it within the baked good, keeping the cookie layer soft and chewy for days rather than drying into a cracker-like crust over the brownie.
The white sugar drives surface crackle and golden color: as it melts during baking it flows outward, then recrystallizes on the surface as the bar cools, producing the slight crackle and golden sheen visible on the cookie top in the photos. A cookie layer made with 100% brown sugar would be softer, more matte, and would not have that crackled golden finish. This is why the ratio is not interchangeable. For more on how bar construction affects texture from the base up, see my chocolate chip cookie bars article.
Chocolate Chip Cookie Brownies Troubleshooting & Pro-Tips
Why Your Brownie Layer Is Lighter in Color and Sharper in Flavor
This is a Dutch-process cocoa substitution failure. Natural cocoa and Dutch-process cocoa look similar in the bag but produce completely different results in this recipe. Dutch-process cocoa has been alkalized, which neutralizes its natural acidity and produces the deep, near-black color and smooth, round chocolate flavor visible in the cross-section photos. Natural cocoa is acidic, produces a medium brown color — noticeably lighter — and carries a sharper, slightly bitter edge. If your bars came out medium brown inside rather than near-black, and the flavor is sharper than expected, natural cocoa was used instead of Dutch-process. There is no fix after baking.
For future batches: look for “Dutch-process,” “Dutched,” or “alkalized” on the cocoa tin — Droste, Valrhona, and King Arthur all make reliable Dutch-process options. Natural cocoa tins will often say “natural” or contain no processing note at all.
Why the Bottom of Your Bars Is Burnt
This is a dark pan problem. Dark non-stick pans absorb significantly more radiant heat from the oven floor than light-colored aluminum and overbrown the bottom cookie layer before the brownie interior has time to set. The result is a burnt or very dark bottom with an under-set center — the two layers finishing at completely different rates. The fix going forward is a light-colored aluminum pan. If you only have a dark pan: line the bottom with a double layer of parchment, place the dark pan on top of a light-colored baking sheet on the middle rack — the second pan acts as a heat diffuser — and reduce the oven temperature by 15°F (8°C). If the bottom is already burnt: trim the bottom cookie layer off each bar with a sharp knife before serving. The brownie and top cookie layers are intact.
Why Your Brownie Layer Came Out Dry and Cakey Instead of Fudgy
Three causes produce this, in order of likelihood. First: the bars were overbaked — the brownie layer sets its fudgy texture during the 2-hour cooling period, not in the oven. If you baked until the brownie toothpick came out clean, you went past the correct pull point.
Second: flour was measured by scooping the cup directly into the bag rather than spooning and leveling — a scooped cup can weigh 30–40g more than intended, which tightens the gluten network and produces a cakey, dry crumb. Weigh the flour at 90g.
Third: the tablespoon of neutral oil was omitted — that small amount keeps the interior soft and yielding after cooling, and without it the brownie layer firms up significantly more during the 2-hour rest.
If your bars are already dry: warm individual bars in the microwave for 10–12 seconds before serving — it will not restore the fudgy texture fully but will soften them considerably. Serve alongside vanilla ice cream to compensate.
Why Your Cookie Top Baked Up Pale and Soft Instead of Golden and Crackled
A pale, soft cookie top with no crackle has one of three causes. The oven was not fully preheated — an under-temperature oven does not generate the surface heat needed for the Maillard reaction to develop that golden color and crackle before the interior sets. Always confirm full temperature before the pan goes in, and if you have an oven thermometer, use it.
The second cause: white sugar was reduced or substituted. White sugar drives surface crackle and golden color — brown sugar alone produces a matte, soft top. If you swapped all brown sugar or reduced the white sugar, the finish will be noticeably different from the photos.
The third cause: baking soda was expired. Dead baking soda produces no lift and no surface crackle in the cookie layer — the top will look flat and dense rather than lightly risen and crackled. Always freshness-check before using. If your top is already pale and flat: the bars are still edible — dust lightly with flaked sea salt and serve warm, which draws attention to the interior rather than the surface.
Why Your Bars Fell Apart When You Cut Them
Bars that crumble or collapse when the knife goes through were cut too early. The brownie center continues setting for the full 2 hours after the pan leaves the oven — what looks firm from the outside is still molten in the interior for at least the first hour.
The fix for next time: the full 2-hour cool at room temperature, then a 30-minute refrigerator rest before cutting. If your bars have already crumbled: serve them warm in bowls with a scoop of vanilla ice cream — the result is genuinely good and does not read as a mistake to anyone eating it.
Why Your Layers Did Not Separate — The Bar Looks Like One Uniform Slab
If the cross-section shows no distinct cookie layer and the interior looks like one uniform dark slab, the cookie dough base was pressed too thin or the brownie batter was poured after it had started to thicken and could not spread evenly. Make both batters in sequence with no long gaps — the brownie batter should be poured while still fully fluid. The cookie base should be at least ¼ inch (6mm) thick before the brownie goes over it — too thin and it merges entirely into the brownie layer during baking.
Expert Pro-Tips
Press the bottom cookie layer into the corners first. The corners are the thinnest point of the pan and the most likely place for the bottom cookie layer to disappear into the brownie layer during baking. Press firmly and make sure the corners have at least as much dough as the center.
Weigh both batters before layering. The brownie batter should be approximately 500g and the cookie dough approximately 600g total. Weigh the cookie dough and set aside 200g for the top layer before pressing the remaining 400g into the base. This produces a balanced top and bottom with a consistent ratio across every bar.
Use an offset spatula to spread the brownie batter. Pouring the brownie batter directly from the bowl will disturb the pressed cookie base and create uneven coverage. Pour it into the center of the pan and use an offset spatula with light, outward strokes from the center to the edges — this minimizes disruption to the bottom cookie layer.
Chill before cutting, every time. Even after the full 2-hour room temperature cool, a 30-minute refrigerator rest produces dramatically cleaner cuts. The brownie layer firms from yielding and soft to just firm enough to hold a clean edge when the knife goes through. Wipe the knife with a damp cloth between each cut — cocoa and chocolate transfer from cut to cut and make the bars look smeared.
The bars are better on day two. The brownie layer deepens in flavor overnight as the cocoa and chocolate continue to bloom at room temperature. The cookie layer softens slightly as the moisture from the brownie migrates upward. Day one is excellent. Day two is the version I prefer.
🗒 Luna’s Note: I always make these the day before I need them for exactly this reason. Day two bars, pulled from the fridge 20 minutes before serving, are the version I would put in front of someone I wanted to impress.
At high altitude (above 3,500 feet / 1,065m): Reduce the baking soda in the cookie dough layer by ⅛ teaspoon. The brownie layer has no leavening and is largely unaffected, though start checking at 25 minutes rather than 28. In high humidity, the batters may be slightly looser than expected — if the cookie dough looks too soft to hold its shape when scooped, add 1 tablespoon (8g) of flour and reassess before layering.
How to Store Chocolate Chip Cookie Brownies
Room Temperature
Store the bars in an airtight container at room temperature for up to 4 days. Place a sheet of parchment paper between layers if stacking — the chocolate chips on the surface of the top bars will imprint into the bottom of the bars above them and the flaked salt will transfer. The bars stay soft and fudgy at room temperature because of the hygroscopic brown sugar in the cookie layer, which continues to draw ambient moisture and keep the top layer from drying out.
Do not store uncovered on a plate or cutting board. The exposed brownie layer loses moisture quickly and the edges will dry out and harden within 12 hours at room temperature without a sealed container.
Refrigerator
Refrigerator storage is recommended if your kitchen runs warm or humid, or if you are keeping the bars beyond 4 days. Store in an airtight container in the refrigerator for up to 7 days. The bars will firm up significantly when cold — the brownie layer becomes dense and almost truffle-like in texture, and the cookie layer firms to a chewier, more compact bite. Both are good. Both are different from room temperature.
Pull the bars from the refrigerator 15–20 minutes before serving to allow the fats to soften slightly — cold bars straight from the fridge have a muted chocolate flavor because cold suppresses aromatic compounds. Fifteen minutes at room temperature brings both the texture and the flavor back to their best.
Freezer — Baked
These bars freeze exceptionally well. Wrap each bar individually in plastic wrap, pressing out any air, then place the wrapped bars in a zip-top freezer bag or airtight freezer container. Freeze for up to 3 months. The individual wrapping prevents freezer burn on the cut edges and keeps the bars from fusing together in the container.
To thaw: unwrap and leave at room temperature for 1 to 1.5 hours. Do not microwave from frozen — the brownie layer will heat unevenly and the cookie layer will turn rubbery. If you want a warm bar, thaw fully at room temperature first, then microwave for 10–12 seconds. The brownie layer will return to its gooey, nearly molten texture and the chocolate chips will soften. It is a very good thing.
Freezer — Unbaked
The assembled unbaked pan can be frozen before baking. Assemble the layers in the parchment-lined pan, cover tightly with plastic wrap and then foil, and freeze for up to 1 month. Do not add the flaked sea salt before freezing — add it immediately after the pan comes out of the oven.
To bake from frozen: remove the plastic wrap and foil, place the frozen pan directly into a cold oven, then turn the oven to 350°F (175°C). Starting in a cold oven allows the bars to thaw gradually as the oven heats, preventing the outside from setting before the center has a chance to warm through. Add 12–15 minutes to the bake time and use the same visual doneness cues — golden set cookie top, matte brownie surface, fudgy toothpick from the brownie portion. Cool for the full 2 hours before cutting.
Serving Suggestion
Serve these bars at room temperature or very slightly warm — 10 seconds in the microwave if they have been refrigerated. Cold bars are good. Warm bars are the version that makes people ask for the recipe before they have finished eating.
I serve these with strong black coffee. No sugar, no milk. The bitterness cuts directly through the richness of the brownie layer in a way that milk or a sweet drink does not — it resets the palate between bites and makes the chocolate flavor sharper and more defined. If coffee is not your preference, a cold glass of whole milk is the correct alternative. Nothing else works as well.
These belong on a Tuesday night when you want something that takes 20 minutes of active work and produces something that tastes like it took much longer. They also travel well — individually wrapped bars hold their shape and stay fresh for 2 days at room temperature without refrigeration, which makes them a reliable thing to bring somewhere. Unlike layer cakes or frosted cupcakes, they do not require any special handling in transit.
The day two note from the Troubleshooting section is worth repeating here: make these the day before you need them. The brownie layer deepens overnight and the cookie layer softens to that perfect chewy texture. Day one is good. Day two, pulled from an airtight container and left at room temperature for 15 minutes, is the version I make when I want the result to be exactly right.
One honest limitation: these do not hold up well in heat. At temperatures above 80°F (27°C) — a warm outdoor event, a car in summer — the chocolate chips will soften to the point of smearing and the brownie layer will become too soft to hold its shape when picked up. Make them for indoor serving or keep them refrigerated until the last possible moment if the environment is warm.
🗒 Luna’s Note: I cut the full pan into 16 bars and freeze half of them individually wrapped the same day I make them. That way I always have one available without making a full batch. A frozen bar thawed at room temperature for an hour is indistinguishable from a fresh one.
Frequently Asked Questions About Chocolate Chip Cookie Brownies
What is the difference between a brookie and a chocolate chip cookie brownie?
A brookie and a chocolate chip cookie brownie are the same thing — two names for the same layered bar that combines brownie batter and chocolate chip cookie dough baked together in one pan. The name brookie is the more common shorthand, while chocolate chip cookie brownies is the more descriptive search term. Some recipes use boxed mixes for one or both components; this recipe builds both layers from scratch, which gives you control over the texture of each layer independently. The from-scratch brownie layer in this recipe is specifically formulated to stay fudgy under the cookie dough — something boxed brownie mix batters, which are designed for standalone baking, do not reliably produce in this layered format.
How do I know when brookies are done baking?
Brookies are done when the cookie dough layer on top looks golden amber and set at the edges, the brownie surface between the cookie dough pieces looks matte rather than wet and shiny, and a toothpick inserted into the cookie dough portion comes out with moist crumbs but no wet batter. Do not use the toothpick test on the brownie portion — the brownie layer is designed to read fudgy and underdone at the correct pull point. Protein coagulation in the brownie layer finishes during the 2-hour cooling period through carryover heat, not in the oven. If you wait for the brownie toothpick to come out clean, the bars will be overbaked and dry.
Can I make chocolate chip cookie brownies ahead of time?
Yes — and they are genuinely better made the day before. The brownie layer deepens in flavor overnight as the cocoa blooms fully at room temperature, and the cookie layer softens to a more even, chewy texture as moisture migrates between the layers. Make the full batch, cool completely, cut into bars, and store in an airtight container at room temperature overnight. Pull them 15 minutes before serving. For a brookie recipe that covers a slightly different ratio of cookie to brownie, my brookie recipe article goes into more detail on how the layer proportions affect the final texture.
Can I use a boxed brownie mix for the brownie layer?
You can, but the results will be inconsistent. Boxed brownie mixes are formulated for standalone baking in an uncovered pan — they contain more leavening and a higher flour ratio than this recipe’s from-scratch brownie layer, which means they are more likely to bake up cakey and dry under the cookie dough rather than staying fudgy. If you use a boxed mix, choose a fudgy variety, reduce the bake time by 3–5 minutes, and watch the doneness cues carefully. The color will also be different — most boxed mixes use natural cocoa rather than Dutch-process, so the interior will be lighter brown rather than the near-black shown in the photos.
Why did my chocolate chip cookie brownies come out cakey instead of fudgy?
Cakey brownies in this recipe have one of three causes. Overbaking is the most common — the brownie layer sets its final fudgy texture during the 2-hour cooling period, not in the oven, and pulling the pan when the brownie toothpick reads clean means the layer is already past its best texture. The second cause is too much flour — a scooped cup of all-purpose flour can weigh 30–40g more than the recipe intends, which tightens the gluten structure and produces a cakey crumb. Weigh the flour at 90g for the brownie layer. The third cause is omitting the tablespoon of neutral oil — that small amount of oil keeps the interior soft and yielding even after the bars cool, and without it the brownie layer firms up significantly more during the cooling period.
Can I double this recipe?
Doubling this recipe requires two 9×13 inch (23x33cm) pans baked simultaneously, not one larger pan. A larger pan changes the depth of both layers and throws off the bake time in ways that are difficult to predict — the center will be significantly underbaked before the edges show the correct doneness cues. Two pans on the same middle rack works if your oven is wide enough; if not, bake them on separate racks and rotate halfway through baking. Leavening in the cookie dough layer scales linearly — double the baking soda exactly. Bake time stays the same at 28–32 minutes. Cool both pans for the full 2 hours before cutting.
How do altitude and humidity affect these bars?
At high altitude — above 3,500 feet (1,065m) — the lower air pressure causes leavening to act faster and gases to expand more rapidly during baking. For the cookie dough layer, reduce the baking soda by ⅛ teaspoon to prevent over-rise and collapse. The brownie layer has no leavening so it is largely unaffected by altitude, though the bake time may decrease slightly — start checking at 25 minutes. High humidity affects both layers by adding ambient moisture to the batter — flour absorbs moisture from the air before it ever reaches the bowl, so in a very humid kitchen the batters may be slightly looser than expected. If the cookie dough looks too soft to hold its shape when scooped, add 1 tablespoon (8g) of flour and reassess. Storage in humid climates requires an airtight container — the cookie layer will absorb ambient moisture quickly and become sticky on the surface within a few hours if left uncovered.
More Bars and Brownies You’ll Love
- Nestlé Toll House Cookie Bars — the classic recipe made in a 9×13 pan, with that distinctive butterscotch-forward Toll House flavor and pools of melted semi-sweet chips in every bite

Chocolate Chip Cookie Brownies
Ingredients
Equipment
Method
- Position oven rack in the middle and preheat to 350°F (175°C), then line a 9×13 inch (23x33cm) light-colored aluminum pan with parchment paper leaving a 2-inch overhang on both long sides, and grease the two short exposed sides.
- Make the brownie batter: whisk together the melted cooled butter and neutral oil, then add the granulated sugar and whisk vigorously for 60 seconds until slightly thickened.
- Add the 2 eggs and 1 egg yolk to the brownie bowl one at a time, whisking fully after each addition, then whisk in the vanilla extract until the batter looks smooth and glossy.
- Sift the Dutch-process cocoa powder into the brownie bowl, add the flour and fine sea salt, then switch to a silicone spatula and fold gently for 15–20 strokes until no dry streaks remain — do not whisk.
- Make the cookie dough: in a separate bowl whisk together the melted cooled butter, packed brown sugar, and granulated sugar until smooth, then add the egg and egg yolk one at a time and whisk until glossy, then whisk in the vanilla extract.
- Add the flour, baking soda, and fine sea salt to the cookie dough bowl, switch to a silicone spatula, and fold until just combined, then fold in the semi-sweet chocolate chips with the final few strokes.
- Press approximately two-thirds of the cookie dough (about 400g) into an even layer across the bottom of the prepared pan, working it to the edges and corners until approximately ¼ inch (6mm) thick.
- Pour the entire brownie batter over the cookie dough base and spread evenly to the edges using an offset spatula, then drop the remaining cookie dough in rough tablespoon-sized pieces across the top and press reserved chocolate chips across the surface.
- Bake on the middle rack at 350°F (175°C) for 28–32 minutes, until the cookie dough pieces on top look golden amber and set, the brownie surface between them looks matte, and a toothpick inserted into the cookie dough portion comes out with moist crumbs — the brownie portion will still read fudgy and that is correct.
- Remove the pan from the oven and immediately scatter flaked sea salt across the entire top surface, then place on a wire rack and cool at room temperature for a minimum of 2 full hours before cutting.
- For cleanest cuts, refrigerate the cooled pan for 30 minutes, then lift the slab out using the parchment overhang, cut into a 4×4 grid for 16 bars using a sharp knife wiped clean between each cut, and serve at room temperature or slightly warm.