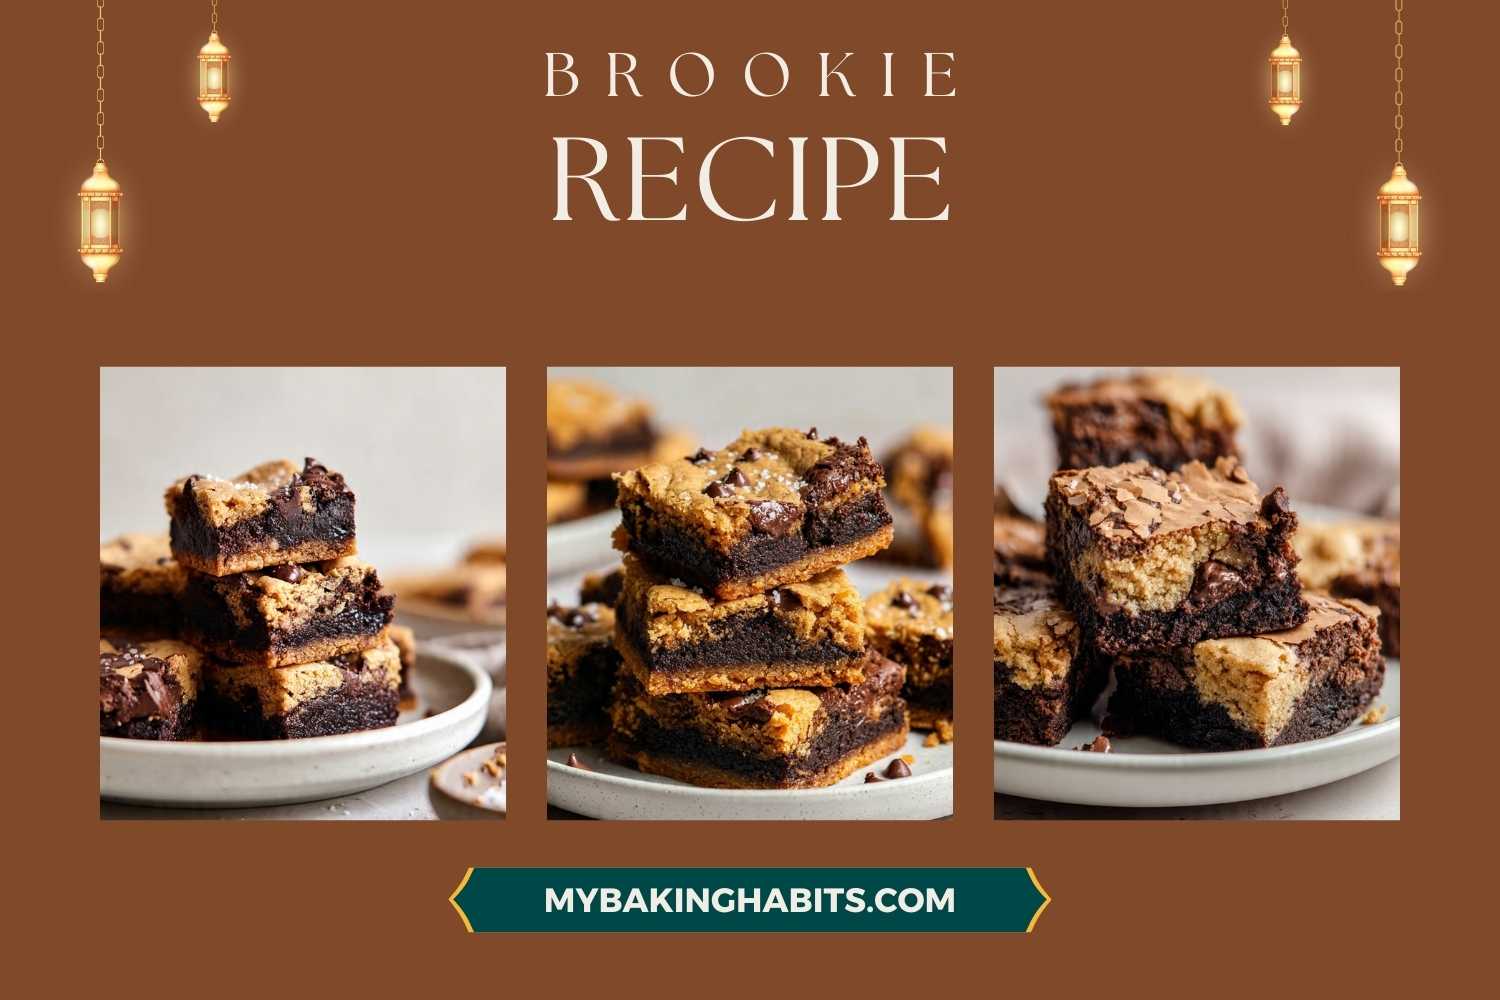
Fudgy Brookie Bars Recipe

I have made this brookie recipe eleven times across three different pan sizes before landing on the version in these photos. The first four batches had the same problem — a greasy, underdone cookie base sitting beneath a perfectly baked brownie layer. The cookie layer never had a chance. Brownie batter, once it covers raw dough, acts as an insulating layer that blocks direct oven heat from above. The dough underneath stalls. No matter how long the pan stays in the oven, the cookie base cannot catch up. The fix is a 10-minute par-bake — the cookie base goes in alone first, gets a structural head start, and then the brownie batter goes on. Batches five through eleven were right. This is that recipe.
The second variable I tested was butter temperature in the cookie base. Three batches used butter that was melted and still warm when it went into the dough — the result was a greasy dough that spread rather than held its shape under the brownie layer. Three batches used butter that had cooled to room temperature before mixing — the dough pressed cleanly into the pan and held its edges through both bakes. The difference was visible before the pan ever went into the oven. Cool your melted butter completely before the dough comes together.
No stand mixer. No chilling the dough. No resting time. The total hands-on work in this brookie recipe is about 20 minutes — two bowls, a whisk, a spatula, and one pan.
🗒 Luna’s Note: The partial pre-bake step is the one thing every brookie recipe I tested skipped. Every one of them had an undercooked cookie base. Once I understood that the brownie batter insulates the bottom layer once it goes in, the fix was obvious.
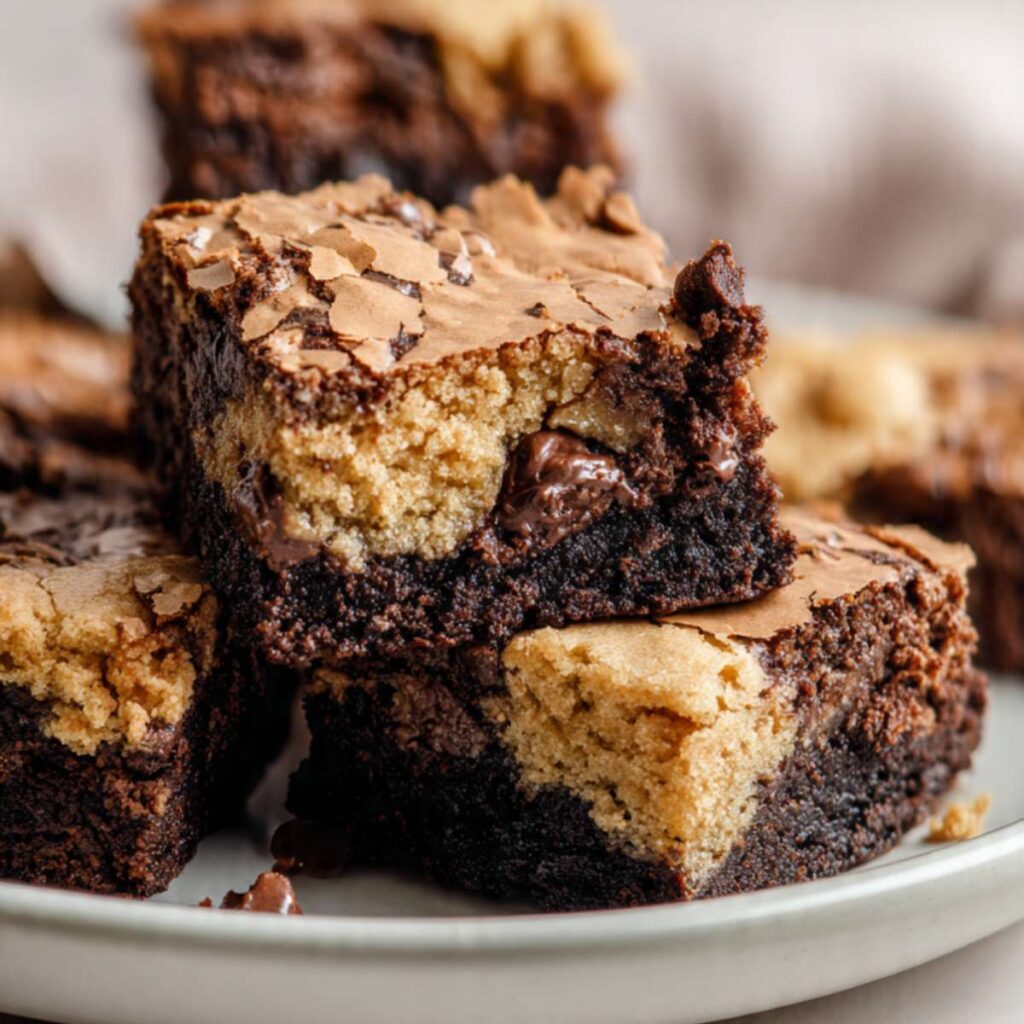
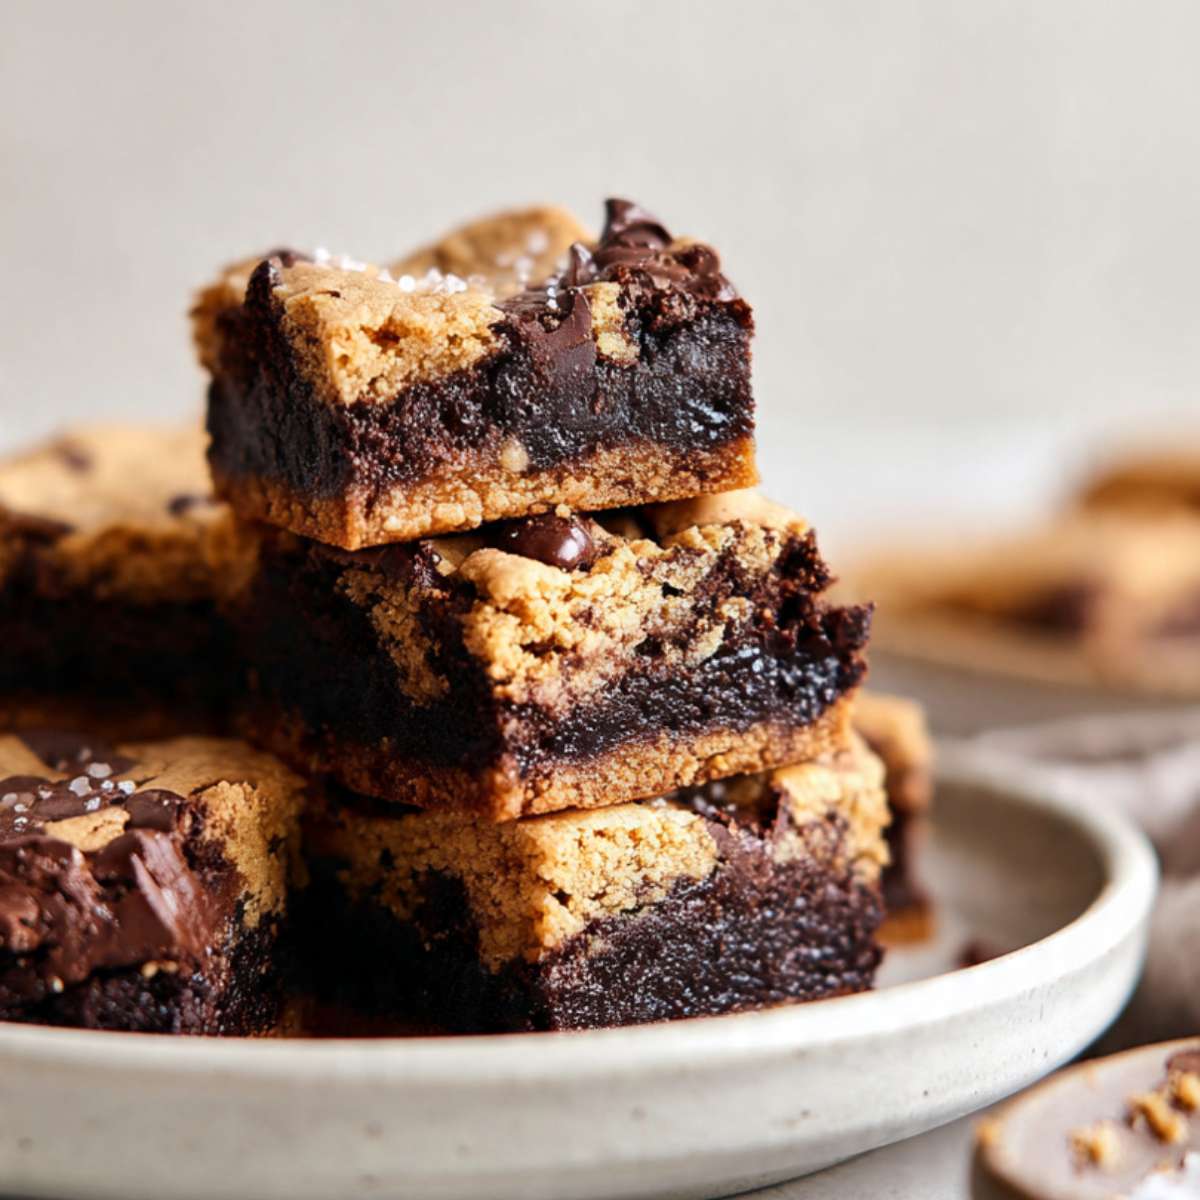
This is the recipe I make when someone asks me to bring something and I want them to remember it. It is not a cookie. It is not a brownie. It is both, in distinct layers, with a flaked sea salt finish that cuts through the sweetness in a way that makes the whole thing taste more intentional than it is.
A word on the brownie layer: it is genuinely fudgy. Not a little fudgy. The dark, dense kind that needs to cool fully before cutting or it will fall apart at the knife. I am not going to tell you to wait patiently. I am going to tell you that if you cut these before they have cooled for at least 2 hours, the centers will be molten and the bars will not hold their shape. Set a timer and leave the kitchen.
| Prep Time | 25 minutes |
| Pre-Bake Time | 10 minutes (cookie base only) |
| Bake Time | 28–32 minutes (after brownie layer added) |
| Cooling Time | 2 hours minimum before cutting |
| Total Time | Approximately 3 hours (includes cooling) |
| Yield | 16 bars (from a 9×9 inch / 23x23cm pan) |
| Pan Size | 9×9 inch (23x23cm) light-colored aluminum pan |
| Difficulty | Easy — no mixer, one bowl per component, straightforward layering |
| Calories | ~380 per bar |
| Carbs | ~48g |
| Fat | ~19g |
| Protein | ~4g |
| Sugar | ~32g |
| Sodium | ~160mg |
Nutrition is estimated based on 16 bars. Values will vary based on exact brands and chocolate chip type used.
Ingredients & Tools
For the Cookie Base
- 1½ cups (190g) all-purpose flour (spooned into the measuring cup and leveled — or weighed at 190g)
- ½ cup (100g) packed brown sugar
- ¼ cup (50g) plain white granulated cane sugar
- ½ cup (113g) unsalted butter, melted and cooled to room temperature
- 1 large egg (approximately 50g without shell), room temperature
- 1 tsp pure vanilla extract
- ½ tsp baking soda, checked for freshness
- ¼ tsp fine sea salt
- 1 cup (170g) semi-sweet chocolate chips (45–55% cacao), such as Nestle Toll House or Ghirardelli, plus extra for pressing on top
For the Brownie Layer
- ½ cup (113g) unsalted butter, cut into pieces
- 4 oz (113g) bittersweet chocolate (60–70% cacao), finely chopped — bar chocolate, not chips
- ¾ cup (150g) plain white granulated cane sugar
- 2 large eggs (approximately 50g each without shell), room temperature
- 1 tsp pure vanilla extract
- ½ cup (63g) all-purpose flour (spooned and leveled — or weighed at 63g)
- 2 tbsp (12g) Dutch-process cocoa powder
- ¼ tsp fine sea salt
For the Finish
- Flaked sea salt, such as Maldon, for scattering on top immediately after baking
Before You Start
Use a kitchen scale. The gram weights in this recipe are the numbers I tested with. Volume measurements can vary by 20–30% depending on how the ingredient is scooped or packed — especially flour, which is the most common reason cookie bases come out dry or dense. Weigh both flour measurements separately.
Melt and cool the butter before you begin. Both the cookie base and the brownie layer use melted butter. Melt them separately — the brownie butter will be melted together with the chocolate, so handle it last. The cookie base butter should be melted, then set aside to cool until it no longer feels warm to the touch. To check readiness: press your fingertip to the bottom of the bowl — it should feel neutral to slightly cool, not warm. If it still feels warm, wait another 5 minutes and check again. Hot melted butter added to a cookie dough will partially cook the egg and produce a greasy, uneven base that does not press cleanly into the pan.
Room temperature eggs. Pull your eggs from the refrigerator 30 minutes before you begin, or place them in a bowl of warm (not hot) water for 10 minutes. Cold eggs do not emulsify smoothly into melted butter — the mixture will look broken and slightly greasy rather than smooth and cohesive.
Check your brown sugar for hardening. Packed brown sugar that has hardened in the bag cannot be packed accurately — the volume will be off by 20–30% and the moisture content of the cookie base dough will be wrong. If your brown sugar has hardened, place it in a microwave-safe bowl, lay a damp paper towel over the surface, and microwave in 20-second increments until it feels pliable and can be pressed together. Let it cool before measuring.
Check your baking soda freshness. Drop ½ tsp (3g) into a small bowl of hot water with a splash of white vinegar. It should bubble aggressively within 2 seconds. If it fizzes weakly or not at all, replace the box before baking.
Pan material matters. This recipe was tested in a light-colored aluminum 9×9 inch (23x23cm) pan lined with parchment paper with overhang on two sides. A dark non-stick pan will overbrown the cookie base before the brownie layer has finished baking. A glass or ceramic pan retains heat longer — reduce oven temperature by 25°F (15°C) if using either. Do not skip the parchment overhang — without it, you will not be able to lift the bars out of the pan cleanly.
Oven rack position: Place the rack in the middle position before preheating. The middle rack ensures even heat distribution for both the par-bake and the combined bake. A lower rack position overbrowns the cookie base bottom during the par-bake. An upper rack position browns the brownie top before the center is set.
No stand mixer needed. This entire recipe comes together with two mixing bowls, a whisk, and a silicone spatula. Do not use an electric mixer for either component — overworking both the cookie dough and the brownie batter produces a tough, dense result in the cookie base and a cakey rather than fudgy brownie layer.
Bar chocolate for the brownie layer, not chips. Chocolate chips contain stabilizers that prevent them from melting fully and evenly. Use a bittersweet chocolate bar (60–70% cacao), finely chopped — it melts into a smooth, glossy liquid that produces the fudgy interior visible in the cross-section photos.
Necessary Tools
- Kitchen scale (strongly recommended)
- 9×9 inch (23x23cm) light-colored aluminum baking pan
- Parchment paper cut with overhang on two sides
- Two medium mixing bowls
- Small saucepan or microwave-safe bowl (for melting brownie butter and chocolate)
- Whisk
- Silicone spatula
- Instant-read thermometer (optional but useful for confirming chocolate has cooled before eggs go in)
- Sharp knife and cutting board for chopping chocolate
- Oven thermometer (recommended — most home ovens run 15–25°F / 8–14°C off)
I use a bench scraper instead of the flat bottom of a measuring cup to press the cookie dough into the pan. The straight edge gets the corners more cleanly than a curved cup bottom does. It is a small thing and a measuring cup works fine — but if you have a bench scraper, reach for it here.
How to Make Fudgy Brookies
Step 1 — Prepare the Pan and Preheat the Oven
Preheat your oven to 350°F (175°C). Most home ovens run 15–25°F (8–14°C) off — if you have an oven thermometer, confirm the actual temperature now before anything goes in the pan. Place the oven rack in the middle position.
This recipe uses two separate methods — a one-bowl, no-mixer approach for the cookie base and a melt-and-mix method for the brownie layer. Neither component requires a stand mixer or hand mixer at any point. Keep both mixing bowls ready before you begin.
Line your 9×9 inch (23x23cm) light-colored aluminum pan with parchment paper, leaving at least 2 inches of overhang on two opposite sides. Press the parchment into the corners firmly. The overhang is your handle — without it, you cannot lift the finished bars out of the pan without breaking them. Do not grease the parchment.
The pan should look like a sling — parchment flat on the bottom, two sides hanging over the rim, two sides of the pan exposed. This is the correct setup before anything goes in.
Set the pan aside. Move to the cookie dough.
Step 2 — Make the Cookie Base Dough
This is a one-bowl, no-mixer dough. In a medium mixing bowl, whisk together the melted and cooled unsalted butter (113g), packed brown sugar (100g), and plain white granulated cane sugar (50g) until fully combined and the mixture looks smooth and glossy — about 60 seconds of whisking. The sugars should be fully dissolved into the butter with no visible granules remaining.
Add the room temperature egg (50g) and pure vanilla extract (1 tsp) and whisk again for 30 seconds until the mixture looks slightly thickened and cohesive. This is the emulsification step — the egg binds the fat and sugar together. If the mixture looks broken or greasy, the butter was still too warm when the egg went in. Let it sit for 2 minutes and whisk again — it will usually come together.
Switch to your silicone spatula. Add the all-purpose flour (190g, spooned and leveled or weighed), baking soda (½ tsp), and fine sea salt (¼ tsp) directly into the bowl. Fold gently — wide, slow strokes — until no dry flour streaks remain. Do not stir aggressively. The moment the flour disappears is the moment to stop. Overworking this dough develops gluten and produces a tough, bready cookie base instead of the soft, slightly chewy layer visible in the photos.
Fold in the semi-sweet chocolate chips (170g) with 5–6 strokes of the spatula.
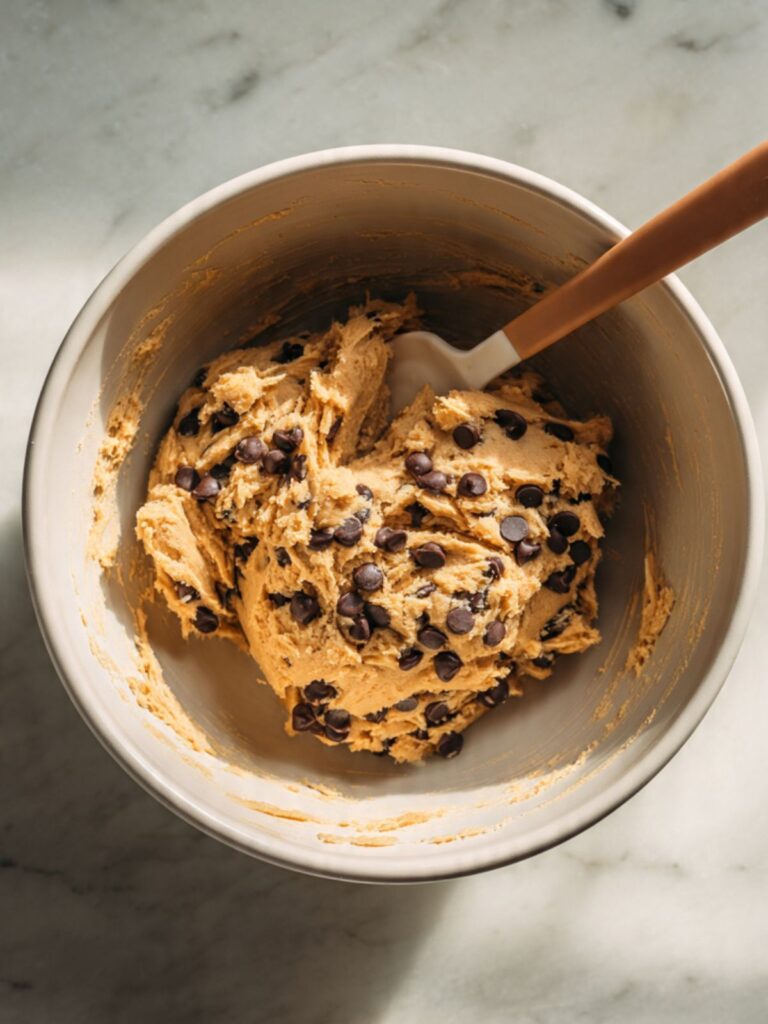
The finished dough should look thick, cohesive, and slightly sticky — not crumbly, not wet, and no dry patches at the bottom of the bowl. If it looks crumbly, your butter may have been too cool when it went in — press the dough together with your hands and it will hold.
🗒 Luna’s Note: I always weigh both the cookie base flour and the brownie flour separately before I start either component. Two small bowls, measured and set aside. It removes one variable from a recipe that already has two batters to manage.
Press the cookie dough evenly into the prepared pan using your fingertips or the flat bottom of a measuring cup. Work from the center outward. The layer should be approximately ½ inch (1.3cm) thick and reach all four edges — including the two sides not covered by parchment. Press firmly enough that the dough holds together as a single flat layer without gaps.
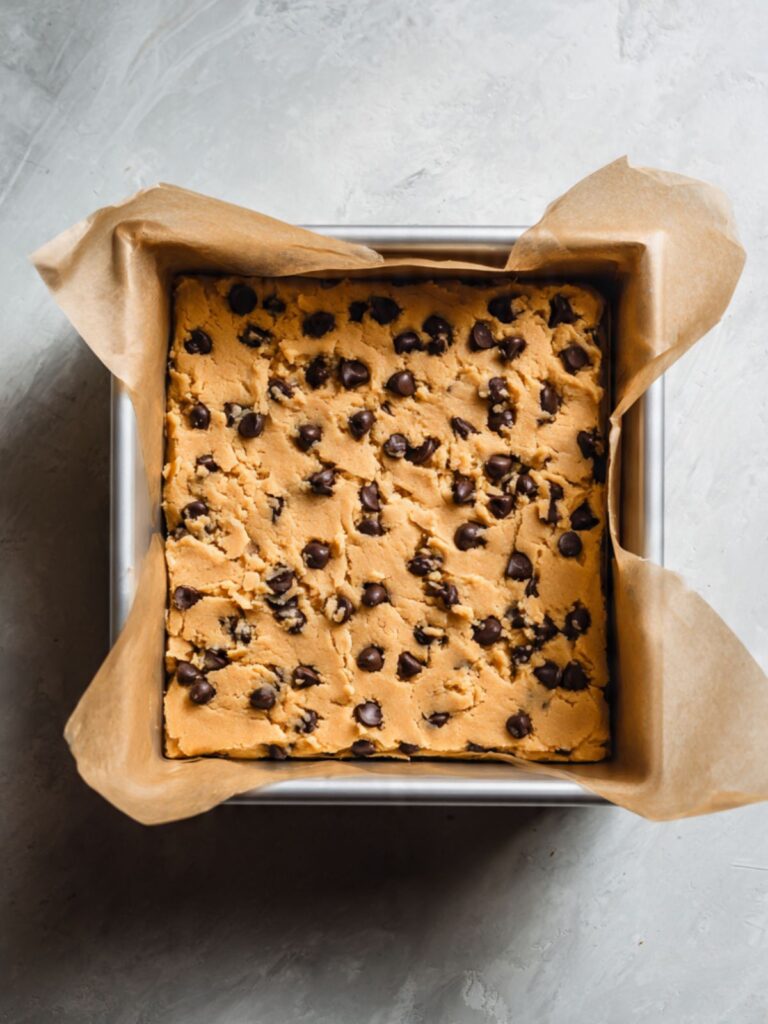
The dough layer should look like an even, flat slab that reaches all four edges with no thin spots at the corners. This is what goes into the oven first.
Set the pan aside and move to the brownie batter — but do not add the brownie batter yet. The cookie base bakes alone first.
Step 3 — Par-Bake the Cookie Base
Slide the pan with just the cookie dough layer into the preheated 350°F (175°C) oven. Bake for exactly 10 minutes. Do not open the oven door during this time.
At 10 minutes, the cookie base should look set at the edges and pale golden across the surface — it will not look fully baked and the center will look soft. This is correct. You are not baking it through — you are giving it a structural head start so it does not sit raw under the brownie batter for the full bake time.
The edges should look just set and very lightly golden, and the center should still look matte and pale. If the edges are browning deeply at this point, your oven runs hot — reduce by 15°F (8°C) for the remainder of the bake.
Pull the pan from the oven and set it on a wire rack. Leave the oven on at 350°F (175°C). Make the brownie batter now while the cookie base rests — you want it slightly cooled but still warm when the brownie batter goes on top. The warm surface helps the two layers bond during the final bake.
Step 4 — Melt the Brownie Butter and Chocolate
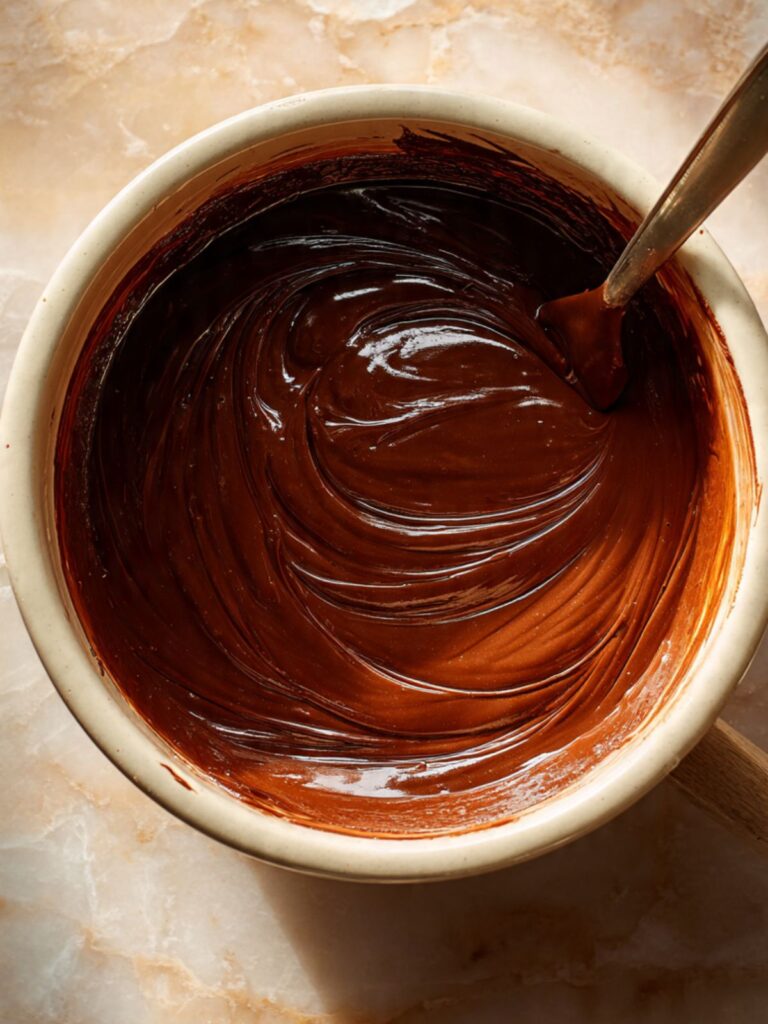
In a small saucepan over low heat, combine the unsalted butter pieces (113g) and finely chopped bittersweet chocolate (113g). Stir constantly with a silicone spatula using slow, circular strokes. Remove the pan from the heat the moment the last visible piece of chocolate disappears — residual heat in the pan will finish melting any remaining fragments.
Alternatively, combine butter and chocolate in a microwave-safe bowl and microwave in 30-second intervals at 50% power, stirring between each interval, until fully melted and smooth. The 50% power setting matters — full power scorches chocolate on the outside before the center melts.
The melted mixture should look smooth, glossy, and uniformly dark — no visible butter separation, no graininess, no pale streaks. If you see graininess, the chocolate overheated. Set it aside, let it cool completely, and stir vigorously — it will usually come back together.
This is the most important temperature checkpoint in the recipe. The melted chocolate and butter mixture must cool to below 90°F (32°C) before the eggs go in. Pour the mixture into a medium mixing bowl and let it sit for 8–10 minutes. Test it by touching the bottom of the bowl — it should feel warm, not hot. If you have an instant-read thermometer, use it here. Eggs added to a mixture above 90°F will begin to cook on contact, producing scrambled bits in your brownie batter.
Set the cooled mixture aside and move to the next step.
Step 5 — Build the Brownie Batter
To the cooled chocolate and butter mixture, add the plain white granulated cane sugar (150g). Whisk vigorously for 60 seconds until the sugar is fully incorporated and the mixture looks slightly thickened. The sugar does not fully dissolve at this stage — that is normal.
Add the two room temperature eggs (50g each) one at a time, whisking well after each addition. Add the pure vanilla extract (1 tsp) with the second egg. After both eggs are in, whisk for a full 45 seconds without stopping. This step is building the thin crackled top skin you can see in the photos — that skin forms when the sugar and eggs are properly emulsified and aerated before the flour goes in. Rushing this step produces a matte, flat brownie top with no crackle.
After whisking, the batter should look thick, glossy, and slightly ribbony when you lift the whisk — it should fall in a slow, wide ribbon rather than dripping immediately. This is the correct consistency before the dry ingredients go in.

Switch to the silicone spatula. Add the all-purpose flour (63g), Dutch-process cocoa powder (12g), and fine sea salt (¼ tsp) to the bowl. Fold gently — do not whisk from this point forward. Count your strokes: 15–18 slow folds is all this batter needs. Stop the moment the last streak of flour disappears. The batter will look dense and very dark.
🗒 Luna’s Note: Dutch-process cocoa is not interchangeable with natural cocoa in this recipe. Dutch-process is neutralized — it does not react with baking soda, which this brownie batter does not contain. Natural cocoa is acidic and would react with the residual alkalinity of the Dutch-process in ways that change both the rise and the flavor. Use Dutch-process here specifically.
The finished brownie batter should look very dark, thick, and glossy — almost like a soft ganache before it sets. If it looks grainy or dull, the chocolate overheated at some point. The batter will still bake, but the texture will be slightly less fudgy.
Step 6 — Layer and Bake
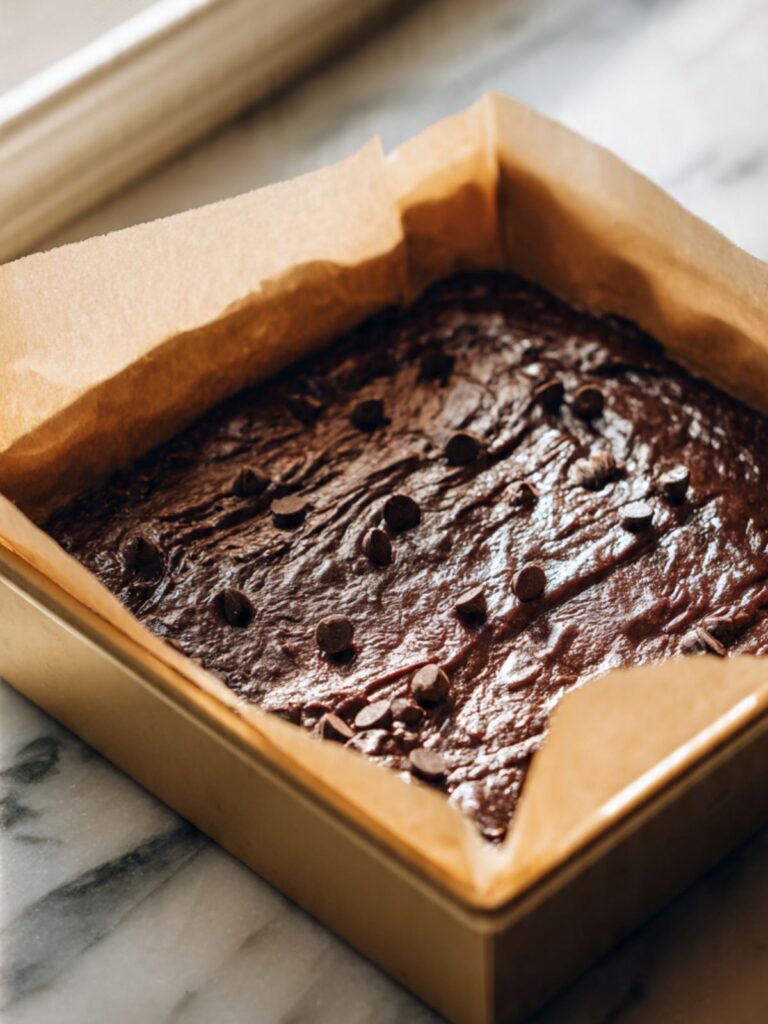
Pour the brownie batter directly over the par-baked cookie base. Use the silicone spatula to spread it in an even layer that reaches all four edges. Work quickly but gently — you are not pressing the batter into the cookie base, just floating it on top. The weight of the batter will settle it into contact with the cookie layer on its own.
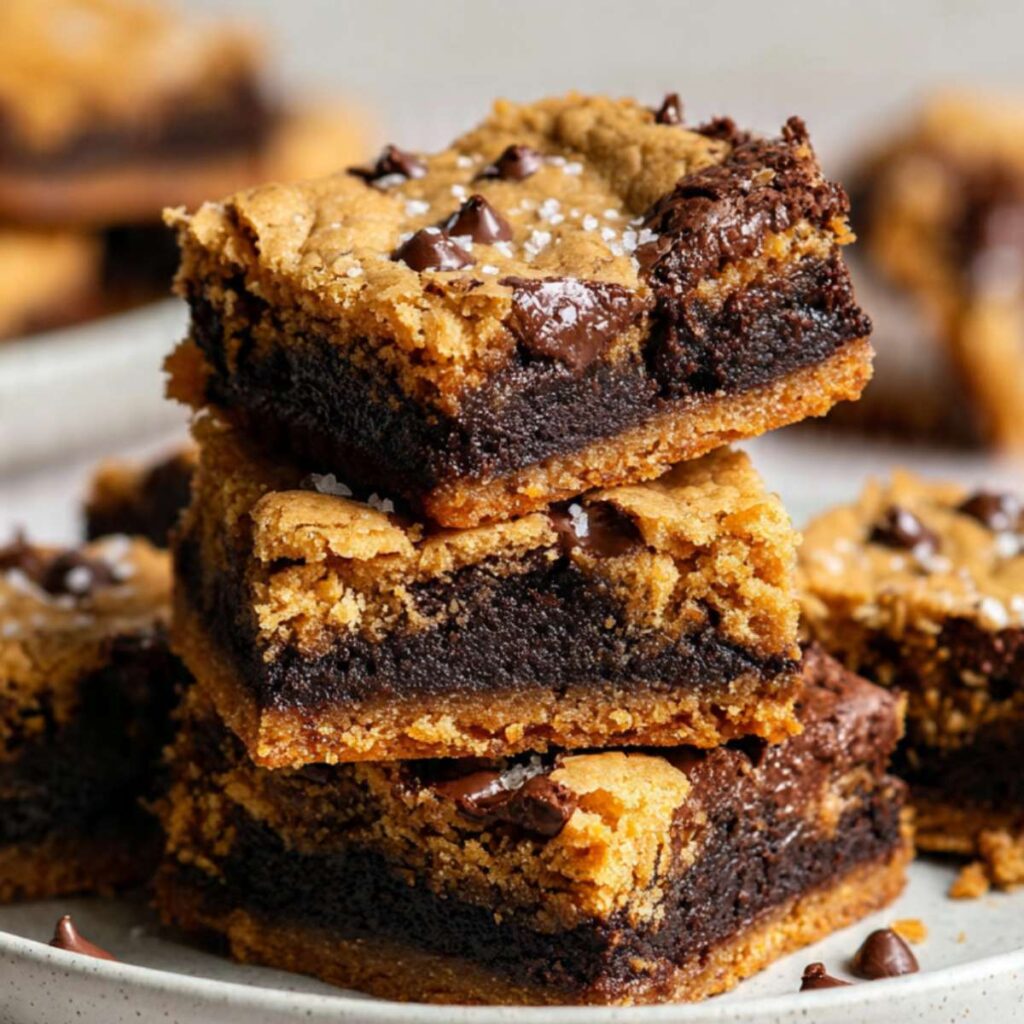
As you can see in the close-up cross-section photos, the two layers should remain visually distinct after baking — the golden cookie base beneath and the dark brownie layer above. If the brownie batter is worked into the cookie layer rather than floated on top, the layers merge and the clean separation is lost.
Scatter a small handful of extra semi-sweet chocolate chips over the top of the brownie batter. Press them in very lightly — just enough that they sit in the surface rather than rolling off. These are the chips visible sitting proud on the top surface in the photos.
Slide the pan back into the oven at 350°F (175°C) and bake for 28–32 minutes. Start checking at 28 minutes.
Baker's Warning: Do not pull these bars based on the top surface alone — the brownie layer will look set and the top will feel firm to a light touch well before the center is done. Insert a toothpick into the center: it should come out with moist, fudgy crumbs attached, not wet batter, and not clean. A clean toothpick means overbaked. Wet batter means underbaked. Moist crumbs is the target.
At the correct pull point, the edges will look fully set and slightly pulling away from the pan sides, the top surface will show that thin crackled brownie skin visible in the photos, and the center will feel just barely set when you press it gently with your fingertip — it should give slightly but not feel liquid underneath.
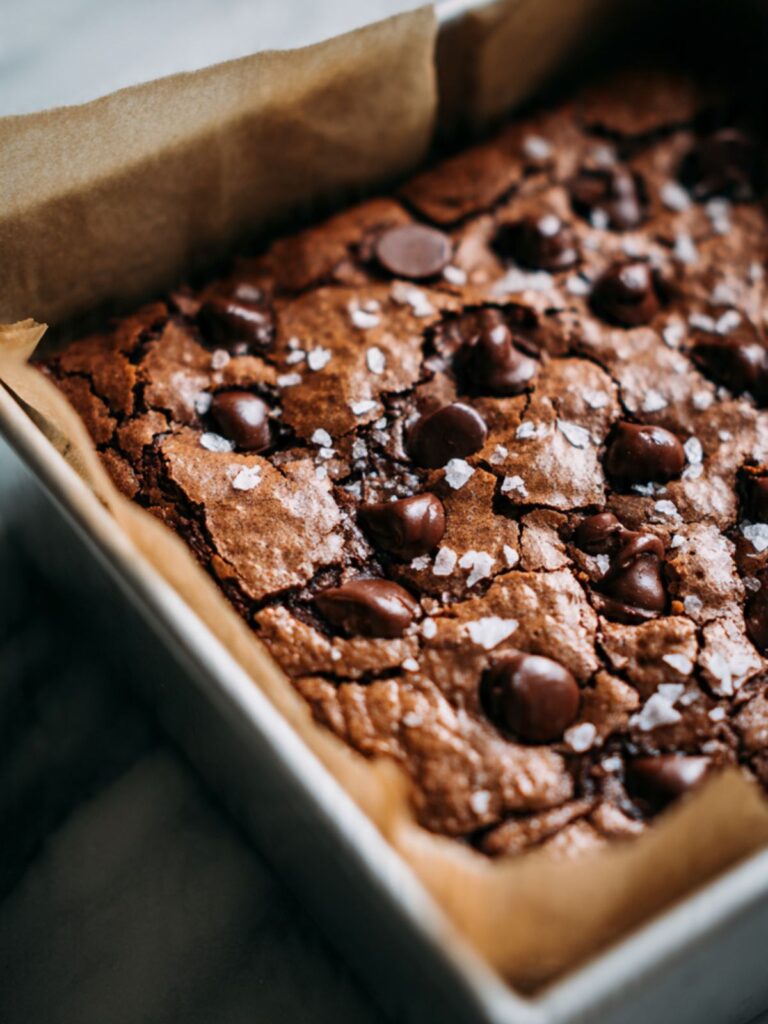
Scatter the flaked sea salt over the top immediately after pulling the pan from the oven while the surface is still warm and slightly tacky. The salt adheres to the warm surface — if you wait until it cools, the salt will not stick.
Step 7 — Cool, Cut, and Portion
Set the pan on a wire rack immediately after pulling from the oven. Do not move it, do not cover it, do not refrigerate it yet. Cool at room temperature for a minimum of 2 hours.
The brownie layer continues to cook via carryover heat after the pan comes out of the oven — residual heat stored in the pan and in the batter itself continues to raise the internal temperature for several minutes after baking ends. The starch gelatinization that gives the brownie layer its fudgy, cohesive structure is still completing during the first 30–45 minutes of cooling. The fat is still in a semi-liquid state for up to 90 minutes. Cutting before 2 hours interrupts both processes simultaneously.
Baker's Warning: Do not cut the bars before the full 2-hour cooling time. The brownie center is still setting as it cools — the center will be molten underneath the set surface for at least 90 minutes after the pan comes out of the oven. Cutting early causes the centers to collapse into a gummy, underdone mess that will not hold its shape at the knife and will not look like the bars in the photos.
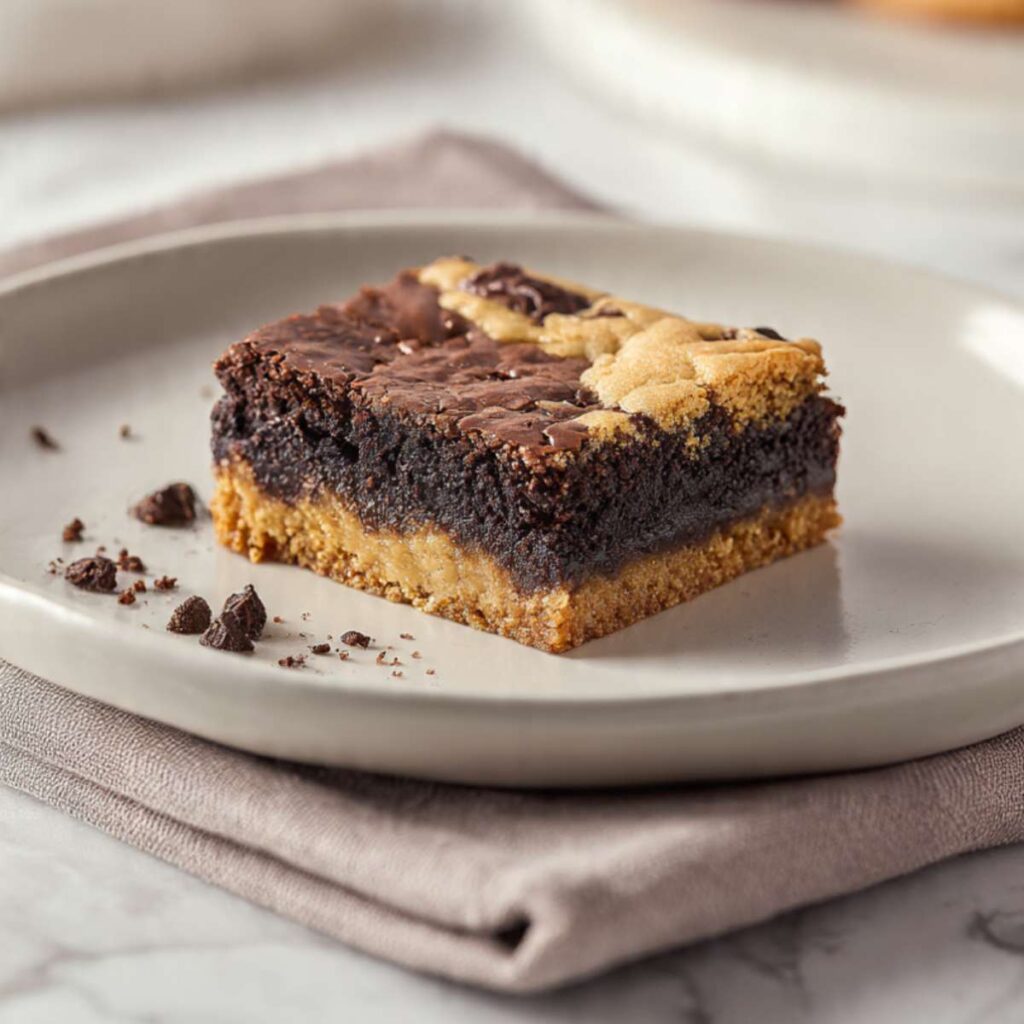
After 2 hours at room temperature, the bars can be cut for a fudgy, slightly soft result. For the cleanest edges — exactly the sharp two-layer profile visible in the single-bar photo showing the distinct golden cookie base and dark brownie top — refrigerate the pan for an additional 30 minutes after the room temperature cooling period, then cut cold.
Use the parchment overhang to lift the entire slab out of the pan and onto a cutting board. Use a sharp knife wiped clean with a damp cloth between each cut. Cut into 16 equal bars: 4 cuts across, 4 cuts down, at 2.25 inch (5.7cm) intervals. Each bar weighs approximately 65–70g. Weigh the first cut bar on your kitchen scale — if it lands significantly above or below this range, adjust your cut spacing before completing the remaining cuts.
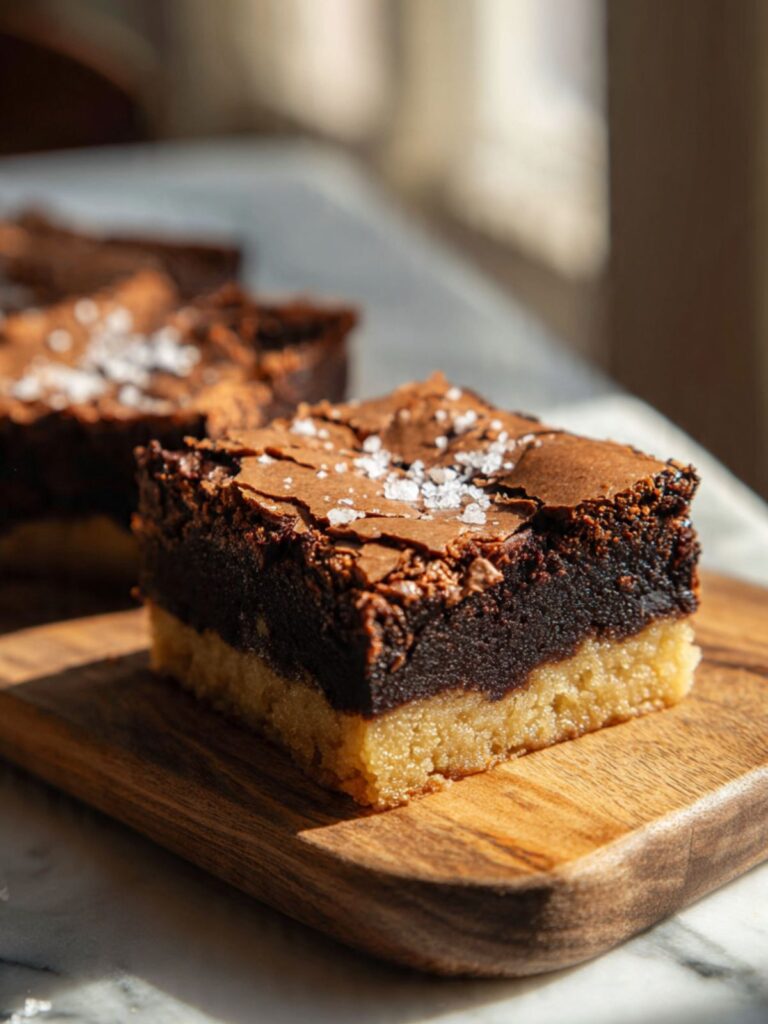
The finished bars should look exactly like the stacked photos — a defined golden cookie base layer approximately 40% of the total bar height, a dark fudgy brownie layer occupying the top 60%, chocolate chips visible in both layers, and flaked sea salt sitting on the crackled brownie surface.
Your bars are ready to serve or store.
The Science Behind the Perfect Brookie
Why the Cookie Base Needs a Head Start
The two components in this recipe bake at different rates, and understanding why tells you exactly what goes wrong when you skip the par-bake step.
Cookie dough is a relatively dense, low-moisture mixture. It needs direct pan heat and consistent oven temperature to set its structure — the proteins in the egg coagulate, the starches gelatinize, and the butter fat sets into a stable matrix. That process takes time, and it relies heavily on heat conducted upward from the pan itself.
Brownie batter is the opposite in almost every relevant way. It is wetter, higher in fat, and lower in flour. It acts as an insulating blanket over anything underneath it. The moment brownie batter covers raw cookie dough, the dough beneath is no longer receiving direct oven heat from above — it is receiving conducted heat from the pan below and whatever radiates through the dense brownie layer. That is not enough to bake the cookie base fully in the same window of time the brownie layer needs.
The result, without the par-bake, is exactly what happened in my first three batches: a fully baked brownie sitting on top of a greasy, underdone cookie layer that never had the chance to set. Ten minutes of solo baking gives the cookie base enough structural integrity to finish alongside the brownie layer during the combined bake. The two layers meet in the middle at the same moment. That is what produces the clean separation visible in the cross-section photos — not two merged batters, but two distinct textures that baked to completion at the same time.
🗒 Luna’s Note: If you want to understand whether your cookie base par-baked correctly, look at the edges when you pull the pan at 10 minutes. Set edges with no color yet in the center means you are exactly where you should be. Browning edges at 10 minutes means your oven runs hot and you need to reduce the temperature by 15°F (8°C) before the brownie layer goes on. You can also find more on achieving the right cookie base texture in my chocolate chip cookie bars article, which covers the one-bowl cookie base method in full detail.
The Crackled Brownie Top — What Creates It
That thin, shiny, crackled skin on the brownie surface is one of the most recognizable visual markers of a well-made fudgy brownie. It is not decorative. It is a direct result of a specific chemical sequence that either happens or does not happen depending on how you handle the eggs and sugar.
When granulated sugar and eggs are whisked together vigorously before the flour goes in, two things happen simultaneously. First, the sugar begins to dissolve into the moisture from the eggs, forming a saturated solution that rises to the surface of the batter during baking. Second, the mechanical action of whisking incorporates a small amount of air into the egg-sugar mixture — not enough to make the batter cakey, but enough to create a slightly aerated surface layer that sets faster than the dense interior below it.
In the oven, that surface layer dries out ahead of the center. As the brownie rises slightly and then settles during baking, the dry surface skin cracks. The result is the crackled, slightly glossy top visible in every photo. It is entirely dependent on the whisking step in the brownie batter — specifically, the full 45 seconds of whisking after both eggs are added. Cut that step short and the surface will bake up matte and flat. The interior will still be fudgy, but the visual marker will be missing.
This is also why Dutch-process cocoa matters here. Natural cocoa is acidic and reacts with residual alkaline compounds in the batter. That reaction produces additional CO2 during baking, which disrupts the even rise-and-settle sequence the crackled top depends on. Dutch-process cocoa is neutralized — it contributes deep chocolate flavor and color without interfering with the surface chemistry that produces the crackle.
How Fat Controls the Fudgy vs. Cakey Spectrum
Every brownie exists somewhere on a spectrum between fudgy and cakey. The position on that spectrum is almost entirely controlled by the fat-to-flour ratio and the number of eggs relative to the total batter volume.
Fudgy brownies are high-fat, low-flour. In this recipe, the brownie layer contains 113g of butter plus 113g of bittersweet chocolate — both are significant fat sources — against only 63g of flour. That ratio produces a dense, moist interior with very little air structure. When the brownie cools, the fat sets into a firm but yielding matrix rather than a crumb structure. This is why the cross-section in the photos looks dense and almost glossy at the cut edge rather than open and porous.
Cakey brownies have more flour and often more eggs. The additional flour builds more gluten structure, and the additional eggs provide more protein scaffolding — the result is a lighter, more cake-like crumb that holds air rather than fat. If you added another 30g of flour to this brownie layer, you would shift it noticeably toward cakey. If you added a third egg, the same would happen.
The two large eggs in this recipe are at the correct count for the fat and flour ratio. They provide just enough protein structure to hold the brownie together when cut without adding enough to create air pockets in the crumb. Starch gelatinization during baking fills in the remaining structure — the flour starches absorb moisture and swell, creating the soft but coherent body of the fudgy interior. Pull the pan at moist crumbs on the toothpick, and the starch gelatinization is complete while the fat is still fluid enough to keep everything dense and moist. Wait until the toothpick comes out clean and you have overbaked past the fudgy window entirely.
Brookie Recipe Troubleshooting & Pro-Tips
Common Mistakes
The wrong chocolate or cocoa type produced a matte brownie top and a texture that is too cakey or too dense
Symptom: The brownie layer baked up with a flat, matte surface rather than the thin crackled shiny skin visible in the photos. Or the texture is noticeably less fudgy than expected — either cakey and airy, or grainy and dull rather than smooth and dense.
Cause: Two ingredient substitutions cause this. First: using natural cocoa powder instead of Dutch-process cocoa. Natural cocoa is acidic — it reacts with residual compounds in the batter and produces additional CO2 during baking, which disrupts the even rise-and-settle sequence that creates the crackled top and pushes the texture toward cakey. Second: using chocolate chips instead of a finely chopped bittersweet chocolate bar in the brownie layer. Chips contain stabilizers (specifically polyglycerol polyricinoleate or added lecithin) that prevent them from melting fully and evenly. Partially melted chips produce a grainy, uneven fat distribution in the batter — the fudgy texture depends on fully melted, evenly distributed fat from bar chocolate.
Fix: There is no fix for the wrong cocoa type once baked. If you used chocolate chips and the batter looked grainy before baking, the bars will still be edible but the interior will be slightly less smooth and dense than shown in the photos.
Prevention: Use Dutch-process cocoa powder specifically — it is labeled on the package. Brands such as Cacao Barry Extra Brute, Droste, or King Arthur Dutch-process are reliable. Use a finely chopped bittersweet chocolate bar (60–70% cacao) for the brownie layer — Ghirardelli, Lindt, or Guittard bittersweet bars all work. Chop the bar into pieces no larger than ½ inch (1.3cm) so they melt evenly and quickly without overheating.
The wrong pan produced overbaked edges and an underdone center
Symptom: The edges of the bars are dry, crumbly, and darker than the bars shown in the photos, while the center is still underdone and gummy when cut.
Cause: A dark non-stick pan absorbs significantly more radiant heat than a light-colored aluminum pan. The edges, which sit closest to the dark pan walls, overbake before the center reaches temperature. Glass and ceramic pans have the opposite problem — they retain heat and conduct it unevenly, producing hot spots at the base that overbrown the cookie layer while the top center stays underdone.
Fix: If the bars are already baked with overbaked edges, trim the edges before serving — the center bars will still be usable. Tent the pan loosely with foil for the last 8–10 minutes of baking next time if using a dark pan.
Prevention: Use a light-colored aluminum pan. If using a glass or ceramic pan, reduce the oven temperature by 25°F (15°C) and add 3–5 minutes to the bake time. Always use an oven thermometer to confirm actual oven temperature regardless of pan type.
The cookie base is greasy and underdone even after the full bake time
Symptom: When you cut the bars, the cookie base layer looks pale, dense, and slightly greasy — it does not have the golden, slightly set texture visible in the photos. It may feel raw or doughy at the center even after the brownie layer has baked through completely.
Cause: The most common cause is skipping or shortening the par-bake step. Without 10 minutes of solo baking, the cookie base never reaches the temperature needed to set its structure before the brownie batter covers it and acts as an insulating layer. The second cause is butter that was still warm when added to the dough — hot melted butter partially melts the sugar before mixing and produces a greasy rather than cohesive dough.
Fix: If the bars are already baked and the cookie base is visibly underdone, return the cut bars to a 325°F (163°C) oven on a parchment-lined baking sheet for 8–10 minutes. This will not fully rescue the texture but will reduce the raw quality significantly.
Prevention: Always par-bake the cookie base for the full 10 minutes before adding the brownie batter. Cool the melted cookie base butter until the bottom of the bowl feels neutral or slightly cool before adding it to the dough.
The brownie layer baked up cakey instead of fudgy
Symptom: The brownie layer has an open, airy crumb when cut — it looks more like a chocolate cake layer than the dense, fudgy interior visible in the cross-section photos. It may have risen significantly and then sunk slightly in the center.
Cause: The two most common causes are overbaking and over-whisking after the flour goes in. Overbaking drives out the residual moisture that keeps the brownie dense — the fat sets too firmly and the interior dries out. Over-whisking after the flour is added develops gluten and incorporates excess air, both of which push the texture toward cakey. A third cause is using natural cocoa powder instead of Dutch-process — the acid in natural cocoa reacts with residual compounds in the batter and produces additional lift.
Fix: There is no fix for an already-baked cakey brownie layer. It is still edible — it is simply a different result than intended.
Prevention: Pull the pan at moist crumbs on the toothpick — never at a clean toothpick. Stop folding the brownie batter the moment the last flour streak disappears — 15 to 18 strokes maximum. Use Dutch-process cocoa powder specifically, not natural cocoa.
The two layers merged and there is no visible separation when cut
Symptom: When you cut the bars, the cookie base and brownie layer look blended together rather than distinct. There is no clean visual boundary between the golden cookie layer and the dark brownie layer.
Cause: The brownie batter was worked into the cookie base rather than floated on top of it. This happens when the spatula is pressed down into the cookie layer while spreading the brownie batter, or when the cookie base was not par-baked and was still raw and soft when the brownie batter went on — a raw dough surface cannot resist the weight and movement of the batter being spread over it.
Fix: None once baked — the layers cannot be separated. The flavor will still be correct, but the visual result will not match the photos.
Prevention: Pour the brownie batter onto the center of the par-baked cookie base and use the spatula to push it gently toward the edges using surface-only strokes — never press the spatula into the cookie layer. The batter will self-level. Let gravity do most of the work.
The top surface is matte and flat with no crackle
Symptom: The finished brownie top looks smooth and dull rather than showing the thin crackled, slightly shiny skin visible in the photos.
Cause: The egg and sugar mixture was not whisked for long enough before the flour was added. The crackled top forms when the sugar-egg surface layer dries and cracks during baking — this only happens when the eggs and sugar are properly emulsified and slightly aerated first. Under-whisking produces a denser surface layer that dries more slowly and does not crack in the same way.
Fix: None for the current batch. The bars will still taste correct.
Prevention: After adding both eggs, whisk the brownie batter for a full 45 seconds without stopping. The mixture should look slightly thickened and ribbony when you lift the whisk before the dry ingredients go in. Do not rush this step.
The bars crumbled when cut and would not hold their shape
Symptom: When the knife goes through the bars, the layers crumble and separate rather than cutting cleanly. The center may still look wet or gummy.
Cause: Almost always cutting too early. The brownie layer continues to set as it cools — the fat and starch structure that holds the bar together is still fluid for up to 90 minutes after the pan comes out of the oven. A second cause is skipping the refrigerator step before cutting — room temperature bars cut with more crumbling than cold bars.
Fix: Press crumbled pieces back together firmly and refrigerate for 1 hour — cold bars will hold together better. Serve them as rough squares rather than clean-cut bars.
Prevention: Cool at room temperature for the full 2 hours. For the cleanest cuts matching the photos, refrigerate for an additional 30 minutes after room temperature cooling. Wipe the knife clean with a damp cloth between every cut.
Leavening failure in the cookie base
Symptom: The cookie base layer looks completely flat and very dense with no rise at all — it may also taste slightly metallic or soapy.
Cause: Expired baking soda that has lost its potency produces no lift. A metallic or soapy taste means too much baking soda was used, or the baking soda did not have enough acid to react with fully — in this dough, the brown sugar provides the acid for activation.
Fix: None for the current batch.
Prevention: Test baking soda freshness before every use — drop ½ tsp (3g) into a small bowl of hot water with a splash of white vinegar. Aggressive bubbling within 2 seconds means it is active. Measure baking soda precisely — do not estimate.
High altitude and humidity adjustments
High humidity (above 70% relative humidity): The cookie base dough may feel stickier than expected and the brownie layer may take 3–5 additional minutes to set on the surface. If the top still looks wet at 32 minutes, continue baking in 2-minute increments and check the toothpick each time. Store finished bars in a lidded container — exposed bars will absorb ambient moisture and the cookie base will soften significantly within a few hours.
High altitude (above 3,500 feet / 1,067 meters): Reduce the baking soda in the cookie base from ½ tsp to ¼ tsp. Increase the flour in the cookie base by 1 tablespoon (8g). Increase oven temperature by 15°F (8°C) to 365°F (185°C). The brownie layer requires no adjustment — it contains no leavening and the additional oven temperature will not significantly affect the fudgy texture if you pull at moist crumbs.
Expert Pro-Tips
Press extra chips into the brownie batter immediately before the pan goes back into the oven. Chips folded into the brownie batter sink and get buried as the batter bakes. The chips visible sitting proud on the surface in the photos were placed there after the batter was spread — press them in just enough to anchor them. This takes 30 seconds and is the difference between a finished bar that looks intentional and one that looks plain on top.
Use a ruler to score the slab before cutting. A 9×9 inch (23x23cm) slab divided into 16 bars means four cuts in each direction at 2.25 inch (5.7cm) intervals. Mark the cuts lightly with the tip of your knife before committing — once the knife goes through the brownie layer, the cut cannot be moved. Uneven bars are the single most common visual problem in cut bar photography.
Refrigerate the slab before cutting for the cleanest edges. The bars shown in the single-bar photo were cut cold. Room temperature bars cut with a slightly compressed edge — the brownie layer compresses under the knife before it cuts through. Cold bars cut with a clean vertical edge that shows both layers distinctly. 30 minutes in the refrigerator after the 2-hour room temperature cool is all it takes.
How to Store Brookies
Room Temperature
Store cut bars in a lidded hard-sided container with a sheet of unbleached parchment paper between each layer. Room temperature storage is fine for up to 3 days. Do not use zip-lock bags — the bars will compress under their own weight and the cookie base layer will flatten and lose its texture. Do not stack more than two layers deep in the container.
The bars improve between Day 1 and Day 2. On Day 1, the brownie layer is still slightly firm from the refrigerator cut and the flavors have not fully melded. By Day 2, the brownie layer has relaxed to its natural fudgy consistency and the chocolate flavor deepens noticeably — the bittersweet chocolate and the brown sugar in the cookie base come into balance in a way they do not on the day of baking. Day 3 is still good. Day 4 the cookie base begins to dry out at the edges.
Keep the container away from direct sunlight and heat sources. In a warm kitchen above 75°F (24°C), the brownie layer will soften significantly and the bars may become difficult to handle without breaking — move them to the refrigerator in this case.
Refrigerator
Refrigeration is recommended if your kitchen runs warm, if you live in a humid climate, or if you are storing the bars beyond Day 3. Store in a lidded hard-sided container with parchment between layers. Remove from the refrigerator 20–30 minutes before serving — cold bars straight from the fridge have a firmer, less yielding brownie layer that muffles the fudgy quality these bars are known for. Room temperature brings the fat back to its natural soft state and restores the texture.
Do not store uncovered in the refrigerator — exposed bars absorb ambient fridge odors and the cookie base dries out within 24 hours.
Refrigerated bars keep well for up to 5 days with no meaningful texture loss if stored correctly.
Freezer — Baked
Brookie bars freeze well. Wrap each cut bar individually in a layer of plastic wrap, then place the wrapped bars in a zip-lock freezer bag with as much air removed as possible. Freeze for up to 2 months.
To thaw: remove bars from the freezer bag but leave them in the plastic wrap. Thaw at room temperature for 1.5–2 hours. Do not microwave from frozen — the cookie base layer heats unevenly and the brownie layer can become rubbery at the edges while the center is still cold. Once thawed, the texture is nearly identical to fresh — the brownie layer returns to its fudgy state and the cookie base holds its structure well through the freeze-thaw cycle.
🗒 Luna’s Note: I freeze these in individual portions specifically so I can pull one at a time. A single bar thaws in about 90 minutes on the counter. Knowing that is there has saved more than one Tuesday night.
Freezer — Unbaked
The cookie dough base can be made ahead and frozen unbaked. Press the dough into the parchment-lined pan, cover tightly with plastic wrap, and freeze for up to 1 month. When ready to bake, thaw the dough in the pan in the refrigerator overnight. Make the brownie batter fresh on baking day — do not freeze the brownie batter separately, as the eggs do not survive the freeze-thaw cycle with the same emulsification and the crackled top will not form correctly.
Par-bake the thawed cookie base as directed — add 2–3 minutes to the par-bake time since the dough will be cold from the refrigerator. Proceed with the recipe from Step 4.
Serving Suggestion
Serve these bars at room temperature — pulled from the refrigerator at least 20 minutes before serving if they have been stored cold. The brownie layer needs that time to return to its natural texture. A cold brookie bar straight from the fridge has a firmer, more compressed brownie layer that muffles the fudgy quality these bars are known for. Room temperature brings the fat back to its natural soft state and restores the texture you see in the photos.
These are better on Day 2 than Day 1. On the day of baking, the brownie layer is still slightly firm and the two flavors — the bittersweet chocolate and the brown sugar cookie base — have not fully settled against each other. By the following day, the brownie layer has relaxed to its deepest fudgy state and the flavors have balanced in a way that does not happen fresh. If you can make these the day before serving and refrigerate overnight uncut, do it. Cut them cold on the day of serving and they will look exactly like the photos.
I serve these with a strong black coffee, no sugar. The bitterness cuts directly through the sweetness of the brownie layer in a way that milk or a sweet drink does not — it makes the chocolate taste more like chocolate and less like sugar. A glass of cold whole milk works for exactly the opposite reason — the fat coats the palate and makes the whole bar taste richer.
This is the recipe I make when someone asks me to bring something and I want them to remember what I brought. It travels well in the lidded container, it cuts cleanly when cold, and it looks exactly like what it is — two things at once, done correctly. The one honest limitation: this is not a same-day recipe if you want clean results. The 2-hour cooling time is non-negotiable, and the 30-minute refrigerator rest before cutting adds another half hour. Build in 3 hours from the time the pan comes out of the oven to when you are cutting and serving.
Frequently Asked Questions About Brookie Bars Recipe
Can I make brookie bars ahead of time?
Yes — these bars are genuinely better made a day ahead. Bake and cool completely, cut into bars, and store in a lidded hard-sided container with parchment between layers at room temperature or in the refrigerator. The brownie layer deepens in flavor overnight and the two layers settle into a more cohesive texture by Day 2 than they have on the day of baking. If making ahead for an event, bake the day before, refrigerate overnight uncut, and cut cold on the day of serving for the cleanest edges.
Can I use a brownie box mix for the brownie layer?
Partially. A box mix brownie batter will work in this recipe but will produce a different result than the photos show. Most box mix brownies are formulated for a cakey to moderately fudgy texture — they contain more leavening and a different fat ratio than this from-scratch batter, which means the crackled top skin is less likely to form and the interior will be less dense. If using a box mix, prepare it according to package directions, skip any add-ins, and pour it over the par-baked cookie base as directed. Bake time may vary by 3–5 minutes depending on the specific mix. The layer separation will still work — the par-bake step is what controls that, not the batter formula.
Why did my brookie bars come out cakey instead of fudgy?
The brownie layer bakes cakey when it is overbaked, over-mixed after the flour goes in, or made with natural cocoa powder instead of Dutch-process. The toothpick test is the most reliable guide here — pull the pan when the toothpick comes out with moist fudgy crumbs, not clean. A clean toothpick means the moisture that creates the fudgy texture has already baked out. Beyond the toothpick, check your cocoa powder — natural and Dutch-process are labeled differently but can look identical in the container. Dutch-process cocoa has a smoother, darker color and a less sharp smell than natural cocoa. If you are unsure which you have, smell both side by side — natural cocoa smells sharply acidic, Dutch-process does not.
Can I double this brookie recipe?
Yes, with adjustments. To double the recipe, multiply all ingredients by 2 except the baking soda in the cookie base — use ¾ tsp rather than 1 tsp total, not a full teaspoon, or the cookie base will taste faintly soapy. Bake in two separate 9×9 inch (23x23cm) pans rather than one larger pan — a 9×13 inch pan will produce bars that are thinner than shown in the photos and the layer ratio will be off. Bake time stays the same for both pans. Par-bake both cookie bases simultaneously on the same oven rack if they fit, or stagger them by 10 minutes if not.
How does altitude or humidity affect this brookie recipe?
At high altitude above 3,500 feet (1,067 meters), reduce the baking soda in the cookie base to ¼ tsp and increase the cookie base flour by 1 tablespoon (8g). Increase oven temperature to 365°F (185°C). The brownie layer needs no adjustment since it contains no leavening — pull it at moist crumbs on the toothpick as usual, which may happen 2–3 minutes earlier at altitude since leavening gases expand faster and the bake runs slightly ahead. In high humidity above 70% relative humidity, the brownie surface may take longer to form its crackled skin and the bars will soften faster in storage. Refrigerate within 24 hours in humid conditions and bring to room temperature before serving.
Can I swap the bittersweet chocolate for cocoa powder only in the brownie layer?
Partially — but the texture will shift. The bittersweet chocolate bar contributes both cocoa solids and cocoa butter to the brownie layer. Cocoa butter is a fat — removing it and replacing with cocoa powder alone reduces the total fat in the batter, which pushes the texture away from fudgy and toward cakey. If you need to substitute, replace the 4 oz (113g) of chopped chocolate with 3 tablespoons (18g) of additional Dutch-process cocoa powder and add 2 tablespoons (28g) of additional unsalted butter to compensate for the lost fat. The result will be slightly less rich and dense than the bars in the photos but will still be a recognizable fudgy brownie layer. For the closest result to the photos, use chopped bar chocolate as written. You can read more about how chocolate type affects brownie texture in my chocolate chip cookie brownies article.
How do I know when the brookie bars are fully baked?
The toothpick test is the most reliable method — insert it into the center of the pan and look for moist fudgy crumbs on the toothpick, not wet batter and not a clean toothpick. Beyond the toothpick, look for three simultaneous visual cues: the edges pulling slightly away from the pan sides, the top surface showing the thin crackled brownie skin visible in the photos, and the center giving slightly but not feeling liquid when pressed very gently with one fingertip. All three cues together at 28–32 minutes at 350°F (175°C) means the bars are ready. If only one or two cues are present, give the pan another 2 minutes and check again. Carryover cooking after the pan comes out of the oven will finish the center — do not wait for the center to feel fully firm in the oven.
Can I add mix-ins to either layer?
Yes, with limits. The cookie base can take up to ¼ cup (40g) of additional mix-ins beyond the chocolate chips already in the recipe — chopped walnuts, pecans, or white chocolate chips all work. Do not exceed this amount or the dough becomes too heavy to press into an even layer. The brownie layer is more sensitive — the fat-to-flour ratio is precisely balanced for the fudgy result shown in the photos. Adding nuts or chips to the brownie batter is fine in small amounts (up to ¼ cup / 40g), but adding anything that introduces additional moisture (fruit, caramel pieces) will throw off the set and produce a gummy center. Stick to dry mix-ins only in the brownie layer.
More Bars You’ll Love
- Salted Caramel Chocolate Chip Cookie Bars — a layered bar with a buttery cookie base and a salted caramel ribbon baked into the center
- Peanut Butter Chocolate Chip Bars — a dense, fudgy peanut butter bar with semi-sweet chocolate chips throughout and a flaked salt finish
Brookie Recipe
Ingredients
Equipment
Method
- Step 1: Preheat oven to 350°F (175°C) with rack in the middle position. Line a 9×9 inch (23x23cm) light-colored aluminum pan with parchment paper leaving 2-inch overhang on two opposite sides.
- Step 2: In a medium bowl, whisk melted cooled butter, brown sugar, and granulated sugar until smooth and glossy, about 60 seconds. Add room temperature egg and vanilla and whisk 30 seconds until slightly thickened. Add flour, baking soda, and salt and fold with a silicone spatula until no dry streaks remain — do not overmix. Fold in chocolate chips. Press dough evenly into prepared pan.
- Step 3: Bake cookie base alone for exactly 10 minutes until edges are just set and pale golden. Remove from oven and set on wire rack. Leave oven on at 350°F (175°C).
- Step 4: Melt butter and chopped bittersweet chocolate together in a saucepan over low heat, stirring constantly, until smooth. Transfer to a medium bowl and cool until the mixture reaches below 90°F (32°C), about 8–10 minutes.
- Step 5: Whisk granulated sugar into cooled chocolate mixture. Add eggs one at a time, whisking well after each. Add vanilla with the second egg. Whisk for a full 45 seconds after both eggs are in until batter looks thick and ribbony. Fold in flour, Dutch-process cocoa, and salt with a silicone spatula in 15–18 slow strokes until just combined.
- Step 6: Pour brownie batter over par-baked cookie base and spread gently to edges using surface-only spatula strokes — do not press into the cookie layer. Scatter extra chocolate chips on top and press lightly to anchor. Bake at 350°F (175°C) for 28–32 minutes until edges are set, top shows crackled brownie skin, and toothpick inserted in center comes out with moist fudgy crumbs. Immediately scatter flaked sea salt over the top.
- Step 7: Cool in pan on wire rack for minimum 2 hours at room temperature. For cleanest cuts, refrigerate 30 additional minutes after cooling. Lift slab out using parchment overhang, cut into 16 bars with a sharp knife wiped clean between each cut.