Blueberry Dump Cake Recipe
The first time I made this, I did not believe the method was real.
Dump the fruit in the pan. Dump the dry cake mix on top. Lay cold butter slices across the surface. Walk away. That is the entire recipe — no creaming, no folding, no batter to assess. I kept waiting for the step where I was supposed to actually do something. There is no such step.
The texture promise itself is strong — however the lemon zest description at the end pivots to garnish advice rather than staying on the texture promise. Trim and tighten:
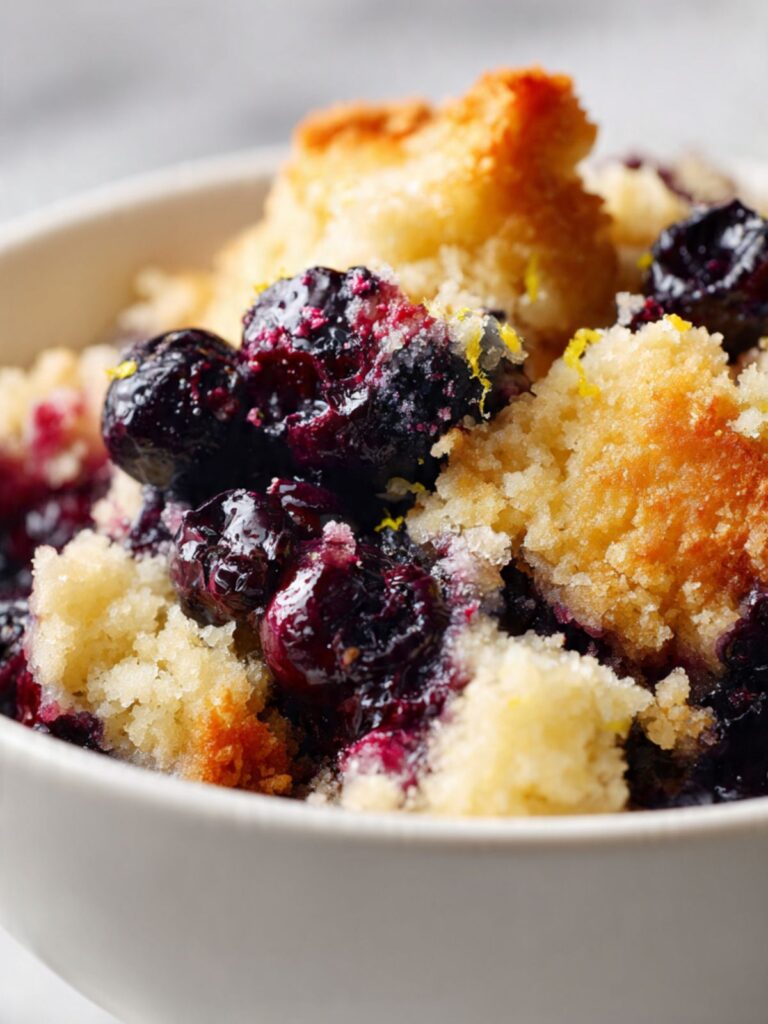
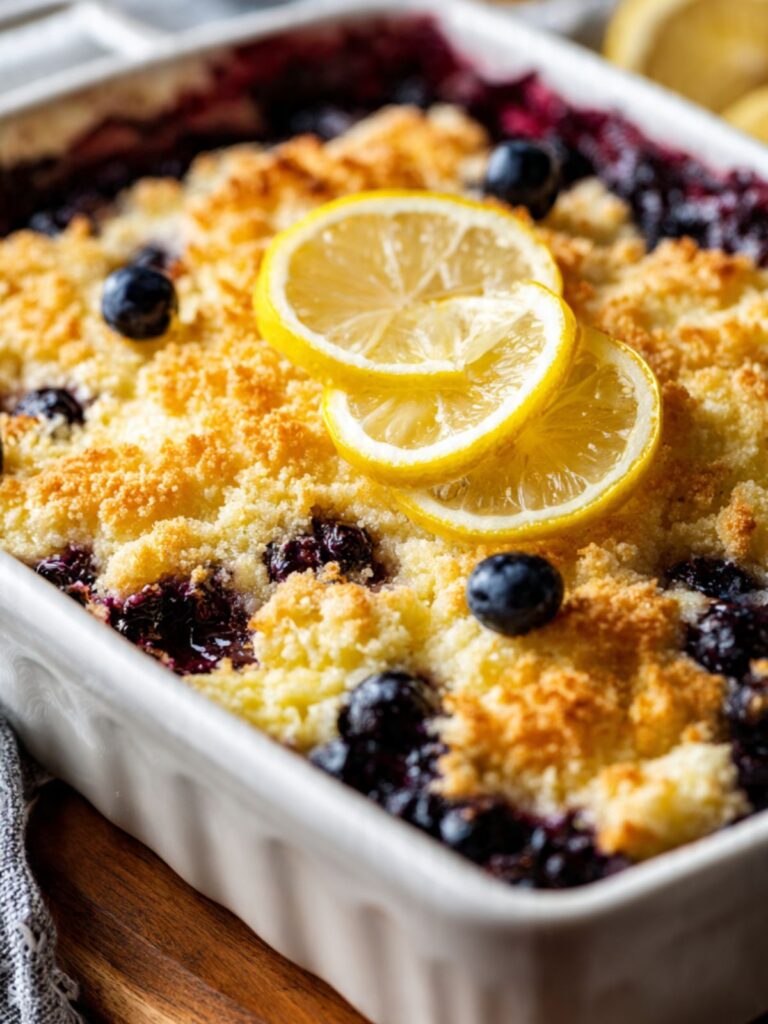
What comes out of the oven is a blueberry cobbler dump cake — deep-dish, pebbled golden-amber topping that shatters when you press a spoon into it, giving way to a thick, jammy blueberry filling underneath that moves like warm lava when you scoop it. The lemon brightens the filling from inside and the lemon zest scattered on top at the end — those bright yellow curls you can see in every photo — is the visual and flavor finish that makes this recipe look and taste like it took far more effort than it did.
🗒 Luna’s Note: I make this when someone asks me to bring a dessert and I have twenty minutes. The dish goes into the oven and I go get ready. Every time, someone at the table asks me for the recipe. I tell them it is three ingredients and they do not believe me.
I tested three versions of the blueberry base: fresh only, frozen only, and an equal mix of both. The fresh version had the best texture — the berries held their shape slightly at the edges of the pan while bursting completely in the center, giving you two textures in one bite. The frozen-only version released significantly more liquid during baking, which thinned the filling unless I added an extra half-tablespoon of cornstarch. The mixed version landed between both results. I landed on fresh for the recipe, with clear instructions for frozen below.
One thing I changed from the version I started with: I toss the blueberries with lemon juice, a small amount of sugar, and cornstarch before they go into the pan. Most dump cake recipes skip this entirely. I do not skip it. The cornstarch controls how the blueberry juice thickens during baking — without it, the filling stays watery and the topping sinks into liquid instead of forming a crust above it. The lemon juice brightens the flavor of the fruit before it even sees heat. Those two steps take thirty seconds and they are why this recipe looks and tastes like it does in the photos above.
This is the recipe I make when I need something to work on the first try and I do not have patience for anything that might not.
No chilling required. No mixer. One bowl to make the filling, and the rest comes together in the baking dish. Total hands-on time is under ten minutes. The oven does everything after that.
| Prep Time | Cook Time | Total Time | Yield | Difficulty |
|---|---|---|---|---|
| 10 min | 45–50 min | 55–60 min | 12 servings | Easy |
| Calories | Fat | Carbs | Sugar | Protein | Sodium |
|---|---|---|---|---|---|
| ~248 kcal | ~7g | ~100g | ~34g | ~6g | ~268mg |
Macros are approximate and will vary based on ingredient brands and serving size.
Ingredients & Tools for Blueberry Dump Cake Recipe
For the Blueberry Filling
- 5 cups (600g) fresh blueberries — standard size, rinsed and dried thoroughly. Do not use blueberries straight from a wet colander — surface moisture prevents the cornstarch from adhering and the filling will be watery. See frozen note in Before You Start.
- 3 tablespoons (38g) granulated white sugar — plain white granulated cane sugar only. Brown sugar changes the color and flavor of the filling.
- 1 tablespoon (8g) cornstarch (also called cornflour outside the US) — this is what controls how the blueberry juice thickens during baking. Without it, the filling stays loose and the topping sinks into liquid rather than forming a crust above it. Do not substitute with flour — flour produces a starchy, cloudy filling.
- 2 tablespoons (30ml) fresh lemon juice — squeezed from approximately 1 medium lemon. Bottled lemon juice is flat and one-dimensional here; fresh juice is not optional.
- 1 teaspoon finely grated lemon zest (from approximately 1 medium lemon) — zest only, no white pith — this goes into the filling. The pith is bitter and will make the entire filling taste off. Use a microplane or the fine holes of a box grater and stop as soon as the colored layer is gone.
- ¼ teaspoon fine sea salt — balances the sweetness of both the fruit and the cake mix topping.
For the Topping
- 1 box (15.25 oz / 432g) yellow cake mix, dry and unmixed — use the full box exactly as it comes. Do not add eggs, oil, or water — the cake mix goes on dry. Yellow cake mix produces the golden color visible in the photos. White cake mix works but produces a paler topping. Spice or lemon cake mix changes the flavor profile entirely.
- ½ cup (113g) cold unsalted butter — kept whole and cold until Step 4, where it is sliced directly from the fridge into ¼-inch rounds immediately before placing on the cake mix. Do not slice in advance and let it sit — warm or softened butter produces a flat, dense topping rather than the pebbled peaks shown in the photos.
For Garnish and Serving
- 1 teaspoon finely grated lemon zest (from approximately 1 medium lemon) — zest only, no white pith — added immediately after the pan comes out of the oven, before serving. This is a mandatory finish, not optional — the bright yellow curls against the dark purple filling are a visual lock from the photos.
- 2 thin lemon rounds, sliced from 1 fresh lemon — placed on top of the baked cake for presentation. Slice just before serving so they stay bright.
- ¼ cup (30g) fresh blueberries — a small handful scattered over the baked topping after it comes out of the oven. Post-bake only — these provide the visual contrast of plump, uncooked fruit against the set crust.
- Vanilla ice cream, for serving — one generous scoop per bowl. The cold ice cream against the warm filling is not a suggestion — it is what the recipe is designed to be served with.
Before You Start
Frozen blueberries: You can substitute frozen blueberries 1:1 by weight. Do not thaw them — use directly from frozen. Frozen blueberries release significantly more liquid during baking than fresh. If using frozen, increase the cornstarch from 1 tablespoon to 1½ tablespoons (12g) to account for the additional juice. Expect the filling to be slightly softer than the fresh version shown in the photos.
The butter must be cold. This is the single most important instruction in this recipe. Cold butter melts slowly during baking, which means different parts of the dry cake mix receive different amounts of fat at different times — this is what creates the pebbled, irregular topping texture. Pull the butter out of the fridge, slice it, and put it directly onto the cake mix. If it warms up on the counter while you are preparing the fruit layer, put it back in the fridge for five minutes before it goes on.
Lemon prep: Zest the lemons before you juice them — it is nearly impossible to do it in reverse. One medium lemon gives approximately 1 teaspoon of zest and 2 tablespoons of juice. You will need 2 teaspoons of zest total across the filling and garnish — have both ready before you begin.
Pan material matters: This recipe was tested in a white ceramic baking dish. Ceramic retains heat and produces an evenly baked, bubbly filling. If you use a glass dish, reduce the oven temperature by 25°F (15°C) — glass behaves similarly to ceramic but runs slightly cooler. Dark metal pans absorb too much heat and will overbrown the topping before the filling has time to bubble through. Light-colored aluminum pans work but produce a drier topping edge — ceramic or glass is preferred for this recipe.
Gram weight priority: For the most consistent results, weigh your blueberries and butter on a kitchen scale set to grams. The gram weights in this recipe are what I tested with — a full 5 cups of blueberries can vary by 50–80g depending on berry size and how loosely you pack the cup. Weight is the more reliable measure here.
No mixer needed. This entire recipe comes together with one large mixing bowl, a silicone spatula or spoon, and your hands for laying the butter. No electric mixer, no whisk, no special technique.
Oven position: Position your oven rack in the middle of the oven before preheating. Top rack will overbrown the topping before the filling bubbles. Bottom rack will underbake the topping and make the fruit filling boil too aggressively.
Oven accuracy: Most home ovens run 15–25°F (8–14°C) off the dial setting. If you have an oven thermometer, verify the actual temperature before the dish goes in. An oven running hot is the most common reason the topping burns before the filling is done.
Cake mix freshness: Check the best-by date on your box of yellow cake mix before you begin. Cake mix contains leavening agents that lose activity over time — an expired box produces a flat, pale topping that will not form the golden, pebbled crust shown in the photos above. If the box is within date but has been stored in a humid pantry, the dry mix may feel clumped rather than free-flowing — sift it lightly through your fingers over the dish to break up any clumps before spreading.
Necessary Tools
Required:
- 9×13 inch (23×33cm) ceramic or glass baking dish
- Large mixing bowl — for tossing the blueberry filling
- Silicone spatula or large spoon — for spreading and tossing
- Microplane or fine box grater — for lemon zest
- Citrus juicer or fork — for lemon juice
- Kitchen scale (strongly recommended — gram weights are more reliable than volume for blueberries and butter)
- Sharp knife and cutting board — for slicing the butter into rounds
- Wire cooling rack — for resting the dish after baking
- Serving spoon or large slotted spoon — the filling is fluid when hot and needs a deep spoon
Optional:
- Oven thermometer — recommended if your oven has a history of running hot or cold
- Small fine mesh sieve — for an optional powdered sugar dusting at serving
How to Make Blueberry Dump Cake
Step 1: Preheating the Oven and Preparing the Baking Dish
Position your oven rack in the middle slot and preheat to 350°F (175°C). Most home ovens take 15–20 minutes to reach a stable temperature — start preheating before you do anything else so the oven is fully ready when the dish goes in. If you have an oven thermometer, confirm the actual temperature now. An oven reading 375°F (190°C) on the dial but actually running at 400°F (205°C) will overbrown the topping in the first twenty minutes before the filling has a chance to bubble through.
This entire recipe uses the dump method — no mixing, no batter, no electric equipment at any point. Everything comes together with a large mixing bowl, a silicone spatula, and your hands for the butter placement step.
Lightly grease your 9×13 inch (23×33cm) ceramic or glass baking dish with a small amount of butter or non-stick spray — just enough to prevent the blueberry syrup from welding to the sides. You do not need parchment for this recipe. The filling scoops out with a spoon and no lifting or cutting is required.
The dish should feel completely dry on the inside after greasing — no visible pooling of fat at the corners. Set the prepared dish on the counter next to your mixing bowl so assembly moves in one direction.
⚠️ Baker’s Warning: Do not skip preheating. A cold oven start causes the butter to melt and pool before the dry cake mix can begin absorbing it — the topping will look greasy and flat instead of the pebbled, irregular crust visible in the pan photo above.
The oven is preheating and the dish is ready — now make the blueberry filling.
Step 2: Building the Blueberry Lemon Filling
In your large mixing bowl, combine your 5 cups (600g) fresh blueberries (rinsed and thoroughly dried), 3 tablespoons (38g) granulated white sugar, 1 tablespoon (8g) cornstarch, 2 tablespoons (30ml) fresh lemon juice, 1 teaspoon finely grated lemon zest, and ¼ teaspoon fine sea salt.
The cornstarch is doing two things here: it coats the outside of each berry, and it will absorb the juice released during baking and thicken it into the jammy, scoopable consistency visible in the overhead bowl photo above — where the deep purple blueberry syrup pools around the golden cake crumble — that deep purple, lava-like consistency does not happen without it. The lemon juice activates the fruit’s natural pectin slightly and brightens the flavor before the oven does its work.
Using your silicone spatula, fold the mixture together with slow, deliberate strokes — approximately 15 to 20 folds — until every berry is coated and no dry cornstarch is visible at the bottom of the bowl. Do not stir aggressively. You want the berries coated, not crushed.
The filling should look glossy and lightly coated — the sugar and cornstarch will be mostly dissolved into the lemon juice, clinging to the surface of the berries rather than sitting dry at the bottom of the bowl. If you see a white cornstarch layer at the bottom, fold 5 more times.
⚠️ Baker’s Warning: If your blueberries were still damp when you added the dry ingredients, the cornstarch will clump instead of coating evenly — you will see white paste spots rather than an even gloss. Pat the berries dry with a paper towel before mixing if there is any surface moisture.
Pour the filling into your prepared baking dish and spread it into an even layer using the spatula — edge to edge, roughly 1 inch (2.5cm) deep across the entire base.
Step 3: Layering the Dry Cake Mix
Open your 1 box (15.25 oz / 432g) yellow cake mix and pour the entire contents directly over the blueberry filling in one steady pour. Do not add water, eggs, or oil — the box goes on dry, exactly as it comes.
Using your silicone spatula or the back of a large spoon, spread the dry cake mix into an even layer from corner to corner of the dish. The goal is complete coverage — no gaps where bare fruit is exposed. Exposed fruit will bubble up through the topping during baking, which is partially intentional, but large uncovered patches will produce a wet, unset surface in those areas rather than the golden crust shown in the photos.
The dry cake mix layer should look uniform and matte — like a blanket of pale yellow powder covering the entire surface of the fruit. You should not be able to see the blueberries underneath except possibly at the very edges.
⚠️ Baker’s Warning: Do not stir or press the cake mix into the fruit layer. The moment you mix the two layers together, you have created a batter — and a batter bakes into a solid cake rather than the loose, pebbled cobbler-style crust visible in the photos. Keep the layers completely separate.
🗒 Luna’s Note: I use the empty cake mix box to scoop and pour — it gives me a wide, even pour across the surface without the powder cloud you get from pouring from height. Small habit, genuinely useful.
The fruit is covered — now the butter goes on.
Step 4: Laying the Cold Butter Across the Surface
Take your ½ cup (113g) cold unsalted butter and, using a sharp knife, slice it into rounds approximately ¼-inch (6mm) thick — you should get approximately 16 rounds from a standard stick. Working quickly so the butter stays cold, lay the rounds across the surface of the dry cake mix in a grid pattern, spacing them as evenly as possible to cover the entire surface. You will not achieve full coverage — there will be gaps between the rounds, and that is correct.
The butter rounds melt during baking and flow outward from each slice point, hydrating the dry cake mix in the immediate area. The areas that receive butter become golden and set — the raised peaks in the pan photo. The areas between butter rounds receive less direct fat and stay slightly paler and drier — those are the valleys. This uneven hydration is the entire mechanism behind the pebbled texture. If you melt the butter and pour it evenly, you lose this effect entirely.
Every butter round should be in full contact with the dry cake mix surface — flat, not stacked, not overlapping. The arrangement does not need to be perfect, but the coverage should be as even as you can manage so no large area of the pan is completely without butter.
⚠️ Baker’s Warning: If the butter has softened while you were preparing the previous steps, the rounds will be greasy and limp rather than firm — they will melt too fast in the oven and pool into the fruit before the topping has time to form. If this happens, slide the assembled dish into the fridge for 5 minutes before baking to re-firm the butter.
The dish is assembled — no stirring, no mixing, no further preparation needed.
Step 5: Baking Until Golden and Bubbling
Place the assembled dish on your middle oven rack and bake at 350°F (175°C) for 45 to 50 minutes. Set a timer for 40 minutes and begin checking at that point.
You are looking for three simultaneous signals before you pull the dish:
First: The topping has reached a deep golden-amber on the raised peaks — not pale yellow, not light tan, but the distinct amber visible in the close-up pan shots above where the butter-hydrated areas have fully colored.
Second: The blueberry filling is visibly bubbling through the gaps in the topping — you will see deep purple syrup pushing up between the crust peaks around the edges and in a few spots in the center. This bubbling is not optional — it tells you the filling has reached temperature and the cornstarch has gelatinized properly into that thick, jammy consistency.
Third: The edges of the topping are set and beginning to pull very slightly away from the sides of the ceramic dish — just a visible line of separation, not a dramatic gap.
All three signals must be present at the same time. A topping that is golden but not bubbling means the filling is not done. A filling that is bubbling but the topping is still pale means the oven is running cold — add 5 to 8 more minutes and check again.
⚠️ Baker’s Warning: Do not open the oven door before the 40-minute mark. Opening early drops the oven temperature and interrupts the crust formation — the topping will look pale and steamed rather than golden and textured. Set your timer and leave it.
Remove the dish from the oven and place it on your wire cooling rack. The filling will still be actively bubbling when it comes out — this is correct. Do not attempt to serve it yet.
Step 6: Resting, Garnishing, and Serving
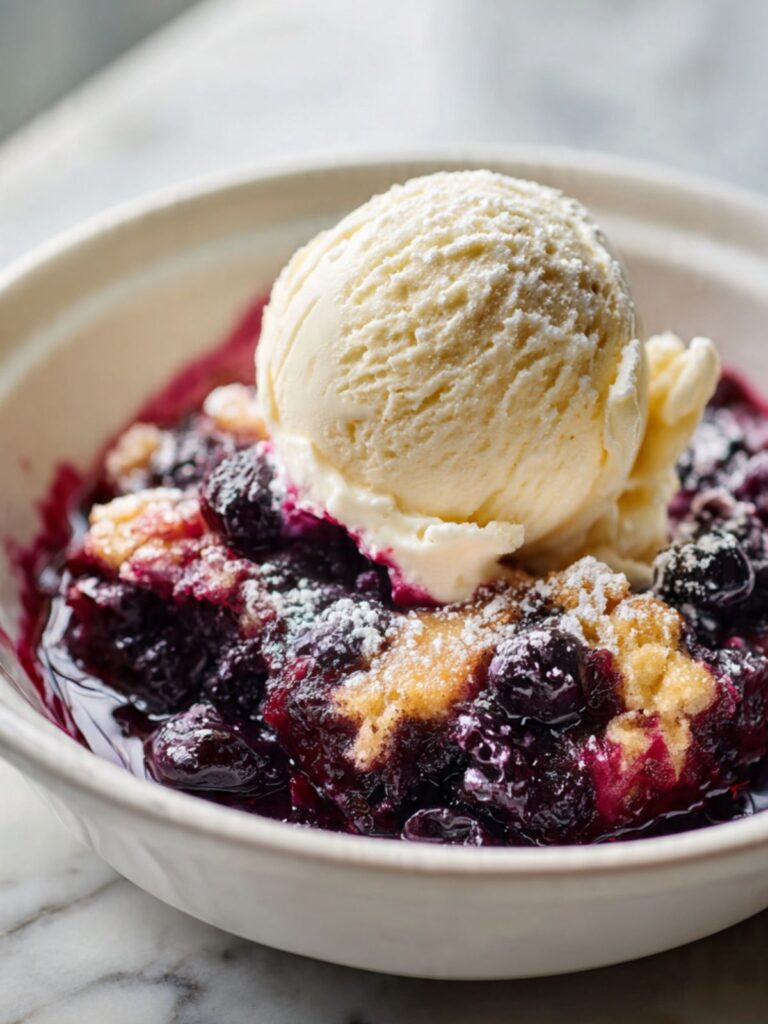
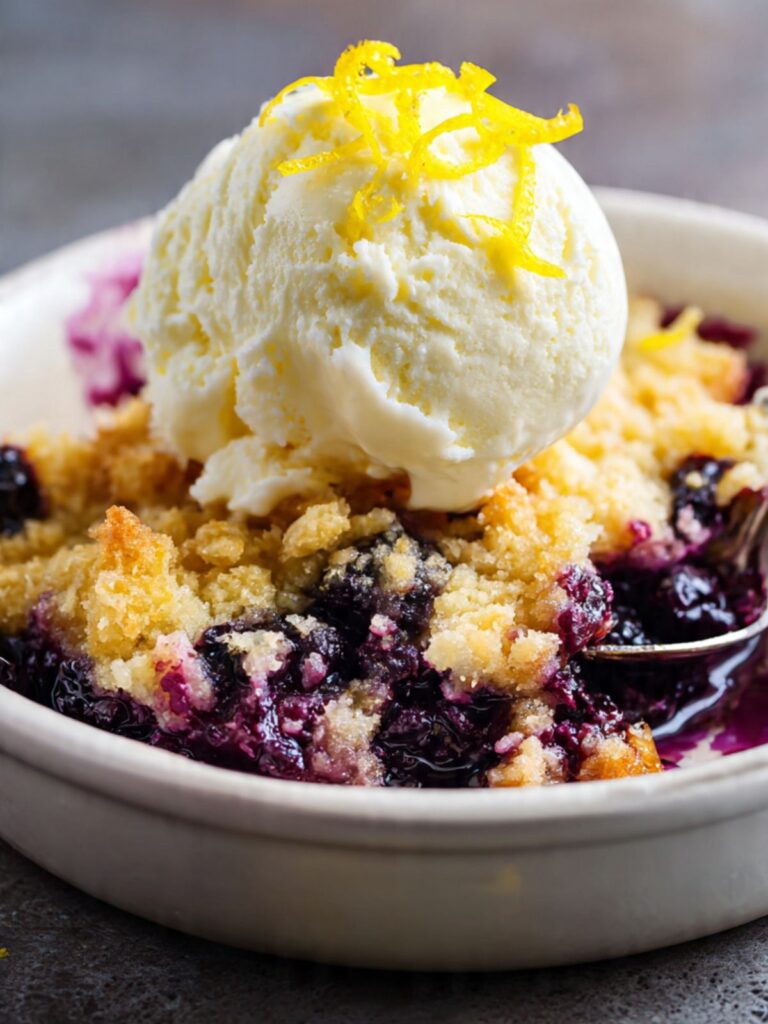
Allow the dish to rest on the wire cooling rack for 15 minutes before garnishing or serving. The blueberry filling is at approximately 200°F (93°C) when it exits the oven — it is genuinely dangerous to serve immediately, and the filling is too fluid to hold its shape in the bowl. During the 15-minute rest, the cornstarch-thickened filling continues to set as it cools slightly, moving from fully molten to the thick, scoopable, lava-like consistency visible in the bowl shots above.
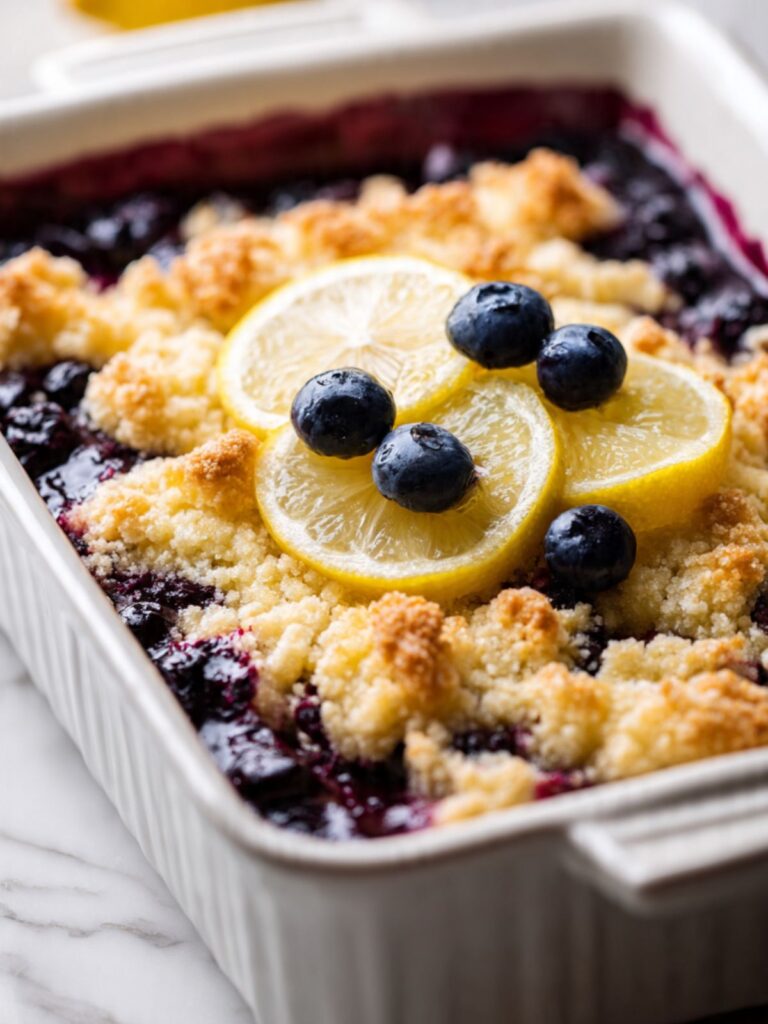
After 15 minutes, scatter your 1 teaspoon of lemon zest across the surface of the entire pan — distribute it evenly so every serving gets some. Immediately place your 2 thin lemon rounds in the center of the pan, overlapping slightly, and scatter your ¼ cup (30g) fresh blueberries across the topping. Do the garnishing in this order: zest first, then lemon slices, then fresh berries. The zest needs to land on the warm crust to release its oil into the surface; the lemon slices and berries are purely visual and go on last.
A 9×13 inch (23×33cm) dish at this fill depth yields 12 servings when portioned with a generous serving spoon — approximately a 3×4 grid of scoops across the pan, each scoop pulling through the full depth of topping and filling.
The finished pan should show distinct golden-amber pebbled peaks across the topping, dark purple blueberry syrup bubbling up between the crust in several spots, and a rim of deep jam-like filling visible at the edges of the dish — exactly as shown in the whole-pan photo above.
To serve, scoop deeply with your serving spoon — go all the way through the topping and into the fruit base so each bowl gets both layers. Serve immediately with one generous scoop of vanilla ice cream placed directly on top. The cold ice cream against the hot filling is the point.
🗒 Luna’s Note: I always scoop from the edges first — the filling-to-topping ratio is more balanced there. The center has the most fruit and the least crust. Save the center for whoever wants the most blueberry.
The Science Behind Blueberry Dump Cake
Fat Crystallization: How Butter Temperature Determines Topping Texture
I made the melted butter version first. It seemed more logical — melted butter would cover the surface evenly, hydrate every part of the dry mix, and produce a consistent golden crust. What I got instead was a dense, flat, pale layer that looked nothing like the photos. The topping had absorbed the butter all at once, swelled uniformly, and baked into a solid sheet rather than the irregular, pebbled surface I was trying to replicate. I went back to cold butter slices on the second batch and the difference was immediate and obvious.
Here is why it happens. Cold butter slices melt at different rates from different points of contact — the underside touching the dry mix melts first, the top surface melts last. As each round releases fat gradually, it hydrates the mix in a small radius outward from that contact point. The dry mix in that radius absorbs the fat, clumps together, and forms a peak — the golden-amber raised dome you can see in the pan photo. The areas between butter rounds receive little to no direct fat during the first 20 minutes of baking, so they stay dry, lighter in color, and lower in profile — the pale valleys. Fat crystallization is what controls this: cold butter fat exists in a semi-crystalline state that releases slowly under heat, while pre-melted butter is fully liquid and spreads immediately to cover every surface evenly, eliminating the differential hydration entirely. The pebbled texture is not cosmetic — it is a direct record of how the fat moved through the dry mix during baking.
🗒 Luna’s Note: This is one of the few recipes where the method that looks more careful — melting the butter evenly — actually produces the worse result. Cold and uneven is correct here. It took me two batches to trust that.
How Cornstarch Controls the Filling Texture
The blueberry filling in this recipe does not set on its own. Raw blueberries contain natural pectin, but when they burst under heat they release a large volume of juice — more than the natural pectin can thicken into anything resembling the jammy, scoopable consistency visible in the bowl shots above. Without the cornstarch toss, that juice stays loose and watery throughout baking, and the dry cake mix topping partially sinks into it rather than forming a crust above it.
Starch gelatinization is the mechanism at work. When cornstarch is heated in the presence of water above approximately 145°F (63°C), the starch granules absorb the surrounding liquid and swell dramatically — thickening the liquid around them into a gel. In this recipe, the cornstarch is tossed with the blueberries before they go into the pan, so it is distributed evenly through the fruit from the start. As the oven heats the filling, the released blueberry juice triggers gelatinization and the liquid thickens progressively as the temperature climbs.
By the time the filling is bubbling at the edges — which you can see happening in the pan during baking — the cornstarch has done its work and the filling has the body it needs to hold its shape in the bowl. This is also why the bubbling signal matters as a doneness cue: a filling that has reached a visible bubble has almost certainly crossed the gelatinization threshold. A filling that has not yet bubbled may look done on the surface but will pour out of the bowl like juice when you scoop it.
If you want a thicker, more jam-like filling that holds its shape even more firmly when scooped — closer to a fruit pie slice than a cobbler — increase the cornstarch to 1½ tablespoons (12g). If you prefer a looser, more fluid filling with more blueberry juice pooling around the topping in the bowl, reduce to 2 teaspoons (5g). The recipe as written lands in the middle: thick enough to stay in the bowl, fluid enough to flow slightly around the ice cream when you press the scoop down into it.
For a deeper look at how fruit-to-thickener ratios work across different baking methods, the Peach Dump Cake article covers the same mechanism with a different fruit and a different juice volume — a useful comparison if you are planning to adapt this recipe with other berries.
Acid-Anthocyanin Reaction: Why Lemon Juice Deepens Both the Flavor and Color of the Filling
Blueberries on their own are sweet, mildly tart, and relatively flat when baked — the heat concentrates the sugar but also mutes the brightness. The lemon juice in the filling is doing something specific: it is lowering the pH of the fruit mixture before it goes into the oven, which has two observable effects.
First, it intensifies the perceived tartness of the blueberries themselves — acidity amplifies the flavor compounds already present in the fruit rather than introducing a separate lemon flavor. What you taste in the finished filling is more blueberry, not lemon-over-blueberry.
Second, lemon juice reacts with the natural anthocyanin pigments in blueberries — the compounds responsible for their deep blue-purple color — and shifts them slightly toward a brighter, more vivid red-purple under heat rather than the muted, dull grey-blue that plain baked blueberries often develop.
This is why the filling in the photos reads as a deep, saturated midnight purple rather than a flat, washed-out color. The lemon zest added post-bake works differently — it contributes aromatic citrus oil to the surface of the warm crust rather than acidity into the filling, which is why it smells more intensely lemon than the filling itself tastes.
Blueberry Dump Cake Troubleshooting & Pro-Tips
Common Mistakes
The Topping Looks Dense, Flat, and Pale Instead of Pebbled and Golden
This is a butter temperature failure. Softened or melted butter spreads immediately across the entire surface of the dry cake mix the moment it goes into the oven, hydrating every area simultaneously and producing an even, solid layer rather than the irregular pebbled peaks. Cold butter slices melt slowly from each contact point outward — the differential hydration is what creates the raised peaks and pale valleys.
Fix if it has already happened: The texture will not recover in the oven. Serve it as-is — the flavor is identical. Scoop it like a cobbler, add the ice cream, and the difference in topping texture is largely unnoticed once it is in the bowl.
Prevention: Pull the butter from the fridge immediately before slicing. If the assembled dish has been sitting on the counter for more than 10 minutes before going into the oven, refrigerate it for 5 minutes to re-firm the butter rounds before baking.
The Topping Is Burned or Overbrowned Before the Filling Bubbles
This is a pan material failure or an oven temperature problem. Dark metal pans absorb significantly more radiant heat than ceramic or glass and overbrown the topping surface before the fruit filling reaches temperature. An oven running 25°F (14°C) hot produces the same result even in the correct pan.
Fix if it has already happened: If the topping is dark but not fully burned, tent the dish loosely with aluminum foil and continue baking until the filling bubbles — typically 8 to 12 more minutes. The foil stops further browning on the topping while the filling catches up. If the surface is fully burned, scoop from the center where the topping is thickest and protected — the interior layers are often still edible even when the surface is overdone.
Prevention: Use a white ceramic or glass baking dish. If you only have a dark metal pan, reduce the oven temperature to 325°F (165°C) and add 10 minutes to the bake time. Verify your oven temperature with a thermometer before the dish goes in.
The Filling Is Watery and Runs Out of the Bowl When Scooped
The cornstarch did not thicken properly. This happens for three reasons: the filling was not baked long enough for the cornstarch to fully gelatinize (bubbling at the edges is the minimum signal — center bubbling is better), frozen blueberries were used without increasing the cornstarch amount, or the cornstarch was not evenly distributed through the fruit before baking and clumped in one area.
Fix if it has already happened: Return the dish to the oven for an additional 10 minutes and watch for vigorous center bubbling, not just edge activity. If the topping is already at risk of overbrowning, tent loosely with foil. A thin filling that has fully cooled will thicken somewhat as it approaches room temperature — if you have time, let it cool for 30 minutes before deciding whether to return it to the oven.
Prevention: Dry the blueberries completely before tossing with the cornstarch. Fold thoroughly — a minimum of 15 strokes — so no dry cornstarch sits at the bottom of the bowl. If using frozen blueberries, increase cornstarch to 1½ tablespoons (12g). Do not pull the dish until you see vigorous bubbling in at least two spots on the surface, not just at the edges.
There Are Chalky, Powdery Patches of Uncooked Cake Mix on the Surface After Baking
The butter rounds were spaced too far apart, or there were not enough of them to cover the surface adequately. Large gaps between butter slices leave areas of dry mix that the melting fat never reaches — those areas stay raw and chalky through the full bake time.
Fix if it has already happened: If the patches are small and scattered, the baked areas around them are still fully edible — the powdery spots can be pushed aside when scooping. If there are large unhydrated areas, cut 2 tablespoons (28g) of additional cold butter into small pieces, tuck them into the dry spots, and return the dish to the oven for 10 more minutes.
Prevention: Slice the butter into rounds no thicker than ¼ inch (6mm) — thinner rounds cover more surface area as they melt outward. Arrange them in a grid with no more than 1.5 inches (4cm) between rounds. You should feel like you are using slightly more butter than seems necessary — that is correct.
The Filling Tastes Flat and One-Dimensional — No Brightness or Tartness
The lemon juice was skipped, reduced, or substituted with bottled lemon juice. Bottled juice is pasteurized and lacks the volatile aromatic compounds that fresh juice contributes. Without sufficient acidity, the sweetness of the cake mix and the blueberries has nothing to balance against — everything reads as one-dimensional sugar.
Fix if it has already happened: Squeeze fresh lemon juice directly over each serving bowl just before adding the ice cream. Even half a teaspoon per bowl makes a noticeable difference at the serving stage. The post-bake lemon zest helps significantly here — do not skip it even if the filling itself is flat.
Prevention: Use fresh lemon juice only. Measure it — 2 tablespoons (30ml) is the minimum for a 9×13 dish. If your lemons are small or have been sitting in the fridge for more than a week, use 2½ tablespoons and taste the fruit mixture before it goes into the pan. It should taste noticeably bright and tart before baking.
The Topping Is Dry, Crumbly, and Tough After Baking
This is an overbake. The butter-hydrated areas of the topping go through a window: they are first set and golden, then they continue to dry out as moisture evaporates and the crust toughens. Pulling the dish at 55 or 60 minutes when the topping was done at 47 produces this result.
Fix if it has already happened: Serve with extra ice cream and scoop aggressively — the topping breaks apart more easily when it is mixed into the softening ice cream. Alternatively, spoon warm blueberry filling from the edges of the pan over the dry topping sections and let it sit for 2 minutes to rehydrate slightly before serving.
Prevention: Begin checking at 40 minutes. Pull the dish the moment all three doneness signals are present simultaneously — golden peaks, visible edge bubbling, and slight pull-away from the dish sides. Do not wait for center bubbling if the edges and topping color are already there.
The Filling Is Looser Than Expected at High Altitude, or the Topping Hydrates Unevenly in Humid Conditions
At high altitude (above 3,500 feet / 1,065m): Lower air pressure means water boils at a lower temperature, so the blueberry filling reaches a visible bubble earlier than it would at sea level — but that bubble does not mean the cornstarch has fully gelatinized. The filling will look active at the edges while still being thin in the center. Fix: Continue baking for 8 to 12 minutes beyond the first bubble appearance and watch for slow, thick, lava-like bubbles rather than rapid thin ones. Prevention: Set a hard minimum of 50 minutes bake time at altitude regardless of when the filling first bubbles.
In high humidity (above 70% relative humidity): The dry cake mix begins absorbing atmospheric moisture immediately once the box is opened, which means areas of the topping that are not covered by butter can start to clump before the butter melts over them. Fix: If you notice clumping after baking, those areas will be denser than the rest of the topping — scoop through them and mix with the surrounding crumble in the bowl. Prevention: Assemble and bake in one continuous sequence. Do not open the cake mix box until the blueberry filling is already in the dish and you are ready to proceed immediately.
Expert Pro-Tips
Scatter the lemon zest while the pan is still warm, not after it has cooled. The warm crust surface acts like a sponge for citrus oil — the essential oils in the zest release directly into the topping as they land on the heat. Zest scattered over a cold or room-temperature topping sits on the surface without releasing. You can smell the difference within 30 seconds of application.
Use a deep serving spoon and angle it at 45 degrees when scooping. The filling is stratified — dense fruit base underneath, porous topping above. A straight-down scoop often breaks through the topping and catches mostly fruit. An angled scoop catches both layers in every serving, which is the ratio you want in the bowl.
If you want a crunchier topping texture, sprinkle 2 tablespoons (25g) of granulated white sugar evenly over the butter rounds before the dish goes into the oven. The sugar caramelizes during baking and adds a thin, glassy crunch layer on the peaks. This is not visible in the reference photos and is not part of the tested recipe — it is a textural variation for readers who prefer more crunch than the standard pebbled crust provides.
For a more pronounced lemon flavor throughout the filling, add ½ teaspoon of pure lemon extract (not imitation) to the blueberry toss before assembling. The extract amplifies the lemon note without adding additional liquid that would thin the filling. Use pure extract only — imitation lemon extract has a distinctly chemical, medicinal aftertaste that survives baking.
How to Store Blueberry Dump Cake
Room Temperature
Allow the cake to cool for a minimum of 30 minutes before covering — covering while still hot traps steam directly against the topping and begins softening it immediately. After 30 minutes, cover loosely with aluminum foil and store at room temperature for up to 2 days. Do not wrap the dish tightly in plastic wrap — tight wrapping traps steam against the topping and turns the pebbled crust soft and soggy within a few hours. The foil or towel allows enough airflow to keep the topping texture intact while preventing the surface from drying out.
Store the dish at a cool room temperature — below 72°F (22°C). In a warm kitchen, the blueberry filling can begin to ferment at the 36-hour mark, particularly in summer. If your kitchen runs warm, move it to the refrigerator after the first day.
The topping is at its best on Day 1, within a few hours of baking. By Day 2 at room temperature, the peaks will have softened slightly and the filling will have thickened further as it cools completely — the texture shifts from warm cobbler toward something closer to a set fruit bar. Still good. Not the same.
Refrigerator
For storage beyond 2 days, transfer the dish to the refrigerator covered loosely with foil — up to 4 days total from the day it was baked. The cold slows fermentation in the fruit filling and keeps the cake safe considerably longer than room temperature storage.
Cold blueberry dump cake straight from the fridge is dense and the filling is fully set — it does not scoop or serve the same way as it does warm. Before serving refrigerated leftovers, reheat individual portions in a microwave-safe bowl at 50% power for 60 to 90 seconds, or return the full dish to a 325°F (165°C) oven for 12 to 15 minutes covered with foil until the filling is warm and beginning to loosen. Remove the foil for the last 3 minutes to re-crisp the topping surface slightly.
🗒 Luna’s Note: I actually prefer this reheated from the fridge on Day 2. The filling has had time to fully set and the flavor of the blueberries deepens noticeably overnight — the lemon is less sharp and the fruit reads richer. The topping loses some of its crunch but the overall dessert tastes more cohesive than it does fresh out of the oven.
Freezer — Baked
Blueberry dump cake freezes adequately but with trade-offs. The filling freezes and reheats well — fruit fillings are stable through freeze-thaw cycles. The topping does not recover as well — it softens significantly after thawing and reheating and will not return to the pebbled, textured state it had fresh from the oven.
If you plan to freeze it, portion into individual servings first. Wrap each portion tightly in plastic wrap, then place in a lidded freezer-safe container or zip-lock freezer bag — up to 2 months. Thaw overnight in the refrigerator, then reheat at 325°F (165°C) for 12 to 15 minutes until warmed through. Expect the topping to be softer and more uniform in texture than the freshly baked version — perfectly acceptable as a weeknight dessert, not ideal if you are serving guests.
Do not freeze the full dish in the ceramic baking dish — the sudden temperature change from freezer to oven can crack ceramic. Always portion first.
Freezer — Unbaked
This recipe does not freeze well in its unbaked assembled state. The dry cake mix absorbs moisture from the blueberry filling during freezing, and the layers partially merge before baking — the result after baking is a denser, less distinct topping without the pebbled texture. If you want to get ahead, prepare and refrigerate the blueberry filling up to 24 hours in advance in a covered bowl. Assemble the dry cake mix and butter layer immediately before baking — do not pre-assemble and freeze.
Serving Suggestion
Serve this warm — not hot from the oven, but the 15-minute rest warm where the filling has settled into that thick, scoopable consistency and the topping is still slightly crisp at the peaks. That is the window. Once it has cooled to room temperature, you have a different dessert — denser, more set, perfectly edible but not the experience the recipe is built around.
I serve this in wide, shallow bowls rather than deep ones. The ratio of filling to topping matters in the bowl — a deep narrow bowl stacks the layers vertically and you end up eating them sequentially. A wide bowl lets you get both in every spoonful, which is the point.
One generous scoop of vanilla ice cream, placed directly in the center of the portion. I do not use whipped cream here. The temperature contrast between the cold ice cream and the warm filling is what makes this dessert work — whipped cream is already at room temperature and does not provide that. The ice cream also melts into the purple blueberry syrup at the edges of the bowl and creates a lavender-tinged cream that is, in my opinion, the best part of the entire thing.
I do not own a fancy ice cream scoop. I use a large metal tablespoon that I run under cold water before each use. It releases a clean, round scoop every time without the ice cream sticking. If you use an ice cream scoop, run it under cold water between servings for the same result.
This is not a recipe that travels well. The filling is too fluid when warm and the topping softens quickly once covered for transport. Make it where you are serving it, serve it within 20 minutes of coming out of the oven, and let the dish speak for itself.
Frequently Asked Questions About Blueberry Dump Cake
Can I make blueberry dump cake ahead of time?
Prepare the blueberry filling up to 24 hours ahead and refrigerate it covered. Do not assemble the full dish in advance — the dry cake mix absorbs moisture from the fruit during refrigeration and the layers partially merge, eliminating the textural contrast between filling and topping. Assemble and bake immediately before serving. The baked cake keeps refrigerated for up to 4 days.
Can I use frozen blueberries instead of fresh?
Yes — use them directly from frozen, never thawed. Thawed frozen blueberries are waterlogged and release so much liquid the cornstarch cannot keep up, producing a thin, watery filling. Increase the cornstarch from 1 tablespoon to 1½ tablespoons (12g) when using frozen to compensate for the higher juice volume. Expect a slightly softer filling than the fresh version shown in the photos.
Can I make blueberry dump cake without cake mix?
Yes, with trade-offs. Whisk together 1½ cups (180g) all-purpose flour, 1 cup (200g) granulated sugar, 2 teaspoons (8g) baking powder, and ¼ teaspoon fine sea salt. The result will be less sweet and less golden — commercial cake mix contains emulsifiers and a higher sugar ratio that contribute to the specific color and flavor visible in the photos. The topping texture will also be slightly denser.
How do I know when blueberry dump cake is done?
Three signals must appear simultaneously: topping peaks are deep golden-amber, blueberry filling is visibly bubbling through the topping gaps in at least two spots, and the rim shows a faint pull-away from the dish sides. The bubbling signal is most critical — it confirms the filling has crossed the cornstarch gelatinization threshold and will hold its shape when scooped. Start checking at 40 minutes.
Can I double this blueberry dump cake recipe?
Use two separate 9×13 inch dishes rather than one larger vessel — a deeper fruit layer prevents the filling from reaching temperature before the topping overbrowns. Bake both dishes on the same middle rack or swap rack positions halfway through if stacking. Bake time stays the same. To halve the recipe, use an 8×8 inch (20×20cm) dish and reduce bake time to 35 to 40 minutes.
How does altitude or humidity affect blueberry dump cake?
At altitude above 3,500 feet, water boils at a lower temperature — the filling bubbles earlier but the cornstarch may not have fully gelatinized yet. Extend bake time 8 to 12 minutes beyond first visible bubbling and look for thick, slow-moving bubbles rather than thin rapid ones. In high humidity, assemble and bake immediately after opening the cake mix — atmospheric moisture causes the dry mix to clump before the butter reaches it.
Can I use a different fruit in this dump cake?
Most berries and stone fruits work with cornstarch adjusted by juice volume. Raspberries and blackberries: same 1 tablespoon cornstarch. Cherries: increase to 2 tablespoons (16g) and pit first — they release significantly more juice. Peaches: 1½ tablespoons (12g) cornstarch, peeled and sliced. Keep the lemon juice regardless of fruit — acidity brightens any baked fruit filling. See Chocolate Dump Cake for a version with no fruit at all.
More Dump Cakes You’ll Love
- Pineapple Upside Down Dump Cake — a caramelized pineapple base with maraschino cherries and a buttery golden topping, served warm directly from the pan.

Blueberry Dump Cake Recipe
Ingredients
Equipment
Method
- Position oven rack in the middle slot and preheat to 350°F (175°C). Lightly grease a 9×13 inch (23×33cm) ceramic or glass baking dish with butter or non-stick spray and set aside.
- In a large mixing bowl, combine the blueberries, granulated sugar, cornstarch, lemon juice, lemon zest, and salt. Fold with a silicone spatula for 15 to 20 strokes until every berry is evenly coated and no dry cornstarch remains at the bottom of the bowl.
- Pour the blueberry filling into the prepared dish and spread into an even layer edge to edge.
- Pour the dry yellow cake mix evenly over the blueberry filling and spread with a spatula until the fruit is completely covered with no exposed gaps.
- Slice the cold butter into ¼-inch (6mm) rounds and arrange them across the surface of the dry cake mix in an even grid pattern — do not stir or press the layers together at any point.
- Bake at 350°F (175°C) for 45 to 50 minutes, beginning to check at 40 minutes, until the topping peaks are deep golden-amber, the blueberry filling is visibly bubbling through the topping in at least two spots, and the edges show a slight pull-away from the dish sides.
- Remove from the oven and place on a wire cooling rack. Rest for 15 minutes before garnishing.
- Scatter 1 teaspoon lemon zest evenly over the surface of the warm cake, place 2 thin lemon rounds in the center, and scatter ¼ cup fresh blueberries across the topping. Serve immediately with a generous scoop of vanilla ice cream per bowl.