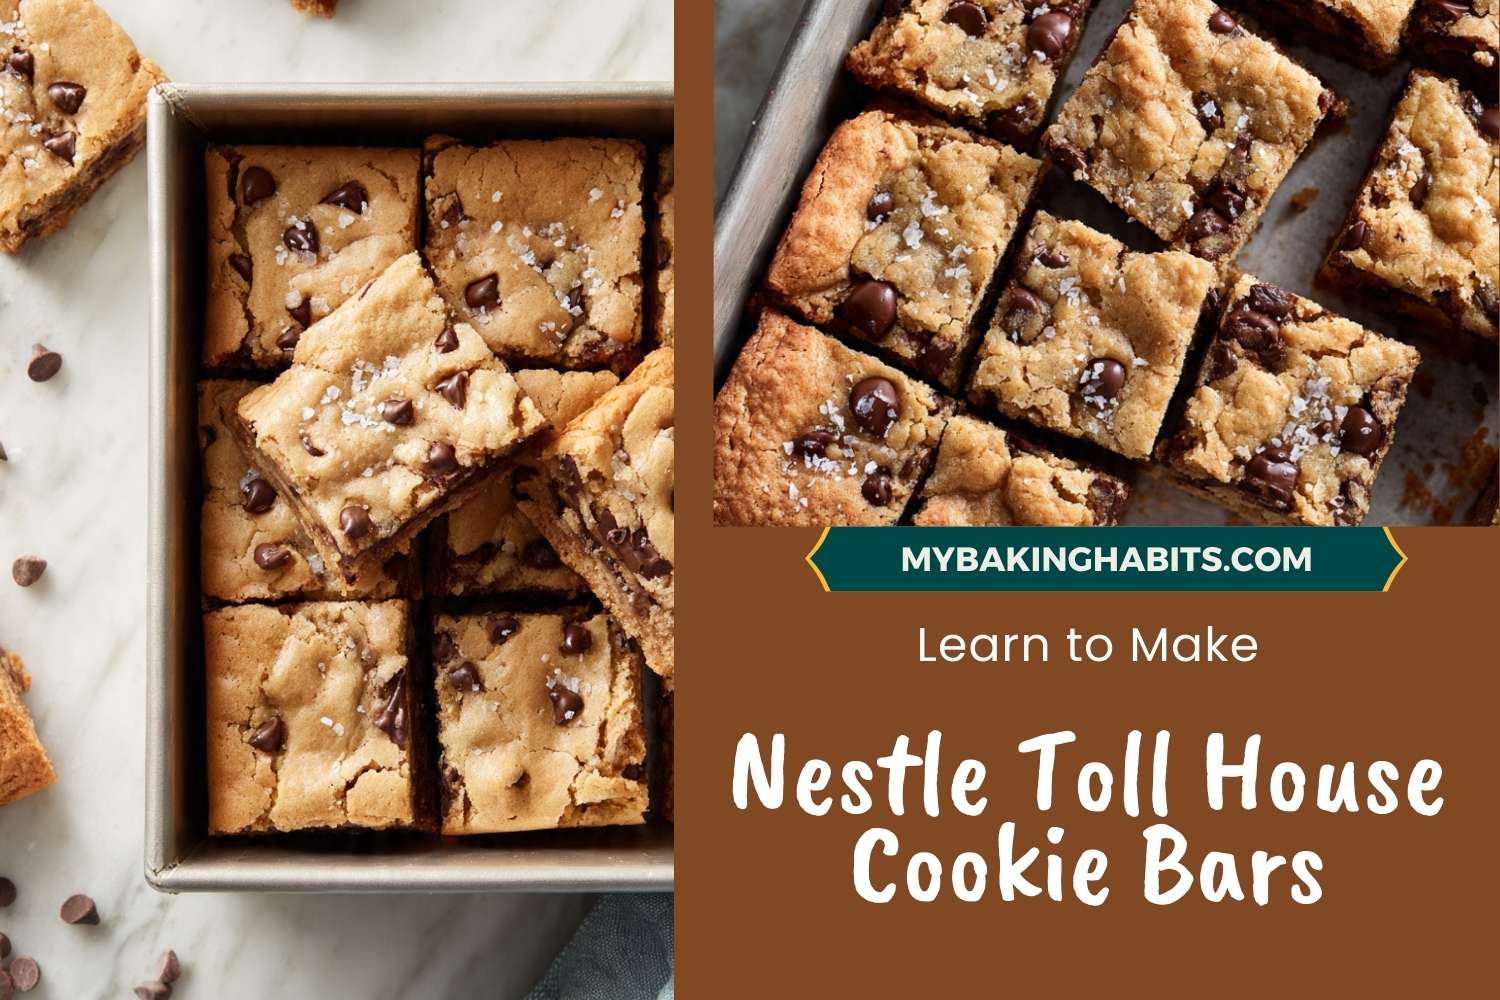
Nestlé Toll House Cookie Bars (One Bowl, No Mixer)
I have made these Nestlé Toll House cookie bars in my kitchen more times than I can count — at least thirty batches across three years of testing, adjusting, and starting over. I know exactly where this recipe fails and why, and I have fixed every one of those failure points so you do not have to.
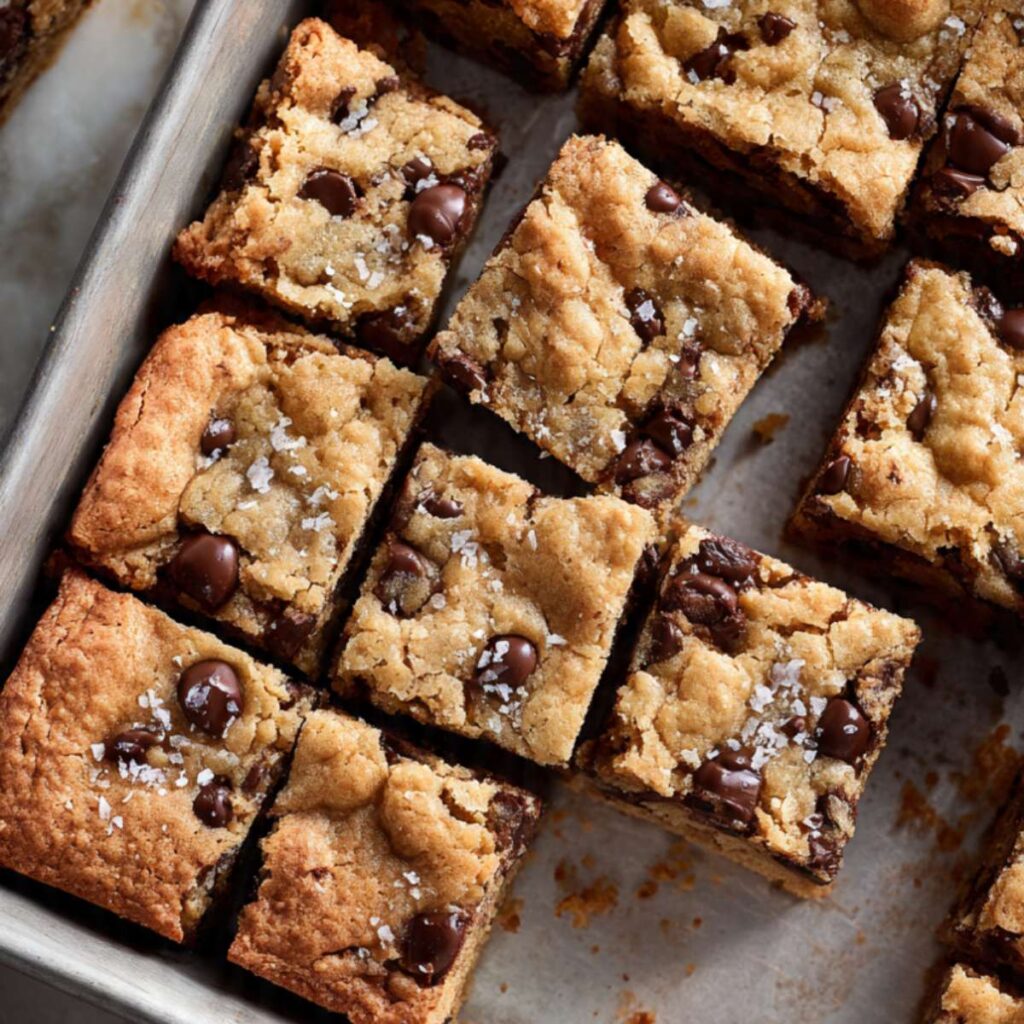
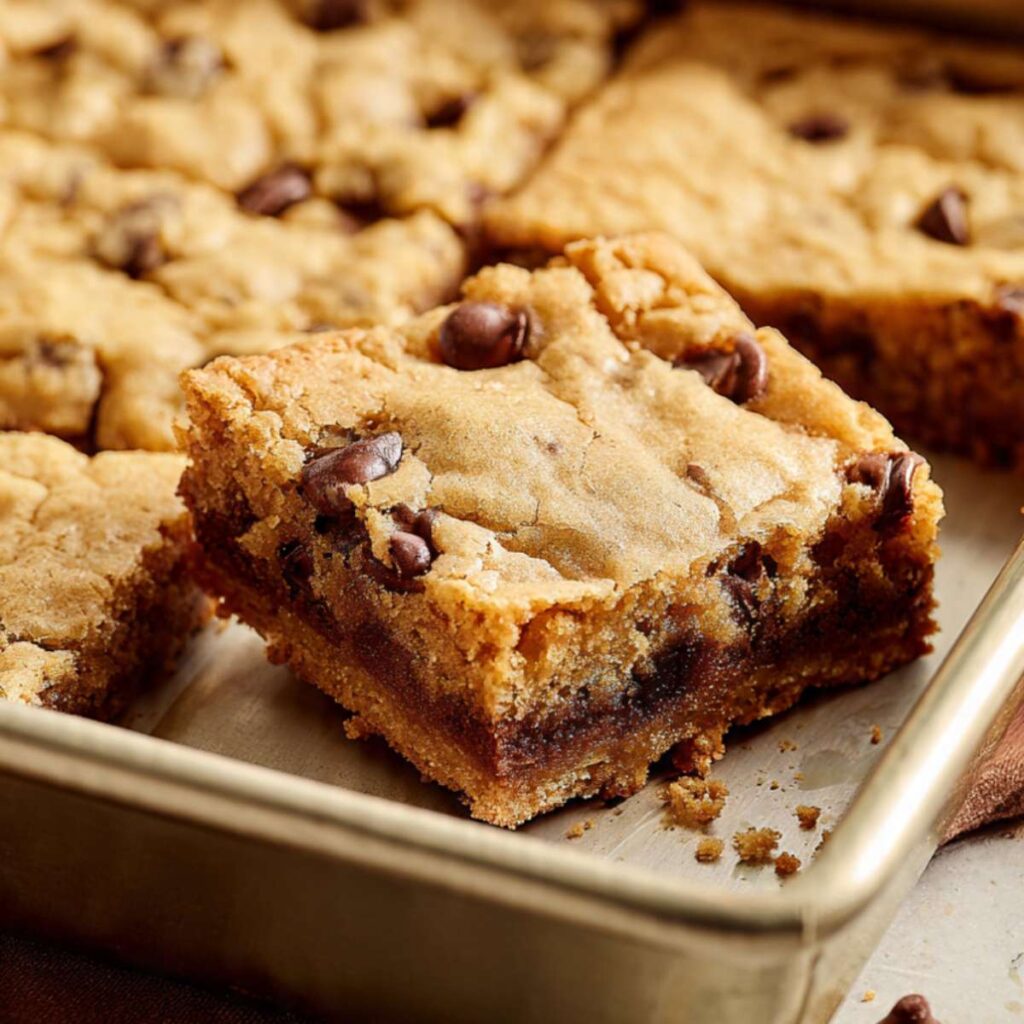
The result is a bar with a golden, crackled top crust, crisp edges that hold a clean cut, and a center that stays dense and chewy — not cakey, not gummy, not dry. The interior has two distinct layers: a slightly firmer top and a deeper, fudgier bottom where the brown sugar and melted butter concentrate as the bar bakes. Every bite has pockets of half-melted semi-sweet chocolate and a finish of flaked sea salt that cuts through the sweetness.
🗒 Luna’s Note: This is the recipe I make when I need something reliable. No chilling, no mixer, one bowl, forty minutes start to finish. I have pulled these out of the oven for everything from weeknight cravings to last-minute potlucks — they have never let me down.
There is no creaming step in this recipe. The butter is melted, not softened, which is what gives these bars their dense, chewy structure instead of a cakey one. That distinction matters more than any other single decision in this recipe.
I tested melted butter at different temperatures before adding the eggs. Butter that was still warm — above 95°F (35°C) — caused the eggs to partially cook on contact, producing a greasy, uneven batter. Butter cooled to below 90°F (32°C) blended smoothly every time, producing a thick, glossy batter that baked into the chewy, fudgy interior shown in the close-up photo above. That is the version I kept.
I tested bake time in five-minute increments between 20 and 30 minutes. Bars pulled at 20 minutes had gummy, underbaked centers that never fully set even after two hours of cooling. Bars left to 30 minutes had dry, chalky centers and overdone edges. The window is 22 to 26 minutes — edges deep golden brown, center looking just set with a faint visual softness. Carryover heat in the pan does the rest.
No chilling required. No mixer needed. One bowl, one pan, and you are done.
| Prep Time | Cook Time | Cooling Time | Total Time | Yield | Difficulty | Method | Pan Size |
|---|---|---|---|---|---|---|---|
| 15 minutes | 22–26 minutes | 2 hours minimum | ~2 hours 40 minutes | 16 bars | Easy | Melt-and-mix, one bowl | 9×13 inch (23x33cm) |
Nutrition Per Bar (1 of 16 — without walnuts):
| Calories | Carbohydrates | Sugar | Fat | Saturated Fat | Protein | Sodium | Fiber |
|---|---|---|---|---|---|---|---|
| ~265 kcal | ~35g | ~22g | ~13g | ~8g | ~3g | ~160mg | ~1g |
Nutrition is calculated from actual gram weights for every ingredient using the base recipe without optional walnuts or additional flaked salt. Values are estimates — your results will vary slightly based on the exact brand of chocolate chips and butter used.
Ingredients & Tools for Nestlé Toll House Cookie Bars Recipe
For the Cookie Bars
- 2 cups (240g) all-purpose flour, spooned into the measuring cup and leveled — or weighed at 240g
- ¾ cup (150g) packed light brown sugar
- ¼ cup (50g) plain white granulated cane sugar
- ¾ cup (170g) unsalted butter, melted and cooled to below 90°F (32°C)
- 2 large eggs (approximately 50g each without shell), room temperature
- 1 teaspoon (5ml) pure vanilla extract
- 1 teaspoon (6g) baking soda, checked for freshness
- ½ teaspoon (3g) fine sea salt
- 1½ cups (255g) semi-sweet chocolate chips (45–55% cacao), such as Nestlé Toll House or Ghirardelli
- Flaked sea salt, such as Maldon, for finishing — visually present on every bar in the photos and strongly recommended
Optional Add-In
- ½ cup (60g) toasted walnuts, roughly chopped — not shown in the photos; adds crunch without changing bake time
Before You Start
Read this section completely before you touch a single ingredient. Every failure point in this recipe is predictable and preventable.
Butter temperature is the most critical variable in this recipe. Melt the butter first, then set it aside to cool. The target temperature before you add the eggs is below 90°F (32°C). If you do not have a thermometer, press the back of your wrist to the side of the bowl — it should feel no warmer than body temperature. Butter that is too warm will partially cook the eggs on contact and produce a greasy, broken batter that bakes unevenly.
Eggs must be at room temperature. Pull your eggs from the fridge at least 30 minutes before you start. In a hurry, place them in a bowl of warm (not hot) water for 10 minutes. Cold eggs added to warm melted butter cause the fat to seize and the batter to look curdled and uneven.
Vanilla extract. Use pure vanilla extract — not imitation. Imitation vanilla uses synthetic vanillin and has a sharper, more chemical flavor that is especially noticeable in a bar where vanilla is one of the only flavoring agents. Pure vanilla extract rounds out the brown sugar and butter flavor and adds the warm background note that makes these bars taste like a classic rather than a generic chocolate chip bake.
Measure your flour correctly — this is the second most common failure point. Spoon the flour into your measuring cup and level it off with a straight edge. Never scoop directly from the bag — scooping packs 20–30% more flour than the recipe accounts for and produces dry, crumbly bars. For the most accurate results, use a kitchen scale set to grams. The gram weights in this recipe are the numbers I tested with — they are the most reliable way to get the same result I got.
🗒 Luna’s Note: I keep a kitchen scale on my counter permanently. Weighing flour changed my bar results more than any other single habit. 240g is 240g every single time — a scooped cup is a guess.
Check your baking soda for freshness. Drop ½ teaspoon (3g) of baking soda into a small bowl with a splash of hot water and a splash of white vinegar. It should bubble aggressively within 2 seconds. If it fizzes weakly or not at all, replace the box before you bake. Expired baking soda produces flat, dense bars with no surface crackle and a gummy interior that never fully sets.
Brown sugar freshness check. If your brown sugar has hardened, place a damp paper towel over it and microwave in 20-second increments until it is pliable and easy to pack. Hardened brown sugar cannot be packed accurately, which changes the moisture content and chewiness of the finished bar.
Chocolate chip note. Use semi-sweet chocolate chips in the 45–55% cacao range — Nestlé Toll House or Ghirardelli are the brands I tested with. Milk chocolate chips have a higher sugar content and lower melting point, which makes the bars sweeter and softer than what is shown in the photos. Bittersweet chips above 60% cacao produce a noticeably less sweet bar with a firmer set.
Pan preparation. Line your 9×13 inch (23x33cm) light-colored aluminum baking pan with parchment paper, leaving a 2-inch (5cm) overhang on both long sides. Lightly grease the two short ends where the parchment does not reach. This overhang is what lets you lift the entire slab out of the pan cleanly before cutting. If you skip it and grease only, the bars will still release — but the edges will crumble when you try to cut them in the pan.
Oven rack position. Place your oven rack in the middle position before you preheat. Middle rack ensures even heat distribution across the full 9×13 surface. Bottom rack overbrowns the base. Top rack dries out the surface before the center sets.
No mixer needed — and do not use one. This entire recipe comes together with a large mixing bowl and a silicone spatula. Using a hand mixer or stand mixer will overdevelop the gluten in the flour and produce tough, dense bars instead of the chewy, tender texture shown in the photos.
Necessary Tools
Required:
- 9×13 inch (23x33cm) light-colored aluminum baking pan — not dark non-stick, not glass, not ceramic
- Large mixing bowl (at least 4-quart / 3.8L capacity)
- Silicone spatula
- Parchment paper with overhang
- Kitchen scale (strongly recommended over volume measurements)
Optional but useful:
- Instant-read thermometer — to confirm butter is below 90°F (32°C) before adding eggs
- Oven thermometer — most home ovens run 15–25°F (8–14°C) off their stated temperature; confirming your actual oven temp takes the guesswork out of the 22–26 minute bake window
- Offset spatula — for pressing the dough into an even layer across the pan
How to Make Nestlé Toll House Cookie Bars
This recipe uses the melt-and-mix method — melted butter goes in first, sugars and eggs follow, and the dry ingredients are folded in last with minimal mixing. The sequence is not arbitrary. Each addition builds on the one before it, and deviating from the order changes the texture of the finished bar.
Step 1: Prepare the Pan and Preheat the Oven
Goal: Get the pan ready and the oven fully up to temperature before the dough is mixed — dough that sits while the oven catches up continues to hydrate and can produce tougher bars.
Equipment: 9×13 inch (23x33cm) light-colored aluminum baking pan, parchment paper, oven.
Position your oven rack in the middle slot. Heat the oven to 350°F (175°C). If you have an oven thermometer, place it on the middle rack now — most home ovens run 15–25°F (8–14°C) hotter or cooler than the dial states, and that gap matters inside a 22–26 minute bake window.
Line the pan with parchment paper, pressing it into the corners and leaving at least a 2-inch (5cm) overhang on both long sides. Lightly grease the two short ends where the parchment does not reach, using butter or non-stick spray.
The overhang is not decorative — it is your lifting handle. Without it, you will be cutting bars inside a metal pan and the edges will crumble. With it, you lift the entire slab onto a cutting board and get clean, even cuts on all four sides.
⚠ Baker's Warning: Do not use a dark non-stick pan. Dark pans absorb more radiant heat and overbrown the bottom of the bars before the center fully sets. If a dark pan is the only option, reduce the oven temperature by 25°F (15°C) and start checking at 20 minutes.
Your pan should be sitting on the counter, fully lined, with the oven climbing to 350°F (175°C). The parchment overhang should extend evenly on both long sides before you move to Step 2.
Step 2: Melt and Cool the Butter
Goal: Produce fully melted, lump-free butter that has cooled enough to add eggs safely — below 90°F (32°C).
Equipment: Small saucepan or microwave-safe bowl, instant-read thermometer or wrist test.
Measure ¾ cup (170g) unsalted butter and melt it completely — stovetop over low heat or microwave in 30-second increments. Once melted, pour it into your large mixing bowl and set it aside to cool for 8–12 minutes.
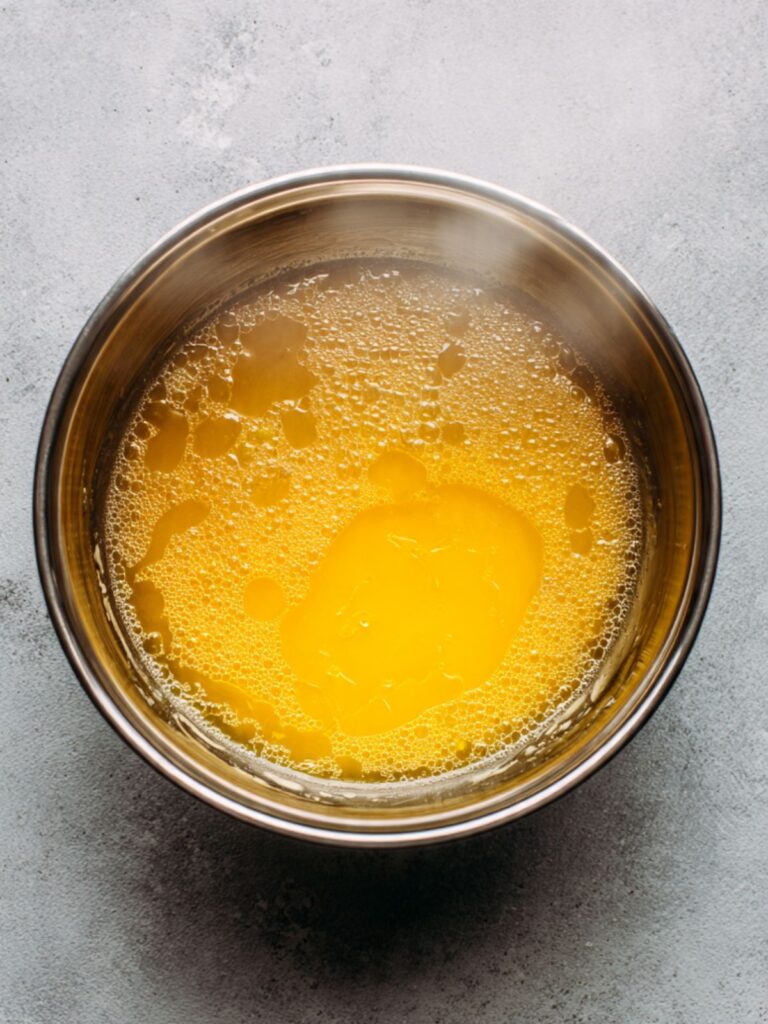
To check readiness: press the back of your wrist against the outside of the bowl. It should feel no warmer than body temperature — neutral, not warm. If you have a thermometer, the target is below 90°F (32°C). Do not rush this step with refrigeration — rapid cooling can cause the butter to re-solidify unevenly at the edges of the bowl.
The melted butter should look clear golden-yellow with no white foam remaining, and the bowl should feel neutral against your wrist — not warm. If it still feels warm, wait another 3–4 minutes and check again.
⚠ Baker's Warning: Do not add the eggs to warm butter. Butter above 95°F (35°C) partially cooks the egg proteins on contact, producing a greasy, broken batter with visible white streaks that will not bake evenly. This is the single most common failure point in melt-and-mix bar recipes.
Step 3: Combine the Butter and Sugars
Goal: Dissolve the sugars fully into the melted butter and create the moisture-rich base that gives these bars their chewy, dense interior.
Equipment: Large mixing bowl, silicone spatula.
Add ¾ cup (150g) packed light brown sugar and ¼ cup (50g) plain white granulated cane sugar directly to the cooled melted butter. Stir from the bottom of the bowl upward in slow, wide circular strokes — approximately 40 to 50 strokes — until no dry sugar pockets remain and the mixture looks uniform, thick, and slightly grainy.
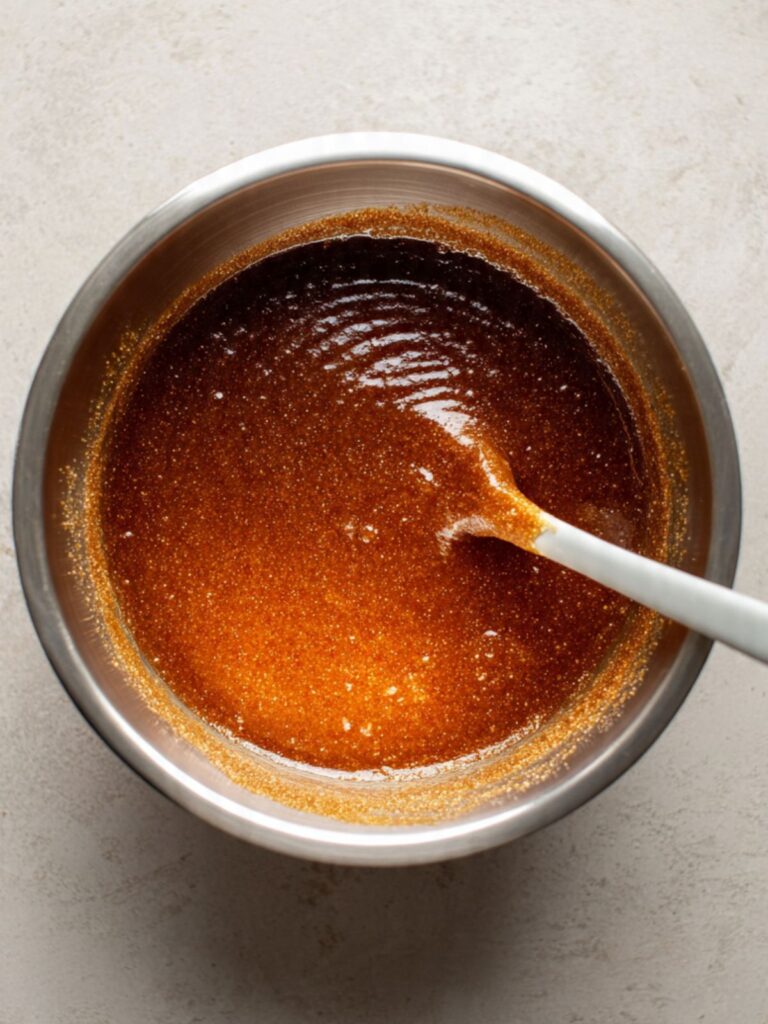
The brown sugar will not dissolve completely at this stage — that is correct. You are looking for full incorporation, not a smooth liquid. The mixture should look thick and paste-like with a deep amber color from the molasses in the brown sugar.
🗒 Luna’s Note: I always pack my brown sugar firmly into the measuring cup and then level it with my finger. One loosely packed cup can be 30% less sugar than a firmly packed one — and less brown sugar means less chew and less moisture in the finished bar.
The butter-sugar mixture should look thick, dark amber, and slightly grainy — not shiny or liquid. No dry sugar should be visible at the bottom or sides of the bowl. This is the correct consistency before the eggs go in.
⚠ Baker's Warning: Do not substitute coconut sugar, raw sugar, or turbinado for the granulated white sugar. These sugars have different moisture contents and crystal structures that change how the bars spread and set. The plain white granulated cane sugar in this recipe is not interchangeable.
Step 4: Add the Eggs
Goal: Emulsify the eggs fully into the butter-sugar base to create a thick, glossy, cohesive batter — the foundation of the chewy texture.
Equipment: Silicone spatula, large mixing bowl.
Add 2 large eggs (approximately 50g each without shell), room temperature, one at a time. After the first egg goes in, stir vigorously in circular strokes — approximately 30 strokes — until the mixture looks fully combined and begins to thicken. Then add the second egg and repeat.
After both eggs are incorporated, stir for an additional 20 strokes. The mixture should look noticeably thicker, glossier, and more uniform than it did after the sugars. Add 1 teaspoon (5ml) pure vanilla extract directly to the batter and stir for 5 more strokes until fully incorporated. This is emulsification happening — the egg yolks are binding the water in the sugar with the fat in the butter into a stable, cohesive batter, and the vanilla is distributing evenly through that stable base.
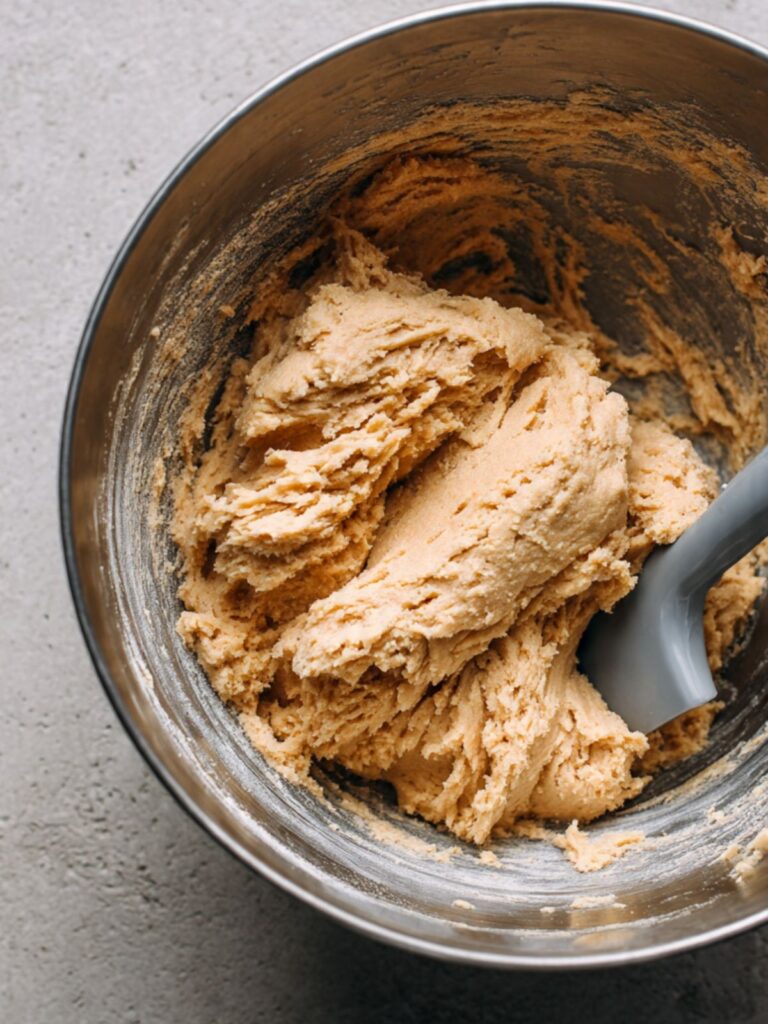
The batter should look thick, smooth, and glossy at the edges — not grainy, not greasy, and no visible egg streaks remaining. It should smell of warm brown sugar and vanilla and fall off the spatula in a slow, heavy ribbon. If it still looks broken or greasy, stir for another 15 strokes and reassess.
⚠ Baker's Warning: Do not add both eggs at once. Adding them together does not allow the first egg to emulsify before the second one loads the mixture with additional liquid — the result is a batter that looks broken and greasy and produces bars with an uneven, oily crumb.
Step 5: Add the Dry Ingredients
Goal: Incorporate the flour, baking soda, and salt with the minimum number of strokes needed — just until no dry flour is visible. Every stroke beyond that point builds gluten and moves the bars from chewy toward tough.
Equipment: Silicone spatula, large mixing bowl.
Add 2 cups (240g) all-purpose flour (spooned and leveled, or weighed), 1 teaspoon (6g) baking soda checked for freshness, and ½ teaspoon (3g) fine sea salt directly to the batter. Do not pre-mix the dry ingredients in a separate bowl — for a melt-and-mix recipe with this ratio of wet to dry, adding them directly works and saves a bowl.
Fold from the bottom of the bowl upward in slow, deliberate strokes — not stirring in circles, which develops gluten faster. Count your strokes. Stop at the exact moment no dry flour is visible — approximately 20 to 25 strokes. The dough will be thick, sticky, and heavy. It will not look smooth like cake batter. That is correct.
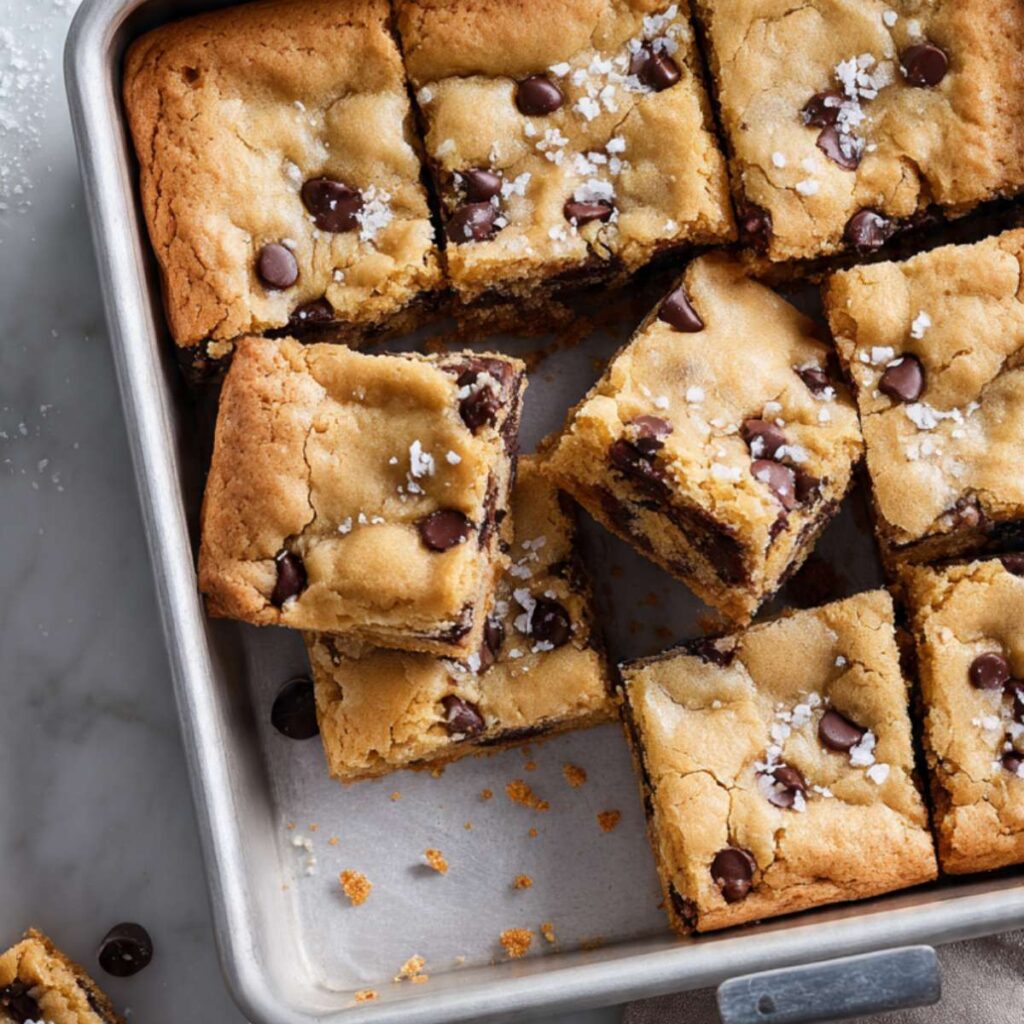
As you can see in the overhead pan photo, the finished bars have a matte, non-glossy surface — that texture starts here. A dough that looks matte and holds its shape when pressed is on track to produce that same matte, crackled top crust after baking. A dough that looks shiny and wet at this stage has too much liquid relative to flour — see Troubleshooting.
⚠ Baker's Warning: Do not overmix after the flour goes in. Overmixing develops gluten and produces bars that bake up tough and dense with a breadlike chew instead of the soft, cookie-like chew visible in the cross-section photo. If you lose count of your strokes, stop as soon as the flour disappears — err on the side of under-mixing.
Step 6: Fold in the Chocolate Chips
Goal: Distribute 1½ cups (255g) semi-sweet chocolate chips evenly throughout the dough without additional mixing strokes that would toughen the bars.
Equipment: Silicone spatula, large mixing bowl.
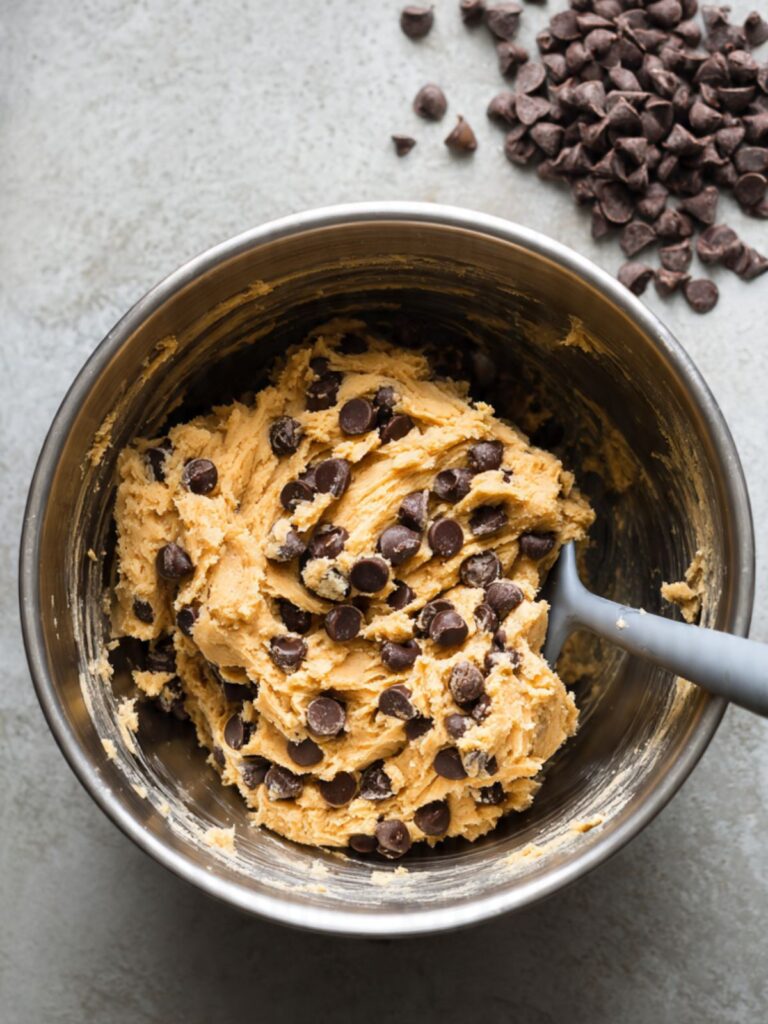
Add 1½ cups (255g) semi-sweet chocolate chips (45–55% cacao), such as Nestlé Toll House or Ghirardelli, directly to the dough. If you are using ½ cup (60g) toasted walnuts, roughly chopped, add them at the same time. Fold with 8 to 10 slow strokes from the bottom of the bowl upward until the chips are evenly distributed throughout the dough.
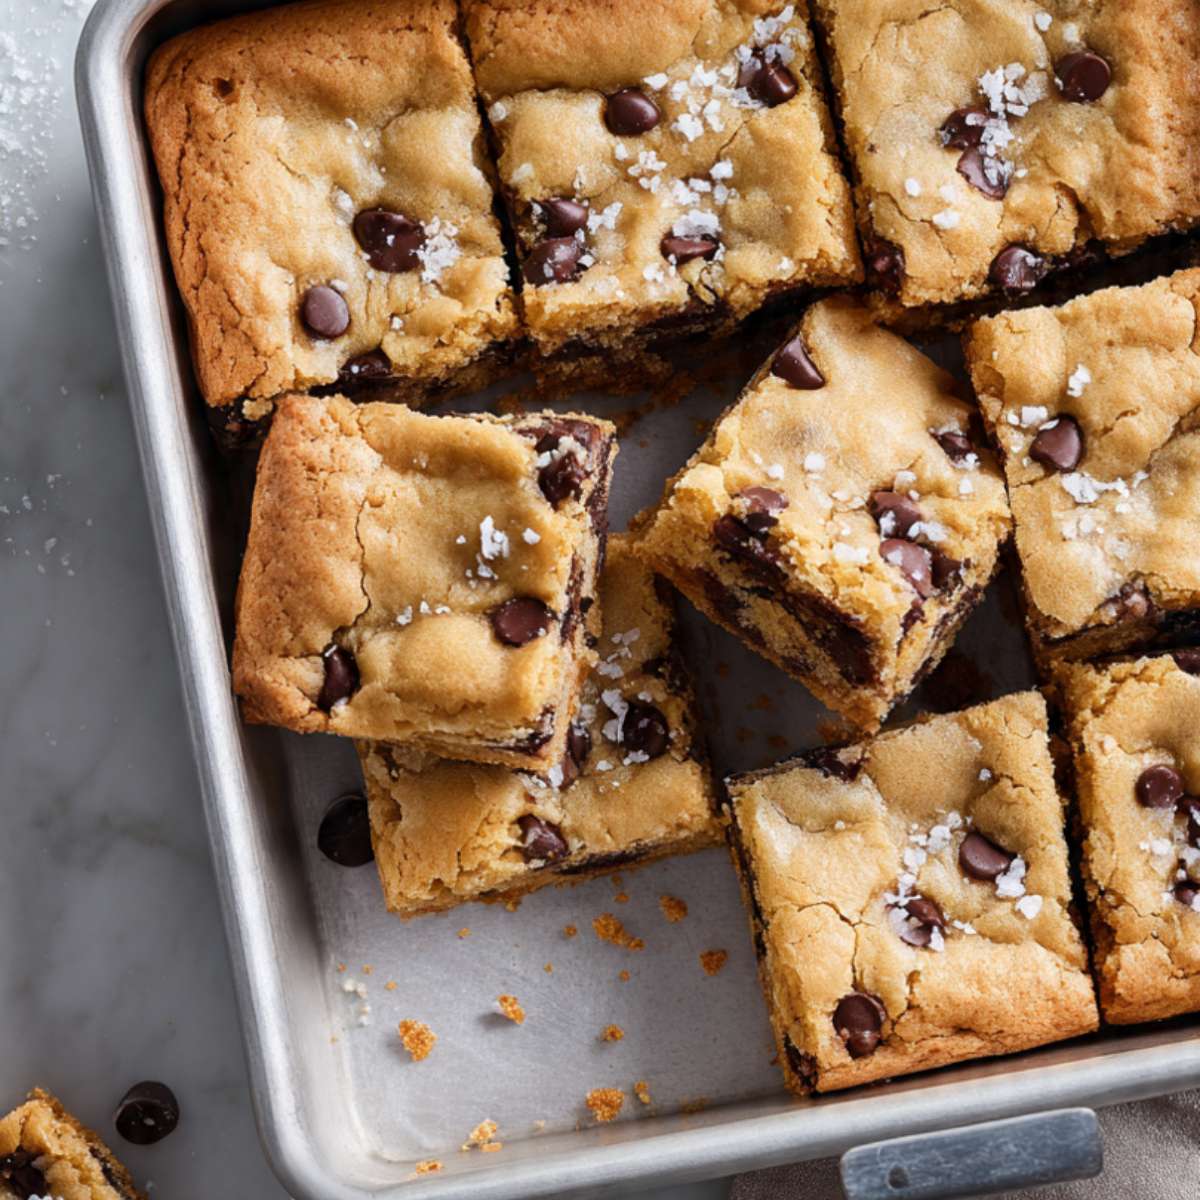
Reserve a small handful of chips — approximately 2 tablespoons (20g) — to press onto the surface of the dough after it is spread in the pan. This guarantees visible, glossy chocolate on the top of every finished bar, exactly as shown in the overhead pan photo.
The dough should look chunky and heavy, with chips visible throughout. It should not look smooth or uniform — the chips create irregular pockets, and that is correct. The dough will be stiff enough that the chips do not sink to the bottom.
⚠ Baker's Warning: Do not use milk chocolate chips as a substitute for semi-sweet. Milk chocolate chips have a higher sugar content and lower melting point — they make the bars sweeter, softer, and less structurally stable. The bars shown in the photos are made with semi-sweet chips in the 45–55% cacao range.
Step 7: Press the Dough into the Pan and Finish the Surface
Goal: Spread the dough into a completely even layer across the full 9×13 inch (23x33cm) surface so every bar bakes to the same thickness and doneness.
Equipment: Offset spatula or lightly dampened hands, prepared 9×13 inch (23x33cm) pan.
Transfer the dough to the prepared pan. Use an offset spatula or lightly dampened fingertips to press the dough into an even layer — working from the center outward toward the edges and corners. The layer should be uniform in thickness across the entire pan. Pay extra attention to the corners, which tend to be thinner and will overbake if left uneven.
Press the reserved handful of chocolate chips onto the surface of the dough, spacing them across the top so every bar will have visible chips after cutting. Scatter flaked sea salt, such as Maldon, evenly across the entire surface — approximately ¾ to 1 teaspoon of flakes, applied from about 12 inches (30cm) above the pan for even distribution.
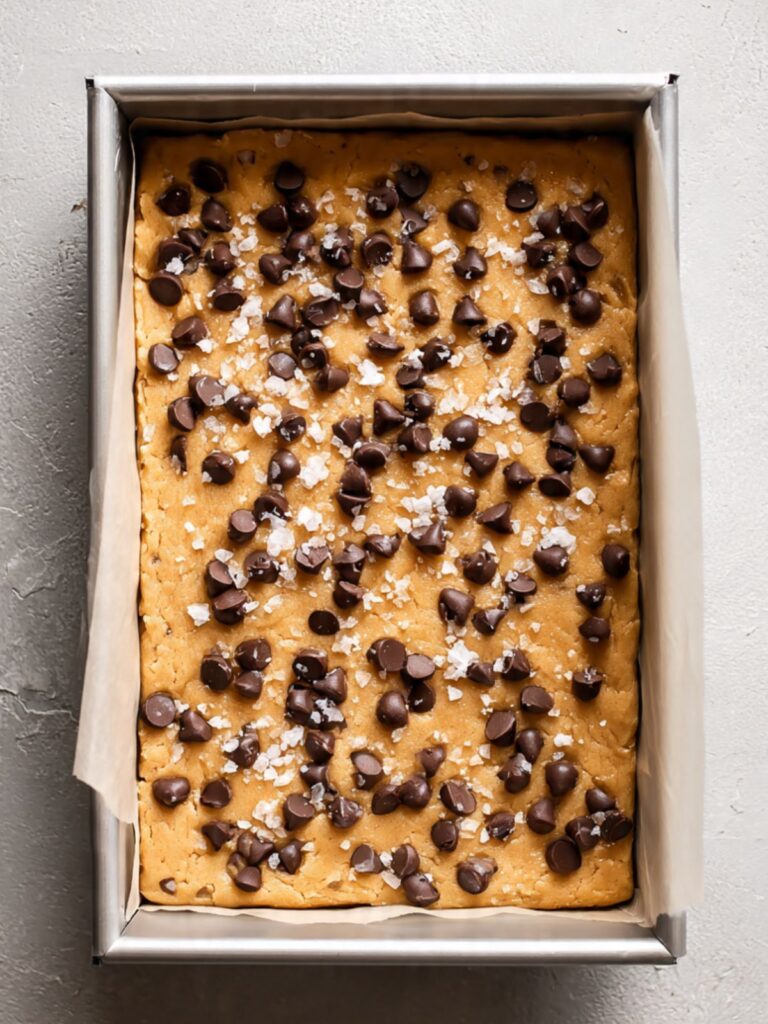
As you can see in the overhead pan photo, the dough surface before baking should look level and slightly matte — not shiny, not domed in the center. If the center looks higher than the edges, press it down gently with damp fingertips before the pan goes into the oven.
The dough should fill the pan in an even, level layer approximately ¾ inch (2cm) thick, with chips pressed into the surface and flaked salt scattered evenly across the top. The corners and edges should be the same thickness as the center — not thinner.
⚠ Baker's Warning: Do not skip the parchment overhang at this stage. Once the dough is pressed into the pan, it is easy to forget — but trying to cut bars inside the pan without the overhang will crumble the edges and make clean squares impossible.
Step 8: Bake the Bars
Goal: Bake until the edges are deep golden brown and the center looks just set — with a faint visual softness that will firm up during the mandatory cooling period from carryover heat.
Equipment: Oven preheated to 350°F (175°C), middle rack, oven thermometer if available.
Place the pan on the middle rack of your preheated 350°F (175°C) oven. Set a timer for 22 minutes. Do not open the oven before 22 minutes — opening early releases heat and can cause the center to sink.

Start checking at 22 minutes. The edges should look deep golden brown and fully set — they will have pulled very slightly away from the short ends of the pan. The center should look set but retain a faint softness when you look at it straight on — not jiggly, not wet-looking, but not as dry and matte as the edges either. This is the correct pull point.
The full bake window is 22 to 26 minutes. If your oven runs cool (confirmed by an oven thermometer), go to 25–26 minutes. If it runs hot, start checking at 21 minutes. The visual cue matters more than the clock.
The bars are done when the edges look exactly like the deep golden-brown border visible in the overhead pan photo — set, slightly darker than the center, and beginning to pull from the pan edges. The center should look pale golden and just set. If the entire surface looks uniformly golden and matte, the bars are overbaked.
⚠ Baker's Warning: Do not bake until the center looks fully set and dry. By the time the center looks done in the oven, it is already overbaked — the center will continue cooking on the hot pan for the full cooling period. A center that looks slightly soft when the pan comes out will be perfectly chewy after two hours of cooling.
Step 9: Cool, Lift, and Cut
Goal: Allow the bars to cool completely in the pan so carryover heat finishes setting the center, then lift and cut cleanly for the even squares shown in the photos.
Equipment: Wire cooling rack, parchment overhang, sharp chef’s knife or bench scraper.
Place the pan on a wire cooling rack immediately after pulling it from the oven. Do not move the bars, do not cut them, and do not attempt to lift them from the pan yet. The bars are structurally fragile while hot — the center is still setting from carryover heat conducted through the pan base and walls.
Leave the bars in the pan for a minimum of 2 hours at room temperature. The pan continues conducting heat into the bar base during the first 30 minutes of this rest — this carryover cooking is what finishes the fudgy, dense interior without the oven drying it out. Moving or cutting before 2 hours produces bars that crumble at the cut edges and look underbaked in the center even when they are not.
After 2 hours, grip both sides of the parchment overhang and lift the entire slab straight up and out of the pan. Set it on a cutting board. Use a sharp chef’s knife, pressing straight down in one clean motion — do not drag the knife. For 16 even bars, cut 3 lines across the width (making 4 columns) and 3 lines down the length (making 4 rows).
🗒 Luna’s Note: I always chill the fully cooled slab in the fridge for 20 minutes before cutting. Cold bars cut cleaner than room-temperature bars — the chocolate chips firm up and the interior holds its shape against the knife instead of compressing. It takes 20 minutes and makes every cut look like it was made with a ruler.
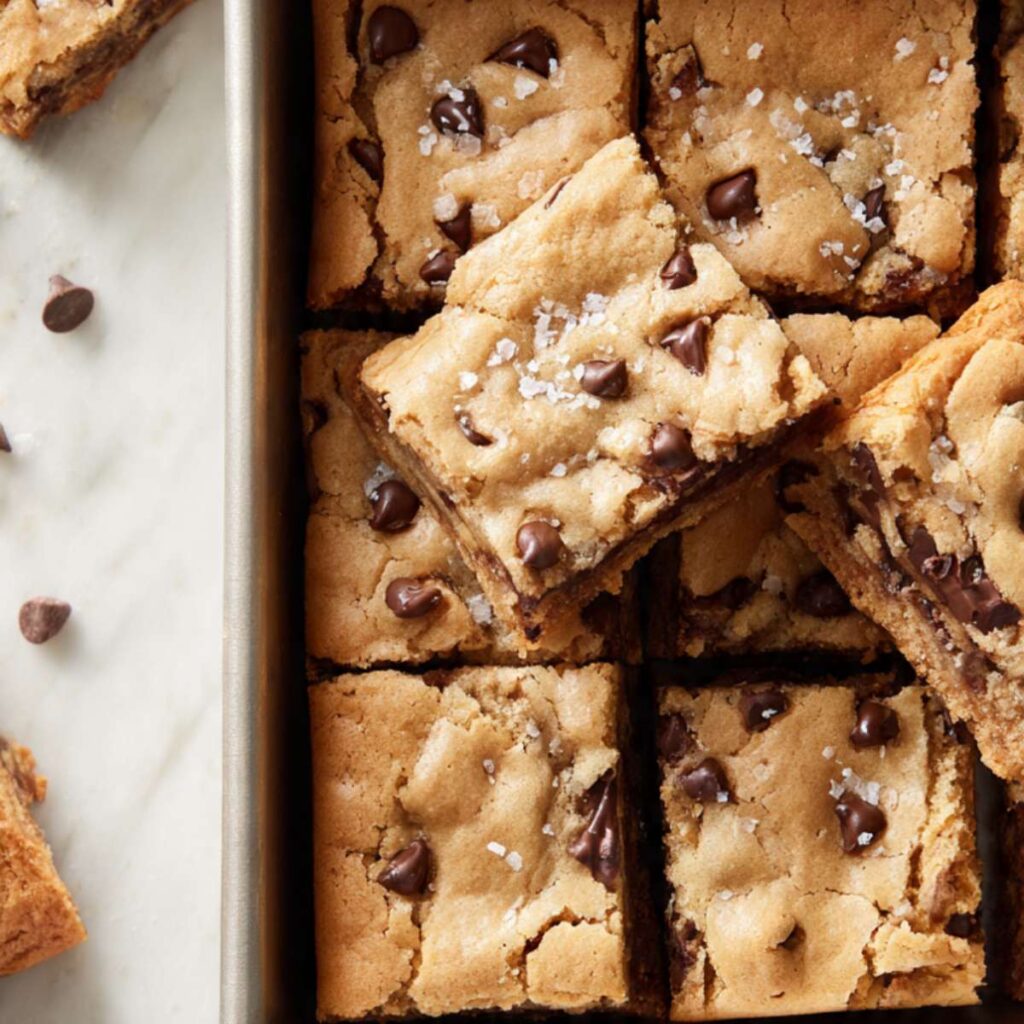
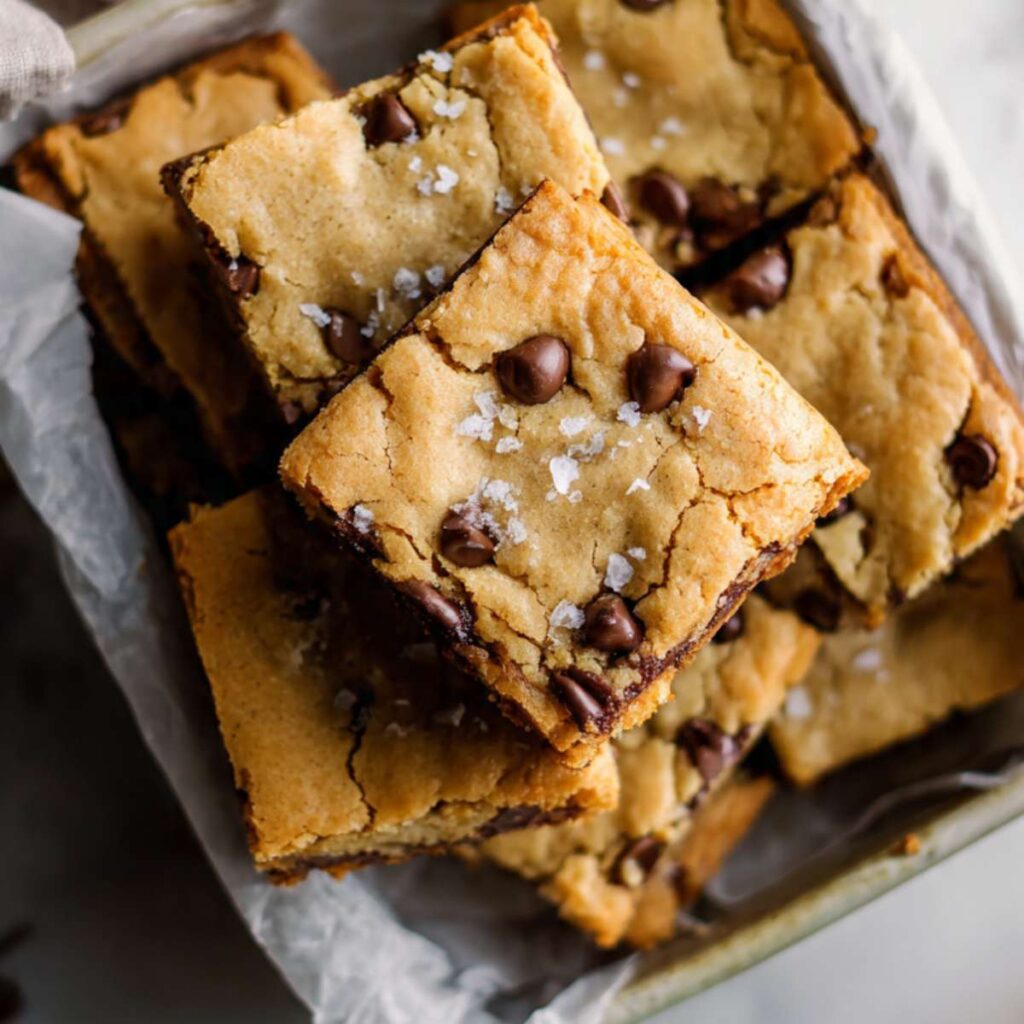
The finished bars should look exactly like the stacked bars in the close-up photo — a pale golden top crust with a fine crackle, a thin line of deeper golden-brown at the cut edges, and a dense, chewy interior with visible pockets of chocolate throughout. The flaked salt on top should still be visible and intact.
⚠ Baker's Warning: Do not cut the bars while they are warm or hot. Warm bars are structurally soft — the interior has not finished setting and the cut edges will compress and crumble instead of holding a clean line. Two hours is the minimum. If you have time, three hours produces even cleaner cuts.
The Science Behind Chewy Cookie Bars
Most people think chewy bars are about the recipe. They are actually about three specific decisions — and understanding why each one works is what separates a bar you can repeat reliably from one that comes out differently every time.
Melted Butter and Sugar Concentration
The decision to melt the butter instead of cream it is the single most important structural choice in this recipe. Creaming butter traps air — and trapped air creates lift, lightness, and a cakey texture. That is exactly what we do not want here.
Melted butter coats the flour proteins differently. Instead of building an airy, open crumb structure, it produces a tighter, denser network that bakes into the chewy, fudgy interior visible in the cross-section shot above. The brown sugar amplifies this effect through hygroscopicity — its ability to attract and hold onto moisture from the surrounding environment. That is why these bars stay soft on day three when a standard cookie would be stale. Brown sugar does not just add sweetness. It actively retains moisture in the finished bar long after it leaves the oven.
For more on how sugar type controls texture in chocolate chip baked goods, my brown butter chocolate chip cookies article breaks down the full sugar science in detail.
Gluten Development and the Fold-Not-Stir Rule
Flour contains two proteins — glutenin and gliadin — that link together into long, elastic chains called gluten when they come into contact with water and mechanical action. The more you mix after the flour goes in, the longer and stronger those chains become.
Long gluten chains produce bread. Short, minimally developed gluten chains produce the tender, yielding chew visible when you pull apart a bar from the center of the pan. This is why the method specifies a maximum of 20 to 25 folding strokes after the flour is added — and why folding from the bottom upward develops less gluten than stirring in circles. The stroke direction is not a stylistic choice. It is gluten management.
🗒 Luna’s Note: I tell every baker I know: count your strokes after the flour goes in. It sounds tedious. It is the difference between a chewy bar and a tough one.
Carryover Cooking and the Two-Hour Rule
The bars come out of the oven looking slightly underdone in the center. That is intentional, not a mistake. The 9×13 inch (23x33cm) aluminum pan retains significant heat after leaving the oven — it continues conducting that heat into the base and sides of the bar for 20 to 30 minutes after the oven door closes.
This carryover cooking is what sets the fudgy, dense center without the oven drying out the edges. A bar pulled at the correct visual cue — edges golden and set, center just barely firm — will finish baking on the cooling rack. A bar left in the oven until the center looks fully done has already been overbaked. The two-hour cooling window is not about patience. It is about letting the physics of heat transfer finish the job the oven started. The two-hour cooling window is not about patience. It is about letting the physics of heat transfer finish the job the oven started.
Troubleshooting & Pro-Tips
Common Mistakes
Wrong ingredient type — butter state, vanilla, or chocolate chip substitution
Symptom: The bars taste flat or one-dimensional, bake up greasy and uneven, or have a texture that does not match the dense, chewy interior shown in the close-up photo.
Cause: Three substitutions cause the most failures in this recipe. First — using salted butter instead of unsalted butter throws off the salt balance of the entire recipe; combined with the fine sea salt and flaked finish, the bars tip from balanced to aggressively salty. Second — using imitation vanilla instead of pure vanilla extract produces a sharp, chemical background note that is impossible to mask in a recipe where vanilla is one of only two flavoring agents. Third — using milk chocolate chips instead of semi-sweet chips in the 45–55% cacao range makes the bars sweeter, softer, and less structurally stable, producing a bar that does not hold its shape cleanly when cut.
Immediate fix: None for the current batch — ingredient substitutions cannot be corrected after baking.
Prevention: Use unsalted butter at exactly ¾ cup (170g), pure vanilla extract at exactly 1 teaspoon (5ml), and semi-sweet chocolate chips in the 45–55% cacao range. These are the three ingredients where substitution has the most visible impact on the finished bar.
Wrong pan type or preparation
Symptom: The bottom of the bars is dark, tough, or bitter while the center is still soft. Or the bars cannot be lifted cleanly from the pan and the edges crumble on cutting.
Cause: A dark non-stick pan absorbs significantly more radiant heat than the light-colored aluminum pan this recipe was tested with — the base overbrowns before the center can set. Glass and ceramic pans retain heat differently and produce uneven baking across the 9×13 inch (23x33cm) surface. Insufficient parchment overhang or skipped pan greasing prevents clean release.
Immediate fix: Slide a second empty baking sheet under the bar pan for the remaining bake time to shield the base. For stuck bars, use a thin offset spatula to separate the edges before attempting to lift.
Prevention: Use a light-colored aluminum 9×13 inch (23x33cm) pan lined with parchment paper leaving a 2-inch (5cm) overhang on both long sides, with the short ends lightly greased. If only a dark pan is available, reduce oven temperature by 25°F (15°C) and start checking at 20 minutes.
The bars came out dry and crumbly — not chewy
Symptom: The finished bars crumble when cut, feel dry and sandy in the mouth, and do not have the dense, yielding chew shown in the cross-section photo.
Cause: Overmeasured flour is responsible for this in the majority of cases. Scooping the measuring cup directly into the flour bag packs 20–30% more flour than spooning and leveling — that extra flour absorbs the available moisture in the batter and produces a dry, tight crumb. Overbaking is the second most common cause — bars left in the oven until the center looks fully set are already past the correct pull point.
Immediate fix: There is no fix for a baked bar. For the next batch, weigh the flour at exactly 240g. Pull the bars at 22–24 minutes — edges deep golden, center just set with a faint visual softness.
Prevention: Use a kitchen scale. Spoon and level if you must use volume. Set a timer for 22 minutes and start checking visually from that point forward.
The bars came out cakey instead of chewy and dense
Symptom: The interior looks open and airy — more like a thick cake than a dense cookie bar. The texture pulls apart in soft chunks rather than the tight, chewy layers shown in the close-up photo.
Cause: The butter was too warm when the eggs were added, which partially cooked the egg proteins and changed how they set during baking. Overmixing after the flour was added is the second cause — excess gluten development produces a more structured, cakey crumb. Using bread flour instead of all-purpose flour also produces this result.
Immediate fix: None for the current batch. For the next batch, confirm butter temperature is below 90°F (32°C) before adding eggs, count strokes after the flour goes in, and confirm you are using all-purpose flour.
Prevention: Melt the butter first, then complete all your other prep while it cools. By the time you have measured everything else, the butter will be at the correct temperature.
The bottom of the bars is overbaked and dark while the center is still soft
Symptom: The base of the bars is dark brown, tough, or bitter-tasting, while the interior is still soft and underbaked.
Cause: A dark non-stick pan absorbs significantly more radiant heat than a light-colored aluminum pan. The base of the bar cooks faster than the center can set. Bottom rack placement produces the same result — direct bottom heat overbrowns the base before the top surface has time to set.
Immediate fix: Slide a second empty baking sheet under the bar pan for the remaining bake time. This shields the base from direct heat and slows bottom browning.
Prevention: Use a light-colored aluminum pan on the middle rack every time. If you only own a dark pan, reduce the oven temperature by 25°F (15°C) and start checking at 20 minutes.
The bars did not set — the center is gummy even after cooling
Symptom: After two full hours of cooling, the center of the bars is still soft, gummy, and does not hold its shape when cut.
Cause: Underbaking is the primary cause — the center did not reach the temperature needed for the egg proteins to fully coagulate and the starch to fully gelatinize. Expired baking soda is a secondary cause — without adequate leavening, the interior structure does not develop correctly and the center stays dense and gummy rather than setting into the chewy texture shown in the photos.
Immediate fix: If the bars are still warm, return them to a 325°F (165°C) oven for 8–10 minutes. Check every 3 minutes. If they have fully cooled and are still gummy, they are salvageable as a warm dessert served with ice cream — but the texture will not improve at room temperature.
Prevention: Test your baking soda before every batch. Bake to the correct visual cue — edges fully golden and set, center just barely firm. When in doubt, give it one more minute.
The bars spread too thin and baked up flat
Symptom: The finished bars are noticeably thinner than the approximately ¾-inch (2cm) thickness shown in the stacked bar photo. The edges are crisp and the center has no chew.
Cause: Too much butter or butter that was too warm caused the dough to spread excessively in the oven before the structure set. Using a pan larger than 9×13 inch (23x33cm) produces the same result — the same amount of dough spread over a larger surface area bakes thinner and dries out faster.
Immediate fix: None for the current batch. For the next batch, confirm pan size is exactly 9×13 inch (23x33cm) and butter is measured at exactly ¾ cup (170g).
Prevention: Confirm pan dimensions before pressing the dough in. A 10×15 inch (25x38cm) pan with this dough quantity produces bars that are half the thickness shown in the photos.
The bars stuck to the pan and the edges crumbled when cut
Symptom: The parchment did not release cleanly, or the edges crumbled and broke when the bars were lifted or cut.
Cause: Insufficient parchment overhang — either the overhang was too short to grip, or the short ends of the pan were not greased. Cutting while the bars were still warm is the second most common cause — warm bars have not fully set and compress and crumble under the knife rather than cutting cleanly.
Immediate fix: Use a thin offset spatula or butter knife to gently separate the edges from the pan walls before attempting to lift. Cut in the pan using a plastic or silicone knife to minimize crumbling.
Prevention: Always leave at least 2 inches (5cm) of parchment overhang on both long sides. Grease the short ends. Wait the full 2 hours — or chill the cooled slab for 20 minutes in the fridge before cutting.
Leavening failure — bars are flat, dense, and have no surface crackle
Symptom: The bars bake up flat and dense with no visible crackle on the surface and a gummy, under-structured interior.
Cause: Expired baking soda. Baking soda loses potency within 3–6 months of opening. Without active leavening, the carbon dioxide bubbles that create the bar’s interior structure and surface crackle never form.
Immediate fix: Replace the baking soda and rebake a fresh batch.
Prevention: Test baking soda before every batch — drop ½ teaspoon (3g) into hot water with a splash of white vinegar. Aggressive bubbling within 2 seconds means it is active. Write the opening date on the box.
High altitude and high humidity adjustments
High altitude (above 3,500 feet / 1,067m): Reduce baking soda to ¾ teaspoon (4.5g). Increase flour by 2 tablespoons (15g). Increase oven temperature to 360°F (182°C) and start checking at 20 minutes. At altitude, leavening acts faster and the lower air pressure causes bars to rise and then collapse if there is too much lift too quickly.
High humidity: Flour absorbs ambient moisture in humid environments, which can make the dough stickier than expected and slow the bake. If your kitchen is consistently above 70% humidity, add 1 tablespoon (8g) of extra flour to compensate. Extend the bake by 2–3 minutes and confirm the visual doneness cue rather than relying on timing alone.
Expert Pro-Tips
Press chips on top of the dough surface before the pan goes in. Reserve 2 tablespoons (20g) of chips and press them directly onto the dough surface after spreading. Chips folded into the dough get partially buried as the bars bake. The reserved chips on the surface guarantee visible, glossy chocolate on the top of every bar — exactly as shown in every overhead photo in this article.
Chill the fully cooled slab before cutting for bakery-clean edges. After the bars have cooled for 2 hours at room temperature, slide the whole pan into the fridge for 20 minutes before lifting and cutting. Cold bars hold their shape against the knife. The chocolate firms up, the interior sets more firmly, and the cut edges stay clean instead of compressing. It adds 20 minutes and makes every bar look intentional.
Use a ruler and a sharp chef’s knife for even cuts. Mark the cutting lines lightly with the back of the knife before committing to the cut. For 16 bars from a 9×13 inch (23x33cm) pan, you need 3 cuts across the 9-inch width and 3 cuts down the 13-inch length. Press straight down in one clean motion — never drag or saw. Dragging compresses the interior and produces ragged edges.
How to Store Nestlé Toll House Cookie Bars
Room Temperature
Store the bars in a hard-sided lidded container — a rectangular food storage container with a tight-fitting lid works best for this shape. Layer the bars in a single layer if possible, or stack with a sheet of parchment paper between each layer to prevent the bottoms from sticking to the tops of the bars below.
Do not store in zip-lock bags. Bags compress the bars under their own weight and flatten the edges. They also trap condensation against the surface, which softens the top crust and makes the flaked salt dissolve into the bar instead of staying as distinct crystals on the surface.
At room temperature, the bars stay soft and chewy for up to 4 days. Day 2 and day 3 are actually the best — the brown sugar continues drawing moisture through the bar overnight, and the interior becomes slightly more dense and fudgy than it was on day one. By day 4, the edges begin to dry out while the center stays soft. By day 5, the texture difference between edge and center bars becomes significant.
Keep the container away from direct sunlight and heat sources. A warm kitchen (above 75°F / 24°C) accelerates drying and can cause the chocolate chips to bloom — developing a white, chalky surface coating that does not affect flavor but changes texture.
🗒 Luna’s Note: I always cut the full slab into bars before storing. It seems counterintuitive — uncut bars stay fresher longer because less surface area is exposed to air. But I have never once made a batch of these and had them last long enough for that to matter.
Refrigerator
Refrigeration is not recommended for these bars as a primary storage method. The fridge pulls moisture out of baked goods faster than room temperature air does, and these bars will dry out and lose their chewy interior texture within 24–36 hours of refrigeration.
If your kitchen runs consistently warm (above 78°F / 26°C) or humid, refrigeration is a better choice than letting the bars sit out. In that case, store in a hard-sided container with parchment between layers, and bring the bars to room temperature for 20–30 minutes before serving. Cold bars fresh from the fridge are noticeably denser and less yielding than bars at room temperature — the fat in the butter and chocolate firms up significantly when chilled.
Do not wrap individual bars in plastic wrap for fridge storage — the wrap traps condensation directly against the bar surface and makes the top crust soft and slightly sticky within hours.
Freezer — Baked Bars
These bars freeze exceptionally well. Allow the bars to cool completely — a full 2 hours at room temperature minimum — before freezing. Never freeze warm bars.
Wrap each bar individually in plastic wrap, pressing the wrap snugly against all six sides to eliminate air pockets. Then place the wrapped bars in a single layer inside a zip-lock freezer bag or a hard-sided freezer-safe container. The individual wrapping is what prevents freezer burn — the outer bag or container is secondary protection.
Frozen bars keep their texture for up to 2 months. Beyond 2 months, ice crystals begin to form inside the bar and the texture becomes slightly grainy on thawing.
To thaw: remove individual bars from the freezer and unwrap them while still frozen — leaving the wrap on during thawing traps condensation against the surface and makes the top crust soggy. Place on a wire rack at room temperature for 45–60 minutes. The bar is ready when it yields to gentle finger pressure at the center.
To reheat from frozen: place an unwrapped bar on a microwave-safe plate and microwave at 50% power for 25–30 seconds. The center will be warm and the chocolate will be soft and melted — this is the closest you will get to a fresh-from-the-oven result without actually baking a new batch.
Freezer — Unbaked Dough
The dough can also be frozen before baking. Press the dough into the parchment-lined pan as directed, then wrap the entire pan tightly in two layers of plastic wrap and freeze for up to 1 month.
To bake from frozen: remove the pan from the freezer and let it sit at room temperature for 30 minutes while the oven preheats to 350°F (175°C). Do not thaw completely before baking — a partially frozen slab goes into the oven. Add 5–8 minutes to the bake time and use the same visual cues: edges deep golden brown, center just set. The frozen dough center takes longer to heat through, so the visual cue matters more than the clock here.
Scatter the flaked sea salt on top after the 30-minute counter rest and just before the pan goes into the oven — not before freezing, as the salt will absorb moisture from the dough during freezer storage.
Serving Suggestion
I serve these at room temperature, cut into squares and arranged on a wooden board with the flaked salt side up so the finishing salt is the first thing people see. The salt catches the light and signals that these are not ordinary cookie bars before anyone has taken a bite.
When I want to make them feel more like dessert than a snack, I warm a bar for 20 seconds in the microwave — just enough to soften the chocolate back to a melted state — and serve it with a scoop of vanilla ice cream. The contrast between the warm, dense bar and the cold ice cream is one of those combinations that needs no explanation.
🗒 Luna’s Note: I have served these at every kind of gathering — casual weeknight dinners, holiday cookie exchanges, school bake sales. They travel well, they cut cleanly, and they look more intentional than a plate of drop cookies. The flaked salt on top does a lot of the visual work.
Frequently Asked Questions
Can I make Nestlé Toll House cookie bars ahead of time?
Yes — and these bars are genuinely better on day two than on the day they are baked. The brown sugar continues pulling moisture through the bar overnight, which makes the interior denser and more chewy by the following day. Bake the bars the day before you need them, cool completely for the full 2 hours so carryover cooking finishes setting the crumb structure, then store uncut in a hard-sided lidded container at room temperature.
Cut them the next day immediately before serving for the cleanest edges. If you need to go further ahead, the baked bars freeze well for up to 2 months — wrap individually in plastic wrap, freeze flat, and thaw at room temperature for 45–60 minutes before serving.
Can I use salted butter instead of unsalted butter in cookie bars?
You can, but you need to adjust the recipe. Salted butter contains approximately ¼ teaspoon (1.5g) of salt per ½ cup (113g), which means ¾ cup (170g) of salted butter adds roughly ⅜ teaspoon (2.25g) of extra salt to the dough on top of the ½ teaspoon (3g) of fine sea salt already in the recipe. That combined salt level tips most batches from balanced to noticeably salty.
If salted butter is your only option, omit the fine sea salt from the recipe entirely, skip the flaked salt finish, and note that the emulsification of fat and sugar may feel slightly different during mixing — salted butter contains trace water additives that affect how smoothly the batter comes together. The bars will still taste good — but the salt balance will be less precise than the tested version.
Why did my cookie bars come out cakey instead of chewy?
The most common cause is butter that was too warm when the eggs were added. Butter above 95°F (35°C) partially cooks the egg proteins on contact — those proteins set differently during baking and produce a more open, cakey crumb structure instead of the dense, fudgy interior visible in the close-up photo. The second cause is overmixing after the flour goes in — excess gluten development creates a structured crumb that behaves more like a cake than a cookie bar.
Confirm your butter is below 90°F (32°C) before adding eggs, stop folding the moment no dry flour is visible — approximately 20 to 25 strokes — and remember that gluten development is cumulative: every stroke past that point builds more structure and pushes the bar further from chewy toward cakey. For a side-by-side comparison of how mixing method controls texture in chocolate chip baked goods, my chewy chocolate chip cookies article covers the same science applied to drop cookies.
How do I know when cookie bars are done baking?
Use the visual cue, not the clock. The bars are done when the edges look deep golden brown and have just begun to pull away from the short ends of the pan — exactly as shown in the overhead pan photo above. The center should look set but retain a faint visual softness when you view it straight on. It should not look wet or jiggly, but it should not look as dry and matte as the edges either. That slightly soft center will finish setting from carryover heat during the 2-hour cooling period. If you wait for the center to look fully done in the oven, the bars are already overbaked and will be dry when cooled.
Can I double this Nestlé Toll House cookie bars recipe?
Yes, with one important adjustment. Do not double the baking soda — increase it by only 50% instead. Doubling leavening does not produce twice the lift; it produces bars that rise too fast, collapse in the center, and have a metallic, soapy aftertaste from excess sodium bicarbonate. For a doubled batch, use 1½ teaspoons (9g) of baking soda instead of 2 teaspoons (12g).
Bake the doubled batch in two separate 9×13 inch (23x33cm) pans on the same oven rack if your oven is wide enough, or bake sequentially. Do not attempt to bake a doubled batch in a single larger pan — the thickness change makes the bake time unpredictable and the parchment-lined overhang system that allows clean lifting will not work correctly on a non-standard pan size.
Why are my cookie bars dry and crumbly instead of chewy?
Overmeasured flour is the cause in the majority of cases. Scooping the measuring cup directly into the flour bag packs 20–30% more flour than the recipe was tested with — that extra flour absorbs the moisture in the batter and produces a dry, sandy crumb that falls apart when cut. The fix is to spoon flour into the measuring cup and level it with a straight edge, or better yet, weigh it at exactly 240g every time. Overbaking is the second cause — bars left in the oven until the center looks fully set are already past the correct pull point and will continue drying out as they cool.
How do altitude and humidity affect this recipe?
At high altitude above 3,500 feet (1,067m), the lower air pressure causes leavening to act more aggressively — the bars can rise too fast and then collapse in the center. Reduce the baking soda to ¾ teaspoon (4.5g), add 2 tablespoons (15g) of extra flour measured using the spoon-and-level method, and increase the oven temperature to 360°F (182°C).
In high humidity environments above 70%, flour absorbs ambient moisture before it even goes into the bowl, which makes the dough stickier than expected and slows the bake. Add 1 tablespoon (8g) of extra flour and extend the bake by 2–3 minutes, relying on the visual doneness cue rather than the timer.
More Cookie Bars You’ll Love
- Salted Caramel Chocolate Chip Cookie Bars — the same chewy, dense bar base with a ribbon of salted caramel folded through the dough and a caramel drizzle finish on top.
- Oatmeal Chocolate Chip Bars — rolled oats replace a portion of the flour for a heartier chew and a nuttier flavor, with the same melted butter method and flaked salt finish.
- Peanut Butter Chocolate Chip Bars — commercial creamy peanut butter replaces a portion of the butter for a dense, fudgy bar with a deep roasted peanut flavor in every bite.
- Easy Chocolate Chip Cookies Recipe — the drop cookie version of this same dough, portioned individually and baked for the same chewy center and crisp edge result in half the cooling time.
Nestlé Toll House Cookie Bars
Ingredients
Equipment
Method
- Position the oven rack in the middle slot and heat the oven to 350°F (175°C), then line a 9×13 inch (23x33cm) light-colored aluminum baking pan with parchment paper leaving a 2-inch (5cm) overhang on both long sides and lightly grease the two short ends where the parchment does not reach.
- Melt ¾ cup (170g) unsalted butter completely and pour into a large mixing bowl, then set aside to cool for 8–12 minutes until the bowl feels neutral against your wrist and the butter registers below 90°F (32°C) on an instant-read thermometer before moving to the next step.
- Add ¾ cup (150g) packed light brown sugar and ¼ cup (50g) plain white granulated cane sugar to the cooled melted butter and stir from the bottom of the bowl upward in slow wide circular strokes for approximately 40 to 50 strokes until no dry sugar pockets remain and the mixture looks thick, dark amber, and slightly grainy.
- Add 2 large room-temperature eggs one at a time stirring vigorously for approximately 30 strokes after each addition until the mixture looks thick, smooth, and glossy with no visible egg streaks, then stir for an additional 20 strokes after the second egg is fully incorporated, add 1 teaspoon (5ml) pure vanilla extract, and stir for 5 more strokes until fully combined.
- Add 2 cups (240g) all-purpose flour spooned and leveled, 1 teaspoon (6g) baking soda, and ½ teaspoon (3g) fine sea salt directly to the batter and fold from the bottom of the bowl upward in slow deliberate strokes stopping at the exact moment no dry flour is visible — approximately 20 to 25 strokes — the dough will be thick, sticky, and heavy and should not look smooth or shiny.
- Add 1½ cups (255g) semi-sweet chocolate chips (45–55% cacao) and fold with 8 to 10 slow strokes until the chips are evenly distributed throughout the dough, reserving approximately 2 tablespoons (20g) of chips to press onto the surface after spreading, and adding ½ cup (60g) toasted roughly chopped walnuts at this stage if using.
- Transfer the dough to the prepared pan and use an offset spatula or lightly dampened fingertips to press it into a completely even layer working from the center outward toward the edges and corners, then press the reserved chocolate chips onto the surface and scatter flaked sea salt such as Maldon evenly across the entire top from approximately 12 inches (30cm) above the pan.
- Bake on the middle rack at 350°F (175°C) for 22 to 26 minutes without opening the oven before 22 minutes, pulling the pan when the edges look deep golden brown and just beginning to pull from the pan walls and the center looks set but retains a faint visual softness — do not wait for the center to look fully dry or the bars will be overbaked.
- Place the pan immediately on a wire cooling rack and leave the bars completely undisturbed for a minimum of 2 hours at room temperature, then grip the parchment overhang on both long sides, lift the entire slab onto a cutting board, and cut into 16 bars using a sharp chef’s knife pressed straight down in one clean motion — 3 cuts across the 9-inch width and 3 cuts down the 13-inch length.
Notes
before adding eggs — warm butter above 95°F
partially cooks the egg proteins on contact and
produces a greasy, cakey bar instead of a
chewy one. – Vanilla extract: use pure vanilla extract only —
not imitation. Imitation vanilla has a sharp,
chemical aftertaste that is especially noticeable
in a recipe where vanilla is one of only two
flavoring agents. – Flour measuring: spoon into the measuring cup
and level with a straight edge — never scoop
directly from the bag. For best results, weigh
at exactly 240g on a kitchen scale. – Eggs: must be room temperature — pull from the
fridge 30 minutes before starting or place in
warm water for 10 minutes. Cold eggs cause the
butter to seize and the batter to look broken. – Baking soda: test for freshness before every
batch — drop ½ tsp (3g) into hot water with a
splash of white vinegar; aggressive bubbling
within 2 seconds means it is active. Replace
if it fizzes weakly. – Chocolate chips: use semi-sweet 45–55% cacao
only — such as Nestlé Toll House or Ghirardelli.
Milk chocolate chips produce a sweeter, softer
bar that does not set or cut correctly. – Pan: light-colored aluminum 9×13 inch (23x33cm)
only — dark pans overbrown the base before the
center sets. If using glass or ceramic, reduce
oven temperature by 25°F (15°C). – Parchment overhang: mandatory — leave at least
2 inches (5cm) on both long sides. Without it
the bars cannot be lifted cleanly and the edges
will crumble when cut. – Cooling: minimum 2 hours before cutting — the
center continues setting from carryover heat
during this time. Cutting early produces
crumbling edges and an underbaked-looking center. – Clean cuts: chill the fully cooled slab in the
fridge for 20 minutes before cutting — cold bars
hold their shape against the knife and produce
cleaner edges. – Make-ahead: bars are better on day 2 — bake the
day before, store uncut in a hard-sided lidded
container at room temperature overnight, cut
before serving. – Freezing baked bars: wrap each bar individually
in plastic wrap, place in a freezer-safe
container, freeze up to 2 months — thaw
unwrapped at room temperature for 45–60 minutes
or microwave at 50% power for 25–30 seconds. – Freezing unbaked dough: freeze in the pan
wrapped tightly in two layers of plastic wrap
up to 1 month — rest at room temperature
30 minutes before baking and add 5–8 minutes
to bake time. Add flaked salt after the counter
rest, not before freezing. – Scaling: do not double the baking soda if
doubling the recipe — increase by 50% only
(1½ tsp / 9g total) to avoid metallic aftertaste
and collapsed centers. Bake in two separate
9×13 inch pans. – High altitude above 3,500 feet (1,067m): reduce
baking soda to ¾ tsp (4.5g), add 2 tbsp (15g)
extra flour using the spoon-and-level method,
increase oven to 360°F (182°C), start checking
at 20 minutes. – High humidity: add 1 tbsp (8g) extra flour and
extend bake by 2–3 minutes — rely on visual
doneness cue rather than the timer. – Allergens: contains wheat, eggs, dairy, and soy
(present in most chocolate chip brands). Contains
tree nuts if optional walnuts are added.