
Vanilla Mug Cake Recipe
I did not take mug cakes seriously for a long time. They seemed like a compromise — the baking equivalent of deciding you did not really want cake. Then I started getting reader questions about them. A lot of them. And I realized I had been wrong about what a mug cake is actually for.
A vanilla mug cake is not a substitute for a layer cake. It is its own thing. You want cake in four minutes, in one mug, with no leftovers and no dishes. That is exactly what this recipe is for. I tested it eleven times before the baking powder ratio and microwave time were both right — and it does that job better than any version I have encountered.
The texture, when you get it right, is a genuine surprise. The surface comes out matte and slightly porous — you can see the steam vents in the top. When you break into it with a spoon, the crumb is open and tender, with color streaks from the rainbow jimmies that melted slightly during cooking. It does not taste like compromise. It tastes like a real vanilla sponge, made in under five minutes.
I tested this with oil versus melted butter. Oil produced a slightly more moist crumb but lost all the flavor complexity. Butter won, and it was not close. The vanilla-butter combination in this recipe is what makes it taste like actual cake rather than a microwaved flour blob. I kept the butter and I would not change it.
I tested the baking powder ratio at ¼ tsp, ½ tsp, and ¾ tsp. At ¼ tsp, the cake rose barely at all — dense, flat, almost custard-like. At ¾ tsp, the top became spongy and slightly bitter with a baking powder aftertaste. At ½ tsp, the rise was full and even, the crumb was open, and there was no chemical taste. That is the ratio in this recipe.
This is a one-bowl recipe — technically one-mug, since you mix directly in the vessel you cook in. No electric mixer. No separate bowls. A fork and a measuring spoon are the only tools that touch the batter. No chilling, no preheating, no resting. From pantry to eating in under five minutes.
The sprinkles are folded into the batter before cooking — that is what gives you the funfetti-style color throughout the crumb, exactly as you can see in the cross-section photo above. This is not optional if you want that result. Sprinkles added only on top will not migrate into the interior during the short microwave time.

| Prep Time | Cook Time | Total Time | Yield | Difficulty |
|---|---|---|---|---|
| 3 minutes | 90 seconds | 5 minutes | 1 mug cake (1 serving) | Easy |
| Calories | Fat | Carbs | Sugar | Protein | Sodium |
|---|---|---|---|---|---|
| ~290 kcal | ~9g | ~47g | ~24g | ~4g | ~190mg |
Macros are approximate and will vary based on ingredient brands and exact serving size. Whipped cream topping not included in calculation.
Ingredients & Tools for Vanilla Mug Cake Recipe
For the Mug Cake
- 4 tablespoons (30g) all-purpose flour (spooned into the measuring spoon and leveled — or weighed at 30g)
- 2 tablespoons (25g) plain white granulated cane sugar
- ½ teaspoon (2g) baking powder, checked for freshness
- ⅛ teaspoon (0.5g) fine sea salt
- 3 tablespoons (46ml) whole milk, room temperature
- 1 tablespoon (14g) unsalted butter, melted and cooled slightly
- ¼ teaspoon pure vanilla extract
- 1 tablespoon (15g) rainbow jimmies (rod-shaped sprinkles — not nonpareils)
For the Topping
- 3 tablespoons whipped cream (from a can, or freshly whipped full-fat heavy whipping cream (minimum 36% fat), whipped to firm peaks and stabilized with ½ teaspoon powdered sugar — or canned whipped cream
- 1 teaspoon rainbow jimmies, for scattering on top
Before You Start
This recipe mixes directly in the mug — read these notes before you touch a single ingredient.
Mug selection — this is the most important equipment decision in this recipe: Use a microwave-safe ceramic mug with a capacity of at least 12 oz (350ml). Do not use a mug smaller than 12 oz — the batter rises approximately 25–30% during cooking and will overflow a smaller vessel, making a mess and ruining the cake. Do not use metal mugs, mugs with metallic paint or gold rim detailing, or travel mugs with insulated walls — none of these are microwave-safe. If you are unsure whether your mug is microwave-safe, look for the microwave-safe symbol on the bottom. When in doubt, use a different mug.
Flour measuring: Spoon the flour into your measuring spoon using a separate small spoon and level it flat with a straight edge. Do not scoop the measuring spoon directly into the flour bag — scooping packs in significantly more flour than the recipe needs and produces a dense, dry cake. For the most accurate result, weigh the flour at exactly 30g on a kitchen scale. Gram weight always takes priority over volume in this recipe.
Salt: The ⅛ teaspoon (0.5g) fine sea salt in this recipe is not optional even though it looks decorative at this quantity. Salt suppresses the slight bitterness of baking powder and amplifies the vanilla and sugar, which are the two flavors this recipe depends on entirely. Skipping it produces a cake that tastes flat — technically correct in texture but noticeably underwhelming in flavor.
Gram weight priority: For the most consistent results, use a kitchen scale set to grams. The gram weights in this recipe are what I tested with — they are the most reliable way to match my result.
Butter preparation: Melt the butter in a small microwave-safe bowl or ramekin in 10-second bursts until fully liquid. Let it sit for 2 minutes to cool slightly before adding it to the mug. Butter that is still hot when it contacts the other ingredients will partially cook the flour and produce a gummy, uneven batter. You want it liquid but not steaming.
Milk temperature: Whole milk straight from the fridge is fine for this recipe — the batter volume is small enough that cold milk will not affect the final result. Full-fat whole milk is specified because the fat content contributes to the tender crumb. Low-fat or skim milk produces a slightly drier, less rich cake. Plant-based milks (oat, almond, soy) work as a substitution but will change the flavor and slightly reduce richness.
Baking powder freshness check: Drop a pinch of your baking powder into a small bowl of hot water. It should bubble actively within 2 seconds. If it sits there doing nothing, replace the tin — expired baking powder is the single most common reason a mug cake rises barely at all and comes out dense and flat. Baking powder loses potency after 6–12 months once opened.
Sprinkle type: Use rainbow jimmies — the rod-shaped sprinkles, not nonpareils (the tiny round spheres). Jimmies hold their shape better during the short microwave heat and produce the distinct color streaks visible throughout the crumb in the cross-section photo. Nonpareils dissolve more readily and bleed their dye more aggressively into the batter, which can turn the whole cake an unappetizing grey-pink. If nonpareils are all you have, they will work — but the visual result will be different from what is shown here.
Mixing method: This recipe requires only a fork. No electric mixer, no stand mixer, no whisk attachment. If you are reaching for a hand mixer — put it back. The goal here is gentle, low-friction mixing that keeps gluten development minimal. An electric mixer will overdevelop the gluten in 4 tablespoons of flour in under 20 seconds and produce a tough, bread-like crumb instead of the open, tender sponge shown in the photos.
This recipe uses a microwave, not an oven: No oven rack position, no preheating, no baking sheet. If your recipe instinct is to preheat — skip it. The microwave is the only heat source here.
Vanilla extract freshness: Pure vanilla extract does not go bad in the traditional sense, but it loses its aromatic potency significantly after 3 to 4 years of storage. In a recipe this simple — where vanilla is the primary flavor — flat vanilla means a flat-tasting cake. Smell the bottle before you measure. It should smell deep, complex, and unmistakably vanilla. If it smells thin or faintly alcoholic with no vanilla character behind it, replace it.
No preheating, no chilling, no resting: This recipe goes from measuring to microwave in under 3 minutes. There is nothing to prepare in advance beyond melting the butter.
Necessary Tools
Required:
- 12 oz (350ml) or larger microwave-safe ceramic mug — straight-walled, C-handle style preferred
- Kitchen scale (strongly recommended — gram weights are more reliable than volume for this recipe)
- Small microwave-safe bowl or ramekin (for melting butter separately)
- Fork (for mixing the batter in the mug)
- Measuring spoons — tablespoon and teaspoon
- Microwave
Optional:
- Oven thermometer (not applicable here, but if your microwave has known hot spots, rotate the mug halfway through cooking)
- Piping bag fitted with a star tip (for a formally piped whipped cream swirl — a spoon works fine for a rustic dollop)
- Kitchen timer (set it for 70 seconds and check — do not estimate microwave time by feel)
How to Make Vanilla Mug Cake
Step 1: The Dry Base — Evenly Combined With No Baking Powder Pockets
In your 12 oz (350ml) or larger microwave-safe ceramic mug, add your 4 tablespoons (30g) all-purpose flour (spooned and leveled), 2 tablespoons (25g) plain white granulated cane sugar, ½ teaspoon (2g) baking powder, checked for freshness add your 4 tablespoons (30g) all-purpose flour (spooned and leveled), 2 tablespoons (25g) plain white granulated cane sugar, ½ teaspoon (2g) baking powder, checked for freshness, and ⅛ teaspoon (0.5g) fine sea salt. The salt is not for salinity — at this quantity you will not taste it as salt. It suppresses the faint bitterness of the baking powder and amplifies the vanilla and sugar, which are the only flavors this cake has. Leave it out and the cake tastes technically correct but noticeably flat.
The baking powder is the only leavening agent in this recipe — it contains its own acid and activates on contact with liquid and heat, producing the CO2 bubbles responsible for the rise you can see in the finished cake. Do not substitute baking soda — without an acidic ingredient in this batter to activate it, baking soda will produce a flat, slightly soapy result.
Using your fork, stir the dry ingredients together with approximately 10 to 12 circular strokes until the baking powder is evenly distributed through the flour and sugar. Tilt the mug slightly and look at the bottom — you should not see any white pockets of undistributed baking powder sitting against the mug wall.
The dry mix should look like fine, uniform white powder with no visible clumps. If you see baking powder clumping together, press the clumps apart with the back of your fork and stir again.
This takes 30 seconds. Do not skip it — baking powder that sits in one concentrated spot in the batter will cause uneven rise, with one side of the cake ballooning while the other stays flat. Your dry mix is ready — add the wet ingredients directly on top.
Step 2: The Batter — Smooth, Thick, and Ready to Rise
In the same mug, using your fork as both mixing tool and scraper, pour your 3 tablespoons (46ml) whole milk, room temperature, 1 tablespoon (14g) unsalted butter, melted and cooled slightly, and ¼ teaspoon pure vanilla extract directly on top of the dry ingredients. The vanilla extract is not decorative — it is doing the heavy lifting on flavor in a recipe this simple. Pure vanilla extract uses real vanilla bean compounds that hold up to microwave heat. Imitation vanilla uses synthetic vanillin that can taste slightly sharp or chemical when heated quickly in a small volume. Use pure extract here.
Using your fork, mix with slow, deliberate strokes from the bottom of the mug upward — not fast circular stirring, which traps air unevenly and can cause the batter to puff and collapse rather than rise steadily. Count approximately 20 strokes, scraping the bottom of the mug with each pass to catch any dry flour pockets sitting below the wet ingredients.
Do not overmix. Once the batter looks smooth and uniform, stop. Overmixing develops gluten in the flour, which produces a tough, chewy, almost bread-like texture instead of the tender sponge crumb shown in the photos.
The finished batter should look thick, smooth, and slightly viscous — it will hold the pattern of your fork for a moment before slowly settling flat. If it looks lumpy or streaky with dry flour, mix for 5 more strokes and check again. If it looks completely smooth and pourable like water, you have added too much liquid.
Baker’s warning: if the melted butter was still hot when you added it and you can see the batter separating or looking greasy at the edges, let the mug sit for 60 seconds before folding — the temperature will equalize and the batter will come together. Do not microwave a broken, separated batter — it will cook unevenly and the texture will be wrong.
Your batter is ready — fold in the sprinkles now before it goes into the microwave.
Step 3: The Sprinkles Folded In Before the Dye Releases
Add your 1 tablespoon (15g) rainbow jimmies directly into the batter in the mug. The jimmies go into the batter now — not on top — specifically because folding them in before cooking is what produces the color streaks visible throughout the crumb in the spoon-lift cross-section photo. Sprinkles added only on top will not migrate into the interior during the 70 to 90 second cook time. If you want the internal funfetti effect shown in the photos, they must go in here.
Using your fork, fold the sprinkles in with 5 to 6 gentle strokes — just enough to distribute them through the batter without overworking it.

Work quickly here. Rainbow jimmies begin releasing their dye the moment they contact the wet batter. The longer they sit before cooking, the more color they bleed. Fold them in and move immediately to the microwave — do not let the batter sit with the sprinkles mixed in for more than 60 seconds before cooking.
The batter should look like the thick, swirled batter visible in the overhead close-up photo — jimmies distributed throughout but still visible as distinct rods, with the batter holding enough body to support them rather than letting them sink to the bottom.
🗒 Luna’s Note: I always add a few extra jimmies directly on top of the batter right before microwaving — just a pinch scattered across the surface. They partially melt into the top of the cake during cooking and create small pockets of color right at the surface. It takes three seconds and makes the cross-section look intentional.
Your mug is ready for the microwave — do not cover it with anything.
Step 4: Microwaving to the Correct Doneness Point
Place your mug in the center of the microwave. Microwave on high power for 70 seconds. Set a kitchen timer — do not estimate by watching through the window.
At 70 seconds, stop the microwave and assess. Every microwave runs at a slightly different wattage — this recipe was tested in an 1100-watt microwave. If yours is lower wattage (700–900 watts, which is common in older models), add 10 to 15 seconds. If yours is higher than 1100 watts, start checking at 60 seconds.
Baker’s warning: the single most common mug cake failure is overcooking by 20 to 30 seconds. The cake will look underdone at the correct stopping point — the surface will be matte and slightly damp-looking, and your instinct will say to give it more time. Do not. Adding 30 extra seconds turns a tender sponge into a rubbery disc. The residual heat in the mug continues cooking the cake for 60 to 90 seconds after the microwave stops. That carryover heat is what finishes the center without drying out the crumb.
At the correct doneness point — which matches exactly what is visible in the close-up photo of the finished cake in the mug — the surface will be matte and dry to the touch at the edges, slightly domed in the center, and the sides of the cake will have pulled very slightly away from the mug wall. The center may still look just barely set. This is correct. Pull it now.
If you press the surface very gently with the tip of your finger and it springs back immediately, it is done. If your finger leaves an indent that does not spring back, microwave for an additional 10 seconds and check again.
Let the mug sit on the counter for 60 to 90 seconds before adding the topping. The carryover heat is still working during this time — cutting into the cake immediately will show an undercooked center even if the cake is fully done.
Step 5: The Finished Cake — Cream Applied While the Mug Is Still Warm
After the 60 to 90 second rest, spoon or pipe your 3 tablespoons whipped cream must be at firm peaks here specifically because the mug is still warm from the microwave even after resting. Soft-peak cream will begin melting within 60 seconds on contact with residual heat. Firm-peak cream — where the whisk leaves a peak that stands straight without curling — holds its mound for 4 to 5 minutes, which is all the time you need to eat this.
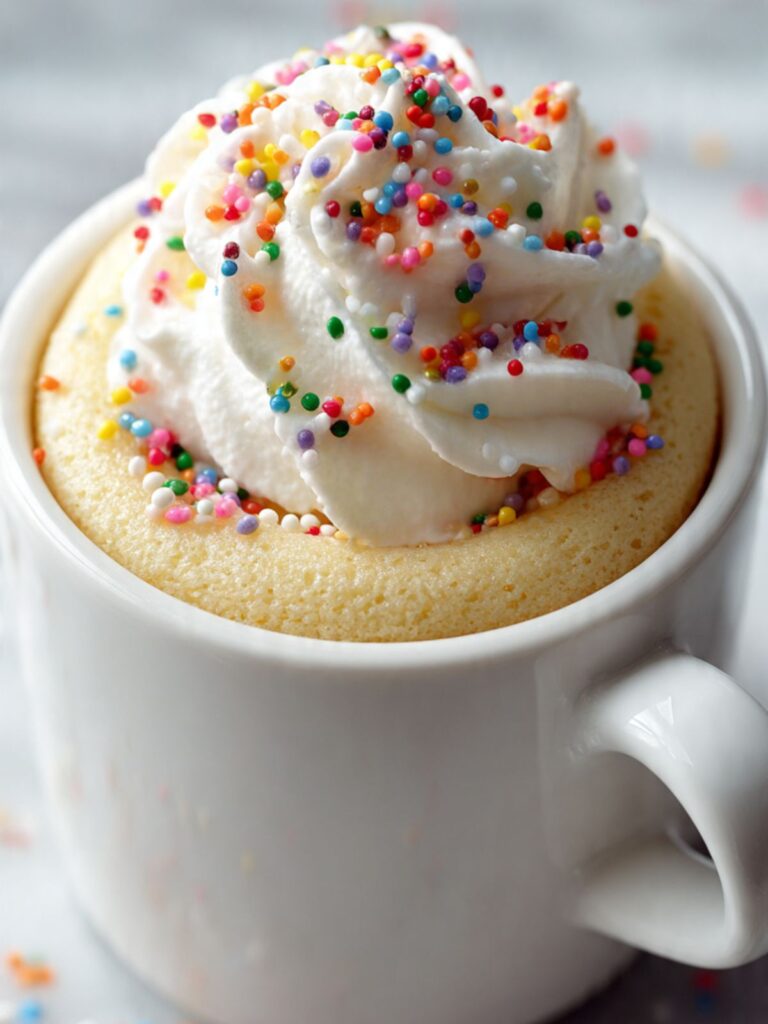
If you are using canned whipped cream, apply it in a swirling motion from the outside edge inward, building a small mound — exactly as shown in the finished hero photo of the mug with the peaked cream and scattered sprinkles. If you are using freshly whipped cream, it should be whipped to firm peaks so it holds its shape against the warmth of the cake without immediately melting flat.
Do not apply whipped cream to a mug that feels hot to the touch on the outside. If the ceramic is still warm enough to be uncomfortable to hold, rest for another 30 seconds. Cream applied to an overheated mug pools and collapses within 30 seconds — the peaked cream visible in the finished photo requires the mug surface to be warm, not hot.
Scatter your 1 teaspoon rainbow jimmies over the cream immediately after applying — do not wait, or the sprinkles will press into softening cream rather than sitting on the surface cleanly.

The finished cake should look exactly like the close-up photo — cream mounded above the rim of the mug, jimmies scattered across the cream and the exposed cake edge, the cake itself domed and slightly retracted from the mug wall with a matte, pore-dotted surface.
Serve immediately. Mug cakes do not hold. The texture changes within 5 minutes of cooking as the residual steam redistributes through the crumb and the surface begins to tighten. Eat it now, directly from the mug.
The Science Behind Vanilla Mug Cake
Protein Coagulation and the Overcooking Window
I pulled my first mug cake out at 90 seconds because the surface still looked wet and I was not convinced it was done. It was the texture of a pencil eraser. I microwaved the second one for 60 seconds and it was raw in the center. The third one I pulled at 70 seconds — surface matte, edges retracted, center still looking slightly underdone — and it was right.
What I did not understand in those first two attempts was that microwave cooking and oven baking operate on completely different heat transfer mechanisms, and the visual cues are not the same.
In a conventional oven, heat moves from the outside of the baked good inward — the exterior browns and sets first, the interior finishes last. A mug cake in a microwave works the opposite way. Microwave radiation excites water molecules throughout the entire batter simultaneously, generating heat from within. The center cooks at the same time as the edges. This means there is no reliable browning signal — no golden crust, no set edge to use as a reference point.
The surface matte finish and the slight edge retraction are the only external signals, and they appear before the center is visibly set. By the time the center looks done through the window, the exterior has been overcooked by 20 to 30 seconds and the egg and flour proteins have cross-linked too tightly — producing the rubbery texture that gives mug cakes a bad reputation. Pull it at matte surface and retracted edges. The carryover heat from the hot ceramic mug finishes the center in the 60 to 90 seconds after the microwave stops.
Leavening Chemistry in a 90-Second Cook
Baking powder is a complete leavening system — it contains both an acid (cream of tartar or sodium aluminum sulfate, depending on the brand) and a base (baking soda), plus cornstarch to absorb moisture and prevent premature reaction. When it contacts liquid, the acid and base react to produce carbon dioxide bubbles. When heat is applied, a second reaction produces additional CO2. This double-action is what gives the mug cake its rise in the short window of microwave cooking.
The ratio here — ½ teaspoon (2g) for 4 tablespoons (30g) of flour — is higher than the standard ratio used in conventional cakes, which typically runs at about 1 teaspoon per cup of flour. The reason is time. A conventional cake has 25 to 35 minutes to build structure as the gluten network firms and the egg proteins coagulate around the CO2 bubbles. A mug cake has 70 to 90 seconds. A higher leavener ratio produces more CO2 more quickly, giving the cake the rapid rise visible in the finished result. Too little and the cake sits flat and dense. Too much — as I found at ¾ teaspoon — and the CO2 production outpaces the batter’s ability to trap it, producing a spongy, collapsed texture with a faint bitter aftertaste. The ½ teaspoon is not a round number chosen for convenience. It is the exact amount this batter can support.
🗒 Luna’s Note: Most of a mug cake’s CO2 production needs to happen during heating, not during mixing — otherwise the batter rises in the bowl and has nothing left to give in the microwave. King Arthur baking powder uses sodium aluminum sulfate as its acid, which is heat-activated rather than moisture-activated. Generic store-brand baking powder can use different acids with faster activation, which costs you rise timing control in a 70-second cook. It is a small thing. It is also the thing I noticed first when I switched.
Starch Gelatinization vs. Gluten — What Actually Holds This Cake Together
In most baked goods, gluten — the elastic protein network formed when flour proteins glutenin and gliadin hydrate and bond — provides the structural framework that holds the crumb together. In a mug cake, gluten plays a much smaller role than you might expect, and this is actually what makes the texture work.
The batter is low-hydration relative to a conventional cake batter, and the mixing time is deliberately short — 20 strokes with a fork, not the extended beating of an electric mixer. This produces minimal gluten development. What provides the structure instead is starch gelatinization: as the microwave heats the batter, the starch granules in the flour absorb the surrounding water and swell, forming a gel that sets the crumb as the temperature rises. Egg protein coagulation assists — the single egg’s proteins cross-link at around 145°F (63°C), adding a secondary scaffold.
The result is a crumb that is tender and slightly springy rather than chewy or bread-like. This is exactly why overmixing is a genuine problem in this recipe in a way it is not always critical in other baked goods — excess mixing develops gluten beyond what the short cooking time can support, producing a crumb that is tight and tough rather than open and tender.
Vanilla Mug Cake Troubleshooting & Pro-Tips
Common Mistakes
The cake rose barely at all, tastes flat, and has a dense, slightly gummy texture
The crumb is compact, there is almost no dome, and the flavor is underwhelming — flat rather than bright and vanilla-forward. Three ingredient causes produce this cluster of symptoms together: expired baking powder, imitation vanilla extract, and skipped salt.
Expired baking powder is the most common culprit — it loses its CO2-producing capacity after 6 to 12 months once opened, so the leavening system fails partially or completely and the rise never happens. Imitation vanilla extract uses synthetic vanillin that tastes thin and slightly sharp when heated in a concentrated small-batch recipe with no other flavors to hide behind it. Missing salt removes the compound that suppresses baking powder’s faint bitterness and amplifies the vanilla — the cake tastes technically cooked but noticeably bland.
Fix: freshness-test the baking powder (pinch into hot water — must bubble actively within 2 seconds), use pure vanilla extract only, and confirm the ⅛ teaspoon of fine sea salt was not skipped. Prevention: check all three before measuring anything.
The batter overflowed the mug during cooking
Batter bubbled up over the mug rim and spilled onto the microwave turntable. This is entirely a mug size and fill level problem. The batter expands approximately 25 to 30 percent in volume during cooking as the baking powder releases CO2 and steam builds inside the batter. A mug under 12 oz (350ml), or any mug filled more than halfway with raw batter, will not contain that expansion. Metallic mugs, travel mugs with insulated walls, or mugs with metallic glaze decoration are also a failure cause — none of these are microwave-safe and some will arc.
Salvage: if overflow happens mid-cook, stop the microwave immediately, wipe the turntable, scrape the mug rim clean, and microwave the remaining batter for 30 to 40 seconds — the cake will be smaller and slightly denser but edible.
Prevention: use a plain ceramic mug of at least 12 oz (350ml) capacity, fill it no more than halfway with raw batter, and confirm there is no metallic detailing on the rim or interior.
The cake collapsed immediately after the microwave stopped — good rise during cooking, then rapid deflation
The cake rose fully during the microwave cycle but sank noticeably within 30 seconds of the microwave stopping. At high altitude — above 3,500 feet (1,067m) — lower atmospheric pressure causes CO2 from the baking powder to expand faster than the batter’s starch structure can set around the bubbles. The cake rises aggressively, then the structure collapses because the gelatinized starch has not had enough time to firm before the pressure differential deflates the bubbles.
Fix: reduce the baking powder to ¼ teaspoon and add 5 to 8 extra seconds to the microwave time — the slightly reduced leavening and longer cook gives the structure time to set before collapse.
High humidity has minimal impact on this recipe given the short cook time and enclosed vessel — no adjustment needed for humidity.
The cake came out rubbery and dense
The symptom is a cake that bounces back when pressed but feels tight and compacted rather than springy — almost elastic. The cause is overcooking. Every extra 10 seconds past the correct doneness point tightens the protein and starch structure irreversibly. Microwave radiation continues exciting water molecules even after the timer stops, and the hot ceramic mug conducts residual heat into the base and sides for 60 to 90 seconds post-cooking. A cake pulled at 90 seconds instead of 70 has effectively been cooked for close to 3 minutes total when carryover is included.
There is no fix once this has happened — the texture cannot be reversed. Prevention: pull the cake at matte surface and retracted edges, even when the center still looks slightly underdone. Set a timer. Do not watch through the window and decide by feel.
Salvage note: a rubbery mug cake is still edible. Crumble it into a bowl, layer with cold whipped cream and extra sprinkles, and eat it as a trifle-style dessert. The crumbled texture actually works better than the whole cake in this format.
The batter has dry flour pockets at the bottom of the mug
After mixing, you can see or feel undissolved flour sitting at the base of the mug when you tilt it. This means the mixing strokes did not reach the bottom consistently — a common problem with straight-sided mugs where the fork tines do not make full contact with the base.
Fix before microwaving: use the back of the fork to press against the bottom of the mug in a circular motion, then fold upward 5 more times. A batter with dry flour pockets will cook unevenly — the flour pockets will stay raw while the rest of the cake sets, producing a gummy, streaky interior.
Prevention: always use deliberate bottom-scraping strokes when mixing, and tilt the mug to check the base before cooking.
The sprinkles turned the whole batter an unappetizing color
The batter looks grey, pink, or mottled before the cake has even gone into the microwave. This is a sprinkle type and timing problem. Nonpareils (round spheres) have a very thin sugar shell that dissolves rapidly on contact with wet batter, releasing all their dye immediately. Jimmies (rod-shaped) have a wax coating that delays dye release significantly. If you used nonpareils and the batter has already turned, there is no fix — the cake will bake with the discolored batter and the interior will be a muted grey-purple rather than the pale ivory with colored streaks shown in the photos. The cake will still taste correct.
Prevention: use rainbow jimmies, fold them in immediately before microwaving, and do not let the batter sit with any sprinkle type mixed in for more than 60 seconds before cooking.
The cake tastes flat or flavorless
The cake cooked correctly — correct texture, correct rise — but the flavor is underwhelming or bland. The most likely cause is imitation vanilla extract rather than pure vanilla extract. In a recipe this simple, with no chocolate, no spice, and no competing flavors, the vanilla is doing all the flavor work. Imitation vanilla uses synthetic vanillin that can taste slightly sharp or one-dimensional when heated in a small, concentrated volume.
A second possible cause is stale flour — all-purpose flour stored for more than 12 months after opening can develop a flat, slightly cardboard taste that is noticeable in neutral-flavored recipes. Smell the flour before using.
Prevention: use pure vanilla extract and smell your flour before measuring.
Expert Pro-Tips
Adjust microwave time by wattage, not by feel. The 70-second time is calibrated for an 1100-watt microwave. If your microwave is 700–800 watts — which is standard for older countertop models — start at 80 to 85 seconds and assess. If it is 900–1000 watts, start at 75 seconds. Most microwaves have their wattage printed on a label inside the door or on the back panel. Check it once and write it down — you will use that adjustment every time you make this recipe.
Grease the inside of the mug with a very thin layer of softened butter before adding the batter. Run a small piece of paper towel with a tiny amount of butter around the interior walls. This does two things: it prevents the cake from sticking to the mug walls during the rise, which can tear the crumb structure as the cake pulls away, and it makes eating directly from the mug easier — the cake releases cleanly from the sides with a spoon rather than requiring scraping. It takes 10 seconds and noticeably improves the texture of the outer edge.
Use a mug that is wider than it is tall. Tall, narrow mugs trap steam more aggressively and produce a denser crumb because the steam cannot escape as readily through the smaller surface area at the top. A wide, straight-sided mug — the standard diner-style coffee mug — allows steam to vent more evenly across the whole surface, which is what produces the open, pore-dotted surface visible in the finished photos.
How to Store Vanilla Mug Cake
Room Temperature
Mug cake is a single-serve recipe designed to be eaten immediately. This is not a storage recipe.
If you have cooked the cake and genuinely cannot eat it within the next 15 minutes, cover the top of the mug loosely with a small plate or a piece of plastic wrap and leave it at room temperature. It will hold for up to 2 hours before the texture degrades meaningfully. Do not use an airtight seal — trapping steam against the surface accelerates the tightening of the crumb and produces a gummy, dense top layer faster than leaving it uncovered.
After 2 hours at room temperature, the crumb will have tightened noticeably and the matte surface will have become slightly tacky. It is still edible — it is just not the same cake it was at 5 minutes.
Do not store a mug cake with whipped cream already on top. The cream will weep and collapse into the cake within 30 minutes. If you need to store it, leave the cream off and add it immediately before eating.
Refrigerator
Refrigerating a mug cake is not recommended. The cold environment accelerates starch retrogradation — the process by which gelatinized starch molecules re-crystallize and expel moisture as the temperature drops. The result is a crumb that turns dry, tight, and slightly grainy within an hour of refrigeration. If you must refrigerate it — cover the mug with plastic wrap pressed directly against the cake surface to minimize moisture loss — eat it within 4 hours and do not expect the original texture.
There is no good way to bring a refrigerated mug cake back. A 10-second microwave blast will re-soften it slightly, but the crumb structure has already changed and the texture will be noticeably inferior to the fresh result
Freezer — Baked
Do not freeze a baked mug cake. The freezing and thawing cycle collapses the open crumb structure entirely — the cake thaws as a dense, wet disc with no resemblance to the original texture. This recipe takes under 5 minutes to make from scratch. Make a fresh one.
Freezer — Unbaked
The dry ingredients can be pre-measured and stored in a small zip-lock bag or lidded jar at room temperature for up to 1 month. Label the bag with the wet ingredient quantities so you do not have to think about it when you want the cake. When ready, pour the dry mix into your mug, add the wet ingredients, fold in the sprinkles, and microwave as directed. This is the make-ahead version of this recipe — it saves the measuring step without compromising the fresh result.
🗒 Luna’s Note: I keep two or three pre-measured dry mix bags in my pantry at a time. It is the kind of thing that feels unnecessary until the moment you want cake at 10pm and do not want to get out four different measuring tools. The bag takes 90 seconds to put together and it changes the whole calculus of whether making this is worth it.
Serving Suggestion
Eat this cake the moment it is ready — 60 to 90 seconds after it comes out of the microwave, cream on, jimmies scattered, still warm from the mug. That window is the whole point.
I eat this one with a strong black coffee, no sugar. The bitterness cuts through the sweetness of the jimmies and the vanilla in a way that makes the cake taste more complex than it has any right to for something made in under five minutes. Cold whole milk also works — the fat cuts the sugar without adding competing flavor, which matters in a cake where vanilla is doing everything on its own.
This is the recipe I make when I want something real and I do not want to wait for it. Not for guests, not for a party. For a Tuesday night when the day has been long and the idea of washing a baking sheet is genuinely unappealing. That is the honest context for this recipe.
Day 2 is not a concept that applies here. Make it fresh. Eat it immediately. There is no day 2.
One honest limitation: this recipe does not scale meaningfully. You cannot make two mug cakes simultaneously in one microwave and get the same result — the wattage distributes differently across two vessels and both cakes will be undercooked. Make one, eat it, make another if you need a second. The whole process takes five minutes. The sequencing is not a hardship.
Frequently Asked Questions About Vanilla Mug Cake
How do you make a mug cake?
A vanilla mug cake comes together by whisking flour, sugar, baking powder, and salt directly in a microwave-safe mug, then stirring in whole milk, melted butter, and vanilla until a smooth thick batter forms. Fold in rainbow jimmies, microwave on high for 70 to 90 seconds, rest 60 to 90 seconds, then top with whipped cream and extra sprinkles.
Why is my mug cake rubbery?
A rubbery mug cake is almost always the result of overcooking by even 15 to 20 seconds. Microwave radiation heats the entire batter simultaneously rather than from the outside in, which means the interior reaches doneness well before the surface looks done to the eye. When you cook past that point, the flour proteins and egg proteins cross-link too tightly — the same mechanism that makes overcooked scrambled eggs turn tough and bouncy. Pull the cake when the surface is matte and the edges have pulled slightly from the mug wall, even if the center still looks underdone. Carryover heat from the hot ceramic mug finishes the center in the 60 to 90 seconds after the microwave stops.
Can I make a mug cake without eggs?
Yes — this vanilla mug cake recipe contains no eggs. The structure comes from starch gelatinization in the flour rather than egg protein coagulation, which is why it works without them. The whole milk provides enough liquid protein to assist binding, and the baking powder handles the lift entirely on its own. If you want to make it dairy-free as well, substitute the whole milk with full-fat oat milk or full-fat coconut milk — both have enough fat content to approximate the richness of whole milk. Almond milk and skim milk produce a slightly drier, less tender crumb because of their lower fat content.
How long do you microwave a mug cake?
Microwave time depends on your appliance’s wattage because higher wattage means more energy delivered per second — and in a 90-second cook, a 200-watt difference changes the protein coagulation and starch gelatinization rate meaningfully. At 1100 watts, 70 seconds is the target. At 700 to 800 watts, start at 80 to 85 seconds. Always use the visual doneness cue — matte surface, edges retracted — rather than trusting any fixed time as a guarantee.
Can I make mug cake ahead of time?
The baked cake cannot be made ahead — it degrades within 2 hours at room temperature and does not refrigerate or freeze well. What you can prepare ahead is the dry ingredient mix: measure the flour, sugar, and baking powder into a small zip-lock bag or lidded jar and store at room temperature for up to 1 month. When you want the cake, pour the dry mix into your mug, add the wet ingredients, fold in the sprinkles, and microwave as directed. This pre-measured dry mix approach gives you a fresh mug cake in under 3 minutes with almost no active effort. For more single-serve microwave cake ideas, see my chocolate mug cake which uses the same pre-mix system.
Why did my mug cake overflow?
A mug cake overflows when the mug is too small for the volume of batter plus rise. The batter expands approximately 25 to 30 percent in volume during the microwave cycle as the baking powder reacts and the steam builds. A mug smaller than 12 oz (350ml), or a larger mug filled more than halfway, will not contain that expansion. The fix is simple: use a 12 oz or larger mug and fill it no more than halfway with raw batter. The leavening chemistry that causes the overflow cannot be suppressed — the baking powder will react regardless of the mug size. The mug needs to be large enough to give it room to do so.
Can I double a mug cake recipe?
You can double the ingredient quantities, but cook each mug separately rather than combining the doubled batter into one large mug or cooking two mugs simultaneously. Doubling the batter volume in a single mug will overflow — the rise is proportional to the batter volume and no standard mug will contain it. Cooking two mugs at once in the same microwave distributes the wattage across two vessels, which means both cakes will be undercooked at the standard time. Leavening does not scale linearly in microwave cooking the way it does in conventional baking — make one mug, eat it, then make the second. The five-minute process is fast enough that this is not the inconvenience it sounds like.
More Mug Cakes You’ll Love
- Chocolate Dump Cake — when you want something more than a single serving, this one-bowl chocolate cake goes from pantry to table in under an hour with no creaming, no layering, and no fuss
- Peanut Butter Cup Dump Cake — rich, dense, and loaded with peanut butter and chocolate in a format that requires almost no active effort

Vanilla Mug Cake Recipe
Ingredients
Equipment
Method
- Add the flour, sugar, baking powder, and fine sea salt to a 12 oz (350ml) or larger microwave-safe ceramic mug and stir with a fork for 10 to 12 strokes until evenly combined with no baking powder pockets visible.
- Add the whole milk, melted and slightly cooled butter, and vanilla extract directly into the mug and mix with slow bottom-scraping strokes for approximately 20 strokes until the batter is smooth, thick, and uniform with no dry flour remaining at the base.
- Add the rainbow jimmies and fold in with 5 to 6 gentle strokes — work quickly and move immediately to the microwave, as jimmies begin releasing dye on contact with wet batter.
- Microwave on high power for 70 seconds (1100-watt microwave) — adjust to 80 to 85 seconds for 700 to 800 watt microwaves, or 75 seconds for 900 to 1000 watt microwaves — and stop when the surface is matte, the edges have slightly retracted from the mug wall, and the cake has reached its maximum height.
- Rest the mug on the counter for 60 to 90 seconds — do not skip this step, as carryover heat from the hot ceramic mug finishes the center during this time.
- Top with whipped cream and scatter the remaining rainbow jimmies over the cream immediately before serving — eat directly from the mug while still warm.