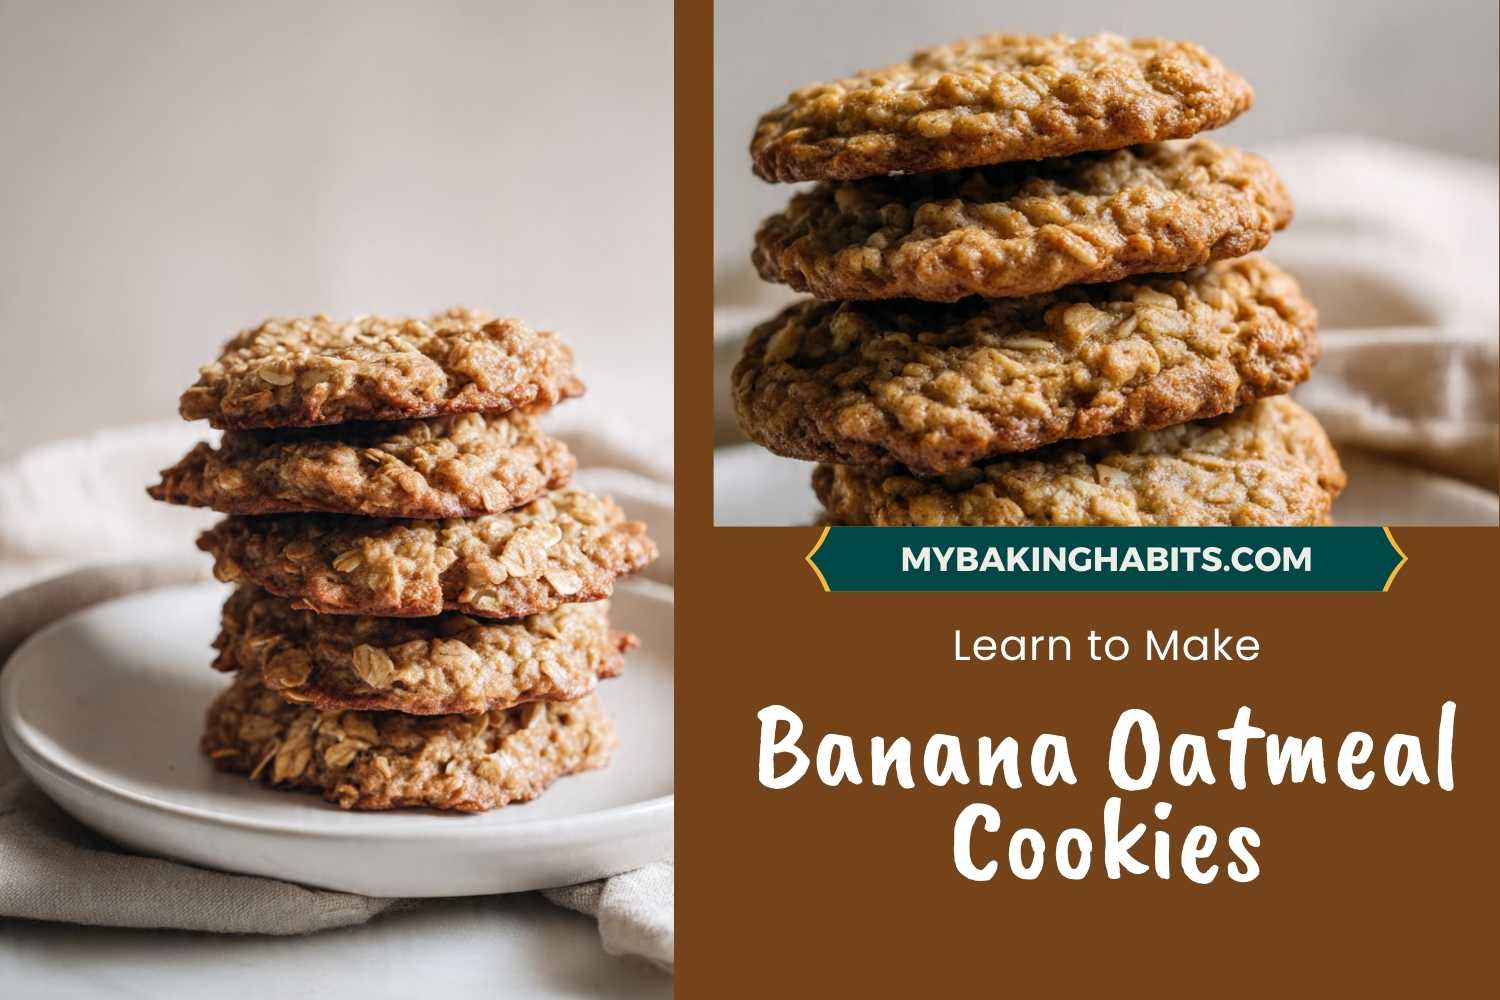
Banana Oatmeal Cookies
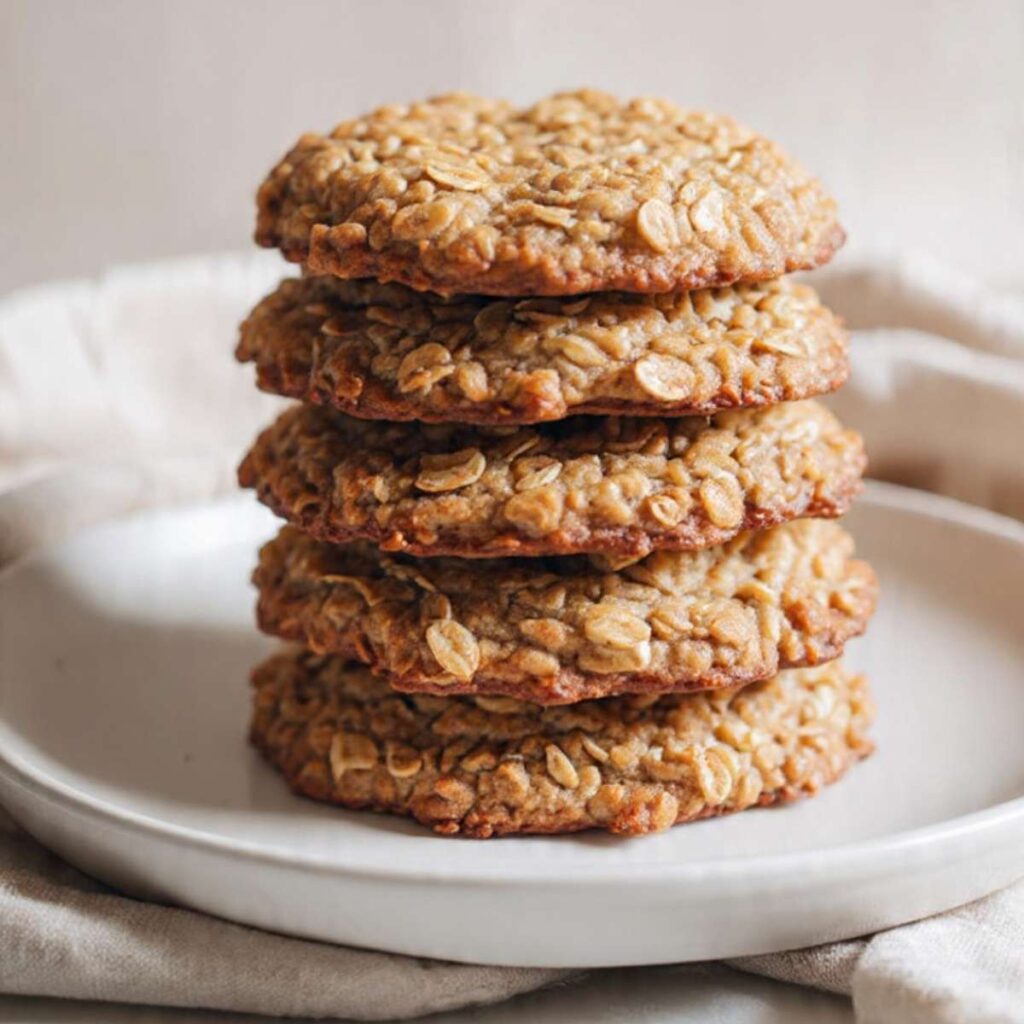
The first three batches I made of these spread completely flat. Not a little flat — paper thin, lacy, crispy around the edges and raw in the center. I blamed the recipe. Then I blamed my oven. The actual problem was the bananas. Overripe bananas carry significantly more water than bananas that are just ripe, and that extra moisture turns cookie dough into a batter. Once I understood that the banana ripeness window matters — not just “ripe,” but specifically past yellow and into spotted brown without crossing into completely black and wet — every batch came out thick, domed, and exactly like what you see stacked in the photo above.
These are not health food cookies wearing a dessert costume. They are real cookies — properly sweet, properly buttery, with a craggy oat-heavy surface that catches light the same way a rough-hewn edge does, and a tender interior that holds together cleanly when you bite through it. I tested the butter ratio across four variations — melted versus softened, ¼ cup versus ½ cup — and the melted full-half-cup version was the only one that produced the golden, slightly crisp oat edges visible on the surface of every cookie in the stack while keeping the interior genuinely tender rather than dry.
Softened butter creamed into the dough produced a puffier, cakey result that tasted more like an oatmeal muffin than a cookie. That is not this recipe. The banana does two jobs here: it binds the dough in place of a second egg and it adds a quiet sweetness that sits underneath the brown sugar without announcing itself. You taste banana in the way you taste vanilla — present, necessary, not the whole story.
No chilling required. No mixer. One bowl, one spatula, 12 minutes in the oven.
🗒 Luna’s Note: I have made these on weeknights when I had two spotty bananas on the counter and no plan. That is the honest origin of this recipe. The version that made it to this site went through eleven more test batches after that first accident — but the weeknight energy is still in the DNA.
This is the recipe I reach for when I need something real and homemade and I do not have patience for anything with more than one bowl. That is the arrangement we have.
Recipe Overview & Nutrition Table
| Prep Time | 10 minutes |
| Bake Time | 11–13 minutes |
| Cool Time | 5 minutes on pan + 10 minutes on rack |
| Total Time | 38 minutes |
| Yield | 18 cookies |
| Serving Size | 1 cookie |
| Difficulty | Easy |
| Method | One-bowl, no mixer |
| Cuisine | American |
| Calories | Fat | Carbs | Fiber | Sugar | Protein | Sodium |
|---|---|---|---|---|---|---|
| 118 kcal | 4.5g | 18g | 1.2g | 8g | 1.8g | 62mg |
Ingredients & Tools for Banana Oatmeal Cookies Recipe
For the Cookies
- 2 medium ripe bananas (220g peeled weight) — past yellow, heavily spotted brown, not fully black or wet inside. See Before You Start for the exact ripeness window and why it matters.
- ½ cup (113g) unsalted butter, melted and cooled to room temperature — not hot, not browned. Salted butter can be used but reduce the added salt to ⅛ teaspoon.
- ½ cup (100g) packed light brown sugar — packed firmly into the measuring cup. Check that the sugar is soft and pliable before measuring — hardened brown sugar that has dried out in the bag will not incorporate smoothly and leaves crunchy sugar pockets in the finished cookie. To soften hardened brown sugar, place it in a bowl with a damp paper towel over the top and microwave in 20-second bursts until soft. Dark brown sugar can be substituted for a deeper molasses flavor and slightly chewier result.
- 1 large egg, room temperature — cold eggs cause the melted butter to seize into greasy clumps in the batter.
- 1 teaspoon (5ml) pure vanilla extract — not imitation vanilla. The banana flavor is subtle; imitation vanilla competes with it in a way pure extract does not.
- 1½ cups (135g) old-fashioned rolled oats — not quick oats, not instant oats, not steel-cut oats. Old-fashioned rolled oats are the only variety that produces the thick, craggy oat-proud surface visible in the stacked cookie photo. Quick oats dissolve into the batter and produce a flat, uniform cookie with no visible oat texture.
- 1 cup (120g) all-purpose flour, spooned into the measuring cup and leveled — do not scoop directly from the bag. Scooping packs in 20–30% more flour and produces dry, crumbly cookies that do not hold together.
- ½ teaspoon (2g) baking soda — check freshness before starting: drop ½ teaspoon into 3 tablespoons of hot water; it should bubble immediately and vigorously. Baking soda stored in an open cardboard box near the stove loses potency within weeks — keep it in a sealed glass jar.
- ½ teaspoon (1.5g) ground cinnamon
- ¼ teaspoon (1.5g) fine sea salt — not kosher salt, not table salt. If using table salt, reduce to ⅛ teaspoon.
Before You Start
This recipe uses a standard light-colored aluminum baking sheet — no specific pan dimensions required, but size matters in one way: a small or dark-colored pan will not give you enough surface area to space the cookies 2 inches apart, and crowded cookies steam each other rather than bake independently, producing a softer, less caramelized result. Two half-sheet pans (18×13 inch / 46x33cm) are ideal. If you only have one, bake in two back-to-back batches and cool the pan completely between them.
Banana ripeness is the single most important variable in this recipe. The banana must be past fully yellow and into heavily brown-spotted territory — at least 70% of the peel should be brown or black. Under-ripe bananas do not mash smoothly and lack the sweetness and moisture balance the recipe is built around. Over-ripe bananas that are completely black and wet inside carry too much moisture and will turn the dough into a batter that spreads flat. If your bananas are not spotted enough, place them unpeeled on a baking sheet at 300°F (150°C) for 15–20 minutes until the skins turn black and the fruit softens. Cool completely before using.
Melt and cool the butter first. The butter must be fully melted but cooled to room temperature — not warm, not hot. Hot butter added to mashed banana will partially cook the egg when it goes in and produce a scrambled, broken batter. Melt the butter and set it aside for at least 15 minutes before starting.
Position your oven rack in the middle position before preheating. The middle rack is the only position that circulates heat evenly around the cookie without over-browning the bottom or leaving the top pale. Top-rack baking causes pale bottoms and dark tops. Bottom-rack baking causes dark bottoms before the centers have set.
Bring the egg to room temperature. A cold egg dropped into melted butter causes the fat to solidify into greasy streaks. Set the egg on the counter for 30 minutes, or place it in a bowl of warm (not hot) water for 10 minutes.
Do not substitute the oats. Old-fashioned rolled oats only. This is not a preference — it is a structural requirement. Quick oats absorb moisture differently and produce a cookie with no visible oat texture and a softer, more uniform crumb.
Check your ground cinnamon. Ground spices lose potency after 12 to 18 months. Rub a pinch between your fingers — if it smells faint or dusty rather than sharp and warm, replace it before baking. Flat-tasting cinnamon produces a cookie that tastes predominantly of brown sugar with no warm spice note in the background.
For the most accurate results, use a kitchen scale set to grams. Volume measurements like cups and tablespoons can vary by 20–30% depending on how the ingredient is scooped or packed. The gram weights in this recipe are the numbers I tested with — they are the most reliable way to get the same result.
This recipe requires no electric mixer. A large mixing bowl and a sturdy silicone spatula are the only tools you need for mixing. A hand mixer will overwork the batter and produce a tougher cookie.
Necessary Tools
- Kitchen scale — for gram-weight accuracy on flour, oats, butter, and banana
- Large mixing bowl — at least 4-quart capacity; the batter is thick and needs room to fold
- Medium bowl or fork-mashing plate — for mashing the bananas separately before combining
- Sturdy silicone spatula — for folding the batter and scraping the bowl clean; do not use a whisk
- 2-tablespoon cookie scoop (approximately 45g) — for consistent portioning and uniform bake time; a spoon can be used but weigh the first portion to calibrate
- Light-colored aluminum baking sheets — two if possible to bake back-to-back batches. Dark non-stick pans absorb more radiant heat and will overbrown the cookie bottoms before the centers are set.
- Parchment paper — mandatory. Do not use foil (cookies stick and overbrown). Do not grease the pan without parchment (uneven browning, difficult release).
- Wire cooling rack — cookies must transfer off the hot pan after 5 minutes to stop carryover cooking
- Oven thermometer — recommended. Most home ovens run 15–25°F (8–14°C) off from the dial setting. Baking at the wrong temperature is the second most common cause of flat or underdone banana oatmeal cookies.
How to Make Banana Oatmeal Cookies
This recipe uses the one-bowl, no-mixer method — a silicone spatula does all the work from the first step to the last. No electric equipment is needed at any stage.
Step 1: Preheating the Oven and Preparing Your Pans for an Even Bake
Position your oven rack in the middle position — not the top third, not the bottom third. The middle rack is the only position that circulates heat evenly around the cookie without over-browning the bottom or leaving the top pale and underdone. Preheat your oven to 350°F (175°C). If you have an oven thermometer, place it on the middle rack now and confirm the actual temperature before your first pan goes in — most home ovens run 15–25°F (8–14°C) hotter or cooler than the dial reads, and even a 15-degree difference changes the spread and browning on these cookies.
Line two light-colored aluminum baking sheets with parchment paper. Do not grease the parchment — these cookies have enough butter to release cleanly on their own, and extra grease causes the edges to fry rather than bake. If you only have one baking sheet, bake one batch at a time and let the pan cool completely between batches. A hot pan from a previous batch causes the dough to start spreading before it even reaches the oven.
The parchment should lie flat with no curling edges — if it curls, weight the corners with your cookie scoop or a small bowl while you portion the dough. Dark non-stick pans are not interchangeable here — they absorb significantly more radiant heat and will produce overbrowning on the bottoms before the centers have had time to set. If a dark pan is all you have, reduce the oven temperature by 25°F (15°C) and start checking for doneness 2 minutes earlier.
I always line my baking sheets even when a recipe does not require it. Not because it changes the cookie — with enough butter in the dough it does not — but because I cannot stand the cleanup otherwise, and I bake too often to hand-scrub sheet pans at midnight.
Your oven needs a full 15 minutes to reach and stabilize at temperature — set a timer and do not open the door during preheat.
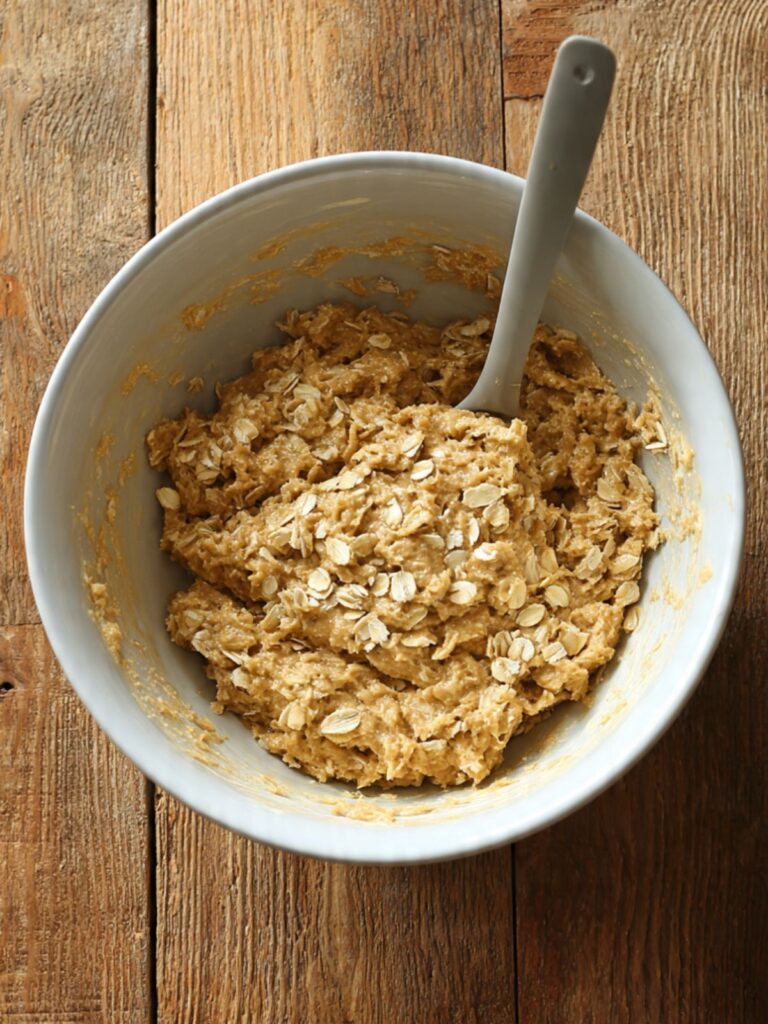
Step 2: Mashing the Bananas to the Right Consistency
Peel your 2 medium ripe bananas (220g peeled weight) and place them in a medium bowl or onto a flat plate. Using a sturdy fork, mash firmly in a pressing and smearing motion — press down, smear forward, lift, repeat. Mash for approximately 60 to 90 seconds until no large chunks remain.
The banana does two structural jobs in this recipe: it provides the moisture that brings the dry ingredients together, and it acts as a partial binder alongside the egg — which is why the consistency of the mash matters more than it does in banana bread. Chunky mashed banana leaves pockets of wet fruit in the dough that steam during baking and create soft, underbaked spots in the finished cookie.
The mashed banana should look like a thick, smooth paste with only very small flecks remaining — no pieces larger than a small pea. If large chunks are still present, keep mashing. The mash will be slightly stringy from the banana fibers — this is correct and will not affect the finished cookie.
Set the mashed banana aside — you will add it to the wet ingredients in the next step.
Step 3: Combining the Wet Ingredients Into a Unified Base
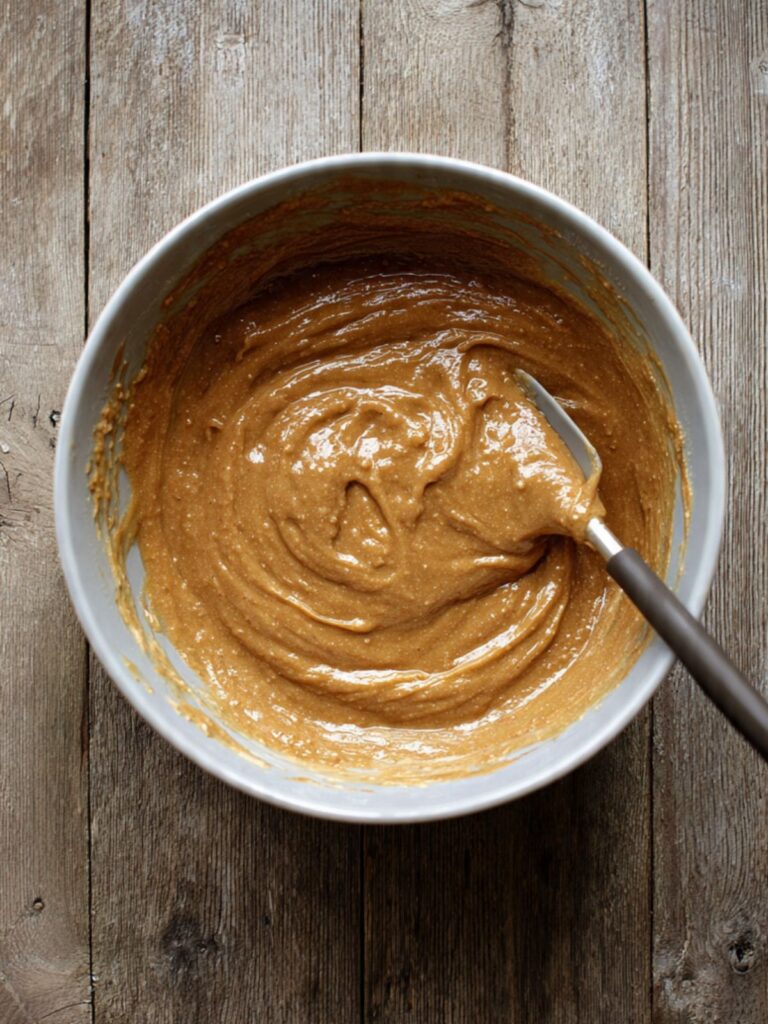
In your large mixing bowl, add your ½ cup (113g) unsalted butter, melted and cooled to room temperature, your ½ cup (100g) packed light brown sugar, and your mashed banana all at once. Using your sturdy silicone spatula, stir in wide circular strokes from the bottom of the bowl upward — approximately 20 to 25 strokes — until the butter, sugar, and banana are fully combined and no butter streaks remain.
The brown sugar does more than sweeten here — it draws moisture from the banana through hygroscopicity, pulling the fruit’s liquid into the fat base and creating a cohesive, emulsified wet mixture rather than a greasy and separated one. This is why white sugar alone produces a thinner, crispier cookie with this recipe — the molasses in brown sugar actively holds the moisture in place.
Add your 1 large egg, room temperature and your 1 teaspoon (5ml) pure vanilla extract. Stir again with the same wide strokes — 15 to 20 strokes — until the egg is fully incorporated and the mixture looks smooth and slightly thickened.
Do not overmix at this stage — the egg proteins begin to develop structure the moment they are worked, and overworking before the flour goes in will produce a tough finished cookie. Stop the moment no egg streaks are visible.
The wet mixture should look smooth, glossy, and uniformly brown — no butter puddles sitting at the bottom, no white egg streaks visible anywhere in the bowl. If the mixture looks greasy or broken, the butter was still warm when it went in. You cannot fully fix this mid-batch, but chilling the mixture for 10 minutes and stirring again will partially bring it back together.
Your wet base is ready — add the dry ingredients in the next step without delay.
Step 4: Adding the Dry Ingredients Without Overworking the Batter
Add your ½ teaspoon (2g) baking soda, ½ teaspoon (1.5g) ground cinnamon, and ¼ teaspoon (1.5g) fine sea salt directly into the wet mixture in the bowl. Stir with 5 to 6 short strokes to distribute the dry leavening and spices through the wet base before the flour and oats go in — this prevents the baking soda from clumping in one spot and reacting unevenly during baking.
Now add your 1 cup (120g) all-purpose flour, spooned and leveled, on top of the wet mixture. Do not stir yet. Add your 1½ cups (135g) old-fashioned rolled oats on top of the flour. The flour goes in before the oats because it needs to be fully hydrated by the wet ingredients — oats added first create a barrier that prevents even flour distribution and results in pockets of dry flour in the finished cookie.
Using your silicone spatula, fold from the bottom of the bowl upward in slow, deliberate strokes — not stirring in circles, which develops gluten and tightens the crumb. Count your strokes: fold until no dry flour streaks remain and the oats are evenly distributed through the batter, approximately 15 to 18 strokes. Stop at the first moment the batter looks unified.
🗒 Luna’s Note: I always fold the oats in last with the widest strokes I can manage. The goal is to coat every oat flake without crushing them — crushed oats disappear into the batter and you lose the craggy surface texture that makes these cookies look the way they do in the photos.
The batter should look thick, slightly sticky, and oat-studded throughout — you should be able to see distinct oat flakes at the surface. If the batter looks smooth and the oats are not visible, it has been overmixed. Overmixed batter produces cookies with a flatter, more uniform surface and a tougher interior rather than the open, tender crumb visible in the broken cookie photo.
The batter is ready to portion immediately — no chilling required.
Step 5: Portioning the Dough for Consistent Size and Even Baking
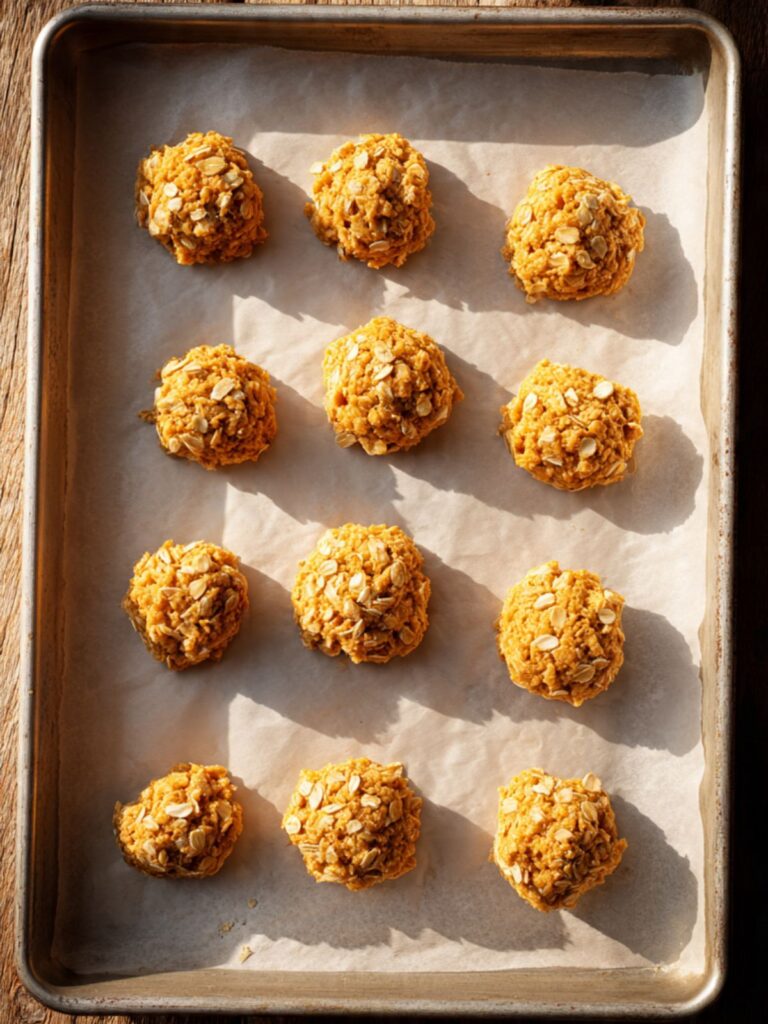
Using your 2-tablespoon cookie scoop, portion the dough onto your prepared parchment-lined baking sheets. Weigh the first portion on your kitchen scale — it should read approximately 45g. Use that first portion as your reference for the rest of the batch. This recipe yields exactly 18 cookies at this scoop size — 9 per sheet if using two pans, or two batches of 9 on a single sheet.
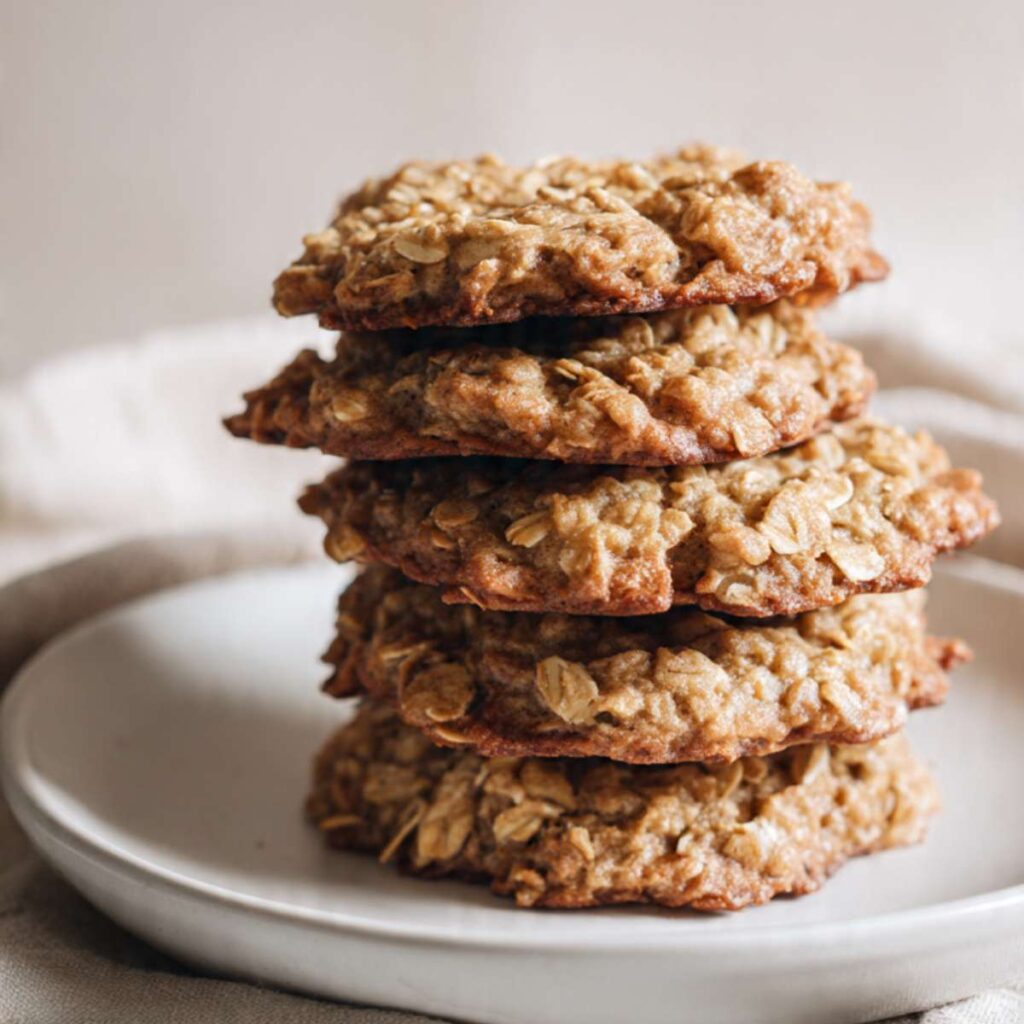
Space each portion at least 2 inches (5cm) apart in all directions. These cookies spread moderately — they will not hold their exact scooped shape, but they also will not run into each other at proper spacing. Do not press the dough down before baking. The oven’s heat will flatten the tops naturally and the cookies will dome and then settle into the thick, slightly irregular shape visible in the photo above showing five cookies stacked on the white plate — that natural settling on the pan is exactly what creates the craggy, uneven oat surface where individual flakes protrude and caramelize at different heights. Pressing them flat before baking removes the dome entirely.
Each portion should look like a rounded mound approximately 1 inch tall before it goes into the oven — if the mounds are collapsing flat on the pan before baking, the banana was over-ripe and carried too much moisture. See Troubleshooting for the fix.
🗒 Luna’s Note: I use a scoop with a spring-release lever, not a spoon. Spoon-portioning makes it nearly impossible to get consistent weights across 18 cookies, and inconsistent weight means inconsistent bake time — the smaller ones overbake while the larger ones finish. A $10 cookie scoop is the best investment this recipe asks for.
Place the first pan into the preheated oven — the second pan waits at room temperature while the first bakes.
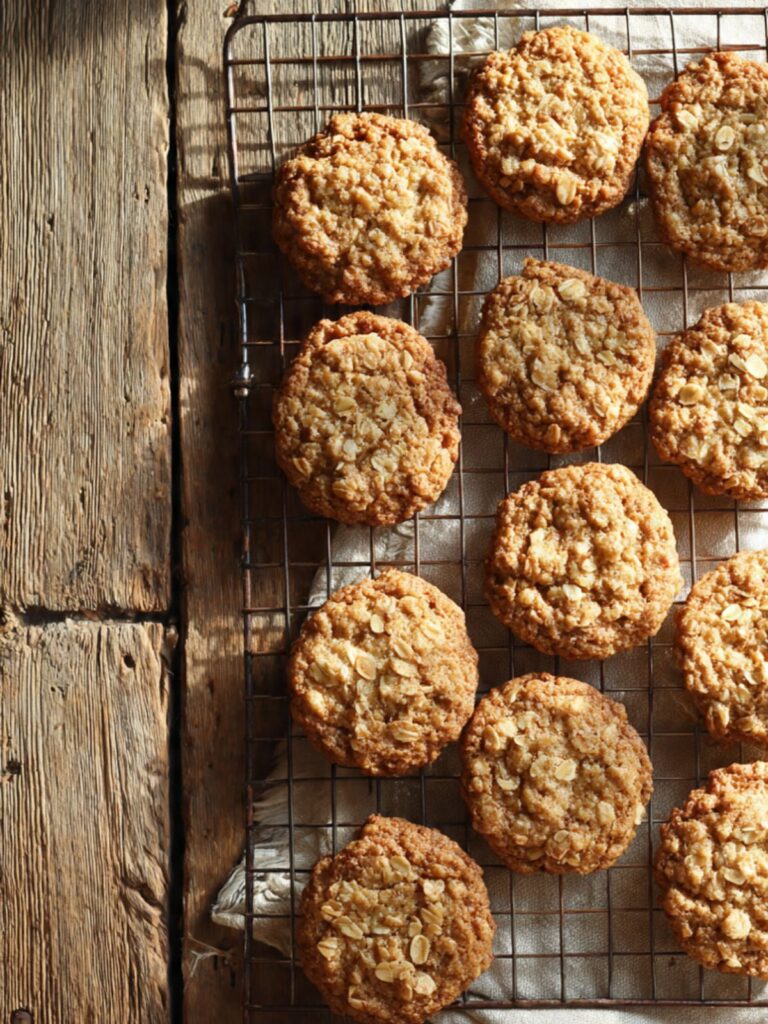
Step 6: Baking to the Exact Doneness Shown in the Photos
Bake at 350°F (175°C) for 11 to 13 minutes. Set your timer for 11 minutes and do not open the oven door before then — opening the door releases heat and causes the cookies to deflate before the structure has set.
At 11 minutes, open the oven and assess: the edges should look set and lightly golden-brown, and the centers should still look slightly underdone and pale — not glossy-wet, but not fully matte either. This is the exact moment to pull the pan. The centers will finish cooking on the hot pan during the 5-minute rest that follows.
The oat-covered surface visible in the photo above showing the stack of five cookies on the white plate — that deep golden caramelization on the oat edges while the centers remain slightly lighter — happens in the last 60 to 90 seconds of baking. If the entire surface looks uniformly pale at 11 minutes, give it one additional minute and check again. If the edges are already deep brown at 11 minutes, your oven is running hot — pull the pan immediately and reduce temperature by 25°F (15°C) for subsequent batches.
Do not wait for the centers to look fully set before pulling the pan. By the time the center looks done through the oven window, the edges are already overbaked and the cookie will be dry and crumbly rather than tender.
The edges should look set and lightly golden. The centers should look just underdone. The oats on the surface should look toasted — not pale, not dark brown. If all three of those things are true at the same time, pull the pan. That is the doneness window for this recipe.
Baking soda freshness check: if the cookies show no rise at all and spread completely flat, the baking soda was expired. Test it before the next batch — drop ½ teaspoon into 3 tablespoons of hot water. It should bubble immediately and vigorously.
Step 7: Resting on the Pan, Then Transferring to the Rack
Leave the cookies on the hot baking sheet for exactly 5 minutes after pulling from the oven. Do not move them, do not slide the parchment, do not touch them. The pan continues to conduct heat into the cookie base during this rest — this is carryover cooking, and it is what finishes setting the centers without the oven drying them out. Moving the cookies before 5 minutes breaks the structural base that is still forming. Waiting longer than 8 minutes over-firms the bottoms as the pan continues to cool against them.
Set a timer for 5 minutes. When it goes off, use a thin metal spatula to transfer each cookie to a wire cooling rack. Slide the spatula fully under each cookie before lifting — these cookies are tender at this stage and will crack across the center if you try to peel them off the parchment by an edge.
Allow the cookies to cool on the wire rack for a minimum of 10 minutes before eating. The interior crumb — that golden, slightly open structure visible in the broken cookie — is still setting during this time. Biting into a cookie before 10 minutes of rack cooling produces a gummy, undercooked-tasting center even if the cookie was perfectly baked.
After 10 minutes on the rack, the cookies should feel firm at the edges and slightly soft but not tacky in the center when you press gently with one finger. That is the correct finished texture. If the centers still feel wet or collapse under light pressure, they needed another 1 to 2 minutes in the oven.

🗒 Luna’s Note: I always bake the second sheet while the first batch rests. By the time the second pan comes out, the first batch has had its full 5 minutes on the pan and is ready to move to the rack. The timing works out exactly right if you start the second pan the moment the first one comes out of the oven.
Your cookies are finished. Move to storage or serve immediately.
The Science Behind Banana Oatmeal Cookies
Why Banana Ripeness Changes Everything About This Recipe
I spent the first several test batches of this recipe confused about why the spread was so inconsistent. Same oven, same pan, same flour weight — and some batches came out thick and domed while others spread completely flat and lacy at the edges. I finally weighed the bananas across different batches and found a 40-gram difference in the peeled weight between a lightly spotted banana and a heavily blackened one at the same visual “medium” size. The blackened banana had released that extra weight as water. Water that goes into the dough has nowhere to go except out during baking — it steams, it loosens the batter, it drives spread.
What is happening chemically is this: as a banana ripens, the starches inside the fruit convert to simple sugars through enzymatic activity, and the cell walls break down and release moisture that was previously locked inside the fruit’s structure. A heavily over-ripe banana is not just sweeter — it is structurally different from a spotted-but-firm one. The cell walls have largely collapsed, the fruit has become mostly liquid sugar and water, and there is very little structural fiber left to contribute to dough binding. That extra water is what turns cookie dough into batter.
The visual you can use to calibrate this at home: the banana peel should be at least 70% brown or black, and the fruit inside should mash to a smooth paste under a fork with minimal resistance — but the mashed banana should still hold its shape in the bowl rather than spreading flat like a puddle. If the mashed banana runs to the edges of the bowl on its own, it is too wet for this recipe. That is the line.
🗒 Luna’s Note: I now keep a dedicated banana ripening bag in my freezer. When bananas hit the right ripeness window, I peel them and freeze them in individual portions in zip-lock bags. Frozen-then-thawed banana mashes perfectly and holds the right moisture level for this recipe consistently — more reliably than fresh bananas, which vary batch to batch depending on the room temperature they ripened in.
How Old-Fashioned Rolled Oats Build the Texture You See in the Photos
Old-fashioned rolled oats are whole oat groats that have been steamed and pressed flat — they retain their shape, their fiber structure, and their ability to absorb moisture slowly during baking rather than all at once. Quick oats are the same grain cut into smaller pieces before rolling, which increases their surface area dramatically and causes them to absorb moisture almost immediately when they hit the wet batter. That rapid absorption is what makes quick oats disappear into the dough — they hydrate fully before the cookies even reach the oven, leaving no visible oat structure on the surface.
In this recipe, old-fashioned oats do three things simultaneously. They absorb just enough moisture from the banana and butter mixture to soften and bind — but they do it slowly, during baking, which means they stay structurally intact as the cookie sets around them. They create the craggy, uneven surface visible in the stacked cookie photos because their edges protrude slightly from the dough and caramelize independently during baking. And they contribute chew — the gelatinized oat starches provide a resistance to the bite that flour-based crumb alone cannot. This is why you can use oatmeal chocolate chip cookies as a benchmark for understanding oat behavior in drop cookie doughs — the oat mechanics are identical even when the surrounding ingredients change.
The swap you cannot make without changing the result: if you use quick oats, the surface will be smooth, the texture will be more cake-like, and the cookie will look nothing like the photos. If you use instant oats, the cookie will be almost entirely flour-textured with faint oat flavor and no visible oat structure at all. The oat type is not a preference — it is a structural specification.
Why This Recipe Needs No Mixer and No Chilling
Most cookie recipes that use creamed butter require a mixer because the creaming process — beating cold butter with sugar for 3 to 5 minutes — is doing a specific structural job: it is forcing air bubbles into the fat that then expand in the oven to create lift and a light crumb. This recipe skips that step entirely because the banana replaces the function of aerated butter. The banana provides both the moisture and the binding that creamed butter normally handles, and it does it without needing air incorporation to work.
Melted butter, by contrast, coats the flour proteins and oat starches in fat before any water is added — this fat coating inhibits gluten development by physically blocking the flour proteins from linking together. Less gluten means a more tender, less elastic crumb. It also means the dough does not tighten up in the refrigerator the way a creamed-butter dough does, which is why chilling is unnecessary here. A creamed-butter dough firms up in the fridge because the aerated fat solidifies and holds the dough in a stiff structure — melted butter dough does not have that aerated structure to begin with, so chilling it would simply make it harder to scoop without changing the bake outcome. The banana and oat ratio provides enough structure to hold the portioned dough in place on the pan without any assistance from refrigeration.
Banana Oatmeal Cookies Troubleshooting & Pro-Tips
Common Mistakes
Wrong banana type or ripeness stage — the dough is too wet and the cookies spread flat
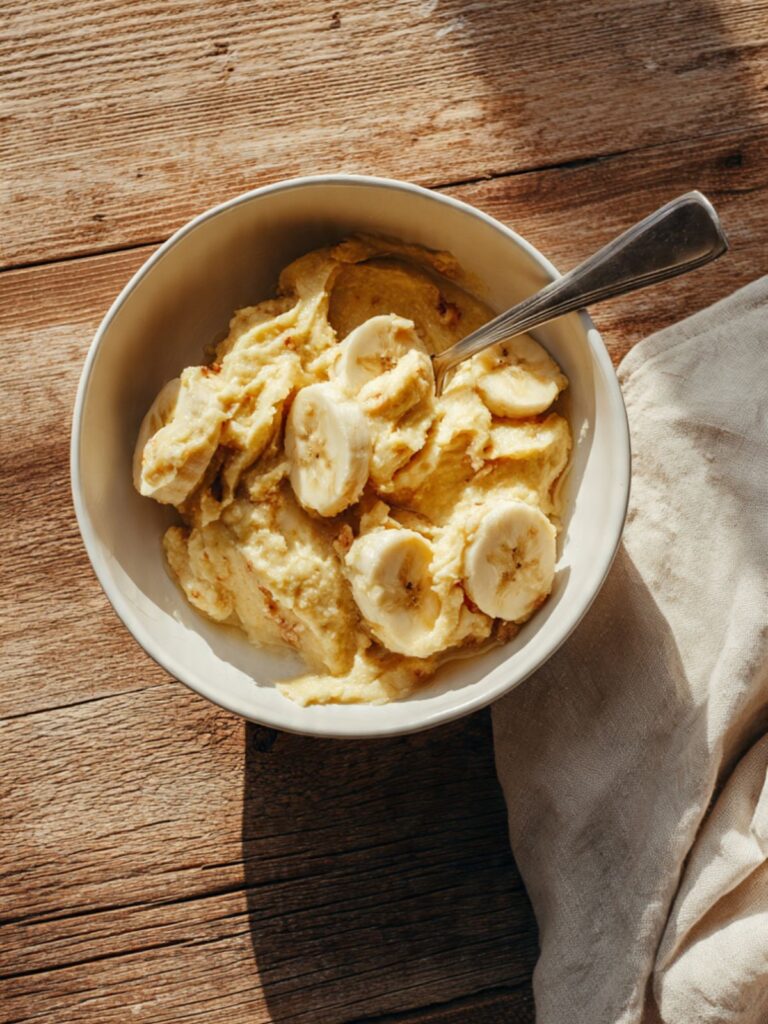
The symptom is dough that looks more like a thick batter and cookies that spread into thin, lacy rounds with crispy edges and raw centers. The cause is bananas that were too over-ripe — fully blackened and wet inside — which carry significantly more water than the recipe accounts for. If you catch this before baking, stir in 2 additional tablespoons (15g) of all-purpose flour and 2 additional tablespoons (12g) of rolled oats, then test-bake one cookie before portioning the full batch. If the cookies have already baked flat, they are still edible — crumble them over vanilla ice cream or layer them in a glass with Greek yogurt and honey as a deconstructed parfait. For the next batch, use bananas that are heavily spotted but still hold their shape when peeled.
Wrong pan type or preparation — burnt bottoms with underdone centers
The symptom is a cookie that looks done on the outside and properly golden on top but has a dark, over-browned or burnt bottom and a center that is still soft and gummy when you bite through. The cause is a dark non-stick baking sheet, which absorbs significantly more radiant heat than a light-colored aluminum pan and transfers that excess heat directly into the cookie base before the center has had time to set. If this has already happened, trim the worst of the burnt bottoms with a serrated knife — the interior and top of the cookie are unaffected. For the next batch, switch to a light-colored aluminum pan, or reduce the oven temperature by 25°F (15°C) and add 1 to 2 minutes to the bake time to allow the center to set before the bottom darkens.
Wrong oat variety — smooth surface with a cakey, uniform texture
The symptom is cookies that look smooth on top with no visible oat texture and a soft, cake-like interior rather than the chewy, oat-proud crumb shown in the photos. The cause is quick oats or instant oats substituted for old-fashioned rolled oats. Quick oats have a much smaller particle size and absorb moisture almost instantly when they hit the wet batter, which means they fully hydrate before the cookie reaches the oven and disappear into the crumb entirely. There is no fix mid-batch — the dough is already made. Bake the batch as-is and use the result as a texture comparison for why the oat specification matters. For the next batch, use only old-fashioned rolled oats.
Cookies spread too flat despite correct banana ripeness — butter was too warm
The symptom is moderate spreading — not as extreme as the over-ripe banana failure, but flatter than the thick, domed cookies shown in the stacked photo. The cause is melted butter that was added to the bowl while still warm rather than cooled to room temperature. Warm butter keeps the fat in a liquid state throughout mixing, which means the dough has no structural resistance to spreading when it hits the hot oven. If the cookies have already baked flat, they are still fully edible and will taste correct — the texture is the only casualty. For the next batch, melt the butter at least 15 to 20 minutes before mixing and confirm it feels room temperature to the touch before it goes into the bowl.
Dry, crumbly cookies that fall apart when picked up — too much flour
The symptom is a cookie that looks baked correctly but breaks apart at the edges when handled and has a dry, powdery interior rather than the slightly tender crumb visible in the broken cookie photo. The cause is flour that was scooped directly from the bag rather than spooned into the measuring cup and leveled — direct scooping packs in 20 to 30% more flour than the recipe requires. A single cup of over-packed flour can add 30 to 40 grams of extra flour to the batter, which absorbs the available moisture and leaves nothing to hold the crumb together. If the cookies have already baked dry, sandwich two together with a thin layer of peanut butter or cream cheese — the added fat and moisture partially compensates. For the next batch, spoon the flour into the measuring cup and level with a straight edge, or weigh it at exactly 120g on a kitchen scale.
No rise, flat cookies, and a faintly soapy or bitter aftertaste — expired baking soda
The symptom is cookies that spread completely flat with no dome and a slightly off, chemical flavor. The cause is baking soda that has lost its potency — baking soda has a shelf life of approximately 6 months once opened, and expired baking soda will not react with the natural acids in the banana to produce the CO2 lift the recipe depends on. Test before the next batch: drop ½ teaspoon of baking soda into 3 tablespoons of hot water. It should bubble immediately and vigorously. If it barely fizzes or does nothing, replace it. Opened baking soda that is stored in the original cardboard box near the stove absorbs moisture and odors quickly — store it in a sealed glass jar away from heat.
Humidity and altitude adjustments
At high altitude (above 3,500 feet / 1,067m): reduce the baking soda to ¼ teaspoon, increase the flour by 2 tablespoons (15g), and increase the oven temperature to 375°F (190°C). High altitude lowers atmospheric pressure, which causes leavening gases to expand faster — cookies spread more aggressively and set less reliably without these adjustments. In high humidity: the flour and oats absorb ambient moisture from the air before and during mixing, which can make the dough stickier than expected and produce slightly more spread. Add 1 additional tablespoon (8g) of flour if the dough feels noticeably wetter than described in the method and the portioned mounds are not holding their shape on the pan.
Expert Pro-Tips
Press 4 to 5 extra oat flakes onto the top of each portioned mound immediately before the pan goes into the oven. The oats folded inside the dough get partially submerged as the cookie spreads and bakes, so surface oats become less visible. Pressing a small pinch of dry oats onto the top of each mound before baking guarantees the prominent, craggy oat-studded surface visible in the stacked cookie photos — exactly the texture that makes these cookies look handmade rather than mass-produced.
Bake one test cookie before portioning the full batch. Scoop one portion, bake it for 11 minutes, and assess the spread, the doneness, and the surface texture before committing to the full 18. This single cookie tells you everything about whether your banana moisture level, butter temperature, and oven calibration are all correct. Adjust as needed before the rest of the batch goes in.
Use two baking sheets and rotate correctly. If you must bake both sheets simultaneously, place one on the upper-middle rack and one on the lower-middle rack and rotate them top-to-bottom and front-to-back at the 6-minute mark. Do not bake two sheets without rotating — the bottom sheet will overbrown and the top sheet will underbake. Single-sheet baking with one batch at a time on the middle rack produces the most consistent result.
How to Store Banana Oatmeal Cookies
Room Temperature
Store completely cooled cookies in a hard-sided lidded container — a glass jar with a clip lid or a plastic container with a snapping lid, not a zip-lock bag. Zip-lock bags compress the cookies under their own weight and flatten the texture within a few hours. Place a sheet of parchment paper between each layer if stacking — direct contact between cookies causes the oat surfaces to stick together and tear when separated. Stored this way at room temperature between 65–72°F (18–22°C), these cookies keep well for up to 4 days.
Do not store near the stove or in direct sunlight. The banana in these cookies makes them more moisture-sensitive than a standard butter cookie — heat accelerates the moisture migration from the interior to the surface, which makes the oat crust go soft faster than it otherwise would.
🗒 Luna’s Note: I keep mine in a wide-mouth mason jar with a clip lid on the counter. They are better on Day 2 than Day 1 — the banana flavor deepens overnight and the oats soften slightly into the crumb in a way that improves the texture. Day 3 is still good. Day 4 is acceptable. Day 5 I would not serve to anyone else.
Refrigerator
Refrigeration is not recommended for these cookies. The cold environment draws moisture out of the crumb and into the oat surface, which makes the exterior go soft and slightly gummy while the interior dries out. If your kitchen runs above 75°F (24°C) and you are storing them beyond 2 days, refrigeration is acceptable — store in the same hard-sided lidded container with parchment between layers and bring the cookies to room temperature for 20 to 30 minutes before eating. Cold banana oatmeal cookies taste muted and dense in a way that room temperature cookies do not.
Freezer — Baked Cookies
Baked cookies freeze well for up to 2 months. Wrap each cookie individually in plastic wrap, pressing the wrap snugly against the surface so no air pockets remain around the oats — air pockets cause freezer burn on the exposed oat edges specifically, which produces an off, stale flavor on the surface while the interior stays fine. After individual wrapping, place all cookies into a zip-lock freezer bag, press out the remaining air, and seal. Label with the date.
To thaw: remove from the freezer bag, unwrap, and let sit at room temperature for 45 to 60 minutes. Do not microwave to thaw — microwave heat turns the oats rubbery and makes the interior gummy. If you want a warm cookie, place the fully thawed cookie on a parchment-lined baking sheet and warm at 300°F (150°C) for 5 to 6 minutes. The oat surface re-crisps during warming and the interior returns to the correct tender texture.
Frozen and thawed cookies are approximately 90% as good as fresh. The banana flavor is unchanged. The oat texture is slightly softer than day-of but still present and distinct.
Freezer — Unbaked Dough
This dough freezes well before baking. Portion the dough into individual scooped mounds using your cookie scoop, place them on a parchment-lined baking sheet, and freeze uncovered for 1 hour until the mounds are solid. Transfer the frozen mounds into a zip-lock freezer bag, press out the air, and seal. Label with the date and the bake temperature. Frozen dough portions keep for up to 6 weeks — the banana degrades in quality beyond this point and the flavor becomes slightly fermented.
To bake from frozen: place frozen dough mounds directly on a parchment-lined baking sheet — do not thaw. Bake at 350°F (175°C) for 14 to 16 minutes, adding 3 to 5 minutes to the standard bake time to account for the frozen core. Check doneness using the same visual cues as the standard method — edges set and golden, centers just underdone when the pan comes out.
Serving Suggestion
These are best served at room temperature — not warm from the oven, and not cold from the refrigerator. The banana flavor is most distinct and the oat texture is at its correct balance of firm exterior and tender interior when the cookie has had its full cooling time and then been left to sit for at least 30 minutes at room temperature after that. A cookie pulled straight from the oven tastes more of butter and brown sugar than banana — the banana flavor needs time to settle into the crumb.
I eat these with black tea, no milk. The tannins in a strong black tea cut the sweetness in a way that milk does not, and the warmth of the mug makes the banana flavor in the cookie more detectable. Strong coffee works the same way — but tea is what I actually reach for.
This is the recipe I bring when someone asks me to bring something and I want it to look more effortful than it was. The cookies look handmade and specific — the craggy oat surface and the domed shape read as intentional — and no one assumes banana oatmeal cookies from a recipe they have not seen before. That is useful.
Day 2 is genuinely better than Day 1. The banana flavor deepens, the oat interior softens slightly into the crumb, and the cookie holds together more cleanly when you bite through it. Make them the night before if you have the option.
These do not travel exceptionally well over long distances — the oat surface softens against packaging within a few hours of being wrapped. Make them where you are serving them, or transport them in a single layer in a hard-sided container with parchment underneath rather than stacked.
Frequently Asked Questions About Banana Oatmeal Cookies
Can I make banana oatmeal cookies without flour?
Banana oatmeal cookies can be made without flour, but the result is a different cookie than the one in this recipe. Flourless versions rely entirely on the oats and banana for structure, which produces a flatter, denser, and more fragile cookie that does not hold together as cleanly when picked up. The flour in this recipe contributes the gluten network that binds the oats and banana together into a cohesive dough — without it, the cookies spread more and crumble at the edges. If you need a flourless version, reduce the banana to 1½ bananas, increase the oats to 2 cups (180g), and expect a thinner, chewier result.
Can I add chocolate chips to banana oatmeal cookies?
Yes — fold in ½ cup (85g) of semi-sweet chocolate chips at the end of mixing, after the flour and oats are fully incorporated. Add them with 3 to 4 final folding strokes so they distribute evenly without overworking the batter. The banana and chocolate combination works well because the banana’s natural sweetness complements rather than competes with semi-sweet chocolate. Milk chocolate chips make the overall cookie significantly sweeter — if you prefer a less sweet result, use dark chocolate chips at 60% cacao or higher. For a version that goes further, my oatmeal chocolate chip cookies covers the full chocolate-oat combination in detail.
Can I substitute quick oats for old-fashioned oats in this recipe?
Quick oats will work in an emergency but will produce a noticeably different cookie. Quick oats are cut into smaller pieces before rolling, which increases their surface area and causes them to absorb moisture much faster than old-fashioned oats — they hydrate almost completely during mixing rather than during baking. The result is a smoother-surfaced cookie with a softer, more uniform crumb and no visible oat texture. The cookie will taste similar but will look nothing like the photos. Old-fashioned rolled oats are the specification this recipe was developed and tested with. Instant oats are not a workable substitute — they dissolve into the batter entirely.
How ripe should bananas be for banana oatmeal cookies?
The banana peel should be at least 70% brown or black with heavy spotting across the entire surface — past fully yellow but not completely black and liquefied inside. At this ripeness stage, the starches have converted fully to simple sugars, which provides the sweetness the recipe relies on, and the cell walls have broken down enough to mash smoothly without chunks. Under-ripe bananas will not mash properly and lack sufficient sweetness. Over-ripe bananas that are completely blackened and wet inside carry too much water and cause the cookies to spread flat. The mashed banana should hold its shape in the bowl rather than running to the edges.
Can I make banana oatmeal cookies ahead of time?
Yes — two make-ahead options work well here. First, the baked cookies are better on Day 2 than Day 1, so baking the night before serving is genuinely recommended rather than just acceptable. Store in a hard-sided lidded container at room temperature with parchment between layers. Second, the unbaked dough can be portioned into scooped mounds, frozen solid on a baking sheet, and transferred to a zip-lock freezer bag for up to 6 weeks. Bake directly from frozen at 350°F (175°C) for 14 to 16 minutes without thawing first. Both options produce results close enough to fresh that the difference is minor. For a similar make-ahead cookie, see my peanut butter oatmeal cookies — the dough holds in the freezer even longer.
Can I double or scale up banana oatmeal cookies?
This recipe doubles reliably — simply multiply all ingredients by two and bake in two separate batches rather than crowding one oversized pan. Do not scale the baking soda linearly beyond a double batch: at a triple batch, keep baking soda at 1¼ teaspoons total rather than 1½ teaspoons. Baking soda does not scale proportionally at larger volumes — excess baking soda produces a soapy aftertaste and over-browning before the centers have set. All other ingredients scale linearly.
How do I adjust banana oatmeal cookies for high altitude or high humidity?
At high altitude above 3,500 feet (1,067m), reduce the baking soda to ¼ teaspoon, increase the flour by 2 tablespoons (15g), and raise the oven temperature to 375°F (190°C) — lower atmospheric pressure causes leavening gases to expand faster, which drives excess spread before the cookie structure sets. In high humidity, the flour and oats absorb ambient moisture from the air before mixing begins, making the dough stickier and more prone to spreading. Add 1 tablespoon (8g) of extra flour if the portioned mounds are not holding their shape on the pan before baking. These are the only two adjustments this recipe requires — all other variables remain the same.
More Recipes You’ll Love
If these banana oatmeal cookies hit the right note, these are the recipes worth making next:
My oatmeal raisin cookies use the same old-fashioned rolled oat base but with a brown butter and cinnamon-heavy dough that produces a chewier, more caramelized result — the raisin-to-oat ratio is tested to the gram and the texture is genuinely different from every other oatmeal raisin recipe you have tried.
My no bake chocolate oatmeal cookies are for the days when the oven is not an option. The oats go in dry, the chocolate sets at room temperature, and the whole batch is done in under 20 minutes. They are a different category of cookie but the oat texture comparison between baked and no-bake is worth experiencing once.
My oatmeal cream pies take the same oat-forward cookie as the base and sandwich a vanilla cream filling between two of them — the cookie itself is softer and more cake-like than this recipe by design, because it needs to compress slightly under the filling without breaking.

Banana Oatmeal Cookies
Ingredients
Equipment
Method
- Position the oven rack in the middle position. Preheat the oven to 350°F (175°C). Line two light-colored aluminum baking sheets with parchment paper and set aside.
- Peel the 2 medium ripe bananas and place them in a medium bowl. Mash with a fork in a pressing and smearing motion for 60 to 90 seconds until smooth with no chunks larger than a small pea. Set aside.
- In a large mixing bowl, combine the ½ cup (113g) melted cooled butter, ½ cup (100g) packed light brown sugar, and mashed banana. Stir with a silicone spatula in wide circular strokes for 20 to 25 strokes until fully combined with no butter streaks.
- Add the 1 large room temperature egg and 1 teaspoon (5ml) pure vanilla extract. Stir for 15 to 20 strokes until the egg is fully incorporated and the mixture looks smooth and slightly thickened with no egg streaks visible.
- Add the ½ teaspoon (2g) baking soda, ½ teaspoon (1.5g) ground cinnamon, and ¼ teaspoon (1.5g) fine sea salt directly to the wet mixture. Stir with 5 to 6 short strokes to distribute evenly.
- Add the 1 cup (120g) spooned and leveled all-purpose flour followed by the 1½ cups (135g) old-fashioned rolled oats on top. Fold from the bottom of the bowl upward in slow deliberate strokes — approximately 15 to 18 strokes — until no dry flour streaks remain and the oats are evenly distributed. Do not overmix.
- Using a 2-tablespoon cookie scoop, portion the dough onto the prepared baking sheets, spacing each portion at least 2 inches (5cm) apart. Each portion should weigh approximately 45g. This recipe yields exactly 18 cookies. Do not press the mounds flat before baking.
- Bake at 350°F (175°C) for 11 to 13 minutes until the edges look set and lightly golden and the centers still look slightly underdone. Do not wait for the centers to look fully set before pulling the pan.
- Leave the cookies on the hot baking sheet for exactly 5 minutes — do not move them. Transfer to a wire cooling rack and cool for a minimum of 10 minutes before eating.