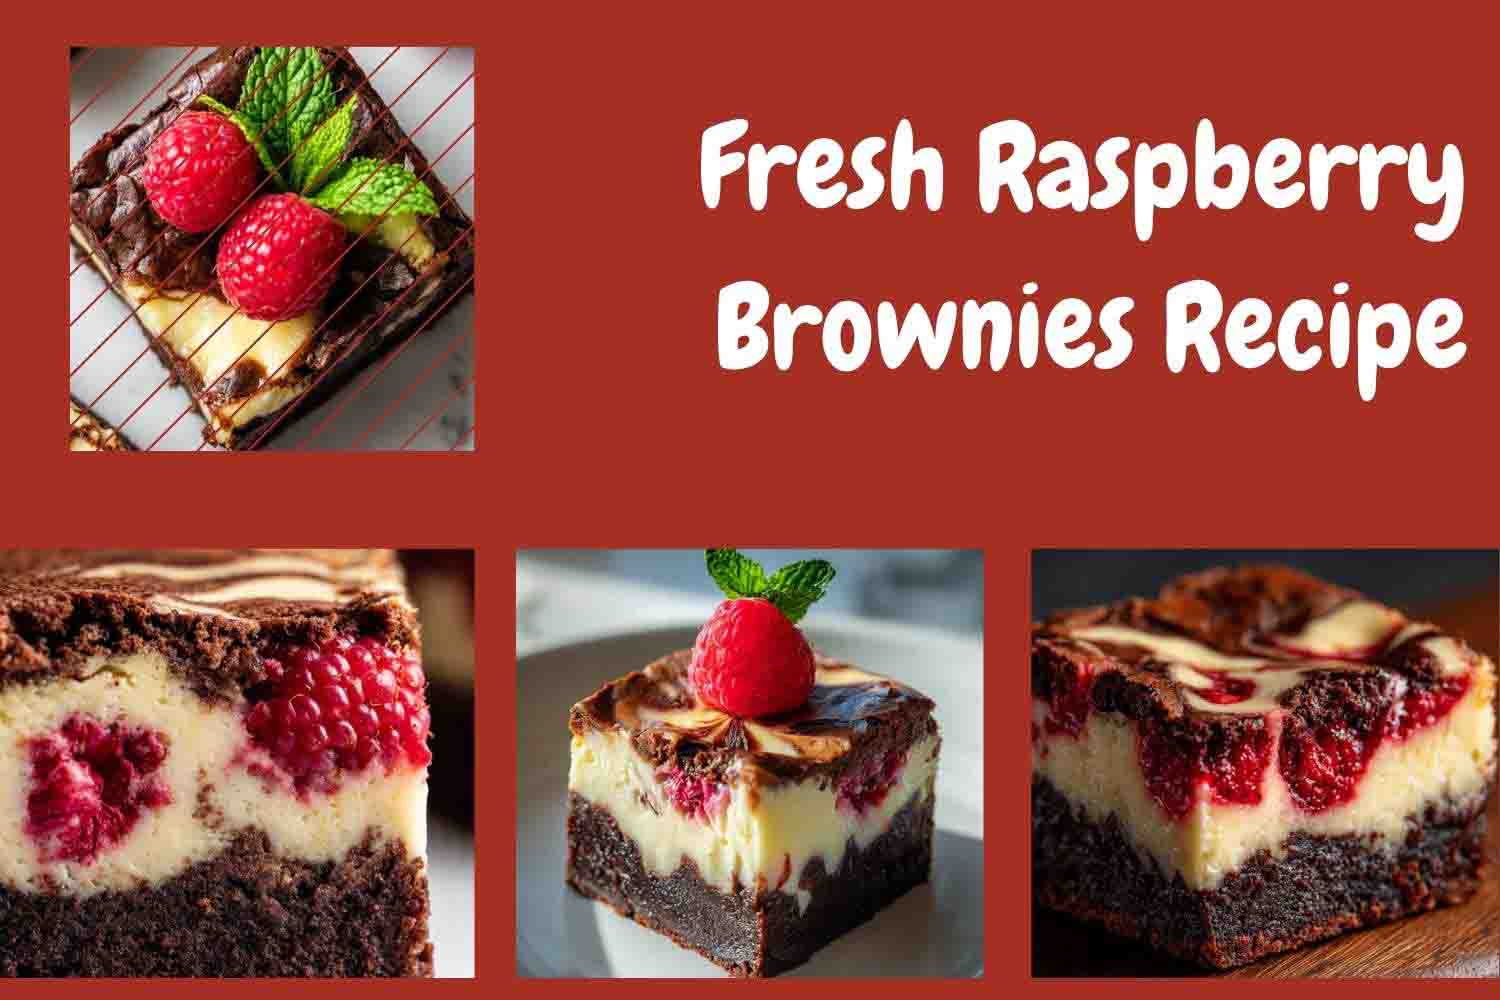
Fudgy Raspberry Brownies Recipe
The first version I made of these had the raspberries folded directly into the brownie batter. They disappeared entirely. The juice turned everything purple-grey and the fruit became undetectable — just a vague acidic note with no presence. I started over and tried a different approach: a separate cheesecake layer on top of the brownie base, with the raspberries pressed through it before baking. That batch was different in every way. The fruit holds its color. The cheesecake sets around the berries. You can see them in every slice.
These are fudgy raspberry brownies with a full cheesecake swirl baked on top — not a thin swirl, a real layer. The brownie base uses melted butter and bittersweet chocolate and bakes to a dense, ganache-like texture with that paper-thin crackled crust on the chocolate sections. Getting that crackle consistent took another four batches after I had the layering right — the variable was how long I whisked the sugar into the warm chocolate before the eggs went in. Sixty seconds of whisking. That is the number. The cheesecake portion is set firm enough to slice cleanly but creamy enough that it reads as a distinct layer, not a coating. Fresh raspberries go in twice: pressed into the cheesecake batter before baking, and added fresh on top after chilling.
The brownie base requires no electric mixer — one saucepan, one bowl, one spatula. The cheesecake layer needs a hand mixer or stand mixer for the cream cheese. No chilling of dough required before assembly. The mandatory wait is after baking: a full 4-hour refrigerator chill before slicing. That chill is non-negotiable. I will explain why in the method.
🗒 Luna’s Note: I did not expect the cheesecake layer to bake as cleanly as it does here. The first batch I pulled at what I thought was correct looked underdone. I let it go two more minutes on the second batch. The edges browned and the center cracked. The underdone batch — the one that wobbled at the center — sliced perfectly after chilling. Trust the wobble.
| Prep Time | Cook Time | Total Time | Yield | Difficulty |
|---|---|---|---|---|
| 25 min | 35 min | 5 hours (includes 4-hour chill) | 16 bars | Intermediate |
| Calories | Fat | Carbs | Sugar | Protein | Sodium |
|---|---|---|---|---|---|
| ~290 kcal | ~16g | ~34g | ~26g | ~5g | ~65mg |
Macros are approximate and will vary based on ingredient brands and serving size.
Ingredients & Tools for Raspberry Brownies Recipe
For the Brownie Base
- ¾ cup + 2 tablespoons (198g) unsalted butter — Kerrygold or any European-style butter with 82%+ fat content. Do not use salted butter; the salt content varies by brand and will throw off the balance in this recipe.
- 7 oz (200g) bittersweet chocolate (60–70% cacao), finely chopped — Use a baking bar, not chips. Ghirardelli 60% bittersweet baking bar is what I use. Chips contain stabilizers that prevent smooth melting and produce a slightly grainy base.
- 1 cup (200g) granulated white sugar — Plain white granulated cane sugar only. Do not substitute brown sugar, coconut sugar, or raw sugar here — the white sugar is what creates the paper-thin crackled crust on the chocolate sections.
- 3 large eggs, room temperature — Cold eggs added to warm melted chocolate will seize the mixture. Set eggs out 30 minutes before starting.
- 1 teaspoon (5ml) pure vanilla extract
- ½ cup (60g) all-purpose flour, spooned and leveled — King Arthur all-purpose flour. Do not substitute cake flour (too low in protein, produces a gummy base) or bread flour (too high, produces a chewy, tough base).
- ¼ teaspoon (1.5g) fine sea salt
- 2 tablespoons (12g) Dutch-process cocoa powder — Adds depth to the chocolate flavor and deepens the color. Do not substitute natural cocoa — the pH difference affects both color and flavor.
For the Cheesecake Layer
- 8 oz (226g) full-fat block cream cheese, softened to room temperature — Block cream cheese only, not spreadable tub cream cheese, not low-fat, not Neufchâtel. Tub cream cheese has a higher water content and will produce a runny layer that never sets properly. Allow 2 full hours on the counter — no shortcuts, no microwave.
- ¼ cup (50g) granulated white sugar
- 1 large egg, room temperature
- 1 teaspoon (5ml) pure vanilla extract
For the Raspberries
- 6 oz (170g) fresh raspberries, divided — Approximately 1½ cups total. Use fresh, not frozen. Frozen raspberries release too much liquid during baking and make the cheesecake layer wet and loose. You will use roughly two-thirds pressed into the batter before baking and the remainder as a fresh garnish after chilling.
For Garnish
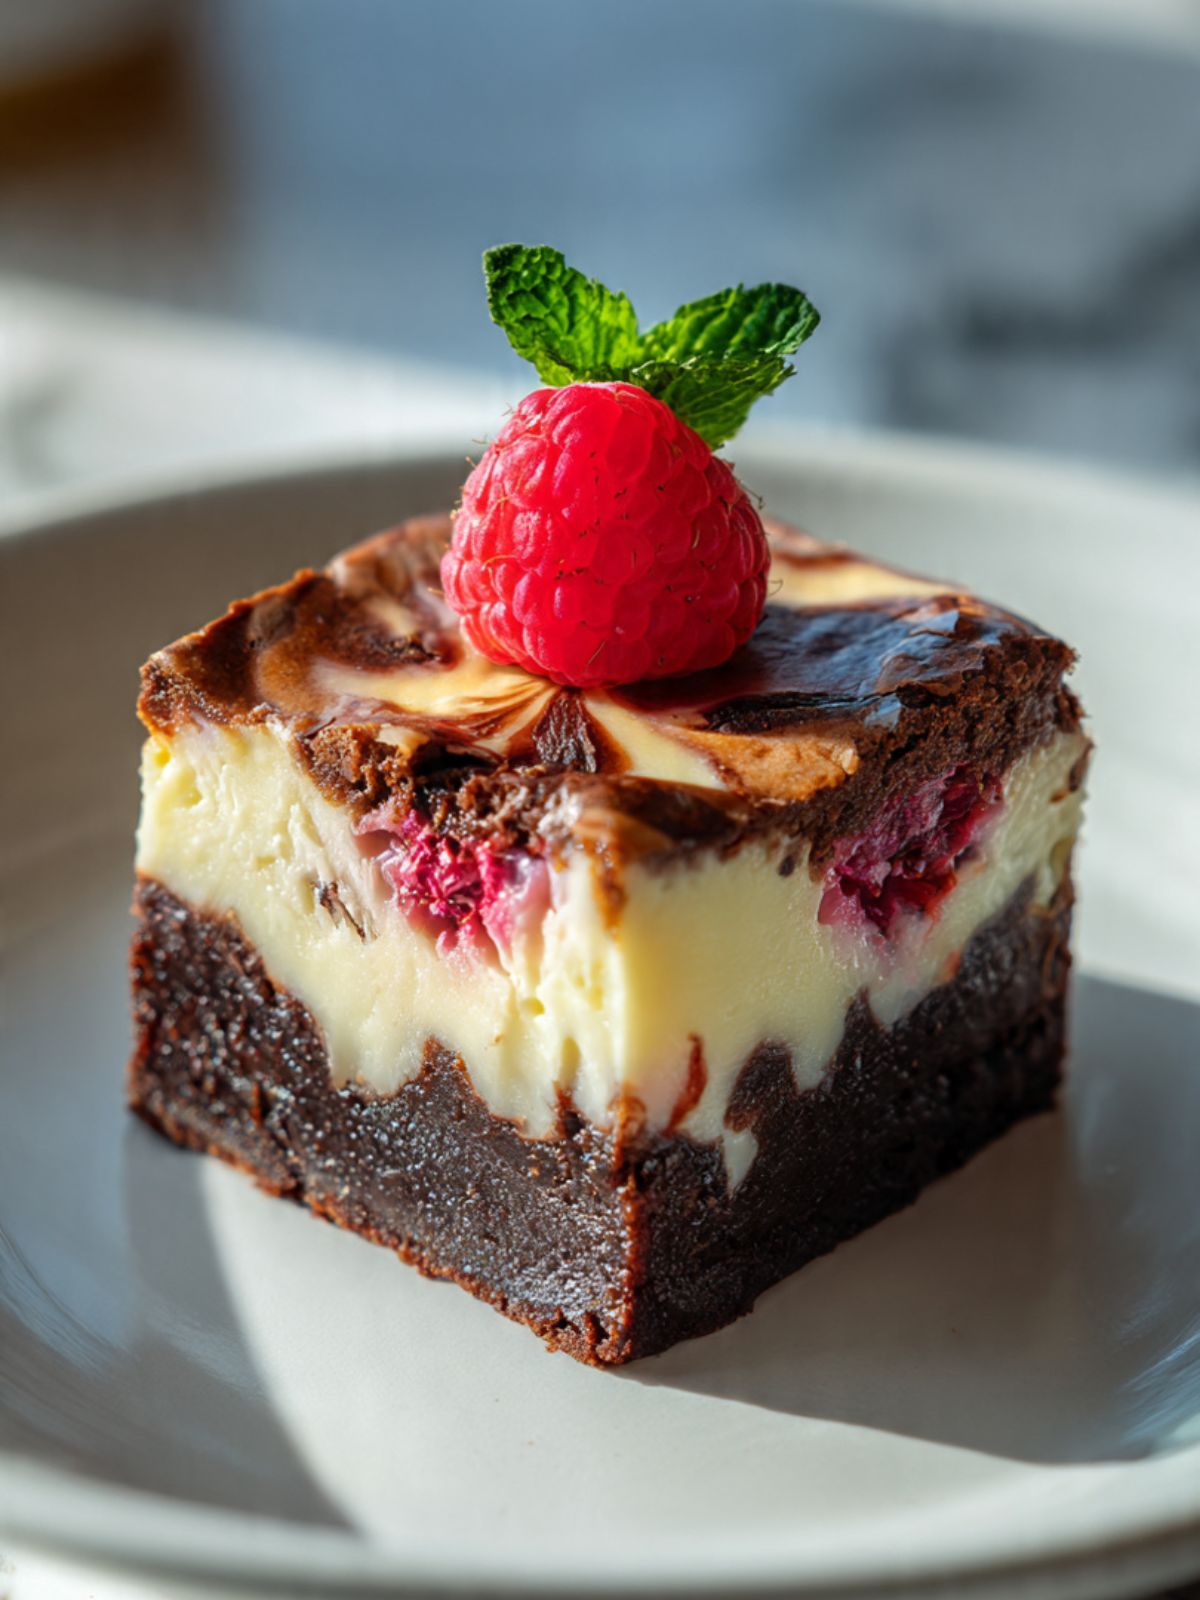
- Fresh mint sprigs — Optional, for serving. The mint is a styling choice, not a flavor component, but it reads as intentional in the photo and on the plate.

Before You Start
Temperature prep: Pull your block cream cheese and all 4 eggs from the refrigerator at least 2 hours before you plan to start for the cream cheese, and 30 minutes before for the eggs. The cream cheese must be genuinely soft — press a finger into the center of the block and it should indent without resistance, feel cool but yielding, and show no firm core. If it has a firm core, it has not softened long enough. Cold cream cheese does not beat smooth; it stays in chunks that no amount of mixing will fully break down, and the cheesecake layer will be lumpy throughout.
Flour measuring: Spoon the flour into your measuring cup using a separate spoon and level it off with a straight edge. Do not scoop the cup directly into the flour bag — scooping packs in 20–30% more flour than this recipe needs and will make the brownie base dense and dry rather than fudgy. For guaranteed accuracy, weigh the flour at 60g on a kitchen scale. Gram weight always takes priority over volume in this recipe.
Gram weight priority: For the most consistent results, use a kitchen scale set to grams. The gram weights in this recipe are what I tested with — they are the most reliable way to match my result.
Mixing equipment: The brownie base requires only a medium saucepan, a large mixing bowl, and a silicone spatula — no electric mixer. The cheesecake layer requires a hand mixer or stand mixer fitted with the paddle attachment. Do not try to beat the cream cheese smooth by hand — it will not work.
Pan prep: Use an 8×8 inch (20×20cm) light-colored aluminum baking pan. Line it with parchment paper, leaving a 2-inch overhang on two opposite sides — this overhang is how you lift the entire slab out of the pan cleanly after chilling. Lightly grease the two unlined sides with butter or non-stick spray. If you use a dark non-stick pan, the brownie base will overbrown on the bottom before the cheesecake layer is set. If you use a glass or ceramic pan, reduce the oven temperature by 25°F (15°C) and expect the bake time to increase by 3–5 minutes.
Oven position: Position your oven rack in the middle of the oven before preheating. Top rack will brown the cheesecake surface before the brownie sets. Bottom rack will overbake the base.
Chocolate melting note: The butter and chocolate are melted together directly in a heavy-bottomed saucepan on the lowest heat your burner produces — not over a double boiler. The fat ratio in this recipe is high enough that scorching on low direct heat is nearly impossible if you keep stirring. Keep the heat at its absolute lowest setting and stir constantly. If your burner has no reliable low setting, use a double boiler: set a heatproof bowl over a saucepan of barely simmering water, ensuring the bowl does not touch the water. Either way, the mixture must cool to below 90°F (32°C) before the eggs go in.
Chilling requirement: These bars require a minimum 4-hour refrigerator chill after baking before they can be sliced. Do not attempt to cut them at room temperature or after less than 4 hours — the cheesecake layer will still be soft at its interior and will collapse and smear under the knife. Plan the bake time accordingly: these need to go into the oven at least 6 hours before you intend to serve them (35 minutes bake + 1 hour room temperature cool + 4 hours refrigerator minimum).
Necessary Tools
Required:
- Kitchen scale (strongly recommended — gram weights are more accurate than volume)
- Medium heavy-bottomed saucepan (for melting butter and chocolate)
- Large mixing bowl (for the brownie base)
- Medium mixing bowl (for the cheesecake layer)
- Hand mixer or stand mixer with paddle attachment (for the cheesecake layer only)
- Silicone spatula
- 8×8 inch (20×20cm) light-colored aluminum baking pan
- Parchment paper with overhang on two sides
- Wire cooling rack
- Sharp chef’s knife (for slicing — must be wiped clean between each cut)
Optional but recommended:
- Instant-read or oven thermometer — most ovens run 15–25°F (8–14°C) off actual temperature, and this recipe is sensitive to overbaking
- Thin offset spatula or butter knife (for creating the cheesecake swirl on top)
- Skewer or toothpick (for the marbled swirl pattern on the surface)
How to Make Raspberry Brownies
Step 1: Melt the Butter and Chocolate Into a Smooth, Glossy Base — The Melt-and-Mix Method Starts Here
This recipe uses the melt-and-mix method for the brownie base — fat and chocolate are melted together first, then sugar, eggs, and dry ingredients are added in sequence to the cooled mixture. No creaming, no aeration, no electric mixer. In your medium heavy-bottomed saucepan, combine your ¾ cup + 2 tablespoons (198g) unsalted butter, chopped into tablespoon-sized pieces, and your 7 oz (200g) finely chopped bittersweet chocolate (60–70% cacao).
In your medium heavy-bottomed saucepan, combine your ¾ cup + 2 tablespoons (198g) unsalted butter, chopped into tablespoon-sized pieces, and your 7 oz (200g) finely chopped bittersweet chocolate (60–70% cacao). Set the pan over the lowest heat your burner can produce and stir constantly with your silicone spatula using slow, continuous strokes from the bottom of the pan upward. The goal is to melt both together gradually — you are not boiling anything, you are coaxing the fat and chocolate into a single emulsified mass.
The butter melts first and begins to coat the chocolate pieces. Keep stirring. The chocolate will soften around the edges before the centers give way. Do not rush this with higher heat — chocolate scorches at temperatures above 120°F (49°C) and scorched chocolate cannot be saved. Once the mixture looks almost fully melted with only a few solid flecks remaining, remove the pan from the heat entirely and stir until those last pieces dissolve from the residual heat.
The finished mixture should look deep brown, glossy, and completely smooth — no visible lumps, no graininess, no separation between the butter and chocolate. If it looks oily with the fat pooling separately, the heat was too high. Let it cool and stir vigorously — it usually comes back together.
Pour the mixture into your large mixing bowl and set it aside to cool. This cooling step is not optional. The mixture must reach below 90°F (32°C) — warm to the touch but not hot — before the eggs go in. Plan on 10 to 15 minutes at room temperature. Use this time to prepare your pan and measure out the remaining ingredients.
🗒 Luna’s Note: I always melt the chocolate directly in the saucepan rather than using a double boiler for this recipe. The fat ratio here is high enough that scorching on low heat is nearly impossible if you keep stirring. One less bowl to wash.
Step 2: Building the Brownie Batter — Sugar, Eggs, and Dry Ingredients
Once your chocolate mixture has cooled to below 90°F (32°C), add your 1 cup (200g) granulated white sugar directly to the bowl and whisk vigorously for 60 full seconds. The sugar will not dissolve completely at this stage — that is correct — but the whisking begins to dissolve the surface layer of sugar crystals into the fat, which is what eventually produces the crackled paper-thin crust during baking. Skipping or shortening this step produces a flat, matte top with no crackle.
Now add your 3 large room-temperature eggs, one at a time, whisking after each addition until fully incorporated before adding the next. Adding all three at once risks breaking the emulsion — the fat seizes around the sudden volume of water from the eggs and the batter looks broken and greasy. One at a time keeps everything cohesive. After the third egg is fully incorporated, add your 1 teaspoon (5ml) pure vanilla extract and whisk to combine.
⚠️ Baker’s Warning: If the batter looks greasy and separated at this point — fat pooling on the surface, mixture not coming together — the chocolate mixture was still too warm when the eggs went in. The eggs have begun to cook. There is no fix for this batch; the proteins have seized. Start the brownie base again with cooled chocolate.
Switch from your whisk to your silicone spatula. Add your ½ cup (60g) all-purpose flour (spooned and leveled), 2 tablespoons (12g) Dutch-process cocoa powder, and ¼ teaspoon (1.5g) fine sea salt all at once. Fold with slow, deliberate strokes from the bottom of the bowl upward — not stirring in circles, which develops gluten and toughens the base. Count 20 strokes maximum from the moment the dry ingredients touch the batter. Stop when no white flour streaks remain.
The finished batter should look thick, deeply dark, and glossy — it will fall off the spatula in a slow, heavy ribbon. If it looks thin and pourable, something in the ratio is off. A correct brownie batter at this stage is closer to a thick ganache than a cake batter.
Reserve approximately 3 tablespoons (45ml) of brownie batter in a small bowl — you will use this for the swirl on top. Pour the remaining batter into your prepared 8×8 inch (20×20cm) parchment-lined pan and spread it into an even layer using your offset spatula. The layer will be approximately ¾ inch (2cm) deep. Set the pan aside and move immediately to the cheesecake layer.
Step 3: Beat the Cheesecake Layer Until Completely Smooth
In your medium mixing bowl, add your 8 oz (226g) full-fat block cream cheese, softened to room temperature for a full 2 hours. Using your hand mixer fitted with the beaters — or your stand mixer fitted with the paddle attachment — beat the cream cheese alone on medium speed for 90 seconds until it is completely smooth with no lumps whatsoever. Scrape the bottom and sides of the bowl with your silicone spatula and beat for another 30 seconds.
This step — beating the cream cheese alone before adding anything else — is the single most important technique in the cheesecake layer. Cold cream cheese or cream cheese that is not beaten smooth before the sugar goes in produces a lumpy layer that bakes unevenly. Every lump you see before the sugar goes in is a lump you will see in the finished bar.
Add your ¼ cup (50g) granulated white sugar and beat on medium speed for 60 seconds, scraping the bowl sides halfway through. Add your 1 large room-temperature egg and beat on low speed — not medium, not high — for 20 seconds until just incorporated. Add your 1 teaspoon (5ml) pure vanilla extract and beat on low for another 10 seconds.
⚠️ Baker’s Warning: Do not beat the cheesecake mixture on medium or high speed after the egg goes in — overmixing after the egg is added incorporates too much air, which expands in the oven and then collapses as the cheesecake cools, causing the layer to crack and sink. Low speed, short time, stop when combined.
The finished cheesecake batter should look pale ivory, smooth, and thick enough to hold a slow ribbon when you lift the beater — not pourable, not stiff. It should look like a thick, creamy frosting. Set it aside.
Step 4: Layering, Raspberry Placement, and the Swirl
Preheat your oven to 325°F (163°C) — not 350°F (177°C). The lower temperature protects the cheesecake layer from overbrowning and cracking while giving the dense brownie base enough time to set through. If your oven runs hot — and most home ovens run 15–25°F off — verify the actual temperature with your oven thermometer before the pan goes in. My oven runs 15°F hot, so I set it to 310°F (154°C).
Pour your cheesecake batter evenly over the brownie base in the pan. Use your offset spatula to spread it into a smooth, even layer that covers the brownie base completely — you want the two layers meeting edge to edge with no brownie visible beneath.
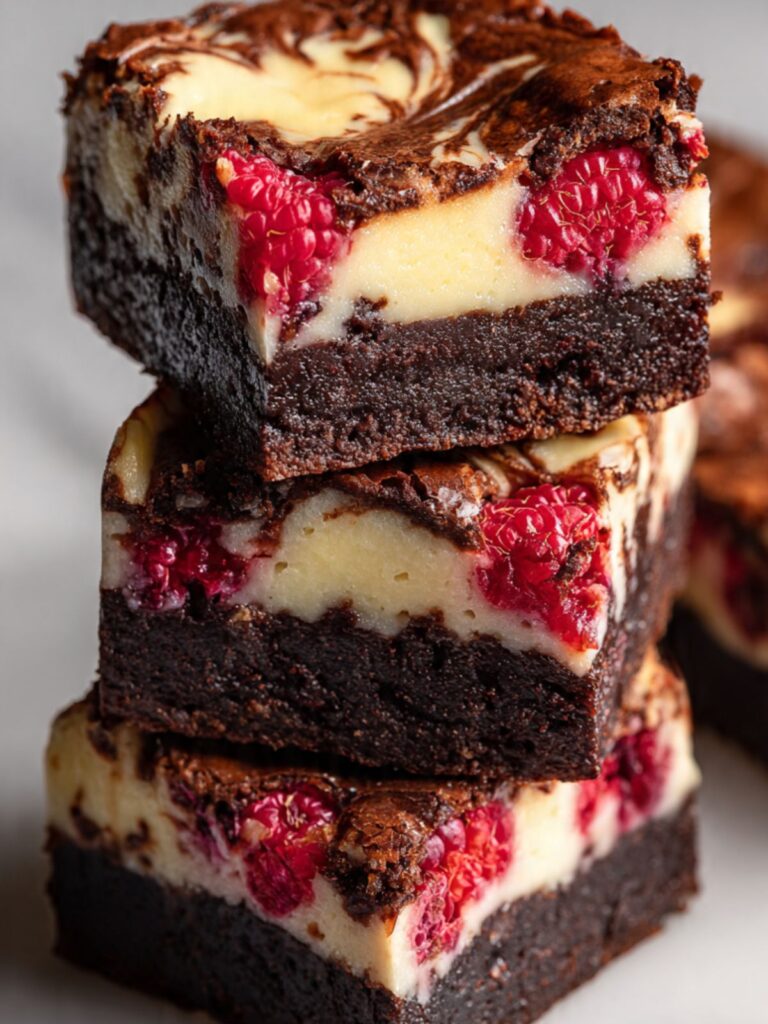
Now take approximately 4 oz (113g) of your fresh raspberries — roughly two-thirds of the total — and press them individually into the cheesecake layer, distributing them evenly across the surface. Press each berry down firmly so that the bottom half of the berry disappears into the cheesecake batter and some berries reach down to the brownie base interface. This is what creates the visual you see in the stacked cross-section photo — raspberries suspended throughout the full depth of the cheesecake layer, with juice bleeding slightly into the top of the brownie base below.
Take your reserved 3 tablespoons of brownie batter and drop it in small spoonfuls across the top of the cheesecake layer — approximately 8 to 10 small drops distributed evenly. Using your skewer or toothpick, drag it through the batter drops in slow, continuous S-curves to create the marbled swirl pattern visible across the surface. Do not over-swirl — 6 to 8 slow passes is enough. More than that muddies the pattern into a uniform brown.
The pan before it goes into the oven should show three distinct elements: ivory cheesecake with visible fresh raspberries pressed throughout, dark chocolate swirl pattern on the surface, and a brownie base visible at the edges of the pan — exactly as shown in the overhead view of the assembled pan.
Step 5: Baking to the Exact Fudgy Stage
Place the pan on the middle rack of your preheated 325°F (163°C) oven. Set a timer for 33 minutes and do not open the oven door before that point — opening early causes a temperature drop that deflates the cheesecake layer before it has set enough to hold its structure.
If you used foil instead of parchment to line the pan, the brownie base will stick to the foil at the edges and the bars will tear rather than lift cleanly. If you skipped the lining entirely and only greased the pan, you will not be able to remove the slab in one piece for slicing — the cheesecake layer will crack and break as you try to cut directly in the pan. Parchment with overhang is the only preparation method that allows clean removal after chilling.
At 33 minutes, open the oven and assess. You are looking for a specific combination of visual signals:
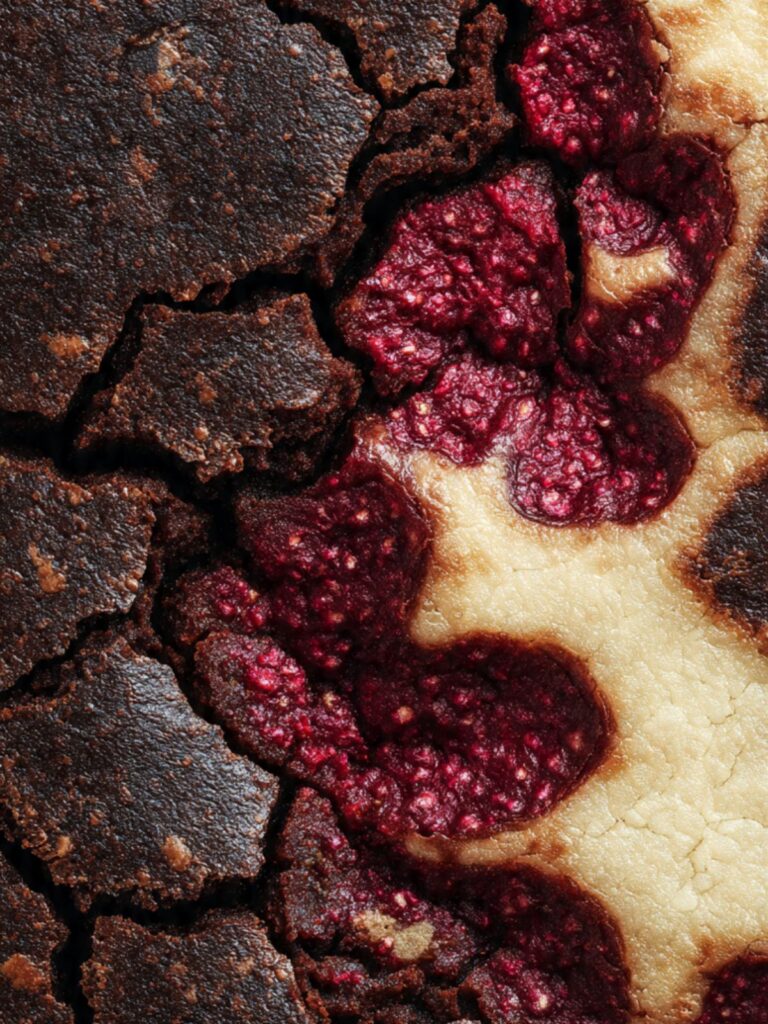
The chocolate sections of the surface should show a paper-thin, crackled crust — the same dark, slightly shiny crackle visible in the extreme close-up surface photo. The cheesecake sections should look matte and set at the edges with no visible liquid sheen. The raspberries pressed into the cheesecake surface should have fully collapsed and become jammy — no longer whole berries sitting proud of the surface but sunken, seed-visible pockets of deep magenta fruit. If the raspberries still look intact and rounded, the cheesecake layer around them has not reached temperature yet. The very center of the pan — a roughly 2-inch (5cm) circle — should still have a gentle, stable wobble when you nudge the pan. This is correct and intentional. It is not underbaked.
If the center still looks liquid and moves in waves rather than a unified wobble, bake for 2 more minutes and check again. If the cheesecake sections have developed any color or visible browning, the pan has gone too long — pull it immediately.
⚠️ Baker’s Warning: Do not wait for the center to look fully set before pulling the pan. A center that looks done in the oven will be overbaked after carryover cooking — the brownie base will lose its fudgy texture and bake dry and cakey, and the cheesecake layer will crack and tighten. The wobbling center is correct. Pull the pan at the wobble.
Total bake time: 33 to 38 minutes at 325°F (163°C).
Step 6: Cooling, Chilling, and Slicing for Clean Edges
Remove the pan from the oven and set it on your wire cooling rack. The brownie base and cheesecake layer are both still cooking — this is carryover cooking, the process by which residual heat stored in the pan and the batter continues driving the internal temperature upward for 10 to 15 minutes after the pan leaves the oven. Any disturbance during this window — cutting, pressing, toothpick testing — interrupts the setting process and collapses structure that has not yet had time to firm. Leave the pan completely undisturbed at room temperature for 1 full hour. Set a timer and walk away.
Do not attempt to move the bars, cut them, or check the center with a toothpick at this point — the cheesecake layer is still setting through carryover heat and any disturbance will collapse the structure. Leave the pan completely undisturbed at room temperature for 1 full hour.
After 1 hour, the pan will still feel warm and the bars will not be sliceable. Transfer the entire pan — uncovered — to the refrigerator for a minimum of 4 hours. Overnight is better. The chill time is what transforms the cheesecake layer from a set-but-soft baked custard into the firm, cleanly sliceable layer visible in the photos. Cutting before 4 hours produces bars that look correct on the outside but collapse and smear at the cheesecake layer when the knife goes through.
After chilling, lift the slab out of the pan using the parchment overhang and set it on a cutting board. Using your sharp chef’s knife, slice into a 4×4 grid: 4 cuts across, 4 cuts down, yielding exactly 16 bars. Each bar weighs approximately 65–70g. Weigh the first bar on your kitchen scale — if it reads significantly over 70g, your grid spacing is uneven and the remaining cuts will produce inconsistent bars. Adjust the grid before continuing. After each cut, wipe the blade completely clean with a damp cloth before making the next cut. Residue from the previous cut smears the cheesecake layer on every subsequent slice.
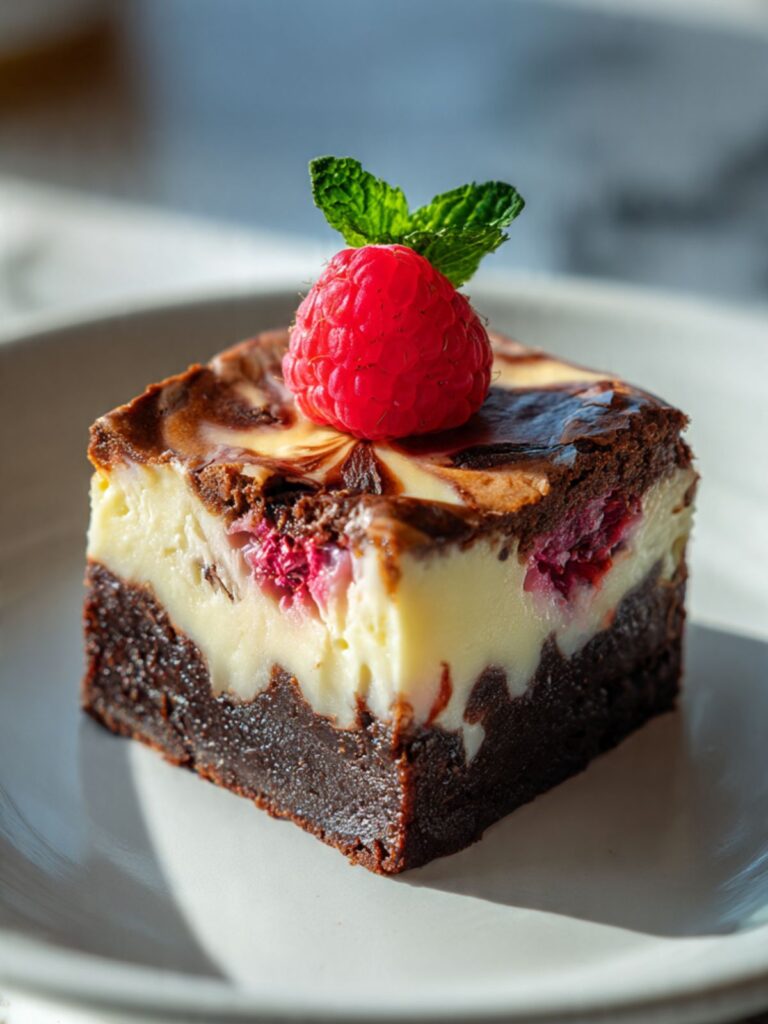
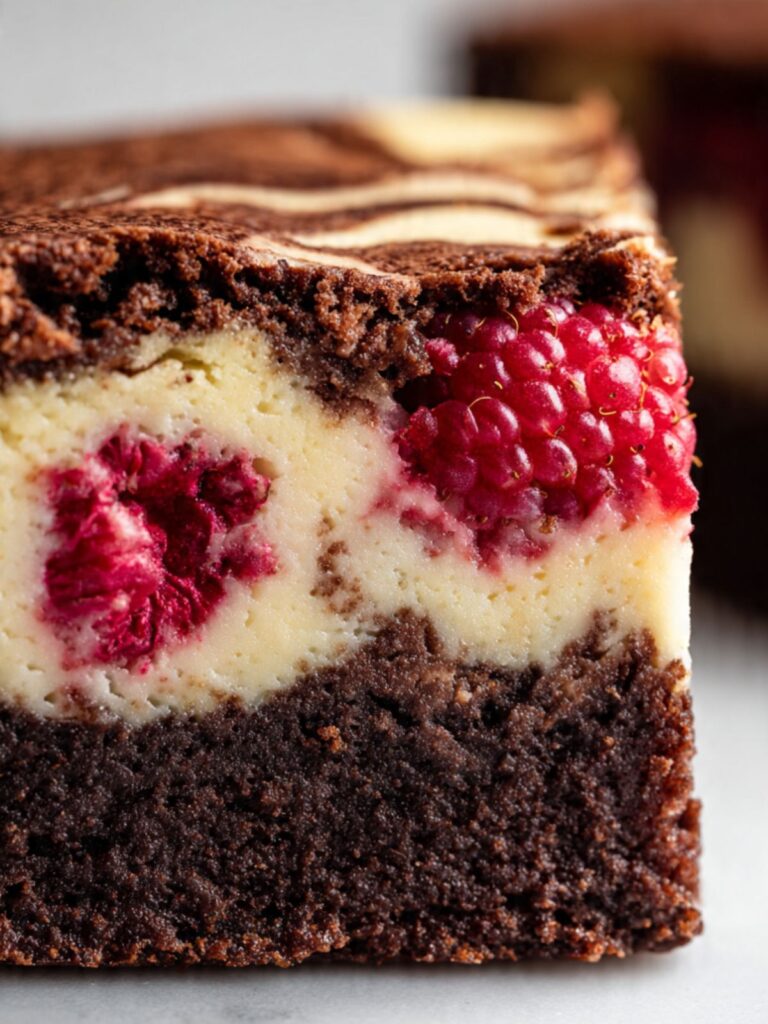
The finished bars should show the layer structure visible in the stacked photo: a dense, dark brownie base approximately ¾ inch (2cm) tall, a thick ivory cheesecake layer with raspberries at multiple depths, and the crackled swirled surface on top. Clean, sharp edges on all four sides.
Add the remaining 2 oz (57g) of fresh raspberries and any mint sprigs as garnish directly before serving — not before chilling, not hours ahead. Fresh raspberries placed before refrigeration will release juice onto the cheesecake surface and stain it.
🗒 Luna’s Note: I run my knife under hot water for 10 seconds and dry it before the first cut. The warmth helps the blade pass through the cheesecake layer cleanly without dragging. Wipe between every single cut — not every few cuts, every one.
The Science Behind Raspberry Brownies
The Paper-Crust Top: What Sugar Actually Does in a Fudgy Brownie
I made six batches of this brownie base before I understood why some had the crackled paper-thin crust and some did not. The ones without it looked fine — dark, set, evenly baked. But they were missing the visual signature that makes a fudgy brownie look like a fudgy brownie. I thought it was the chocolate type. I changed the chocolate three times. The crust appeared on some batches and not others with no obvious pattern. The variable I was not tracking was how long I whisked the sugar into the warm chocolate before adding the eggs.
The chemistry: when granulated sugar is whisked into warm melted chocolate and butter, the heat partially dissolves the sugar crystals. The dissolved sugar migrates toward the surface of the batter during baking as moisture evaporates. At the surface, the concentrated sugar solution dries into a thin, brittle, slightly shiny layer — the crackle. This surface browning also triggers the Maillard reaction — the same chemical process that browns meat and toast — which is why the crackled chocolate sections taste slightly more complex and roasted than the interior of the brownie base below them.
This is the same mechanism that creates the crinkle on a crinkle cookie and the shiny top on a properly made brownie. The longer you whisk at this stage, and the warmer the chocolate mixture is when the sugar goes in, the more sugar dissolves and the more pronounced the crackle becomes.
This is why the whisking step in this recipe is timed to 60 full seconds — not “until combined,” not “briefly.” It is also why the granulated white sugar cannot be swapped for brown sugar or coconut sugar here. Brown sugar contains molasses, which holds moisture and prevents the surface crystallization. Coconut sugar has a different particle size and does not dissolve the same way. Both produce a matte, non-crackled top.
The crackled sections visible across the chocolate areas of the surface in the close-up photo are the visual confirmation that the sugar was correctly dissolved during mixing. The matte ivory sections are the cheesecake layer behaving differently — it contains no free-migrating sugar, so it sets smooth. The contrast between the two is both visual and chemical.
Why the Cheesecake Layer Sets Without Cracking: Protein Coagulation and Temperature Control
Baked cheesecake is essentially a protein gel. The cream cheese provides fat and protein, the egg adds additional protein, and the sugar controls sweetness. When heat is applied, the egg proteins begin to coagulate — they unwind from their natural coiled structure and form new bonds with each other, creating a network that traps water and fat and holds the layer firm. This coagulation starts at around 145°F (63°C) and is complete by approximately 165°F (74°C).
The problem is that the gap between “set” and “overcooked” is only about 20°F (11°C). A cheesecake that reaches 165°F before the oven shuts off will keep climbing through carryover heat. At 180°F (82°C), the protein network tightens and squeezes out moisture — the layer cracks, shrinks, and takes on a rubbery, grainy texture.
The 325°F (163°C) bake temperature in this recipe exists specifically to slow the rate of heat transfer into the cheesecake layer. At 350°F (177°C), the outer edges of the layer cook faster than the center can catch up — the edges overbake before the center sets, and the differential contraction as it cools pulls the surface apart. At 325°F (163°C), the heat moves through the layer more evenly, the center sets within a few degrees of the edges, and the stable wobble at pull time means the center temperature is around 150°F (65°C) — right in the safe zone before the protein network overtightens.
The 4-hour refrigerator chill completes the set. The cheesecake layer firms from approximately 150°F (65°C) at pull time down through room temperature and into refrigerator temperature over that time. The gradual cooling is gentler on the protein network than rapid cooling, which is why uncovering the pan during refrigeration (rather than wrapping tightly, which traps steam) produces a cleaner surface finish.
If you want to understand cheesecake swirl technique applied to a different base, my chocolate chip cheesecake bars walk through the same principles with a cookie dough base instead of a brownie.
Fresh vs. Frozen Raspberries: Why the Water Content Changes Everything
The raspberries in this recipe are doing two jobs simultaneously — they are a flavor component and a structural one. Pressed through the cheesecake layer before baking, they release juice as they heat up and their cell walls break down. That juice disperses into the surrounding cheesecake matrix, creating the magenta pockets visible in the cross-section. The berry itself collapses slightly, leaving a jammy, concentrated pocket of fruit flavor suspended in the creamy layer.
Fresh raspberries contain approximately 85% water by weight, held inside intact cell walls. When they are pressed into the cheesecake batter and baked, that water releases slowly as the cell walls break — a controlled release that disperses into the surrounding cheesecake without overwhelming it.
Frozen raspberries have already experienced cell wall damage from the freezing process. Ice crystals form inside the berry during freezing and rupture the cells. When a frozen raspberry thaws — or is placed into a warm cheesecake batter and begins to warm — it releases all of that water immediately rather than gradually. The result is not a jammy pocket but a wet pool that destabilizes the protein gel around it. The cheesecake layer in those sections will not set properly. It will look wet and sunken after chilling rather than the clean, creamy cross-section visible in the stacked photo.
🗒 Luna’s Note: I have tested this recipe with frozen raspberries twice because the question comes up constantly. Both times the cheesecake layer around the fruit was noticeably wetter than the surrounding sections. Fresh raspberries only.
Raspberry Brownies Troubleshooting & Pro-Tips
Common Mistakes
1. The cheesecake layer is lumpy throughout
Symptom: The baked cheesecake layer has visible white lumps or an uneven, curdled appearance rather than the smooth ivory finish visible in the cross-section photo.
Cause: The cream cheese was not fully softened before beating, or it was not beaten alone long enough before the sugar and egg were added. Full-fat tub cream cheese instead of block cream cheese is the other common culprit — tub cream cheese has a looser structure that breaks differently during beating.
Fix: There is no fix once the bars are baked — the lumps are set into the protein structure. Serve them anyway; the flavor is identical. For the next batch, pull the block cream cheese from the refrigerator 2 full hours before you start. Beat the cream cheese alone for 90 seconds on medium speed before any other ingredient touches the bowl. Scrape the sides and bottom of the bowl completely before adding the sugar.
Prevention: Block cream cheese only. Full room temperature only — not partially softened, not microwaved. Beat alone first, every time.
2. The brownie base overbrowns on the bottom before the cheesecake layer sets
Symptom: The edges of the brownie base are noticeably darker than the center after baking, or the bottom of the bar tastes slightly burnt while the cheesecake layer above looks correct.
Cause: Dark non-stick pan absorbing excess heat at the base, bottom rack position, or oven temperature too high. The brownie base and the cheesecake layer bake at different rates — the dense chocolate base conducts heat faster than the cream cheese layer above it. A dark pan amplifies the heat differential.
Fix: If the bottom is slightly overbrowned but the bars are otherwise correct, serve them. The cheesecake layer compensates in flavor. For the next batch, switch to a light-colored aluminum pan and verify the middle rack position before preheating.
Prevention: Light-colored aluminum pan only. Middle rack only. Oven temperature verified with a thermometer before the pan goes in.
3. The top surface has no crackle — it baked flat and matte across both layers
Symptom: The baked surface looks uniformly matte with no paper-thin crackled crust on the chocolate sections. The surface looks more like a cake top than a brownie top.
Cause: The sugar was not whisked long enough into the warm chocolate mixture before the eggs were added, or the chocolate mixture had cooled too much before the sugar went in. Sugar that is added to chocolate below 80°F (27°C) does not dissolve enough to migrate to the surface during baking. An oven that was not fully preheated when the pan went in also suppresses crackle formation — the batter surface sets slowly rather than forming the rapid crust that crackle requires.
Fix: The texture and flavor of the bars will not be affected — the crackle is a surface phenomenon only. Serve them as-is.
Prevention: Whisk the sugar into the chocolate mixture vigorously for a full 60 seconds while the mixture is still warm. Fully preheat the oven — minimum 20 minutes at temperature before the pan goes in.
4. The bars crumble and collapse at the cheesecake layer when sliced
Symptom: The knife passes through the top correctly but the cheesecake layer smears, tears, or collapses rather than cutting cleanly. The bars look correct from the outside but fall apart on the cut face.
Cause: Insufficient chill time. The cheesecake layer needs a minimum of 4 hours in the refrigerator to firm enough to hold a clean slice. Cutting at 2 hours — even though the bars feel set on the surface — leaves the interior of the cheesecake layer still soft enough to smear under the knife pressure.
Fix: If the bars have already been partially cut and are smearing, press the cut faces back together and return the slab to the refrigerator for another 2 hours — the cold will re-firm the cheesecake layer enough to reslice more cleanly. If the bars have fully crumbled and cannot be reassembled: break the pieces into rough chunks, layer them in a glass with whipped cream or vanilla ice cream between each layer, and serve as a deconstructed brownie parfait. The flavor is completely intact. The presentation becomes intentional rather than accidental.
Prevention: Minimum 4 hours refrigerator chill — overnight is better. Never cut warm.
5. The cheesecake layer cracked across the surface during baking
Symptom: One or more cracks run across the cheesecake sections of the surface after baking. The surface looks broken rather than smooth.
Cause: Overbaking — the center was allowed to look fully set before the pan was pulled, which means the cheesecake protein structure overtightened and contracted as it cooled. Overmixing the cheesecake batter after the egg was added (incorporating too much air) is the other cause — the expanded air collapses and the surface tears.
Fix: A cracked cheesecake layer does not affect flavor at all. Once chilled, spread a thin layer of softened cream cheese (2 tablespoons, beaten smooth with 1 teaspoon of sugar) over the surface and refrigerate for 30 minutes — it fills the cracks and blends in. Add the fresh raspberry garnish directly on top and no one will notice.
Prevention: Pull the pan when the center has a gentle wobble, not when it looks fully set. Beat the cheesecake batter on low speed after the egg goes in — no exceptions.
6. The baked raspberries have made the cheesecake layer wet and sunken in spots
Symptom: The cheesecake layer around some of the baked-in raspberries looks wet, loose, or slightly collapsed after chilling rather than firm and creamy.
Cause: Frozen raspberries used instead of fresh, or fresh raspberries that were rinsed and not dried — surface water on the berries releases into the cheesecake batter immediately on contact and creates wet pockets before baking even begins.
Fix: Once baked and chilled, the texture of the affected sections will not improve. Serve the bars — the flavor is not affected. For the next batch, use only fresh raspberries and do not rinse them before use. If you must rinse, spread them on a paper towel and dry thoroughly before pressing into the batter.
Prevention: Fresh raspberries only. Do not rinse or if rinsed, completely dry before use.
7. The brownie base is dry, tight, and crumbly rather than fudgy
Symptom: The brownie base slices cleanly but the texture is dry and crumbly with visible open crumb — more like a chocolate cake slice than the dense, ganache-like base shown in the cross-section photo. The base does not feel moist or fudgy when eaten.
Cause: Overbaking is the primary cause — every minute past the wobble stage drives moisture out of the brownie base. Wrong chocolate type is the second cause: chips rather than a chopped baking bar contain stabilizers that prevent full fat integration, producing a slightly drier, less glossy base. Too much flour from scooping rather than weighing adds a third variable.
Fix: A dry brownie base cannot be restored after baking. Slice the bars, layer them with vanilla ice cream between each layer, and serve as a brownie ice cream sandwich — the ice cream compensates for the dry texture. Alternatively, warm individual bars at 300°F (150°C) for 5 minutes and serve immediately with a scoop of ice cream on top.
Prevention: Pull the pan at the wobble — not when the center looks set. Use a chopped baking bar at 60–70% cacao, not chips. Weigh flour at exactly 60g. These three variables together determine whether the base is fudgy or dry.
8. Altitude and humidity adjustments
High altitude (above 3,500 feet / 1,067 meters): Leavening gases expand faster at altitude. This recipe contains no baking powder or baking soda in the brownie base, which makes it more altitude-stable than most baked goods. For the cheesecake layer, increase the oven temperature by 15°F (8°C) and reduce the bake time by 2 to 3 minutes — the lower air pressure causes the cheesecake to set faster and it will overbake if left at the standard time. Watch for the wobble cue rather than the clock.
High humidity (above 70% relative humidity): The paper-crust crackle on the chocolate sections may be less pronounced in humid environments — surface moisture from the air rehydrates the sugar crust before it can fully form. The bars will still bake correctly; the visual difference is cosmetic only. Store the baked bars in a lidded container rather than loosely covered to prevent the surface from becoming tacky.
Expert Pro-Tips
I use a metal offset spatula for spreading both layers in this recipe. A silicone spatula spreads the cheesecake batter unevenly because it flexes too much under pressure — the metal offset holds its angle and produces the flat, even layer that bakes consistently. It is the one tool in this recipe where the specific type genuinely changes the result.
Tip 1 — Reserve brownie batter for the swirl before spreading the base layer. Measure out 3 tablespoons of brownie batter into a small bowl before spreading the base into the pan. If you try to reserve batter after spreading — scraping some back out — you disturb the even base layer and create thin spots that bake differently. The reserved batter goes on top of the cheesecake layer and produces the dark swirl pattern visible on the surface.
Tip 2 — Press raspberries to different depths for the cross-section visual. When pressing raspberries into the cheesecake layer, vary how far each berry is pressed down. Some berries pressed flush to the top, some pressed halfway, some pressed nearly to the brownie base. The stacked cross-section shows raspberries at multiple depths throughout the full cheesecake layer — that result requires deliberate placement at varied depths, not just scattering them on the surface.
Tip 3 — Use a hot, dry knife and wipe between every cut without exception. Run your chef’s knife under hot water for 10 seconds, dry it completely, and make the first cut. Wipe the blade with a clean damp cloth before the second cut. Repeat for every single subsequent cut. The cheesecake layer is soft enough that residue from the previous cut builds up on the blade and drags through the next slice, smearing the ivory layer and destroying the clean edge visible in the photos. One skipped wipe ruins the cut face.
Tip 4 — Chill overnight for the cleanest slices and deepest flavor. Four hours is the minimum. Overnight — 8 to 12 hours — is measurably better. The brownie base compresses and firms as it chills, making the base layer denser and more fudgy in texture rather than soft and yielding. The raspberry juice that has seeped into the surrounding cheesecake matrix also deepens in color overnight, producing the vivid magenta pockets visible in the cross-section rather than the pale pink you see at the 4-hour mark.
How to Store Raspberry Brownies
Room Temperature
These bars cannot be stored at room temperature. The cheesecake layer is a baked dairy and egg product — it requires refrigeration within 2 hours of serving. Leaving them on the counter longer than that is a food safety issue, not a texture preference.
If you are serving these at a party or gathering, pull them from the refrigerator no more than 30 minutes before serving. The brownie base softens slightly as it warms and becomes more fudgy at the edges, which is actually the better eating temperature — but the cheesecake layer starts to soften past the 30-minute mark in a warm room and loses the clean-edge structure visible in the photos.
Refrigerator
Store cut bars in a single layer in a hard-sided lidded container — not a zip-lock bag, which compresses the bars and smears the cheesecake surface, and not plastic wrap directly on the cut faces, which pulls the cheesecake layer when removed. Place a sheet of parchment paper between layers if you need to stack them.
Refrigerator storage: up to 5 days. The bars are at their best on Day 2 — the raspberry juice has fully permeated the cheesecake matrix overnight, the flavors have had time to settle, and the brownie base has compressed to the dense, fudgy texture that is harder to achieve straight from the oven. Day 1 is good. Day 2 is better. Day 4 the cheesecake layer starts to look slightly weepy at the edges where the raspberry juice has continued to migrate — still safe to eat, less visually clean.
Do not store these with fresh raspberry garnish already placed on top. Add the fresh raspberries and mint directly before serving each time.
Freezer — Baked
These bars freeze well if wrapped correctly. After the full chill and slicing, wrap each bar individually in a single layer of plastic wrap — pressed firmly against all six sides, no air gaps — then place the wrapped bars in a zip-lock freezer bag or a lidded freezer-safe container. The individual wrapping prevents freezer burn on the cheesecake layer, which is the first surface to show ice crystal damage if left unwrapped.
Freeze for up to 2 months.
To thaw: transfer individual bars from the freezer to the refrigerator and leave overnight — minimum 8 hours. Do not thaw at room temperature; the cheesecake layer softens unevenly and the surface becomes condensation-wet before the interior has thawed. Do not microwave to thaw — the cheesecake layer heats faster than the brownie base and turns rubbery before the brownie warms through.
Texture after freezing: the brownie base is nearly identical to fresh — dense and fudgy. The cheesecake layer loses a small amount of its creaminess and becomes very slightly firmer after freezing and thawing. Still good. Not quite the same as fresh-chilled.
Freezer — Unbaked
The assembled unbaked pan — brownie base spread, cheesecake layer poured, raspberries pressed in, swirl done — can be frozen before baking. Cover the pan tightly with two layers of plastic wrap and freeze for up to 1 month. When ready to bake, transfer the frozen pan to the refrigerator overnight to thaw, then bake from refrigerator-cold — add 5 to 8 minutes to the bake time and watch for the wobble cue rather than the clock.
Do not freeze the assembled pan for longer than 1 month — the raspberries begin to deteriorate and release excess liquid into the cheesecake batter during the freeze-thaw cycle, producing the wet pockets described in Troubleshooting.
Serving Suggestion
I serve these cold, pulled directly from the refrigerator. Not at room temperature, not slightly warmed — cold. The cheesecake layer has a different quality cold than it does after sitting out: firmer, cleaner on the palate, more distinct from the brownie base below it. The contrast between the two layers is sharper cold. That contrast is the whole point of the recipe.
I pair these with black coffee, no sugar. The bitterness cuts through the richness of both layers in a way that milk or a sweet drink cannot — it resets the palate between bites. If coffee is not your preference, a strong unsweetened black tea does the same job.
This is not a recipe I make casually. The chill time alone means a commitment of half a day minimum. I make these when I want something that looks considered — when I am bringing something somewhere and I want it to be the thing people ask about. The layers are visible the moment you cut into them. That cross-section does the work.
🗒 Luna’s Note: I always add the fresh raspberry garnish at the last possible moment — not before transport, not an hour ahead. Raspberries placed on a cold cheesecake surface start releasing juice within 20 minutes. By the time you serve them, the surface around each berry will be stained pink. Place them at the destination, not at home.
Frequently Asked Questions About Raspberry Brownies
Can I make raspberry brownies ahead of time?
Yes — and they are better made ahead. Bake, chill the minimum 4 hours, slice, and refrigerate in a lidded container up to 5 days. The raspberry juice fully permeates the cheesecake layer overnight, deepening both flavor and color. The overnight chill firms the brownie base and produces cleaner slices than the 4-hour minimum. Add fresh garnish directly before serving.
Can I use frozen raspberries instead of fresh?
No. Frozen raspberries have already sustained cell wall damage from freezing, so they release all their water immediately when pressed into the cheesecake batter rather than gradually during baking. That sudden release destabilizes the protein gel around each berry, creating wet, sunken pockets that never fully set. Fresh raspberries only — do not rinse them before use, or dry them completely if you do.
How do I know when the raspberry brownies are done baking?
Pull the pan when the cheesecake edges look matte and set, the chocolate sections show a paper-thin crackle, the pressed raspberries have fully collapsed into jammy pockets, and the center 2-inch circle still has a gentle unified wobble. That wobbling center is approximately 150°F (65°C) — the residual heat and the 4-hour chill complete the set. A fully set center in the oven means overbaked bars after chilling.
Why did my brownies come out cakey instead of fudgy?
Two causes in order of likelihood: overbaking, and too much flour. Every minute past the wobble stage drives moisture out of the brownie base and moves it toward a cakey crumb. Scooping flour directly from the bag packs 20–30% more than the recipe needs — extra flour absorbs the fat that would otherwise produce the dense, ganache-like texture. Weigh flour at 60g and pull the pan at the wobble.
Can I substitute the cream cheese in the cheesecake layer?
Mascarpone works — use the same weight (226g) and identical technique. Its higher fat content produces a richer, slightly denser layer with less tang than cream cheese. Do not substitute ricotta (too much water, will not set), Greek yogurt, or sour cream as a primary base — neither has sufficient fat or protein structure to hold the layer together after baking. Full-fat block cream cheese remains the tested version.
How do I adjust this recipe for high altitude or high humidity?
At high altitude (above 3,500 feet / 1,067 meters): the brownie base has no leavening, making it altitude-stable. For the cheesecake layer, increase oven temperature by 15°F (8°C) and check for the wobble cue 3 minutes early — lower air pressure causes faster setting and overbaking happens quickly. At high humidity (above 70%): the crackle may be less pronounced as surface moisture rehydrates the sugar crust. Store immediately in a lidded container after chilling.
Can I double this raspberry brownies recipe?
Yes. Double all ingredients — no leavening means linear scaling applies throughout. Bake in a 9×13 inch (23×33cm) pan rather than two 8×8 pans; the single larger pan produces bars at similar height to the original. Expect bake time to increase 5 to 8 minutes — start checking for the wobble at the standard 33-minute mark. Do not bake a doubled batch in the original 8×8 pan; the layers will be too deep for even baking.
More Brownies and Bars You’ll Love
- Brookie Recipe — the same fudgy brownie base layered with a thick cookie dough top, baked together in one pan for two textures in every bite.
- Chocolate Chip Cookie Brownies — a brownie base with a cookie dough layer pressed on top, finished with extra chocolate chips for maximum coverage.
- Chocolate Chip Cookie Bars — thick, chewy cookie bars with crisp edges and a soft center, made in one pan with no chilling required.
Fudgy Raspberry Brownies Recipe
Ingredients
Equipment
Method
- Line an 8×8 inch (20×20cm) light-colored aluminum baking pan with parchment paper leaving a 2-inch overhang on two sides, lightly grease the two unlined sides, and set aside.
- In a medium heavy-bottomed saucepan over the lowest heat, melt the 198g unsalted butter and 200g finely chopped bittersweet chocolate together, stirring constantly with a silicone spatula until completely smooth, then remove from heat and pour into a large mixing bowl to cool to below 90°F (32°C), approximately 10 to 15 minutes.
- Whisk the 200g granulated white sugar into the cooled chocolate mixture vigorously for 60 full seconds, then add the 3 room-temperature eggs one at a time whisking fully after each addition, then add the 1 teaspoon pure vanilla extract and whisk to combine.
- Switch to a silicone spatula and add the 60g all-purpose flour, 12g Dutch-process cocoa powder, and 1.5g fine sea salt all at once, then fold with slow strokes from the bottom of the bowl upward — maximum 20 strokes — until no flour streaks remain.
- Reserve 3 tablespoons (45ml) of brownie batter in a small bowl, then pour the remaining batter into the prepared pan and spread into an even layer using an offset spatula.
- In a medium bowl, beat the 226g room-temperature full-fat block cream cheese alone on medium speed for 90 seconds until completely smooth, scrape the bowl, then beat 30 seconds more.
- Add the 50g granulated white sugar and beat on medium speed for 60 seconds scraping halfway through, then add the 1 room-temperature egg and beat on low speed for 20 seconds until just incorporated, then add the 1 teaspoon pure vanilla extract and beat on low for 10 seconds.
- Preheat the oven to 325°F (163°C) and position the rack in the middle of the oven.
- Pour the cheesecake batter evenly over the brownie base and spread into a smooth layer covering the brownie base completely edge to edge.
- Press approximately 4 oz (113g) of the fresh raspberries individually into the cheesecake layer at varied depths — some flush to the surface, some pressed nearly to the brownie base — distributing them evenly across the pan.
- Drop the reserved brownie batter in 8 to 10 small spoonfuls across the cheesecake surface, then drag a skewer through the drops in slow S-curves — 6 to 8 passes — to create the swirl pattern.
- Bake on the middle rack at 325°F (163°C) for 33 to 38 minutes until the cheesecake edges look matte and set, the chocolate sections show a paper-thin crackled crust, and the center 2-inch circle still has a gentle unified wobble when the pan is nudged — do not wait for the center to look fully set.
- Set the pan on a wire rack and cool at room temperature undisturbed for 1 full hour, then transfer uncovered to the refrigerator for a minimum of 4 hours or overnight.
- Lift the slab from the pan using the parchment overhang, place on a cutting board, and slice into a 4×4 grid for 16 bars using a sharp knife wiped completely clean between every cut.
- Add the remaining fresh raspberries and mint sprigs as garnish directly before serving.