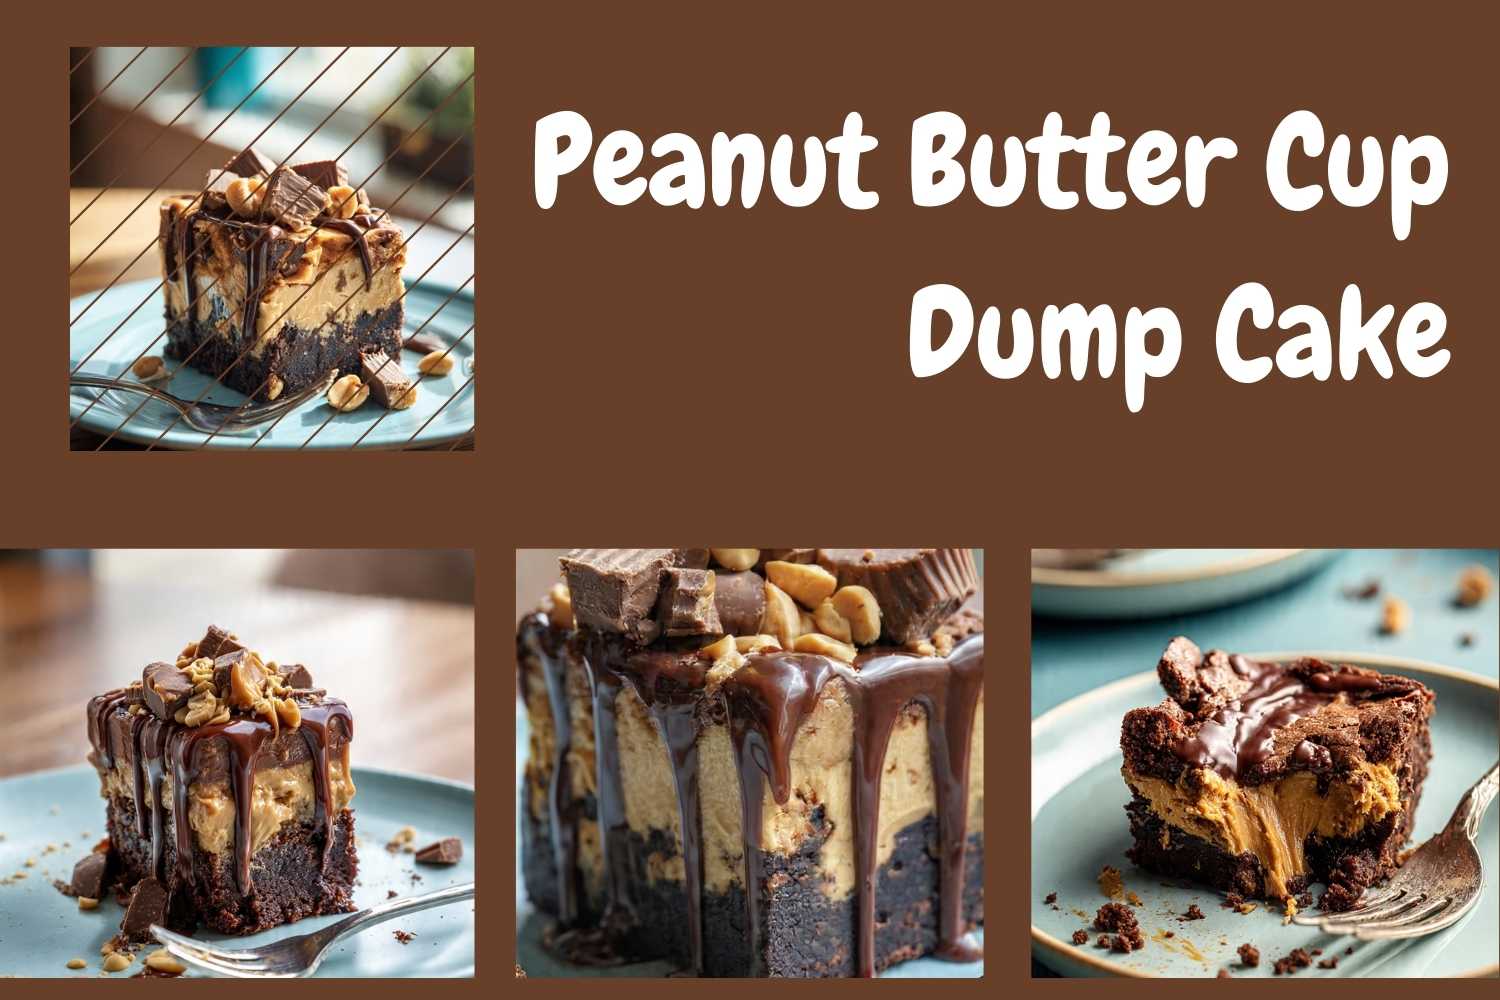
Peanut Butter Cup Dump Cake
The first time I made this, I spread the peanut butter layer too thin. I thought it would sink into the batter during baking and become part of the base. It did not sink — it disappeared. There was no middle layer. There was just a damp, flat chocolate cake that had no reason to exist. I doubled the peanut butter layer on the second batch. That is the recipe here.
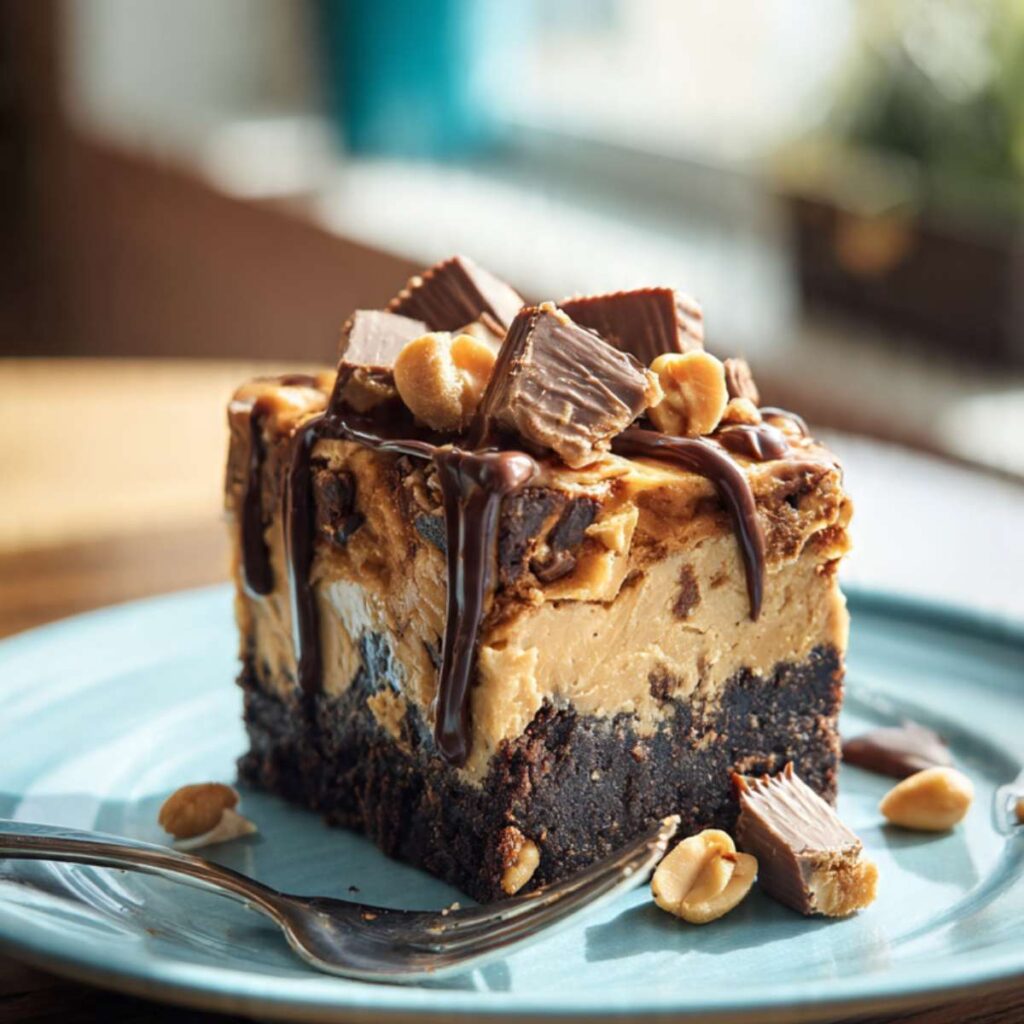
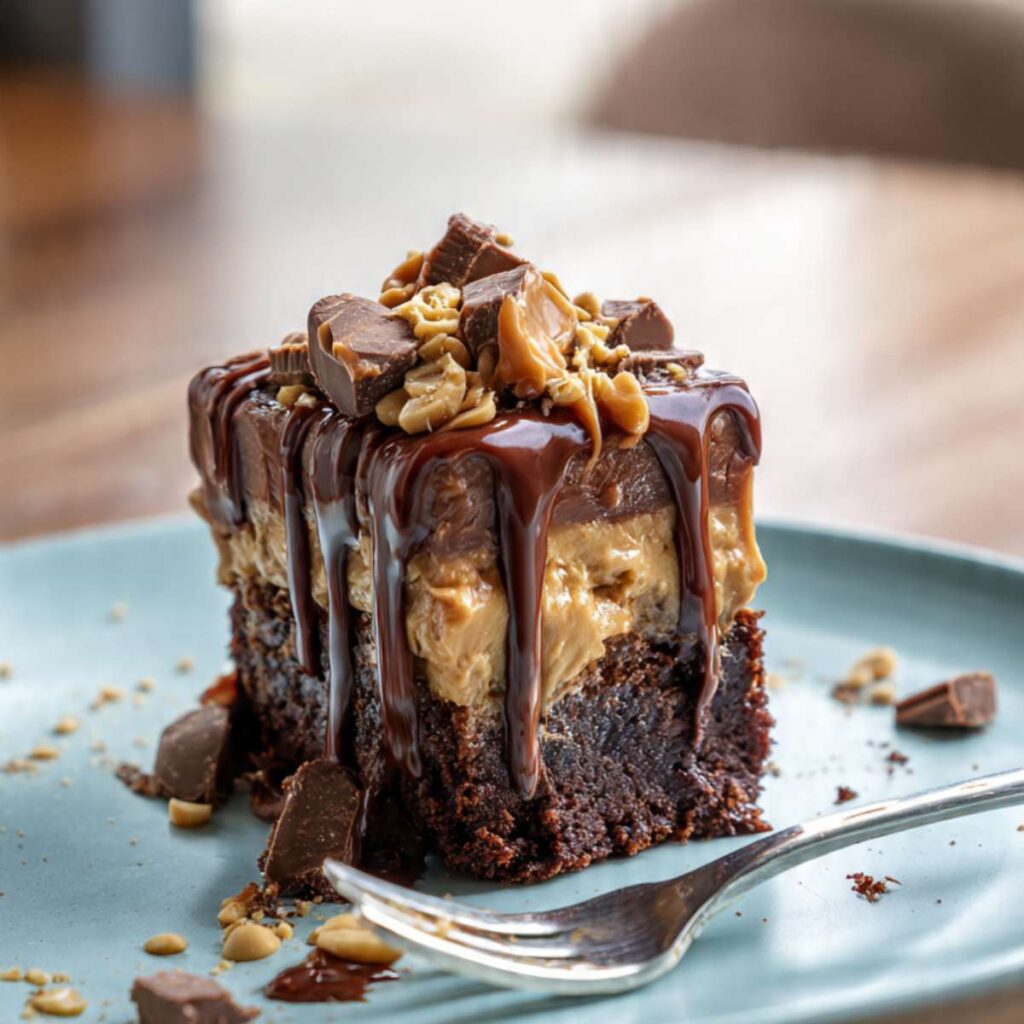
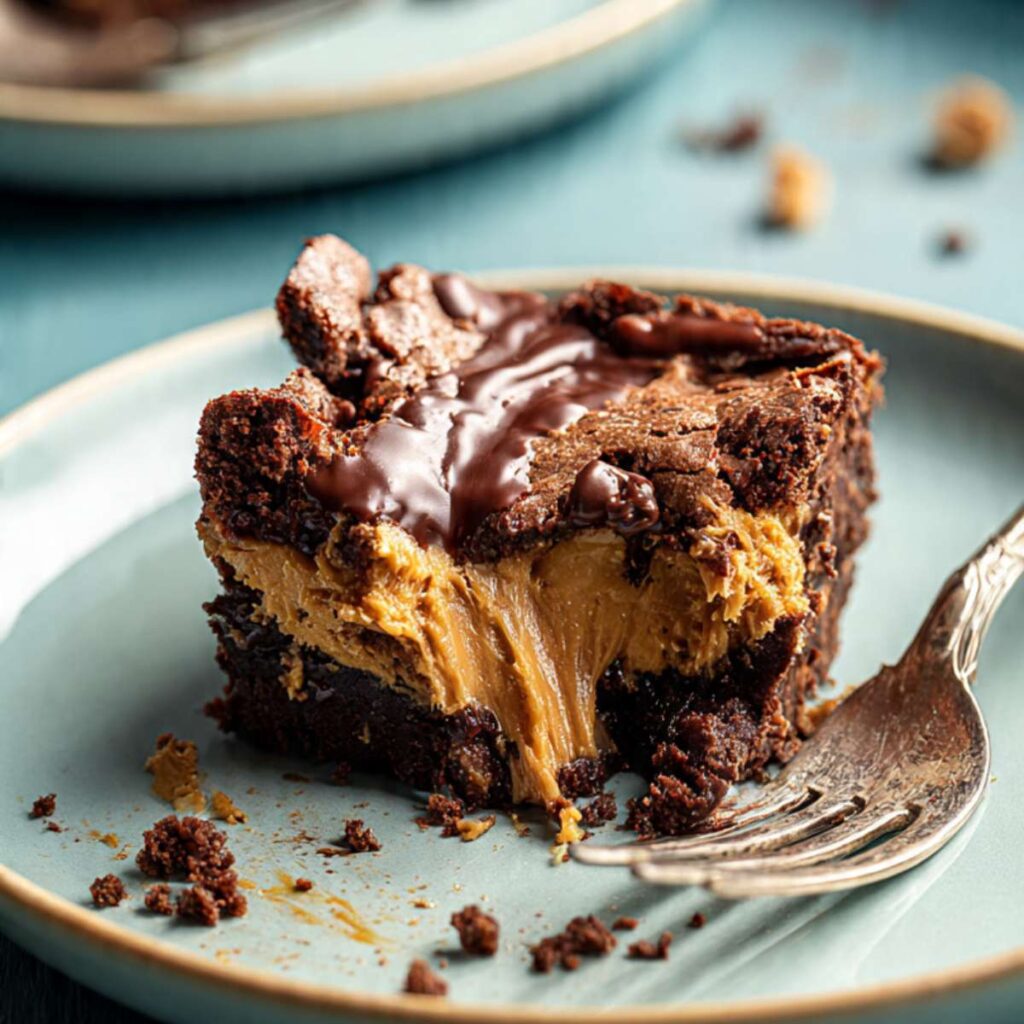
This is a peanut butter cup dump cake — and if you have ever made anything in a dump cake format, you already know the basic principle: box mix on the bottom, something irresistible in the middle, ganache and candy on top, one pan, one oven, done. What makes this version work is that the peanut butter filling is treated like a real layer, not an afterthought. It is thick enough to stay distinct after baking. When you cut into it, you get a clean cross-section of dark chocolate cake, then cream-colored peanut butter filling, then a top draped in chocolate ganache and loaded with chopped Reese’s cups and roasted peanuts. It holds. It looks like what you came for. No mixer, no chilling — the whole thing is one pan from start to finish.
I tested this with natural peanut butter versus commercial creamy. Natural peanut butter produced a filling that was oily on the bottom and grainy on top. The oil separated during baking and soaked into the cake layer below. The filling did not hold its shape when cut. Commercial creamy peanut butter — Jif or Skippy — produced a smooth, uniform layer that stayed exactly where I put it. There is no version of this recipe that works correctly with natural peanut butter.
I tested the ganache two ways — chocolate chips melted with cream, versus a chocolate fudge sauce poured straight. The fudge sauce made the top too sweet and too thick — it competed with the peanut butter layer instead of finishing it. The ganache (chips plus cream) was thinner when warm and set into a glossy, firm drizzle after cooling. I kept the ganache.
No mixer. No chilling. The whole thing comes together in about 20 minutes of active work before it goes into the oven. The only patience required is the cooling time before cutting — and I will tell you exactly why that matters in the method.
🗒 Luna’s Note: I keep roasted peanuts in a jar on my counter specifically for recipes like this one. The saltiness cuts through the chocolate-peanut butter richness in a way that unsalted peanuts simply don’t — and the contrast shows up in every bite. This is the recipe I make when someone asks me to bring something and I want them to stop asking questions and just eat it.
| Prep Time | Cook Time | Total Time | Yield | Difficulty |
|---|---|---|---|---|
| 20 min | 45 min | 1 hr 5 min + 2 hrs cooling | 15 bars | Easy |
| Calories | Fat | Carbs | Sugar | Protein |
|---|---|---|---|---|
| ~440 kcal | ~28g | ~46g | ~27g | ~9g |
Macros are approximate and will vary based on ingredient brands and serving size.
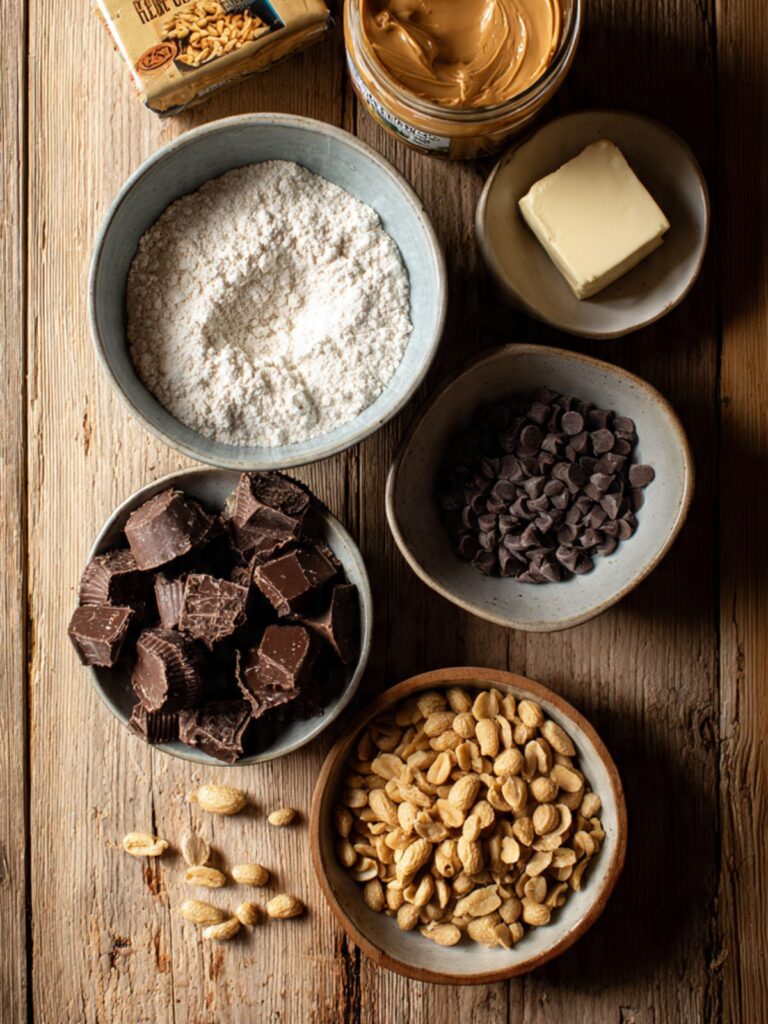
Ingredients & Tools
For the Chocolate Cake Base
- 1 box (432g) devil’s food cake mix — use a standard 15.25 oz box; Betty Crocker or Duncan Hines both tested well. Do not use a “moist” mix that contains pudding — it produces a denser, gummier base that does not set correctly.
- 3 large eggs (approximately 50g each without shell), room temperature — cold eggs cause the batter to look broken and curdled. Pull them from the fridge 30 minutes before you start.
- ½ cup (109g) neutral oil — vegetable oil or canola oil. Do not use olive oil or coconut oil — both have strong flavors that compete with the chocolate and peanut butter.
- 1 cup (237ml) water, room temperature
For the Peanut Butter Layer
- 1 cup (258g) creamy commercial peanut butter, such as Jif or Skippy — this is non-negotiable. Natural peanut butter where the oil separates will break the filling during baking and produce a greasy, grainy layer that does not hold its shape when cut. Commercial creamy peanut butter is the only type that works here.
- 4 oz (113g) full-fat block cream cheese (not low-fat, not whipped), softened to room temperature — the cream cheese stabilizes the peanut butter layer and gives it body. Low-fat versions contain more water and will produce a wet, loose filling. Whipped cream cheese has a different fat ratio and will not set properly. Block only.
- ½ cup (60g) powdered sugar, sifted — sift it before measuring. Unsifted powdered sugar clumps and produces a gritty filling.
- 2 tablespoons (30ml) heavy cream (36% fat) — this loosens the filling just enough to spread smoothly. Do not substitute with milk or half-and-half — the lower fat content makes the filling runny.
For the Chocolate Ganache Drizzle
- 1 cup (170g) semi-sweet chocolate chips (45–55% cacao), such as Nestlé Toll House or Ghirardelli — semi-sweet is the right balance here. Dark chips (60%+) make the ganache too bitter against the sweet peanut butter layer. Milk chocolate chips are too sweet and too soft — the ganache will not set firmly.
- ½ cup (120ml) heavy cream (36% fat) — the 2:1 chip-to-cream ratio produces a ganache that pours easily when warm and sets to a glossy, firm drizzle at room temperature. Do not use half-and-half — it will not set.
For the Topping
- 8–10 Reese’s Peanut Butter Cups, roughly chopped — use the standard full-size cups, not minis. Chop them into irregular pieces — some large chunks, some small crumbles. The size variation is visible in the finished photos and is part of the visual.
- ¼ cup (37g) roasted salted peanuts — salted, not plain. The salt contrast is part of the flavor balance. Whole or roughly chopped — both work.
Before You Start
Temperature prep: Pull your eggs and full-fat block cream cheese from the refrigerator at the same time — both need to be at room temperature before you begin. Eggs need 30 minutes. Cream cheese needs 60–90 minutes. Cold cream cheese will not blend smoothly into the peanut butter filling and will leave lumps that are impossible to remove once they form. Press your finger into the softened cream cheese — it should give easily and feel like soft clay, not cold and firm.
Peanut butter type: Commercial creamy peanut butter only — Jif or Skippy. Natural peanut butter where the oil separates has inconsistent fat content. The filling will be oily and will not hold its shape when cut. This is the single most common failure point in this recipe.
Cake mix selection: Use a standard devil’s food box mix at approximately 15.25 oz (432g). Check the box before you start — if your mix includes a pudding packet or says “extra moist with pudding,” set it aside and use a different box. The pudding formulation changes the texture of the base.
Powdered sugar: Sift it before adding. Thirty seconds with a fine-mesh sieve prevents gritty filling.
Mixing method: This entire recipe comes together with a large mixing bowl and a silicone spatula — no electric mixer needed. The peanut butter filling can be mixed by hand if the cream cheese is fully softened.
Pan prep: Line a 9×13 inch (23x33cm) light-colored aluminum baking pan with parchment paper, leaving at least 2 inches (5cm) of overhang on both long sides. Grease the parchment lightly with non-stick spray. If you skip the parchment overhang, you will not be able to lift the bars out cleanly — the ganache-covered top makes it impossible to flip the pan.
Oven position: Place your oven rack in the middle position before preheating. Top rack burns the top before the base is set. Bottom rack overbrowns the bottom while the center stays underdone.
Oven calibration: Most home ovens run 15–25°F (8–14°C) hotter or cooler than the dial reads. If you have an oven thermometer, set it on the middle rack and confirm the actual temperature before the pan goes in. An oven running 25°F hot will overbrown the base before the center sets.
Gram weight priority: The gram weights in this recipe are what I tested with. Use a kitchen scale whenever possible — the peanut butter and cream cheese quantities especially benefit from weighing rather than eyeballing volume.
Necessary Tools
Required:
- Kitchen scale (strongly recommended — gram weights are more accurate than volume)
- 9×13 inch (23x33cm) light-colored aluminum baking pan
- Parchment paper with overhang on both long sides
- 2 large mixing bowls
- Silicone spatula
- Fine-mesh sieve (for sifting powdered sugar)
- Small saucepan or microwave-safe bowl (for ganache)
- Wire cooling rack
Optional:
- Oven thermometer (most ovens run 15–25°F off — worth confirming)
- Offset spatula (for spreading the peanut butter layer evenly)
- Sharp chef’s knife, wiped clean between cuts, for clean bar edges
How to Make Peanut Butter Cup Dump Cake
Step 1: Preparing the Pan and Preheating the Oven
Position your oven rack in the middle of the oven and preheat to 350°F (175°C). While the oven heats, line your 9×13 inch (23x33cm) light-colored aluminum baking pan with parchment paper, pressing it into the corners and leaving at least 2 inches (5cm) of overhang on both long sides. Lightly spray the parchment with non-stick spray. The overhang is your handle — without it, you cannot lift the finished bars out cleanly once the ganache has set on top. Set the prepared pan aside.
The pan should look fully lined with no bare aluminum visible on the bottom or short sides, and the overhang should hang over both long edges before anything goes in.
⚠ Do not use a dark non-stick pan — it absorbs more heat and will overbrown the chocolate base before the center is set. Light-colored aluminum is what this recipe was tested with. If you only have a glass or ceramic dish, reduce the oven temperature by 25°F (15°C) and add 5–7 minutes to the bake time.
The pan is ready — start the batter now while the oven finishes preheating.
Step 2: Mixing the Chocolate Cake Batter
In your large mixing bowl, combine your 1 box (432g) devil’s food cake mix, 3 large eggs (room temperature), ½ cup (109g) neutral oil, and 1 cup (237ml) room-temperature water. Using your silicone spatula, stir from the bottom of the bowl upward in wide strokes — approximately 40 to 50 strokes — until no dry streaks of cake mix remain and the batter looks uniform and glossy. The oil is the primary fat in this base — it produces a moister, more tender crumb than butter would, and it is part of why the base stays soft at room temperature even after the cake cools.
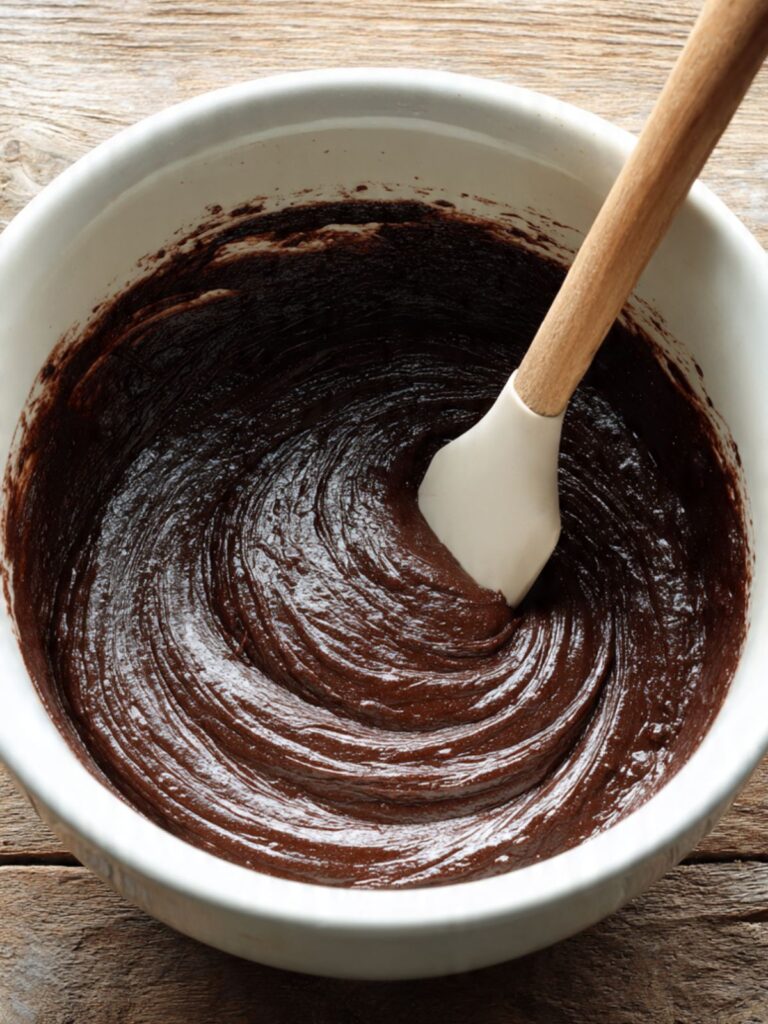
The batter should look dark, smooth, and thick enough to coat the spatula — not watery, not lumpy. A few small lumps are fine. Visible dry streaks of cake mix are not fine — keep stirring.
⚠ Do not overmix — 50 strokes is enough. Overworked batter develops excess gluten from the flour in the mix and will bake up tough and slightly rubbery rather than soft and fudgy.
Pour the batter into your prepared pan and spread it to the edges using the spatula. The batter should fill the pan to approximately ¼ inch (6mm) depth — thin and even across the full surface. Set aside while you make the peanut butter layer — do not put the pan in the oven yet.
Step 3: Building the Peanut Butter Layer
In your second large mixing bowl, combine your 1 cup (258g) creamy commercial peanut butter (Jif or Skippy), 4 oz (113g) full-fat block cream cheese (softened to room temperature), ½ cup (60g) sifted powdered sugar, and 2 tablespoons (30ml) heavy cream. Using your silicone spatula, stir firmly from the bottom of the bowl in circular strokes until the mixture is completely smooth and no white streaks of cream cheese remain — approximately 30 to 40 strokes. The cream cheese is what gives this layer its body and keeps it from melting entirely into the cake below during baking. The heavy cream loosens the mixture just enough to spread without thinning it to the point where it loses structure.
The filling should look thick, smooth, and uniform — a warm tan color throughout with no white cream cheese streaks visible. It should hold a soft mound when dropped from the spatula, not run off the spoon.
⚠ If the cream cheese was still cold when it went in, the filling will have white lumps that will not mix out no matter how long you stir. If this happens, stop. Microwave the bowl for 10 seconds only, stir again. Repeat once if needed. Do not microwave longer — overheated cream cheese changes the fat structure and the filling will be greasy.
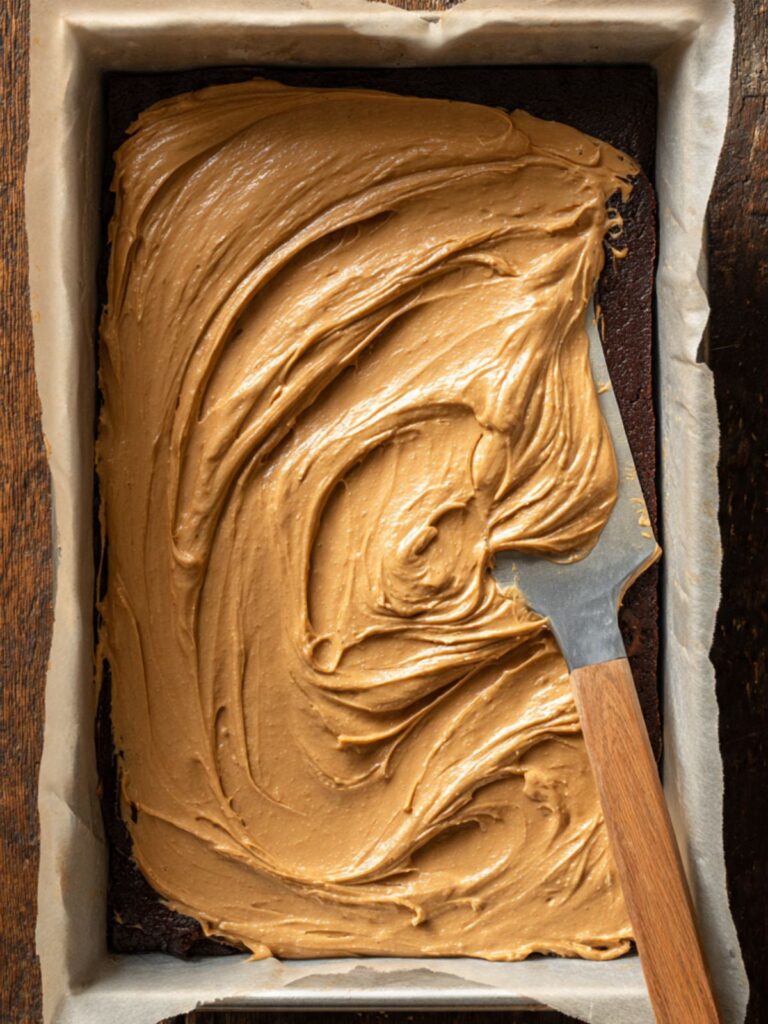
Spoon the peanut butter filling onto the unbaked batter in the pan. Using your offset spatula (or the back of a large spoon), spread it as evenly as possible across the full surface of the batter, working all the way to the edges. As you can see in the finished cross-section photos, this layer is substantial — not a thin smear. Use all of it. The filling will not sink entirely into the batter below; it stays as a distinct middle layer through baking, which is exactly what you want.
🗒 Luna’s Note: I always spread the peanut butter layer in one direction first, then go back across it at a 90-degree angle. It takes an extra 20 seconds and produces a much more even layer than trying to do it in one pass — you can see the difference in the cross-section when you cut.
The filling is ready — spread it over the unbaked batter now before either layer has time to skin over.
Step 4: Baking Until the Edges Pull and the Center Sets
Place the pan on the middle rack of your preheated 350°F (175°C) oven. Bake for 40 to 45 minutes. The cake is done when the edges have visibly pulled away from the sides of the pan by about ¼ inch (6mm), the top surface looks matte and set rather than wet or shiny, and a toothpick inserted into the chocolate base (not the peanut butter layer — aim for a corner) comes out with moist crumbs, not wet batter. The top will look uneven and rustic — this is correct for a dump cake format.
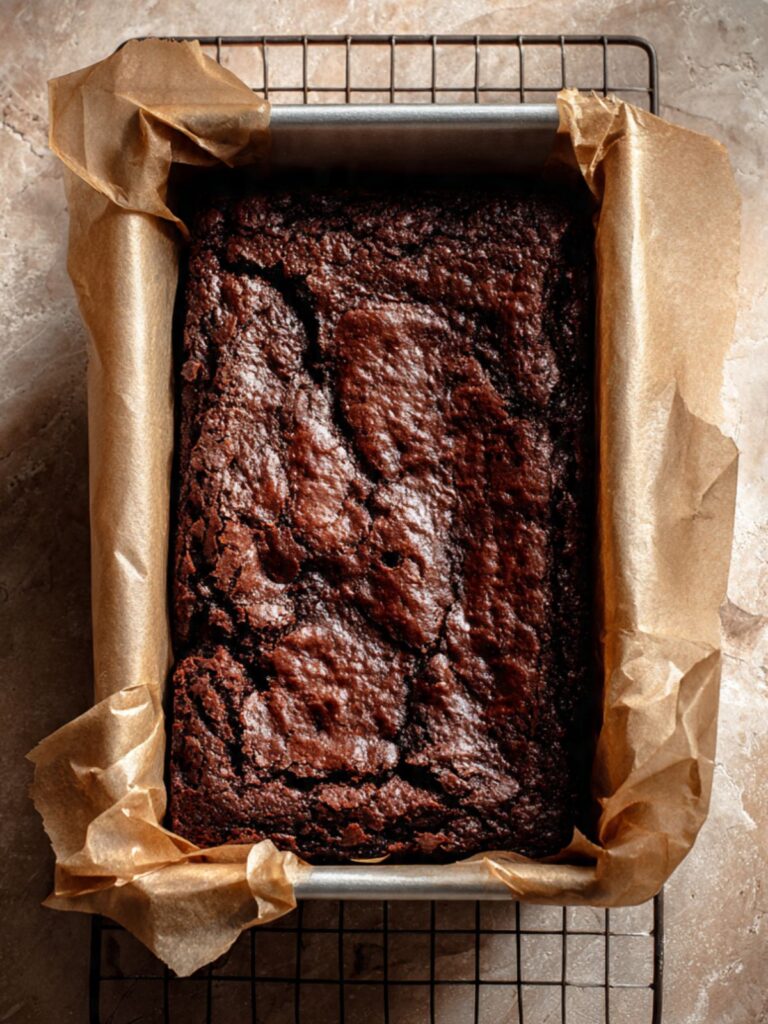
The edges should look firm and slightly darker than the center. The center should look set and matte — not jiggly, not shiny. If the center still looks wet and moves when you gently nudge the pan, give it 3 more minutes and check again.
⚠ Do not open the oven door before 35 minutes — the sudden temperature drop can cause the center to sink. This is particularly visible in dump cakes because the peanut butter layer traps steam below it during baking.
Step 5: Cooling the Base Before Adding Ganache
Remove the pan from the oven and place it on your wire cooling rack. During the first 10–15 minutes out of the oven, the residual heat in the pan continues to cook the chocolate base — this is carryover cooking, and it is the reason the toothpick should show moist crumbs (not wet batter) when you pull the pan rather than a completely clean result. Pulling at the exact right moment and letting carryover finish the job is what keeps the base fudgy rather than dry.
Cool in the pan for a minimum of 60 minutes before making or pouring the ganache. The cake surface should feel room temperature to a light touch on the parchment edge — not warm, not hot. If you have an instant-read thermometer, the internal temperature of the chocolate base should read below 85°F (29°C) before the ganache goes on. At this temperature, the ganache will pool and set on the surface rather than absorbing in.
Press the back of your hand lightly 1 inch (2.5cm) above the surface of the cake — it should feel at most very slightly warm, not hot. If you can feel heat radiating off the surface, wait another 20 minutes.
⚠ Do not rush the cooling step. A cake that looks cooled on the outside can still be holding heat in the center, especially with a thick peanut butter layer insulating the base. Pouring ganache too early is the most common reason the topping looks flat and absorbed rather than glossy and drizzled as shown in the photos.
Step 6: Making the Chocolate Ganache
In a small saucepan over medium-low heat, warm your ½ cup (120ml) heavy cream until small bubbles just begin to appear at the edges — do not let it boil. Remove from heat immediately. Add your 1 cup (170g) semi-sweet chocolate chips (45–55% cacao). Let them sit undisturbed in the hot cream for exactly 2 minutes — this allows the heat to melt the chips without you needing to stir aggressively. After 2 minutes, stir slowly from the center outward using the silicone spatula until the ganache is completely smooth, glossy, and uniform. The semi-sweet chips are the correct choice here — they produce a ganache with enough sugar to balance the richness of the peanut butter layer without tipping into cloying sweetness.
The finished ganache should look dark, glossy, and flow easily off the spatula in a thick ribbon — not grainy, not separated, not dull. If it looks grainy or has white streaks, the cream was too hot and the cocoa butter separated. Add 1 teaspoon (5ml) of warm cream and stir gently until it comes back together.
Allow the ganache to cool for 5 minutes before pouring — this gives it time to thicken slightly so it drizzles rather than floods.
The ganache is ready to pour — give it exactly 5 minutes to cool and thicken before it goes over the cake.
Step 7: Drizzling the Ganache and Adding the Toppings
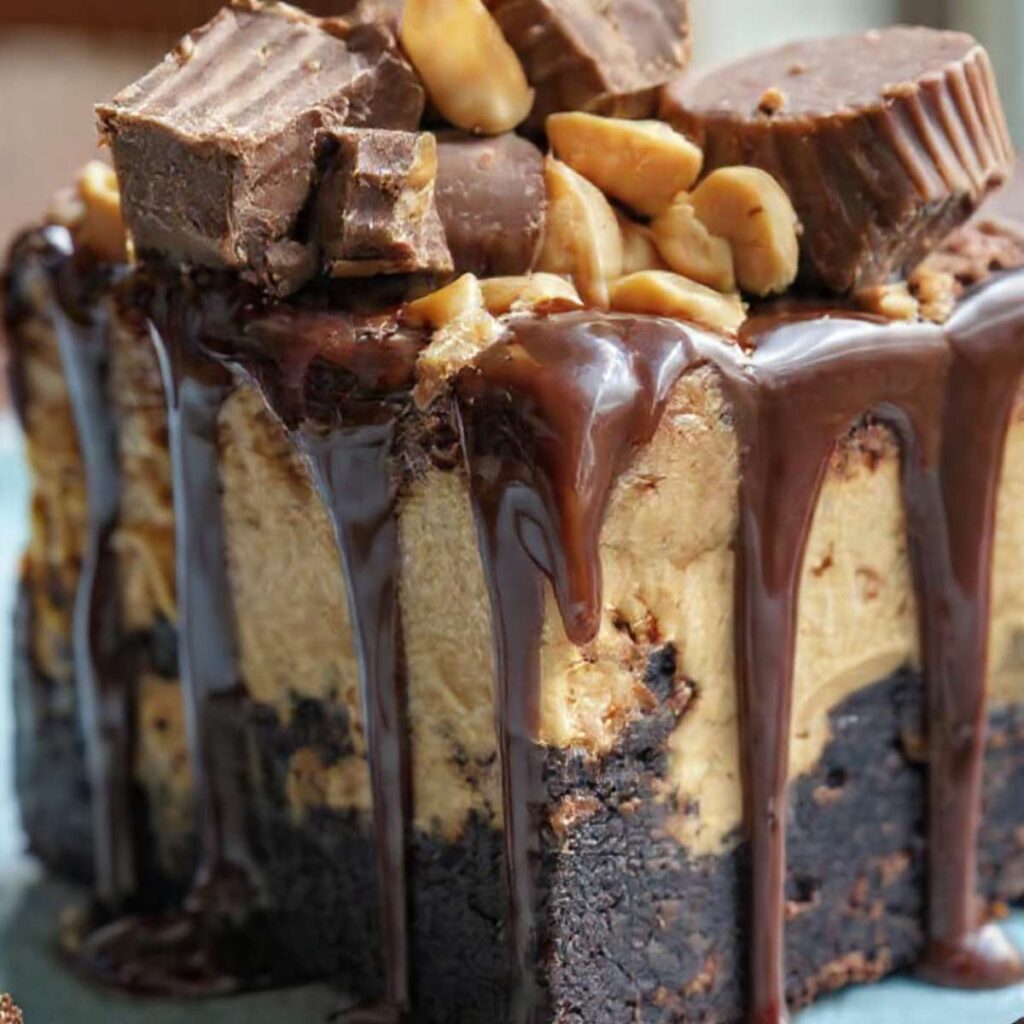
Pour the ganache over the cooled cake in a slow, back-and-forth drizzle across the full surface. As you can see in the close-up photos, the ganache should flow generously over the top and cascade down the sides — this is an intentional finish, not a mistake.
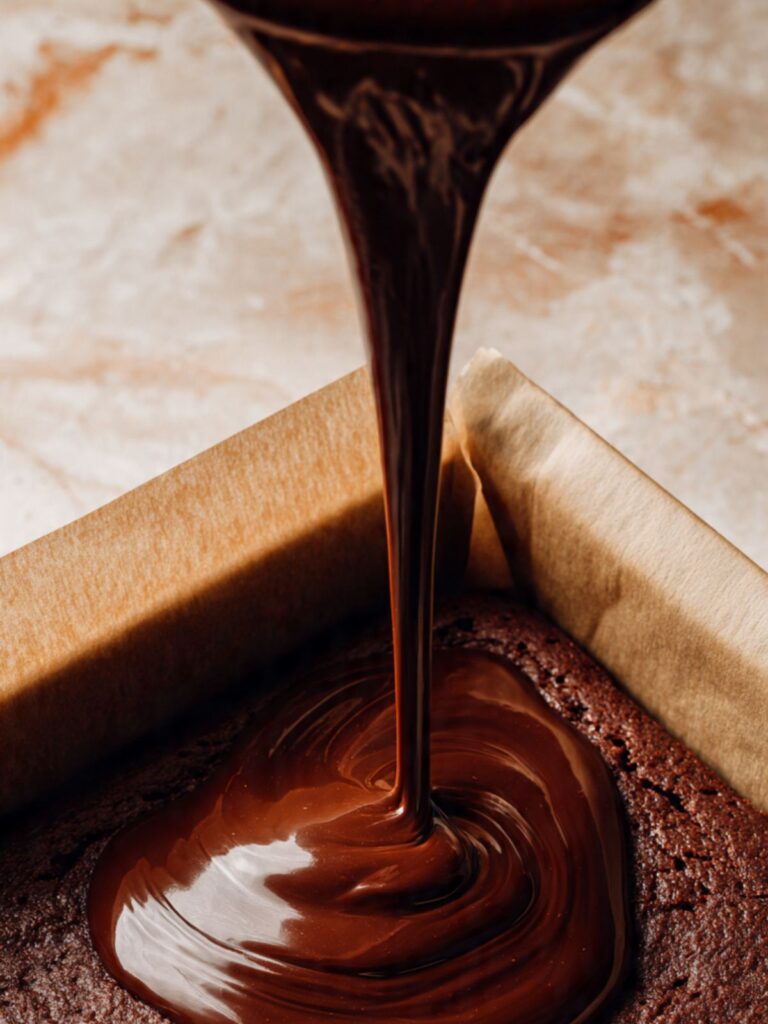
Use all of the ganache. Immediately, before the ganache begins to set, scatter your 8–10 roughly chopped Reese’s Peanut Butter Cups across the top, followed by your ¼ cup (37g) roasted salted peanuts. Press the larger Reese’s pieces very gently into the ganache so they anchor rather than slide off when the bars are cut.
The top should look loaded — chocolate ganache visible between the pieces, Reese’s chunks at varying heights, peanuts scattered across the surface. This is exactly what appears in the hero images. If your top looks sparse, add more Reese’s pieces now before the ganache sets.
⚠ Do not add the toppings after the ganache has set — they will not adhere and will fall off when the bars are cut and served.
Step 8: Final Cooling and Cutting the Bars
Allow the fully topped cake to cool at room temperature for a minimum of 2 hours before cutting. During this time, the ganache sets to a firm glossy finish and the internal structure of both the cake base and the peanut butter layer firms up enough to cut cleanly. For the cleanest possible edges — the kind visible in the plated photos — refrigerate the pan for 30 minutes after the 2-hour room temperature rest, then cut with a sharp chef’s knife wiped clean between every single cut.
The bars are ready to cut when the ganache on top is completely firm to the touch and does not leave a smear on your fingertip. The peanut butter layer, when exposed at the cut edge, should look smooth and hold its shape rather than oozing.
⚠ Do not cut before the 2-hour cooling period — the peanut butter layer will still be soft and warm underneath the set ganache surface, and every cut will collapse into a gummy mess that does not hold its shape on the plate. The photos show clean, tall cross-sections. That result is only possible with full cooling time.
Use the parchment overhang to lift the entire slab out of the pan onto a cutting board before slicing. Cut into 15 bars — 3 cuts along the short side, 4 cuts along the long side. The full 9×13 pan produces approximately 1,950g of finished cake. At 15 bars, each bar weighs approximately 130g. Weigh the first bar on your kitchen scale — if it is significantly heavier or lighter than 130g, adjust your cut lines before continuing.
🗒 Luna’s Note: I wipe the knife blade with a damp paper towel between every cut — not just occasionally. The ganache and peanut butter layer both stick to a warm blade and drag through the next cut. One extra second per cut is the difference between clean edges and pulled, messy ones.
The Science Behind Peanut Butter Cup Dump Cake
Why Commercial Peanut Butter Holds the Middle Layer While Natural Peanut Butter Destroys It
I noticed this before I understood it. The first batch made with natural peanut butter looked identical going into the oven — same thickness, same spread, same color. What came out was a chocolate cake with a greasy, grainy streak through the middle and a pool of separated oil soaked into the base below it. The layer had completely lost its structure. I used the same quantity of Jif on the second batch. The layer held exactly where I put it.
The reason is fat stabilization. Commercial peanut butter like Jif or Skippy contains added hydrogenated vegetable oil, which keeps the peanut and oil components permanently emulsified — the fat does not separate at baking temperatures. Natural peanut butter contains only peanuts and sometimes salt, with no emulsifier. At 350°F (175°C), the natural oil separates from the peanut solids and migrates downward into the cake batter below, leaving behind a dry, gritty residue instead of a smooth, cohesive layer. The middle layer you see in the cross-section photos — thick, smooth, holding its shape cleanly between the chocolate base and the ganache — is only possible with commercially stabilized peanut butter. This is not a preference. It is the mechanism.
How the Ganache Ratio Controls the Finish
The 2:1 chip-to-cream ratio used in this recipe is a specific choice, not a default. Ganache ratios are not arbitrary — they determine whether the finished product pours, drizzles, spreads, or sets firm enough to slice.
A 1:1 ratio (equal parts chocolate and cream) produces a sauce-consistency ganache that stays pourable at room temperature and never firms up to a glossy set finish. A 3:1 ratio produces truffle-consistency ganache — too thick to drizzle, sets almost solid at room temperature. The 2:1 ratio used here produces a ganache that flows easily when warm, cascades over the sides the way the photos show, and then sets at room temperature to a firm, glossy finish that holds its shape when the bars are cut. The dark gloss visible across the top of every bar in the hero images is exactly what a correctly ratioed, fully set 2:1 ganache looks like. Too much cream and that surface stays tacky. Too little and it sets before it finishes drizzling.
If you want to explore this ratio further, my chocolate dump cake uses the same ganache formula applied to a different base — it is a useful side-by-side for understanding how the ratio behaves across different cake textures.
Why Cooling Time Is a Structural Requirement, Not a Patience Test
Dump cakes with a distinct middle layer behave differently from single-layer cakes during the cooling phase. A single-layer cake sets as one continuous structure — the starches gelatinize, the proteins coagulate, and the whole thing firms up at roughly the same rate. A layered dump cake has two distinct structures cooling at different rates: the chocolate cake base, which sets relatively quickly, and the peanut butter filling, which contains a significant amount of fat that stays fluid at elevated temperatures long after the base feels done.
When the peanut butter layer is still warm and fluid, its fat content is low-viscosity — it flows under pressure, including the gentle pressure of a knife. Cutting at this stage pushes the filling sideways rather than through it, collapsing the layer and producing the gummy, formless interior that results from cutting too early. At room temperature after two full hours, the fats in the peanut butter and cream cheese have resolidified to their normal viscosity. The layer holds its shape under the knife. The clean cross-section in the photos — distinct chocolate base, visible peanut butter middle, ganache top — is a cooling result, not just a cutting technique.
🗒 Luna’s Note: I always refrigerate mine for the final 30 minutes before cutting. The cold firms the ganache to the point where the knife goes through it cleanly instead of dragging. The texture of the bar itself is better served slightly cool anyway — the peanut butter layer firms up to something closer to a Reese’s cup filling than a warm spread.
Peanut Butter Cup Dump Cake Troubleshooting & Pro-Tips
Common Mistakes
The peanut butter layer disappeared into the cake during baking
Symptom: You cut into the finished bars and there is no distinct middle layer — just a dense, slightly greasy chocolate cake with no visible peanut butter filling between the base and the top.
Cause: One of two things happened. Either natural peanut butter was used instead of commercial creamy — the oil separated during baking and soaked into the cake base, leaving no cohesive layer behind. Or the filling was spread too thin — less than ¼ inch (6mm) — and the small volume was absorbed into the surrounding cake during the 40–45 minute bake time.
Fix: There is no fix once the bars are baked. Serve them as a chocolate peanut butter cake — the flavor is still correct, just without the layered structure.
Prevention: Use commercial creamy peanut butter only — Jif or Skippy. Use the full quantity of filling specified. Spread it to a thickness you can visibly see before the pan goes in — it should look like a generous, even layer covering the entire surface of the batter.
The wrong pan produced overbrowned bottoms and an underdone center
Symptom: The bottom of the bars is dark, almost burnt, while the center of the cake base is still wet and underdone when the toothpick comes out with wet batter.
Cause: A dark non-stick pan was used. Dark pans absorb radiant heat more aggressively than light-colored aluminum — the bottom of the cake reaches overbrowning temperature before the center has had time to set. A glass or ceramic dish has the same effect: it retains heat and transfers it unevenly, producing burnt edges and an underdone center simultaneously.
Fix: If you catch it early — the bottom is darkening but the center is still underdone — tent the pan loosely with aluminum foil to slow the top heat and give the center more time. If the bottom is already burnt, there is no fix.
Prevention: Use a light-colored aluminum pan as specified. If you only have a dark non-stick pan, reduce the oven temperature by 25°F (15°C) — to 325°F (160°C) — and increase the bake time by 5–8 minutes. If using glass or ceramic, reduce temperature by 25°F (15°C) and check at the 50-minute mark.
The ganache looks grainy, dull, or separated
Symptom: Instead of a smooth, glossy dark drizzle, the ganache looks grainy, matte, or has visible white streaks running through it. It may also look broken — a greasy liquid with chocolate solids clumping separately.
Cause: The cream was brought to a full boil before being added to the chips. Boiling cream overheats the cocoa butter in the chocolate chips, causing it to separate from the solids — this is called fat bloom in reverse, or ganache breaking. A single degree past the correct temperature is enough to cause it.
Fix: Add 1 teaspoon (5ml) of warm (not hot) cream to the broken ganache and stir gently from the center outward. Repeat in single-teaspoon additions until it comes back together. Do not add cold cream — the temperature shock will make the separation worse.
Prevention: Heat the cream only until small bubbles appear at the edges of the pan — not a full rolling boil. Remove from heat the moment you see those edge bubbles. Pour over the chips and wait the full 2 minutes before stirring.
The cream cheese filling has lumps that won’t mix out
Symptom: The peanut butter filling looks mostly smooth but has visible white lumps of cream cheese that remain no matter how much you stir.
Cause: The cream cheese was not fully softened before mixing. Cold cream cheese does not break down under manual stirring — the fat in cold cream cheese is crystallized and does not emulsify with the peanut butter at room temperature.
Fix: Microwave the bowl containing the lumpy filling for exactly 10 seconds. Stir again firmly. If lumps remain, microwave for another 10 seconds — no more. The goal is to warm the cream cheese fat just enough to soften it. Do not exceed 20 seconds total — overheated cream cheese becomes greasy and the filling will be oily.
Prevention: Pull the cream cheese from the refrigerator at the same time as the eggs — 60 to 90 minutes before you start. Press your finger into it before mixing: it should indent easily and feel like soft clay, not firm or cold. If you are short on time, fill a bowl with warm (not hot) water and set the unwrapped cream cheese block in it for 15 minutes.
The bars crumbled when cut and did not hold their shape
Symptom: When the knife goes through, the chocolate base crumbles apart rather than cutting cleanly. The bars fall into pieces on the cutting board instead of lifting out as intact squares.
Cause: The bars were cut before fully cooled, or the batter was overmixed — excess gluten development from overworking the cake mix produces a tough, crumbly texture that fractures under the knife rather than cutting smoothly. Cutting while still warm is the more common cause: the base has not fully set and the structure collapses under pressure.
Fix: If the base is simply undercooled, press the crumbled pieces back together and refrigerate the whole slab for 30 minutes before attempting to cut again.
Prevention: Allow the full 2-hour room temperature cooling period, then refrigerate 30 minutes before cutting. Mix the batter for no more than 50 strokes — stop the moment no dry streaks remain. Wipe the knife clean between every cut.
The toppings slid off after the bars were cut
Symptom: The Reese’s pieces and peanuts that looked anchored on top are sliding or falling off when the bars are served or stored.
Cause: The toppings were added after the ganache had already begun to set. Once ganache starts to cool and firm, it loses its adhesive quality — toppings placed on semi-set ganache sit on the surface rather than embedding into it.
Fix: Press any loose pieces gently back onto the surface. If the ganache is still slightly tacky, they will re-adhere. If the ganache is fully set and firm, warm a teaspoon of the remaining ganache (or a small amount of new ganache) in the microwave for 5 seconds and use it as a spot-adhesive under each piece.
Prevention: Add all toppings immediately after pouring the ganache — within 2 minutes of it hitting the surface. Press larger Reese’s pieces gently but firmly into the ganache so they anchor below the surface line.
Pro-Tips
Use full-size Reese’s cups, not minis. Mini cups have a higher chocolate-to-peanut-butter ratio than full-size. When chopped, they produce mostly chocolate shell pieces with very little peanut butter center visible. Full-size cups give you the large, recognizable chunks with the distinct layers that are visible in the finished photos.
Chill before cutting for clean cross-sections. After the 2-hour room temperature rest, 30 minutes in the refrigerator makes the difference between a clean cut and a dragged one. The cold firms the ganache, solidifies the peanut butter layer, and sets the cake base to the point where the knife goes through all three layers in one clean stroke.
High altitude bakers: At elevations above 3,500 feet (1,067 meters), box cake mixes behave differently — leavening gases expand faster and the base can rise and then sink before it sets. Most devil’s food mix boxes include high-altitude instructions on the back panel — follow those adjustments for the cake base. The peanut butter layer and ganache are unaffected by altitude.
High humidity bakers: In climates above 70% relative humidity, the ganache surface may stay slightly tacky longer than expected — this is moisture from the air, not underset ganache. Give it an extra 30 minutes at room temperature or 10 minutes in the refrigerator before cutting.
How to Store Peanut Butter Cup Dump Cake
Room Temperature
Cut bars store best in a single layer inside a hard-sided airtight container — not a zip-lock bag, which compresses the Reese’s topping and drags the ganache surface when you pull a bar out. If you need to stack layers, press a sheet of unbleached parchment gently against the ganache surface of the bottom layer before adding the next. Do not place plastic wrap directly against the ganache — it adheres and pulls the topping off when unwrapped.
Room temperature storage works for up to 2 days, kept away from direct heat or sunlight. On Day 1, the ganache is at its glossiest and the Reese’s pieces hold their sharpest edges. On Day 2, the ganache softens slightly at the surface and the Reese’s cups begin to lose their defined edges as the chocolate shell absorbs ambient moisture — still completely correct to eat, just visually less crisp than Day 1.
For the record: I think Jif makes a better baked good than Skippy. The flavor is slightly more roasted. It is a small difference and Skippy works fine — but if you are choosing at the store, reach for Jif.
Refrigerator
Refrigerated bars keep for up to 5 days in a hard-sided airtight container with parchment between layers. The cold does something useful here — it firms the peanut butter layer to something close to an actual Reese’s cup filling. Dense, smooth, almost snappy. A lot of people prefer this over the slightly softer room-temperature version, and I am one of them.
Pull bars from the refrigerator 20 minutes before serving. The chocolate base goes quite dense when fully cold — not unpleasant, but noticeably different from the intended texture. Twenty minutes at room temperature brings it back. Do not microwave to speed this up — the ganache melts unevenly and the Reese’s topping gets greasy.
Freezer
Bars freeze well for up to 2 months. Freeze them cut, not as a slab — the ganache and Reese’s topping do not survive being cut from frozen without cracking and breaking apart.
Freeze in two stages: place cut bars in a single layer on a parchment-lined tray and freeze uncovered for 1 hour until the ganache surface is fully solid. Then transfer to a freezer-safe hard-sided container with unbleached parchment between each layer. The initial open freeze is what prevents the ganache from sticking to the parchment when you separate them later.
Thaw overnight in the refrigerator — do not thaw at room temperature. Room-temperature thawing causes the ganache surface to sweat and the Reese’s topping to soften and slide. After refrigerator thawing, pull bars out 20 minutes before serving as you would with any refrigerated bar.
Do not freeze unbaked: this recipe does not have a useful freeze-unbaked option. The peanut butter filling does not freeze and thaw correctly before baking — the fat content separates on thawing and the layer loses its structure before it ever goes into the oven.
Serving Suggestion

Serve at cool room temperature — pulled from the refrigerator about 20 minutes before you plan to eat. The peanut butter layer is best when it has lost the full chill of the fridge but has not gone soft and warm. That window, slightly cool and firm but yielding, is the texture the recipe is built around.
I serve mine with cold whole milk. Not coffee — coffee amplifies the bitterness of the dark chocolate ganache and tips the balance away from the peanut butter, which is supposed to be the dominant flavor here. Milk resets the palate between bites. It makes the whole thing feel less heavy than it is.
These are the bars I make when someone asks me to bring something and I want them to stop asking questions and just eat it. A potluck, a bake sale, the birthday of someone who asked for chocolate and peanut butter and gave me 90 minutes — this is that recipe. It does not look like a dump cake when it is plated. It looks like something that took considerably longer than it did.
Day 2 is better than Day 1 for the interior. The peanut butter layer firms overnight and develops a denser, more distinct bite — closer to the filling of an actual Reese’s cup than it is on the day it bakes. I make these the day before on purpose when I am bringing them somewhere. The ganache loses a little gloss overnight. The structure gains more than it loses.
One honest limitation: these bars do not travel warm. Above 75°F (24°C), the ganache softens and the Reese’s topping begins to slide. Transport them cold in a hard-sided container and let them come to temperature at the destination.
🗒 Luna’s Note: I always refrigerate these for the full 30 minutes before cutting — not just for clean edges, but because the cold firms the peanut butter layer to the point where the knife goes through all three layers in one stroke rather than dragging. The cross-section you see in the photos is a refrigerator result, not just a knife technique.
Frequently Asked Questions About Peanut Butter Cup Dump Cake
Can I make peanut butter cup dump cake ahead of time?
Yes — and I recommend it. Bake the full recipe the day before, allow it to cool completely at room temperature, add the ganache and toppings, then refrigerate overnight uncovered for the first hour until the ganache sets firm, then covered for the remainder. The peanut butter layer firms overnight into a denser, more distinct texture that is closer to an actual Reese’s cup filling than it is on the day it bakes. Cut the bars cold the next morning and serve at cool room temperature. This is genuinely the better version.
Can I use a different cake mix instead of devil’s food?
You can, with trade-offs. A chocolate fudge mix produces a slightly denser, moister base than devil’s food — it works but the base is heavier and makes the overall bar feel richer than intended. A yellow cake mix produces a completely different flavor profile — the peanut butter layer reads differently without the deep chocolate contrast underneath it. A chocolate cake mix labeled “extra moist with pudding” changes the texture of the base significantly — the pudding formulation produces a gummy, dense crumb that does not set cleanly. If you substitute, use a standard chocolate or devil’s food mix without a pudding addition, at the same 15.25 oz (432g) box weight, and follow the egg and oil quantities on your specific box rather than the ones in this recipe.
Why did my peanut butter dump cake come out greasy?
A greasy result almost always means natural peanut butter was used instead of commercial creamy. Natural peanut butter contains no emulsifier — at baking temperatures, the oil separates from the peanut solids and migrates into the surrounding cake base, leaving an oily layer throughout the bar. Commercial peanut butter like Jif or Skippy contains hydrogenated vegetable oil that keeps the emulsification stable through the full bake time, which is why the peanut butter layer holds its shape and stays clean rather than bleeding into the chocolate base. Check your jar — if the label says “just peanuts and salt” or if there is oil sitting on top, that is natural peanut butter. Use a commercial brand for this recipe.
Can I double this peanut butter cup dump cake recipe?
Yes, with adjustments. Double all ingredients except do not double the leavening in the cake mix — leavening does not scale linearly, and most box mixes are already calibrated. Bake in two separate 9×13 inch (23x33cm) pans rather than one larger pan — a deeper pan changes both the bake time and the ratio of layers. Two pans at 350°F (175°C) bake for the same time as one — 40 to 45 minutes. Do not attempt to bake a doubled batch in a single deeper pan. Make the ganache in two separate batches as well — a doubled ganache quantity in one small saucepan heats unevenly and is more likely to break.
How do I know when peanut butter dump cake is done baking?
The cake is done when three things are true simultaneously: the edges have pulled away from the sides of the pan by approximately ¼ inch (6mm), the top surface looks matte and set rather than shiny or wet, and a toothpick inserted into the chocolate base at a corner — not through the peanut butter layer — comes out with moist crumbs rather than wet batter. The center of the cake will look slightly less set than the edges, which is correct — carryover cooking continues for several minutes after the pan leaves the oven. If only one or two of these three signals are present, give it 3 more minutes and check all three again. The matte, set surface and slightly pulled edges visible in the cross-section photos are exactly what correctly done looks like before the ganache goes on.
Can I make this peanut butter dump cake without cream cheese in the filling?
Technically yes, but the filling will not hold its shape as a distinct layer. The cream cheese provides the structural stability that keeps the peanut butter filling from melting entirely into the cake base during baking — without it, the filling softens to the point where it partially absorbs into the batter below and loses its clean cross-section. If you cannot use cream cheese, substitute with 4 oz (113g) full-fat Greek yogurt, room temperature — the result will be slightly less rich and the layer will be thinner and softer, but it will hold better than peanut butter alone. My chocolate chip cookie bars use a similar technique for layered bar structure if you want to see how filling stability works across different formats.
How does humidity or altitude affect this dump cake?
At high altitude above 3,500 feet (1,067 meters), follow the high-altitude instructions printed on the back of your devil’s food cake mix box — these adjustments are calibrated for the specific mix formulation and are more reliable than general altitude guidelines. The peanut butter layer and ganache are not affected by altitude. In high humidity above 70% relative humidity, the ganache surface may stay tacky longer than expected and the Reese’s topping may soften faster — this is surface moisture from the air, not an error in the recipe. Refrigerate the finished bars rather than storing at room temperature in humid conditions, and add the toppings as close to serving time as possible.
More Dump Cakes and Bars You’ll Love
- Peach Dump Cake — a buttery, golden brown fruit dump cake with a crisp top and tender peach filling, ready in under an hour with three ingredients.
- Brookie Recipe — the brownie-cookie hybrid that delivers fudgy brownie base and thick chocolate chip cookie top in a single pan, no layering tricks required.

Peanut Butter Cup Dump Cake
Ingredients
Equipment
Method
- Position oven rack in the middle and preheat to 350°F (175°C), then line a 9×13 inch (23x33cm) light-colored aluminum pan with parchment paper leaving 2 inches (5cm) overhang on both long sides and lightly spray with non-stick spray.
- In a large bowl, combine the devil’s food cake mix, 3 room-temperature eggs, ½ cup (109g) neutral oil, and 1 cup (237ml) water, then stir with a silicone spatula for 40–50 strokes until no dry streaks remain and the batter looks smooth and glossy.
- Pour the batter into the prepared pan and spread to the edges with the spatula, then set aside — do not bake yet.
- In a second large bowl, combine the 1 cup (258g) creamy commercial peanut butter, 4 oz (113g) softened full-fat block cream cheese, ½ cup (60g) sifted powdered sugar, and 2 tablespoons (30ml) heavy cream, then stir firmly for 30–40 strokes until completely smooth with no white cream cheese streaks remaining.
- Spoon the peanut butter filling onto the unbaked batter and spread evenly to the edges using an offset spatula or the back of a spoon — use the full quantity, the layer should be visibly thick across the entire surface.
- Bake on the middle rack for 40–45 minutes until the edges pull away from the pan by ¼ inch (6mm), the top looks matte and set, and a toothpick inserted into the chocolate base at a corner comes out with moist crumbs not wet batter.
- Remove from oven and cool on a wire rack for a minimum of 60 minutes until the surface feels at most very slightly warm before proceeding.
- In a small saucepan over medium-low heat, warm ½ cup (120ml) heavy cream until small bubbles appear at the edges — do not boil — then remove from heat, add 1 cup (170g) semi-sweet chocolate chips, let sit undisturbed for 2 minutes, then stir from the center outward until smooth and glossy.
- Allow ganache to cool for 5 minutes, then pour over the cooled cake in a slow back-and-forth drizzle across the full surface, letting it cascade over the sides.
- Immediately scatter the roughly chopped Reese’s cups and roasted salted peanuts across the ganache surface, pressing larger pieces gently to anchor them, then allow to cool at room temperature for a minimum of 2 hours before cutting.
- For clean cuts, refrigerate the pan for 30 minutes after the 2-hour rest, then lift out using the parchment overhang, cut into 15 bars with a sharp knife wiped clean between every cut, and serve at cool room temperature.