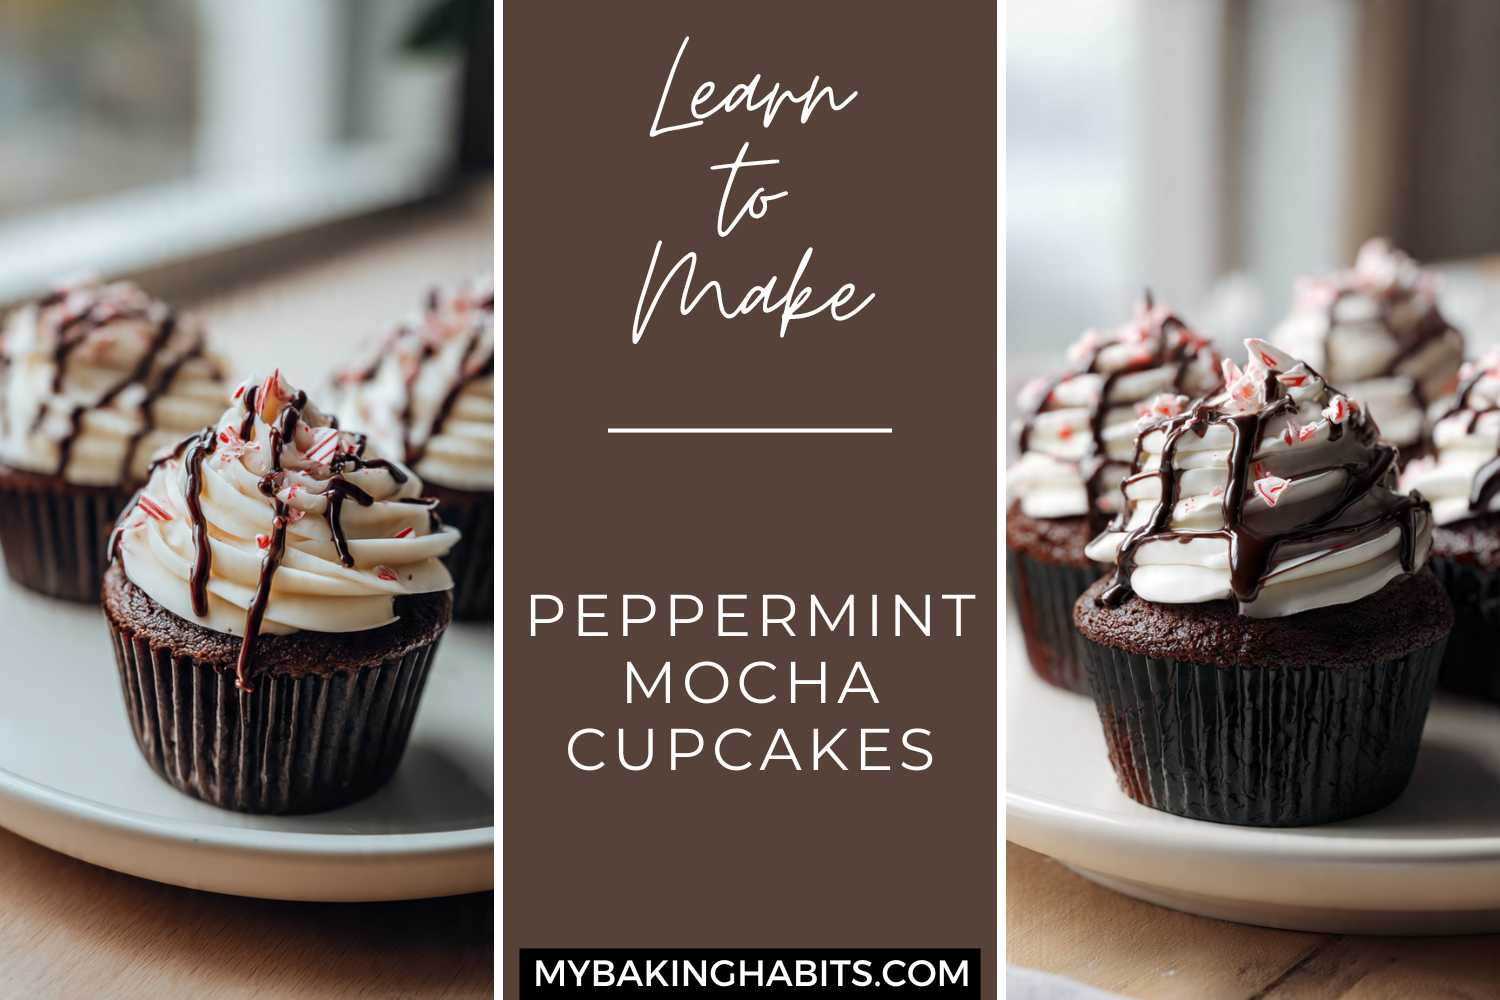
Peppermint Mocha Cupcakes
The peppermint mocha combination is one of those things that works immediately and completely, and most recipes still manage to get the balance wrong. Too much mint and the cupcake tastes like toothpaste. Not enough espresso and it is just a chocolate cupcake with candy on top. I have made this recipe across two holiday seasons — twenty-two batches total — and the version I landed on is the one that actually tastes like the drink it is named after: dark, bitter-edged chocolate up front, a real hit of coffee underneath, and mint that lands at the finish without taking over.
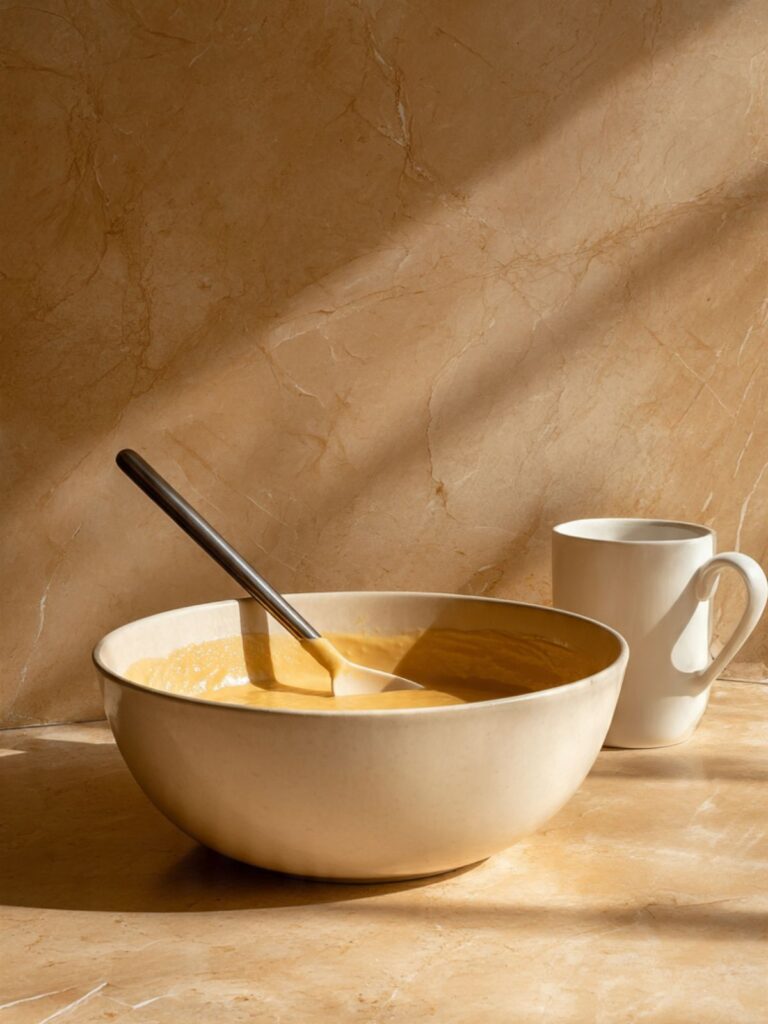
The cupcake itself is oil-based, not creamed butter. I know the instinct is to reach for butter in everything, but the first time I made this recipe with butter I got exactly what butter gives you — good flavor, firmer crumb, and a base that felt dry against the weight of the ganache and frosting. I switched to vegetable oil on batch seven and the crumb changed completely: moist, dense, near-black, the kind that stays soft on Day 2 and Day 3 without drying out. Oil wins here. There is no mixer required for the batter — just a large bowl, a whisk, and about ten minutes.
I also tested peppermint extract quantities back to back across four batches — ¾ teaspoon, 1 teaspoon, 1¼ teaspoons, and 1½ teaspoons. The ¾ teaspoon version tasted like chocolate cake with a hint of something. The 1½ teaspoon version tasted like a candy cane that had been run through a machine. One teaspoon is the number. That is what is in this recipe, and it is not a suggestion.
These are the cupcakes I make in December when I want the kitchen to smell like a coffee shop for two hours and have something to show for it that looks like I tried. That is their specific role and they play it well.
🗒 Luna’s Note: The “mocha” part of this recipe is not just a name. I use both espresso powder in the dry ingredients and hot brewed strong coffee in the liquid — the double espresso hit is what gives these their depth. Skip one and it tastes thin. Use both and it tastes like something.
The frosting is a stiff peppermint American buttercream piped tall with a Wilton 1M tip — the swirl you see in the photos cannot be achieved with an offset spatula or a knife. A hand mixer is mandatory for the frosting. The ganache drizzle is a two-ingredient chocolate sauce that takes five minutes and makes the finished cupcake look bakery-level. All three components — cupcake, frosting, ganache — are written so they can be made on the same day without timing problems.
No chilling required, no special equipment beyond a piping bag and tip, and the cupcakes go from a cold oven preheat to finished and frosted in under two hours. The recipe yields 12 standard cupcakes.
| Yield | 12 standard cupcakes |
| Prep Time | 25 minutes |
| Bake Time | 18–20 minutes |
| Cooling Time | 45 minutes (before frosting) |
| Total Time | approximately 1 hour 30 minutes |
| Difficulty | Intermediate |
| Nutrient | Amount |
|---|---|
| Calories | ~420 |
| Carbohydrates | ~55g |
| Fat | ~22g |
| Protein | ~4g |
| Sugar | ~44g |
| Sodium | ~210mg |
Calculated per ingredient from scratch. Values are estimates — actual results vary by exact brand and portion size.
Ingredients & Tools for Peppermint Mocha Cupcakes
For the Cupcakes
- 1 cup (120g) all-purpose flour, spooned into the measuring cup and leveled — do not scoop directly from the bag
- ¾ cup (65g) Dutch-process cocoa powder — not natural cocoa (see Before You Start)
- 1 cup (200g) plain white granulated sugar
- 2 tablespoons (25g) packed light brown sugar — check for hardening before using; hard brown sugar that does not break up evenly will create dense pockets in the batter. Press out any lumps before adding.
- 1½ teaspoons (6g) baking powder, checked for freshness
- ½ teaspoon (3g) baking soda
- ½ teaspoon (3g) fine sea salt — not table salt, not kosher salt
- 2 large eggs, room temperature
- ½ cup (120ml) vegetable oil — or any neutral oil such as canola or sunflower
- ½ cup (120ml) full-fat buttermilk, room temperature — not low-fat, not a vinegar substitute (see Before You Start)
- ½ cup (120ml) hot brewed strong coffee or hot water with 1½ teaspoons espresso powder dissolved in it
- 1 teaspoon (5ml) pure vanilla extract
- 1½ teaspoons (4g) espresso powder — not instant coffee granules (see Before You Start)
For the Peppermint Buttercream
- ¾ cup (170g) unsalted butter, softened to room temperature (65–68°F / 18–20°C) — not melted, not cold
- 3 cups (360g) powdered sugar, sifted — sift before measuring, not after
- 2 tablespoons (30ml) heavy whipping cream — not milk, not half-and-half
- 1 teaspoon (5ml) pure peppermint extract — not mint extract, not spearmint extract (see Before You Start)
- ¼ teaspoon (1.5g) fine sea salt
- 1–2 tablespoons (15–30ml) additional heavy cream, added one teaspoon at a time to adjust consistency
For the Chocolate Ganache Drizzle
- 2 oz (60g) bittersweet chocolate, finely chopped — not chocolate chips, not milk chocolate (see Before You Start)
- ¼ cup (60ml) heavy whipping cream
For the Garnish
- 3–4 standard candy canes, crushed into irregular pieces — not pre-crushed candy cane dust, not peppermint candies
Before You Start
Dutch-process cocoa is not interchangeable with natural cocoa in this recipe. Dutch-process cocoa has been alkalized, which neutralizes its acidity. This recipe uses baking soda, which requires an acid to activate. If you swap in natural cocoa, the leavening balance shifts and the cupcakes will not rise correctly. Use Dutch-process only. Brands I have tested and trust: Droste, Cacao Barry Extra Brute, King Arthur.
Full-fat buttermilk only. Low-fat buttermilk contains more water and produces a thinner, less rich batter. A vinegar-and-milk substitute works in a pinch but produces a slightly different tang and a less tender crumb. If you use a substitute, the texture will be close but not identical to the photos.
Espresso powder, not instant coffee. Instant coffee granules are coarser and do not fully dissolve in the batter, leaving small bitter pockets. Espresso powder dissolves completely and provides a cleaner, more concentrated coffee flavor. King Arthur and Anthony’s are the brands I use.
Pure peppermint extract, not mint extract. Mint extract is a blend of spearmint and peppermint and produces a muddier, less clean mint flavor. Peppermint extract is sharp and clear. Start with 1 teaspoon — taste the frosting before piping, and add up to ¼ teaspoon more only if needed. Peppermint extract is easy to over-add.
Bittersweet chocolate for the ganache, not chips. Chocolate chips contain stabilizers that prevent them from melting smoothly. Chopped baking chocolate or a high-quality bar (Guittard, Valrhona, or Lindt 70%) melts to a smooth, fluid ganache. Chips produce a grainy, dull ganache that will not drizzle cleanly.
Butter temperature for the frosting is critical. Butter at exactly 65–68°F (18–20°C) creams to a pale, fluffy base. Butter that is too warm turns the frosting soupy and it will not hold the tall swirl visible in the photos. If your kitchen is warm, start with butter on the cooler side of this range. When you press your finger into the butter, it should leave a clean indent without the surface looking shiny or greasy.
Room temperature timing guide:
| Ingredient | Time at 68°F (20°C) |
|---|---|
| Unsalted butter (frosting) | 45–60 minutes — cube and rest, do not microwave |
| Large eggs | 30 minutes — or 10 minutes in a warm water bath |
| Full-fat buttermilk | 30 minutes on the counter |
Check your leavening before starting. Baking powder: drop 1 teaspoon into ½ cup of hot water — it should bubble vigorously and immediately. Baking soda: drop ¼ teaspoon into 1 teaspoon of white vinegar — it should fizz actively on contact. No reaction means it is expired. Expired leavening in this recipe produces flat, dense cupcakes with no dome — there is no fix once baked.
This recipe requires a standard 12-cup muffin tin with paper or foil liners. Do not bake these directly in a greased tin without liners — the dark batter sticks to unlined cups and the cupcakes will tear when removed. Parchment tulip liners change the bake height and produce a taller, narrower cupcake that does not match the proportions shown in the photos. Standard flat-bottomed liners only.
Mixing method: No mixer is needed for the cupcake batter — a large bowl and a whisk are sufficient. A hand mixer is required for the peppermint buttercream. Mixing the buttercream by hand will not incorporate enough air and the frosting will be too dense to pipe the tall swirl shown in the photos.
Oven rack: Position your rack in the middle of the oven before preheating. Cupcakes baked on the top rack brown on the dome before the centers set. Cupcakes baked on the bottom rack overbrown the bases.
For the most accurate results, use a kitchen scale set to grams. Volume measurements like cups and tablespoons can vary by 20–30% depending on how the ingredient is scooped or packed. The gram weights in this recipe are the numbers I tested with — they are the most reliable way to get the same result I got.
Necessary Tools
- Standard 12-cup muffin tin — light-colored aluminum preferred; dark non-stick pans overbrown the cupcake bases before the centers are set
- Standard paper or foil cupcake liners — not parchment tulip liners (they change the bake height)
- Two large mixing bowls
- Whisk
- Silicone spatula
- Hand mixer with beaters
- Kitchen scale
- Piping bag — 14-inch or 16-inch reusable or disposable
- Wilton 1M open-star piping tip — this specific tip produces the tall swirl visible in the photos; a closed star tip will produce a tighter, shorter swirl
- Small saucepan
- Spoon or squeeze bottle for ganache drizzle
- Zip-lock bag and rolling pin or meat mallet (for crushing candy canes)
- Wire cooling rack
- Oven thermometer — most home ovens run 15–25°F (8–14°C) off; confirm before baking
How to Make Peppermint Mocha Cupcakes
Step 1: Setting Up — Oven, Pan, and Mise en Place
This is a one-bowl method — the dry ingredients come together in one bowl, the wet ingredients in a second, and they are combined once with minimal handling. No creaming, no electric mixer, no resting the batter. The entire process from bowl to oven is under 15 minutes once the oven is hot.
Position a rack in the middle of your oven before turning it on. Top rack browns the dome before the center sets. Bottom rack overbrowns the base. Middle rack only. Set the oven to 350°F (175°C) and allow it to preheat for a full 15 minutes after it signals ready — most ovens beep before the internal walls and racks have actually stabilized at temperature. If you have an oven thermometer, confirm the reading before the pan goes in. Most home ovens run 15–25°F (8–14°C) off from the dial setting.
Line your standard 12-cup light-colored aluminum muffin tin with paper or foil cupcake liners now, before the batter comes together. Do not use a dark non-stick tin at 350°F — the darker material absorbs more heat and overbrowns the bases before the centers finish setting. If a dark tin is all you have, drop the temperature to 325°F (163°C) and begin checking at 16 minutes.
Set your brewed strong coffee on the counter to cool slightly while you prepare the bowls. It should be hot — around 160–180°F (71–82°C) — when it goes into the batter, not boiling and not cooled to room temperature. Hot blooms the cocoa. Room temperature does not.
The pan should be lined and sitting on the counter before the batter comes together — baking powder begins activating the moment it contacts the wet ingredients, and a batter that sits in the bowl loses lift while you search for the liners.
Your room-temperature eggs and buttermilk should be on the counter. Your sifted powdered sugar, softened butter, and piping equipment should be ready to go for after the cupcakes bake. This bake moves fast once it starts.
Step 2: Whisking the Dry Ingredients to a Uniform Dark Mix
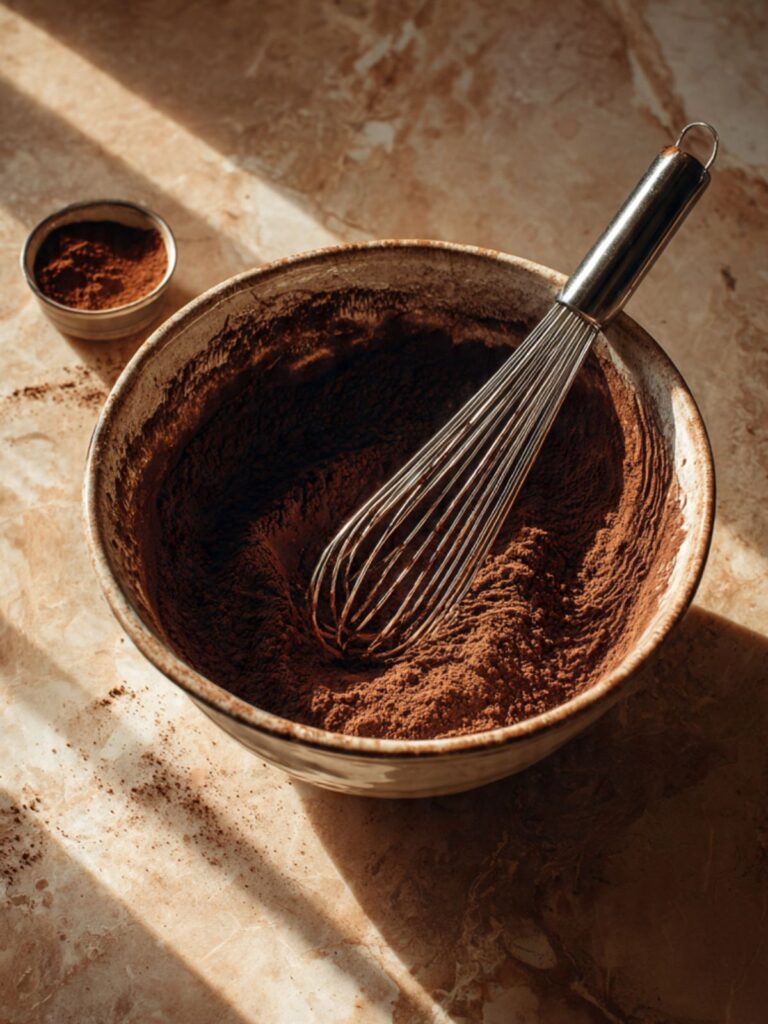
In your large mixing bowl, combine 1 cup (120g) all-purpose flour (spooned and leveled), ¾ cup (65g) Dutch-process cocoa powder, 1 cup (200g) plain white granulated sugar, 2 tablespoons (25g) packed light brown sugar, 1½ teaspoons (6g) baking powder, ½ teaspoon (3g) baking soda, ½ teaspoon (3g) fine sea salt, and 1½ teaspoons (4g) espresso powder.
Whisk for a sustained 30 seconds — not a few quick passes, but a full half-minute of active whisking that moves the cocoa, espresso powder, and leavening through every part of the flour. Cocoa powder clumps. Espresso powder clumps. Baking soda that is not evenly distributed reacts unevenly, which means uneven rise across the 12 cups. Thirty seconds of real whisking prevents all of this.
The espresso powder is doing two things in this recipe. Here it disperses into the flour so every bite carries coffee flavor. In the next step, the hot brewed coffee does the same job in liquid form. That layered application — powder in the dry, brewed coffee in the wet — is the mechanism behind the mocha flavor depth. One without the other tastes thin.
The dry mixture should look completely uniform — a single deep dark brown with no lighter flour streaks, no visible cocoa lumps, and no white patches of undistributed leavening. If you see any streaks, whisk for another 10 seconds and check again.
Do not add anything else to this bowl yet. The wet mixture comes together separately before the two meet.
Step 3: Combining the Wet Ingredients and Blooming the Cocoa
In your second large mixing bowl, add 2 large room-temperature eggs, ½ cup (120ml) vegetable oil, ½ cup (120ml) full-fat buttermilk (room temperature), and 1 teaspoon (5ml) pure vanilla extract. Whisk together with approximately 20 steady strokes until the mixture looks uniform and slightly foamy from the eggs.
Now add your ½ cup (120ml) hot strong coffee, pouring it in a slow, steady stream while whisking constantly. Do not dump it in all at once — a sudden pour of hot liquid into eggs can begin to cook them at the edges of the bowl. A slow stream while whisking keeps the temperature rise even across the whole mixture.
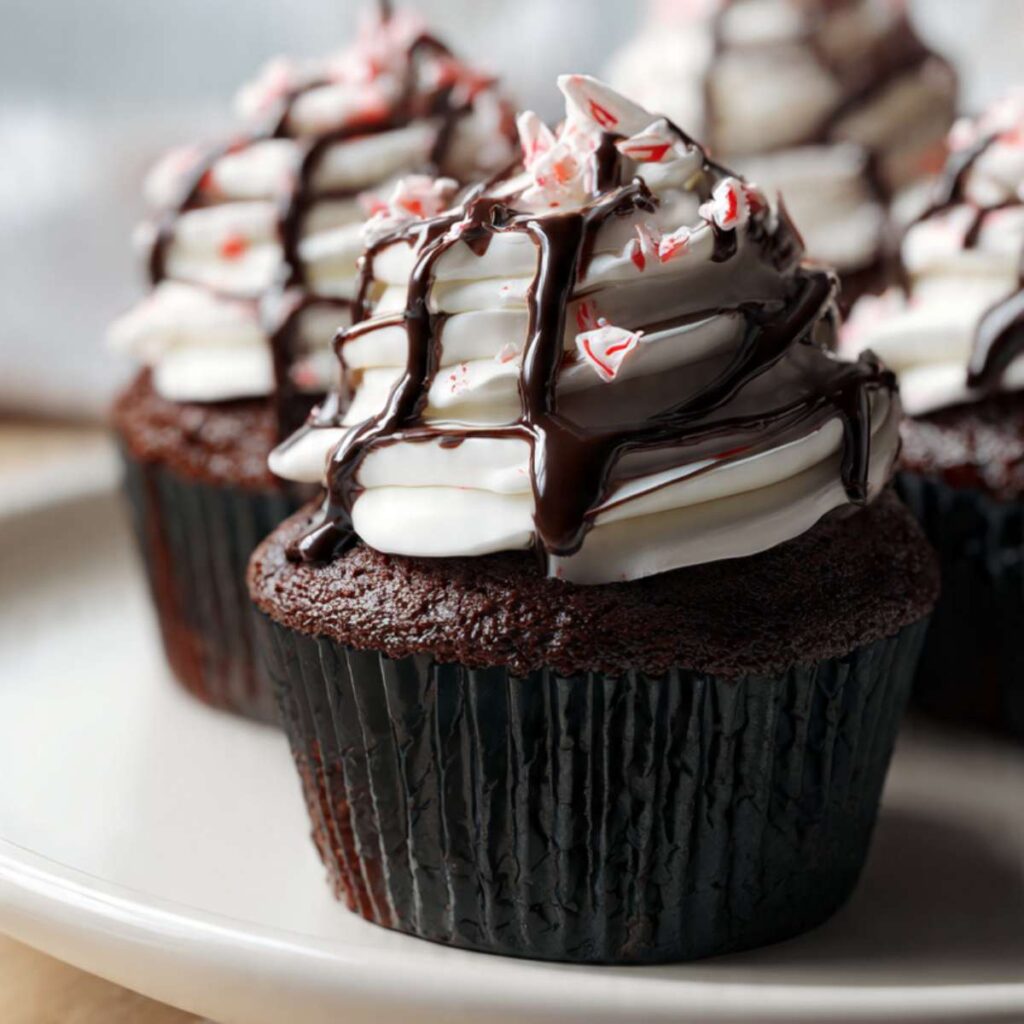
This is where the color shift happens. The hot coffee makes contact with the cocoa that will be released when the wet and dry bowls combine — the pre-bloom starts here at the wet stage and completes when the two bowls meet. The near-black crumb you can see at the base of the cupcakes in the close-up photo — where the dark cake meets the liner edge — is the result of this blooming step working correctly. A pale brown batter at this stage, or a batter made with cooled coffee, will bake up medium brown rather than the deep near-black the photos show.
The wet mixture should look thin, glossy, and uniformly golden-brown at this point — slightly foamy at the surface from the egg and oil combination. This is correct. The color deepens dramatically once it contacts the dry ingredients.
Do not let this sit. Move immediately to the combination step.
Step 4: Folding Wet into Dry — 20 Strokes, No More
Pour the entire wet mixture into the dry ingredient bowl all at once. Switch from the whisk to your silicone spatula.
Fold with slow, wide strokes from the bottom of the bowl upward and over — not stirring in circles, which builds gluten and tightens the crumb. The goal is to lift the dry ingredients from the bottom and fold the wet over them, repeating until no dry flour streaks remain. Count your strokes. Stop at 20 to 25 folds, or the moment no dry streaks remain, whichever comes first.
The batter will look very dark and thin — almost liquid compared to a standard cupcake batter. This is correct for an oil-based recipe. Do not add more flour. A thicker batter here is an overmixed batter, and overmixed oil-based batters bake up with tight, tunnel-filled crumbs rather than the fine, even interior this recipe is designed to produce. A few small lumps are acceptable. A smooth, glossy, evenly dark batter with no streaks is the target — not a perfectly smooth, aerated batter.
🗒 Luna’s Note: I switch from whisk to spatula for this step on purpose. The whisk is faster but it overdevelops the gluten in the time it takes to clear the dry streaks. The spatula forces slower, wider strokes. Slower is right here.
The finished batter should fall off the spatula in a thick, fluid ribbon — deeply dark, glossy, and pourable. If it looks pale brown or matte, the cocoa was not fully incorporated during the dry-whisk step. This cannot be corrected at this stage — the color is set.
Move immediately to portioning. Do not let the batter rest in the bowl.
Step 5: Filling the Liners to Exactly Two-Thirds
Using a large cookie scoop or a ¼-cup (60ml) measure, portion the batter into the 12 lined cups. Fill each liner to approximately two-thirds full — about 3 tablespoons (45ml) of batter per cup.
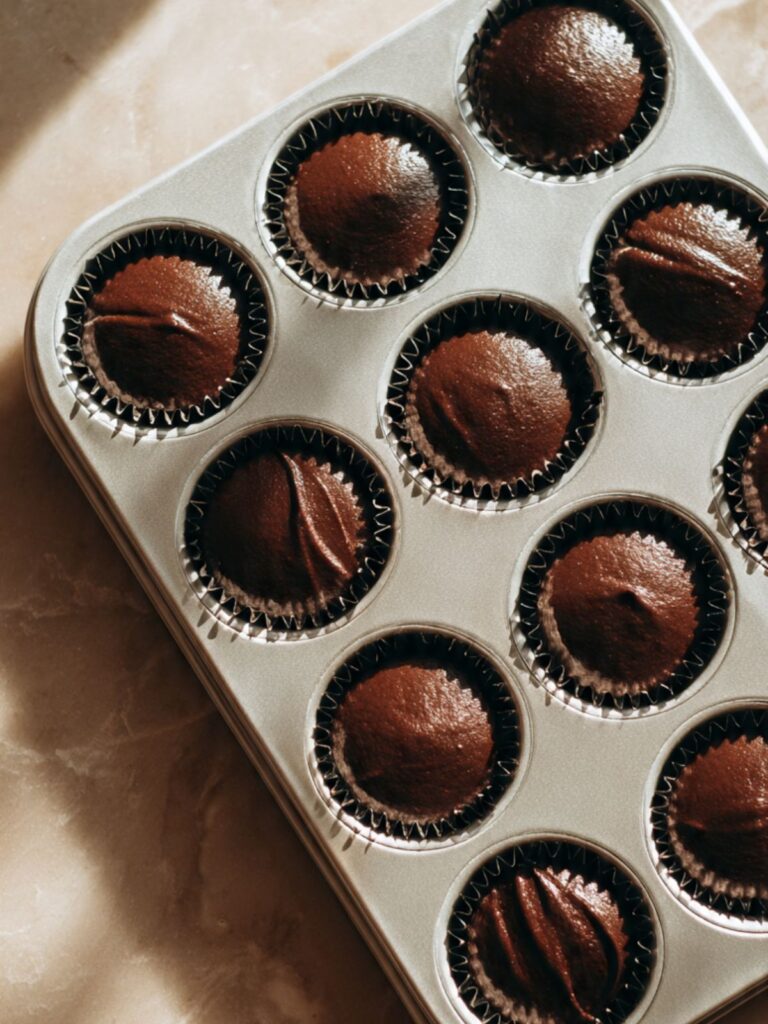
Weigh the first filled cup on your kitchen scale: it should read approximately 65–70g of batter. Use that as your calibration and portion the remaining 11 cups to match. At 65–70g per cup across 12 cups, the total batter weight portioned should be approximately 780–840g — if you weighed your empty bowl before mixing, you can verify the full batch came together correctly before you start filling.
Two-thirds full is not an estimate. Overfilled cups — above three-quarters full — cause the batter to spill over the liner edge during the initial oven spring, flattening the dome and producing wide, overflow tops rather than the clean cylindrical profile with a gentle dome visible across all the photos. Underfilled cups produce small cupcakes that look disproportionate under the tall frosting swirl.
Every cup should look the same before the pan goes in — the same fill level, the same color, the same smooth surface. Uneven portioning produces uneven baking times across the tin, and the cups that were overfilled will still be wet when the smaller ones are done.
Step 6: Baking to the Correct Pull Moment
Place the filled tin on the middle rack and bake at 350°F (175°C) for 18 to 20 minutes. Set a timer for 18 minutes and do not open the oven door before it goes off — opening before 18 minutes drops the oven temperature and can deflate the domes mid-rise.
At 18 minutes, open the oven and perform the doneness check: press the center of a middle cupcake lightly with one finger. It should spring back completely — no indent remaining. Insert a toothpick into the center of the same cupcake. It should come out with a few moist crumbs attached.
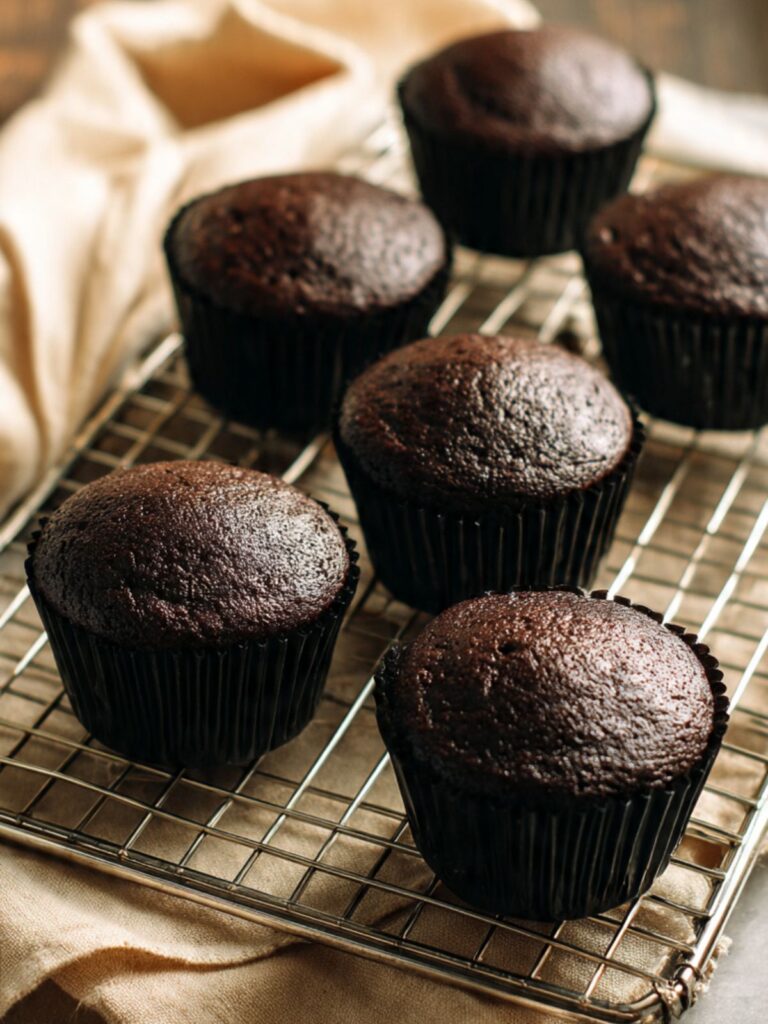
A completely clean toothpick means the cupcakes are overbaked. This is the counterintuitive moment in this recipe and it matters. The crumb visible in the photos — moist, dense, deeply dark — is only achievable by pulling the cupcakes when a few crumbs still cling to the toothpick. Carryover heat from the hot pan will finish the centers in the next step. Wait for a clean toothpick and the oil-based crumb will be dry and slightly gummy rather than the moist texture shown.
If the center does not spring back at 18 minutes, return the pan for 2 more minutes and check again. Do not guess past 20 minutes — check with the toothpick.
🗒 Luna’s Note: I rotate the tin 180 degrees at the 12-minute mark. My oven runs hotter at the back left and overbrowns whatever sits there. One rotation mid-bake, door open for no more than 5 seconds, solves it. If your oven bakes evenly, skip this.
The tops should look fully set and matte — not shiny or wet in the center. The edges will have pulled very slightly from the liner walls. These are the two visual confirmations the cupcakes are ready to come out.
Step 7: Cooling — In the Tin, Then on the Rack
Remove the tin from the oven and set it on a wire cooling rack. Leave the cupcakes in the tin for exactly 5 minutes. Do not move them, do not tilt the tin, do not test one. The pan is still conducting heat into the cupcake base during this window — carryover cooking is finishing what the oven started. Moving them before 5 minutes risks breaking the base where it meets the liner. Waiting beyond 8 minutes traps steam under the cupcake and softens the liner until it sticks.
Set a timer for 5 minutes. It matters.
After 5 minutes, lift each cupcake individually out of the tin and transfer directly to the wire rack. The cupcakes must cool completely before frosting — a minimum of 45 minutes at room temperature, or 20 minutes at room temperature followed by 15 minutes in the refrigerator if you are short on time. Buttercream applied to a warm cupcake melts on contact and runs down the sides. The tall swirl in the photos requires a completely cold surface to hold its shape.
The cupcake is ready to frost when it feels completely cool to the touch on all sides including through the base of the liner. If the bottom still feels warm, wait 10 more minutes. No exceptions.
Use this cooling time to make the peppermint buttercream and the chocolate ganache drizzle.
Step 8: Making the Peppermint Buttercream
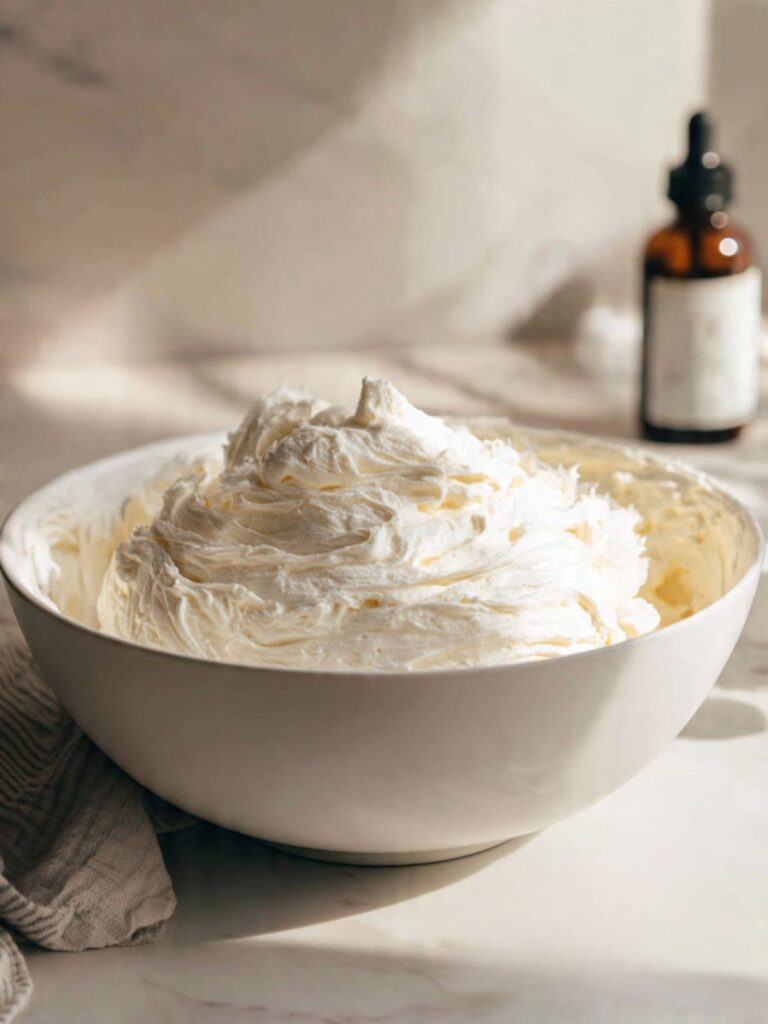
In a large mixing bowl, beat your ¾ cup (170g) unsalted butter, softened to 65–68°F (18–20°C) with a hand mixer on medium speed for a full 3 minutes before adding anything else. Set a timer. This step is not optional and it cannot be shortened — the butter needs sustained beating to aerate to a pale, fluffy base. Under-beaten butter produces a frosting that looks smooth but is too dense to pipe to the height visible in the photos and loses its shape within minutes of piping.
After 3 minutes the butter should have lightened from yellow to nearly off-white and increased visibly in volume. Still yellow and dense after 3 minutes — beat for another 60 seconds and check again.
Add 3 cups (360g) sifted powdered sugar in three additions — one cup at a time — beating on low speed after each addition until just incorporated before adding the next. Low speed only during the sugar additions. High speed at this stage causes the sugar to fly out of the bowl and the mix to become uneven.
Add ¼ teaspoon (1.5g) fine sea salt, 1 teaspoon (5ml) pure peppermint extract, and 2 tablespoons (30ml) heavy whipping cream. Beat on medium-high speed for 2 full minutes until the frosting is smooth, bright white, and stiff enough to hold a peak when the beater is lifted.
Taste now. The peppermint should be cleanly present — sharp at the front, gone by the finish, not lingering. If it tastes too mild, add peppermint extract in ¼ teaspoon increments, beating and tasting between each addition. Stop the moment the mint registers clearly. The candy cane garnish adds its own mint hit on top of the frosting — account for that when calibrating. The difference between 1 teaspoon and 1½ teaspoons of peppermint extract is the difference between mint-forward and something that tastes medicinal.
If the buttercream looks curdled — broken into greasy yellow chunks rather than coming together smoothly — the butter was slightly too cold when beating began. Wrap a warm towel around the outside of the bowl for 60 seconds, then beat on medium speed for 2 more minutes. It will come together. If it stays broken after that, let the bowl sit at room temperature for 5 minutes and beat again.
Adjust consistency with additional heavy cream, one teaspoon at a time. The frosting should hold a sharp peak for 5 seconds when you lift the beater without drooping. Too stiff and it tears during piping. Too soft and the swirl collapses.
The finished buttercream should be bright white, smooth, and stiff — a spatula dragged through it should leave a sharp, clean line that holds for at least 10 seconds without the edges softening or slumping. Yellow buttercream means the butter was too warm. Refrigerate the bowl for 10 to 15 minutes and re-beat.
Fit your piping bag with the Wilton 1M open-star tip, fill it two-thirds full, and twist the top closed. Set it aside at room temperature while you make the ganache. Do not refrigerate the filled piping bag — cold buttercream will not pipe smoothly through the tip.
Step 9: Making the Chocolate Ganache Drizzle
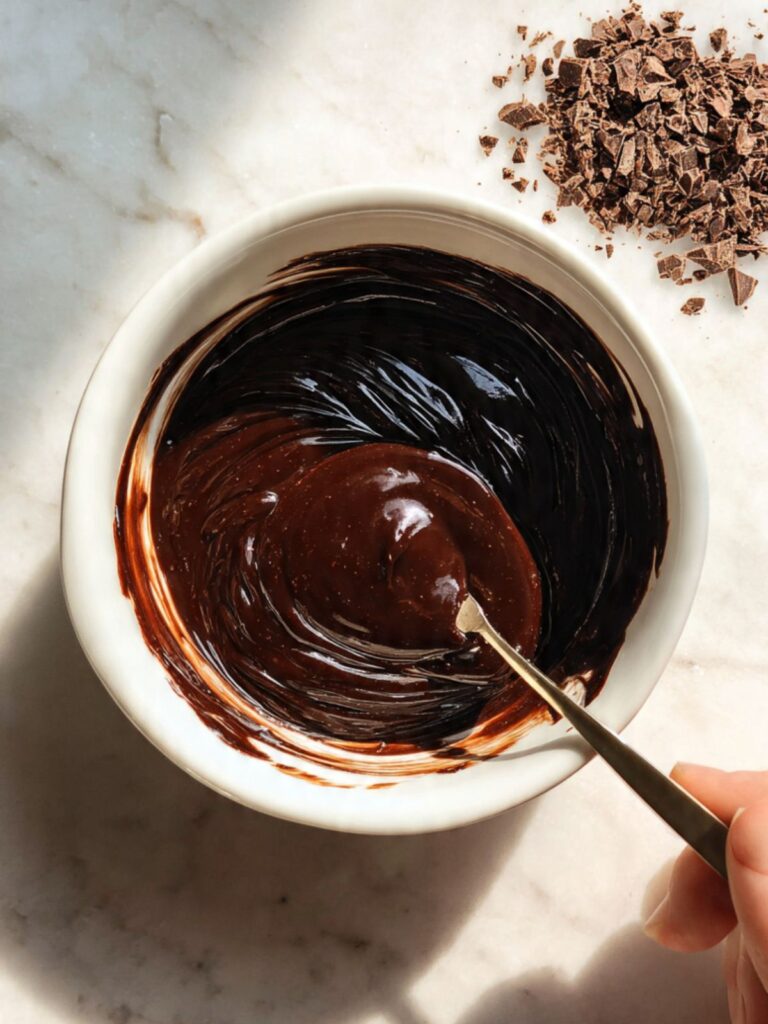
Place your 2 oz (60g) finely chopped bittersweet chocolate in a small heatproof bowl. The chocolate must be finely chopped — pieces no larger than a pea. Large chunks do not melt evenly from the heat of the cream and leave you with partially melted lumps in the ganache.
In a small saucepan over medium heat, warm ¼ cup (60ml) heavy whipping cream until small bubbles appear at the edges of the pan and wisps of steam rise from the surface — just below a simmer, approximately 180°F (82°C). Do not bring it to a full boil. Boiling cream causes the fat to separate from the liquid when it hits the chocolate and the ganache will look greasy and broken rather than glossy and smooth.
Pour the hot cream over the chopped chocolate all at once. Do not stir. Let it sit completely undisturbed for 90 seconds — the residual heat of the cream needs uninterrupted time to melt the chocolate fully before any agitation. Stirring immediately traps air bubbles and produces a matte, grainy finish rather than the mirror-glossy surface visible in the drizzle across the cupcakes in the photos.
After 90 seconds, stir slowly from the center of the bowl outward using a small spatula or spoon — small circles at the center first, gradually widening. The ganache will look broken and streaky for the first 10 to 15 strokes. Keep stirring. It comes together into a smooth, dark, glossy liquid by the time you reach the edges of the bowl.
The finished ganache should look deeply dark, mirror-glossy, and fluid — it should fall off a spoon in a thin, steady stream rather than in blobs or sheets. Dull surface with white streaks means it was stirred before the chocolate fully melted. Start a new batch — it takes 5 minutes and the ingredients are inexpensive.
Cool at room temperature for 8 to 10 minutes. Do not refrigerate. The ganache needs to reach approximately 85–90°F (29–32°C) — fluid enough to drizzle in a thin line but thick enough to stay where it lands on the frosting rather than running entirely off. Test it on a spoon: it should fall in a thin, steady thread. Too fast and sheeting — wait 2 more minutes. Falling in blobs — it has cooled too far, set the bowl over a small bowl of warm water and stir gently for 20 seconds.
Step 10: Piping, Drizzling, and Finishing — Assembly in Order
Work one cupcake at a time through the full assembly sequence — pipe, drizzle, garnish — before moving to the next. This keeps the ganache at the right temperature for adhering the candy cane pieces throughout the whole batch rather than drizzling all 12 and then finding the ganache has set before the candy cane goes on.
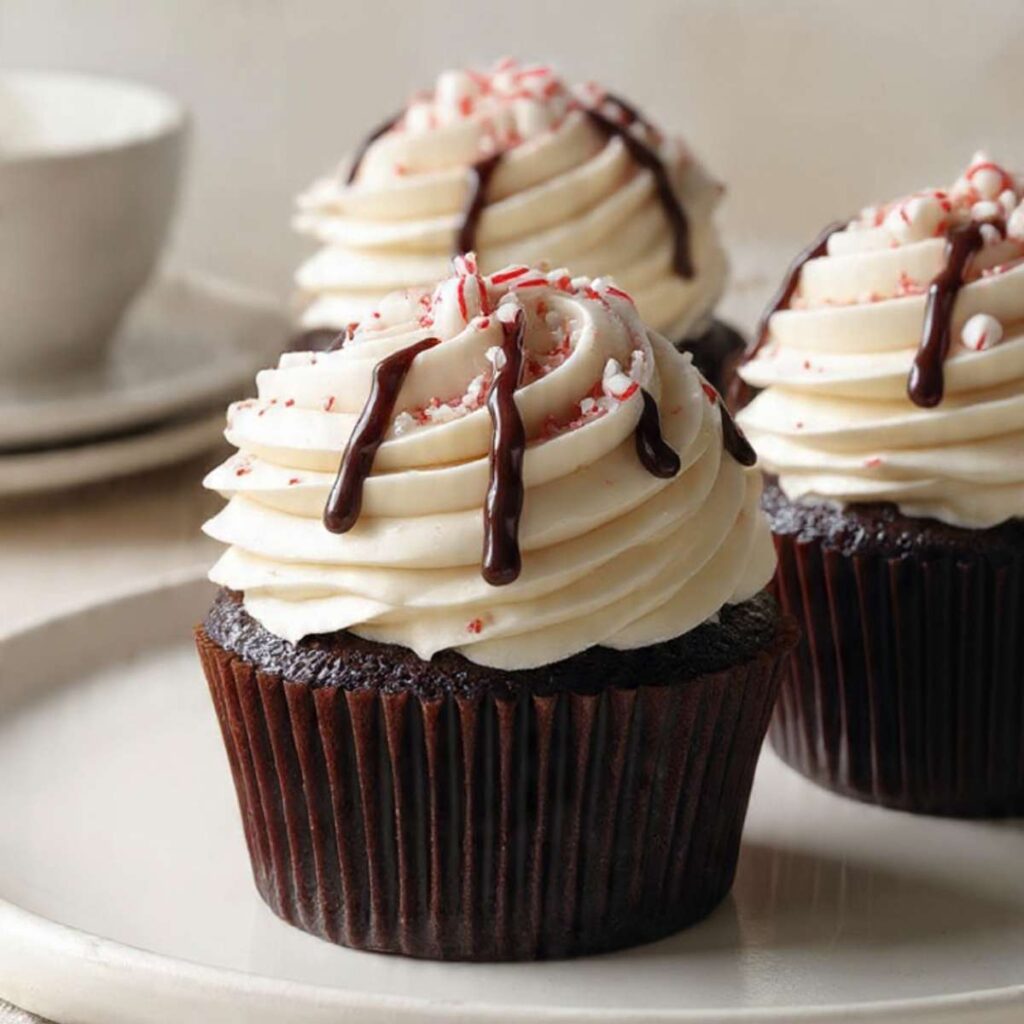
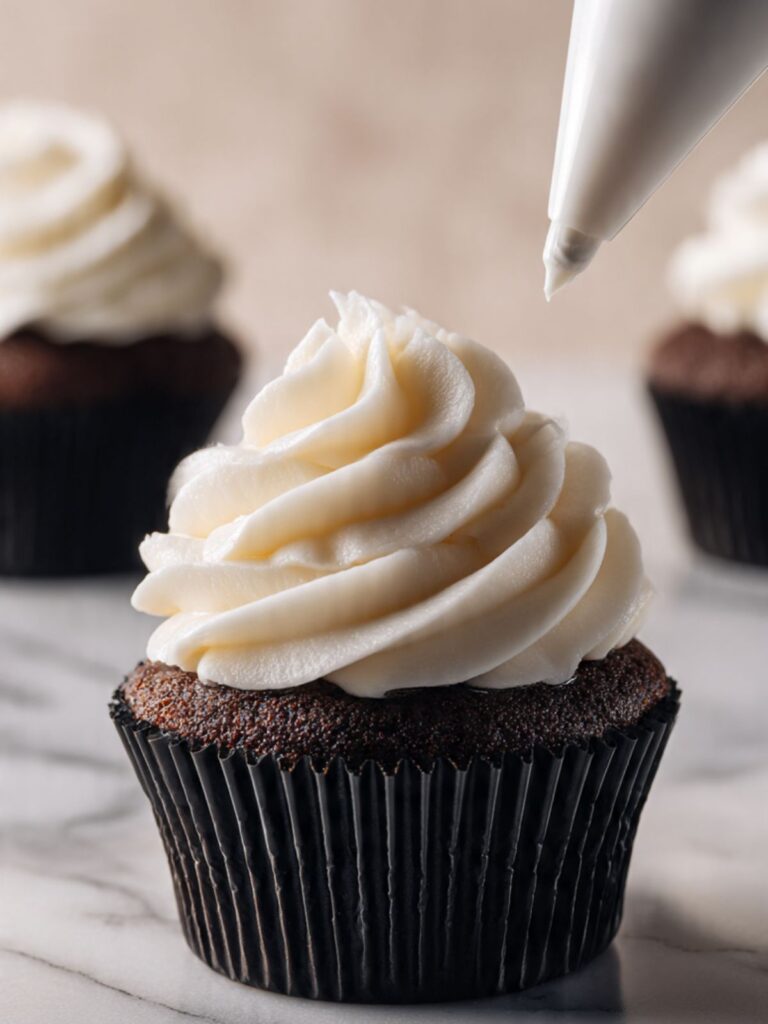
Piping the swirl: Hold the piping bag fitted with the Wilton 1M tip directly above the center of the cupcake, the tip approximately ½ inch (1.25cm) above the surface. Apply steady, even pressure to the bag and move in a tight outward circle — one full revolution from center to edge. Without releasing pressure, spiral upward in a second revolution that sits directly on top of the first, slightly inward. Finish with a quick, decisive upward pull to create the peak visible at the top of every swirl in the photos.
Consistent pressure is everything. The open-star tip creates the ridged texture visible in the close-up frosting photo — the layered, ruffled look of the swirl — but only when the pressure is even throughout the spiral. Releasing pressure partway through produces a collapsed, uneven pile rather than a structured tower. If the first cupcake does not look right, scrape the frosting back into the piping bag and try again — the buttercream is stiff enough to be reused.

Drizzling the ganache: Using a spoon or a squeeze bottle — a squeeze bottle gives significantly more control over line thickness — drizzle the ganache over the frosted cupcake in a back-and-forth zigzag motion. Start from one side of the swirl, cross to the other, and return. Two to three passes produces the coverage visible in the photos. Move at a steady, consistent pace — too slow produces thick blobs, too fast produces a broken line that does not drape cleanly over the frosting ridges.
Adding the candy cane: Immediately after drizzling each cupcake, scatter the crushed candy cane pieces over the top while the ganache is still wet. The ganache is the adhesive — it holds the candy cane pieces in place as it sets. Press larger shards in gently with a fingertip if they are sitting too tall. Once the ganache sets, nothing will stick to it.
If the ganache thickens noticeably before you have finished all 12 cupcakes, set the bowl over a small bowl of warm water and stir for 20 seconds. Do not microwave it — the temperature spike is too fast to control and the ganache will overheat.
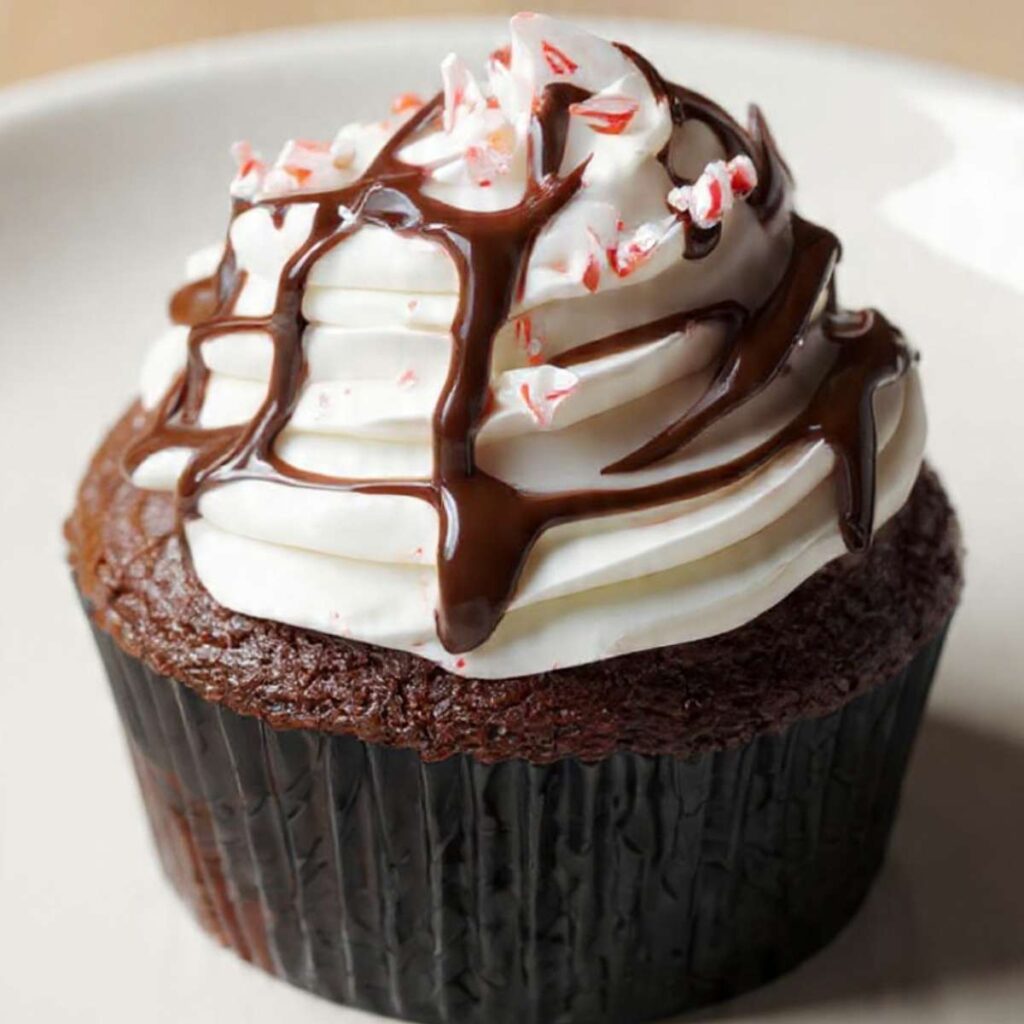
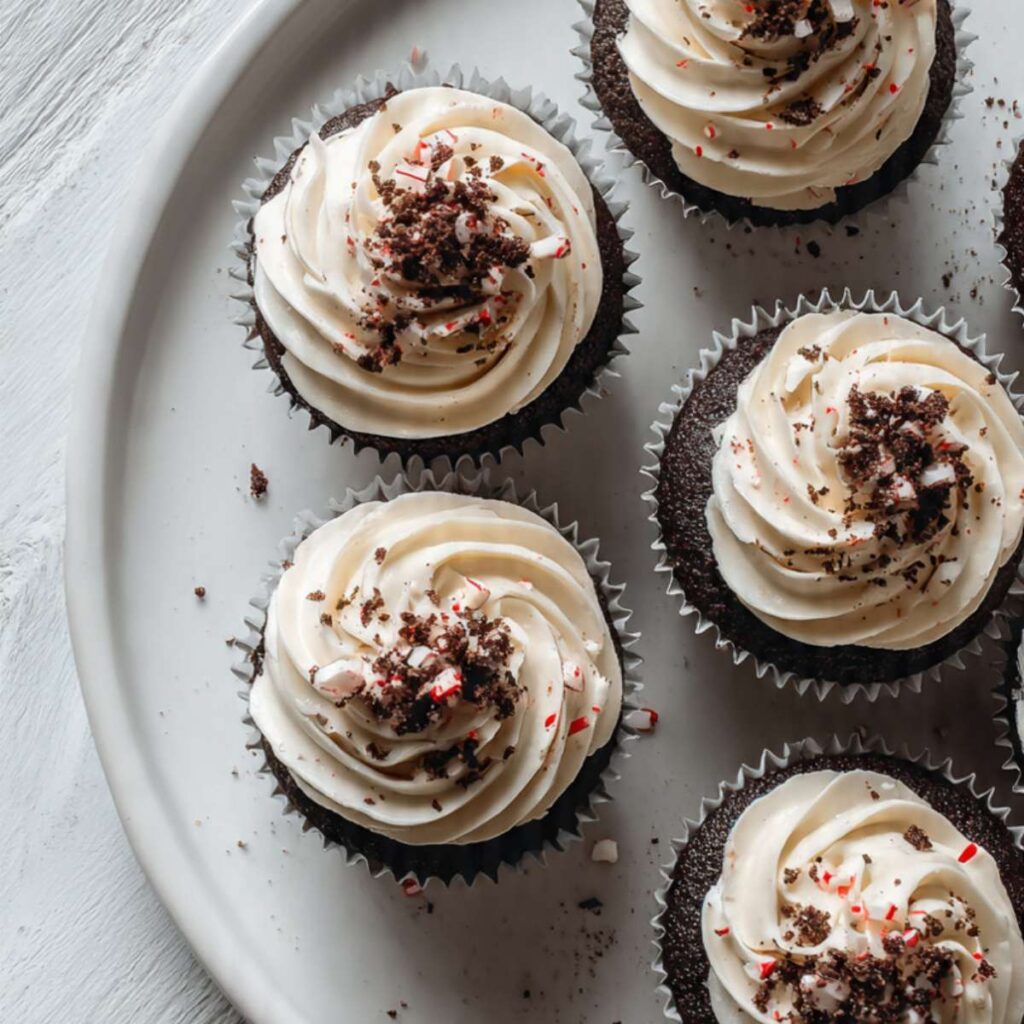
The finished cupcakes should match the photos exactly — tall bright-white frosting swirl with defined ridges from the open-star tip, dark chocolate ganache in a crossing zigzag pattern settled into the frosting valleys, and red-and-white candy cane pieces catching the light on top. If the frosting has softened at any point during assembly, refrigerate the finished cupcakes for 10 minutes to reset the swirl before serving.
The Science Behind Peppermint Mocha Cupcakes
Why Dutch-Process Cocoa Produces That Near-Black Color
I kept getting a dark brown cupcake when I wanted a near-black one. I tried adding more cocoa. I tried longer bake times. The color stayed medium brown and the texture got worse with each adjustment. What I did not understand at the time was that the color was never a quantity problem — it was a chemistry problem.
Natural cocoa is acidic, with a pH of around 5 to 6. Dutch-process cocoa has been treated with an alkalizing agent that raises its pH to 7 or above, neutralizing that acidity. The alkalization process does two things simultaneously: it deepens the cocoa color from reddish-brown to a true dark brown or near-black, and it mellows the flavor from sharp and tangy to smooth and deeply chocolatey. The near-black crumb you can see in every photo of these cupcakes is the direct result of that pH shift — the same batch of batter made with natural cocoa would bake up medium brown and taste noticeably more acidic.
This is also why the two cocoas are not interchangeable without adjusting the leavening. Natural cocoa is acidic and reacts with baking soda to produce CO₂ lift. Dutch-process cocoa is neutral and cannot trigger that reaction — it requires baking powder instead. This recipe uses both baking powder and a small amount of baking soda because it contains buttermilk, which is acidic enough to activate the baking soda independently. Remove the Dutch-process cocoa and substitute natural, and the leavening balance shifts, the rise changes, and the color is wrong. The cocoa choice is structural, not cosmetic.
What the Hot Coffee Actually Does to Chocolate
Hot liquid in a chocolate batter is one of those things that looks wrong on paper. The batter goes from thick to very thin the moment the coffee goes in, and most bakers’ instinct is that something has gone wrong. Nothing has gone wrong. The thinness is the point.
Cocoa powder contains flavor compounds — most of them fat-soluble — that are locked inside the cocoa particles in their dry state. Hot liquid, particularly hot water or hot coffee, penetrates the cocoa particles and releases those compounds in a process called blooming. The result is a dramatically more intense chocolate flavor from the same quantity of cocoa — not because there is more cocoa, but because more of the flavor that was already there has been unlocked. The hot coffee in this recipe does double duty: it blooms the cocoa and it adds its own roasted, bitter flavor compounds that reinforce the espresso powder already in the dry ingredients. This layered coffee application — espresso powder in the dry mix, hot brewed coffee in the wet mix — is what makes these taste genuinely like a mocha rather than a chocolate cupcake with coffee flavor added as an afterthought.
The thin batter is correct. The batter thickens slightly as the starch in the flour begins to hydrate, and it sets to a tight, moist crumb during baking. Trust the process and do not add flour to compensate for the consistency. If you want to see a related approach to layered chocolate flavor, the hot chocolate cupcakes on this site use a similar blooming technique with a different liquid and a white chocolate frosting.
Why Oil Produces a Moister Cupcake Than Butter — and Why That Matters Here
Butter is approximately 80% fat and 20% water and milk solids. Vegetable oil is 100% fat with zero water content. During baking, the water in butter evaporates and the milk solids set — both of which contribute to structure but also to dryness. Oil has no water to evaporate and no solids to set, which means the fat stays in the crumb after baking rather than partially leaving with the steam. The result is a cupcake that stays soft and moist at room temperature for significantly longer than a butter-based version.
For a cupcake this heavily topped — tall buttercream swirl, ganache drizzle, candy cane pieces — a moist, dense base is the right structural choice. A butter-based cupcake would produce a slightly firmer, drier crumb that would feel out of balance with the richness of the frosting. Oil also contributes to the fine, even crumb visible in these photos because it coats the flour proteins more evenly than solid fat, which limits gluten development and keeps the texture tender. The trade-off is flavor complexity — butter contributes a richness that oil cannot replicate. That trade-off is intentional here: the espresso, cocoa, and peppermint carry all the flavor this cupcake needs, and the base exists to support them without competing.
For a different approach, the chocolate peppermint cookie cups on this site use a butter-based chocolate base with the same peppermint combination and are a useful comparison — the texture difference between the two makes the oil-versus-butter trade-off visible side by side.
Peppermint Mocha Cupcakes Troubleshooting & Pro-Tips
Common Mistakes
Wrong cocoa type used
Symptom: The cupcakes bake up medium brown instead of the near-black visible in the photos. The flavor is sharp and acidic rather than smooth and deeply chocolatey, and the rise is uneven — some cups dome correctly while others sit flat or sink slightly in the center.
Cause: Natural cocoa was used instead of Dutch-process. These are not interchangeable. Natural cocoa has a pH of around 5 to 6 — it is acidic, and that acidity throws off the leavening balance in a recipe built around neutral Dutch-process cocoa. The color difference is immediate and visible. The flavor difference is significant. Both problems originate from the same substitution.
Fix: There is no fix once baked. The color and the leavening response are set. Serve as-is — the ganache drizzle and peppermint frosting mean the finished cupcake still tastes good, just differently than intended. Note what happened and use Dutch-process next time.
Prevention: Read the label before opening the tin. Dutch-process cocoa will say “Dutch-process,” “alkalized,” or “processed with alkali” on the packaging. If the label does not specify, assume it is natural. Droste, Cacao Barry Extra Brute, and King Arthur Dutch-process are the brands I have tested. Any of them will produce the near-black color visible in the photos.
Wrong pan type or overfilled liners
Symptom: The cupcake bases are overbrowning and pulling from the liner before the centers are set, or the tops have overflowed the liner edges during baking and collapsed into a flat, wide, domed shape rather than the clean cylindrical profile with a defined top visible in the photos.
Cause: Dark non-stick muffin tins absorb more radiant heat than light-colored aluminum and overbrown the base and sides of the cupcake before the center finishes baking — the exterior sets too fast while the inside is still liquid. Overfilled liners — above two-thirds full — cause the batter to spill over the liner rim during the initial oven spring and collapse outward rather than doming upward.
Fix: If the bases are already dark, remove the cupcakes from the tin at the 5-minute mark and do not place them on any surface that retains heat. If the tops overflowed and collapsed, trim the excess dome level with a sharp serrated knife once fully cooled. The frosting swirl will cover the trim line completely — no one will know. The cupcake underneath is still fully edible.
Prevention: Use a light-colored aluminum muffin tin. If a dark pan is all you have, drop the oven temperature to 325°F (163°C) and begin checking at 16 minutes rather than 18. Fill liners to exactly two-thirds full — use a large cookie scoop for consistent portioning across all 12 cups.
Cupcakes are dry and tight instead of moist
Symptom: The crumb is dense and slightly gummy or dry when you bite into it — tight-textured, with none of the soft, moist interior visible in the photos. The cupcake may also feel heavier than expected for its size.
Cause: Two causes, and they often happen together. Overbaking is the most common — a completely clean toothpick means the cupcakes stayed in the oven past the optimal pull point, and the oil-based crumb, which stays moist because the fat does not evaporate the way butter does, will turn dry and gummy when the starch over-sets. Overmixing the batter after the wet and dry ingredients combine is the second cause — extra strokes develop gluten and compress the crumb structure from open and tender to tight and dense.
Fix: A dry crumb cannot be rehydrated from the outside once baked. Slice each cupcake horizontally through the middle with a serrated knife and brush the cut surface generously with a simple syrup — equal parts sugar and water, brought to a brief simmer and cooled to room temperature. Reassemble and frost as normal. The syrup will not fully restore the original crumb but it salvages the texture enough to serve. Alternatively, crumble the overbaked cupcakes into a bowl, layer with the peppermint buttercream and crushed candy cane, and serve as a deconstructed trifle — the components still work well together regardless of the crumb texture.
Prevention: Pull the cupcakes at 18 minutes when a toothpick comes out with a few moist crumbs attached — not wet batter, not completely clean. Stop folding the batter the moment no dry flour streaks remain. Twenty to twenty-five strokes maximum.
Frosting is too soft to hold the swirl
Symptom: The buttercream looks glossy and yellow rather than bright white and stiff. It pipes out of the bag but immediately begins to collapse and slide down the sides of the cupcake rather than holding the tall spiral visible in the photos. The ridges from the piping tip soften and disappear within minutes.
Cause: Butter above 68°F (20°C) loses its ability to hold air when beaten — the fat becomes too fluid to trap the air bubbles that give buttercream its structure. The frosting goes into the piping bag looking usable and then fails on contact with the cupcake. In a warm kitchen this happens fast, especially if the butter was softened on the counter on a warm day and went slightly past the correct temperature range.
Fix: Do not add more powdered sugar trying to stiffen it — it will make the frosting grainy and intensely sweet without fixing the structural problem. Transfer the entire bowl to the refrigerator for 10 to 15 minutes. Re-beat on medium speed for 2 minutes. The fat will re-solidify and the frosting will tighten back to a pipeable consistency. Check the stiffness before loading the piping bag — it should hold a sharp peak for 5 seconds when the beater is lifted.
Prevention: Butter at exactly 65–68°F (18–20°C). In a warm kitchen, err toward the cooler end of this range. When you press a finger into the butter it should leave a clean indent without the surface looking shiny or greasy — shiny means too warm. Never soften butter for frosting in the microwave. The outside softens while the inside stays hard, and the resulting uneven temperature produces frosting that behaves unpredictably from the first stroke of the beater.
Ganache is grainy, dull, or will not smooth
Symptom: The ganache looks matte rather than glossy, has visible white streaks or a sandy texture when stirred, and drizzles in broken, uneven lines rather than the smooth, fluid zigzag visible in the photos. In some cases it looks almost curdled — separated fat sitting on top of a dark liquid.
Cause: One of three things happened. The cream was brought to a full boil rather than just below a simmer, which causes the fat to separate from the liquid when it hits the chocolate. The chocolate was stirred before it had 90 full seconds to melt from the heat of the cream — agitating too early traps air and produces a matte, grainy texture. Or chocolate chips were used instead of chopped baking chocolate — chips contain added stabilizers that prevent smooth melting and produce a thick, dull ganache regardless of technique.
Fix: A broken or grainy ganache does not recover with continued stirring — more stirring makes it worse. If it is only slightly grainy, add one teaspoon of warm cream and stir very gently from the center; this occasionally recovers a lightly seized batch. If it is fully broken or matte, start a new batch. It takes 5 minutes. The chocolate and cream are inexpensive. The cupcakes are worth it.
Prevention: Finely chopped bittersweet baking chocolate only — never chips. Bring the cream to just below a simmer, small bubbles at the edges and wisps of steam. Pour over the chocolate and do not touch it for a full 90 seconds. Stir slowly from the center outward only after that rest.
Peppermint flavor is too strong or medicinal
Symptom: The frosting tastes overwhelmingly of mint — sharp, chemically medicinal, with none of the clean peppermint finish the recipe intends. It does not taste like peppermint. It tastes like something you would rinse your mouth with.
Cause: Too much peppermint extract was added, or the wrong extract was used. Mint extract is a blend of spearmint and peppermint and produces a muddier, more aggressive mint flavor than pure peppermint extract. Peppermint extract is highly concentrated — the workable range in this frosting is narrow. Half a teaspoon too much crosses from pleasant to medicinal and there is no walking it back by adding more butter.
Fix: Make a second batch of plain, unflavored buttercream — same quantities, no extract — and fold it into the over-minted batch in a 1:1 ratio. Taste as you fold and stop when the mint level reads as clean and present rather than dominant. This doubles your total frosting yield, which is not a problem — extra buttercream freezes well for up to 3 months.
Prevention: Start with exactly 1 teaspoon of pure peppermint extract. Taste the frosting before adding any more. If you add more, do it in ¼ teaspoon increments only, beating and tasting between each addition. Remember that the candy cane garnish brings its own mint note to every bite — the frosting does not need to carry all the peppermint flavor alone.
Cupcake tops are flat instead of domed
Symptom: The cupcakes bake up with flat or nearly flat tops rather than the gentle dome visible across all the photos. The frosting swirl looks disproportionately tall relative to the cupcake body beneath it and the overall profile looks off-balance.
Cause: Flat tops almost always come from one of three places. The oven was not fully preheated — the rapid initial heat burst when the pan goes into a hot oven is what drives the dome. An oven that is still coming up to temperature produces cupcakes that rise slowly and set flat. Overfilled liners cause the batter to expand outward rather than upward. Expired or under-measured leavening means the batter has no mechanism to dome.
Fix: Flat-topped cupcakes are fully baked and completely fine to eat — the flavor is unaffected. Before piping, apply a thick flat base layer of buttercream directly across the surface and build the swirl on top of that foundation. The added height compensates for the missing dome and the finished cupcake looks proportional. No one at the table will know.
Prevention: Allow the oven to preheat for a full 15 minutes after it signals ready. Confirm the temperature with an oven thermometer if you have one. Fill liners to exactly two-thirds full. Test leavening freshness before starting — baking powder into hot water should bubble vigorously and immediately.
Cupcakes are sticking to the paper liners
Symptom: When the liner is peeled back, the cupcake base and sides tear and remain stuck to the paper rather than releasing cleanly. The outer edge of the cupcake crumb comes away with the liner and the sides look ragged and torn.
Cause: Sticking is almost always an underbaking problem, a cooling problem, or both. An underbaked oil-based crumb is too soft and fragile to release from the liner — the structure has not fully set. Cupcakes removed from the tin before the 5-minute rest still have active steam trapped between the crumb and the liner, and that steam softens the paper until it fuses with the cake surface. Oil-based recipes in particular need the full cooling time before the liner releases cleanly because the fat stays soft longer than in a butter-based crumb.
Fix: If the cupcakes are stuck, leave them in the liner and serve them that way. The ganache drizzle and frosting swirl cover everything — no one needs to peel the liner back. Do not try to remove a stuck liner from a cupcake that has not fully cooled. It takes the crumb with it and leaves an unsalvageable surface.
Prevention: Bake to the full doneness cue — spring-back test plus toothpick with a few moist crumbs. Cool in the tin for exactly 5 minutes, no more, no less. Transfer to a wire rack and cool completely — a minimum of 45 minutes — before touching the liners at all.
Leavening freshness check
If the cupcakes did not rise correctly despite following the recipe — low dome, dense crumb, flat tops — test your leavening before the next batch. Baking powder: drop 1 teaspoon into ½ cup of hot water. It should bubble vigorously and immediately on contact. Baking soda: drop ¼ teaspoon into 1 teaspoon of white vinegar. It should fizz actively the moment they touch. A slow reaction or no reaction at all means the leavening is expired and must be replaced. Leavening loses potency once opened, regardless of the best-by date — if the tin has been open for more than 6 months, replace it before baking.
Altitude and humidity adjustments
At high altitude above 3,500 feet (1,067m): reduce baking powder to 1 teaspoon, reduce granulated sugar by 2 tablespoons, and increase the hot coffee by 2 tablespoons. The batter will look slightly thinner — this is correct at altitude. Begin checking at 16 minutes rather than 18; cupcakes at altitude rise faster and overbake more quickly than the stated time suggests.
In high humidity: the powdered sugar in the buttercream absorbs moisture from the air even after the frosting is piped, softening the swirl and dulling the definition of the ridges. If your kitchen is humid, refrigerate the frosted cupcakes for 20 minutes after piping to set the structure before serving. Add the candy cane garnish as late as possible — crushed candy cane pieces are hygroscopic and begin weeping color into the frosting within an hour in humid conditions.
Expert Pro-Tips
Use a squeeze bottle for the ganache drizzle, not a spoon. A spoon works but gives you almost no control over line thickness or trajectory. Transfer the cooled ganache to a small squeeze bottle with a narrow tip opening, and apply with consistent hand pressure moving at a steady pace. The crossed zigzag pattern visible in the photos — two passes in opposing directions — takes about 4 seconds per cupcake with a squeeze bottle. With a spoon it takes four times as long and looks half as precise. This is a $2 tool that makes a visible difference in the finished result.
Pipe a small anchor base before starting the swirl. Before beginning the spiral, hold the piping bag directly over the center of the cupcake and apply a brief burst of pressure — just enough to deposit a small flat circle of frosting as a foundation. Release pressure completely, then begin the spiral from the center outward. This anchor gives the tall swirl something stable to build on and prevents the whole swirl from sliding off the dome of the cupcake during piping or serving. Ten seconds per cupcake. Worth it every time.
Crush the candy canes inside a sealed zip-lock bag. Place whole candy canes in a zip-lock bag, seal it completely removing as much air as possible, and strike firmly with a rolling pin or the flat side of a meat mallet. The sealed bag keeps the pieces contained and lets you control the size — three or four strikes gives the larger irregular shards visible in the photos; ten or more strikes gives fine dust. Do not use a food processor. It turns them to powder in 2 seconds and you lose the red-and-white contrast that makes the garnish visible from across the table.
Make the ganache last, not first. The ganache has a short drizzle window — approximately 8 to 12 minutes at room temperature before it thickens past the point of clean drizzling. If you make it before the buttercream and before piping, it will have set by the time you are ready to use it and you will need to reheat it, which risks overheating. Make the cupcakes, make the buttercream, pipe all 12 cupcakes completely, then make the ganache and drizzle immediately. This sequence keeps the ganache in its optimal window for the entire batch.
How to Store Peppermint Mocha Cupcakes
Room Temperature
Frosted peppermint mocha cupcakes can be stored at room temperature for up to 2 days. Place them in a hard-sided lidded cake carrier or a deep lidded container tall enough to clear the frosting swirl without touching it — the swirl is approximately 2 to 3 inches above the cupcake top and will deform permanently if the lid presses against it. Do not use zip-lock bags or plastic wrap directly over the frosting. Do not stack them.
The candy cane pieces will begin to soften and weep into the frosting after the first 24 hours at room temperature, particularly in a humid kitchen. This does not affect flavor but it does affect appearance — if you are making these for an event, add the candy cane garnish no more than 2 hours before serving.
On Day 1, the buttercream is at its stiffest and the ganache has its sharpest definition. On Day 2 at room temperature, the buttercream softens slightly and the espresso flavor in the cupcake deepens — the coffee and chocolate notes merge in a way the fresh-baked version does not quite have yet. The eating experience on Day 2 is actually better than Day 1. The appearance is slightly less precise.
Room temperature storage works best when the kitchen is below 70°F (21°C). In a warm kitchen, the buttercream will soften and the swirl will begin to lose definition after several hours. If your kitchen runs warm, refrigerate instead.
Refrigerator
Refrigeration is recommended for storage beyond 24 hours, particularly in warm kitchens. Place the cupcakes in a hard-sided lidded container with enough vertical clearance for the frosting. Refrigerate for up to 5 days.
Cold buttercream firms significantly in the refrigerator and the texture of both the frosting and the cupcake base will feel dense when pulled straight from the fridge. Remove the cupcakes from the refrigerator 30 minutes before serving and allow them to come to room temperature — the buttercream will soften back to its original texture and the cupcake crumb will relax from the dense, cold state it holds at refrigerator temperature. Do not microwave refrigerated frosted cupcakes to speed this up — the frosting melts before the cupcake warms.
🗒 Luna’s Note: I store these in the refrigerator even on Day 1 if I am making them more than a few hours ahead. The cold sets the ganache to a matte finish and firms the frosting swirl so it holds its shape perfectly when I take them out. The 30-minute counter rest before serving brings everything back.
Freezer — Baked and Frosted
Frosted cupcakes can be frozen but the process requires care to protect the piped swirl. Place the frosted cupcakes on a flat baking sheet and freeze uncovered for 45 minutes to 1 hour until the frosting and ganache are completely solid. Once frozen solid, wrap each cupcake individually in a layer of plastic wrap followed by a layer of aluminum foil, and store in a rigid freezer-safe container. Freeze for up to 6 weeks.
To thaw: unwrap each cupcake and place on the counter at room temperature for 2 to 3 hours. Do not thaw in the refrigerator — the slow temperature change causes condensation to form on the frosting surface, which softens and dulls the buttercream. The ganache drizzle will retain its glossy finish after freezing and thawing. The candy cane pieces will soften noticeably during the thaw — if appearance matters, remove them before freezing and add fresh crushed candy cane after thawing.
Freezer — Unfrosted Cupcakes
Unfrosted cupcake bases freeze significantly better than fully assembled cupcakes and this is the approach I recommend for make-ahead situations. Cool the baked cupcakes completely on a wire rack, then wrap each one individually in plastic wrap and place in a zip-lock freezer bag. Freeze for up to 3 months.
To use: thaw the wrapped cupcakes at room temperature for 1 to 1½ hours. Make the buttercream and ganache fresh on the day of serving — both take under 15 minutes and the results are noticeably better than thawed frosting. The cupcake crumb after freezing and thawing is indistinguishable from freshly baked when the cupcakes are properly wrapped.
Serving Suggestion
Serve these at room temperature — not cold from the refrigerator, not warm. The buttercream needs to be at room temperature to have the soft, yielding texture that contrasts with the snap of the ganache and the crunch of the candy cane. Cold frosting straight from the fridge is dense and waxy in a way that does not do the recipe justice.
I serve these with a strong black coffee or a double shot of espresso alongside — no milk, no sugar. The bitterness of the coffee cuts through the sweetness of the buttercream in a way that makes both taste better. A cup of hot cocoa works equally well and leans into the mocha theme, which is why these have become my standard offering when people come over during the colder months.
These belong to a specific kind of occasion — the one where you want something that looks like real effort and tastes like you meant it. A holiday cookie swap, a December dinner party, a Sunday afternoon when you want the kitchen to smell like espresso and chocolate for two hours. They are not an everyday cupcake. The assembly takes time and the three-component finish is not something to rush.
On Day 2, the espresso flavor in the cupcake deepens noticeably — the coffee and chocolate merge in a way that the fresh-baked version does not quite have yet. The frosting softens slightly and the overall flavor becomes more cohesive. Day 1 is impressive. Day 2 is better. I have never had a Day 3 to report on — they are always gone.
These do not travel well over long distances. The tall frosting swirl is vulnerable to any lateral movement and the ganache, once set, can crack if the cupcakes shift in transit. Make them where you are serving them, or transport them in a rigid cupcake carrier with individual inserts that hold each cupcake in place.
Frequently Asked Questions About Peppermint Mocha Cupcakes
Can I make peppermint mocha cupcakes ahead of time?
Yes. The cupcake bases can be baked up to 3 days ahead and stored at room temperature wrapped in plastic wrap, or frozen for up to 3 months. The peppermint buttercream can be made up to 5 days ahead and refrigerated in a sealed container — bring it to room temperature and re-beat for 2 minutes before piping. Make the ganache drizzle fresh on the day of serving — it takes 5 minutes and reheated ganache loses its glossy finish. Assemble and garnish no more than 2 hours before serving for the sharpest visual result.
Can I substitute natural cocoa for Dutch-process cocoa?
Technically yes, but the result will be meaningfully different. Natural cocoa is acidic and reacts with baking soda differently than neutral Dutch-process cocoa — the rise will change, the color will shift from near-black to medium brown, and the flavor will be noticeably sharper and more tangy. If you substitute, increase baking soda to ¾ teaspoon and reduce baking powder to 1 teaspoon to compensate for the acidity shift. The cupcakes will still be good — they will just not match the deep, dark, smooth result visible in the photos. Dutch-process cocoa is worth sourcing for this specific recipe.
Can I skip the espresso powder?
You can, but the mocha element disappears almost entirely without it. Espresso powder is what separates a chocolate peppermint cupcake from a peppermint mocha cupcake — the coffee flavor is structural to the recipe name and the flavor profile. If you have a sensitivity to caffeine, use decaffeinated espresso powder, which behaves identically and produces the same depth of flavor. If espresso powder is completely unavailable, substitute with 1 tablespoon of very finely ground instant coffee and reduce the hot brewed coffee to ¼ cup, replacing the remainder with hot water — the flavor will be slightly thinner but present. For anyone who loves this flavor combination, the snickerdoodle cupcakes on this site offer a completely caffeine-free cupcake option in the same format.
What piping tip should I use for peppermint mocha cupcakes?
Use a Wilton 1M open-star tip. This is the specific tip that produces the tall, defined spiral swirl visible in the photos — the ridges of the star create the layered look as the frosting spirals upward. A closed-star tip (such as a Wilton 2D) produces a tighter, more compact rosette with less height. A round tip produces a smooth dome with no texture. If you do not own a Wilton 1M, any large open-star tip with a similar diameter (approximately ½ inch / 1.25cm opening) will produce a comparable result. The tip size matters more than the brand.
Can I make these cupcakes without buttermilk?
Yes, with a substitution that works reasonably well. Combine ½ cup (120ml) whole milk with 1½ teaspoons of white vinegar or fresh lemon juice, stir, and let it sit for 5 minutes until the milk curdles slightly — this is a standard buttermilk substitute. The acidity is close to true buttermilk and the baking soda will react correctly. The crumb will be very slightly less tender than full-fat buttermilk produces because the fat content is lower, but the difference is minor. Do not substitute with low-fat milk — the reduced fat content produces a noticeably drier, less rich cupcake that does not match the texture in the photos.
How do I get clean ganache drizzle lines on the frosting?
The two variables that control ganache drizzle quality are temperature and application speed. The ganache must be cooled to approximately 85–90°F (29–32°C) before drizzling — fluid enough to pour in a thin line but thick enough to stay where it lands rather than running entirely off the frosting. Test it on a spoon: it should fall in a steady, thin thread rather than a wide sheet. Apply with a squeeze bottle for the most control, moving your hand in a consistent back-and-forth motion at a steady pace. Moving too slowly produces thick blobs. Moving too quickly produces a broken, thin line. Practice the motion once on a piece of parchment before moving to the cupcakes — one practice pass is enough to calibrate your hand speed.
Can I double this peppermint mocha cupcakes recipe?
Yes, this recipe doubles reliably. Use two muffin tins and bake them on the same rack if your oven fits both side by side, or on two racks with the pans offset — not stacked directly above each other. Rotate both pans 180 degrees at the 12-minute mark. The batter, buttercream, and ganache all scale directly at 2x with no adjustment needed. Do not attempt to triple the buttercream in a single stand mixer bowl — it overloads the mixer and does not aerate correctly. Make two separate buttercream batches for a triple recipe. Baking powder and baking soda scale linearly at 2x, but if tripling, reduce each leavening agent by 10% to prevent a chemical aftertaste.
Do peppermint mocha cupcakes need any adjustments for high altitude or humid kitchens?
At high altitude above 3,500 feet (1,067m), reduce baking powder to 1 teaspoon, reduce granulated sugar by 2 tablespoons, and increase the hot coffee by 2 tablespoons. Cupcakes rise faster at altitude and overbake more quickly — begin checking at 16 minutes rather than 18. In high humidity, the powdered sugar in the buttercream absorbs moisture from the air, softening the frosting even after it has been piped. If your kitchen is humid, refrigerate the frosted cupcakes for 20 minutes after piping to set the swirl before serving, and add the candy cane garnish at the last possible moment — crushed candy cane pieces absorb moisture quickly and will weep into the frosting in a humid environment.
More Cupcakes You’ll Love
If these peppermint mocha cupcakes are your kind of thing — deeply chocolatey, boldly flavored, fully assembled with frosting and ganache — these are the ones to make next.
Chocolate Peppermint Cookie Cups — if you want the peppermint and chocolate combination in a smaller, no-frosting format, these are the ones. Butter-based chocolate base, peppermint filling, ready faster than a cupcake.
Cookie Dough Cupcakes — a chocolate cupcake base with an edible cookie dough filling piped inside the frosting swirl. The assembly logic is the same as this recipe and the result is the kind of cupcake that requires an explanation when you serve it.

Peppermint Mocha Cupcakes
Ingredients
Equipment
Method
- Position a rack in the middle of the oven and preheat to 350°F (175°C) for at least 15 minutes. Line a standard 12-cup light-colored aluminum muffin tin with paper or foil cupcake liners.
- In a large mixing bowl, whisk together the flour, Dutch-process cocoa powder, granulated sugar, brown sugar, baking powder, baking soda, fine sea salt, and espresso powder for a full 30 seconds until completely uniform with no streaks or cocoa clumps visible.
- In a second large bowl, whisk together the eggs, vegetable oil, room-temperature buttermilk, and vanilla extract until combined and slightly foamy. Pour the hot brewed coffee in a slow steady stream while whisking constantly until the wet mixture is uniform and glossy.
- Pour the wet ingredients into the dry ingredients all at once. Using a silicone spatula, fold together with slow wide strokes from the bottom of the bowl upward — 20 to 25 strokes maximum, stopping the moment no dry flour streaks remain. Do not overmix. The batter will be thin, dark, and pourable — this is correct.
- Using a large cookie scoop or ¼-cup measure, portion the batter evenly into the 12 lined cups, filling each approximately two-thirds full (approximately 65–70g per cup). Do not overfill.
- Bake at 350°F (175°C) on the middle rack for 18 to 20 minutes, until the tops spring back when lightly pressed and a toothpick inserted into the center of a middle cupcake comes out with a few moist crumbs — not wet batter, not completely clean. Rotate the tin 180 degrees at the 12-minute mark.
- Remove from the oven and cool in the tin on a wire rack for exactly 5 minutes, then transfer the cupcakes individually to the rack. Cool completely — minimum 45 minutes — before frosting.
- Beat the softened unsalted butter with a hand mixer on medium speed for 3 full minutes until pale and fluffy. Add the sifted powdered sugar one cup at a time on low speed, beating to incorporate between each addition. Add the fine sea salt, pure peppermint extract, and 2 tablespoons heavy cream. Beat on medium-high speed for 2 minutes until smooth, bright white, and stiff. Adjust consistency with additional heavy cream one teaspoon at a time. Taste and adjust peppermint extract cautiously in ¼ teaspoon increments if needed.
- Place finely chopped bittersweet chocolate in a small heatproof bowl. Heat heavy cream in a small saucepan until small bubbles appear at the edges — just below a simmer. Pour over the chocolate, let sit undisturbed for 90 seconds, then stir slowly from the center outward until completely smooth and glossy. Cool at room temperature for 8 to 10 minutes until slightly thickened but still fluid.
- Fit a piping bag with a Wilton 1M open-star tip and fill two-thirds full with peppermint buttercream. Pipe a tall spiral swirl onto each cooled cupcake, starting from the center and spiraling outward and upward in two revolutions, finishing with a sharp upward pull.
- Using a spoon or squeeze bottle, drizzle the cooled ganache over each frosted cupcake in a back-and-forth zigzag pattern. Immediately scatter crushed candy cane pieces over the ganache while it is still wet. Allow the ganache to set for 5 minutes before serving.