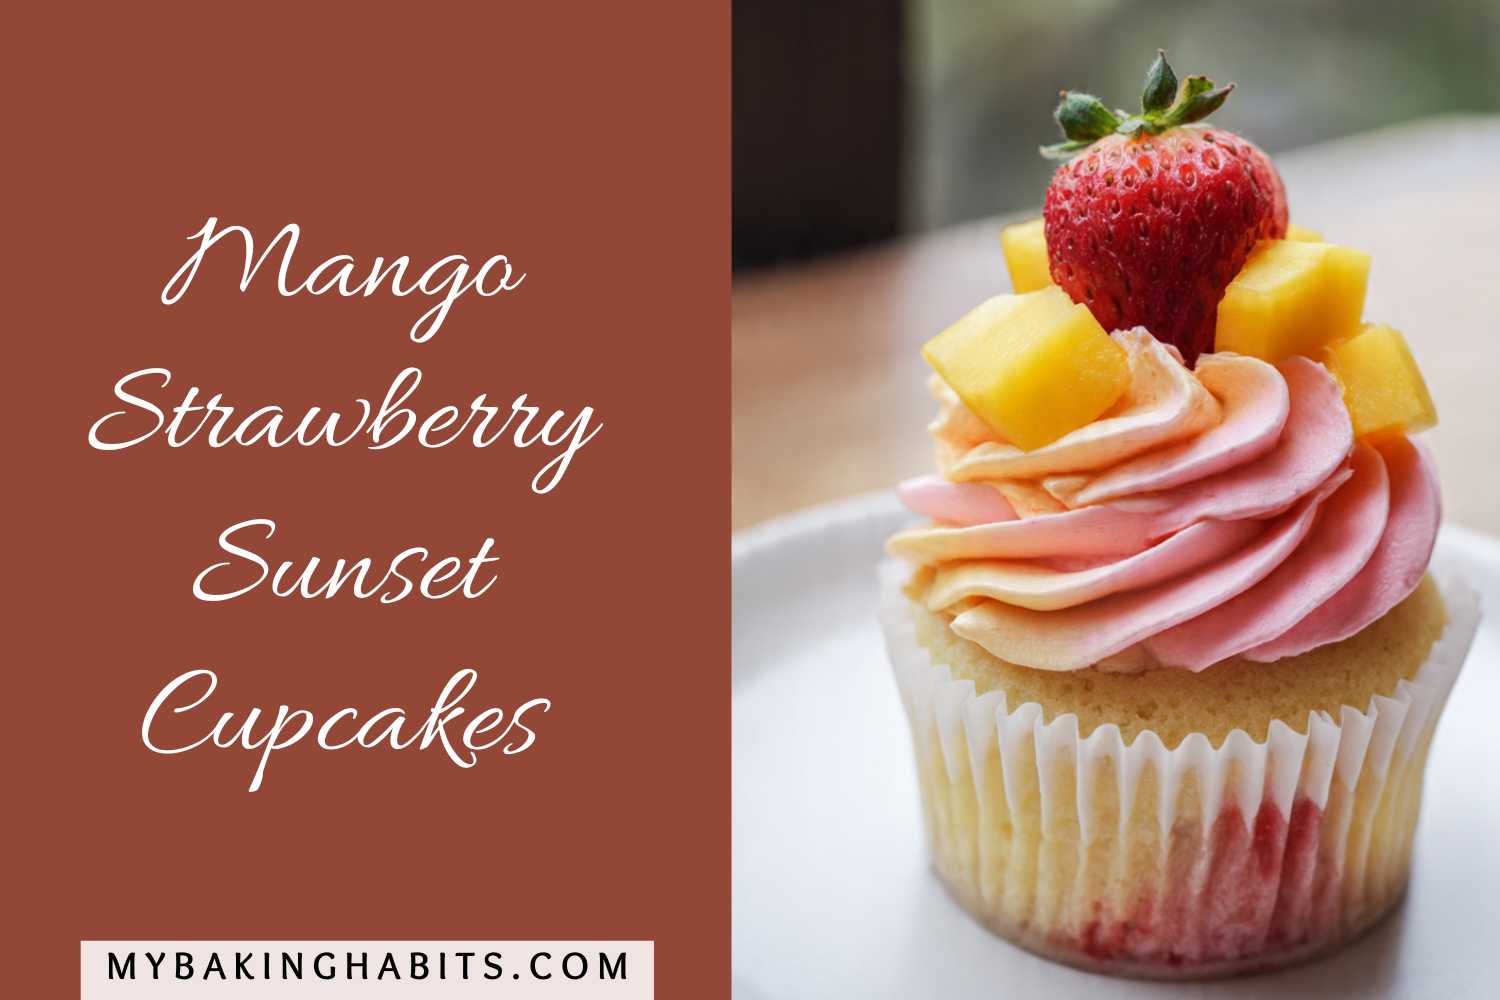
Mango Strawberry Sunset Cupcakes
These Mango Strawberry Sunset Cupcakes are the recipe I reach for every time summer fruit is at its peak and I want something that looks genuinely impressive without a full day in the kitchen. I tested six batches of these mango strawberry cupcakes over three weeks in my Los Angeles kitchen before I was happy with every element — the crumb, the frosting ratio, the garnish, the coulis drizzle. What I landed on is a cupcake that looks like it came from a boutique bakery and takes less than an hour of active work.
The vanilla crumb is soft and tender with a gentle dome — not flat, not mushroomed over the edge. The sour cream in the batter is the reason. It keeps the crumb tight and moist without making it dense, and it gives the cupcakes a subtle tang that balances the sweetness of the frosting. The strawberry swirl baked into the base of each cupcake is visible through the liner — you can see it in the photos — and it adds a concentrated berry hit in the first bite.
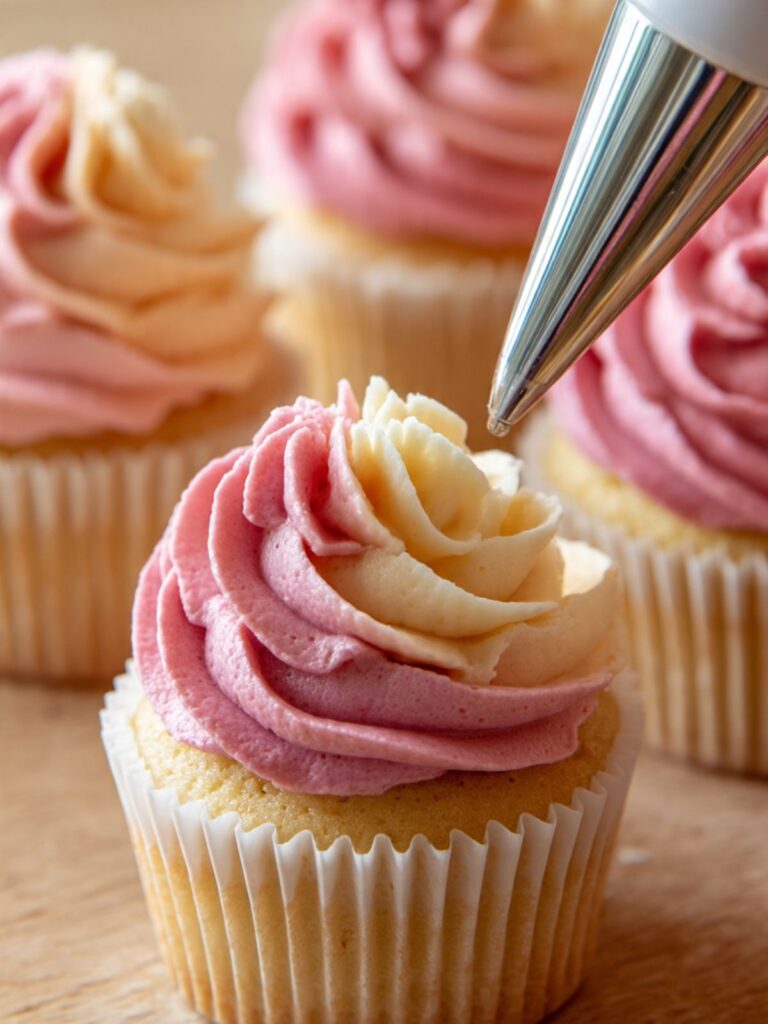
The frosting is the centerpiece. Two buttercreams — a deep rose strawberry and a soft mango peach — are loaded into a single piping bag side by side and piped in one motion. The colors blend as they come out of the tip, creating that gradient swirl from dark pink at the outer edge to pale gold at the center. It looks like a sunset, which is exactly where the name comes from.
🗒 Luna’s Note: I use freeze-dried strawberry powder in the buttercream instead of fresh purée. Fresh purée adds too much moisture and the frosting turns soft and slides off the cupcake within an hour. Freeze-dried powder gives a concentrated berry flavor and a vivid pink color without touching the consistency.
I tested the strawberry element two ways. The first batch used strawberry jam folded directly into the batter. The second used a small swirl of jam pressed into each cupcake well after portioning, right before baking. The swirl method kept the jam concentrated in one spot — you get a distinct strawberry layer in the base of the cupcake rather than a faint berry flavor dispersed through the crumb. The swirl version is what I kept and what you see in the photos.
I tested the mango buttercream with both mango extract and a reduced fresh mango purée. The extract version was flat — artificial and candy-like. The reduced purée gave a natural, bright mango flavor and a beautiful pale yellow-gold color that creates the warm peach tone in the piped swirl. The reduction takes 8 minutes on the stovetop and is worth every second.
This recipe requires a stand mixer or hand mixer for the batter and the buttercreams. No chilling required at any stage — from mixing to frosting to serving. Once the cupcakes are at room temperature and the buttercreams are piped, the garnish goes on and they are ready.
| Prep Time | Cook Time | Total Time | Yield | Difficulty |
|---|---|---|---|---|
| 35 min | 20 min | 55 min | 12 cupcakes | Intermediate |
| Calories | Fat | Carbs | Sugar | Protein |
|---|---|---|---|---|
| ~485 kcal | ~22g | ~70g | ~54g | ~4g |
Macros are approximate and will vary based on ingredient brands and serving size.
Ingredients & Tools
For the Vanilla Cupcake Batter
- 2¼ cups (270g) all-purpose flour, spooned into the measuring cup and leveled — do not pack
- 1½ tsp (6g) baking powder, checked for freshness (drop ½ tsp into hot water — it must bubble actively within 5 seconds)
- ½ tsp (3g) fine sea salt
- ½ cup (113g) unsalted butter, softened to 65–68°F (18–20°C) — press a finger into it; it should indent without resistance but hold its shape. Do not melt.
- 1 cup (200g) plain white granulated cane sugar
- 2 large eggs, at room temperature — cold eggs will break the emulsion and produce a dense, curdled-looking batter
- 1 tsp (5ml) pure vanilla extract — not imitation
- ½ cup (120ml) whole milk, at room temperature
- ½ cup (120g) full-fat sour cream, at room temperature — do not substitute low-fat; the fat content is what keeps the crumb tender
For the Strawberry Swirl
- ¼ cup (80g) good-quality strawberry jam — use a jam with visible fruit pieces, not a clear jelly
For the Strawberry Buttercream
- ½ cup (113g) unsalted butter, softened to 65–68°F (18–20°C)
- 1½ cups (180g) powdered sugar, sifted — unsifted powdered sugar causes lumps that block the piping tip
- 3 tbsp (15g) freeze-dried strawberry powder — not fresh strawberries, not freeze-dried whole berries ground at home without sifting. Grind freeze-dried strawberries in a spice grinder and sift out the seeds before using.
- 1–2 tbsp (15–30ml) heavy cream, added one tablespoon at a time to reach pipeable consistency
- Pinch of fine sea salt
For the Mango Buttercream
- ½ cup (113g) unsalted butter, softened to 65–68°F (18–20°C)
- 1½ cups (180g) powdered sugar, sifted
- 3 tbsp (45ml) mango purée reduction — made from ½ cup (120ml) fresh or thawed frozen mango purée reduced on the stovetop to 3 tbsp. Do not use mango extract.
- 1 tbsp (15ml) heavy cream, if needed for consistency
- Pinch of fine sea salt
For the Mango Coulis (Optional Drizzle)
- ½ cup (120ml) fresh or thawed frozen mango purée
- 1 tbsp (12g) granulated sugar
- 1 tsp (5ml) fresh lime juice
For the Fresh Fruit Garnish
- 1 cup (about 165g) fresh ripe mango, cut into ½-inch (1.2cm) cubes — approximately 4–6 cubes per cupcake
- 12 fresh strawberries, whole with green hull intact — choose berries of similar size so every cupcake looks consistent
Necessary Tools
- Stand mixer fitted with the paddle attachment, or a hand mixer with a large mixing bowl
- Second large mixing bowl for the dry ingredients
- Whisk
- Silicone spatula
- Standard 12-cup muffin tin — light-colored aluminum, not dark non-stick (dark pans cause overbrowning on the cupcake sides before the center sets)
- 12 standard white paper cupcake liners
- Small offset spatula or butter knife for the jam swirl
- Kitchen scale (strongly recommended — gram weights are more reliable than volume for every ingredient in this recipe)
- Oven thermometer — most home ovens run 15–25°F (8–14°C) off
- Small saucepan for the mango purée reduction and coulis
- Large piping bag — 16-inch minimum to hold both buttercreams side by side
- Wilton 1M open star piping tip, or equivalent large open star tip
- Wire cooling rack
Before You Start
Gram weights are more reliable than volume for every ingredient in this recipe. Use a kitchen scale wherever possible.
This recipe uses the creamed butter method — a stand mixer fitted with the paddle attachment or a hand mixer with a large bowl is required. No chilling required at any stage.
Temperature prep — do this 45–60 minutes before you begin: Pull the butter for the batter and both buttercreams (340g total) from the refrigerator and leave at room temperature. At 65–68°F (18–20°C), butter will hold its shape when pressed but indent without resistance. In a warm Los Angeles kitchen in summer, 30 minutes is often enough — in a cooler kitchen, allow the full 60 minutes. Do not speed this up with the microwave. Melted or greasy butter produces flat, dense cupcakes and buttercream that will not hold a piped swirl.
Pull both eggs and the sour cream from the refrigerator at the same time. Cold eggs dropped into creamed butter break the emulsion — the batter will look curdled and separated, and the finished cupcakes will be dense and uneven. Cold sour cream has the same effect. Both need a minimum 45 minutes at room temperature before mixing begins.
Flour measuring method: Spoon the flour into the measuring cup using a separate spoon and level it off with a straight edge — do not scoop the cup directly into the flour bag. Scooping packs 20–30% more flour into the cup than the recipe calls for, which produces a dry, dense crumb. If you are using a kitchen scale, measure 270g directly — this is always more accurate than volume.
Leavening freshness check: Before measuring the baking powder, confirm it is fresh. Drop ½ teaspoon into a small bowl of hot water — it must bubble actively within 5 seconds. If it fizzes weakly or not at all, the baking powder is expired and the cupcakes will not rise properly. The domes will be flat and the crumb will be dense regardless of how long you cream the butter. Replace it before baking.
Make the mango purée reduction first — before mixing the batter. Pour ½ cup (120ml) fresh or thawed frozen mango purée into a small saucepan over medium-low heat. Stir frequently and cook for 8–10 minutes until reduced to 3 tablespoons (45ml). It will thicken slightly and deepen in color. Pour into a small bowl and let it cool completely to room temperature before adding it to the buttercream. Warm purée melts softened butter on contact and breaks the frosting.
Preheat the oven to 350°F (175°C) at least 20 minutes before baking. Confirm the actual temperature with an oven thermometer — most home ovens read incorrectly. Position the rack in the middle of the oven.
Line the muffin tin with 12 paper liners before the batter is mixed. Do not grease the liners. Use a light-colored aluminum muffin tin — dark non-stick pans absorb more heat and cause the cupcake sides to overbrown before the centers set. If a dark tin is all you have, reduce the oven temperature to 325°F (163°C) and check at 16 minutes.
Note on liner staining: The strawberry jam swirl pressed into each cupcake well will bleed slightly through the paper liner during baking, producing a soft pink stain at the base of each cupcake. This is visible in the photos and is the correct result — it is not a sign of overfilling or a wet liner.
How to Make Mango Strawberry Sunset Cupcakes
Step 1: Making the Mango Purée Reduction
In your small saucepan over In your small 1-quart (1-litre) saucepan over medium-low heat, pour your ½ cup (120ml) fresh or thawed frozen mango purée. Stir continuously with a silicone spatula, scraping the bottom and sides of the pan every 30 seconds. The purée will bubble gently — if it is boiling hard, reduce the heat immediately. Cook for 8–10 minutes until the volume reduces to exactly 3 tablespoons (45ml). The reduction is ready when it coats the back of a spatula and holds a line when you draw your finger through it.
The reduction concentrates the mango flavor so intensely that 3 tablespoons delivers more real mango taste than a full cup of fresh purée folded raw into the frosting. Raw purée adds too much moisture and collapses the buttercream structure within minutes of piping.
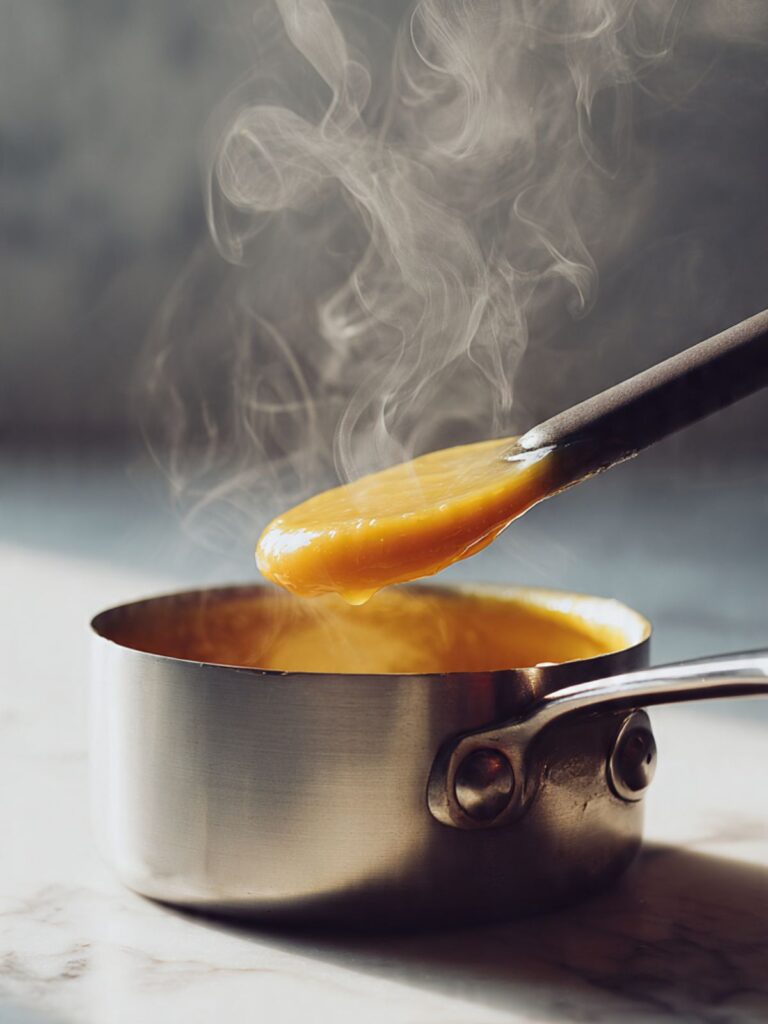
The finished reduction should be thick, glossy, and a deep amber-gold — not pale yellow and watery. Pour it into a small bowl, press a piece of plastic wrap directly against the surface to prevent a skin from forming, and set aside to cool completely. Do not rush this cooling step — warm reduction added to softened butter will melt it on contact and the mango buttercream will be liquid, not pipeable.
Your reduction is cooling while you move to the batter — check it is at room temperature before you begin the mango buttercream.
Step 2: Whisking the Dry Ingredients Until Fully Combined
In your large mixing bowl, add your 2¼ cups (270g) all-purpose flour, 1½ tsp (6g) baking powder, and ½ tsp (3g) fine sea salt. Whisk together for 30 full seconds — not a quick stir. The baking powder must be evenly distributed through the flour before the wet ingredients go in. A pocket of concentrated baking powder in the finished batter creates a bitter, soapy taste in the cupcake directly above it.
The all-purpose flour provides the structure that holds the dome. Cake flour would produce a more delicate, fragile crumb that collapses under the weight of the tall piped frosting swirl — this is why AP flour is the correct choice here.
⚠️ Do not skip the 30-second whisking time — if the dry ingredients are stirred only briefly, the baking powder will not distribute evenly. When this happens, you will not see it in the batter, but you will taste it in the finished cupcake: one bite will be normal and the next will have a sharp, soapy bitterness where the concentrated baking powder pocket baked. The fix is at this step only — once the wet ingredients go in, the distribution is locked in.
The whisked dry ingredients should look uniform pale white with no visible clumps — if you see small white lumps, those are baking powder clumps. Break them up and whisk again for another 15 seconds. Set this bowl aside and move to your stand mixer.
Your dry ingredients are ready — the next step builds the batter base.
Step 3: Creaming the Butter and Sugar Until Pale and Significantly Increased in Volume
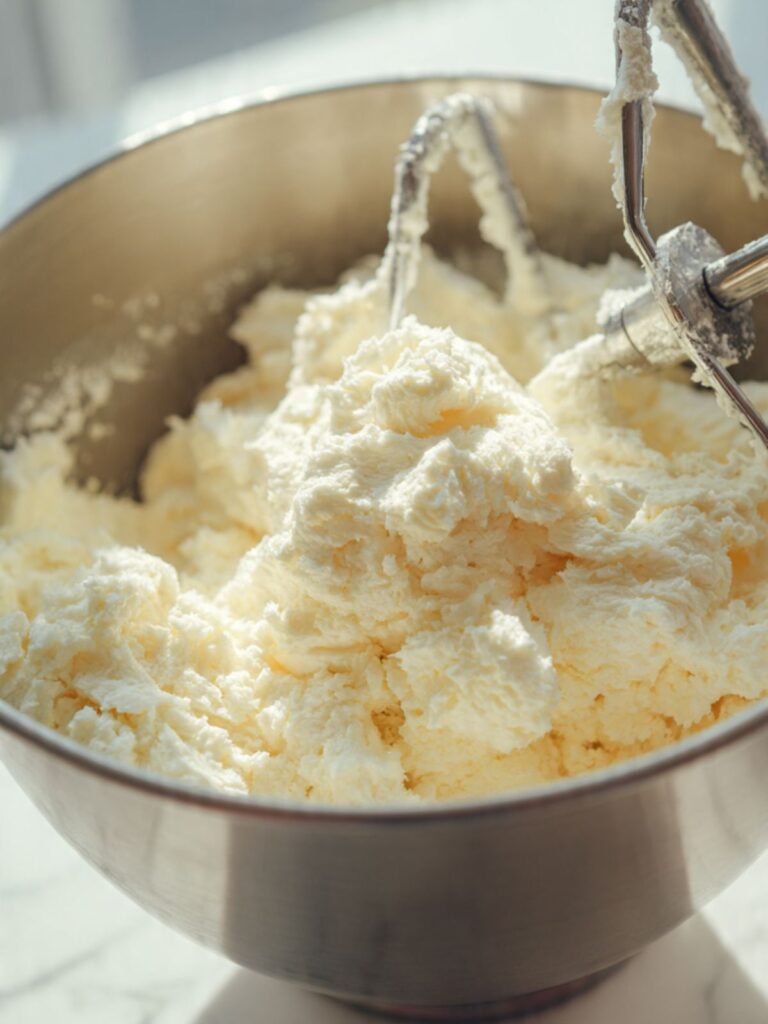
In the bowl of your stand mixer fitted with the paddle attachment, add your ½ cup (113g) softened unsalted butter and 1 cup (200g) plain white granulated cane sugar. Start on the lowest speed for 30 seconds to bring the ingredients together, then increase to medium speed (speed 4 on a KitchenAid). Beat for exactly 4 minutes — set a timer. Do not estimate.
The granulated sugar crystals cut into the butter during creaming, creating thousands of tiny air pockets. Those air pockets expand in the oven and are what gives these cupcakes their gentle dome and light, tender crumb. Under-creaming — stopping at 2 minutes because the mixture looks combined — produces flat-topped, dense cupcakes. The volume difference between 2 minutes and 4 minutes of creaming is visible: the mixture nearly doubles.
🗒 Luna’s Note: In my LA kitchen in summer, my butter sometimes softens past 68°F before I get to it. If the butter looks shiny and greasy rather than fluffy after 2 minutes of creaming, it is too warm. Stop, scrape the bowl into a container, refrigerate for 10 minutes, then return it to the mixer and continue. Warm butter traps no air and the cupcakes will bake flat.
After 4 minutes, the mixture should be noticeably pale — nearly white rather than yellow — and have increased significantly in volume. It should look fluffy and light, not dense and yellow. If it still looks yellow and dense, beat for another 60 seconds and check again. Do not move to the next step until this visual is achieved.
Your creamed butter and sugar are ready — eggs go in next.
Step 4: Adding the Eggs and Vanilla Without Breaking the Emulsion
With the mixer on low speed, add your 2 large room-temperature eggs one at a time. Add the first egg and wait until it is fully incorporated — approximately 20 seconds — before adding the second. After both eggs are in, add your 1 tsp (5ml) pure vanilla extract. Increase to medium speed and beat for 30 seconds until the mixture looks smooth and cohesive.
The eggs emulsify the fat and liquid in the batter — they are the structural bridge that holds everything together. Adding cold eggs to warm creamed butter creates a temperature shock that breaks the emulsion. When this happens, the batter looks curdled and separated — small wet lumps in a greasy liquid. A slightly curdled batter will usually bake out, but the cupcakes will be noticeably denser and the dome will be less pronounced.
The batter at this stage should look smooth, pale, and slightly glossy — like a thick, pale yellow cream. If it looks broken or curdled, do not panic. Add 1 tablespoon of your measured flour and beat on medium for 30 seconds — this usually pulls the emulsion back together. Scrape down the sides and bottom of the bowl with your silicone spatula before the next step.
Your egg mixture is smooth and ready — the dry and wet ingredients combine next.
Step 5: Alternating the Dry Ingredients, Milk, and Sour Cream for a Tender Crumb
With the mixer on the lowest speed, add the dry ingredients and the wet ingredients in alternating additions — this is called the ABAB method and it keeps the batter emulsified throughout. Add in this exact order:
— One third of the dry ingredients → mix on low 10 seconds — All of the ½ cup (120ml) whole milk → mix on low 10 seconds — One third of the dry ingredients → mix on low 10 seconds — All of the ½ cup (120g) full-fat sour cream → mix on low 10 seconds — Final third of the dry ingredients → mix on low until just combined — approximately 15 seconds
Stop the mixer the moment the last streak of flour disappears. Switch to your silicone spatula and finish with 3–4 slow folds from the bottom of the bowl upward to catch any unmixed flour at the base.
⚠️ Do not overmix. The warning sign happens in the bowl before the pan goes in — an overmixed batter looks slightly elastic and pulls away from the spatula in one stretchy mass rather than falling in a heavy ribbon. If you see the batter clinging and stretching rather than dropping cleanly, stop immediately. The finished cupcakes from an overmixed batter will have a tight, rubbery crumb that no amount of sour cream or correct bake time can correct — gluten development is irreversible once it has happened.
The sour cream adds fat and acidity. The fat keeps the crumb moist for days after baking. The acidity reacts gently with the baking powder and tenderizes the gluten strands, which is why these cupcakes stay softer longer than cupcakes made with milk alone.
The finished batter should look thick, smooth, and pale — it should fall from the spatula in a slow, heavy ribbon. If it looks thin and pourable, the butter was too warm or the milk was too cold. If it looks lumpy, the dry ingredients were not fully incorporated — fold gently 2–3 more times and stop. Do not mix further.
Your batter is complete — portion it into the lined tin next.
Step 6: Portioning the Batter and Adding the Strawberry Swirl
Using a standard cookie scoop or a ¼ cup (60ml) measure, portion the batter evenly across all 12 lined cups. Each cup should be filled to exactly half full — not two-thirds, not three-quarters. The strawberry jam goes on top of the batter in the next step and the cupcakes will rise during baking. Overfilling at this stage causes the cupcakes to overflow and mushroom over the edge of the liner.
Weigh the first portion on your kitchen scale — it should be approximately 55–60g of batter per cup. Use that as your calibration for the remaining 11 cups.
Once all cups are half filled, spoon 1 teaspoon (approximately 7g) of strawberry jam into the center of each cup. Using a small offset spatula or the tip of a butter knife, press the jam gently into the batter — do not stir it in. You want it to sit as a concentrated pocket just below the surface, not dispersed through the crumb. As you can see in the photos, the jam bakes into the base of each cupcake and is visible as a pink stain through the liner — this is the correct result.
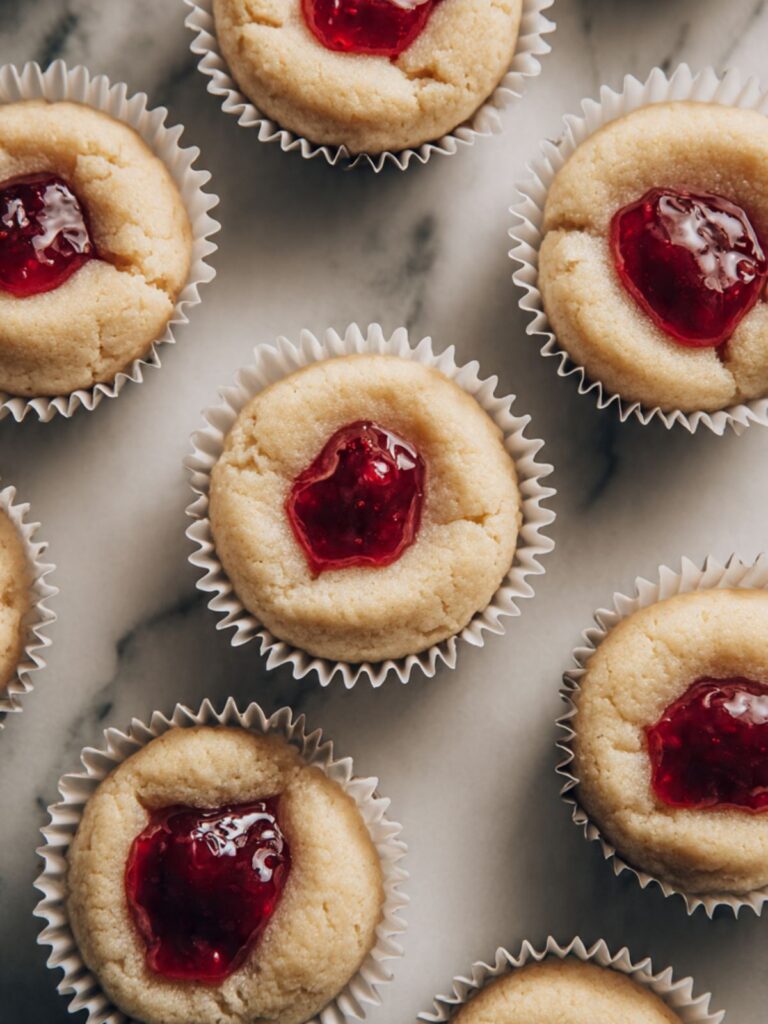
Each cup should look half-filled with batter and have a visible dot of deep red jam pressed into the center — not stirred in, not swirled to the edges. Do not add more jam than specified — excess jam sinks to the bottom and makes the liner wet and fragile.
Your filled tin is ready — it goes into the preheated oven now.
Step 7: Baking Until the Tops Spring Back and the Edges Pull Slightly from the Liner
Slide the filled muffin tin onto the middle rack of your preheated 350°F (175°C) oven. Bake for 18–22 minutes. Begin checking at 18 minutes. Do not open the oven door before 18 minutes — the sudden temperature drop can cause the centers to sink before the structure sets.
The cupcakes are done when the tops spring back immediately when lightly pressed with one finger, and a toothpick inserted in the center comes out with a few moist crumbs — not wet batter, not completely clean. The edges of each cupcake will have pulled very slightly away from the paper liner. The tops should be pale golden, domed, and matte — not shiny, not sunken, not cracked.
Do not bake until the toothpick comes out completely clean. A clean toothpick means the cupcakes have passed their optimal window — the crumb will be drier than what is shown in the photos.
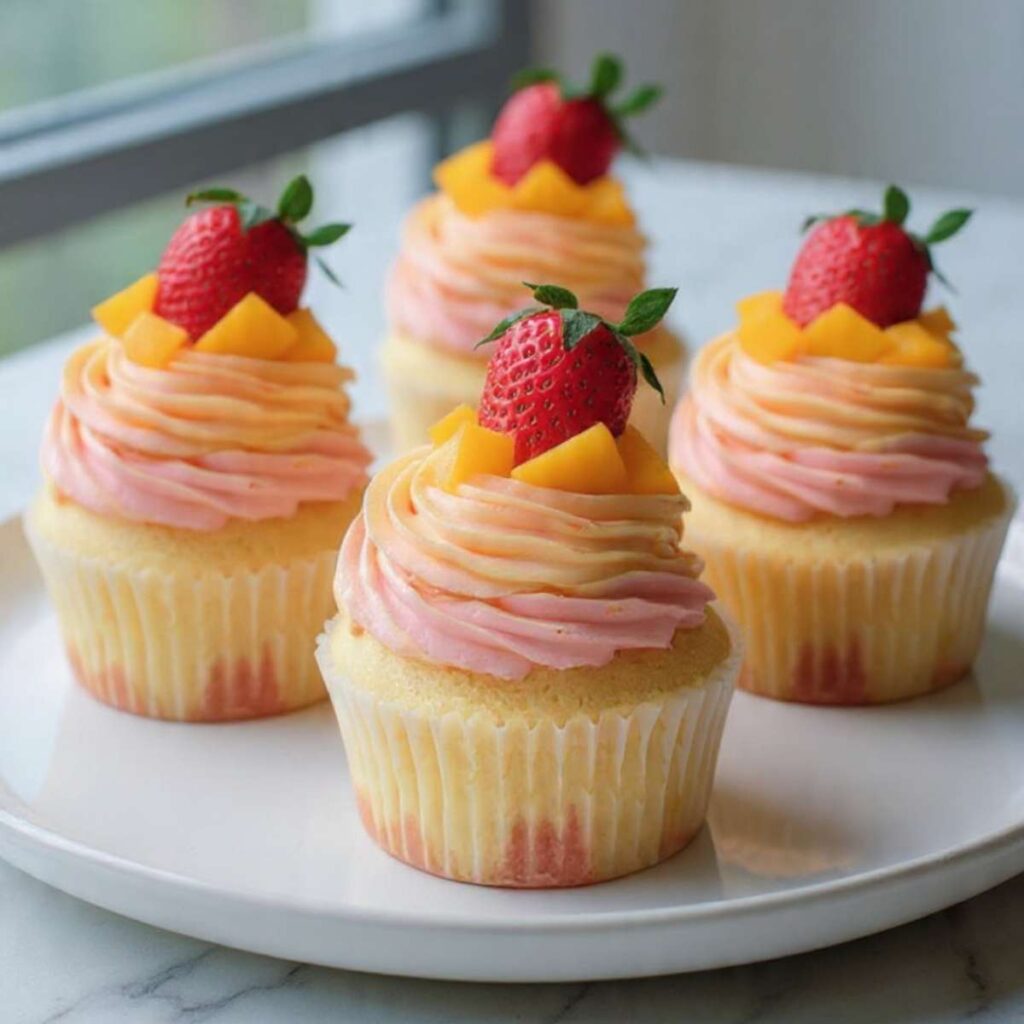
As you can see in the batch shot, the finished cupcakes have a gentle, even dome with pale golden color across the top — not browned, not flat. The paper liner sits close against the cupcake with no gap at the base, which tells you the fill level was correct and the bake was even.
Leave the cupcakes in the tin for exactly 5 minutes after pulling from the oven — do not move them. The pan conducts residual heat into the cupcake base during this time and finishes the set without the oven drying them out further. After 5 minutes, transfer each cupcake to a wire cooling rack. Cool completely to room temperature — minimum 45 minutes — before frosting. Frosting warm cupcakes melts the buttercream on contact and the piped swirl will slide off within minutes.
Your cupcakes are cooling — make both buttercreams while you wait.
Step 8: Making the Strawberry Buttercream
Wash and dry the mixer bowl and paddle attachment. Add your ½ cup (113g) softened unsalted butter to the clean bowl. Beat on medium speed for 2 minutes until the butter is pale and fluffy. Reduce to low speed and add your 1½ cups (180g) sifted powdered sugar in three additions — add one third, wait until it is incorporated before adding the next. Adding all the powdered sugar at once causes a cloud of sugar dust and an uneven mix.
Add your 3 tbsp (15g) freeze-dried strawberry powder and a pinch of fine sea salt. Increase to medium speed and beat for 2 minutes. Add 1 tablespoon (15ml) of heavy cream and beat for 30 seconds. Check the consistency — the buttercream should hold a firm peak when you lift the paddle and should feel smooth, not gritty. If it is too stiff to pipe smoothly, add the second tablespoon of cream and beat for another 20 seconds.
The freeze-dried strawberry powder is non-negotiable for consistency. Fresh strawberry purée adds 2–3 tablespoons of liquid to the buttercream — enough to make it too soft to hold the tall piped swirl shown in the photos. Freeze-dried powder delivers concentrated strawberry flavor and a vivid deep rose color without adding any moisture.
The finished strawberry buttercream should be deep rose-pink, smooth, and hold a firm peak for at least 5 seconds when you lift the paddle. If it looks pale pink and soft, add another teaspoon of strawberry powder and beat for 30 seconds. Scrape into one side of a bowl and set aside.
Your strawberry buttercream is done — make the mango buttercream now.
Step 9: Making the Mango Buttercream
Wipe the mixer bowl and paddle attachment clean with a paper towel — remove all visible traces of the strawberry buttercream. Any remaining deep rose pigment will bleed into the mango buttercream and shift it from pale amber-gold to a muted pink — the two-toned gradient effect depends on the mango buttercream being a distinctly different, warm gold color. A quick wipe is sufficient — you do not need to wash and fully dry the bowl, but the bowl must look clean before the butter goes in.
Add your second ½ cup (113g) softened unsalted butter to the wiped bowl. Beat on medium speed for 2 minutes until pale and fluffy. Add your 1½ cups (180g) sifted powdered sugar in three additions on low speed, exactly as in the strawberry buttercream. Add your 3 tbsp (45ml) fully cooled mango purée reduction and a pinch of fine sea salt. Increase to medium and beat for 2 minutes.
Check the consistency. The mango buttercream should be smooth, pale amber-gold, and hold a firm peak. If the reduction made it slightly softer than the strawberry buttercream, add 1 tablespoon (15ml) of heavy cream and beat for 20 seconds — this tightens the emulsion rather than loosening it at this stage. If it is still too soft, refrigerate for 10 minutes and beat again briefly before loading the piping bag.
The finished mango buttercream should be pale gold — the color of ripe peach flesh — smooth, and hold a firm peak that matches the strawberry buttercream in stiffness. If it looks pink rather than gold, the bowl retained strawberry pigment — the color cannot be corrected at this point. Make a fresh batch in a clean bowl. Both buttercreams must be the same consistency for the split-bag piping to work correctly — if one is stiffer than the other, they will not pipe out at the same rate and the ombre effect will be uneven.
Your two buttercreams are ready — load the piping bag next.
Step 10: Loading the Split Piping Bag for the Ombre Swirl
Fit your large 16-inch piping bag with the Wilton 1M open star tip. Hold the bag open with one hand or set it tip-down in a tall glass. Using your silicone spatula, spoon the strawberry buttercream down one side of the bag — press it firmly against the bag wall from the tip to halfway up. Spoon the mango buttercream down the opposite side of the bag in the same way. The two buttercreams should sit side by side inside the bag without fully mixing.
Do not stir or swirl the two buttercreams together at this stage. The gradient effect happens automatically as they come out of the star tip simultaneously — the colors blend where they meet at the tip opening, creating the transition from deep rose at the outer edge to pale gold at the center that is visible in the photos.
Twist the top of the bag closed and squeeze gently until both colors appear at the tip. Pipe one test swirl onto a piece of parchment to confirm the gradient is forming correctly before piping onto the cupcakes.
The test swirl should show both colors coming out simultaneously — deep rose on one side, pale gold on the other, blending where they meet. If only one color is coming out, the other buttercream is too stiff. Remove it from the bag, beat it briefly with a tablespoon of cream, and reload.
Your piping bag is loaded — pipe the cupcakes now.
Step 11: Piping the Sunset Swirl and Adding the Fresh Fruit Garnish
Hold the piping bag vertically, tip pointing straight down, approximately ½ inch (1.2cm) above the outer edge of the first cooled cupcake — not the center. Apply steady, even pressure and pipe in a continuous circular motion inward toward the center, completing one full ring close to the outer edge of the cupcake top. Without lifting or releasing pressure, continue spiraling inward and upward in progressively tighter circles, building height with each pass toward the center. Finish at the center peak by releasing pressure sharply and pulling the tip straight up to create a defined point. The entire swirl takes 4–5 seconds of continuous, even pressure.
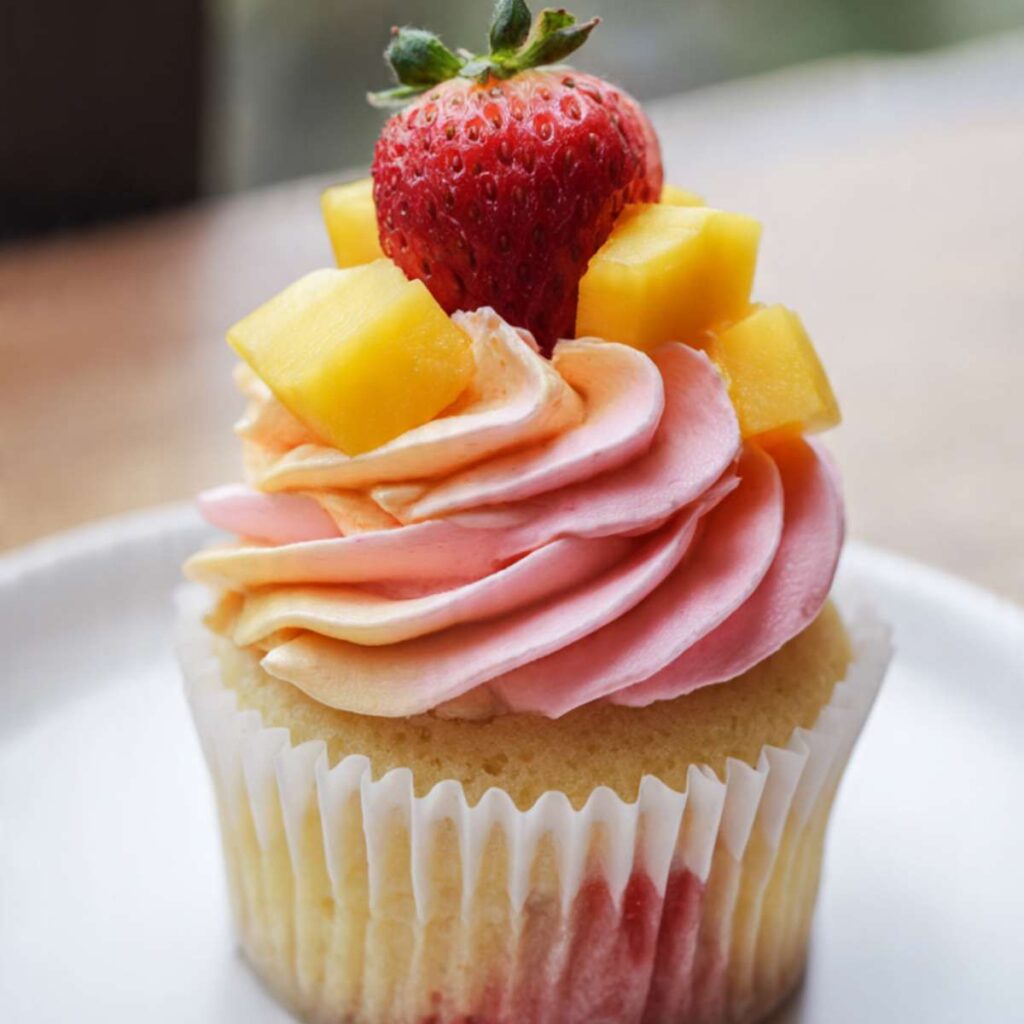
As you can see in the close-up photo, the finished swirl builds from a wide base at the outer edge of the cupcake and rises to a defined center peak — the ridges from the star tip run in concentric rings inward and upward. Starting at the outer edge and spiraling inward is what creates this structure. Starting from the center and spiraling outward produces the opposite shape — a flat, wide swirl that spreads rather than rises, and the gradient reads differently because the color placement is reversed.
Do not stop and restart mid-swirl — stopping creates a visible seam line in the frosting where the two passes meet. Do not rush — too fast and the star tip ridges will be shallow and undefined. The gradient from deep rose at the outer base to pale gold at the center peak intensifies naturally as the swirl builds height, because the two buttercreams shift pressure distribution with each inward pass.
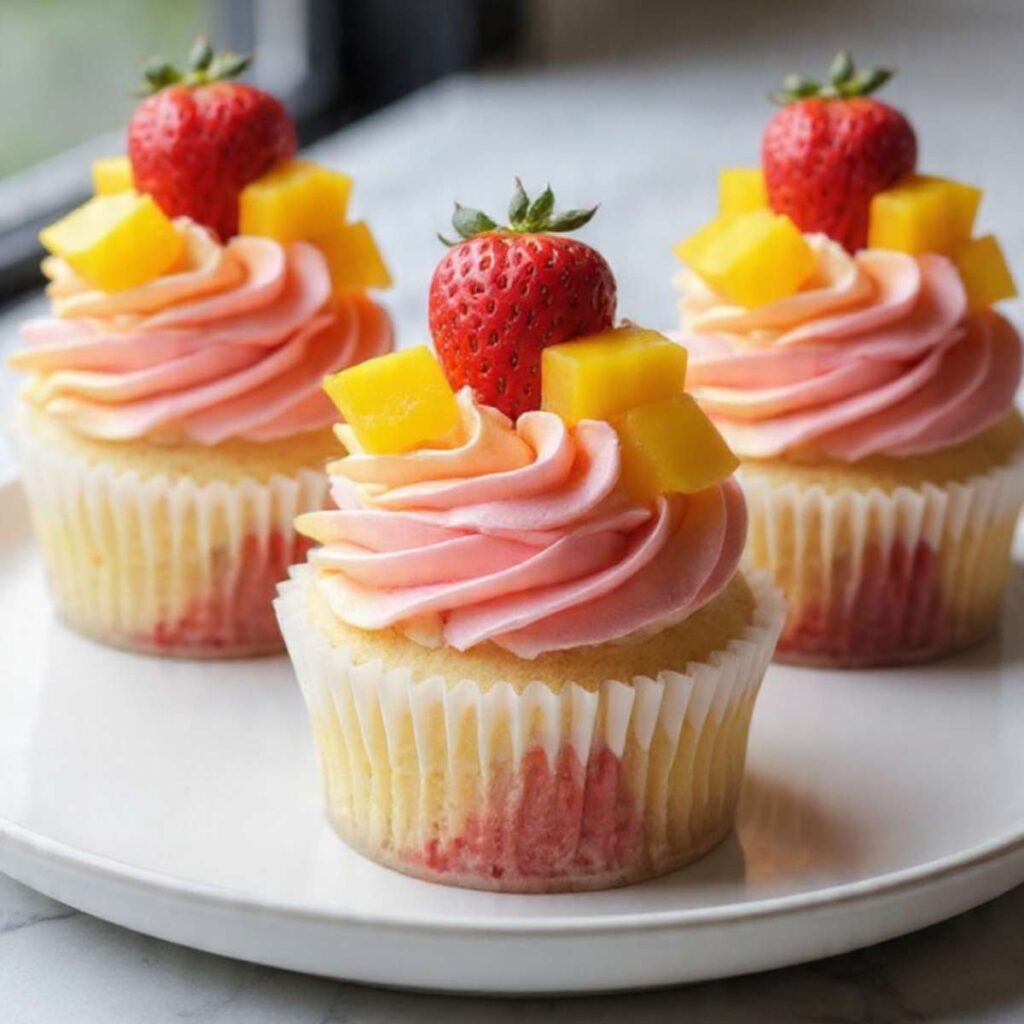
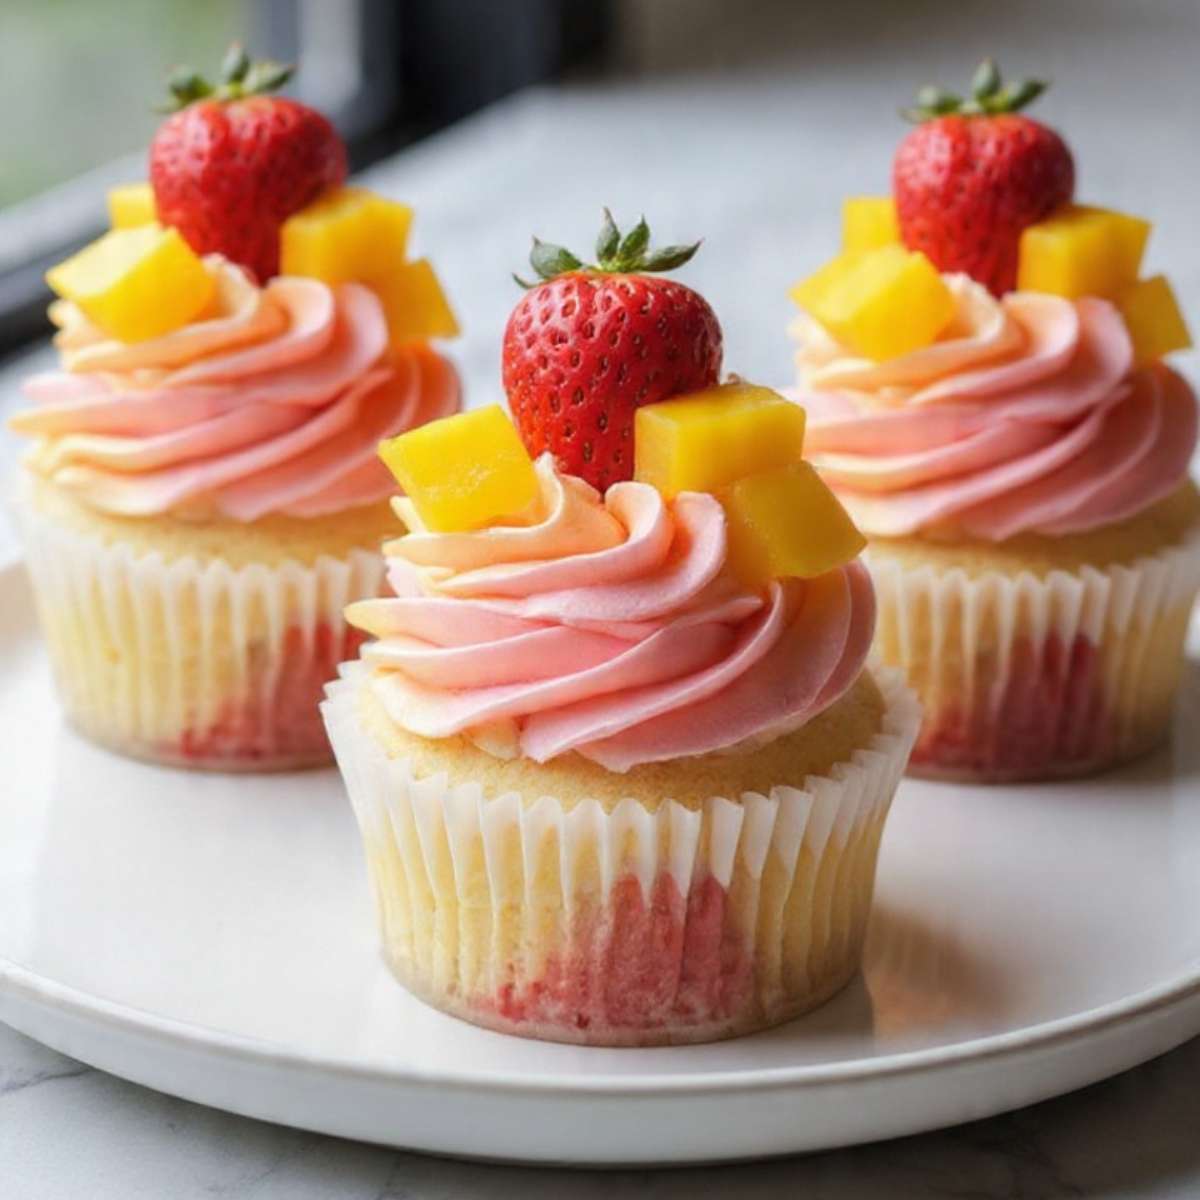
Immediately after piping each cupcake, press 4–6 fresh mango cubes into the frosting around the upper portion of the swirl, then set 1 whole strawberry with hull intact upright in the center peak. The garnish must go on while the frosting is freshly piped — the surface is slightly tacky and will hold the fruit securely. Frosting that has been sitting for more than 8–10 minutes starts to crust and the fruit will not adhere cleanly. Pipe and garnish one cupcake at a time rather than piping all 12 first.
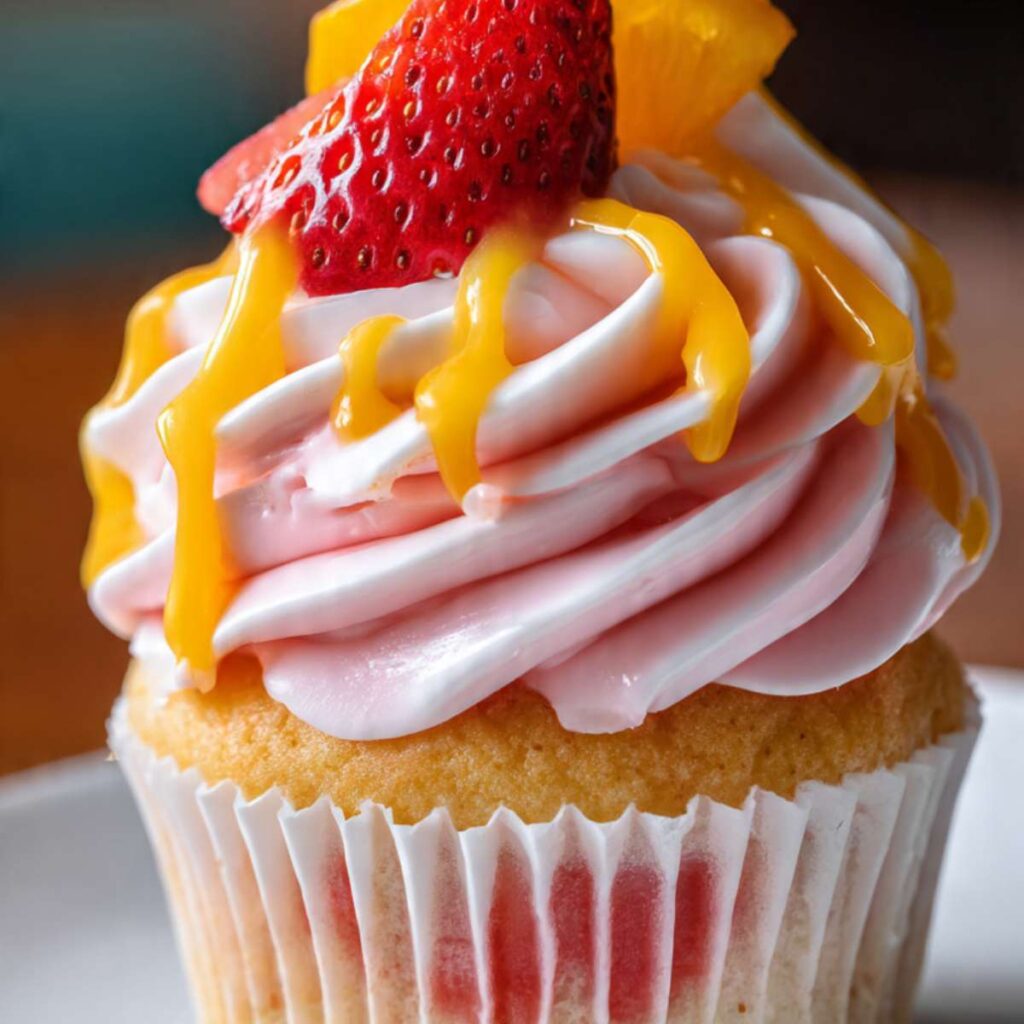
For the coulis drizzle variant: For this finish, use a sliced strawberry half placed cut-side down on the frosting rather than a whole strawberry — the flat cut surface sits more securely against the swirl when the coulis makes the surface slightly slick. Combine your ½ cup (120ml) mango purée, 1 tbsp (12g) granulated sugar, and 1 tsp (5ml) fresh lime juice in a small saucepan over low heat. Stir for 3–4 minutes until the sugar dissolves and the coulis is smooth and pourable. Cool to room temperature, then transfer to a small squeeze bottle or a zip-lock bag with one corner snipped. Drizzle in thin ribbons across the piped frosting swirl before adding the fruit garnish — the coulis goes on the frosting first, then the fruit is pressed on top. This is the order visible in the photos.
The finished cupcake should look exactly like the hero image — a tall inward-spiraling swirl from wide outer base to defined center peak, deep rose at the outer rings fading to pale gold at the center, scattered mango cubes sitting proud in the upper frosting, and one whole strawberry centered at the peak. If the swirl looks flat and wide rather than tall and defined, the piping started from the center rather than the outer edge — begin the next cupcake at the outer rim.
These cupcakes are ready to serve immediately, or cover loosely and hold at room temperature for up to 2 hours before adding the fruit garnish.
The Science Behind Mango Strawberry Sunset Cupcakes
Why Sour Cream Builds a Dome That Holds the Weight of the Frosting
Sour cream does two things in this batter that milk alone cannot. First, it adds fat — full-fat sour cream is approximately 20% fat by weight, which coats the gluten strands during mixing and physically limits how much they can tighten. Tighter gluten means tougher crumb. More fat means a softer, more tender bite that stays that way on day two. Second, sour cream is acidic. That acidity reacts with the baking powder during baking — producing a slightly faster, more controlled rise and a more open, tender crumb structure than a neutral liquid produces.
The dome itself comes from the creaming stage, not the leavening. When softened butter and granulated sugar are beaten together at medium speed for 4 minutes, the sharp edges of the sugar crystals cut thousands of microscopic air pockets into the butter. Those air pockets expand when exposed to oven heat, pushing the batter upward from the inside. The baking powder stabilizes and extends that rise, but the initial structural lift comes from the air trapped during creaming. This is why butter temperature is non-negotiable — butter above 70°F (21°C) is too soft to trap air pockets, and butter below 60°F (15°C) is too firm for the sugar crystals to penetrate. Both produce flat-topped cupcakes regardless of how long you cream them. The dome you see in the photos is built before the pan goes into the oven.
Why Freeze-Dried Strawberry Powder Outperforms Fresh Purée in Buttercream
Fresh strawberry purée is approximately 90% water by weight. Adding 3 tablespoons of fresh purée to a buttercream introduces enough liquid to shift the fat-to-liquid ratio past the point where the emulsion holds — the result is a soft, glossy frosting that looks beautiful for about 20 minutes and then begins to weep and slide. Freeze-dried strawberry powder contains less than 2% moisture. It delivers concentrated strawberry flavor and a vivid, stable pigment without changing the water content of the buttercream at all. The piped swirl holds its shape and its color for hours at room temperature. The same moisture logic applies to the mango buttercream — raw mango purée is a high-moisture liquid that oversaturates the emulsion if added unreduced. Eight minutes of reduction removes 62% of the water volume while concentrating the natural fruit sugars, which is what produces the thick, pipeable frosting and the pale amber-gold color visible in the photos. If you are curious about how other fruit-forward frostings handle this same moisture problem, the strawberry crunch cupcakes article covers a cream cheese base that behaves differently under the same conditions.
🗒 Luna’s Note: I grind freeze-dried strawberries in a small spice grinder and sift the powder through a fine mesh sieve before adding it to the buttercream. The seeds that remain in the sieve would block a Wilton 1M tip mid-pipe — sifting takes 30 seconds and prevents a ruined swirl.
How the Split-Bag Technique Creates the Ombre Gradient
The two-toned gradient in the frosting is not painted on and it is not two separate frostings piped in separate passes. It comes from loading two different colored buttercreams side by side into a single piping bag so they sit against each other without mixing. When pressure is applied to the bag, both buttercreams are forced through the star tip simultaneously. At the tip opening, where the two colors meet, they blend into a transition zone — the deep rose and pale gold merge into a warm peach at the boundary. The gradient intensifies as the swirl builds inward and upward because the pressure distribution shifts slightly with each tighter circular pass. The result is a swirl that is darkest pink at the wide outer base and palest gold at the inner center peak — exactly the sunset gradient visible in all five photos. Consistency between the two buttercreams is what makes this work. If one is stiffer than the other, it resists the pressure while the softer one flows freely, and the swirl becomes one-sided rather than blended.
Mango Strawberry Sunset Cupcakes Troubleshooting & Pro-Tips
Your Cupcakes Baked Flat Instead of Domed
The dome comes from the creaming stage — not the oven. If the tops baked flat, the butter was either too warm or too cold when creaming began, or the creaming time was cut short. Butter above 70°F (21°C) looks shiny and greasy in the mixer rather than fluffy and pale — it cannot trap air regardless of how long it is beaten. Butter below 60°F (15°C) is too firm for the sugar crystals to cut through — it will look crumbly rather than cohesive after 4 minutes of creaming. The fix for future batches is to check butter temperature with an instant-read thermometer before starting — the target is 65–68°F (18–20°C). If the batter was the correct consistency and the cupcakes still baked flat, confirm the oven reached full temperature before the tin went in — an underheated oven allows the fat to melt and spread before the structure sets. Use an oven thermometer on the middle rack to verify.
Your Cupcakes Have Overbrowning on the Sides or a Tight, Dark Base
Overbrowning on the sides and a dark, tight base are the signature of a dark non-stick muffin tin. Dark pans absorb significantly more radiant heat than light-colored aluminum — the exterior of each cupcake receives more heat than the interior can keep pace with, producing sides and bases that overbake before the center crumb sets. The result is a pale, slightly underdone center dome sitting on an overbaked, tight base — visible when you peel back the liner. Light-colored aluminum is the correct pan for this recipe. If a dark tin is all you have, reduce the oven temperature to 325°F (163°C), place the tin on the middle rack, and begin checking at 16 minutes. Do not attempt to compensate by reducing bake time alone without reducing temperature — the surface will underbake before the interior damage is prevented.
Your Cupcakes Have a Flat Top and Dense Crumb Despite Correct Creaming — Stale Baking Powder
If the creaming produced the correct pale, fluffy result and the batter looked right going into the oven but the cupcakes still baked flat and dense, the baking powder is the most likely cause. Baking powder loses its leavening power gradually after the container is opened — it can test as chemically present but produce significantly weaker lift than fresh powder. Drop ½ teaspoon into a small bowl of hot water immediately. If it does not bubble actively within 5 seconds, the baking powder is expired. Expired leavening cannot be compensated for at any other point in the recipe — the batch cannot be saved once baked. Replace the baking powder and repeat. Opened baking powder stored in a humid environment loses potency faster than the best-by date suggests — store it sealed in a cool, dry place and replace every 6 months regardless of the date on the container.
Your Cupcake Batter Looks Curdled or Broken
A curdled batter is an emulsion that has broken — the fat and liquid are no longer bonded together. This happens when cold eggs meet warm creamed butter, when the eggs are added too quickly, or when the sour cream is too cold. The batter will look like wet scrambled eggs — lumpy, separated, with a greasy sheen. The fix in the moment: add 1 tablespoon of your measured flour to the broken batter and beat on medium speed for 30 seconds. The flour acts as an emulsifier and usually pulls the batter back together. If the batter is severely broken, add a second tablespoon and beat for another 30 seconds. A slightly curdled batter that was rescued with flour will produce cupcakes that are marginally denser than the ideal result but still fully edible. Prevention: pull eggs from the refrigerator at the same time as the butter — minimum 45 minutes before mixing — and add them one at a time with the mixer running.
Your Buttercream Is Too Soft to Hold the Piped Swirl
Soft buttercream that slumps rather than holds a peak has too much liquid relative to fat — caused by butter that was too warm when beaten, too much cream added, or a mango reduction that was not cooled fully before incorporating. If the buttercream is soft but not separated, refrigerate the bowl for 15 minutes, then beat again on medium for 60 seconds — the fat firms up as it cools and the emulsion tightens. If it is still too soft after chilling, add 2 tablespoons (16g) of sifted powdered sugar and beat for 30 seconds. Do not add more cream at this point — more liquid makes a soft buttercream softer. If the mango buttercream is consistently softer than the strawberry buttercream, the reduction was not concentrated enough — next time cook it for 2 additional minutes and measure the output before using it.
Your Ombre Gradient Is Not Forming — Only One Color Is Coming Out
When the piping bag produces only one color, the buttercream on the opposite side is too stiff to flow through the tip at the same rate. This happens when the two buttercreams have different consistencies — one is firm and one is soft — so the soft one flows freely while the stiff one barely moves. Remove the buttercream from the bag and check both separately. Beat the stiffer one with 1 teaspoon of heavy cream until it matches the consistency of the softer one, then reload the bag. Both buttercreams must hold a peak of exactly the same firmness before the split-bag technique works correctly. Always pipe a test swirl onto parchment before piping onto the cupcakes — if the gradient is not forming on parchment, it will not form on the cupcake.
Your Fresh Fruit Garnish Is Sliding Off the Frosting
Fruit slides off buttercream when the frosting has crusted over before the garnish was applied, or when the fruit pieces are too heavy for the frosting surface to support. The window for pressing fruit into freshly piped buttercream is approximately 8–10 minutes — after that the surface firms and the fruit will not embed. Pipe and garnish one cupcake at a time rather than piping all 12 first and then garnishing. For the whole strawberry, press it firmly but gently straight down into the center peak of the swirl — not on the side of the swirl where it has less surface contact. If a cupcake has already crusted over, use a small offset spatula to add a pea-sized dot of fresh buttercream to the top of the swirl and press the fruit into that.
Your Jam Sank to the Bottom of the Cupcake
Jam that migrates all the way to the bottom during baking was either too liquid, added in too large a quantity, or pressed too deeply into the batter before baking. The batter at the half-fill stage is thick enough to suspend the jam if it is placed on the surface and pressed only lightly — 1–2cm deep. Jam pressed to the full depth of the batter will reach the bottom of the liner before the batter sets around it. The correct amount is exactly 1 teaspoon (7g) per cup — measured, not estimated. More jam than this is too heavy for the batter to hold and it sinks. Use a jam with visible fruit pieces rather than a smooth clear jelly — the fruit solids help anchor it in place during the bake.
Your Cupcakes Are Dry or Have a Tight, Rubbery Crumb
A tight, rubbery crumb is the signature of overdeveloped gluten — caused by overmixing after the flour was added, using bread flour instead of AP flour, or overbaking past the moist-crumb stage. Once gluten is overdeveloped, it cannot be reversed in the finished cupcake — prevention is the only fix. After the final addition of dry ingredients, stop the mixer the moment the last streak of flour disappears and finish with 3–4 folds by hand. Set a timer for 18 minutes when the tin goes in and begin checking at that mark — a toothpick that comes out completely clean means the cupcakes have been in the oven too long. A dry cupcake also results from leaving the cupcakes in the tin longer than 5 minutes after pulling from the oven — the residual heat continues to bake the crumb even out of the oven.
Humidity and Altitude Note
High humidity accelerates buttercream softening — in kitchens above 70% relative humidity, the piped swirl loses definition within 30 minutes rather than the 2-hour window in the storage section. Add an extra 2 tablespoons (16g) of sifted powdered sugar to each buttercream and reduce the cream addition by half. Refrigerate the loaded piping bag between cupcakes rather than leaving it on the counter. At high altitude above 3,500 feet (1,067m), reduce the baking powder to 1 tsp (4g) and increase the oven temperature to 375°F (190°C) — excess leavening at altitude causes the cupcakes to rise too fast, peak, and collapse before the structure sets, producing a sunken center with a coarse, open crumb instead of the tight, domed result shown in the photos.
Pro-Tips
Use a kitchen scale for the powdered sugar. Volume measurements for powdered sugar are notoriously inconsistent — a loosely scooped cup and a packed cup can differ by 30g, which is enough to make the difference between a pipeable buttercream and one that is too stiff to move through the tip.
Make the mango reduction and let it cool the night before. It refrigerates perfectly in a sealed container and comes to room temperature in 20 minutes. This removes the most time-sensitive step from the day of baking.
Chill the loaded piping bag for 5 minutes before piping if your kitchen is warm. A warm piping bag transfers hand heat to the buttercream — after 6–8 cupcakes the frosting starts to soften noticeably. Chilling the bag resets the temperature and keeps the swirls consistent from the first cupcake to the last.
Choose strawberries of similar size for the garnish. One undersized strawberry on a cupcake in a batch of 12 reads as an afterthought rather than a deliberate garnish. Sort through the pint before you begin and set aside the 12 most uniform berries.
How to Store Mango Strawberry Sunset Cupcakes
Room Temperature Storage
These cupcakes store at room temperature for up to 2 hours after the fresh fruit garnish is applied. Beyond 2 hours, the fresh mango cubes begin to release juice into the frosting and the whole strawberry softens at the base where it contacts the buttercream. If you are not serving within 2 hours of garnishing, store the frosted cupcakes without the fruit garnish and add the fresh fruit immediately before serving.
Store frosted but ungarnished cupcakes in a single layer in a tall airtight container — the container must be tall enough that the lid clears the top of the piped swirl by at least 1 inch (2.5cm). Do not use plastic wrap directly on the frosted cupcakes — it drags the piped swirl and collapses the peak. Do not store them under a low-domed cake cover that presses against the frosting.
Day-by-day texture at room temperature:
- Day 1 (same day): Crumb is at peak softness, frosting swirl holds full definition, gradient is vivid.
- Day 2 (24 hours): Crumb remains moist and tender — the sour cream fat delays staling. Frosting surface has crusted very slightly but the interior is still soft and creamy. Gradient color holds.
- Beyond 48 hours at room temperature: The crumb begins to dry at the edges and the buttercream surface loses its sheen. Refrigerate if holding past 48 hours.
Refrigerator Storage
Refrigerate frosted cupcakes only if your kitchen is warmer than 75°F (24°C) or if you need to hold them longer than 24 hours. Place them in a single layer in a tall airtight container with enough vertical clearance for the frosting swirl — do not use a shallow container that crushes the peak, and do not wrap in foil, which traps condensation against the frosting surface and makes it wet and sticky when unwrapped. Refrigerate for up to 3 days. Do not add the fresh fruit garnish before refrigerating — cold temperatures accelerate moisture release from fresh fruit and the mango cubes will weep into the frosting within a few hours.
Day-by-day texture in the refrigerator:
- Day 1 in fridge: Frosting firms noticeably — dense and slightly waxy cold. Crumb is moist.
- Day 2 in fridge: Crumb remains soft at the center. Frosting has fully set firm. Pull 30–45 minutes before serving.
- Day 3 in fridge: Still good — crumb very slightly drier at the edges. Frosting softens fully on return to room temperature. Add fruit garnish after warming.
Cold buttercream firms significantly in the refrigerator. Pull refrigerated cupcakes out 30–45 minutes before serving and let them come to room temperature on the counter. The buttercream will soften back to its original texture and the full mango and strawberry flavors will return — both are significantly muted when cold. Do not microwave refrigerated cupcakes to speed up warming — the buttercream melts before the crumb warms through.
🗒 Luna’s Note: The mango flavor in the buttercream is noticeably more pronounced at room temperature than straight from the fridge — the volatile aromatic compounds that carry the tropical flavor are suppressed by cold. I always pull these out at least 30 minutes before serving and add the fruit garnish at that point. The difference in flavor between a cold cupcake and a room-temperature one is significant enough that it changes how people respond to them.
Freezer Storage
Freeze the cupcakes unfrosted and ungarnished only. Buttercream freezes adequately but the freeze-dried strawberry pigment in the strawberry buttercream can bleed and mottle when thawed, and the mango reduction can weep into the frosting as it defrosts — neither produces an attractive result for a cupcake where the visual is a centerpiece element.
To freeze unfrosted cupcakes: cool completely to room temperature, then place in a single layer on a baking sheet and freeze uncovered for 1 hour until the surface is firm. Transfer to a zip-lock freezer bag or an airtight freezer container, pressing out as much air as possible. Freeze for up to 2 months. Thaw overnight in the refrigerator or for 2 hours at room temperature still in the sealed container — opening the container while the cupcakes are still cold causes condensation to form on the crumb surface and makes the tops sticky. Frost and garnish after the cupcakes are fully thawed and at room temperature.
The buttercreams can be made up to 3 days ahead and refrigerated in separate airtight containers. Before using, bring to room temperature for 45 minutes and beat briefly with the mixer for 30 seconds to restore the texture before loading the piping bag.
Serving Suggestion
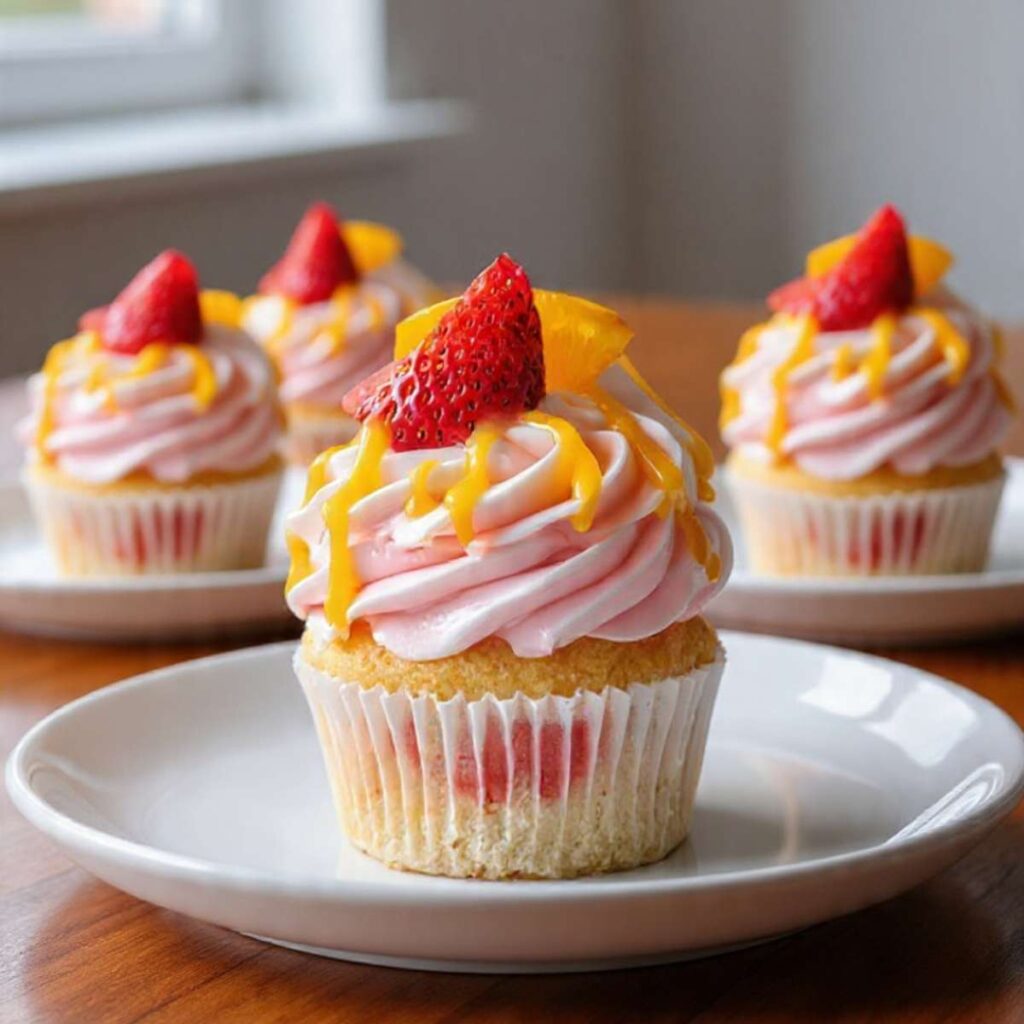
Serve these cupcakes at room temperature — between 68–72°F (20–22°C) — on a white or light-colored plate or tiered stand so the sunset gradient of the frosting reads clearly against a neutral background. The deep rose-to-gold swirl disappears visually against a dark or patterned surface.
I serve these alongside a pot of jasmine tea or a sparkling mango lemonade — the acidity of both cuts through the sweetness of the buttercream and makes the fruit garnish taste brighter. These cupcakes are the right choice for a summer birthday when a full layer cake feels like too much effort — the individual portions look as impressive as a decorated cake, they require no slicing, and the sunset gradient means every person at the table gets an identical, beautiful result without any extra decoration work on your part.
Frequently Asked Questions About Mango Strawberry Sunset Cupcakes
Can I use fresh strawberries instead of freeze-dried powder in the buttercream?
Fresh strawberries do not work as a direct substitute in this buttercream. Fresh strawberries are approximately 90% water — puréed and added to softened butter and powdered sugar, they introduce enough liquid to collapse the emulsion and produce a frosting that is too soft to pipe into the tall swirl shown in the photos. If freeze-dried strawberry powder is not available, strawberry jam reduced on the stovetop to a very thick paste — approximately 2 tablespoons of jam cooked down to 1 teaspoon of thick paste — is the closest workable substitute. Expect a slightly less vivid pink color and a milder strawberry flavor. Do not use fresh purée, strawberry extract, or strawberry syrup — all three add too much liquid.
How do I get the ombre two-toned frosting effect on cupcakes?
The ombre effect comes from loading two different colored buttercreams side by side into a single piping bag — not from mixing them together. Fit a large 16-inch piping bag with a Wilton 1M star tip. Spoon the strawberry buttercream down one interior side of the bag, pressing it firmly against the bag wall. Spoon the mango buttercream down the opposite side. Both buttercreams must be the same consistency — if one is stiffer, it will resist the pressure and only the softer one will pipe through. Squeeze a test swirl onto parchment before piping onto the cupcakes to confirm both colors are flowing evenly. The gradient forms automatically at the tip where both colors meet.
Can I make mango strawberry cupcakes ahead of time?
Yes, with conditions. The unfrosted cupcakes can be baked up to 2 days ahead and stored at room temperature in an airtight container, or frozen for up to 2 months. Both buttercreams can be made up to 3 days ahead and refrigerated separately — bring them to room temperature for 45 minutes and beat briefly before loading the piping bag. Do not add the fresh fruit garnish more than 2 hours before serving — fresh mango and strawberry release moisture that softens the frosting and makes the garnish slide. Pipe the frosting on the day of serving for the best visual result. If you need a fully assembled cupcake the day before, skip the fresh fruit garnish and add it immediately before serving.
How do I keep fresh fruit on cupcakes from getting soggy?
The key is timing and fruit selection. Apply the fresh mango cubes and whole strawberry immediately after piping each cupcake — the freshly piped buttercream surface is slightly tacky and grips the fruit securely. After 8–10 minutes the surface begins to crust and the fruit will not embed properly. Choose ripe but firm mango — overripe mango releases juice immediately on contact with the frosting. Pat the cut mango cubes dry with a paper towel before placing them on the frosting to remove surface moisture. For the strawberry, choose a berry that is fully red but not soft — a soft strawberry releases liquid at the base within an hour. The same 8–10 minute window applies to any buttercream-topped cupcake — if you want to see how a different frosting base handles fresh fruit, the carrot cake cupcakes article uses a cream cheese buttercream that has a slightly longer open window before it crusts.
Can I use canned mango for the coulis and the buttercream reduction?
Canned mango works for both with one important condition — it must be packed in juice, not syrup. Mango packed in heavy syrup adds a cloying sweetness that overwhelms the natural fruit flavor in both the coulis and the reduction. Drain canned mango packed in juice thoroughly and blend until smooth before using — the texture is slightly more fibrous than fresh or frozen purée, which does not affect the finished result in either application. Fresh ripe mango and thawed frozen mango purée both produce a cleaner, brighter flavor than canned. If using frozen purée, thaw overnight in the refrigerator and stir well before measuring — frozen purée can separate and the solids settle at the bottom of the container.
How does humidity and altitude affect these cupcakes?
High humidity softens buttercream faster than the recipe timelines suggest — in a kitchen above 70% relative humidity, the piped swirl will begin to lose definition within 30 minutes of piping rather than the 2-hour window stated in the storage section. In high-humidity conditions, add an extra 2 tablespoons (16g) of sifted powdered sugar to each buttercream and reduce the cream addition by half. Refrigerate the loaded piping bag between cupcakes rather than leaving it on the counter. At high altitude — above 3,500 feet (1,067m) — reduce the baking powder to 1 tsp (4g) and increase the oven temperature to 375°F (190°C). Leavening acts more aggressively at altitude and the extra baking powder will cause the cupcakes to rise too quickly, collapse at the center, and produce a coarse, open crumb rather than the tight, tender result shown in the photos.
Can I scale this recipe to make 24 cupcakes?
The batter doubles reliably — multiply every batter ingredient by two and bake in two standard 12-cup muffin tins on the same middle rack. Do not stack the tins. Bake time remains 18–22 minutes — a double batch in the same oven does not require more baking time because each individual cupcake is the same size. The buttercreams also double without issue. The one ingredient that does not scale linearly is the baking powder — for a double batch, use 2½ tsp (10g) rather than 3 tsp (12g). The full 3 tsp in a double batch at sea level produces an aggressive rise that peaks and then collapses before the structure sets, leaving a sunken center. Reduce by 20% and the dome stays intact.
More Cupcakes You’ll Love
If these Mango Strawberry Sunset Cupcakes hit the right note, these are worth making next.
Snickerdoodle Cupcakes — a soft cinnamon vanilla cupcake with cinnamon sugar buttercream and a crisp snickerdoodle crunch on top.
Cookie Dough Cupcakes — vanilla cupcakes filled with an edible brown butter cookie dough center and topped with cookie dough buttercream.
Raspberry Chocolate Lava Cupcakes — rich dark chocolate cupcakes with a molten raspberry center that pours when the cupcake is broken open.
Mango Strawberry Sunset Cupcakes
Ingredients
Equipment
Method
- Pour ½ cup (120ml) mango purée into a small saucepan over medium-low heat and stir continuously for 8–10 minutes until reduced to 3 tablespoons (45ml) and thick enough to coat the back of a spatula — pour into a small bowl, press plastic wrap directly on the surface, and cool completely to room temperature before using.
- Preheat the oven to 350°F (175°C) with a rack in the middle position and line a standard 12-cup light-colored aluminum muffin tin with paper liners.
- In a large bowl, whisk together 2¼ cups (270g) all-purpose flour, 1½ tsp (6g) baking powder, and ½ tsp (3g) fine sea salt for 30 full seconds until no clumps remain and set aside.
- In the bowl of a stand mixer fitted with the paddle attachment, beat ½ cup (113g) softened unsalted butter and 1 cup (200g) granulated sugar on medium speed (speed 4 on a KitchenAid) for exactly 4 minutes until pale, fluffy, and nearly doubled in volume — set a timer and do not cut this short.
- With the mixer on low, add 2 large room-temperature eggs one at a time waiting 20 seconds between each, then add 1 tsp (5ml) pure vanilla extract and increase to medium speed for 30 seconds until smooth and cohesive.
- With the mixer on the lowest speed, alternate adding the dry ingredients, ½ cup (120ml) whole milk, and ½ cup (120g) full-fat sour cream in five additions (dry, milk, dry, sour cream, dry) — stop the mixer the moment the last streak of flour disappears and finish with 3–4 folds by hand with a silicone spatula.
- Using a cookie scoop or ¼ cup measure, portion approximately 55–60g of batter into each lined cup until half full, then spoon 1 tsp (7g) of strawberry jam into the center of each cup and press it gently 1–2cm into the batter without stirring.
- Bake at 350°F (175°C) for 18–22 minutes, starting to check at 18 minutes — the cupcakes are done when the tops spring back when lightly pressed and a toothpick inserted in the center comes out with a few moist crumbs, not wet batter.
- Leave cupcakes in the tin for exactly 5 minutes, then transfer to a wire rack and cool completely to room temperature — minimum 45 minutes — before frosting.
- For the strawberry buttercream, beat ½ cup (113g) softened butter for 2 minutes until pale, then add 1½ cups (180g) sifted powdered sugar in three additions on low speed, followed by 3 tbsp (15g) freeze-dried strawberry powder and a pinch of salt — beat on medium for 2 minutes, add 1–2 tbsp (15–30ml) heavy cream one tablespoon at a time until the buttercream holds a firm peak.
- For the mango buttercream, beat ½ cup (113g) softened butter for 2 minutes until pale, then add 1½ cups (180g) sifted powdered sugar in three additions on low speed, followed by 3 tbsp (45ml) fully cooled mango purée reduction and a pinch of salt — beat on medium for 2 minutes and add 1 tbsp (15ml) heavy cream only if needed to reach firm-peak consistency.
- Fit a large 16-inch piping bag with a Wilton 1M star tip — spoon the strawberry buttercream down one side of the bag and the mango buttercream down the opposite side, pressing each firmly against the bag wall, then twist the top closed and pipe a test swirl onto parchment to confirm both colors are flowing evenly before piping onto the cupcakes.
- Pipe a tall ombre swirl onto each cooled cupcake starting from the center and spiraling outward then upward in one continuous motion, then immediately press 4–6 fresh mango cubes into the frosting and set one whole strawberry with hull intact upright in the center of the swirl.
- For the optional mango coulis, combine ½ cup (120ml) mango purée, 1 tbsp (12g) granulated sugar, and 1 tsp (5ml) fresh lime juice in a small saucepan over low heat, stir for 3–4 minutes until smooth and the sugar dissolves, cool to room temperature, then drizzle in thin ribbons over the piped frosting before adding the fruit garnish.