Chocolate Chip Cookie Dough Cups
The first batch I made had no crust. I pressed the cookie dough straight into the liners, chilled them, and they came out fine — soft, dense, exactly what I wanted. Then I tried them with a crushed Oreo base and understood immediately what was missing from the first version. The contrast between the dark, slightly bitter crust and the sweet vanilla dough above it is not decoration. It is the whole point. I have not made them without the crust since.
I have made these chocolate chip cookie dough cups across more than fifteen batches, testing the dough-to-crust ratio, the chilling time, and the chocolate chip situation — because it turns out there are two separate chip decisions to make. Full-size semi-sweet chips go inside the dough where they create soft pockets of chocolate in every bite. Mini chips go on top where they stay put and give you something to look at. I tested this both ways. The reverse does not work as well.
These are no-bake. There is no oven involved anywhere in this recipe except for the five-minute flour heat-treatment step. Plan for a minimum 2-hour chill before these are ready — the refrigerator is what sets the cups, and there is no shortcut. I usually leave mine overnight. The structure comes entirely from chilling — the butter in the dough firms as it colds, the crust sets, and what you pull out of the fridge holds its shape cleanly in the liner. Cups pulled before the full chill collapse when the liner is peeled away.
The dough filling is egg-free by design. Standard cookie dough contains raw eggs, which are not safe to eat unbaked. This recipe leaves them out entirely. The dough still has butter, both sugars, vanilla, and heat-treated flour — it tastes like the real thing because it uses the same flavor base. Just no eggs, and no oven.
I tested heat-treated flour versus skipping it. Raw flour carries the same bacterial risk as raw eggs — a fact most edible cookie dough recipes either bury in a footnote or skip entirely. I do not skip it. Spreading the flour on a sheet pan and baking at 350°F for 5 minutes neutralizes the risk and does not change the flavor or texture of the finished dough. It takes five minutes. Do it.
I also tested salted butter versus unsalted with measured salt. Salted butter produces dough that tastes slightly flat — the salt is distributed unevenly through the fat rather than dissolved uniformly into the dough. Unsalted butter with fine sea salt gives you control. I kept the unsalted version and I would not change it.
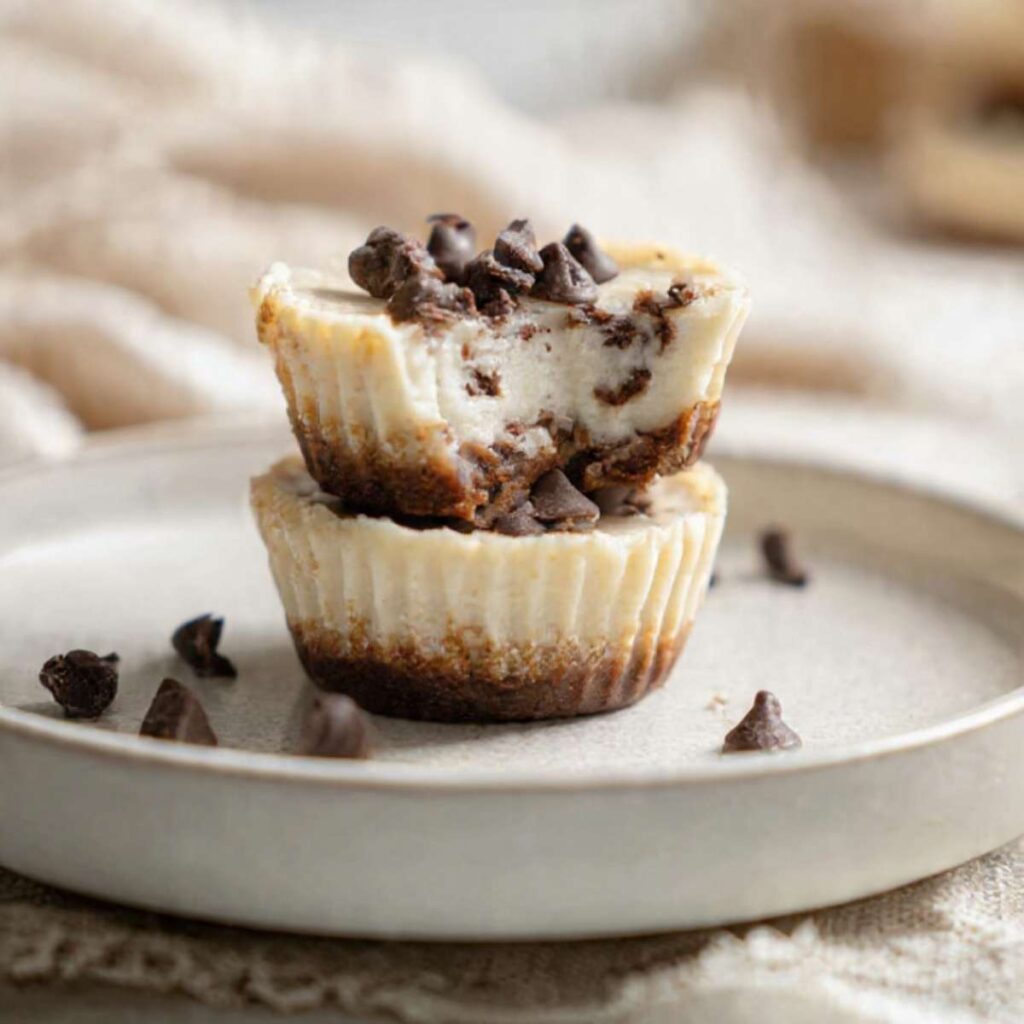
The result: dense, soft cookie dough with chocolate chips throughout and a dark, slightly crunchy Oreo crust underneath. You peel the liner, pull it apart at the layer line if you want, or eat the whole thing at once. No chilling during prep. No mixer required — this entire recipe comes together with a bowl and a spatula. Total active time is about 20 minutes.
🗒 Luna’s Note: I make these when I need something that looks more intentional than it is. Fifteen minutes of work, two hours in the fridge, and what comes out looks like something from a bakery case. The Oreo crust is the detail that does it.
| Prep Time | Cook Time | Total Time | Yield | Difficulty |
|---|---|---|---|---|
| 20 min | 5 min | 2 hrs 25 min (includes 2 hr chill) | 12 cups | Easy |
| Calories | Fat | Carbs | Sugar | Protein | Sodium |
|---|---|---|---|---|---|
| ~343 kcal | ~19g | ~42g | ~25g | ~3g | ~95mg |
Macros are approximate and will vary based on ingredient brands and serving size.
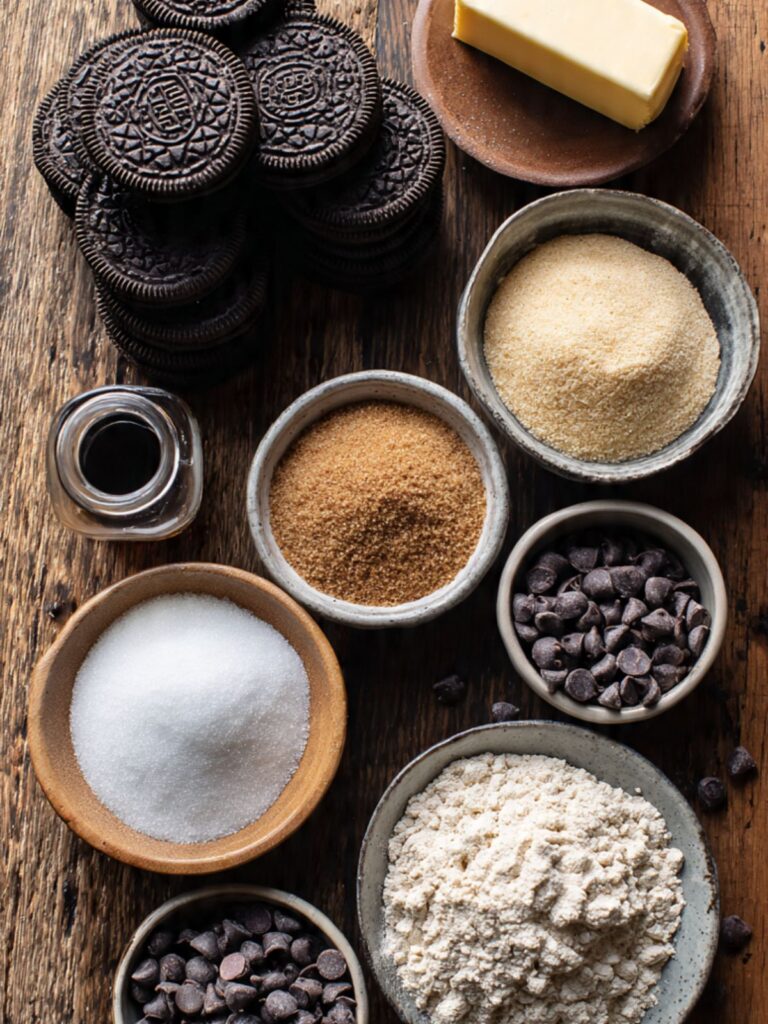
Ingredients & Tools
For the Oreo Crust
- 18 Oreo cookies (198g), whole — filling included, do not scrape
- 3 tablespoons (42g) unsalted butter, melted and cooled slightly
For the Cookie Dough Filling
- ½ cup (113g) unsalted butter, softened to room temperature (65–68°F / 18–20°C)
- ½ cup (100g) packed brown sugar — light or dark both work; dark gives a deeper molasses flavor
- ¼ cup (50g) plain white granulated cane sugar
- 3 tablespoons (45ml) whole milk, room temperature
- 1½ teaspoons pure vanilla extract
- 1¼ cups (150g) all-purpose flour, heat-treated (spooned into the measuring cup and leveled — or weighed at 150g) — see Before You Start for heat-treatment method
- ¼ teaspoon fine sea salt
- ¾ cup (128g) full-size semi-sweet chocolate chips (45–55% cacao), such as Nestlé Toll House or Ghirardelli
For the Topping
- 3 tablespoons (32g) mini semi-sweet chocolate chips (45–55% cacao), such as Nestlé Toll House or Enjoy Life
Optional Garnish
- 2 tablespoons (30g) dark chocolate (60–70% cacao), melted — for drizzling
Before You Start
Flour heat-treatment — mandatory, not optional: Spread your 1¼ cups (150g) all-purpose flour in an even layer on a light-colored aluminum baking sheet lined with parchment. Bake at 350°F (175°C) for exactly 5 minutes. Remove and let cool completely on the pan before using — at least 20 minutes. Raw flour carries the same bacterial contamination risk as raw eggs. This step takes five minutes and eliminates that risk entirely. Do not skip it. The flavor and texture of the finished dough are unchanged.
Flour measuring method: Spoon the heat-treated flour into your measuring cup using a separate spoon and level it off with a straight edge. Do not scoop the cup directly into the flour — scooping packs in 20–30% more flour than the recipe needs and will make the dough dry and crumbly. For guaranteed accuracy, weigh at 150g on a kitchen scale. Gram weight always takes priority over volume in this recipe.
Butter temperature: The butter for the dough filling must be softened to 65–68°F (18–20°C) — not melted, not cold from the fridge. Pull it from the refrigerator 60–90 minutes before you begin in a cool kitchen, or 30–45 minutes in a warm one. When you press your finger into the butter it should leave a clean indent without the butter feeling greasy or slick. If the butter looks shiny or your finger slides through it, it is too warm — refrigerate for 10 minutes and check again. Butter that is too warm produces dough that is greasy and will not hold its shape after chilling.
The crust butter is different: The 3 tablespoons of butter for the Oreo crust should be fully melted and cooled slightly — not softened. These are two separate butter preparations. Do not confuse them.
Chilling — read this before you begin: These cups require a minimum of 2 hours in the refrigerator to set fully. The chill is what gives the cups their structure — the butter firms as it colds and the crust binds. Cups pulled before 2 hours will feel soft and may collapse when you peel the liner. I usually leave mine overnight. Plan accordingly before you start.
Gram weight priority: For the most consistent results, use a kitchen scale set to grams. The gram weights in this recipe are what I tested with — they are the most reliable way to match my result.
Mixing method: This entire recipe comes together with a large mixing bowl and a silicone spatula — no electric mixer needed at any point. A hand mixer can be used for the dough filling if preferred, but it is not required.
Liners: Use standard paper cupcake liners in a 12-cup muffin tin. Do not use silicone liners — the cups will not release cleanly and the crust will stick. Paper liners peel away from the set dough without tearing.
Oven rack position: Position your oven rack in the middle of the oven before preheating for the flour heat-treatment step. Top rack concentrates heat at the flour surface and can toast the top layer before the interior reaches a safe temperature. Bottom rack underbakes. Middle rack heats the flour layer evenly throughout.
Brown sugar freshness check: Packed brown sugar that has hardened cannot be measured accurately — a solid lump pressed into a measuring cup gives a wildly different weight than properly packed sugar. If your brown sugar has hardened, place it in a microwave-safe bowl, lay a damp paper towel directly on top, and microwave in 20-second increments until it is soft and pliable. Cool for 2 minutes before measuring. Do not use sugar that has hardened and dried beyond recovery — it will leave gritty undissolved pockets in the finished dough.
Chocolate chips — two types, two jobs: Full-size semi-sweet chips go inside the dough filling. Mini chips go on top as the finish. Do not substitute mini chips throughout — the full-size chips create the pockets of melted chocolate visible in the cross-section. Mini chips inside produce a more uniform, less textured result. If either bag of chocolate chips has a white or grey coating on the surface, this is chocolate bloom — fat or sugar that has migrated to the surface during storage. The chips are completely safe to eat and their flavor is unchanged, but bloomed chips may not melt as smoothly into the dough. Use them without concern for texture inside the dough; for the optional chocolate drizzle, use fresh chips for a smoother melt.
Necessary Tools
Required:
- Kitchen scale (strongly recommended — gram weights are more accurate than volume)
- Light-colored aluminum baking sheet (for flour heat-treatment)
- Parchment paper
- Standard 12-cup muffin tin
- Standard paper cupcake liners (12)
- Food processor or zip-lock bag + rolling pin (for crushing Oreos)
- Large mixing bowl
- Silicone spatula
- Measuring cups and spoons
- Wire cooling rack
Optional:
- Oven thermometer (recommended — most ovens run 15–25°F off, which matters for the flour heat-treatment step)
- Hand mixer (not required — spatula works fine)
- Small piping bag or zip-lock bag with corner snipped (for chocolate drizzle)
How to Make Chocolate Chip Cookie Dough Cups
This is a no-bake, one-bowl recipe assembled in two stages — the Oreo crust and the cookie dough filling — then set entirely in the refrigerator. No stand mixer, no hand mixer, no oven beyond the flour heat-treatment. A large mixing bowl, a silicone spatula, and a standard muffin tin are the only equipment the assembly requires.
Step 1: Heat-Treating the Flour to Make It Safe for Edible Dough
Preheat your oven to 350°F (175°C) and position the rack in the middle. Line your light-colored aluminum baking sheet with parchment paper. Spread your 1¼ cups (150g) all-purpose flour in an even, single layer across the parchment — do not pile it or leave thick patches, because uneven depth means uneven heat penetration and some flour will not reach a safe temperature while other parts overbrown.
The all-purpose flour is the one ingredient in this recipe that requires a heat step before it is safe to eat. Raw flour can carry E. coli and Salmonella — the same bacterial risks as raw eggs. Baking at 350°F for 5 minutes brings the flour to a temperature that eliminates those risks without changing how it behaves in the dough or how the finished cups taste.
Bake for exactly 5 minutes. Set a timer — do not estimate. Remove the pan and let the flour cool completely on the pan before using. This takes at least 20 minutes. Using warm flour in the dough will partially melt the softened butter and produce a greasy, loose dough that will not hold its shape after chilling.
The cooled flour should look identical to raw flour — no color change, no browning. If the edges look golden or toasted, your oven runs hot. Reduce the temperature by 15°F and repeat with a fresh batch of flour.
🗒 Luna’s Note: I do the flour heat-treatment first, every time, before I prepare anything else. By the time the flour is cool, the Oreo crust is made and the butter for the filling has had time to soften. The timing works out cleanly.
Step 2: Building the Oreo Crust Base That Holds Everything Together

Line your standard 12-cup muffin tin with paper cupcake liners. Add your 18 Oreo cookies (198g), whole with filling intact, to a food processor and pulse until you have fine, uniform crumbs with no large pieces remaining — approximately 15 to 20 short pulses. If you do not have a food processor, place the Oreos in a zip-lock bag, seal it, and crush with a rolling pin until fine. The filling dissolves into the crumbs and acts as a binder — this is why you do not scrape it out.
Pour the Oreo crumbs into a medium bowl. Add your 3 tablespoons (42g) unsalted butter, melted and cooled slightly, and stir with a silicone spatula until every crumb is coated and the mixture holds together when you press a small amount between your fingers. The butter is the only binder here — too little and the crust crumbles when you peel the liner, too much and it becomes greasy and dense.
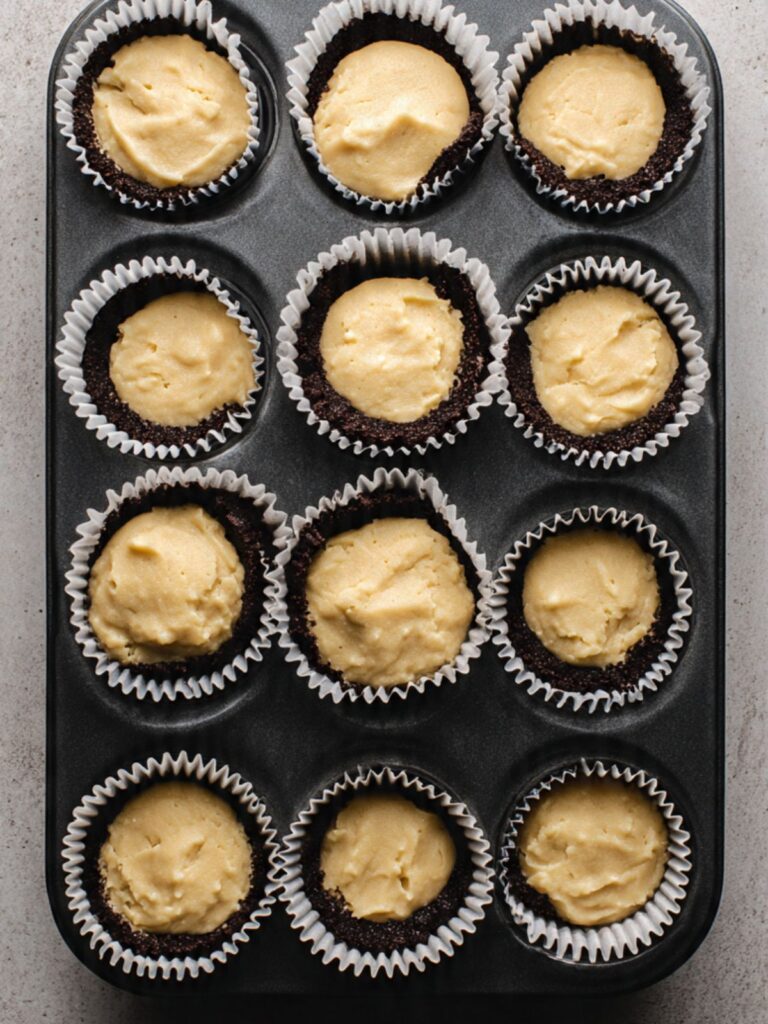
Divide the crust mixture evenly among the 12 lined cups — approximately 1 heaping tablespoon (about 20g) per cup. Use the back of a small spoon or the bottom of a shot glass to press the crumbs firmly and evenly into the base of each liner. Press hard enough that the crust is compacted but do not press so hard that the liner tears.

Do not add the dough filling yet. Place the muffin tin in the refrigerator for 10 minutes while you make the filling. This firms the crust so it holds its position when the dough is pressed on top.
The pressed crust should look dark, uniform, and compacted — approximately ¼ of the total cup height. If any liners have uneven or thin patches, add a small pinch of extra crumb mixture and re-press before chilling.
⚠️ Do not skip pressing the crust firmly — a loosely packed crust will separate from the dough layer when you peel the liner and the cup will fall apart instead of holding its two-layer structure.
Step 3: Making the Cookie Dough Filling With the Right Butter Temperature
In your large mixing bowl, add your ½ cup (113g) unsalted butter, softened to room temperature (65–68°F / 18–20°C). Using your silicone spatula, beat the butter against the sides of the bowl with firm strokes for about 30 seconds until it looks smooth and uniform. This is not a full creaming step — you are just loosening the butter so it incorporates evenly with the sugars.
Add your ½ cup (100g) packed brown sugar and your ¼ cup (50g) plain white granulated cane sugar. The brown sugar provides moisture, chew, and the deep molasses flavor that makes this taste like real cookie dough — not a sweet paste. The granulated sugar sharpens the flavor and gives the dough a slight density that keeps it from feeling heavy. Stir together with the spatula using firm circular strokes from the bottom of the bowl upward, approximately 40 to 50 strokes, until no sugar streaks remain and the mixture looks smooth, slightly glossy, and uniform in color.
Add your 3 tablespoons (45ml) whole milk, room temperature and 1½ teaspoons pure vanilla extract. Stir until fully incorporated — the mixture will loosen slightly and look more cohesive. The milk adjusts the dough to a scoopable, pressable consistency. Without it the dough is too stiff to press into the liners evenly.
The butter-sugar-milk mixture should look smooth, slightly glossy, and pale tan — not grainy, not separated, and no visible pools of liquid. If you see liquid pooling at the bottom of the bowl, the butter was too warm when you started. The dough will still work but the finished cups may be slightly greasy after chilling.
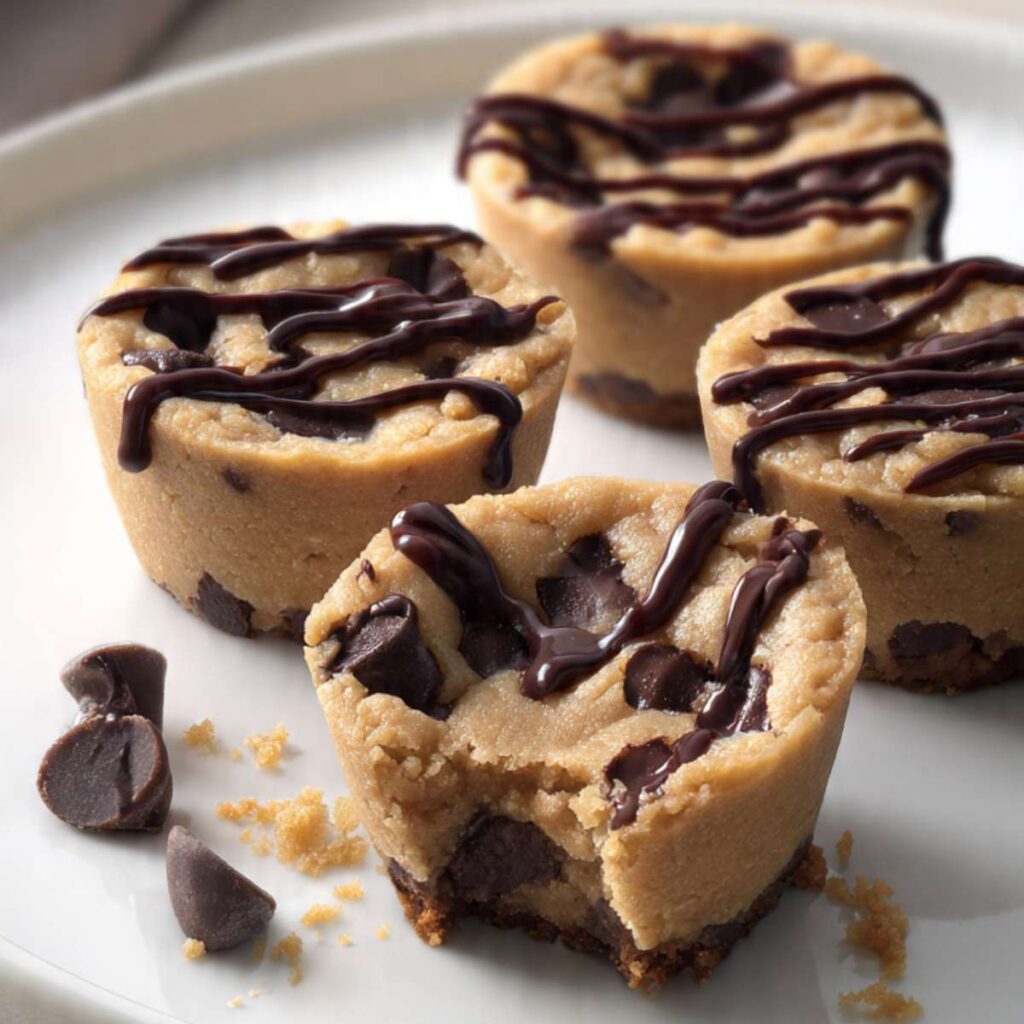
Peanut butter variation: If you are making the tan-dough version visible in the pile shot photo — replace the ½ cup (113g) softened unsalted butter with ½ cup (129g) creamy commercial peanut butter, such as Jif or Skippy. Do not use natural peanut butter where the oil separates — the inconsistent fat content produces a greasy, unstable dough that will not set cleanly. Everything else in the filling stays exactly the same. See FAQ for the full variation details.
⚠️ Do not use cold milk straight from the fridge — cold liquid hitting softened butter can cause the mixture to look broken or curdled. Leave the milk on the counter for 15 minutes before using, or warm it briefly in your palm.
Step 4: Adding the Flour and Chocolate Chips Without Overworking the Dough
Add your 1¼ cups (150g) heat-treated all-purpose flour (spooned and leveled — or weighed at 150g) and your ¼ teaspoon fine sea salt to the butter-sugar mixture. The flour gives the dough its structure and that familiar raw dough texture — the exact amount matters more in this recipe than in a baked cookie, because there is no oven to hide excess flour. Too much flour produces a dry, chalky dough that crumbles when you try to press it into the liners. Too little produces a sticky dough that does not hold its shape after chilling.
Fold the flour in using slow, deliberate strokes from the bottom of the bowl upward — not stirring aggressively in circles. Count approximately 20 to 25 strokes from the moment the flour touches the dough. Stop as soon as no dry flour remains. You are not developing gluten here — there are no eggs and no baking, so technically you cannot over-develop gluten in a meaningful way — but aggressive mixing compresses the dough and changes the texture from soft and slightly yielding to dense and paste-like.
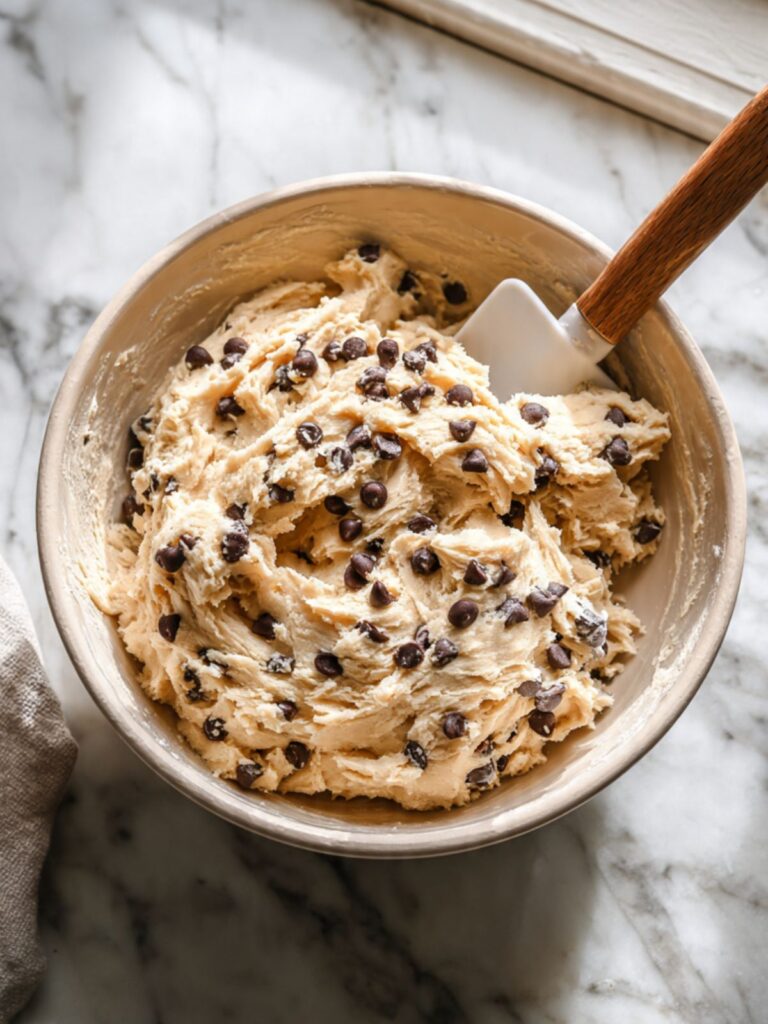
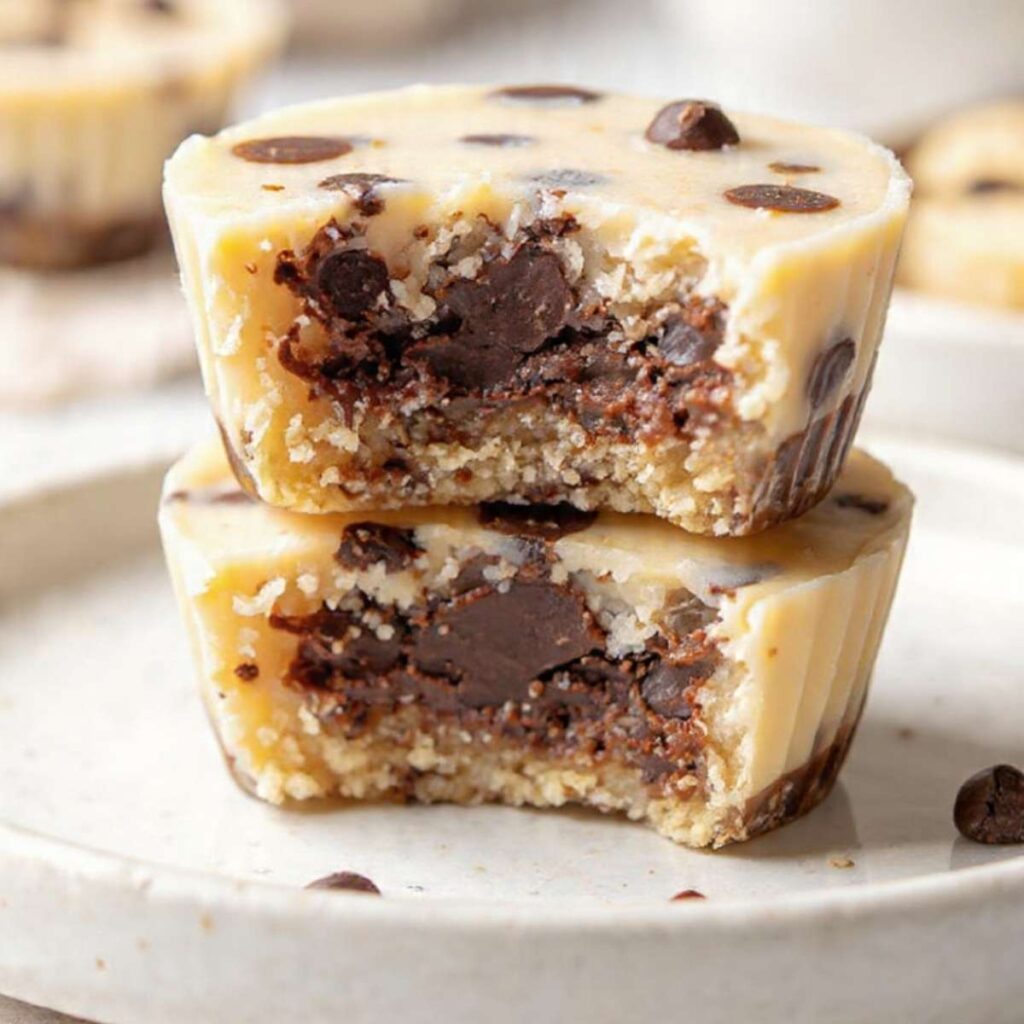
Add your ¾ cup (128g) full-size semi-sweet chocolate chips (45–55% cacao). Fold them in with 8 to 10 strokes, distributing them evenly throughout the dough. These are the chips that create the pockets of chocolate visible in the cross-section of the finished cups — the ones you can see in the cut image above. Mini chips on the surface are the finish. Full-size chips inside are the texture.
The finished dough should look thick, slightly rough at the surface where chips break through, and hold its shape when you press a small amount between your fingers without sticking to your hands. If the dough feels sticky, refrigerate for 10 minutes before portioning. If it feels dry and crumbly, add milk ½ teaspoon at a time until it just comes together.
Step 5: Portioning and Pressing the Dough Into an Even Layer Over the Crust
Remove the muffin tin with the chilled Oreo crusts from the refrigerator. Divide the cookie dough filling evenly among the 12 cups — approximately 2 heaping tablespoons (about 35–38g) per cup. The dough should fill each liner to about ¾ of its total height, sitting on top of the ¼-height Oreo crust underneath.
Use the back of a small spoon or your fingertips to press the dough down firmly and evenly into each cup, smoothing the surface as flat as possible. Press firmly enough that the dough makes contact with the crust below — you want the two layers to bond during chilling, not sit loosely on top of each other. Smooth the surface of each cup so the top is level — this is what gives the finished cups the clean, flat top visible in the finished photos.
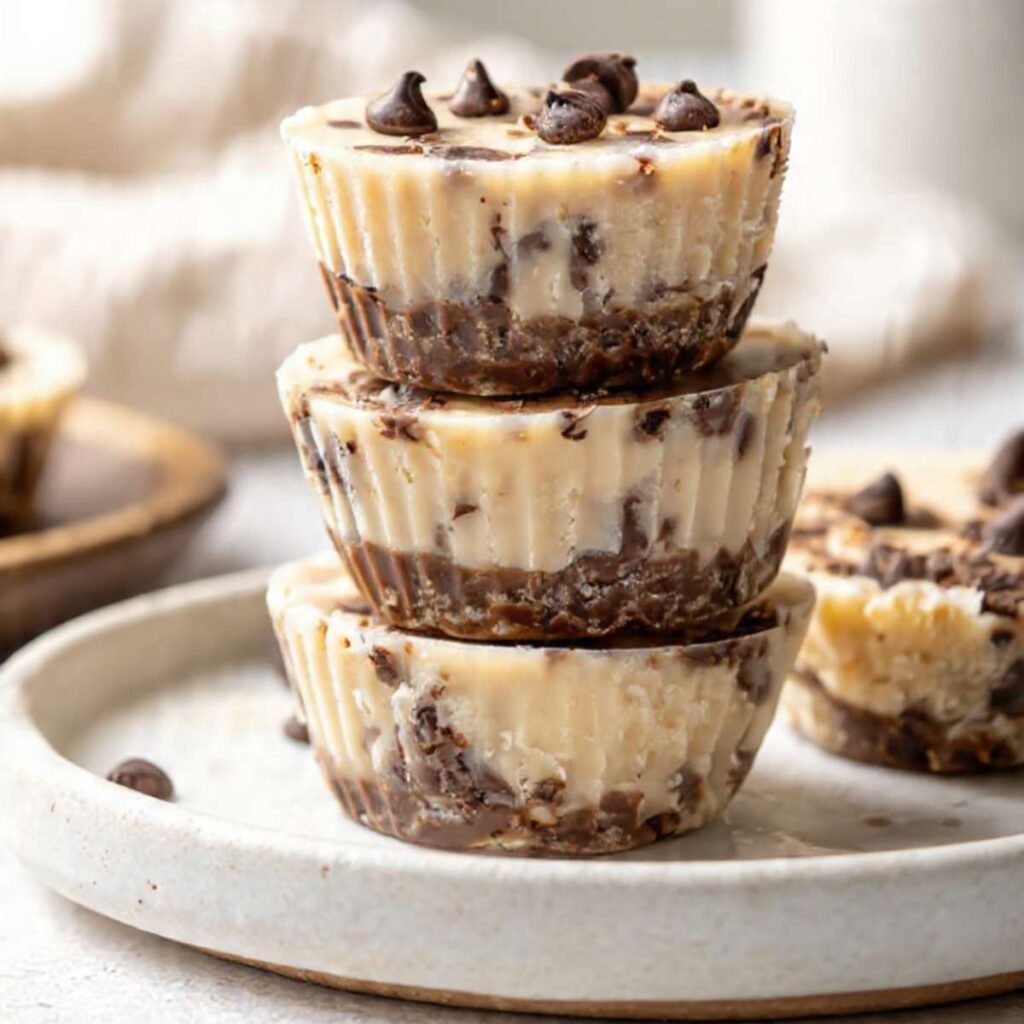
Immediately scatter your 3 tablespoons (32g) mini semi-sweet chocolate chips over the tops of all 12 cups, pressing them very gently into the surface so they stay put during chilling and do not roll off when you peel the liners.
If you are adding the optional chocolate drizzle, melt your 2 tablespoons (30g) dark chocolate (60–70% cacao) in a small microwave-safe bowl in 20-second increments, stirring between each, until fully melted and smooth. Transfer to a small piping bag or a zip-lock bag with one corner snipped, and drizzle across the tops of the cups in a thin back-and-forth motion before chilling.
Each cup should look like the ones in the stacked photo above — a flat, smooth dough surface topped with mini chips, sitting cleanly inside the liner with the dark crust visible at the base. If any cups look uneven or overfilled, redistribute dough between cups before the next step.
⚠️ Do not press so hard that the liner buckles outward at the sides — if the liner flares, the cup loses its straight-sided shape and will not stack cleanly.
Step 6: Chilling Until the Cups Are Fully Set and Ready to Unmold
Cover the muffin tin tightly with plastic wrap — not aluminum foil, which can press against the mini chips on top and drag them out of position. Transfer the tin to the refrigerator.
Chill for a minimum of 2 hours. The cups need this full time for the butter in both the crust and the dough filling to firm completely. At the 1-hour mark the cups will feel set on the surface but will still be too soft at the center to hold their shape when unmolded. Pulling them early produces cups that look fine in the liner and then slowly slump when the liner is peeled away.
I leave mine for at least 4 hours, and overnight is my preference. The texture on day two is actually better than day one — the dough firms more evenly throughout and the crust adheres more cleanly to the filling layer.
To unmold: lift each cup out of the muffin tin by the liner, then peel the paper liner away from the sides and bottom in one slow motion. Work from the bottom of the liner upward. If the liner tears or the crust sticks, the cups needed more chilling time — return them to the fridge for another 30 minutes.
Fully set cups will hold their shape cleanly when the liner is removed, show a distinct dark crust layer at the base and a pale dough layer above it, and feel firm but not hard when pressed gently on the top. The mini chips on top should be flush with the surface, not sunken.
🗒 Luna’s Note: I always make these the night before I need them. The overnight chill does something to the texture that a 2-hour chill does not fully replicate — the dough is denser, the crust is firmer, and the layers hold together more cleanly when you pull the liner off. It is the same recipe, just better with time.
The Science Behind Chocolate Chip Cookie Dough Cups
Why Heat-Treating the Flour Is the Most Important Step in Edible Cookie Dough
I did not take the flour safety step seriously the first time I made edible cookie dough. I had seen dozens of recipes that mentioned it briefly and then moved on, so I moved on too. Then I read the actual CDC data on raw flour contamination and stopped skipping it entirely. The science matters here more than it does in almost any other baking context — because there is no oven to finish the job.
Raw all-purpose flour is an agricultural product that has not been treated to eliminate pathogens. E. coli and Salmonella can survive in dry flour at room temperature for months — the same strains responsible for multiple large-scale flour recalls in recent years. In a baked cookie, oven temperatures above 165°F (74°C) destroy these pathogens before the cookie reaches your mouth. In an edible dough recipe with no bake step, that kill point never happens unless you create it deliberately.
Spreading the flour in a thin layer on a parchment-lined baking sheet and heating it at 350°F (175°C) for 5 minutes brings every part of the flour layer to a surface temperature well above 165°F — the threshold at which pathogenic bacteria are destroyed. The result in these cups is flour that is functionally identical to baked flour in terms of texture and flavor, with the bacterial risk eliminated. You can also microwave the flour in 15-second increments, stirring between each, until it reaches 165°F on an instant-read thermometer — but I prefer the oven method because it heats more evenly and there is no risk of accidentally cooking small patches of flour in a hot spot.
If you want to go further into no-bake and edible dough science, my no bake chocolate oatmeal cookies article covers the binding and setting science for doughs that use oats as the base structure instead of flour.
How Fat Crystallization Sets These Cups Without an Oven
Baked cookies set because heat causes proteins to coagulate and starches to gelatinize — structural changes that lock the dough into its final shape permanently. These cups have no heat step after assembly, which means they need a different mechanism to hold their form. That mechanism is fat crystallization.
Butter is approximately 80% fat. At room temperature, that fat exists in a semi-solid state — firm enough to hold shape in a dough, soft enough to spread. When the temperature drops below roughly 50°F (10°C) in the refrigerator, the fat molecules begin to pack into a tighter crystalline structure. As they crystallize, they lock together and the butter becomes significantly firmer — transitioning from the soft, spreadable state you mixed into the dough to the firm, sliceable state that holds the cup’s shape when you remove the liner.
This is why both the chill time and the chill temperature matter. A freezer set too cold causes the fat to crystallize too rapidly and the texture becomes hard rather than dense and yielding. A refrigerator that runs too warm — above 40°F (4°C) — does not bring the butter fully into its crystalline state, and the cups remain soft and difficult to unmold. The standard refrigerator range of 35–38°F (2–3°C) is ideal. This is also why the cups soften and eventually lose their shape if left at room temperature for more than 20–30 minutes — the fat begins to melt back into its semi-solid state as temperature rises.
Why Brown Sugar Makes This Dough Taste Like Real Cookie Dough
Most no-bake cookie dough recipes use only granulated sugar, or they rely on powdered sugar for a smoother texture. I tested both against packed brown sugar and the difference was not subtle. Brown sugar is granulated sugar with molasses added back in — typically 3.5% molasses for light brown and 6.5% for dark brown. That molasses fraction does two specific things in this recipe.
First, it introduces hygroscopic molecules — compounds that attract and hold moisture from the surrounding environment. This keeps the dough from drying out during the extended chilling time, so the cups you eat on day three have nearly the same soft, dense texture as the ones from day one. Dough made with only granulated sugar dries out faster and develops a slightly gritty texture at the surface after 24 hours in the fridge.
Second, molasses contains over 300 flavor compounds including furfural, diacetyl, and various organic acids — the same compounds that give baked brown sugar cookies their complex, caramelized flavor. In a baked cookie, these compounds develop further through the Maillard reaction at high heat. In this no-bake dough, they are already present from the molasses itself, which is why brown sugar dough tastes closer to real baked cookie dough than a version made with granulated sugar alone. It is not a substitution that works equally well. It is the ingredient that makes the flavor convincing.
🗒 Luna’s Note: I tested this dough with light brown sugar, dark brown sugar, and granulated sugar — three separate batches, side by side. The granulated sugar version tasted like sweet paste. The dark brown sugar version had the most convincing cookie dough flavor but was slightly too dense. Light brown sugar hit the balance I wanted — enough molasses to read as real dough, not so much that it overwhelms the vanilla. That is the version in this recipe.
Chocolate Chip Cookie Dough Cups Troubleshooting & Pro-Tips
Common Mistakes
Your Dough Is Dry, Chalky, and Crumbles When You Press It Into the Liners
Symptom: The dough feels stiff and dry, breaks apart instead of holding together, and leaves crumbles at the bottom of the liner rather than forming a smooth, pressable layer.
Cause: Too much flour. This is almost always a scooping problem — the measuring cup was pressed directly into the flour bag, which packs 20–30% more flour than spooning and leveling. In a baked cookie the oven moisture compensates for slight flour excess. In a no-bake dough there is no compensation. Every extra gram of flour stays dry in the finished cup.
Fix: Add whole milk ½ teaspoon at a time, mixing thoroughly between each addition, until the dough just comes together and holds its shape when pressed. Do not add more than 1 extra tablespoon total — beyond that the dough becomes too wet to set firmly after chilling.
Prevention: Spoon the heat-treated flour into the measuring cup with a separate spoon and level with a straight edge, or weigh it at exactly 150g on a kitchen scale. Gram weight eliminates this variable entirely.
Your Oreo Crust Separates From the Dough Layer When You Peel the Liner
Symptom: When you remove the paper liner, the dark Oreo crust stays stuck to the bottom of the paper while the dough filling lifts away as a separate piece. The two layers do not hold together.
Cause: Either the crust was not pressed firmly enough before chilling, or the dough layer was not pressed down firmly enough to make full contact with the crust surface. The two layers bond during chilling only if they are in direct physical contact under pressure. A loosely packed crust or a dough layer that sits on top without making contact will set as two separate units rather than one cohesive cup.
Fix: If the cups have already been unmolded, press the layers back together by hand — they will re-adhere if the butter in both layers is still cold and firm. Return to the fridge for 30 minutes.
Prevention: After pressing the crust into the liner base, use the bottom of a shot glass or a small spoon to compact it firmly — it should feel dense and not shift when you press on it. When adding the dough layer, press down firmly with your fingertips until you feel resistance from the crust below.
Your Cups Are Soft and Collapse When You Remove the Liner
Symptom: The cups look set in the liner but lose their shape immediately when the paper is peeled away — they slump, flatten at the sides, or the dough layer sags over the crust layer.
Cause: Insufficient chilling time. The butter in both layers has not fully crystallized at the center of the cup. The surface feels firm because it chilled faster than the interior, but the core is still soft enough to deform under its own weight once the liner is removed.
Fix: Return the cups to the muffin tin, press the liners back into shape gently, and refrigerate for at least another hour. If the dough has already slumped significantly, the cups are still edible but will not have the clean two-layer appearance of fully set cups.
Prevention: Chill for a minimum of 2 hours — 4 hours is more reliable, and overnight is best. The muffin tin holds the cups in their correct shape during chilling and prevents the sides from spreading outward. Do not remove the cups from the tin until they are fully set.
Your Dough Filling Tastes Flat or Lacks the Cookie Dough Flavor You Expected
Symptom: The finished cups taste sweet but one-dimensional — more like a sugar paste than actual cookie dough. The flavor is present but not convincing.
Cause: One of three issues: the brown sugar was substituted with granulated sugar or coconut sugar, the vanilla extract is imitation rather than pure, or the salt was skipped or reduced. Brown sugar is not interchangeable with granulated in this recipe — the molasses fraction is the primary flavor driver. Imitation vanilla contains vanillin only, without the 200+ additional flavor compounds in pure vanilla extract. Salt is not a seasoning here — it is a flavor amplifier that sharpens every other ingredient. Without it the dough tastes muted.
Fix: If the dough is already mixed and the flavor is flat, add a small pinch of fine sea salt — approximately ⅛ teaspoon — and stir thoroughly before tasting again. Salt takes a moment to distribute, so taste after 30 seconds of mixing.
Prevention: Use packed brown sugar exactly as specified. Use pure vanilla extract. Do not reduce or skip the salt. These three ingredients together are what makes the flavor profile of this dough convincing.
Your Mini Chips on Top Sink Into the Dough or Fall Off After Chilling
Symptom: The mini chocolate chips on top of the cups either sink below the surface during chilling, leaving a smooth top with embedded chips rather than the garnished finish shown in the photos, or they fall off when you handle the cups after unmolding.
Cause: Chips that sink were placed on top and then not pressed in — the weight of the chip plus gravity during chilling causes them to settle into soft dough. Chips that fall off after unmolding were pressed too hard and lost adhesion as the dough firmed around them.
Fix: If chips have sunk, this is cosmetic only and does not affect flavor. Scatter a few additional mini chips on top of the unmolded cups immediately before serving.
Prevention: After scattering the mini chips on top, press them in very gently — just enough pressure to make contact with the dough surface without pushing them below it. A light fingertip press, not a firm one.
Your Crust Is Greasy and Does Not Hold a Clean Shape
Symptom: The Oreo crust looks shiny and greasy in the liner, feels oily when pressed, and does not hold its compressed shape — it looks wet and loose rather than dry and compacted.
Cause: Too much melted butter in the crust mixture, or the butter was too hot when added to the crumbs. Butter that is too hot partially melts the fat in the Oreo filling, which changes the ratio of dry-to-fat in the crust mixture and produces a wet, greasy result instead of a compacted, crumbly one.
Fix: Add 1 to 2 tablespoons of additional crushed Oreo crumbs to the mixture and stir thoroughly — the extra crumbs will absorb excess butter and restore the correct consistency. Press firmly and re-chill.
Prevention: Let the melted butter cool for at least 3 to 5 minutes before adding it to the crumbs. The butter should be liquid but not hot to the touch. Measure carefully — 3 tablespoons exactly, not a generous pour.
Your Dough Is Too Sticky to Press Into the Liners and Clings to Your Fingers
Symptom: The dough sticks to your fingertips when you try to press it into the cups, pulls up with your fingers rather than staying in the liner, and the surface tears rather than smoothing flat.
Cause: Either too much milk was added during mixing, or the softened butter was warmer than 65–68°F when the dough came together. Excess moisture prevents the dough from holding its shape at room temperature. Warm butter produces a soft, greasy dough that behaves more like frosting than a pressable dough.
Fix: Do not add more flour — it changes the flavor balance. Instead, cover the bowl with plastic wrap and refrigerate the dough for 10 to 15 minutes until it firms slightly. Check again — it should feel like cold Play-Doh, dense and pressable without sticking. If it is still too soft after 15 minutes, refrigerate for another 10 minutes and check again.
Prevention: Measure milk carefully — add it one tablespoon at a time and stop as soon as the dough comes together. Confirm butter temperature before starting — if your butter looks shiny or your finger slides through it without resistance, it is too warm. Refrigerate the butter for 10 minutes and recheck before mixing.
Pro-Tips
Uniform cups every time: Weigh the dough filling rather than estimating by eye. Each cup should receive approximately 35–38g of dough. A kitchen scale takes 30 seconds per cup and produces a perfectly consistent set of cups — identical height, identical layer ratio, identical appearance.
Clean liner removal: Run a thin offset spatula or butter knife around the inside edge of the paper liner before peeling it away. This separates the liner from the dough at the sides and prevents tearing or dragging.
High altitude bakers: At elevations above 3,500 feet (1,067m), refrigerators may run slightly warmer and chilling times may be less predictable. Add 30 minutes to the minimum chill time as a baseline. The flour heat-treatment step is unaffected by altitude.
High humidity bakers: In climates above 70% relative humidity, the surface of the chilled cups may feel slightly tacky after unmolding — this is moisture from the air condensing on the cold dough surface, not underset dough. Pat lightly with a clean paper towel before serving if needed.
Make the cups ahead for a party: These cups are better made 24 hours in advance than the same day. The flavor deepens as the dough rests in the fridge and the layers bond more securely. Store covered in the muffin tin until ready to serve.
Chocolate drizzle without seizing: Chocolate seizes — turns from glossy liquid to a thick, grainy paste — when even a small amount of water contacts it during melting. Make sure your bowl and spatula are completely dry before melting. Melt in 20-second microwave increments, stirring between each, and stop as soon as the chocolate is just melted — do not overheat. If it seizes, add ½ teaspoon of neutral oil and stir vigorously — it will usually come back. For the smoothest drizzle, use chips with a higher cacao content (60–70%) as they melt more cleanly than standard semi-sweet.
How to Store Chocolate Chip Cookie Dough Cups
These cups are a refrigerator dessert from start to finish. They are made cold, stored cold, and served cold. Room temperature is not a storage option — the fat crystallization that holds the cups together begins to reverse above 50°F (10°C), and the cups will soften and lose their shape within 20 to 30 minutes of being set out.
Room Temperature
Not recommended for storage. These cups can sit at room temperature for up to 20 to 30 minutes during serving — enough time to plate and eat without losing structural integrity. Beyond that, the butter in the dough begins to soften and the cups slump. If you are serving at a gathering, pull them from the fridge immediately before serving and work in small batches rather than setting out the full batch at once.
Refrigerator
Store in a lidded glass or plastic container with the cups arranged in a single layer so they do not touch each other. Do not use plastic wrap placed directly on the cups — it drags the mini chips off the top and leaves impressions in the dough surface. Do not store uncovered, even briefly — exposed cookie dough absorbs refrigerator odors quickly and the surface dries out within a few hours.
Properly stored, these cups keep for up to 5 days in the refrigerator. The texture on day one is good. The texture on day two is better — the dough firms more evenly and the layers bond more completely. By day four the dough begins to dry slightly at the surface near the edges, which does not affect flavor but changes the mouthfeel from soft and yielding to slightly firmer. Day five is still good but approaching the limit.
Do not store in the muffin tin after the first 24 hours — the tin is useful for the initial set but takes up significant refrigerator space and does not seal. Transfer to an airtight container once the cups are fully set.
Freezer — Fully Set Cups
These cups freeze well. Arrange fully set cups on a parchment-lined baking sheet in a single layer and freeze uncovered for 1 hour — this hardens the surface so the cups do not stick together or deform in the container. Transfer to a zip-lock freezer bag or airtight freezer-safe container with a sheet of parchment between any stacked layers. Freeze for up to 2 months.
To thaw: transfer to the refrigerator and let thaw overnight — do not thaw at room temperature or the cups will pass through a soft, unstable stage before firming back up, and the layers may separate. Do not microwave to thaw — the chocolate chips will melt unevenly and the dough texture will change permanently. After overnight refrigerator thawing the cups are nearly identical to freshly made.
Freezer — Before Setting
These cups cannot be frozen before they are fully set. The unbaked, unchilled dough layers do not have the structural integrity to survive freezing and thawing — the crust crumbles away from the dough layer and the dough itself becomes grainy and uneven in texture after thawing. Always chill completely in the refrigerator first, confirm the cups hold their shape when unmolded, then freeze if needed.
Serving Suggestion
Serve these cups cold, straight from the refrigerator. Do not let them sit at room temperature before serving — unlike a slice of cake that benefits from coming to room temperature, these cups are designed to be eaten firm and cold. The contrast between the cold, dense dough and the chocolate chips that have set hard during chilling is the point. At room temperature that contrast disappears.
I serve these on a small cream ceramic plate with nothing alongside them — they do not need a sauce, a scoop of ice cream, or a drizzle to be complete. When I have added the optional chocolate drizzle before chilling, I skip everything else entirely. The drizzle is enough.
These are the dessert I make when I need something that looks finished and intentional for a small gathering — a dinner party dessert, an afternoon where someone unexpected shows up, a weeknight when I want something good without committing to an hour in the kitchen. They look like they took effort. They did not.
Day two note: if you made these the night before and stored them covered in the fridge, pull them out and peel the liners immediately before serving — do not peel the liners in advance and then return them to the fridge. The exposed sides of the dough dry out faster without the liner protecting them.
One honest limitation: these do not travel well at room temperature. If you are bringing them somewhere, transport them in an insulated bag with an ice pack, in the container they were stored in, with the liners still on. Anything less than that and you risk arriving with a plate of soft, slumped cups instead of the clean two-layer result they are when cold.
🗒 Luna’s Note: I always keep a batch in the freezer. When I want one I move it to the fridge before bed and it is ready by morning. Two months of on-demand cookie dough cups is not something I am willing to give up.
Frequently Asked Questions About Chocolate Chip Cookie Dough Cups
Can I make chocolate chip cookie dough cups ahead of time?
Yes — these cups are actually better made 24 hours ahead than the same day. The dough firms more evenly overnight, the layers bond more securely, and the flavor deepens as the brown sugar and vanilla have time to fully distribute through the dough. Make them the evening before you need them, store covered in an airtight container in the refrigerator, and peel the liners immediately before serving rather than in advance. They keep for up to 5 days refrigerated.
Can I use natural peanut butter instead of the Oreo crust base?
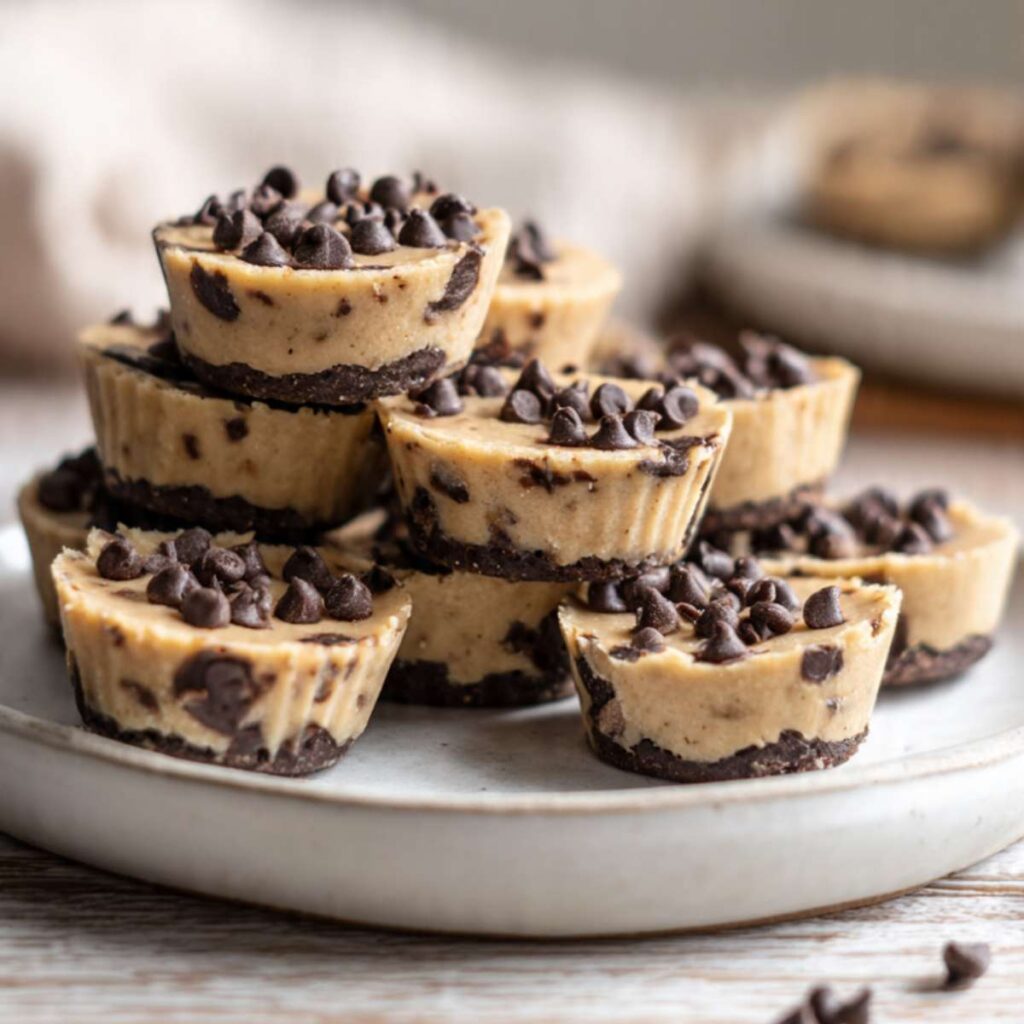
Yes — replace the ½ cup (113g) softened butter in the filling with ½ cup (129g) creamy commercial peanut butter, such as Jif or Skippy. Do not use natural peanut butter where the oil separates — the inconsistent fat content produces a greasy dough that will not set cleanly after chilling. Keep the Oreo crust and all other ingredients exactly as written. The cups will have a warmer tan color and denser texture, as shown in the pile shot photo above.
Why didn’t my no-bake cookie dough cups set properly?
No-bake cookie dough cups fail to set when the chilling time is too short, the refrigerator temperature is too warm, or the butter was too soft when the dough was mixed. The structure of these cups depends entirely on fat crystallization — butter firms as it colds, and that firming is what holds the cup’s shape when the liner is removed. At standard refrigerator temperature (35–38°F / 2–3°C), the minimum chilling time is 2 hours, but 4 hours is more reliable and overnight is best. If your cups feel set on the surface but slump when unmolded, return them to the muffin tin and refrigerate for at least another hour before attempting to unmold again.
Is it safe to eat raw flour in edible cookie dough?
Raw flour is not safe to eat without heat treatment — it can carry E. coli and Salmonella, the same bacterial risks as raw eggs. The heat-treatment step in this recipe — spreading the flour on a parchment-lined baking sheet and baking at 350°F (175°C) for 5 minutes — brings the flour to a temperature that eliminates those pathogens before the flour is used in the dough. This step is mandatory, not optional. Skipping it does not change the flavor or texture of the finished cups, but it leaves a real food safety risk in a recipe that is eaten without further cooking. Always heat-treat the flour before making edible cookie dough of any kind.
Can I double chocolate chip cookie dough cups recipe?
Yes — this recipe doubles cleanly. Multiply all ingredients by 2 and work in two separate muffin tins, 12 cups each. The chilling time does not change — 2 hours minimum per tin regardless of batch size. The flour heat-treatment step should also be done in two separate batches on two baking sheets rather than one large pile — spreading the flour in an even single layer is what ensures uniform heat penetration, and a thick double layer will not heat evenly throughout. Do not increase the salt beyond 2x — salt scales linearly in this recipe and doubling it exactly is correct.
How do I adjust this recipe for high altitude or high humidity?
At high altitude (above 3,500 feet / 1,067m), the flour heat-treatment step is unaffected — oven temperature and time remain the same. Refrigerator chilling times may be less predictable depending on your specific appliance, so add 30 minutes to the minimum as a baseline. In high humidity conditions (above 70% relative humidity), the surface of the unmolded cups may feel slightly tacky — this is condensation from the air hitting the cold dough surface, not underset dough. Pat the surface lightly with a clean paper towel before serving. The dough itself is not affected by ambient humidity because it is assembled and stored cold throughout.
What is the best way to get clean layers in cookie dough cups?
Clean, distinct layers come down to three things: pressing the crust firmly, chilling the crust before adding the dough, and pressing the dough down with enough pressure to make direct contact with the crust surface. The 10-minute crust pre-chill is what separates the two layers during assembly — it firms the crust so it does not get displaced when the dough is pressed on top. After unmolding, the cross-section of a properly made cup shows a clear dark crust layer at the base and a pale dough layer above it, exactly as visible in the cut cup image above. Spoon-and-level or weigh the flour carefully — excess flour makes the dough too stiff to press evenly and the layer line becomes uneven.
More No-Bake Desserts You’ll Love
- Chocolate Peppermint Cookie Cups — a no-bake cup with a dark chocolate peppermint filling and the same Oreo base, built for the holiday season but good any time you want a mint-chocolate combination that holds its shape cold.
- Peanut Butter Chocolate Chip Bars — thick, dense bars with peanut butter dough and semi-sweet chips throughout, baked this time, for when you want the same flavor profile in a format that does not require refrigeration to hold together.

Chocolate Chip Cookie Dough Cups
Ingredients
Equipment
Method
- Preheat oven to 350°F (175°C) and position rack in the middle, then spread 1¼ cups (150g) all-purpose flour in an even single layer on a parchment-lined light-colored aluminum baking sheet and bake for exactly 5 minutes, then remove and cool completely on the pan for at least 20 minutes before using.
- Line a standard 12-cup muffin tin with paper cupcake liners and set aside.
- Add 18 whole Oreo cookies (198g) to a food processor and pulse 15 to 20 times until fine uniform crumbs form with no large pieces remaining, then transfer crumbs to a medium bowl.
- Add 3 tablespoons (42g) melted and slightly cooled unsalted butter to the Oreo crumbs and stir with a silicone spatula until every crumb is coated and the mixture holds together when pressed between your fingers.
- Divide the crust mixture evenly among the 12 lined cups (approximately 1 heaping tablespoon / 20g per cup), then press firmly and evenly into the base of each liner using the back of a small spoon or the bottom of a shot glass, and refrigerate the tin for 10 minutes while making the filling.
- In a large mixing bowl, combine ½ cup (113g) softened unsalted butter, ½ cup (100g) packed brown sugar, and ¼ cup (50g) plain white granulated cane sugar, and stir with a silicone spatula using firm circular strokes for approximately 40 to 50 strokes until smooth, slightly glossy, and no sugar streaks remain.
- Add 3 tablespoons (45ml) room temperature whole milk and 1½ teaspoons pure vanilla extract and stir until fully incorporated and the mixture looks cohesive and uniform.
- Add 1¼ cups (150g) cooled heat-treated all-purpose flour and ¼ teaspoon fine sea salt and fold in using slow strokes from the bottom of the bowl upward for approximately 20 to 25 strokes until no dry flour remains.
- Add ¾ cup (128g) full-size semi-sweet chocolate chips and fold in with 8 to 10 strokes until evenly distributed throughout the dough.
- Remove the muffin tin from the refrigerator and divide the cookie dough filling evenly among the 12 cups (approximately 35–38g per cup), pressing down firmly and smoothing the surface flat so the dough makes direct contact with the crust layer below.
- Scatter 3 tablespoons (32g) mini semi-sweet chocolate chips over the tops of all 12 cups and press in very gently so they make contact with the dough surface without sinking below it.
- If using the optional chocolate drizzle, melt 2 tablespoons (30g) dark chocolate in a microwave-safe bowl in 20-second increments stirring between each until smooth, then drizzle over the cups using a piping bag or zip-lock bag with one corner snipped.
- Cover the muffin tin tightly with plastic wrap and refrigerate for a minimum of 2 hours, or overnight for best results, until the cups are fully set and hold their shape when the liner is removed.
- To unmold, lift each cup out of the tin by the liner and peel the paper away slowly from the bottom upward, then serve immediately cold.