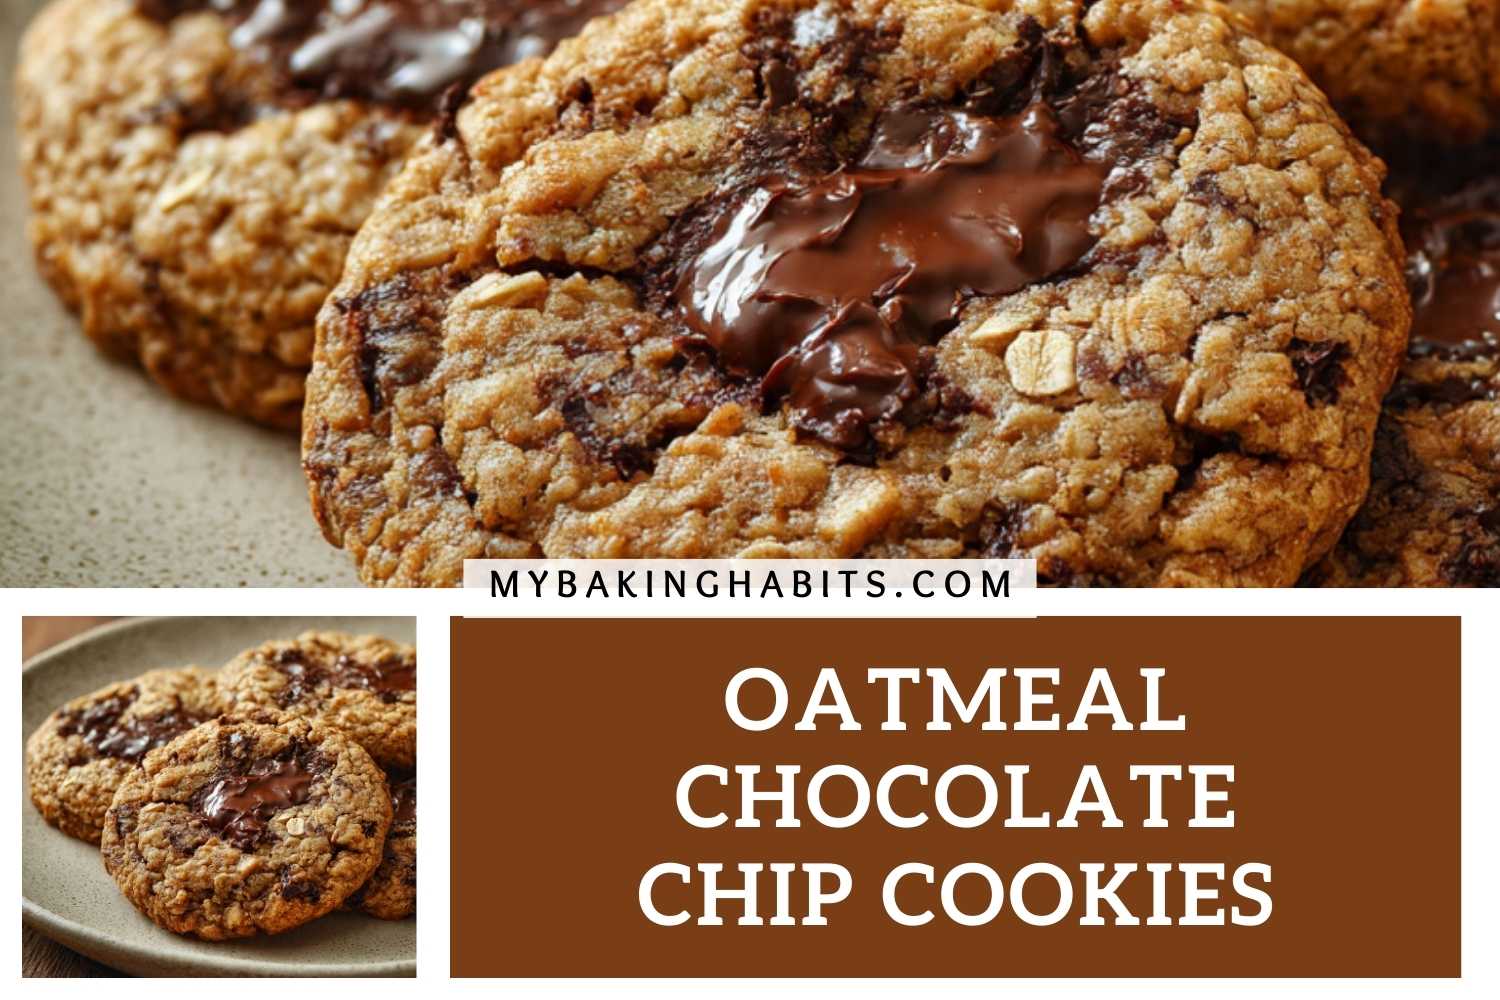
Oatmeal Chocolate Chip Cookies
I have made these oatmeal chocolate chip cookies across four dedicated testing weeks — fourteen batches in total — and the problem I kept running into with every other recipe I tried was cookies that looked thick on the pan and turned dry and flat by the time they cooled to room temperature. I fixed that. These bake thick, stay thick, and the centers stay soft and chewy for three days on the counter without going cakey or stiff.
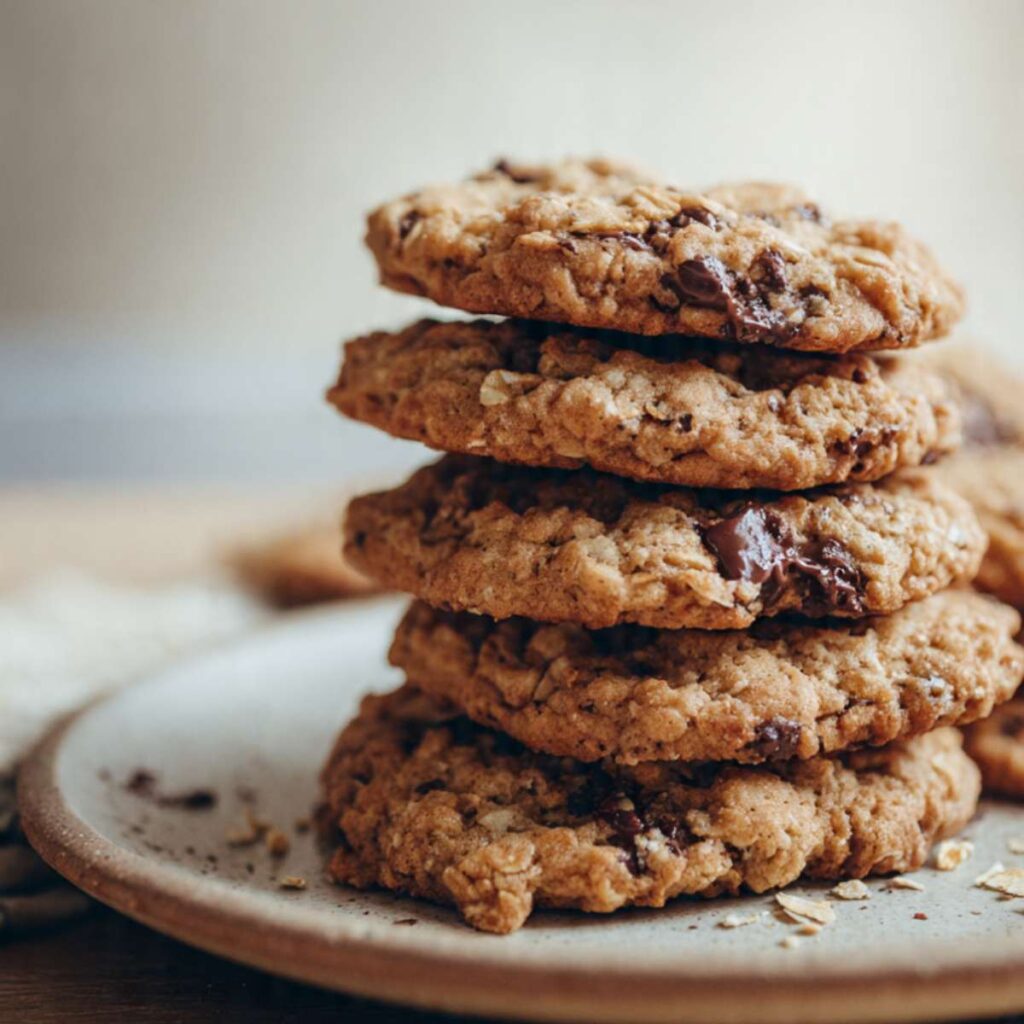
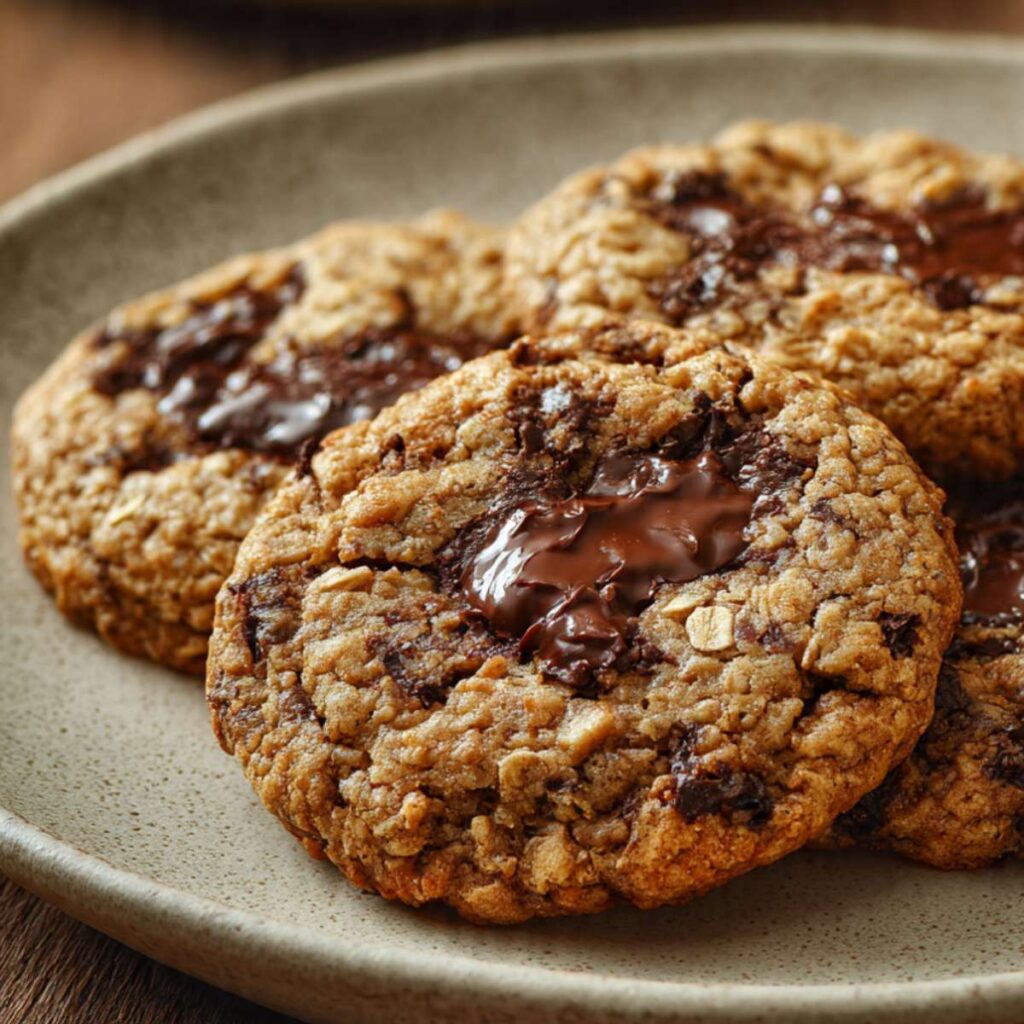
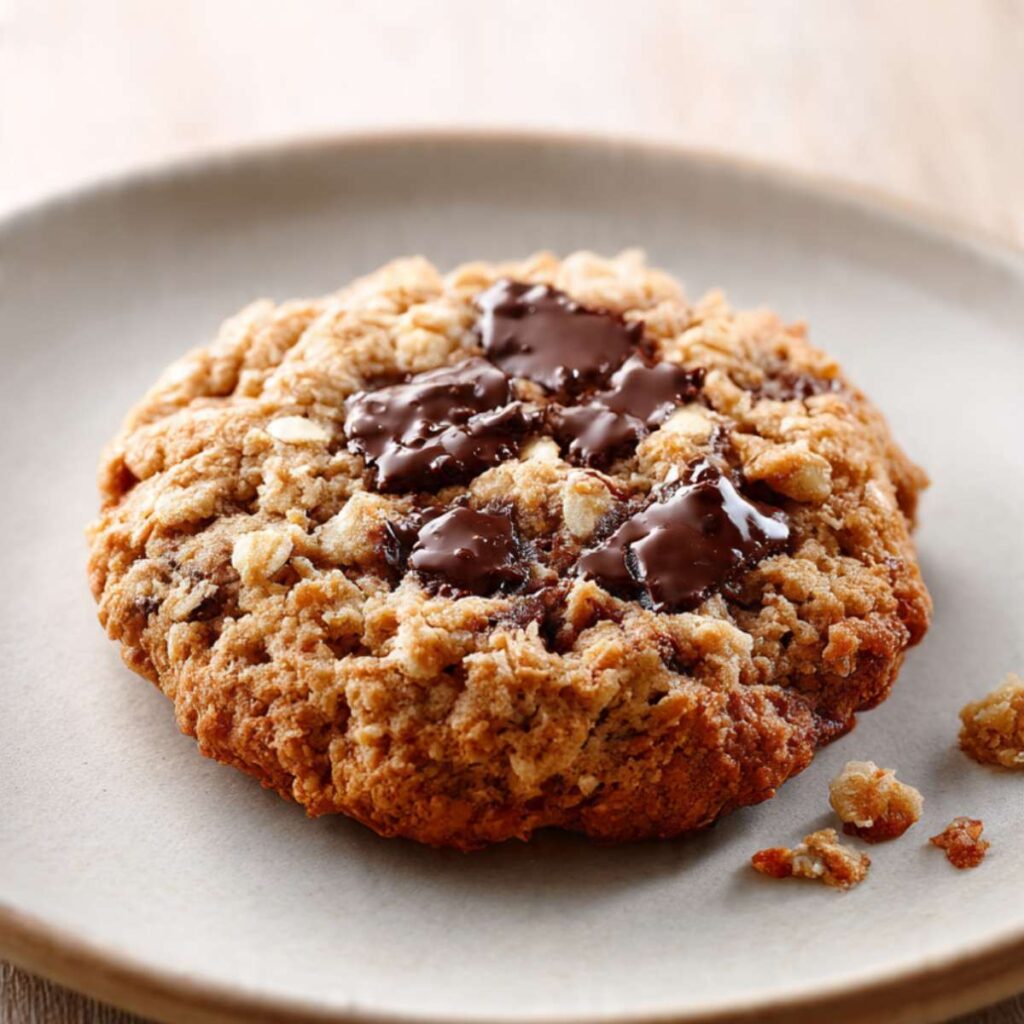
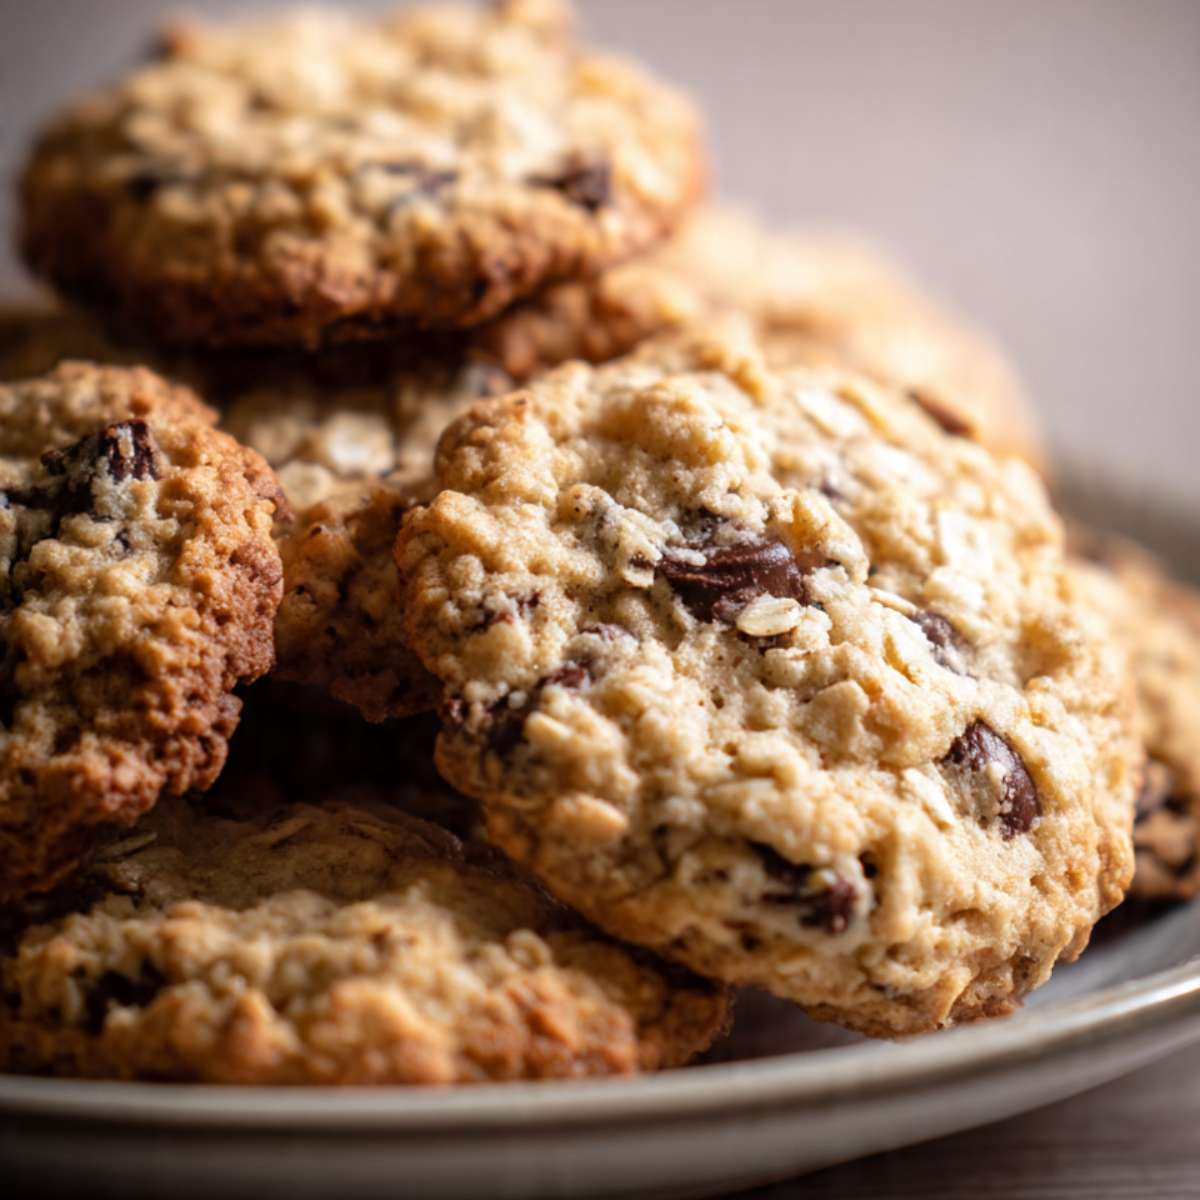
The edges come out golden-brown with a craggy, textured oat finish that holds its shape after cooling. The centers are dense and chewy — not spongy, not cakey — with a rich, buttery base and deep chocolate in every bite. The chocolate melts into glossy, dark pools across the top surface, which is exactly what you can see in the stacked photo and the close-up on the plate. Every bite has oat texture throughout — you can feel the rolled oats in the chew, not just see them on the surface.
🗒 Luna’s Note: I bake these in the afternoon when I want something ready by dinner without starting a project. Start to finish, including cleanup, it’s under 40 minutes.
No chilling required. No electric mixer. One bowl, one spatula, and a baking sheet. That is the complete setup for this recipe.
I tested this with quick oats versus old-fashioned rolled oats. Quick oats dissolved almost completely into the dough during baking — the cookies came out smooth-surfaced, noticeably softer in the center, and lost all of that hearty chew and craggy oat texture that defines an oatmeal cookie. Old-fashioned rolled oats held their shape through the entire bake, kept distinct flake texture in every bite, and produced the thick, craggy surface visible in the photos. The chew difference between the two was significant — not subtle. Old-fashioned rolled oats is the only version I kept, and it is not interchangeable in this recipe.
I tested butter softened to the correct temperature (65°F / 18°C) versus butter that was too warm and slightly greasy. Too-warm butter — anything above 70°F (21°C) — produced cookies that spread noticeably wider and thinner during baking. The edges set too fast and the centers had no time to puff before the structure collapsed. Correctly softened butter, where your finger leaves a clean indent without the surface looking shiny, kept the cookies tall and domed through the full bake. The thick profile you see in the stacked photo comes directly from butter that started at the right temperature — not from any special technique or chilling step.
| Prep Time | Cook Time | Total Time | Servings | Difficulty | Method | Equipment |
|---|---|---|---|---|---|---|
| 15 minutes | 10–12 minutes | ~30 minutes | 12 large cookies | Easy | One-bowl, no mixer | Large bowl + silicone spatula |
| Calories | Carbohydrates | Fat | Protein | Sugar |
|---|---|---|---|---|
| ~225 kcal | ~29g | ~11g | ~3g | ~15g |
Ingredients & Tools
For the Cookies
- ½ cup (113g) unsalted butter, softened to room temperature (65–68°F / 18–20°C)
- ½ cup (100g) plain white granulated cane sugar
- 1 large egg (approximately 50g without shell), room temperature
- 1 cup (120g) all-purpose flour (spooned into the measuring cup and leveled — or weighed at 120g)
- ½ tsp (3g) baking soda, checked for freshness
- ¼ tsp (1.5g) fine sea salt
- 1½ cups (135g) old-fashioned rolled oats (not quick oats or instant oats)
- 1 cup (170g) semi-sweet chocolate chips (45–55% cacao), such as Nestle Toll House or Ghirardelli — plus 2–3 tablespoons extra for pressing on top before baking
Before You Start
Butter: Pull your butter from the fridge 60–90 minutes before starting. At 65–68°F (18–20°C), it should leave a clean indent when you press your finger in without looking shiny or greasy. If the butter looks slick or your finger slides through it, it is too warm — refrigerate for 10 minutes and check again. Too-warm butter is the most common reason these cookies spread flat.
Egg: Set your egg on the counter 30 minutes before starting. Cold eggs do not blend smoothly into the butter mixture and can make the dough look broken. In a rush, place the egg in a bowl of warm (not hot) water for 10 minutes.
Baking soda freshness test: Drop ½ tsp (3g) baking soda into a small bowl with a splash of hot water and white vinegar. It should bubble aggressively within 2 seconds. If it fizzes weakly or not at all, replace the box before baking.
Oats: Use old-fashioned rolled oats only. Quick oats and instant oats absorb moisture differently and produce a smoother, less textured cookie — not what these are.
Flour: Spoon the flour into your measuring cup and level it off with a straight edge. Scooping directly from the bag packs in 20–30% more flour, which produces a dry, stiff dough. If you have a kitchen scale, weigh to 120g — it is faster and more accurate.
Chocolate chips: Reserve 2–3 tablespoons of chips to press onto the top of each dough ball just before baking. This is what produces the glossy, pooled chocolate visible on the surface of the cookies in the photos. Chips folded only into the dough get partially buried as the cookie spreads.
Gram weights: For the most accurate results, use a kitchen scale set to grams. Volume measurements like cups and tablespoons can vary by 20–30% depending on how the ingredient is scooped or packed. The gram weights in this recipe are the numbers I tested with — they are the most reliable way to get the same result I got.
Mixing method: This entire recipe comes together with a large mixing bowl and a silicone spatula — no electric mixer needed.
Oven rack: Position your oven rack in the middle before preheating.
No chilling required. The dough goes straight onto the pan at room temperature. As long as your butter was softened to 65–68°F (18–20°C) before mixing, no resting time is needed before baking.
Necessary Tools
- Large mixing bowl
- Silicone spatula or wooden spoon
- Measuring cups and spoons
- Kitchen scale (strongly recommended)
- Light-colored aluminum baking sheet
- Parchment paper
- Cookie scoop or two spoons (2 tablespoon / 45g capacity)
- Wire cooling rack
- Oven thermometer (optional but recommended)
How to Make Oatmeal Chocolate Chip Cookies
This recipe uses the one-bowl method — wet ingredients first, dry folded in, mix-ins last. No creaming, no mixer, no chilling.
Step 1: The Oven and Pan Are Ready Before the Dough Is
Position your oven rack in the middle slot and heat your oven to 350°F (175°C). Allow at least 15 minutes of full preheat — most home ovens signal ready before they are actually at temperature. If you have an oven thermometer, confirm the actual temperature before the pan goes in. Most home ovens run 15–25°F (8–14°C) off, and an oven that is too cool produces cookies that spread instead of setting up tall.
This recipe uses the one-bowl method — a large mixing bowl and a silicone spatula are the only equipment you need from this point forward. No electric mixer at any stage.
Line a light-colored aluminum baking sheet with parchment paper. Do not grease the parchment and do not use foil — foil conducts heat more aggressively and overbrowns the bottoms before the centers finish baking. Dark non-stick pans do the same thing. Light-colored aluminum with parchment is the only combination I tested and recommend for this recipe.
The pan should be sitting on the counter, lined and ready, before you mix the dough. Do not mix the dough and then search for a pan — the dough sits correctly at room temperature and does not need to rest, but unnecessary delays before baking affect the final spread.
Do not start the dough until the oven is on and the pan is lined.
Step 2: Butter and Sugar Combine Into a Smooth, Pale Base
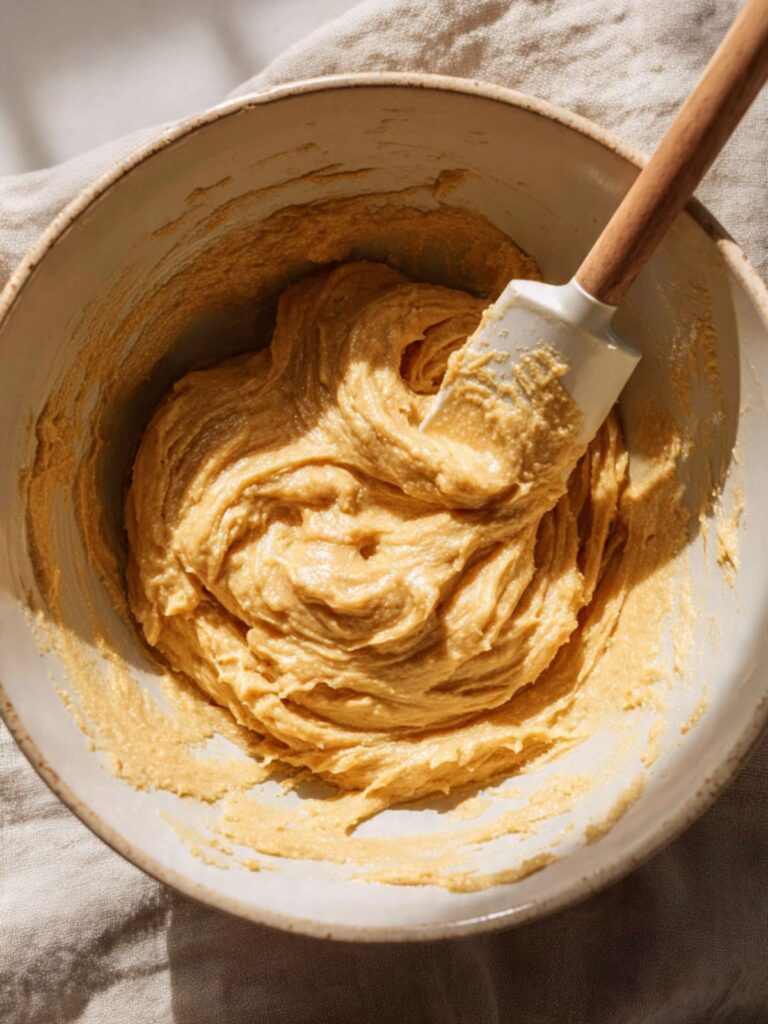
Add ½ cup (113g) softened unsalted butter and ½ cup (100g) plain white granulated cane sugar to your large mixing bowl. Using your silicone spatula, press and stir the butter and sugar together using firm strokes from the bottom of the bowl upward — approximately 40 to 50 strokes — until the mixture looks smooth, slightly pale, and uniform with no visible sugar clumps remaining.
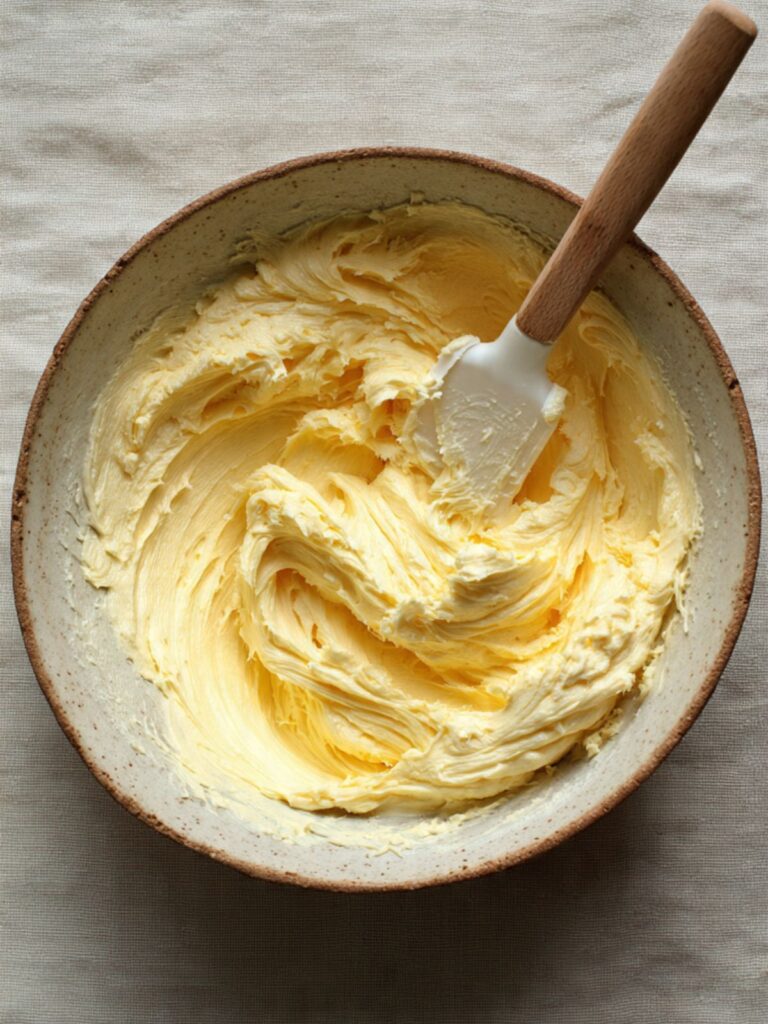
This step is not creaming — you are not trying to aerate the butter. You are combining fat and sugar into a cohesive base. The mixture should look thick and spreadable, similar to a soft frosting, with the sugar fully incorporated into the butter.
The finished base should look pale yellow, smooth, and hold its shape when you press the spatula through it — if you still see sugar granules or the mixture looks separated and greasy, keep stirring for another 20 strokes and check again.
Do not use melted butter at this stage. Melted butter produces a dough that is too loose, and the cookies will spread flat and thin during baking instead of holding their domed shape.
Step 3: The Egg Goes In and the Dough Thickens
Add 1 large room-temperature egg (approximately 50g without shell) directly to the butter-sugar mixture. Stir firmly with the spatula using the same bottom-up strokes — approximately 25 to 30 strokes — until the egg is fully incorporated and the mixture looks slightly thicker and glossy throughout.
The egg provides structure and moisture. A cold egg will not emulsify smoothly into the fat-based mixture and can make the base look broken or curdled. If that happens, keep stirring — in most cases it comes back together within another 15 strokes as the friction warms the mixture slightly.
The dough at this stage should look thick, smooth, and glossy — slightly shinier than the butter-sugar base. If it looks separated or greasy rather than cohesive, your egg was too cold. Continue stirring until it comes together.
Do not add both the egg and the dry ingredients at the same time — the egg must be fully incorporated before the flour goes in or the dough will be uneven.
Step 4: Dry Ingredients Fold In Without Overmixing
Add 1 cup (120g) all-purpose flour spooned and leveled, ½ tsp (3g) baking soda checked for freshness, and ¼ tsp (1.5g) fine sea salt directly on top of the egg-butter mixture. Do not stir yet — let the dry ingredients sit on top for 3 seconds, then begin folding with slow, wide strokes from the bottom of the bowl upward.
Fold only until you no longer see streaks of dry flour — approximately 15 to 20 strokes. Stop immediately when the flour disappears. Every stroke past that point develops gluten, and overdeveloped gluten produces a tough, dense cookie instead of the soft, chewy center visible in the photos.
One important note on the baking soda in this recipe: this dough contains no acid ingredient — no brown sugar, no buttermilk, no cocoa powder. Without an acid, baking soda cannot fully activate the way it does in most cookie recipes. What it still does here is raise the pH of the dough, which accelerates the Maillard reaction during baking — meaning the cookies develop their golden-brown surface color and deeper flavor more efficiently than they would without it. It also contributes a small amount of spread control. This is why the quantity is modest at ½ tsp (3g) — this recipe is not relying on baking soda for lift. The thick, domed shape comes from butter temperature and oat structure, not from leavening.
The dough should look soft, slightly sticky, and hold together when pressed — not powdery, not stiff, not wet enough to pour. If it looks too dry and crumbly, your flour was over-measured. If it looks too wet and loose, your butter was too warm going into the mix.
Do not dump all the dry ingredients in at once and stir aggressively — add them as a group but fold gently from the first stroke.
Step 5: Oats and Chocolate Fold In Last
Add 1½ cups (135g) old-fashioned rolled oats and most of the 1 cup (170g) semi-sweet chocolate chips (45–55% cacao) — reserve 2 to 3 tablespoons of chips for pressing on top before baking. Fold with the spatula using slow, deliberate strokes until the oats and chocolate are evenly distributed throughout the dough — approximately 20 to 25 strokes.
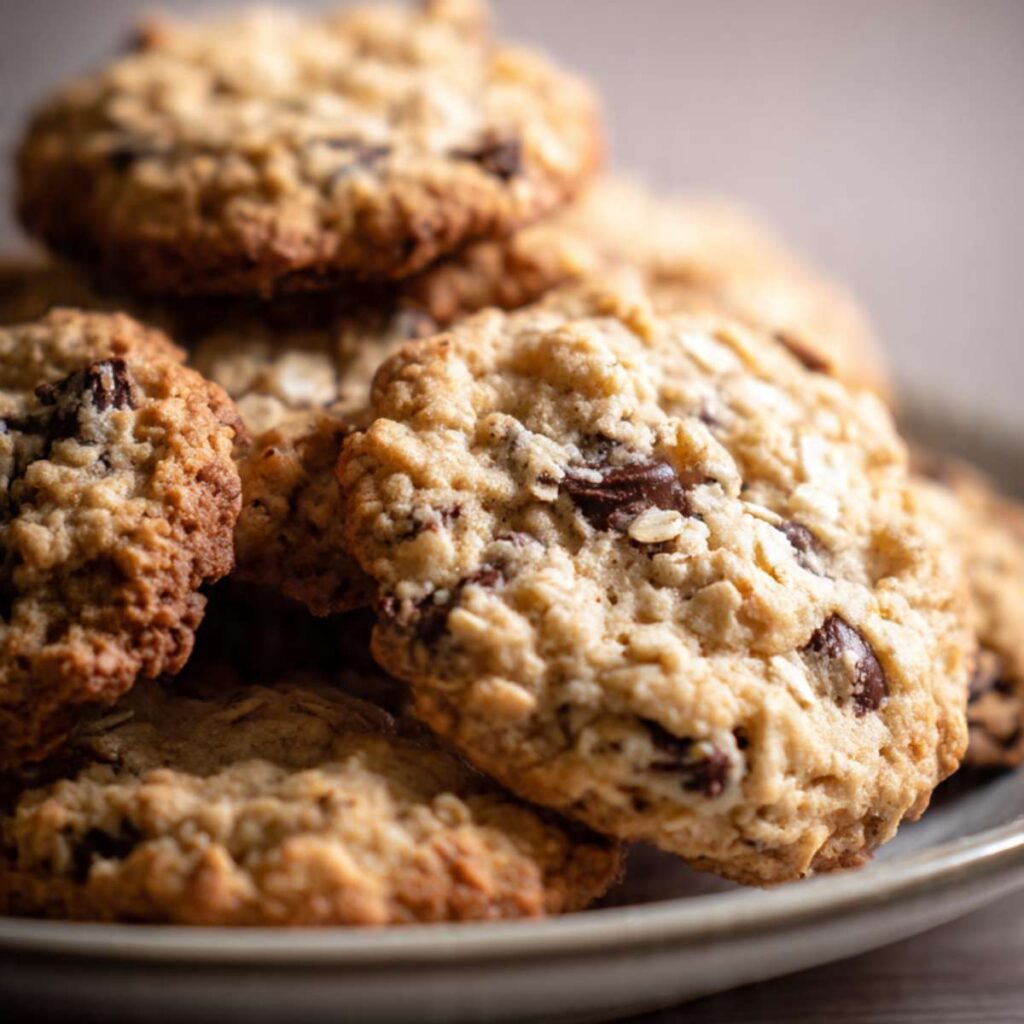
The dough will become noticeably thicker and harder to stir as the oats go in. This is correct. Old-fashioned rolled oats hold their shape in the dough rather than dissolving, which is what creates the craggy, textured surface visible in the finished cookies. You can see the individual oat flakes sitting proud on the surface of every cookie in the pile photo — that visible oat texture starts here, in how the oats hold their structure through the fold.
The finished dough should look chunky and thick, with oat flakes and chocolate pieces visible throughout — not smooth, not uniform. It should hold a clean mound when scooped without immediately flattening on its own. If the dough spreads on its own before it even reaches the pan, the butter was too warm or the flour was under-measured.
Do not overfold at this stage. The oats and chips need to be evenly distributed, but excess mixing compresses the dough and reduces the lift and thickness during baking.
Step 6: Twelve Even Dough Balls Go Onto the Pan
Using a cookie scoop or two spoons, portion the dough into balls of approximately 2 tablespoons (45g) each. Weigh the first ball on your kitchen scale and use it as your calibration reference for the remaining cookies. This batch yields exactly 12 cookies at this scoop size — if you have significantly more or fewer, your portions are inconsistent and bake time will vary between them.
Place each dough ball on the parchment-lined pan, spacing them at least 2 inches (5cm) apart in all directions. These cookies spread moderately during baking — crowding the pan causes them to bake into each other and lose their shape.
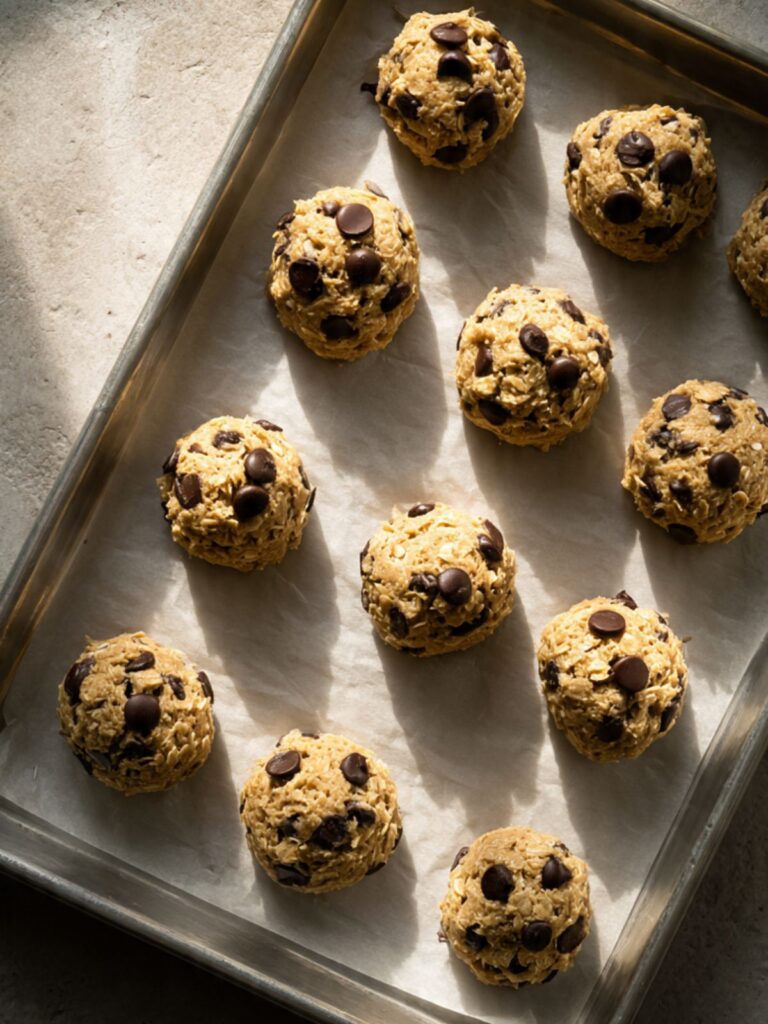
Do not press the dough balls flat before baking. The tall, domed shape going into the oven is exactly what produces the thick, soft center visible in the cooling rack photo. Pressing them flat going in means a thin, crisp cookie coming out.
Immediately press 3 to 4 extra chocolate chips onto the top of each dough ball. As you can see in the close-up photo, the glossy pooled chocolate on the surface comes from chips sitting on top of the dough — chips folded inside get partially buried as the cookie spreads and do not produce that visible, glossy finish.
The pan should go into the oven with 12 evenly spaced domed balls, each with chips pressed visibly on top — if any balls look significantly smaller or flatter than the others, re-roll them before the pan goes in.
Step 7: Ten to Twelve Minutes, Then the Pan Does the Rest
Bake at 350°F (175°C) for 10 to 12 minutes. Start checking at the 10-minute mark. The cookies are done when the edges look golden-brown and set with a defined border, and the centers still look slightly soft and puffy — not fully set, not shiny-wet, but not dry either. The chocolate on top will look visibly melted and glossy, exactly as shown in the cooling rack photo.
Do not wait for the centers to look fully done in the oven. Oatmeal cookies continue cooking on the hot pan after they come out — if the centers look set inside the oven, they will be dry and overbaked by the time they cool. Pull the pan the moment the edges are golden and the centers still have a slight dome and soft appearance.
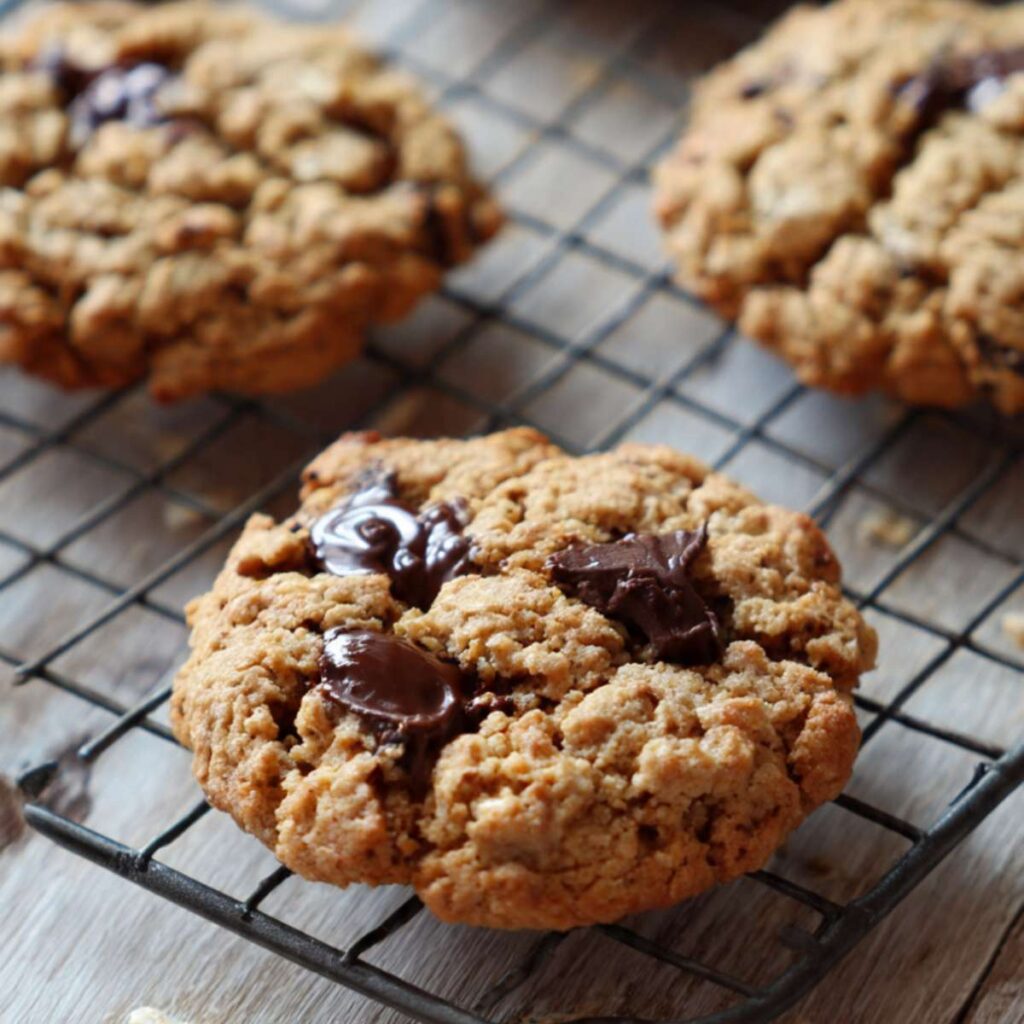
The correctly baked cookie looks like what you see in the photo — golden-brown edges with a defined set border, a center that still looks slightly underdone and puffy, and glossy melted chocolate across the top. This is the exact moment to pull the pan.
If the tops look matte and pale with no color on the edges at 12 minutes, your oven is running cool. Add 2 more minutes and check again. Do not open the oven before the 10-minute mark — temperature drops extend bake time unevenly.
Step 8: Five Minutes on the Pan, Then the Rack
Leave the cookies on the hot pan for exactly 5 minutes after pulling from the oven — do not move them. The pan continues conducting heat into the cookie base during this window. This carryover heat sets the centers completely without the oven drying them out. Moving them before 5 minutes breaks the structural base — the cookies are fragile immediately out of the oven and will crack across the bottom if transferred too early. Waiting longer than 8 minutes starts to over-dry the bottoms. Set a timer.
🗒 Luna’s Note: I slide the whole parchment sheet off the pan and onto the cooling rack rather than moving individual cookies — it’s faster and there’s no risk of breaking a cookie that hasn’t fully set yet.
After 5 minutes, transfer the cookies on the parchment to a wire cooling rack. Allow them to cool for at least 10 more minutes before eating — the centers continue setting as they cool and the texture firms up to that dense, chewy bite shown in the stacked photo.
The cookies should look set at the edges with centers that feel just barely firm when you press them very lightly — not wet, not hard, still slightly yielding in the middle. This is correct texture. If the centers feel completely firm and dry, they were overbaked.
Do not stack the cookies while warm — stacking traps steam and softens the bottoms.
The Science Behind the Chew
Why Old-Fashioned Oats Control Everything About the Texture
Old-fashioned rolled oats are whole oat groats that have been steamed and flattened into flat flakes. Quick oats go through an additional cutting step that breaks them into smaller pieces — they absorb moisture faster and more completely during baking, which means they essentially dissolve into the dough. Old-fashioned oats hold their shape through the entire bake because their larger surface area absorbs moisture slowly, leaving intact flakes in the finished cookie.
Those intact oat flakes are doing two things at once. They add the craggy, textured surface you can see on every cookie in the photos, and they trap moisture inside the dough during baking — which is the direct reason these cookies stay chewy for two days instead of turning dry by the next morning. Rolled oats are hygroscopic, meaning they continue holding onto moisture even after baking. That retained moisture is what keeps the center soft.
🗒 Luna’s Note: I have tried this recipe with quick oats twice, thinking the difference would be minor. Both times the cookies came out smooth-surfaced and noticeably softer — almost cake-like in the center. The oat texture and the chew disappeared entirely. Old-fashioned oats is not a preference in this recipe, it is the recipe.
If you want to learn more about how oat type affects texture in other formats, my oatmeal raisin cookies article covers the same principle in depth with a side-by-side comparison.
Why the Cookie Sets Outside the Oven
When the pan comes out at 10 to 12 minutes, the centers of these cookies are not fully set — and that is intentional. The edges have reached the temperature needed for the egg proteins to coagulate and the starch to gelatinize, which is why they look golden and firm. The centers are still slightly below that threshold, which is why they look soft and puffy.
What finishes the job is carryover cooking. The hot aluminum pan continues conducting heat into the base of each cookie during the 5-minute rest. That residual heat raises the center temperature just enough to set the structure without the forced dry heat of the oven, which would pull moisture out and leave the centers dry. This is why pulling the cookies when the centers still look underdone produces a chewy result, and waiting for the centers to look done in the oven produces a dry one.
The Maillard reaction is also still working during the first 60 to 90 seconds after the pan comes out. The sugars and proteins on the cookie surface continue browning slightly from the pan’s retained heat — this is what deepens the golden color on the edges between the oven and the cooling rack.
Why Butter Temperature Changes the Entire Cookie
Butter is approximately 80% fat and 20% water. At 65–68°F (18–20°C), the fat is in a semi-crystalline state — partially solid, partially soft. In this state, when you mix it with sugar, the fat crystals create a network that holds the dough together and controls how much it spreads during baking. The cookies hold their domed shape going into the oven and spread gradually and evenly as the fat melts.
When butter is too warm — above 70°F (21°C) — the fat crystals break down and the butter loses its semi-solid structure. The dough becomes slack and loose, and when it hits the heat of the oven, it spreads rapidly before the egg proteins and starch have time to set the structure. The result is a flat, thin cookie with crisp edges and no chewy center — the opposite of what the photos show.
This is also why the recipe requires no chilling. Properly softened butter at the correct temperature already has the fat crystallization needed to control spread. Chilling is a correction for butter that was too warm during mixing — if the butter starts at the right temperature, the step is unnecessary. The thick, domed profile you can see in the stacked cookie photo is the direct result of butter that held its structure from mixing through the full bake — not from chilling or any additional step.
Troubleshooting & Pro-Tips
Common Mistakes
My cookies came out smooth-surfaced with no oat texture — they look like regular drop cookies. The oat type was wrong. Quick oats and instant oats are cut into smaller pieces than old-fashioned rolled oats and absorb moisture faster during baking — they dissolve into the dough almost completely and produce a smooth, soft, cake-like cookie with no visible oat flakes and no chewy bite. The craggy surface and hearty texture visible in every photo in this article comes entirely from old-fashioned rolled oats holding their shape through the full bake. There is no fix once the dough is mixed with the wrong oat type. Check the label before opening — the words “old-fashioned” or “rolled oats” must appear. “Quick cooking,” “1-minute,” and “instant” are all the wrong product.
The bottoms are burnt but the tops look underdone. The pan material or rack position is the cause. Dark non-stick pans and foil-lined pans absorb significantly more radiant heat than light-colored aluminum and overbrown the cookie bottoms before the tops have time to finish baking. The bottom rack of the oven compounds this by putting the pan directly in line with the heating element. Use a light-colored aluminum baking sheet lined with parchment paper on the middle rack — this is the only combination tested for this recipe. If you only have a dark pan, reduce the oven temperature by 25°F (15°C) and begin checking at the 9-minute mark. Switching to the correct pan is the permanent fix.
My cookies spread flat and thin. The butter was too warm when the dough was mixed. Butter above 70°F (21°C) loses its semi-crystalline fat structure and the dough spreads too fast in the oven before the egg proteins have time to set the shape. The fix going forward is to pull the butter from the fridge exactly 60 to 90 minutes before mixing and confirm it passes the finger-indent test — a clean indent without any greasy shine. If your kitchen runs warm, check the butter at 45 minutes. If you already have flat cookies from this batch, they are still edible but the texture will be thinner and crispier than the photos show. Refrigerate the remaining portioned dough balls for 20 minutes before baking the next pan.
My cookies came out dry and crumbly, not chewy. Two causes: overbaking or over-measured flour. If the centers looked fully set and dry inside the oven before you pulled the pan, they were overbaked — pull at the 10-minute mark next time the moment the edges are golden and the centers still look slightly puffy and soft. If the dough felt stiff and dry before baking, the flour was over-measured. Scooping flour directly from the bag packs 20 to 30% more than spooning and leveling into the cup. Weigh to 120g next time to eliminate the variable entirely.
The baking soda did nothing — cookies came out pale, flat, and dense. Expired baking soda is the cause. Run the freshness test before every batch: drop ½ tsp (3g) into a small bowl of hot water with a splash of white vinegar. It should bubble aggressively within 2 seconds. Weak or no bubbling means the box is expired — replace it before baking. Baking soda loses potency after 3 to 6 months once opened, even if the expiration date on the box has not passed. Write the opening date on the box with a marker so you always know exactly how old it is.
The chocolate on top did not melt and pool the way it looks in the photos. The extra chips were not pressed onto the raw dough balls before baking, or they were added after the cookies came out of the oven. Chips pressed firmly into the surface of each raw dough ball melt directly against the hot cookie during baking and produce the glossy, pooled coverage visible in the photos. Chips added after baking sit on a cooled surface and will not melt the same way. Press 3 to 4 chips firmly onto each dough ball immediately before the pan goes into the oven — this step takes 30 seconds and makes the difference between cookies that look homemade and cookies that look intentional.
My cookies baked unevenly — some are done, some are underdone on the same pan. Portion size was inconsistent. Cookies that weigh significantly more than 45g take longer to set than smaller ones baking on the same pan at the same time. Weigh the first dough ball on a kitchen scale, use it as your reference weight, and match every subsequent ball to that number. If one side of your oven consistently bakes faster than the other, rotate the pan 180 degrees at the 6-minute mark.
Humidity and altitude adjustments. Symptom in high humidity: the dough feels stickier than described and the baked cookies spread slightly more than shown in the photos, with thinner edges. Cause: flour and oats absorb ambient moisture from the air before baking, softening the dough. Fix: refrigerate the portioned dough balls for 15 minutes before baking — this firms the butter and controls spread. Prevention: keep dry ingredients in sealed containers until use. At high altitude above 3,500 feet (1,065m): reduce baking soda to ¼ tsp (1.5g), add 2 tablespoons (15g) of flour, and reduce the oven temperature by 15°F (8°C). Lower air pressure at altitude causes gases in the dough to expand faster — these adjustments slow the spread and give the egg proteins time to set the structure before the cookie collapses.
Expert Pro-Tips
Press 3 to 4 chips onto the top of every dough ball before the pan goes in — not after. Chips pressed firmly into the surface of each raw dough ball melt against the cookie during baking and produce the glossy, pooled chocolate coverage visible across every cookie in the photos. This takes 30 seconds and is the single biggest visual difference between a cookie where all the chocolate is buried inside and one that looks like the photos in this article.
Weigh every dough ball instead of estimating by eye. At 45g per cookie this batch yields exactly 12. Cookies even 10g heavier than the others will be underdone at the 12-minute mark while the smaller ones are perfectly set. A kitchen scale removes this variable entirely and means every cookie on the pan finishes at the same time.
Slide the entire parchment sheet off the pan and onto the cooling rack rather than moving individual cookies. Cookies are structurally fragile for the first 3 to 4 minutes after coming out of the oven. Lifting them individually before the base has fully set risks cracking them across the bottom. The whole sheet moves in one motion with no risk.
How to Store Oatmeal Chocolate Chip Cookies
Room Temperature
Store fully cooled cookies in a lidded hard-sided container — a cookie tin or a hard plastic container with a snap lid. Place a sheet of parchment paper between each layer to prevent the cookies from sticking together and the chocolate from transferring between them.
At room temperature in a lidded hard-sided container, these cookies stay soft and chewy for up to 4 days. Day one: edges are slightly firm, centers are soft and warm. Day two: the oats have fully hydrated and the centers are at peak chewiness — this is genuinely the best day to eat them. Day three and four: still soft and chewy, slightly denser in the center. After day four the oats begin to dry out and the texture tightens.
Do not store them in a zip-lock bag. Bags compress the cookies under their own weight, flatten the surface texture, and trap condensation that makes the bottoms go soft and sticky. Do not store them uncovered on a plate — exposed cookies dry out from the surface inward and will feel stiff by day two.
The oats in these cookies help them stay softer longer than a standard chocolate chip cookie because old-fashioned rolled oats continue holding onto moisture after baking. Day two is actually when these cookies are at their best — the oats have had time to fully hydrate and the centers are even chewier than the day they were baked.
Refrigerator
I do not recommend refrigerating these cookies. The fridge pulls moisture out of baked goods faster than room temperature storage does, and these cookies will feel noticeably drier and less chewy after even one night in the fridge. Room temperature in a lidded hard-sided container is the better option for short-term storage up to 4 days.
If your kitchen runs very warm — above 75°F (24°C) — and you are concerned about the butter in the cookies going soft, refrigerating is acceptable. Bring the cookies back to room temperature for 20 to 30 minutes before eating so the centers soften back up.
Freezer — Baked Cookies
Wrap each fully cooled cookie individually in plastic wrap, then place all the wrapped cookies in a zip-lock freezer bag with the air pressed out. Freeze for up to 2 months. To thaw, unwrap and leave at room temperature for 45 to 60 minutes. The texture after thawing is very close to fresh-baked — the oats hold up well through freezing and the centers stay chewy rather than drying out.
To refresh a thawed cookie, place it on a parchment-lined baking sheet and warm at 300°F (150°C) for 4 to 5 minutes. The chocolate will re-melt slightly and the centers will soften back to that just-baked consistency.
Freezer — Unbaked Dough
This dough freezes exceptionally well and this is how I keep these cookies available without baking a full batch every time. Scoop the dough into 45g balls, press the extra chips on top of each one, and place them on a parchment-lined baking sheet. Freeze uncovered for 1 hour until the balls are solid, then transfer to a zip-lock freezer bag. Freeze for up to 3 months.
🗒 Luna’s Note: I keep a bag of frozen dough balls in the freezer at all times. Fourteen minutes from frozen oven to cooling rack — that is the actual number. It has become a Tuesday night habit I have no intention of breaking.
Bake directly from frozen at 350°F (175°C) for 13 to 14 minutes — add 2 to 3 minutes to the standard bake time. Do not thaw the dough first. The doneness cues are the same — golden-brown edges, centers that still look slightly soft and puffy, glossy melted chocolate on top.
Serving Suggestion
🗒 Luna’s Note: I serve these slightly warm — about 15 minutes out of the oven when the chocolate is still soft but the cookie has set enough to hold together. A cold glass of whole milk is the only pairing I ever come back to. If I am serving them to guests, I warm refrigerated or room-temperature cookies at 300°F (150°C) for 4 minutes right before plating — they come out looking and tasting freshly baked every time.
Frequently Asked Questions
Can I substitute quick oats for rolled oats in cookies?
Quick oats will work in a pinch but the result is a noticeably different cookie. Quick oats are cut into smaller pieces and absorb moisture faster than old-fashioned rolled oats — they dissolve almost completely into the dough during baking and produce a smoother, softer, more cake-like cookie with no craggy oat texture and significantly less chew. The thick, textured surface visible in the photos comes entirely from old-fashioned rolled oats holding their shape through the bake. If quick oats are all you have, the cookies will still taste good, but the texture and appearance will be closer to a soft drop cookie than an oatmeal cookie. Instant oats are even more processed and produce an even softer result — I do not recommend them for this recipe at all.
What makes oatmeal cookies chewy?
Three ingredients control chew in this recipe, and they work independently of each other. Old-fashioned rolled oats are hygroscopic — they attract and hold moisture after baking, which is why an oatmeal cookie stays soft on day two when a standard chocolate chip cookie is already turning crisp. Granulated sugar, unlike brown sugar, does not add extra moisture to the dough — which means the chew in these cookies comes entirely from the oats and butter structure rather than from sugar hygroscopicity. Butter at the correct temperature creates a dough that spreads slowly and evenly, keeping the cookie thick enough that the center never fully dries out during baking. Pull these cookies when the centers still look underdone and the residual pan heat will finish the job — that is the technique decision that locks in chew.
Can I make oatmeal chocolate chip cookies ahead of time?
Yes, and there are two good ways to do it. The baked cookies store well in a lidded hard-sided container at room temperature for up to 4 days — day two is actually when the texture peaks as the oats fully hydrate. For longer make-ahead, freeze the unbaked dough balls with chips pressed on top for up to 3 months and bake directly from frozen at 350°F (175°C) for 13 to 14 minutes. The frozen dough method gives you genuinely fresh-baked cookies on demand without any planning. I use this method regularly — my no bake chocolate oatmeal cookies article also covers a make-ahead no-bake option if you want something that requires no oven time at all.
Why did my oatmeal chocolate chip cookies go flat?
Flat cookies almost always come down to butter temperature. Butter that is too warm — above 70°F (21°C) — loses its semi-crystalline fat structure and the dough spreads too fast in the oven before the egg proteins and starch have time to set the shape. Confirm your butter passes the finger-indent test before mixing: a clean indent without any greasy shine or slick surface. Expired baking soda is the second most common cause — flat, dense cookies with no lift or crackle point directly to leavening that has lost its potency. Run the freshness test before every batch. A dark pan or bottom rack position can also cause cookies to spread before they set — light-colored aluminum on the middle rack only.
How do I know when oatmeal cookies are done?
Pull the pan when the edges look golden-brown and set with a defined border and the centers still look slightly soft, puffy, and not fully dry — this is the exact doneness point shown in the cooling rack photo. Do not wait for the centers to look done inside the oven. The hot pan continues cooking the cookies during the 5-minute rest through carryover cooking, and the centers will finish setting off the heat. A center that looks fully set inside the oven will be dry and overbaked by the time it cools. Start checking at 10 minutes — the window between perfectly done and overbaked on these cookies is about 90 seconds.
Can I double oatmeal cookies recipe?
Yes, with one adjustment. Double every ingredient proportionally except the baking soda — increase it to ¾ tsp (4.5g) rather than the full doubled amount of 1 tsp (6g). Leavening does not scale linearly, and too much baking soda in a doubled batch produces a soapy, metallic aftertaste and causes the cookies to over-spread. Bake in two separate batches on separate pans — do not crowd both batches onto one pan or bake two pans simultaneously on different racks, as the airflow changes will affect how evenly the cookies bake. Keep the unbaked dough balls at room temperature while the first pan bakes.
How does humidity or altitude affect oatmeal cookies?
In high-humidity environments, the flour and oats absorb ambient moisture before baking, which makes the dough stickier and can cause slightly more spread. Refrigerate the portioned dough balls for 15 minutes before baking if your kitchen is humid — this firms the butter back up and controls spread. At high altitude above 3,500 feet (1,065m), reduce the baking soda to ¼ tsp (1.5g), add 2 tablespoons (15g) of flour, and reduce the oven temperature by 15°F (8°C). At altitude, lower air pressure causes leavening gases to expand faster than at sea level — these adjustments slow the spread and give the egg proteins time to set the structure before the cookie collapses flat.
More Cookie Recipes You’ll Love
- Peanut Butter Oatmeal Cookies — hearty rolled oats meet deep roasted peanut flavor in a one-bowl cookie that requires no chilling and no mixer.
- Banana Oatmeal Cookies — naturally sweetened with ripe banana, these soft oat cookies come together in one bowl and bake up thick with no added sugar needed.
Oatmeal Chocolate Chip Cookies
Ingredients
Equipment
Method
- Position the oven rack in the middle slot and heat the oven to 350°F (175°C), then line a light-colored aluminum baking sheet with parchment paper and set aside.
- Add ½ cup (113g) softened unsalted butter and ½ cup (100g) plain white granulated cane sugar to a large mixing bowl and stir firmly with a silicone spatula for 40 to 50 strokes until the mixture looks smooth, slightly pale, and no sugar granules remain.
- Add 1 large room-temperature egg and stir for 25 to 30 strokes until fully incorporated and the mixture looks thick and glossy throughout.
- Add 1 cup (120g) all-purpose flour, ½ tsp (3g) baking soda, and ¼ tsp (1.5g) fine sea salt on top of the mixture and fold with slow wide strokes for 15 to 20 strokes until no dry flour remains — stop immediately when the flour disappears.
- Add 1½ cups (135g) old-fashioned rolled oats and most of the 1 cup (170g) semi-sweet chocolate chips, reserving 2 to 3 tablespoons, and fold for 20 to 25 strokes until the oats and chocolate are evenly distributed and the dough looks thick and chunky.
- Scoop the dough into 12 balls of approximately 2 tablespoons (45g) each and place them at least 2 inches (5cm) apart on the prepared baking sheet, then press 3 to 4 reserved chocolate chips firmly onto the top of each dough ball.
- Bake at 350°F (175°C) for 10 to 12 minutes until the edges are golden-brown and set and the centers still look slightly soft and puffy with glossy melted chocolate on top — do not wait for the centers to look fully done.
- Leave the cookies on the hot pan for exactly 5 minutes without moving them, then slide the parchment sheet onto a wire cooling rack and allow the cookies to cool for at least 10 more minutes before eating.