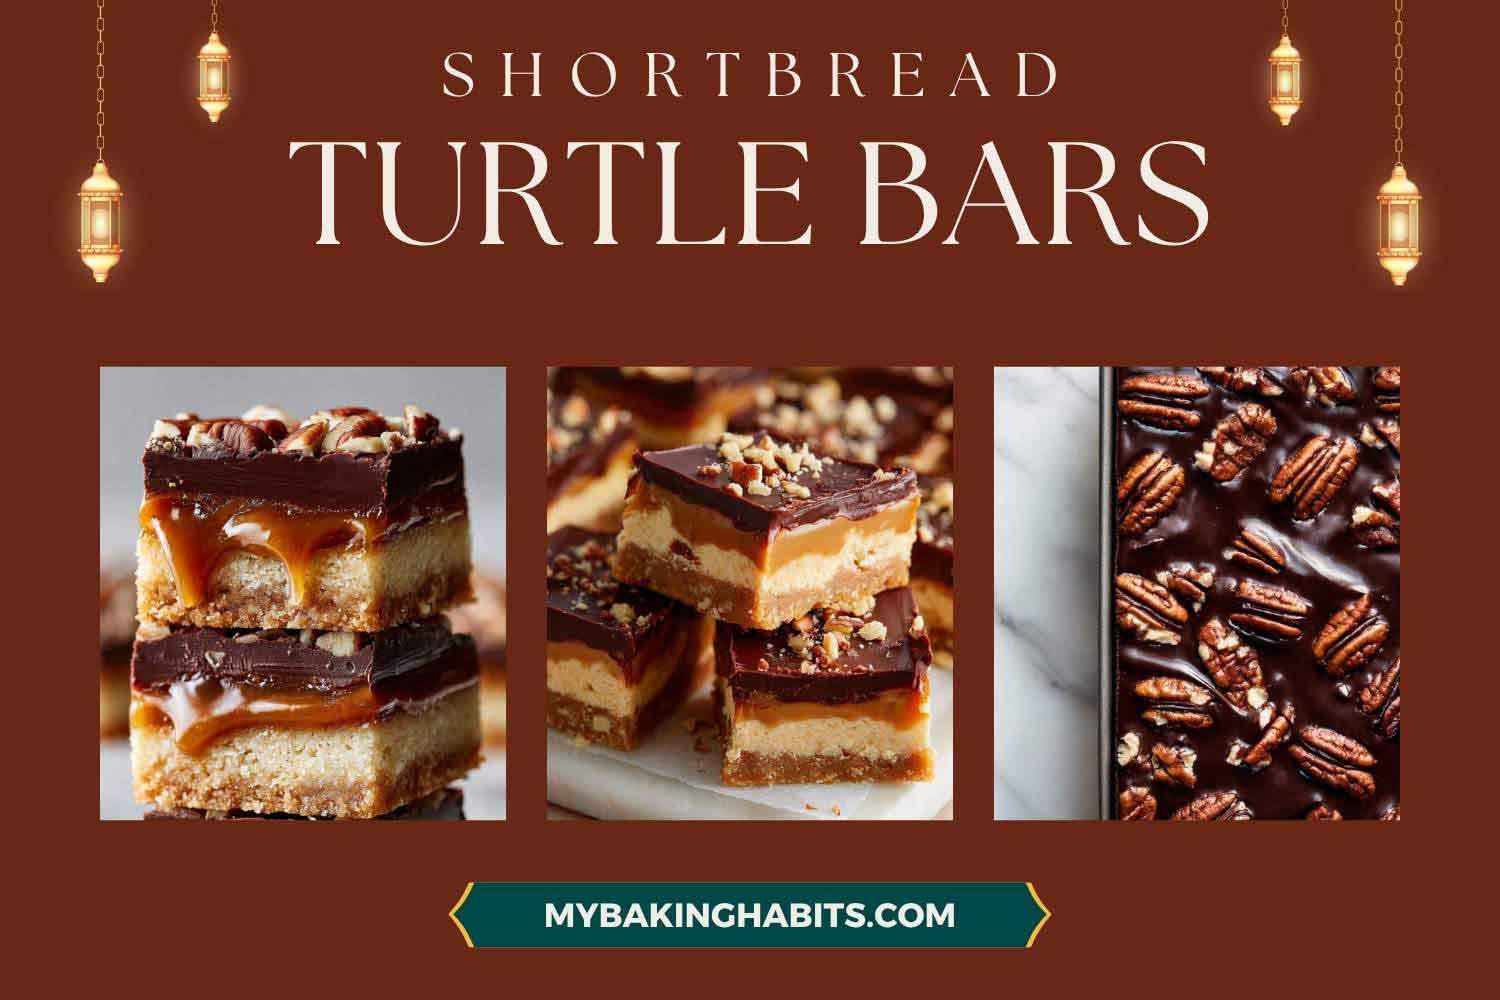
Shortbread Turtle Bars Recipe

Most turtle bars recipes treat the recipe like a three-ingredient situation — melt some chocolate, pour some caramel, call it done. Every version I tried before developing this recipe was either too sweet, too soft, or used a base that turned to wet sand the moment the caramel soaked in. Turtle bars deserve better than that.
I tested nine batches. The first three used a standard 3:2:1 shortbread ratio pressed cold into the pan. The caramel soaked straight through on every one. Batch four was the fix — a par-baked base, pulled when the surface was matte and dry and the edges were just barely beginning to color. That base sealed itself before the caramel hit it. Every batch after that held.
The caramel is stovetop, cooked to soft-ball stage, and it matters. I tried a sweetened condensed milk shortcut in batch six. It was flat, too sweet, and set too firm. In batch seven I tested light brown sugar versus dark — the difference in depth was noticeable enough that I would not use light brown again. The dark brown sugar version has a rounder, more complex flavor that the condensed milk version never will. It also stays ooze-capable at room temperature, which is the whole point — you can see the drip in the stacked bar photo above, and your bars should look exactly like that.
I tested two chocolate topping methods: melted chocolate chips alone versus a heavy cream ganache. Chips melted plain set too hard, cracked when cut, and shattered when bitten. The ganache — dark chocolate and heavy cream — sets firm enough to hold its shape but stays just flexible enough to slice cleanly through without fracturing. That flexibility is not optional. It is what produces the clean-edged cross-section shown in the close-up photos.
I also tested flaked sea salt versus granulated salt as a finish. Granulated salt dissolved into the chocolate surface and disappeared into sweetness. Maldon-style flaked salt stayed visible, gave a distinct pop of contrast in every bite, and made the bars look the way turtle desserts are supposed to look. Maldon only. The granulated version is not worth making.
No mixer required for any part of this recipe. The shortbread comes together by hand. The caramel is stovetop. The ganache is a pour. This is a patient recipe — three stages, two chilling periods — but none of the stages is technically difficult. The complexity is sequencing, not skill.
🗒 Luna’s Note: I make these when I want something that looks like significant effort but does not require it. The par-baking, the caramel cook, the chill — they each take time but none of them require my attention the whole time. I have made these in the background of a full Sunday afternoon. That is how they fit into my week.
| Prep Time | Cook Time | Total Time | Yield | Difficulty |
|---|---|---|---|---|
| 20 min | 35 min | 3 hrs 25 min (includes chilling) | 24 bars | Intermediate |
Total time includes a 2-hour refrigerator chill before cutting. Active hands-on time is approximately 55 minutes.
| Calories | Fat | Carbs | Sugar | Protein | Sodium |
|---|---|---|---|---|---|
| ~309 kcal | ~23g | ~38g | ~28g | ~4g | ~80mg |
Macros are approximate and will vary based on ingredient brands and serving size. Calculated per bar based on 24-bar yield from a 9×13 inch pan.
Ingredients & Tools for Turtle Bars Recipe
For the Shortbread Base
- 2 cups (240g) all-purpose flour, spooned and leveled — King Arthur unbleached all-purpose flour is what I tested with. Do not use self-rising flour; it contains leavening that will change the base texture entirely.
- ½ cup (100g) granulated white sugar
- ¾ cup (170g) unsalted butter, cold and cubed into ½-inch pieces — Kerrygold unsalted butter is my first choice here. Do not use salted butter — the caramel layer already contains salt and you will lose control of the total sodium. Cold butter, straight from the fridge, is mandatory for this base. Softened butter produces a greasy, dense base that will not hold the caramel layer.
- ½ teaspoon fine sea salt
For the Caramel Layer
- 1 cup (200g) packed dark brown sugar — pack it firmly into the measuring cup. Dark brown sugar has more molasses than light brown and gives the caramel a deeper, more complex flavor. Light brown sugar will work but the caramel will taste noticeably flatter.
- ½ cup (113g) unsalted butter, cut into tablespoon-sized pieces — Kerrygold again. Room temperature is fine here; the butter will melt immediately in the pan.
- ⅓ cup (80ml) heavy whipping cream — full-fat only. Half-and-half or milk will not produce the same body or richness and the caramel may not set correctly at room temperature.
- 1 teaspoon pure vanilla extract — pure, not imitation. Imitation vanilla has a chemical aftertaste that is detectable in a caramel this simple.
- ¼ teaspoon fine sea salt
For the Chocolate Ganache
- 1½ cups (255g) bittersweet chocolate chips or bittersweet chocolate (60–70% cacao), finely chopped — Ghirardelli 60% cacao bittersweet chocolate chips are what I use. Do not use milk chocolate — it is too sweet against the caramel and will not set with enough firmness to slice cleanly. Do not use unsweetened chocolate — the ganache will be unpalatably bitter. Stay in the 60–70% cacao range.
- ½ cup (120ml) heavy whipping cream — full-fat only. This is a 2:1 chocolate-to-cream ratio by weight, which produces a ganache that sets firm enough to hold its shape but flexible enough to slice without cracking or shattering.
For the Garnish
- 2½ cups (225g) pecan halves, toasted — whole halves for pressing into the ganache surface, as shown in the pan photo. Toast raw pecans in a dry skillet over medium heat for 4–5 minutes, stirring constantly, until they smell nutty and the color deepens by one shade. Do not use pre-candied or salted pecans — the salt content is uncontrolled and the coating interferes with the ganache bond.
- ½ cup (50g) pecans, roughly chopped — separate from the whole halves above. These go on top of the ganache alongside the whole halves for the textured surface visible in the close-up bar photos. Rough chop only — quarter-inch pieces, not a fine meal.
- 1½ teaspoons flaked sea salt — Maldon flaked sea salt specifically. The large, flat crystal structure is what gives the visible salt contrast shown in the hero bar photo. Granulated sea salt or kosher salt will dissolve into the chocolate surface and disappear. Maldon is not optional here — it is a visual and textural element, not just a flavor finish.
Before You Start
Read this section completely before you begin. The shortbread base requires cold butter and a hot oven. The caramel requires your full attention for approximately 8–10 minutes on the stovetop. Having everything prepped before you start any stage prevents mistakes mid-process.
This recipe uses three separate methods in sequence: a rubbed-in cold-fat shortbread method for the base, a stovetop wet-caramel method for the filling, and a hot-cream ganache pour for the chocolate layer. None of the three stages overlap — each must be completed and chilled (where required) before the next begins. Read through all three stages before you start so the sequence is clear.
Butter temperatures — two different requirements in this recipe: The shortbread base requires cold butter, straight from the fridge. Pull it out, cube it into ½-inch pieces, and use it immediately. The caramel requires butter at room temperature or cut into tablespoons — it will melt quickly in the pan either way. Keep these two butter portions separate and do not let the shortbread butter warm up while you are reading through the recipe.
Toasting the pecans: Do this first, before anything else. Heat a dry skillet over medium heat. Add 2½ cups (225g) pecan halves and ½ cup (50g) chopped pecans together to the skillet. Stir constantly for 4–5 minutes until the nuts smell deeply nutty and the color darkens by one shade — pale tan to medium brown. Pour immediately onto a plate or sheet pan to stop the cooking. They will continue to toast slightly from residual heat if left in the pan. Cool completely before using.
Gram weight priority: For the most consistent results, use a kitchen scale set to grams. The gram weights in this recipe are what I tested with. Volume measurements like cups and tablespoons can vary by 20–30% depending on how tightly ingredients are packed or scooped. The gram weights are the reliable numbers.
Flour measuring (if not using a scale): Spoon the flour into your measuring cup using a separate spoon and level it off with a straight edge. Do not scoop the cup directly into the flour bag — scooping packs in 20–30% more flour than the recipe intends and will produce a base that is dry and crumbly rather than sandy and cohesive.
Pan preparation: Use a 9×13 inch (23×33cm) light-colored aluminum metal baking pan. Line it with parchment paper, leaving a 2-inch overhang on both long sides — this overhang is your handle for lifting the finished slab out of the pan before cutting. Without the overhang, you cannot remove the bars cleanly and the edges will break. Do not use a glass or ceramic pan — these retain heat differently and the shortbread base will overbrown on the bottom before the center sets. Do not use a dark non-stick pan — it absorbs more heat and will produce the same bottom-browning problem.
No mixer needed: The shortbread base comes together by hand or with a pastry cutter. The caramel is stovetop. The ganache is a simple pour. You do not need a stand mixer or hand mixer for any part of this recipe.
Oven position: Position your oven rack in the middle of the oven before preheating to 325°F (165°C). Top rack burns the shortbread surface before the center sets. Bottom rack overbrowns the base. Middle rack only.
Thermometer note: The caramel must reach soft-ball stage — 235–240°F (113–115°C). A candy thermometer or instant-read thermometer clipped to the side of the saucepan (bulb not touching the bottom) is the most reliable way to confirm this. You can test without a thermometer using the cold water method — drop a small amount of caramel into a glass of ice water and it should form a soft, pliable ball that flattens when pressed. But a thermometer is faster and more accurate, and I recommend using one.
I use a Thermapen for caramel. It is overkill for most home baking tasks. For this specific recipe — where five degrees separates a correct caramel from one that runs — it earns its counter space. A basic clip-on candy thermometer from any kitchen store works fine and costs $12. I am not precious about which one you use, as long as you use one.
Chilling plan: This recipe requires two refrigerator periods: one after the caramel sets (30 minutes minimum) and one after the ganache sets (2 hours minimum before cutting). Plan for a total of approximately 3.5 hours from start to cut bars. Most of that time is passive — you are not actively doing anything. But you cannot rush the chill times without ruining the clean edges visible in the finished bar photos.
Brown sugar hardened in the bag? Measure out 1 cup (200g), place it in a microwave-safe bowl, lay a damp paper towel across the top, and microwave in 20-second increments until the sugar is soft enough to pack. Do not skip this — hardened lumps of brown sugar in the caramel do not fully dissolve during cooking and create pockets of uneven sweetness and texture in the finished layer.
Necessary Tools
Required:
- Kitchen scale (strongly recommended — gram weights are more accurate than volume)
- 9×13 inch (23×33cm) light-colored aluminum baking pan
- Parchment paper with overhang on both long sides
- Medium saucepan (2–3 quart / 2–3 liter capacity) — for the caramel
- Small saucepan or microwave-safe bowl — for the ganache
- Candy thermometer or instant-read thermometer — for caramel temperature
- Pastry cutter or two forks — for cutting cold butter into flour for the shortbread base
- Rubber spatula or silicone spatula — for stirring the caramel and spreading the ganache
- Whisk — for the ganache
- Wire cooling rack
- Sharp chef’s knife — for cutting finished bars
- Dry skillet — for toasting pecans
Optional:
- Oven thermometer — recommended, most home ovens run 15–25°F (8–14°C) off calibration
- Bench scraper — for ultra-clean bar cuts
- Ruler — for marking even 2×2 inch portions before cutting
How to Make Turtle Bars
Step 1: Preheat the Oven and Prepare the Pan
Preheat your oven to 325°F (165°C) and position the rack in the middle of the oven. Most home ovens run 15–25°F (8–14°C) off — if you have an oven thermometer, confirm the actual temperature before the pan goes in. My oven runs about 15°F hot, so I set mine to 310°F and the actual temperature lands at 325°F. Check yours.
Line your 9×13 inch (23×33cm) light-colored aluminum baking pan with parchment paper. Press it flat against the bottom and up the sides, leaving at least a 2-inch overhang on both long sides. Crease the corners firmly so the parchment lies flat and does not lift when you press the shortbread dough in. If the parchment keeps lifting, use small binder clips on the outside edges of the pan to hold it down while you press the dough.
⚠️ Baker’s Warning: If you skip the parchment overhang, you will have no way to lift the finished slab out of the pan. The bars must be removed before cutting — cutting inside the pan produces uneven edges and the corner bars will crumble. Line the pan now and save yourself the problem later.
The pan is ready. The shortbread goes together next — work quickly so the butter stays cold.
Step 2: The Shortbread Base Comes Together in the Bowl
In a large mixing bowl, whisk together 2 cups (240g) all-purpose flour, ½ cup (100g) granulated white sugar, and ½ teaspoon fine sea salt until evenly combined — about 15 seconds. This dry mix step matters: evenly distributed salt and sugar in the flour means the base bakes uniformly without sweet or salty pockets.
Add ¾ cup (170g) cold cubed unsalted butter directly into the flour mixture. Using a pastry cutter or two forks, cut the butter into the flour until the mixture resembles coarse, damp sand with some pea-sized butter pieces still visible. You are not trying to achieve a completely uniform texture — some variation in butter piece size is correct and creates the sandy, slightly crumbly texture of a proper shortbread base. This will take approximately 3–4 minutes of active cutting.
⚠️ Baker’s Warning: Do not use your hands to rub the butter in unless you work extremely fast. Hand heat melts butter within 60–90 seconds of contact, and warm butter produces a greasy, dense base that will not hold the caramel layer without soaking through. If your kitchen is warm — above 75°F (24°C) — cube the butter and return it to the fridge for 10 minutes before starting this step.
The mixture should hold together when you squeeze a small amount firmly in your palm but crumble apart cleanly when you open your hand — not clump and stick like wet sand, not fall apart into dry loose flour. If it clumps and sticks, the butter is too warm — return the bowl to the fridge for 10 minutes before continuing. If it will not hold together at all, the butter pieces are too large — cut them smaller. Tip the mixture into the prepared pan and begin pressing.
Step 3: The Base Is Pressed Flat and Even
Tip the shortbread mixture into the lined pan. Using your fingertips and the flat bottom of a dry measuring cup, press the mixture firmly and evenly into the pan — working from the center outward and then pressing the edges firmly into the corners. The layer should be approximately ½ inch (1.25cm) thick and completely uniform — no ridges, no thin patches, no fingerprint impressions left in the surface.
Press your fingertip into the center: it should feel firm and not spring back. If it springs back, the shortbread has not been packed firmly enough and will crumble when the caramel is poured. Press again with the measuring cup bottom until the surface holds a fingerprint without releasing it. Thin spots will overbake before thick spots set.
🗒 Luna’s Note: I use the bottom of a straight-sided glass for the center and switch to my fingertips for the corners. The glass gets a more uniformly flat surface than fingers alone, and flat matters here — an uneven base produces bars of different heights that do not cut cleanly into uniform squares.
Run your finger along all four edges to make sure the dough meets the parchment cleanly with no gaps. Dock the surface lightly with a fork — 15–20 pokes across the surface — to prevent any puffing during the par-bake.
The pan is ready for its first oven visit. Carry it carefully so the loose dough does not shift.
Step 4: The Base Is Par-Baked Until Set and Sealed
Place the pan on the middle rack of the preheated 325°F (165°C) oven. Bake for 18–22 minutes. Start checking at 18 minutes.
The base is ready when the surface looks completely matte and dry — no shiny or wet patches anywhere — and the very edges are just barely beginning to turn a pale, faint gold. The center should still look cream-colored, not golden. This is the pull moment.
As shown in the stacked bar cross-section photos, the finished shortbread base is a uniform pale cream from edge to edge with only the faintest golden color at the very bottom. That is exactly what par-baking to this point produces. Do not wait for a deeper golden color — a base that is fully golden before the caramel goes on will be too brittle to slice cleanly through the finished bar.
⚠️ Baker’s Warning: If the edges begin to look golden while the center still looks raw and pale, your oven is running hot. Tent the pan loosely with foil for the remaining bake time and reduce the oven temperature by 15°F (8°C) for future batches.
Remove the pan from the oven and set it on a wire cooling rack. Do not add the caramel yet. The base needs to cool for exactly 15 minutes — not because it will burn the caramel, but because carryover heat from the pan continues setting the shortbread structure for several minutes after it leaves the oven. Adding cold or room-temperature caramel to a still-hot base disrupts this finishing process, and the caramel will penetrate the base surface rather than sitting cleanly on top of it. Fifteen minutes on the rack allows carryover heat to complete the structure-setting and the surface temperature to drop enough that the caramel pours smoothly and self-levels rather than immediately soaking in. Set a timer.
Step 5: The Caramel Is Cooked to Soft-Ball Stage
While the base cools, make the caramel. Clip your candy thermometer to the side of a medium saucepan — 2 to 3 quart capacity — with the bulb sitting in the center of the pan, not touching the bottom. Touching the bottom gives a false high reading.
Add 1 cup (200g) packed dark brown sugar, ½ cup (113g) unsalted butter cut into tablespoon-sized pieces, and ⅓ cup (80ml) heavy whipping cream to the saucepan. Place over medium heat. Stir constantly with a rubber spatula as the butter melts and the sugar dissolves — approximately 3–4 minutes. Once the mixture comes to a full boil — large bubbles breaking across the entire surface, not just at the edges — stop stirring. Do not stir again until the caramel is off the heat.
⚠️ Baker’s Warning: Stirring the caramel after it reaches a boil causes sugar crystals to form on the sides of the pan and reintroduce into the mixture — this is crystallization, and it will turn your smooth caramel into a grainy, gritty mess that cannot be saved. Once it boils, hands off the spatula. You can swirl the pan gently if needed, but do not stir.
Allow the caramel to boil undisturbed until it reaches 235–240°F (113–115°C) on the candy thermometer — soft-ball stage. This takes approximately 4–6 minutes from the point of full boil, but watch the thermometer, not the clock. At 235°F (113°C), remove the pan from the heat immediately.
Add 1 teaspoon pure vanilla extract and ¼ teaspoon fine sea salt. Stir once to combine — the caramel will bubble up briefly when the vanilla hits the hot sugar. This is normal.
The caramel should look like the translucent amber layer visible in the cross-section bar photos — deep golden, glossy, and fluid. It will thicken as it cools. Pour it immediately onto the cooled shortbread base.
Step 6: The Caramel Layer Is Poured and Set
Pour the hot caramel directly over the par-baked shortbread base. Tilt the pan gently in all four directions to spread the caramel to the edges — do not use a spatula to spread it, as the spatula will drag and create an uneven surface. The caramel is fluid enough at this temperature to self-level with gentle tilting. Work quickly — it begins to thicken within 60–90 seconds of leaving the heat.
If the caramel does not quite reach the corners with tilting, use the very tip of a spatula to nudge it — one or two light touches only. Do not scrape or spread.
Transfer the pan to the refrigerator. Chill for 30 minutes until the caramel is fully set and firm to a light touch at the center. Do not proceed to the ganache while the caramel is still warm or soft — a soft caramel layer will mix into the ganache when poured and the two layers will bleed together rather than staying distinct, which is the entire visual point of these bars.

🗒 Luna’s Note: I always check the caramel set by pressing very gently with one fingertip at the center of the pan. If it gives like cold pudding — still too soft. If it gives slightly but springs back and leaves no indentation — ready for the ganache. The edges always set faster than the center.
Set a 30-minute timer and make the ganache while you wait.
Step 7: The Ganache Is Made and Poured
Place 1½ cups (255g) bittersweet chocolate chips or finely chopped bittersweet chocolate (60–70% cacao) in a medium heat-safe bowl. Heat ½ cup (120ml) heavy whipping cream in a small saucepan over medium heat until it just begins to simmer — small bubbles forming at the edges of the pan, steam rising. Do not bring to a full boil. Boiling cream can scorch and will cause the ganache to seize.
Pour the hot cream directly over the chocolate. Let it sit undisturbed for exactly 2 minutes — this rest period allows the heat to penetrate and melt the chocolate evenly without agitation. After 2 minutes, whisk from the center outward in slow, steady circles until the ganache is completely smooth, glossy, and uniform. No streaks, no lumps. If a few unmelted pieces remain after 60 seconds of whisking, place the bowl over a saucepan of barely simmering water for 30 seconds and whisk again.
⚠️ Baker’s Warning: If you whisk the ganache immediately without the 2-minute rest, you will incorporate air bubbles into the surface. The ganache will still taste correct but the surface will look matte and pocked rather than the smooth satin finish visible in the finished bar photos. Wait the 2 minutes.
Allow the ganache to cool for 3–4 minutes until it is slightly thickened but still completely pourable. It should coat the back of a spoon and fall off in a slow, thick ribbon. If it has cooled too much and is too thick to pour, set the bowl over warm water for 30 seconds and stir gently.
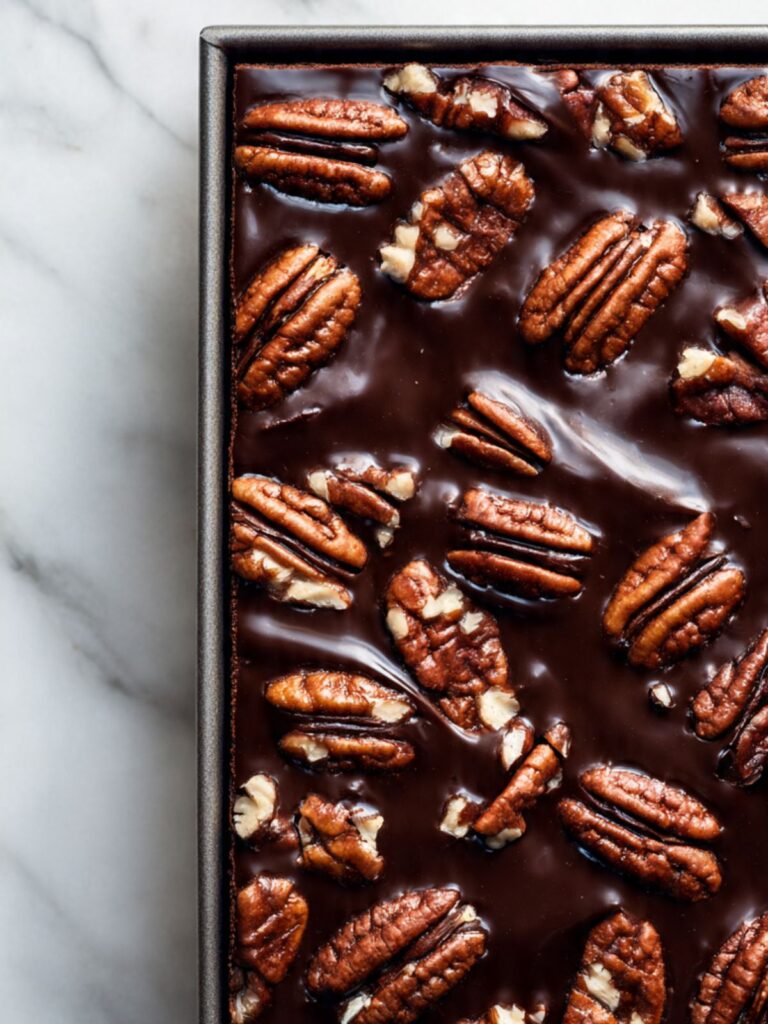
Remove the chilled caramel-topped shortbread from the refrigerator. Pour the ganache evenly over the set caramel layer. Tilt the pan gently to spread it edge to edge — the same tilting method as the caramel. The ganache should self-level to a smooth, even surface as shown in the overhead pan photo.
Step 8: The Pecans Are Pressed In and the Salt Goes On
Immediately after pouring the ganache — while it is still completely wet and fluid — begin pressing the toasted pecan halves into the surface. Work row by row across the pan, pressing each pecan half gently but firmly so it sits flat and embedded in the ganache rather than perched on top. Space them evenly so every finished 2×2 inch bar will have at least one whole pecan half on it when cut.
As shown in the overhead pan photo, the pecan halves should cover the surface in a relatively dense, uniform pattern across the full 9×13 inch span. This is not a scattered garnish — it is a full coverage application. Expect to use the entire 2½ cups (225g) of whole pecan halves.
Scatter the ½ cup (50g) roughly chopped pecans over the surface between the whole halves, pressing them very gently so they stay in place.
⚠️ Baker’s Warning: If you wait more than 4–5 minutes after pouring the ganache to press the pecans in, the surface will have begun to set and the pecans will sit on top rather than embedding. They will fall off when the bars are cut or handled. Press the pecans in within 3 minutes of pouring the ganache — have them measured and ready before you pour.
Transfer the pan to the refrigerator immediately after the pecans are pressed in. Do not add the flaked salt yet.
Step 9: The Bars Chill, Then the Salt Goes On
Refrigerate the pan for a minimum of 2 hours. The ganache must be completely firm — not just set on the surface but firm all the way through — before you add the salt or attempt to cut. Cutting into an underchilled ganache layer compresses it and produces a smeared, ragged chocolate edge rather than the clean, defined lines visible in the finished bar photos.
After 2 hours, remove the pan from the refrigerator. Scatter 1½ teaspoons Maldon flaked sea salt evenly across the entire surface — distribute it across the full 9×13 span, not concentrated in the center, not sparse at the edges. The amount looks generous on the surface, which is correct — you want visible crystal contrast in every bite, as shown in the stacked bar close-up. Press each flake very gently with one fingertip so it adheres to the set chocolate without sinking in.
🗒 Luna’s Note: I add the salt after the full chill rather than before because flaked salt on a wet ganache surface partially dissolves and loses its visual impact. The large crystal structure — the flat, geometric flakes visible in the hero bar photo — only stays intact if the ganache is already set when the salt goes on.
Allow the pan to sit at room temperature for 10 minutes before cutting. A fully refrigerator-cold ganache layer will crack rather than slice cleanly. The 10-minute rest brings it just to the point where a sharp knife passes through without fracturing.
Step 10: The Bars Are Cut Clean
Use the parchment overhang to lift the entire slab out of the pan and onto a cutting board. Remove the parchment from the sides by folding it down flat.
Using a sharp chef’s knife, cut the slab into 24 bars: Each bar is approximately 2.25 × 2.1 inches — the full 9×13 slab divided into 4 equal rows across the 9-inch width and 6 equal columns across the 13-inch length equals exactly 24 bars. If you want to verify your portions before cutting, each finished bar weighs approximately 95–105g depending on how generously the caramel and ganache layers set. Weigh the first cut bar — if it is significantly lighter or heavier, your layers may have been thinner or thicker than intended, and you can adjust the remaining cuts accordingly.
Wipe the knife blade clean with a damp cloth between every single cut. Chocolate ganache that builds up on the blade drags through subsequent cuts and produces ragged edges. One wipe per cut — this is the only thing standing between you and the clean edges shown in the photos.
🗒 Luna’s Note: I mark the cut lines with a ruler and a toothpick before the knife goes in. It takes 90 seconds and the bars come out uniform. Without marking, the first cut is always slightly off and the error compounds across the slab. Mark first.
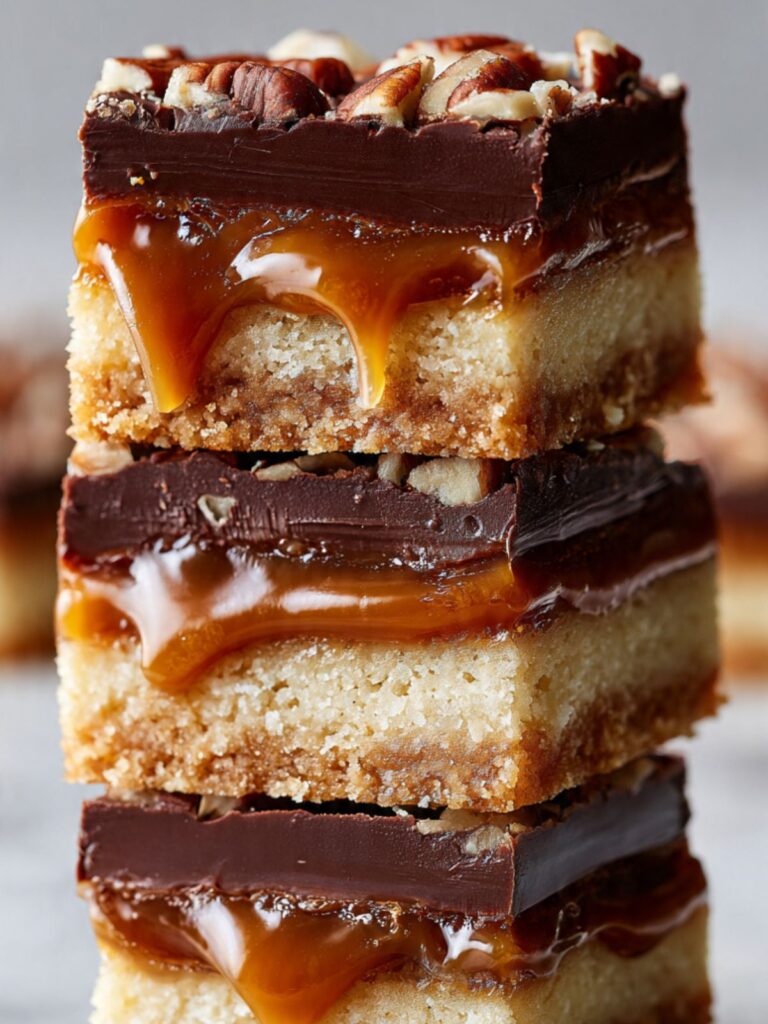
The bars are cut and ready to serve. The caramel will be visible at the cut edges immediately — the slow drip shown in the stacked bar photo is what correct soft-ball caramel looks like at room temperature. That is the result.
The Science Behind Turtle Bars
Why Cold Butter Produces a Shortbread Base That Holds
I noticed something on batch three that I did not understand at the time. The base on that batch had a greasy, dense quality — not sandy, not crisp — and the caramel soaked into it within minutes of being poured. The only thing I had done differently was let the butter sit out for twenty minutes before cutting it in. The butter was barely softened. The result was completely different from the batches where the butter went in straight from the fridge.
What was happening is fat crystallization. Butter at refrigerator temperature — around 35–40°F (2–4°C) — contains fat crystals that are stable and solid. When you cut cold butter into flour, those solid fat crystals coat the flour particles without fully merging with them. During baking, the fat melts out of those coated particles in a controlled way, leaving behind a network of small air gaps that produce the sandy, slightly crumbly texture of a proper shortbread. Softened butter, by contrast, smears into the flour and creates a continuous fat film — the base bakes up dense, greasy, and structurally weak. It cannot support the weight of the caramel layer without compressing and absorbing it.
This is why the cold butter instruction is not a preference. It is the mechanism that makes the base structurally capable of holding two layers of filling. The par-baking step reinforces this — the heat sets the fat-flour network into a rigid structure before the caramel ever touches it. Cold butter plus par-baking is what produces the rigid, clean-edged base visible in the stacked bar cross-section photos.
The Caramel Temperature Window Is Narrower Than It Looks
Soft-ball stage — 235–240°F (113–115°C) — is a five-degree window. It is the difference between a caramel that oozes slowly at room temperature and one that either never sets or sets so hard it cracks when bitten.
Below 235°F (113°C), the caramel retains too much water. It will not set at room temperature and will flow out from under the ganache layer the moment the bars are cut — exactly the kind of structural failure that makes turtle bars look sloppy rather than intentional. The drip visible in the stacked bar photos is a controlled, slow movement of a properly set caramel, not a liquid pour. That texture only happens at the correct temperature.
Above 240°F (115°C), the caramel moves into firm-ball stage. The bars will cut cleanly but the caramel layer will be chewy and dense — closer to a toffee than a flowing caramel. It will also be harder to bite through cleanly, and the contrast between the tender shortbread, the soft caramel, and the ganache — which is the entire textural point of this recipe — disappears. If you do not have a thermometer, use the cold water test: drop a small amount into ice water and feel the ball it forms. Soft and pliable, flattens when pressed — correct. Firm and holds its shape when pressed — too far. Pull it before it gets there.
🗒 Luna’s Note: I have cooked this caramel without a thermometer exactly once, as an experiment. I undershot by about 8°F and did not know it until the bars were cut two hours later and the caramel ran immediately. A thermometer is a $12 tool. It is worth it for this specific recipe. I use a Thermapen for everything — if you bake regularly, buy one and never worry about this again. If you want a salted caramel chocolate chip cookie bars comparison for how caramel behaves differently in a bar versus a cookie context, that article covers the same caramel science from a different angle.
The 2:1 Ganache Ratio Is What Keeps the Chocolate From Cracking
Standard melted chocolate sets hard — brittle enough to snap, which is exactly what you want in a chocolate bar but exactly what you do not want as a topping on a layered dessert bar. A ganache at a 2:1 ratio — two parts chocolate to one part heavy cream by weight — sets to a firm but flexible state. The cream disrupts the cocoa butter crystal network that would otherwise form a rigid, brittle structure.
When you combine hot cream with chocolate, the fat in the cream emulsifies with the cocoa butter in the chocolate. This creates a stable emulsion where the fat molecules are suspended in a uniform network rather than crystallizing into a hard lattice. The result is a ganache that is firm enough to hold a clean edge when sliced but flexible enough to give slightly under a knife without fracturing. This is the texture visible in every cut-bar photo — the chocolate layer compresses slightly at the cut edge rather than shattering. That compression is the emulsion in action.
The ratio matters precisely. A 1:1 ganache (equal parts chocolate and cream) is too soft for this application — it will not set firm enough at room temperature and the bars will be messy to handle. A 3:1 ganache is too firm and will crack. The 2:1 ratio is the middle point that produces the result shown in the photos.
Turtle Bars Troubleshooting & Pro-Tips
Common Mistakes
The caramel soaked into the shortbread base and the layers are not distinct
The most common cause is using softened butter in the shortbread base instead of cold butter. Softened butter produces a structurally weak base that absorbs liquid rather than repelling it. The second cause is skipping or shortening the par-bake — a raw or underbaked base has not yet formed the rigid fat-flour network that seals the surface against liquid penetration. If this has already happened, the bars are not salvageable as layered bars. Press the whole slab firmly into a baking dish, warm it at 300°F (150°C) for 10 minutes until the layers meld together, and serve it as a warm turtle skillet bar with a scoop of vanilla ice cream on top. Next batch: cold butter, fully par-baked base, 15-minute cool before the caramel goes on.
The wrong pan size was used and the bars are too thin or too thick
A 9×9 inch (23×23cm) pan produces bars that are significantly thicker in the shortbread base — expect a denser, heavier result and add 5–7 minutes to the par-bake time. An 11×15 inch (28×38cm) pan produces thinner bars and the shortbread base will par-bake in 14–16 minutes rather than 18–22. The caramel and ganache quantities stay the same for both — the layer depths will simply be thinner in the larger pan. If you have already baked in the wrong pan and the bars turned out too thin, cut them into smaller 1×1 inch pieces and serve as turtle bar bites. The smaller size suits a thin bar better than trying to present it as a full square.
The caramel is grainy and crystallized rather than smooth
This is stirring after the boil. Once the caramel mixture reaches a full boil, any agitation introduces sugar crystals from the sides of the pan back into the mixture, and crystallization spreads rapidly — the entire batch turns grainy within seconds. A grainy caramel cannot be uncrystallized. If this has happened, pour it over the shortbread base anyway — the texture will be gritty but the flavor will still be correct — and cover it with the ganache. The ganache and pecan topping will carry the bars. Next batch: stop stirring the moment the mixture reaches a full boil and do not touch it again until it is off the heat.
The caramel is too runny and flows out when the bars are cut
The caramel did not reach soft-ball stage — 235°F (113°C) minimum. Below this temperature, too much water remains in the caramel and it will not set at room temperature. If the bars are already assembled and chilled, the caramel will run the moment they reach room temperature. Serve them cold, directly from the refrigerator — the caramel is firmer when cold and the bars will hold their shape long enough to be eaten. Next batch: use a candy thermometer and do not pull the caramel off the heat until it reads at least 235°F (113°C).
The caramel set too hard and is chewy and dense
The caramel was cooked past 240°F (115°C) into firm-ball stage. The bars will still taste correct but the caramel layer will be significantly chewier and will not drip at room temperature. This is not a failure — it is a different texture. If you prefer a flowing caramel, pull earlier next time. If you cooked past 245°F (118°C), the caramel may be brittle when cold — warm the bars briefly at 300°F (150°C) for 5 minutes before serving to soften the layer.
The chocolate ganache cracked when cut
Two causes. First: the ganache was cut while fully refrigerator-cold without the 10-minute room temperature rest. Cold ganache is brittle — the 10-minute rest is what brings it to the flexible, sliceable state shown in the photos. Second: the chocolate-to-cream ratio was off — too much chocolate relative to cream produces a ganache that sets too firm. If the bars are already cut and the chocolate has cracked, press the broken pieces back into place with light finger pressure while the chocolate is still cold and they will re-adhere as the ganache comes to room temperature. Next batch: rest the slab at room temperature for 10 minutes before cutting and verify the ratio is 255g chocolate to 120ml cream.
The pecans fell off when the bars were cut or handled
The ganache had already begun to set before the pecans were pressed in. The window for pressing pecans into wet ganache is approximately 3–4 minutes after pouring. After that, the surface firms enough that pecans sit on top rather than embedding. If the pecans are loose on already-cut bars, warm the bars very briefly — 8–10 seconds in the microwave — until the chocolate surface just softens, then press the pecans back in firmly and re-chill for 15 minutes.
If some pecans are missing entirely from individual bars, arrange the bars on a serving plate and scatter the fallen pecans loosely around them — the visual reads as intentional garnish rather than structural failure. Next batch: have the toasted pecans measured and arranged on the counter before the ganache is poured so you can move immediately.
The bars crumbled when lifted out of the pan
The parchment overhang was not used, or the bars were not fully chilled before lifting. A fully chilled slab — firm ganache, set caramel, rigid shortbread — lifts as a single intact unit. An underchilled slab flexes when lifted and the shortbread base cracks. If the slab has already broken into sections, cut each section into bars individually where it lies on the board. If individual bars crumble further during cutting, press the crumbled pieces into small ramekins or glasses, layer with a spoonful of vanilla ice cream, and serve as a turtle bar trifle — warm them at 300°F (150°C) for 5 minutes first for the best result. The crumble only affects presentation, not flavor. The bars are still fully edible — the break only affects presentation, not flavor.
The bars behaved differently at high altitude or in a humid climate
High altitude — above 3,500 feet (1,067 meters) — causes the shortbread to par-bake faster due to lower atmospheric pressure and faster moisture evaporation. Start checking the base at 15 minutes rather than 18. The caramel will also reach temperature more quickly — watch the thermometer closely and be ready to pull at 235°F (113°C) the moment it arrives.
In high humidity — above 70% relative humidity — the Maldon salt will dissolve into the ganache surface within hours of application. Add the salt immediately before serving rather than during assembly if you are in a humid climate. The caramel layer may also feel softer than expected in high heat and humidity — refrigerate the bars until 15 minutes before serving rather than the standard 20–25 minutes.
Expert Pro-Tips
Mark cut lines before the knife goes in. Use a ruler and a toothpick to score the surface of the ganache into 24 even portions — 4 rows by 6 columns — before any cutting begins. The toothpick makes a shallow line that guides the knife without damaging the surface. Without pre-marking, the first cut is almost always slightly off-center and the error compounds across the slab. 90 seconds of marking produces bars that look exactly like the photos. Skip it and the corner bars are always the wrong size.
Wipe the knife between every single cut. Ganache and caramel build up on the blade within one cut. A dirty blade drags through the next cut and smears the chocolate edge. Fill a tall glass with hot water, dip the blade, wipe it with a clean cloth between every cut. The clean-edge cross-section visible in the stacked bar photos is entirely a function of a clean blade at every cut — not the recipe, not the chill time. The knife does the work.
Toast the pecans even if the package says pre-toasted. Pre-toasted pecans from the store are often toasted very lightly and have been sitting in the bag losing volatile aroma compounds since the day they were packed. A fresh 4–5 minute toast in a dry skillet before use deepens the flavor by a full register — the difference between a flat, faintly nutty note and a deep, roasted pecan flavor that holds its own against the caramel and dark chocolate. Taste one pre-toast and one post-toast side by side. The difference is not subtle.
Chill the slab overnight for the cleanest possible cut edges. The 2-hour minimum chill produces good results. An overnight chill — 8 hours or more — produces noticeably cleaner cut edges because the ganache has had time to fully crystallize throughout its depth rather than just at the surface. If you are making these for an occasion where presentation matters, assemble the day before and cut the morning of serving.
How to Store Turtle Bars
Room Temperature
Store cut turtle bars in a single layer in a hard-sided lidded container — a rectangular food storage container with a snap-on lid works well. Place a sheet of parchment paper between layers if you need to stack them. Room temperature storage is fine for up to 3 days in a cool kitchen — below 70°F (21°C). Above that temperature, the caramel layer softens significantly and the bars become difficult to handle without the caramel flowing out at the cut edges.
Do not store in a zip-lock bag. The soft caramel layer means the bars will stick to the bag walls and to each other, and the ganache surface will pick up condensation marks from the plastic pressing against it. Hard-sided container only, with parchment between layers if stacking.
Do not store uncovered on a plate or board at room temperature — the ganache surface picks up odors from the surrounding environment within a few hours, and the caramel edges will dry out and harden unevenly.
🗒 Luna’s Note: I prefer these at room temperature over refrigerator-cold. The caramel is at its correct texture — slow-moving, slightly tacky, the way it looks in the stacked bar photos — when the bars have been sitting out for 20–30 minutes after a refrigerator chill. Straight from the fridge, the caramel is too firm and the shortbread loses some of its sandy texture. Room temperature is the right serving state for this recipe.
Refrigerator
Refrigerator storage extends shelf life to 7 days. Store in the same hard-sided lidded container with parchment between layers. The cold will firm the caramel layer considerably — the bars will feel almost toffee-like straight from the fridge, which is not their best state.
Pull the bars from the refrigerator 20–25 minutes before serving to allow the caramel to return to its correct room-temperature texture. Do not microwave to speed this up — 10 seconds of microwave heat softens the caramel unevenly and can cause the ganache to develop a greasy surface as the cocoa butter separates slightly from the emulsion.
The flaked salt on the surface may absorb some moisture from refrigerator humidity over 3–4 days and lose its crystal structure. This does not affect flavor but does affect appearance. If you are storing for more than 2 days and presentation matters, add the flaked salt immediately before serving rather than before chilling.
Freezer — Baked
Turtle bars freeze well for up to 2 months. Wrap each bar individually in a layer of plastic wrap, pressing the wrap against all six surfaces to exclude air. Place the individually wrapped bars in a zip-lock freezer bag or a hard-sided freezer-safe container. Label with the date.
To thaw: transfer the wrapped bars to the refrigerator overnight — approximately 8 hours. Do not thaw at room temperature from frozen — the ganache surface develops condensation as the cold bar hits warm air, and the water droplets leave permanent marks on the chocolate surface. Thaw in the fridge, then bring to room temperature for 20–25 minutes before serving.
Texture after freezing is very close to fresh — the shortbread base, caramel layer, and ganache all freeze and thaw without significant structural change. The flaked salt will have dissolved into the ganache surface during freezing and thawing. Add fresh Maldon salt immediately before serving.
Freezer — Unbaked Components
The shortbread base can be pressed into the lined pan, covered tightly with plastic wrap, and frozen unbaked for up to 1 month. Bake directly from frozen — add 5–7 minutes to the par-bake time and watch the surface for the matte, dry finish that signals it is ready. Do not thaw the dough before baking.
The caramel and ganache do not freeze well in their liquid state and should always be made fresh. Both come together in under 15 minutes — there is no practical reason to make them ahead in liquid form.
Serving Suggestion
Serve turtle bars at room temperature — pulled from the refrigerator 20–25 minutes before serving, or stored at room temperature in a cool kitchen and served directly. The caramel texture at room temperature is the whole point. Cold bars are a different and lesser experience.
I serve these with strong black coffee — no sugar, no milk. The bitterness cuts through the caramel and dark chocolate in a way that a sweetened coffee cannot. If coffee is not the context, a small pour of bourbon on the side works in the same way — the oak and vanilla notes in the bourbon mirror the caramel layer and the dark chocolate handles the tannin. That pairing is not an accident.
These are the bars I make when someone asks me to bring something and I want them to remember what I brought. Not because they are technically impressive — the method is straightforward once you understand the sequencing — but because the combination of the three layers hits in a specific way that most people do not expect from a bar cookie. The shortbread is the surprise. Everyone expects a graham cracker base. The shortbread changes the whole register of the bar.
Day 1 versus Day 2: these bars are better on Day 2. The shortbread base absorbs just enough moisture from the caramel layer overnight to become slightly less sandy and more cohesive. The caramel flavor deepens. The ganache firms to its best texture. If you can make them the day before serving and refrigerate overnight, do it. Day 1 is good. Day 2 is the version I would serve to someone I was trying to impress.
One honest note: these bars do not travel well in warm weather. The caramel layer softens above 72°F (22°C) and the bars become difficult to handle without the layers separating at the cut edges. If you are bringing these somewhere, transport them in the pan, uncut, in a cooler bag, and cut on arrival. Do not attempt to bring pre-cut bars to an outdoor summer event. They will not survive the trip looking the way they should.
Frequently Asked Questions About Turtle Bars
Can I make turtle bars ahead of time?
Yes — and you should. On Day 2, the shortbread absorbs a small amount of moisture from the caramel layer, making it more cohesive and less sandy — this is the texture shown in the cross-section photos. The caramel flavor deepens as the layers settle together. Assemble fully, refrigerate covered overnight, and cut on the day of serving for the cleanest edges.
Why did my caramel not set and run out when I cut the bars?
The caramel did not reach soft-ball stage before it was pulled from the heat. Soft-ball stage is 235–240°F (113–115°C) — below this temperature, the caramel retains too much water to set at room temperature. Every degree matters in sugar cooking. A thermometer is the only reliable way to confirm the correct temperature — the visual cues alone are not precise enough to distinguish 230°F from 237°F. If your caramel ran, serve the bars cold directly from the refrigerator where the caramel is firmer, and use a thermometer next batch.
Can I use milk chocolate instead of bittersweet chocolate for the ganache?
Technically yes, but the result will be noticeably sweeter and the ganache will set softer than the version shown in the photos. Milk chocolate has a higher sugar content and lower cacao percentage than bittersweet, which means less cocoa butter in the ganache and a softer set. If you use milk chocolate, reduce the heavy cream to ⅓ cup (80ml) instead of ½ cup (120ml) to compensate for the lower cocoa butter content and help the ganache set more firmly. Expect a sweeter, milder bar overall.
Why did my caramel turn grainy and gritty instead of smooth?
Stirring after the full boil caused this. Agitation reintroduces sugar crystals from the pan sides — in hot concentrated sugar solution, one crystal is enough to trigger the entire batch in seconds. It cannot be reversed. Pour the grainy caramel over the shortbread base and cover with ganache; the topping carries the bar. Next batch: stop stirring completely the moment the mixture reaches a full rolling boil.
Can I make turtle bars at high altitude or in a humid climate?
At high altitude — above 3,500 feet (1,067 meters) — the shortbread base will par-bake slightly faster due to lower atmospheric pressure and faster moisture evaporation. Start checking at 15 minutes rather than 18. The caramel will reach temperature faster as well — watch the thermometer closely and be ready to pull it the moment it hits 235°F (113°C). In high humidity — above 70% relative humidity — the flaked sea salt will dissolve into the ganache surface faster than usual. Add the salt immediately before serving rather than before the final chill to preserve the crystal structure visible in the photos.
Can I scale this recipe to make a smaller batch?
Yes — halve all ingredients and bake in a 9×9 inch (23×23cm) pan for 12 bars. The shortbread base will be thicker — increase par-bake time to 22–26 minutes. The caramel cooks faster with smaller volume, so watch the thermometer rather than the clock and pull at exactly 235°F (113°C). To double, bake two separate 9×13 batches — one larger pan produces layers too thin to hold their structure cleanly.
Can I substitute the pecans for a different nut?
Yes. Toasted walnuts are the closest substitute — similar size, similar fat content, and a slightly more bitter flavor that works well against the dark chocolate ganache. Toasted almonds work but are firmer and will give a crunchier bite than the softer pecan texture shown in the photos. Toasted cashews produce a milder, sweeter result that pairs better with milk chocolate than bittersweet. Whatever nut you use, toast it first — raw nuts in any form taste flat against the depth of the caramel and ganache layers. Do not use pre-candied or salted nuts — the coating interferes with the ganache bond and the salt content is uncontrolled.
More Recipes You’ll Love
If you made these turtle bars and want to keep baking in the same direction, these are the recipes I would point you toward next:
- Salted Caramel Chocolate Chip Cookie Bars — the same caramel science in a cookie bar format, with a brown butter dough base and chocolate chips folded throughout. If you want to understand how caramel behaves differently as a swirl versus a poured layer, start here.
- Chocolate Chip Cookie Bars — the foundational bar recipe on this site. One bowl, no mixer, parchment-lined pan. If the turtle bars are the advanced version of a bar cookie, this is the version to make when you want the same satisfying result with less sequencing.
- Shortbread Cookies Recipe — the same shortbread base logic as the turtle bars, in standalone cookie form. If your shortbread base gave you trouble in this recipe, making a batch of these first will teach you exactly what correct cold-butter shortbread dough looks and feels like before the stakes are higher.

Shortbread Turtle Bars Recipe
Ingredients
Equipment
Method
- Preheat oven to 325°F (165°C) with rack in the middle position. Line a 9×13 inch (23×33cm) light-colored aluminum baking pan with parchment paper leaving a 2-inch overhang on both long sides.
- Whisk together 240g all-purpose flour, 100g granulated white sugar, and ½ teaspoon fine sea salt in a large bowl until combined. Add 170g cold cubed unsalted butter and cut in with a pastry cutter or two forks until the mixture resembles coarse damp sand with some pea-sized butter pieces remaining.
- Tip the shortbread mixture into the prepared pan and press firmly and evenly into the bottom using fingertips and the flat bottom of a dry measuring cup until approximately ½ inch (1.25cm) thick. Dock the surface with a fork 15–20 times across the surface.
- Bake on the middle rack for 18–22 minutes until the surface is completely matte and dry and the edges are just barely beginning to show a faint pale gold. Remove from the oven and cool on a wire rack for exactly 15 minutes before adding the caramel.
- While the base cools, clip a candy thermometer to the side of a medium saucepan with the bulb not touching the bottom. Add 200g packed dark brown sugar, 113g unsalted butter cut into tablespoons, and 80ml heavy whipping cream. Cook over medium heat stirring constantly until the butter melts and sugar dissolves and the mixture comes to a full boil — approximately 3–4 minutes.
- Once at a full boil stop stirring. Allow to boil undisturbed until the thermometer reads 235–240°F (113–115°C) — approximately 4–6 minutes. Remove from heat immediately. Stir in 1 teaspoon pure vanilla extract and ¼ teaspoon fine sea salt.
- Pour the hot caramel over the cooled shortbread base. Tilt the pan gently in all four directions to spread the caramel to the edges. Transfer to the refrigerator and chill for 30 minutes until the caramel is fully set and firm to a light touch at the center.
- Place 255g bittersweet chocolate in a medium heat-safe bowl. Heat 120ml heavy whipping cream in a small saucepan over medium heat until just simmering — small bubbles at the edges, not a full boil. Pour over the chocolate and let sit undisturbed for 2 minutes. Whisk from the center outward until completely smooth and glossy. Cool for 3–4 minutes until slightly thickened but still pourable.
- Pour the ganache over the set caramel layer and tilt the pan to spread edge to edge. Immediately press 225g toasted pecan halves into the wet ganache in an even pattern across the full surface. Scatter 50g roughly chopped toasted pecans between the whole halves and press gently to adhere.
- Transfer to the refrigerator and chill for a minimum of 2 hours until the ganache is completely firm throughout. Remove from the refrigerator and scatter 1½ teaspoons Maldon flaked sea salt evenly across the surface pressing each flake gently to adhere. Rest at room temperature for 10 minutes before cutting.
- Use the parchment overhang to lift the slab onto a cutting board. Using a sharp chef’s knife wiped clean between every cut, cut into 24 bars — 4 rows by 6 columns. Serve at room temperature.