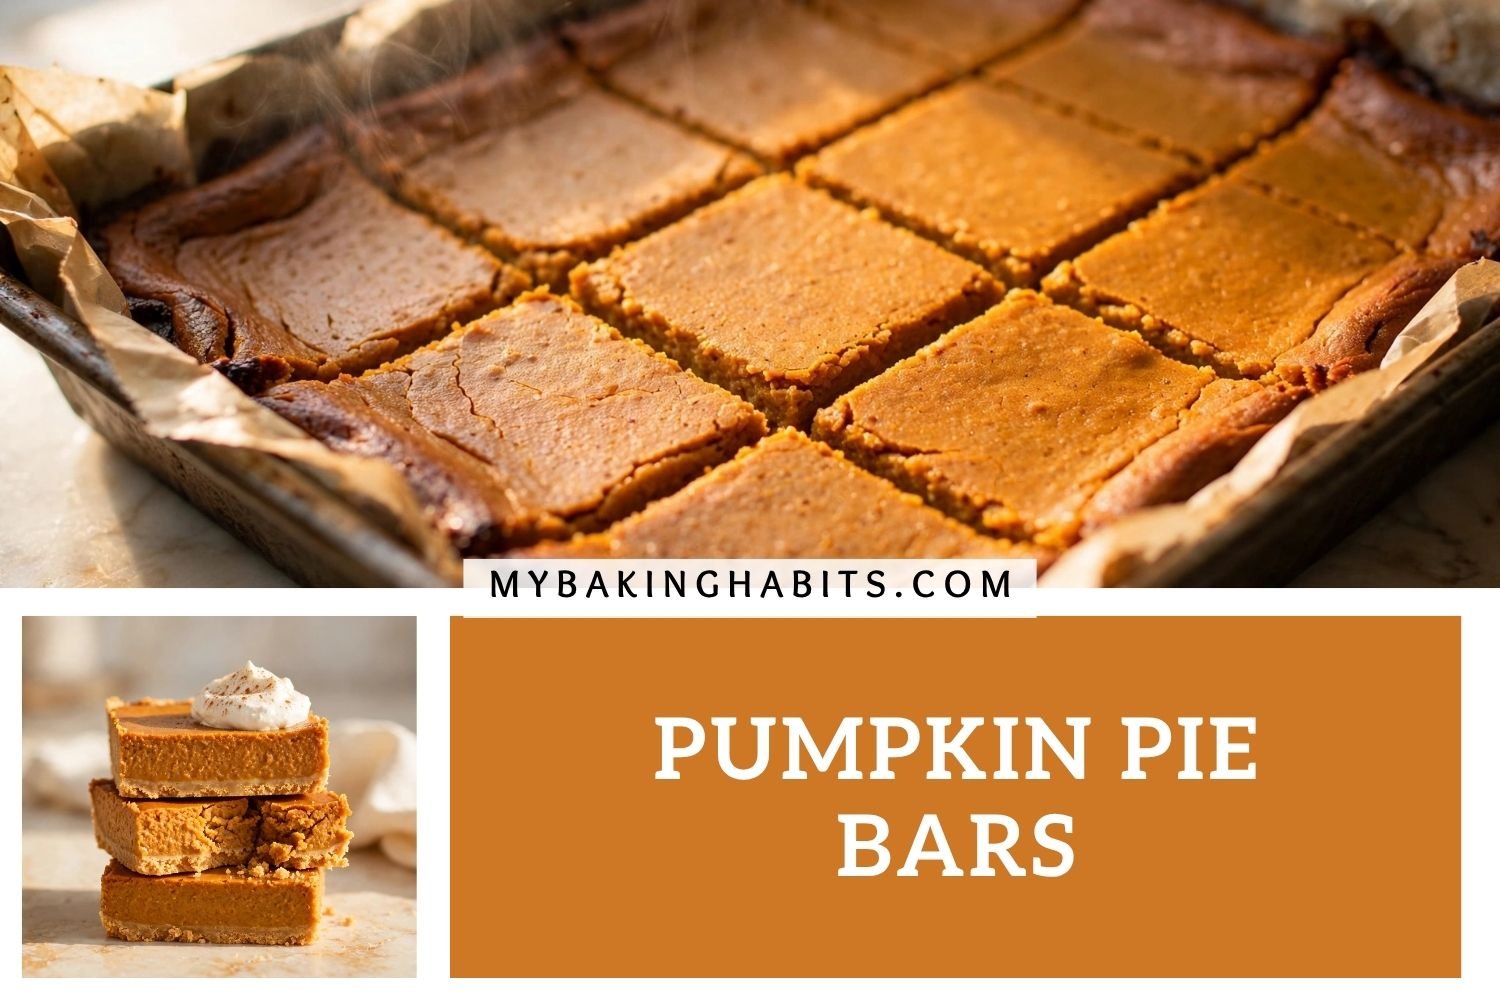
Pumpkin Pie Bars (Creamy Spiced Filling)
The first time I baked pumpkin pie bars, I pulled them from the oven at 375°F after the surface looked set and the edges had pulled slightly from the sides of the pan. They looked done. I cooled them for two hours, lifted them from the pan, and cut one open. The center was completely liquid — a pool of undercooked pumpkin custard sitting under what turned out to be a convincing but structurally meaningless false skin. High heat had set the outside too fast. The interior never had a chance. I dropped the oven to 325°F on the next batch, extended the time by about eight minutes, and learned the jiggle test. That batch was right. Every batch since has been right.
These pumpkin pie bars are everything pumpkin pie is — creamy, warmly spiced, dense in the best way — and easier in one specific way that matters: no pie crust to roll, no water bath, no springform pan. Just a graham cracker crust pressed into a 9×13 pan, a filling that comes together in a single bowl with a whisk, and about forty minutes of oven time at the right temperature.
The filling is dense and silky. Not quite as custardy as a loose slice of pumpkin pie — slightly more structured, because the bar format needs to hold its shape when you cut through it — but every bite tastes exactly like pumpkin pie: warm cinnamon and ginger, sweet but not cloying, with that deep, earthy pumpkin flavor that half-and-half or watered-down fillings never quite deliver. The graham cracker crust gives a buttery crunch underneath that a traditional pie crust would not.
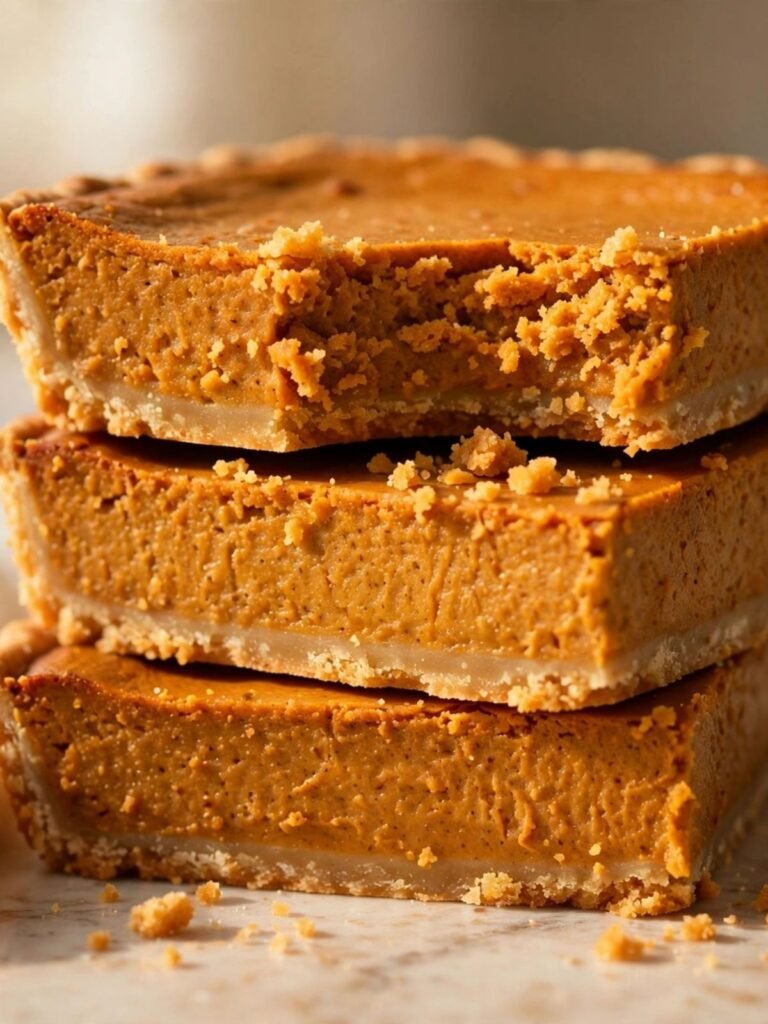
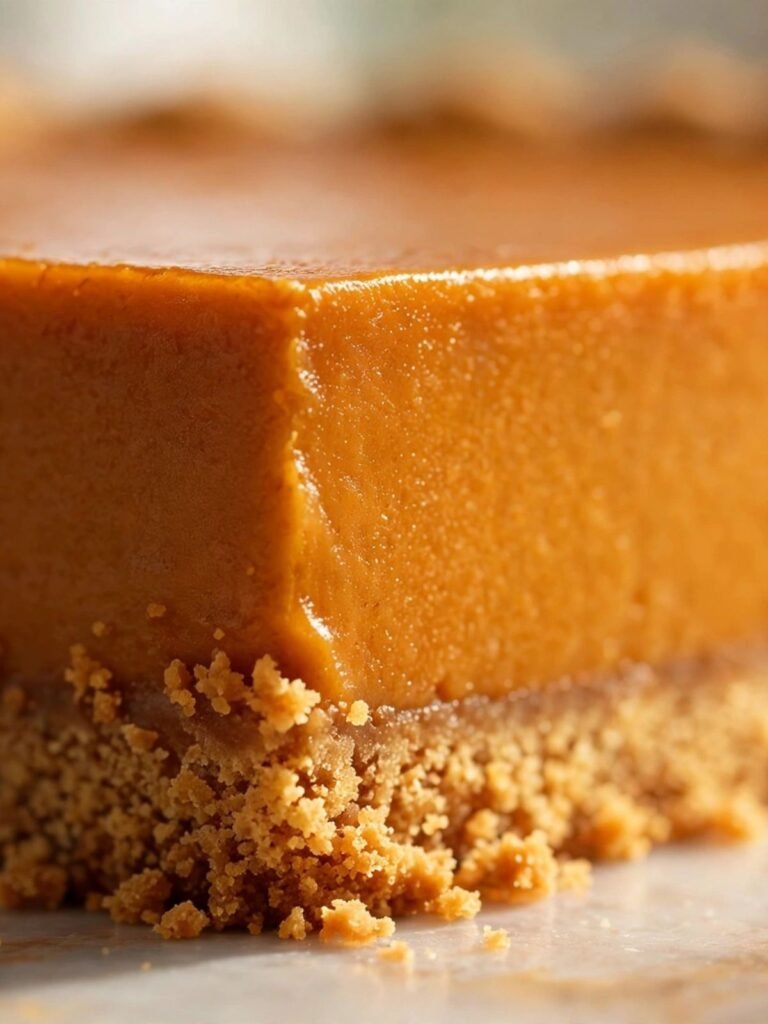
I tested this with half-and-half against heavy cream. Heavy cream wins, and it is not close. Half-and-half produces a slightly thinner set that takes longer to hold in the refrigerator and has a less rich mouthfeel. The difference is noticeable in the cross-section: cream produces that dense, velvety interior you can see in the close-up photos. Half-and-half produces something slightly more translucent and loose. I kept the cream version. The difference in total fat content per serving is small. The difference in texture is not.
I also tested this with pumpkin pie filling versus 100% pure pumpkin purée. The pre-spiced filling version tasted flat — all the spice notes blurred together, the sweetness level came out wrong because the filling already contained sugar, and I could not adjust any of it. Pure pumpkin gives full control over every element. That control is the entire difference between bars that taste specifically of something and bars that taste generically “fall.”
No mixer needed. The filling comes together in a large bowl with a whisk in under five minutes. The hardest part of this recipe is waiting for it to set — a minimum of four hours in the refrigerator, though overnight produces noticeably cleaner cuts and a firmer texture worth the wait.
This is the recipe I pull out every October. It has been to every Thanksgiving table I have been invited to since I developed it, and I have never come home with a piece left.
Recipe Overview
| Detail | Value |
|---|---|
| Yield | 24 bars (4×6 cut from a 9×13 pan) |
| Prep time | 20 minutes |
| Cook time | 50 minutes (8–10 min crust + 40–42 min filling) |
| Cooling + chill time | 6 hours minimum (2 hrs room temp + 4 hrs refrigerator) |
| Total active time | 20 minutes |
| Difficulty | Beginner |
| Equipment | 9×13 inch (23×33cm) light-colored aluminum baking pan, large bowl, whisk, kitchen scale |
Nutrition per Bar (1 of 24)
| Calories | Fat | Carbs | Protein | Sodium |
|---|---|---|---|---|
| ~205 kcal | 11g | 24g | 2g | 110mg |
Calculated using King Arthur graham crackers, unsalted butter, Libby’s 100% pure pumpkin, heavy cream, and granulated sugar. Values are estimates.
Ingredients & Tools for Pumpkin Pie Bars
For the Graham Cracker Crust
- 2 cups (200g) finely ground graham cracker crumbs — about 14 full cracker sheets, ground to a fine uniform powder (not chunky)
- ¼ cup (50g) plain white granulated cane sugar
- ½ tsp ground cinnamon
- ½ cup (113g) unsalted butter, melted and cooled to room temperature — not hot
For the Pumpkin Filling
- Two 15-oz cans (850g total) 100% pure pumpkin purée — not pumpkin pie filling (see Before You Start)
- 1½ cups (300g) plain white granulated cane sugar
- 4 large eggs, room temperature — not cold from the refrigerator
- 1½ cups (360ml) full-fat heavy cream — not half-and-half, not whipping cream with stabilizers
- 2 tsp pure vanilla extract — not imitation vanilla
- 2 tsp ground cinnamon
- 1 tsp ground ginger
- ½ tsp ground nutmeg — freshly grated if possible
- ¼ tsp ground cloves
- ½ tsp (3g) fine sea salt
Before You Start
No mixer required. This recipe comes together with a large mixing bowl and a whisk. A stand mixer or hand mixer is not needed and will not improve the result.
Pure pumpkin purée only. Pumpkin pie filling (the pre-spiced, pre-sweetened kind in the same aisle) is not a substitute. The filling already contains sugar, spices, and sometimes thickeners, which will throw off the sweetness level and spice balance of this recipe entirely.
Eggs at room temperature. Cold eggs incorporated into the filling cool the mixture unevenly, which can cause texture inconsistencies in the baked custard. To bring eggs to room temperature quickly, submerge them uncracked in a bowl of warm (not hot) water for 10 minutes.
Light-colored aluminum pan only. Dark non-stick pans absorb more heat and will overbrown the bottom of the crust while the filling is still underbaked. Glass and ceramic pans retain heat differently and require reducing the oven temperature by 25°F (15°C) and monitoring closely.
Parchment with overhang. Line the pan with parchment that extends at least 2 inches (5cm) above the rim on all four sides. These overhangs are the handles that allow you to lift the entire slab out of the pan cleanly after chilling. Without them, you will be cutting bars inside the pan, which does not work.
Weigh the flour. For the most accurate results, use a kitchen scale set to grams. Graham cracker crumbs can pack differently depending on how you grind them. The gram weights are the numbers I tested with — they are the most reliable way to get the same result.
Necessary Tools
- 9×13 inch (23×33cm) light-colored aluminum baking pan
- Parchment paper (cut to fit with overhang on all sides)
- Large mixing bowl, at least 4-quart capacity
- Medium mixing bowl (for the crust)
- Large whisk
- Fork or spatula (for initially mixing the crust)
- Flat-bottomed measuring cup or drinking glass (for pressing the crust)
- Offset spatula or rubber spatula
- Wire cooling rack
- Kitchen scale (strongly recommended)
- Oven thermometer (strongly recommended — most home ovens run 15–25°F off)
- Sharp chef’s knife
How to Make Pumpkin Pie Bars
Step 1: Preheating to the Correct Temperature and Lining the Pan for Clean Bars
Position your oven rack in the middle and heat your oven to 325°F (165°C). If you have an oven thermometer, confirm the actual temperature before proceeding — most home ovens run 15–25°F (8–14°C) hot or cold, and that variance matters significantly for a custard-based filling. Line your 9×13 inch (23×33cm) light-colored aluminum baking pan with parchment paper, pressing it into the corners and allowing at least 2 inches (5cm) of overhang on all four sides. The overhang is not optional — without it, there is no clean way to lift the slab out of the pan after it sets.
The pan should look like a parchment sling — corners flat, sides vertical, handles extending above the rim on all four sides.
🗒 Luna’s Note: I keep an oven thermometer permanently inside my oven. It has been there for three years. My oven runs 15°F hot and I would not know that without it. For a recipe where oven temperature is the single biggest variable, this is not optional equipment.
Oven ready, pan lined — move to the crust.
Step 2: Mixing the Graham Cracker Crust Until It Clumps
In your medium mixing bowl, combine 2 cups (200g) finely ground graham cracker crumbs, ¼ cup (50g) plain white granulated cane sugar, and ½ tsp ground cinnamon. Stir with a fork until the dry ingredients are evenly distributed. Add ½ cup (113g) unsalted butter, melted and cooled to room temperature, and stir with the fork until every crumb is coated — approximately 30 to 40 strokes, working from the bottom of the bowl upward. The butter is what binds these crumbs into a crust rather than loose sand; sugar at this ratio gives the crust a slight sweetness and helps it hold its shape during pre-baking.
The mixture should look like wet, coarse sand and clump firmly when you press a small amount between your fingers. If it looks dry and does not clump, add 1 tablespoon (14g) of additional melted butter and stir again.
Do not add so much butter that the mixture looks greasy or slick — the crumbs should clump without releasing oil when pressed. Crust that is over-buttered will bake up dense and waxy rather than slightly crisp. Press the crust into the pan now.
Step 3: Pressing and Pre-Baking the Crust for a Stable, Non-Soggy Base
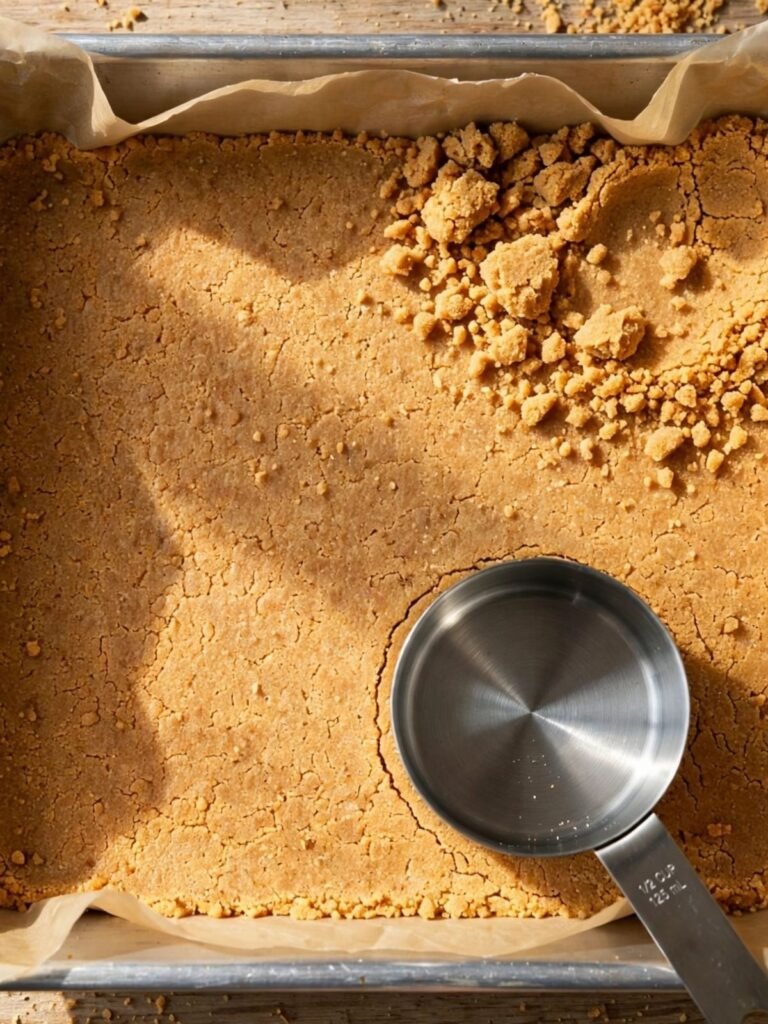
Transfer the graham cracker mixture into your lined pan and use your hands to distribute it roughly across the bottom. Then use the flat bottom of a measuring cup or a drinking glass to press the crumbs into a firm, even layer — working from the center outward, pressing with moderate force until the surface is smooth and compact, with no loose crumbs. Press the crumbs about ½ inch (1.25cm) up the sides of the pan around the edges — this creates a low wall that keeps the filling from sliding under the crust during baking.
Bake the crust alone at 325°F (165°C) for 8 to 10 minutes, until the edges look slightly golden and the surface feels set when you press it very lightly with a fingertip. Do not skip this step — an unbaked crust absorbs moisture from the filling and turns completely soft, which makes the bar unpleasant to eat and nearly impossible to cut cleanly. Remove the pan from the oven and let the crust cool for at least 10 minutes before adding the filling.
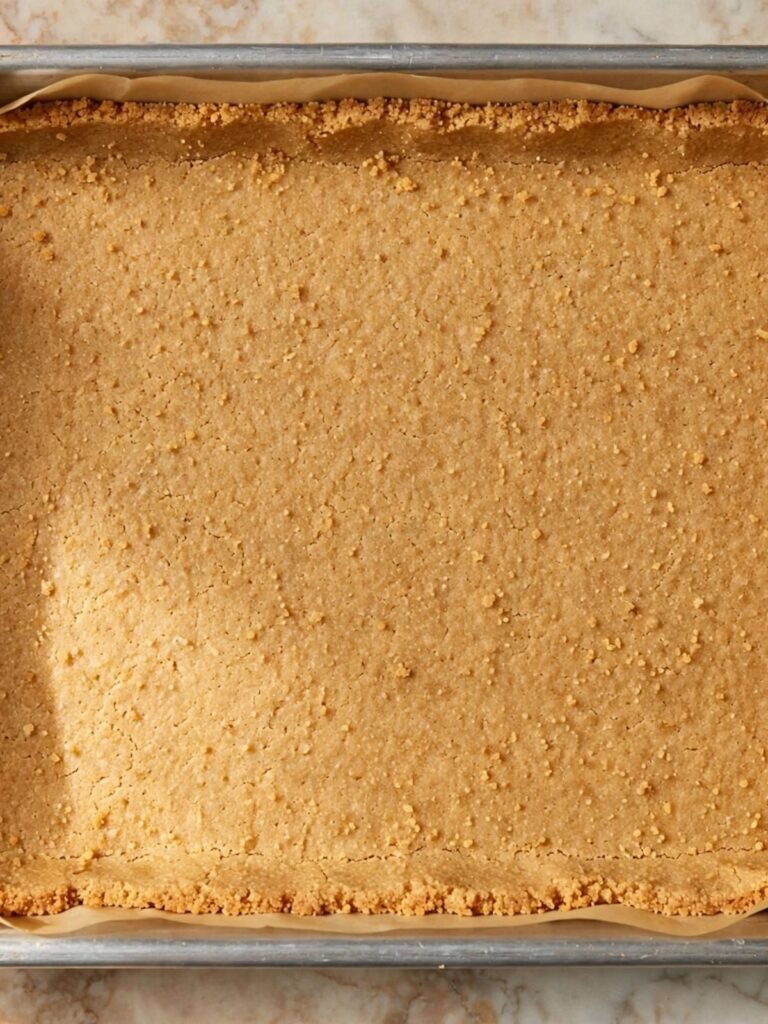
The crust should look uniformly golden at the edges and feel firm, not powdery, when pressed — it should not shift or crumble when you nudge the side of the pan.
Do not fill a warm crust — if the filling meets a hot surface, the bottom of the filling will cook faster than the top, creating an uneven bake and a texture inconsistency between the lower and upper sections of the filling. Cool for 10 full minutes. Meanwhile, make the filling.
Step 4: Whisking the Pumpkin Filling Until Completely Smooth and Uniform

In your large mixing bowl, add two 15-oz cans (850g total) 100% pure pumpkin purée and 1½ cups (300g) plain white granulated cane sugar. Whisk together for about 30 seconds until the sugar is evenly distributed through the pumpkin — the granulated sugar dissolves slowly into the cold pumpkin, so take the time to get it uniformly incorporated before adding the eggs.
Add your 4 large eggs (room temperature), one at a time, whisking each in fully before adding the next. Adding eggs one at a time prevents the dense filling mixture from becoming lumpy and ensures the eggs emulsify fully into the pumpkin base rather than sitting in unincorporated pockets.
Add 1½ cups (360ml) full-fat heavy cream, 2 tsp pure vanilla extract, 2 tsp ground cinnamon, 1 tsp ground ginger, ½ tsp ground nutmeg, ¼ tsp ground cloves, and ½ tsp (3g) fine sea salt. Whisk everything together for 60 seconds using large circular strokes — the filling should look completely uniform in color and texture, with no streaks of egg or cream visible. The sea salt balances the sweetness and amplifies the spice notes; do not reduce it.
The filling should be smooth, deep orange, and slightly thick — it will fall from the whisk in a slow, heavy stream. No lumps, no visible separation, a uniform consistency throughout.
🗒 Luna’s Note: I whisk this filling by hand on purpose. A blender creates too much air, which introduces small bubbles that can affect the surface texture of the baked custard. The whisk, used with slow, deliberate strokes, produces the smooth, matte-topped surface you want.
Do not use pumpkin pie filling here — the pre-spiced, pre-sweetened version has already had sugar and spices added, which will make the bars over-sweet and unbalanceable. The filling is ready. Pour it now.
Step 5: Pouring the Filling Over the Cooled Crust for an Even Bake

Pour the finished filling directly over the cooled graham cracker crust. Use an offset spatula to spread it to the edges of the pan, making sure it reaches all four corners and sits in an even layer. The filling will settle naturally — a few passes with the offset spatula are enough to level it. Do not stir the filling once it is in the pan.
The filling should sit in a smooth, even layer approximately ¾ inch (2cm) thick, touching all four edges of the pan — as you can see in the overhead photo showing the smooth, deep orange surface before it goes into the oven.
Do not fill the pan more than ¾ of the way up the sides — if the filling goes too close to the rim, it may overflow slightly as it bakes. The pan goes into the oven immediately.
Step 6: Baking at Low Temperature Until the Custard Sets at the Edges With a Jiggle at the Center
Slide the pan onto the middle rack of your preheated 325°F (165°C) oven. Bake for 40 to 50 minutes. Do not open the oven door before the 40-minute mark — sudden temperature changes cause the surface to crack or dip, and the custard sets unevenly when cold air enters mid-bake.

At 40 minutes, check the jiggle test: wearing oven mitts, gently shake the pan from side to side. The edges should look fully set and no longer move. The center should have a 3 to 4 inch (7 to 10cm) circle of gentle wobble — like fully-set Jello, not like liquid. If the entire surface still moves like liquid, bake for an additional 5 minutes and check again. The bars continue cooking from carryover heat after they leave the oven.
The first sign your pumpkin pie bars are done: the edges look set and pull slightly from the parchment. The center should still wobble like set Jello. Pull it at this exact moment. Do not wait for the center to look completely firm — by the time the center looks set in the oven, the edges will be overbaked and rubbery.
🗒 Luna’s Note: I look for the color too. The surface should deepen from a bright orange to a slightly darker, more matte amber tone at the edges — the same color shift you’d see on the top of a properly baked custard. That color change, combined with the jiggle test, is the signal I trust.
Remove the pan and place it on your wire cooling rack. Do not cut. Do not remove the parchment yet. Cool for the full time.
Step 7: Cooling at Room Temperature, Then Refrigerating Until the Bars Are Fully Set
Leave the bars on the wire rack at room temperature for exactly 2 hours. During this time, carryover cooking from the pan and filling will finish setting the outer portions of the custard, and the entire slab will shift from hot and fragile to stable enough to move into the refrigerator without disturbing the surface. Do not rush this step — moving hot bars directly into the refrigerator causes condensation on the surface and disrupts the setting process.
After 2 hours at room temperature, transfer the pan (still with the parchment in place) to the refrigerator. Refrigerate for a minimum of 4 hours. Overnight is better — 8 hours produces a denser, more firmly set texture that cuts significantly more cleanly than bars cut at the 4-hour minimum. The bars need overnight. Four hours works. Overnight is better.
The bars are ready to cut when the surface looks firm and matte rather than shiny or wet, and the center feels solid when the pan is pressed very gently — no movement underneath.
Do not cover the bars with plastic wrap during the first 2 hours of refrigeration — the wrap traps steam against the surface and introduces moisture. After the first 2 hours, cover loosely with plastic wrap if refrigerating overnight.
Step 8: Lifting, Cutting, and Serving 24 Clean-Edged Bars
When the bars are fully set, use both parchment overhangs as handles to lift the entire slab cleanly out of the pan onto a large cutting board. Use a sharp chef’s knife and cut a 4×6 grid — 4 cuts down the long side and 6 cuts across the short side — to yield 24 bars of approximately equal size. Wipe the knife blade clean with a damp cloth between every single cut. A knife with pumpkin custard on the blade drags and tears the filling rather than cutting through it. One straight downward cut per section — do not saw.
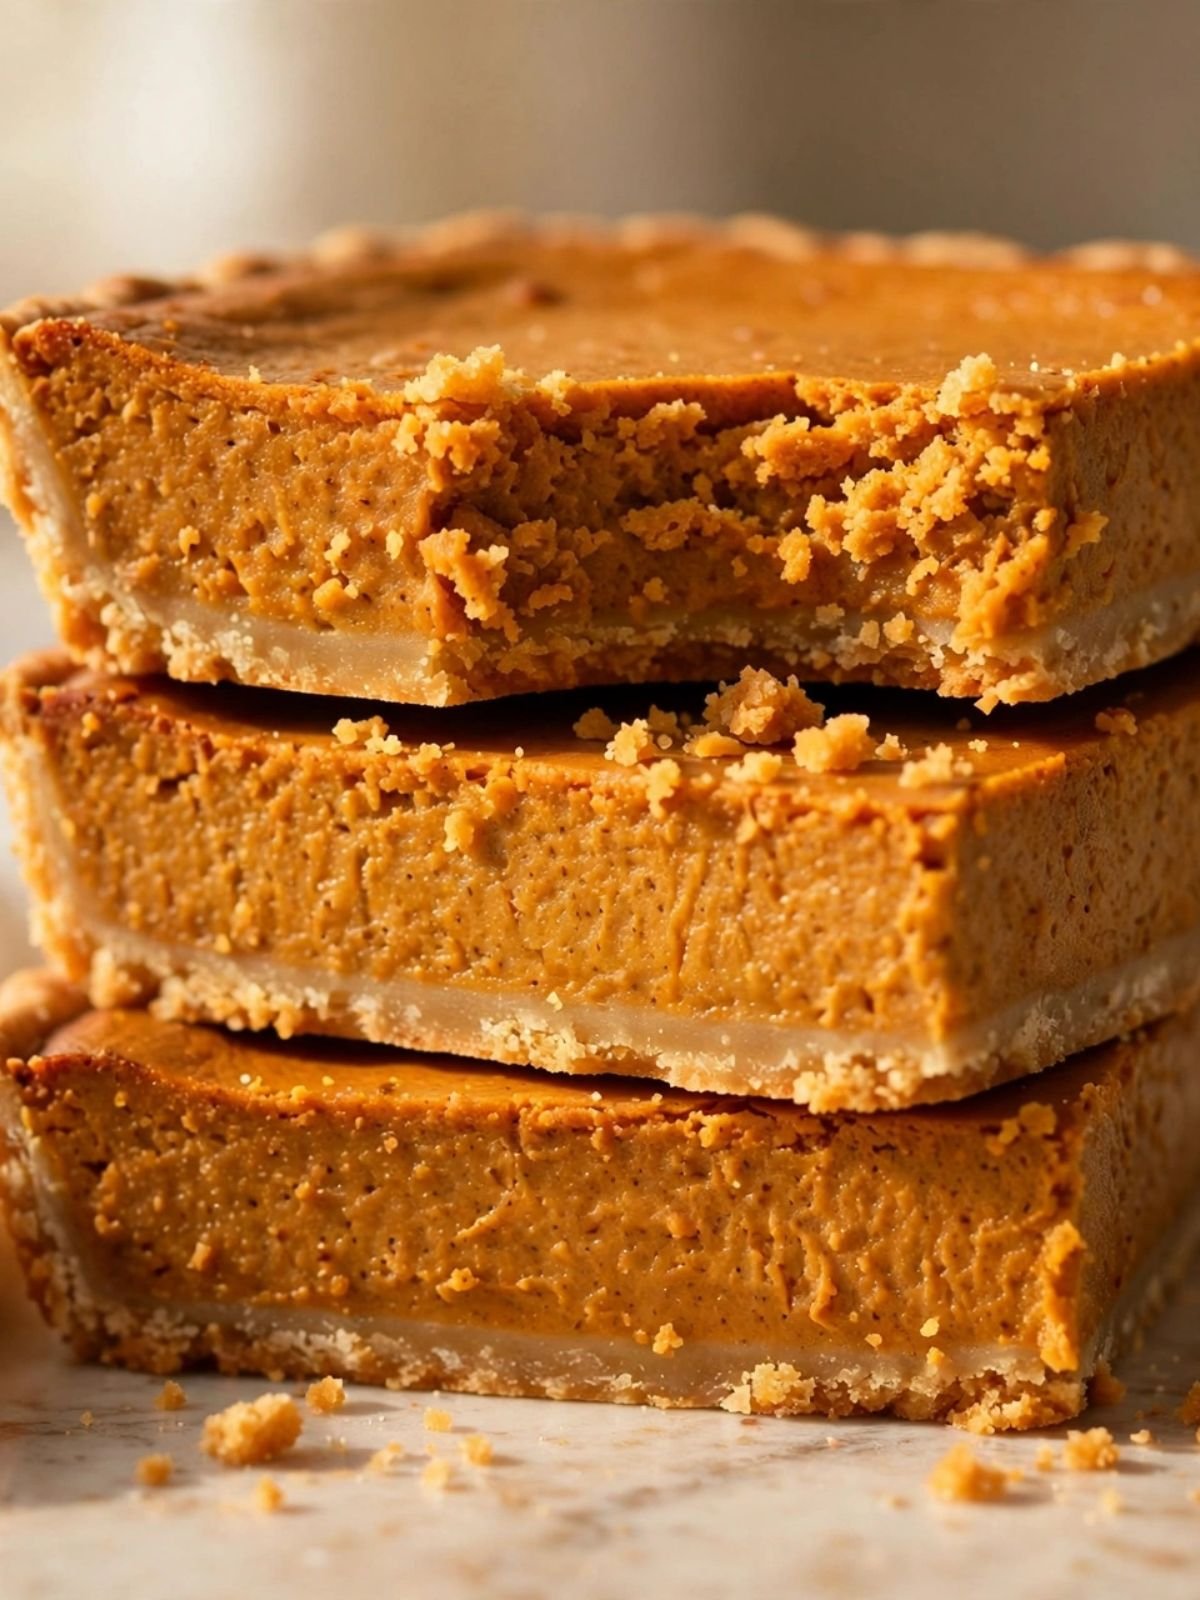
As you can see in the overhead photo showing the full cut slab, each bar should have a clean cross-section with a clearly defined golden crust layer on the bottom and a smooth, dense orange custard layer on top.
Serve chilled or at room temperature.
The Science Behind Pumpkin Pie Bars
Why 325°F Protects the Custard From Breaking
I kept pulling pumpkin pie bars from the oven at the wrong moment because I was watching the surface color, not understanding what was actually happening inside. What I did not know: egg proteins in a custard filling begin to coagulate — to set — at around 145°F (63°C). They tighten completely and turn rubbery and grainy at around 185°F (85°C).
The margin between perfectly set and overbaked is narrow, and a high oven temperature compresses that margin almost to nothing. At 375°F, the filling heats so quickly that the proteins at the edges and top surface tighten and form a false skin before the center has reached 145°F. At 325°F, the entire slab heats slowly and evenly, giving the center time to reach the set point before the edges overshoot it.
The jiggle test works precisely because the center is still in the process of setting — it will finish on the counter from carryover heat, not in the oven.
The Pre-Baked Crust: One Step That Cannot Be Skipped
The graham cracker crust must be pre-baked before the filling goes in. This is not about preference — it is about what happens to a starch-and-fat mixture when it sits in contact with a wet, liquid filling at room temperature while the pan heats up in the oven. The crumbs absorb moisture from the edges of the filling before they have had time to set, turning the bottom layer from a crisp, cohesive crust into a compressed, wet layer that gives no structural support.
Pre-baking at 325°F for 8 to 10 minutes drives out enough moisture and begins the starch gelatinization process — the same process that sets cookie dough — so the crust forms a stable platform before the filling is ever added. A pre-baked crust is firm and slightly golden. An unbaked crust under a custard filling is wet and indistinguishable from the filling itself. If you love pumpkin baked goods, you might also enjoy my Pumpkin Chocolate Chip Cookie Bars — the pre-bake rationale there works on the same principle.
What Pumpkin Purée Actually Contributes
Pumpkin purée is not just flavor — it is structure. The purée contains a significant amount of dietary fiber and starch, which act as a thickening agent in the filling alongside the eggs. This is why pumpkin pie bars and pumpkin pie hold their shape when cut despite having a high liquid content.
The starch in the pumpkin gelatinizes during baking — it absorbs surrounding liquid, swells, and creates a network that gives the filling its dense, sliceable texture. This is also why the type of pumpkin matters: 100% pure pumpkin purée has a consistent fiber and moisture content across brands. Pumpkin pie filling has added liquids, sugars, and starches that alter the ratio unpredictably. The result is a filling that is either too loose or too thick and never quite right.
Troubleshooting & Pro-Tips
Common Mistakes
1. The filling is over-sweet or one-note in flavor
Symptom: The bars taste like sweetened pumpkin with indistinct spice, not like pumpkin pie.
Cause: Pumpkin pie filling was used instead of 100% pure pumpkin purée. The filling already contains sugar and pre-blended spices at levels not calibrated to this recipe.
Fix: There is no fix once the bars are baked. The only correction is to start over with pure pumpkin purée and control the sugar and spice amounts yourself.
Prevention: Check the can. The label should say “100% Pure Pumpkin” with one ingredient: pumpkin. Any can that says “Pie Filling” or lists sugar, sweeteners, or spices in the ingredient list is the wrong product.
Salvage: If the bars are edible but too sweet, serve them with a large dollop of unsweetened whipped cream, which tempers perceived sweetness effectively.
2. The crust is soggy and indistinguishable from the filling
Symptom: The bars have no textural contrast between crust and filling — the bottom layer is wet and soft rather than firm and slightly crisp.
Cause: The crust was not pre-baked, or the filling was poured over a hot crust before it had cooled.
Fix: Soggy crust cannot be corrected once baked. The bars are still edible but lack the texture contrast that defines this recipe.
Prevention: Pre-bake the crust for the full 8 to 10 minutes at 325°F (165°C) and let it cool for 10 full minutes before filling. The crust must feel firm and set before the filling touches it.
Salvage: Crumble the bars and layer with whipped cream in glasses — the soggy crust texture disappears in a parfait format.
3. The bars are cracked across the top
Symptom: The surface has visible cracks or fissures running through the filling.
Cause: The oven temperature was too high, the bars were overbaked, or the oven door was opened before the 40-minute mark, causing a sudden temperature drop that created a rapid pressure change inside the custard.
Fix: Cracks are visual only — the flavor is unaffected. Let the bars cool and refrigerate as normal.
Prevention: Bake at exactly 325°F (165°C), verified with an oven thermometer. Do not open the oven before 40 minutes. Pull the bars when the center still has a 3 to 4 inch wobble.
Salvage: A cracked top is easily covered with a layer of whipped cream spread across the surface before serving. No one will know.
4. The bars did not set — the center is still liquid after cutting
Symptom: The interior collapses when the knife goes through. The filling is the consistency of thick batter rather than firm custard.
Cause: The bars were underbaked, or they were not refrigerated for long enough. Cutting before 4 hours of refrigeration is the most common cause of this — the filling requires cold to firm fully.
Fix: If you have not refrigerated them yet, return the uncut bars to the refrigerator and wait the full time. If you have already cut them and the interior is liquid, the bars have been underbaked and cannot be corrected.
Prevention: Use the jiggle test. Pull only when the edges are set and the center has a small wobble, not when the whole surface is still moving. Refrigerate for a minimum of 4 hours — overnight produces the most reliably firm result.
5. The bars are rubbery or have a dense, tight texture
Symptom: The filling is not creamy and silky — it is dense, slightly grainy, and chewy in a way that does not resemble pumpkin pie.
Cause: The bars were overbaked. The egg proteins in the custard have tightened completely past the ideal set point and contracted, forcing out moisture and producing that grainy, tight texture.
Fix: Overbaked bars cannot be reversed. The flavor remains good — use them in a trifle layered with whipped cream, which adds the creaminess the texture is missing.
Prevention: Watch the jiggle test at 40 minutes. The moment the edges are set and the center wobbles like Jello — not liquid, not firm — pull the pan. Every additional minute past this point works against the texture.
6. The bars crumbled when cut
Symptom: The crust shattered or fell apart when the knife went through. The bars do not hold together when lifted. Cause: The crust was not pressed firmly enough before pre-baking, or the bars were cut before fully chilling.
Fix: Press the pieces back into shape and serve directly on the cutting board.
Prevention: Press the crust with firm, even pressure using the flat bottom of a measuring cup. Every section should feel compact and not shift when you nudge the edge of the pan. Refrigerate overnight before cutting.
7. Leavening note
This recipe contains no leavening (baking soda or baking powder). If your pumpkin filling has visible air bubbles or a spongy texture, the cause is over-whisking — the filling incorporated too much air. Whisk at a slow, steady pace.
Humidity and altitude adjustments
High altitude (above 5,000ft / 1,500m): Begin the jiggle test at 35 minutes. The lower atmospheric pressure causes custards to bake faster at altitude — the edge-set-center-wobble stage arrives earlier than at sea level. Reduce baking time by 5 to 8 minutes from the standard range and monitor closely.
High humidity: Refrigerate overnight minimum rather than the 4-hour minimum. High humidity slows the firming process of custard-based fillings. Four hours may not be enough for clean cuts in a humid environment.
Expert Pro-Tips
1. Chill the pressed crust for 10 minutes before pre-baking. After pressing the crumbs into the pan, slide the pan into the freezer for 10 minutes before it goes into the oven. Cold fat in the crust sets faster when it hits oven heat, which means the crumbs hold their shape rather than slumping or spreading during pre-baking. The crust edges stay clean and defined.
2. Strain the filling through a fine-mesh sieve for a perfectly smooth top. After whisking the filling, pour it through a fine-mesh sieve set over a large bowl. This removes any small lumps of pumpkin fiber and produces a surface that is completely uniform — no texture variation, no fiber strands, just a clean matte finish after baking. Takes 30 seconds and makes a visible difference in the photos and the eating experience.
3. The jiggle test is more reliable than time. A 3 to 4 inch wobble at the center = done. If you are uncertain, err on the side of underbaked — carryover heat will finish the center. An overset custard cannot be fixed. An underset custard can go back in the oven for 5 minutes.
4. Cut with a hot, dry knife for cleaner edges. After the bars are fully chilled, run your chef’s knife under hot water and dry it completely before cutting. A warm, dry blade moves through cold custard without dragging. Wipe and re-warm between cuts.
How to Store Pumpkin Pie Bars
Room Temperature
Pumpkin pie bars contain a custard filling made with eggs and heavy cream. They cannot be stored at room temperature safely beyond 2 hours. If they are out for a party or gathering, return them to the refrigerator within 2 hours.
Refrigerator
Store cut bars in a lidded hard-sided container, with parchment paper between layers to prevent sticking, for up to 5 days. Do not use a zip-lock bag — the pressure of the bag compresses the bars and damages the edges and surface. Keep the container closed to prevent the bars from absorbing refrigerator odors. The bars taste slightly better on day 2 than day 1 — the spice flavors deepen as the bars sit, and the texture becomes slightly denser and more cohesive. By day 4, the crust starts to soften noticeably. Day 5 is acceptable; beyond that, the quality declines.
Freezer — Baked
Wrap individual bars tightly in two layers of plastic wrap, then place in a hard-sided freezer-safe container or zip-lock freezer bag. Freeze for up to 2 months. Thaw overnight in the refrigerator — do not thaw at room temperature. Custard-based fillings change texture when thawed quickly: the frozen water inside expands and separates from the fat, creating a grainy texture. Slow refrigerator thawing preserves the smooth texture far better. The texture of a properly thawed bar is very close to fresh.
Freezer — Unbaked
The filling can be made up to 24 hours ahead and stored in a covered bowl in the refrigerator. Do not freeze the unbaked filling — freezing and thawing raw egg-based custard before baking disrupts the emulsification and produces a filling that sets unevenly with a grainy texture. The crust can be pressed and pre-baked, cooled completely, and stored at room temperature covered with foil for up to 24 hours before adding the filling.
Serving Suggestion
I serve these cold, pulled directly from the refrigerator. The texture is firmer and the slices hold their shape cleanly at refrigerator temperature. Room temperature bars are slightly softer and have a slightly creamier mouthfeel — both are correct, and the choice depends on whether you prefer the firmer or more custard-like texture.
I serve these with freshly whipped cream — heavy cream, powdered sugar, a small amount of vanilla — whipped to soft peaks. Not canned, not stabilized, not pre-made. The unsweetened dairy cuts through the sweetness of the filling in a way that nothing else does and adds a textural contrast that makes each bite feel more like a full dessert. A light dusting of cinnamon on top of the whipped cream is the only garnish I use.
These are a make-ahead dessert by design. They are better the day after baking than the day of, and they hold perfectly in the refrigerator for the full days leading up to Thanksgiving. I would not make these the morning of a dinner party. I would make them two days before and cut them the night before serving.
🗒 Luna’s Note: I make two pans every Thanksgiving. One to bring. One to keep. The one I bring is cut neatly. The one I keep is cut however. I don’t share that one.
Frequently Asked Questions
How do you know when pumpkin pie bars are done baking?
Use the jiggle test. At 40 minutes, gently shake the pan. The edges — approximately 2 inches around the perimeter — should look fully set and not move. The center, a 3 to 4 inch circle, should wobble gently like fully set Jello. This wobble is correct: the residual heat from the pan will continue cooking the center for the 2 hours the bars cool at room temperature. Waiting for the center to look completely firm in the oven means the edges are already overbaked.
Can you use pumpkin pie filling instead of pumpkin purée for pumpkin pie bars?
No. Pumpkin pie filling is pre-sweetened and pre-spiced, and neither the sugar level nor the spice balance is calibrated to this recipe. Adding it in place of pure pumpkin produces bars that are over-sweet with a blurred, indistinct spice flavor — because the spice blend in the can is designed to work in isolation, not alongside an additional sugar component. The only ingredient that works here is 100% pure pumpkin purée with a single ingredient on the label: pumpkin.
Can I use a different crust for pumpkin pie bars?
Yes. A shortbread crust, a sugar cookie crust, or a traditional pie crust all work in place of graham cracker. Shortbread crust: combine 1½ cups (180g) all-purpose flour, ¼ cup (50g) powdered sugar, and ½ cup (113g) cold unsalted butter, cut into small pieces — press into the pan and pre-bake at 325°F for 15 to 18 minutes. Pie crust: press a single sheet of raw store-bought pie crust into the bottom of the pan and pre-bake exactly as directed on the package. For a cake mix crust variation — see my Pumpkin Dump Cake for the method on working with cake mix as a base.
Can pumpkin pie bars be made ahead?
Yes — these are one of the best make-ahead desserts I make. The bars can be baked up to 3 days in advance and stored in the refrigerator. The texture improves slightly after 24 hours as the spice flavors deepen and the filling firms further. For longer make-ahead windows, bake and freeze individually wrapped bars for up to 2 months and thaw overnight in the refrigerator before serving.
How long do pumpkin pie bars last?
Stored in a lidded container in the refrigerator, these bars last up to 5 days. The quality is best on days 1 through 3 — the crust retains some crunch, the filling stays dense and smooth, and the spice flavor is fully developed. By day 4, the crust begins to soften from prolonged contact with the refrigerator moisture. Day 5 is still safe and edible but noticeably softer.
Can I double or halve this recipe?
To halve the recipe, use an 8×8 inch (20×20cm) pan, reduce all ingredient amounts by half, and reduce the bake time to 30 to 38 minutes — start the jiggle test at 30 minutes. The yield is 16 smaller bars. To double, use two 9×13 pans rather than one larger pan; filling baked in a deeper pan does not set evenly. Custard-based fillings are sensitive to pan depth — keep the layer thickness consistent rather than increasing it.
More Pumpkin Recipes You’ll Love
- Pumpkin Chocolate Chip Cookies— soft, cakey drop cookies with a strong pumpkin flavor and pockets of melted chocolate in every bite.
Pumpkin Pie Bars
Ingredients
Equipment
Method
- Position oven rack in the middle and heat oven to 325°F (165°C). Line a 9×13 inch (23x33cm) light-colored aluminum baking pan with parchment paper, leaving at least 2 inches (5cm) overhang on all four sides.
- In a medium bowl, combine 2 cups (200g) graham cracker crumbs, ¼ cup (50g) granulated sugar, and ½ tsp cinnamon. Add ½ cup (113g) melted cooled butter and stir with a fork until every crumb is evenly moistened and the mixture clumps when pressed.
- Transfer crumb mixture to the lined pan. Use the flat bottom of a measuring cup to press into a firm, even layer approximately ½ inch (1.25cm) thick, pressing slightly up the sides.
- Bake the crust for 8 to 10 minutes until the edges are lightly golden and the surface feels set. Remove from oven and cool for 10 minutes before adding filling.
- In a large bowl, whisk together 850g pure pumpkin purée and 1½ cups (300g) granulated sugar until evenly combined, about 30 seconds.
- Add 4 room-temperature eggs one at a time, whisking each in fully before adding the next.
- Add 1½ cups (360ml) heavy cream, 2 tsp vanilla extract, 2 tsp cinnamon, 1 tsp ginger, ½ tsp nutmeg, ¼ tsp cloves, and ½ tsp (3g) fine sea salt. Whisk for 60 seconds until completely smooth and uniform.
- Pour filling over the cooled crust and use an offset spatula to spread it evenly to all four edges.
- Bake at 325°F (165°C) for 40 to 50 minutes. At 40 minutes, gently shake the pan: edges should be fully set, center should have a 3 to 4 inch (7 to 10cm) gentle wobble like set Jello. Pull when you see this — do not wait for the center to look fully firm.
- Cool on a wire rack at room temperature for exactly 2 hours. Do not cover during this time.
- Refrigerate uncovered for the first 2 hours, then cover loosely and continue refrigerating for a minimum of 4 hours total (overnight produces the cleanest cuts).
- Lift slab from pan using the parchment overhangs. Cut a 4×6 grid using a sharp knife wiped clean between each cut. Serve chilled.