
Halloween Oreo Cookies (Whole Oreo Stuffed)
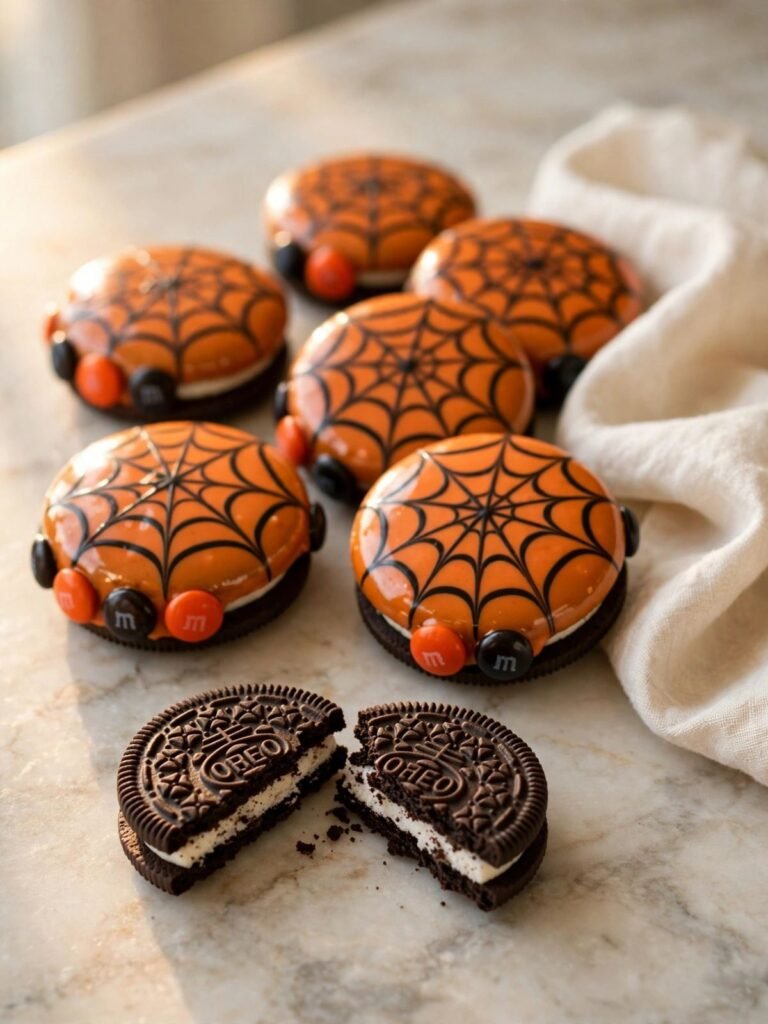
Most “Halloween Oreo cookies” on Pinterest are not actually Oreo cookies. They are regular sugar cookies with a crushed Oreo sprinkled on top, or a photo of a plate where the Oreo is doing decoration work, not baking work. I wanted the real thing: a whole Oreo, unbroken, sealed inside a soft double chocolate cookie, so that every bite from the edge to the center hits dough, then cream filling, then chocolate wafer. I have made this recipe eleven times since the start of October testing. The first four batches cracked open in the oven. The fifth one did not, and I finally understood why.
The texture is not subtle. The outside is a soft, slightly crackled double chocolate cookie — dense at the edges, almost brownie-like where it meets the Oreo. Cut one in half and the center is a clean cross-section: dark cookie, white cream filling, two chocolate wafers, still faintly crisp at the very core. The dough itself tastes like a deep, bittersweet chocolate cookie on its own, which matters, because a bland cookie wrapped around a candy center is candy with a chore attached.
This dough is creamed, not melted — you need a stand mixer or a hand mixer for this one. Do not try to cream cold butter and sugar with a spoon; it will not aerate and the dough will be dense and greasy instead of soft. Chilling is not optional here either, and I will explain exactly why before you get to the ingredient list: an unchilled, warm dough ball spreads before the oven can set the seam around the Oreo, and the seam is the first place these crack open.
I will be honest about the one genuinely fussy part of this recipe: wrapping the dough around the Oreo. It is not difficult in the way brown butter is difficult — there is no narrow thermal window, nothing you can burn. It is fiddly the first three or four times, the same way wrapping a dumpling is fiddly the first three or four times. Your hands figure it out faster than your brain does.
🗒 Luna’s Note: I buy two packages of regular Oreos for this recipe, not one. The first handful of wraps in any batch come out lopsided or thin on one side while my hands are recalibrating to the size of a whole cookie instead of a spoonful of dough — those go straight into my mouth, not onto the pan, and I do not feel bad about it.
I tested the dough-to-Oreo ratio at two thicknesses. A thin, tight wrap — barely enough dough to cover the Oreo with almost no excess — looked more dramatic going into the oven, but three of four cookies split open along one side as they baked, leaking cream filling onto the pan. A thicker, fully overlapped wrap with a firmly pinched seam held its shape in all four cookies, every time I repeated the test. I kept the thicker wrap. The extra dough is not wasted volume — it is the structural reason the cookie holds together.
I found the actual fix by accident, on the sixth batch. I was working faster than usual and pinched every seam twice out of habit instead of once — a second pass, going back over the same line I had already sealed. That was the batch that came out of the oven with zero cracks, all twelve cookies. I went back and deliberately skipped the second pinch on a control batch to confirm it wasn’t a coincidence. The control batch cracked. The double-pinch is now a required step, not a suggestion.
No candy thermometer, no water bath, no resting overnight. This is a same-afternoon recipe if you count the chill time, and it does not require anything you don’t already own if you bake cookies regularly. What it does require is patience for one 25-to-30-minute wrapping stretch and a genuine 30-minute chill before these go into the oven — skip the chill and the dough is too soft to hold its shape as it spreads, and that is exactly when the seam gives out.
| Prep Time | Cook Time | Total Time | Yield | Difficulty |
|---|---|---|---|---|
| 40 min | 13 min | 2 hours | 20 cookies | Intermediate |
| Calories | Fat | Carbs | Sugar | Protein | Sodium |
|---|---|---|---|---|---|
| ~350 kcal | ~16g | ~49g | ~32g | ~4g | ~165mg |
Macros are approximate and will vary based on ingredient brands and serving size.
Ingredients & Tools for Halloween Oreo Cookies
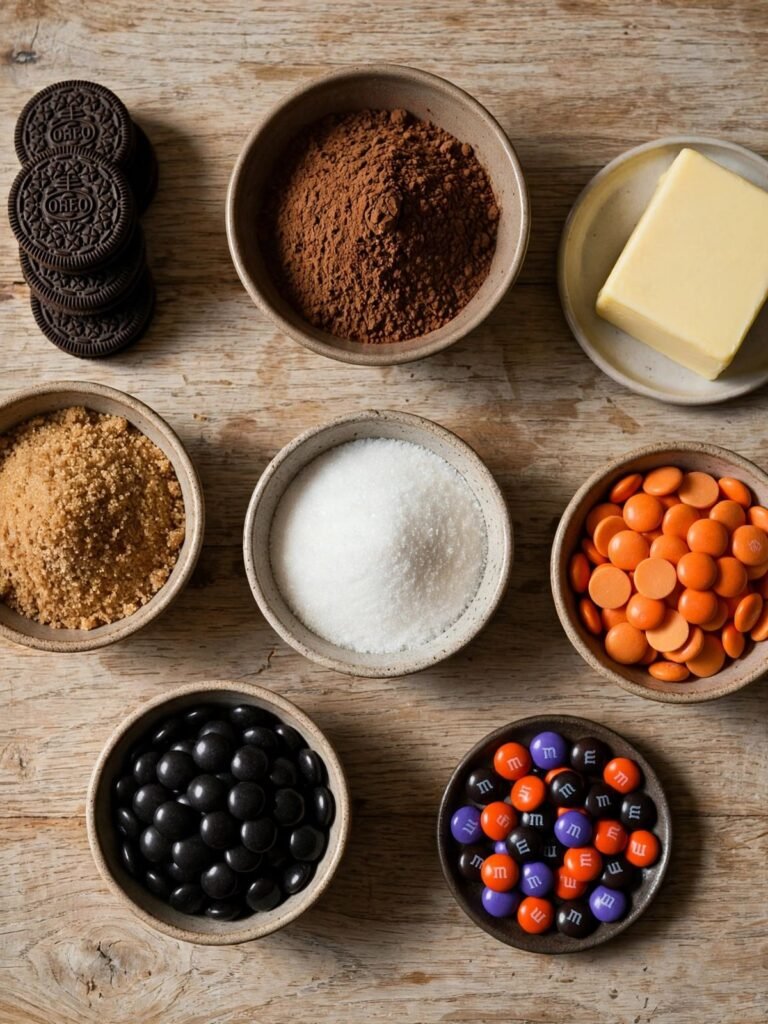
For the Cookie Dough
- 1 cup (226g) unsalted butter, softened to room temperature (65–68°F / 18–20°C)
- ¾ cup (150g) plain white granulated cane sugar
- 1 cup (220g) packed brown sugar
- 1 large egg (approximately 50g without shell), room temperature
- 1 large egg yolk, room temperature
- 2 tsp pure vanilla extract
- 2½ cups (300g) all-purpose flour (spooned into the measuring cup and leveled) — or weighed at 300g
- ¾ cup (65g) unsweetened natural cocoa powder — not Dutch-process, see note below
- 1 tsp baking soda, checked for freshness
- ½ tsp fine sea salt
- 20 whole regular Oreo cookies (original, not Double Stuf — see note below)
For the Halloween Finish
- 1 cup (170g) orange candy melting wafers, such as Wilton
- ¼ cup (45g) black candy melting wafers, such as Wilton
- ½ cup (about 85g) Halloween-colored M&Ms
Ingredient Notes
Cocoa powder — this recipe uses natural cocoa, which is acidic and reacts with the baking soda for lift and the crackle you see on the finished cookie. Dutch-process cocoa is neutralized and will not react the same way — swapping it in without also swapping to baking powder produces a flatter, denser cookie with almost no surface crackle. Do not substitute one for the other without changing the leavener.
Oreo cookies — use the original, regular Oreo, not Double Stuf. Double Stuf has close to double the cream filling, and that extra filling melts and expands more during baking, which is the single fastest way to blow out a seam that would otherwise hold. If Double Stuf is genuinely all you have, expect a higher crack rate and budget extra dough for a thicker seal.
Candy melting wafers, not chocolate chips — for the drizzle, use actual candy melting wafers (Wilton, Ghirardelli melting wafers, or a similar brand), never regular chocolate chips. Chocolate chips are formulated to hold their shape at oven temperature and will not thin out enough to drizzle a clean line — they seize into a grainy paste the moment they touch any moisture, including the moisture in food coloring. Candy melts are formulated to melt smooth and re-set glossy, which is what the web design needs.
Before You Start
- Butter: pull it from the fridge 60–90 minutes before you start (45–60 minutes in a warm kitchen). Press your finger into it — it should leave a clean indent without feeling greasy or slick. Butter that is too warm will not hold air when creamed, and the finished dough will be dense instead of soft.
- Eggs: set the egg and the extra yolk out 30 minutes before you need them, or set them in a bowl of warm (not hot) water for 10 minutes if you forgot.
- Flour: spoon it into the measuring cup and level it with a straight edge — do not scoop directly from the bag, which packs in 20–30% more flour than the recipe needs. For the most consistent result, weigh it at 300g on a kitchen scale. The gram weights in this recipe are what I tested with.
- Baking soda freshness test: drop ½ tsp into a small bowl of hot water with a splash of white vinegar. It should bubble aggressively within 2 seconds. If it fizzes weakly, replace the box before you start — expired baking soda is the single most common cause of flat, dense cookies with no crackle.
- Mixing method: this recipe requires a stand mixer fitted with the paddle attachment or a hand mixer. Mixing cold butter and sugar by hand will not aerate the dough enough, and the cookie will bake up dense and greasy instead of soft.
- Pan: use two light-colored aluminum half-sheet pans (18×13 inches / 46×33cm), lined with parchment paper, ungreased. Dark non-stick pans absorb more heat and will overbrown the bottoms of these cookies before the centers finish baking, given how thick each dough ball is. Never use foil in place of parchment — the cookies stick and the bottoms scorch unevenly.
- Oven rack: position the middle rack before you preheat. Top rack browns the tops too fast; bottom rack burns the bottoms.
- Chilling is not optional: the wrapped dough balls need a minimum 30-minute chill, and up to 45 minutes if your kitchen runs warm. Skipping this step means the dough is still soft when it hits the oven, and soft dough spreads before the seam has any chance to set — this is the fastest way to end up with cracked, leaking cookies instead of clean stuffed ones.
- Candy melts and kitchen temperature: if your kitchen runs warm, the orange and black drizzle will stay workable a little longer than the timing given in Method Step 9 assumes — good for a first attempt, but check it early rather than late. In a cooler or air-conditioned kitchen, the web lines set faster and you have a narrower window to work in.
Necessary Tools
- Kitchen scale (strongly recommended)
- Stand mixer with paddle attachment, or hand mixer
- Large mixing bowl
- Medium bowl (for whisking dry ingredients)
- Silicone spatula
- 2 light-colored aluminum half-sheet baking sheets
- Parchment paper
- Medium cookie scoop (2 tablespoons / 40g capacity)
- Wire cooling rack
- 2 small microwave-safe bowls (for melting candy)
- Fork or squeeze bottle (for the drizzle)
Optional: oven thermometer (recommended — most home ovens run 15–25°F off).
How to Make Halloween Oreo Cookies
This dough comes together with the standard creaming method: butter and sugar first, then eggs, then dry ingredients folded in last. The order matters here specifically because the dough needs enough structure from properly creamed butter to hold its shape wrapped around a whole cookie — underdeveloped creaming produces a dough that is too slack to seal cleanly.
Step 1: Getting Your Pans and Oven Ready
On your two light-colored aluminum half-sheet pans, line each with parchment paper — the cookies do not need greasing beyond that. Position your oven rack in the middle position and preheat the oven to 350°F (175°C). Most home ovens run 15–25°F off from their display, so if you have an oven thermometer, confirm the actual temperature now rather than after the first pan comes out uneven.
You are ready to move on once both pans are lined and the oven is preheating — the dough will take about 15 minutes to come together, which is roughly the time your oven needs anyway.
Step 2: Creaming the Butter and Both Sugars Until Pale and Fluffy
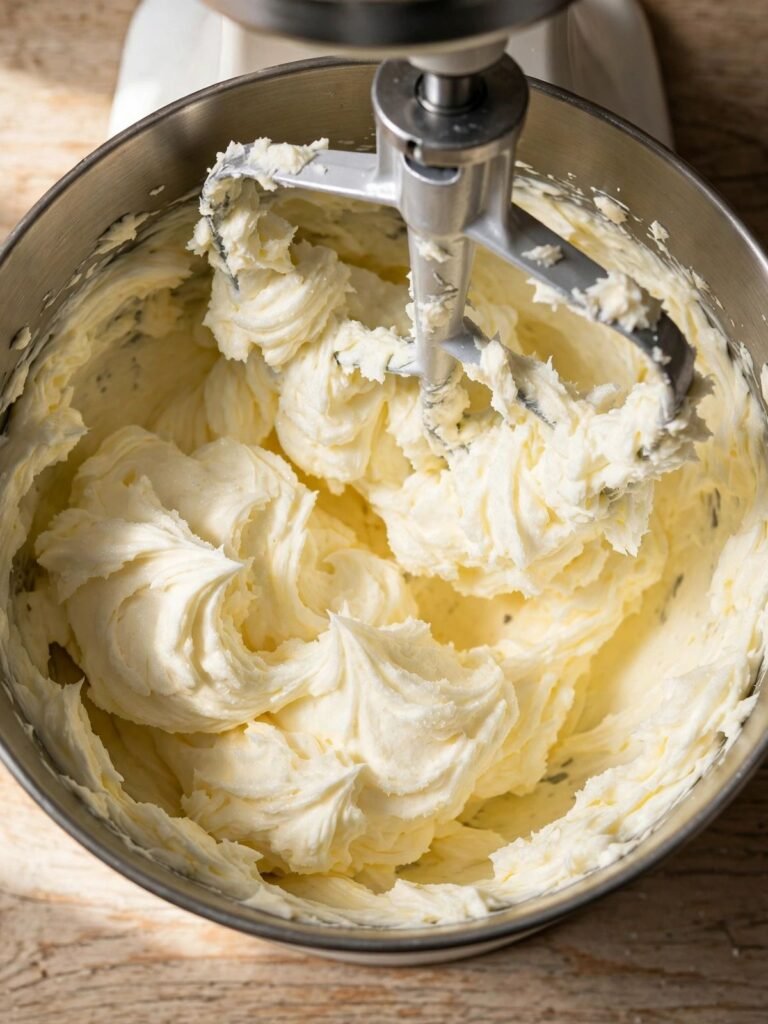
In your stand mixer fitted with the paddle attachment, on medium speed, add your 1 cup (226g) softened unsalted butter, ¾ cup (150g) plain white granulated cane sugar, and 1 cup (220g) packed brown sugar. Beat for a full 3 minutes — set a timer, do not estimate. The sugar is what drives structure here as much as sweetness: properly creamed butter traps air pockets that give the dough enough body to hold its shape once it’s stretched around an Oreo, while undercreamed butter leaves a slack dough that thins out and tears at the seam.
The mixture should look pale, nearly doubled in volume, and hold its shape when you lift the paddle — not still yellow and dense. Do not skip ahead if it still looks like wet sand at the 2-minute mark — that is undercreamed, and the dough downstream will be too weak to wrap cleanly. Your butter and sugar are ready — add the egg next.
Step 3: Adding the Egg, Yolk, and Vanilla
Add your 1 large room-temperature egg, 1 additional room-temperature egg yolk, and 2 tsp pure vanilla extract to the creamed mixture. Beat on medium speed for about 1 minute, scraping the bowl once halfway through. The extra yolk is doing real work here — yolks are almost pure fat and emulsifier, and that extra fat is part of what keeps this dough pliable enough to stretch around a whole cookie without tearing at the edges, rather than cracking like a drier dough would.
The mixture should look glossy, smooth, and slightly lighter in color, with no streaks of unmixed egg visible. If it looks curdled or broken — separated into small yellow globules instead of one smooth mixture — your butter was too warm; keep beating and it will usually come back together within another 30 seconds. This is your wet base — the dry ingredients go in next.
Step 4: Folding in the Dry Ingredients
In a separate medium bowl, whisk together your 2½ cups (300g) spooned-and-leveled all-purpose flour, ¾ cup (65g) unsweetened natural cocoa powder, 1 tsp baking soda, and ½ tsp fine sea salt until no cocoa streaks remain. Add this to the wet mixture in two additions, mixing on low speed only until the last streak of flour disappears — about 20 to 25 seconds total, no longer.
The baking soda needs the natural acidity in the cocoa powder to activate; this reaction is what gives the finished cookie its lift and its faintly crackled top, and it is also why Dutch-process cocoa will not behave the same way here.
The dough should look thick, uniform, and matte dark brown — dense enough that it holds together when you press a spoonful against the side of the bowl, not sticky or wet. Overmixing past this point develops gluten you do not want in a cookie meant to stretch, not spring back — the dough will feel tighter and tear sooner around the Oreo instead of stretching smoothly.
Your dough is finished — it is ready to be portioned and wrapped.
Step 5: Wrapping and Sealing Each Oreo
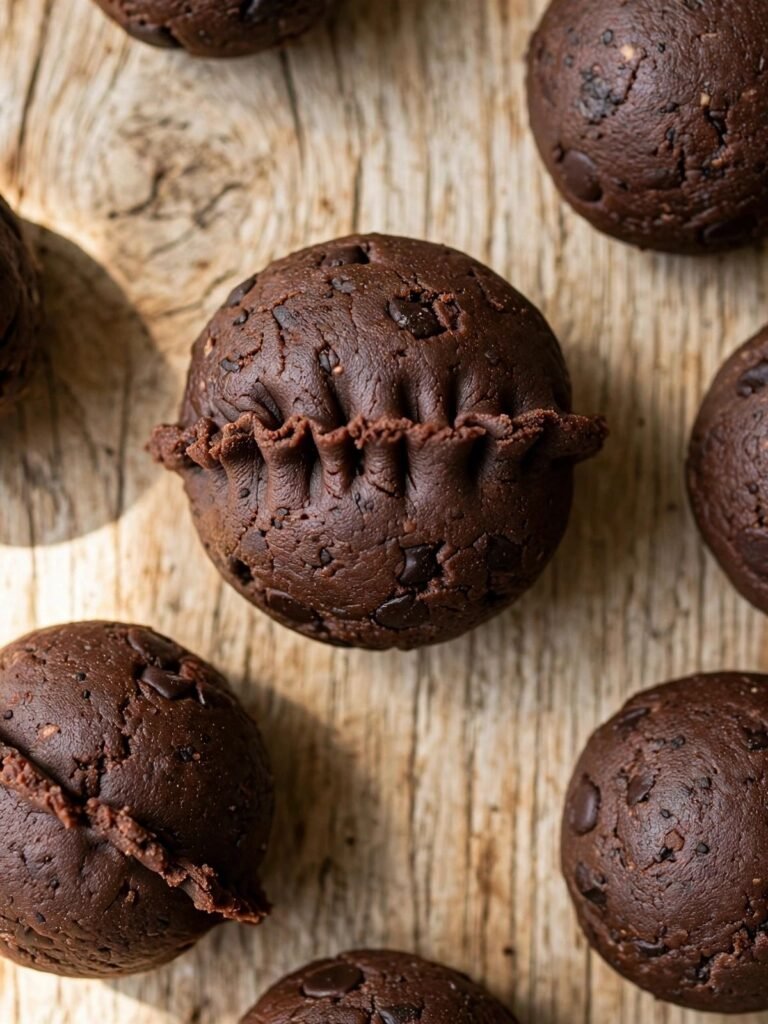
This is the step that determines whether these cookies hold their shape in the oven, so read it before you start scooping. Using your medium cookie scoop, portion the dough into 20 balls of about 2 heaping tablespoons (roughly 40g) each. Flatten one ball into a disc between your palms, about ¼ inch (6mm) thick and wide enough to fully overlap the edges of one whole Oreo cookie on every side.
Center the Oreo on the disc, then bring the edges of the dough up and over the top, pressing them together to fully enclose the cookie with no gaps, thin spots, or visible Oreo edges anywhere. Pinch the seam firmly closed, then go back over the same seam a second time — a genuine second pass, not a token press — smoothing it flat against the ball with your thumb.
The finished ball should look like a smooth, seamless sphere with no visible crack, ridge, or thin patch anywhere on its surface — if you can see the edge of the Oreo through the dough at any point, add a small patch of dough there and re-seal it before setting it down.
Skipping the second pinch is the single most common reason these crack open in the oven — the first pinch closes the seam, but it is rarely tight enough on its own to survive 13 minutes of oven spring and a softening cream filling underneath it.
🗒 Luna’s Note: by the third or fourth cookie, the double-pinch stops being something I think about and becomes the motion my thumb makes — the same way folding a dumpling gets faster the more you do it in one sitting.
Place the sealed balls on your parchment-lined pans, spaced 3 inches (7.5cm) apart — 10 per pan. You are ready to chill — set both pans in the refrigerator.
Step 6: Chilling the Wrapped Dough Balls
Refrigerate both pans, uncovered, for a minimum of 30 minutes and up to 45 minutes if your kitchen runs warm.
Do not skip this step. A warm, freshly wrapped dough ball is soft enough that it starts spreading the moment it hits oven heat, and spreading pulls at the seam you sealed only moments earlier, before the outside of the cookie has any chance to firm up and hold that seam shut — this is the second most common cause of cracked, leaking cookies after an undersealed seam.
The dough balls are ready when they feel firm to the touch all the way through, not only cool on the outside. While these chill, this is a good window to melt your candy for the drizzle if you want it ready the moment the cookies come out — see Method Step 9.
Step 7: Baking
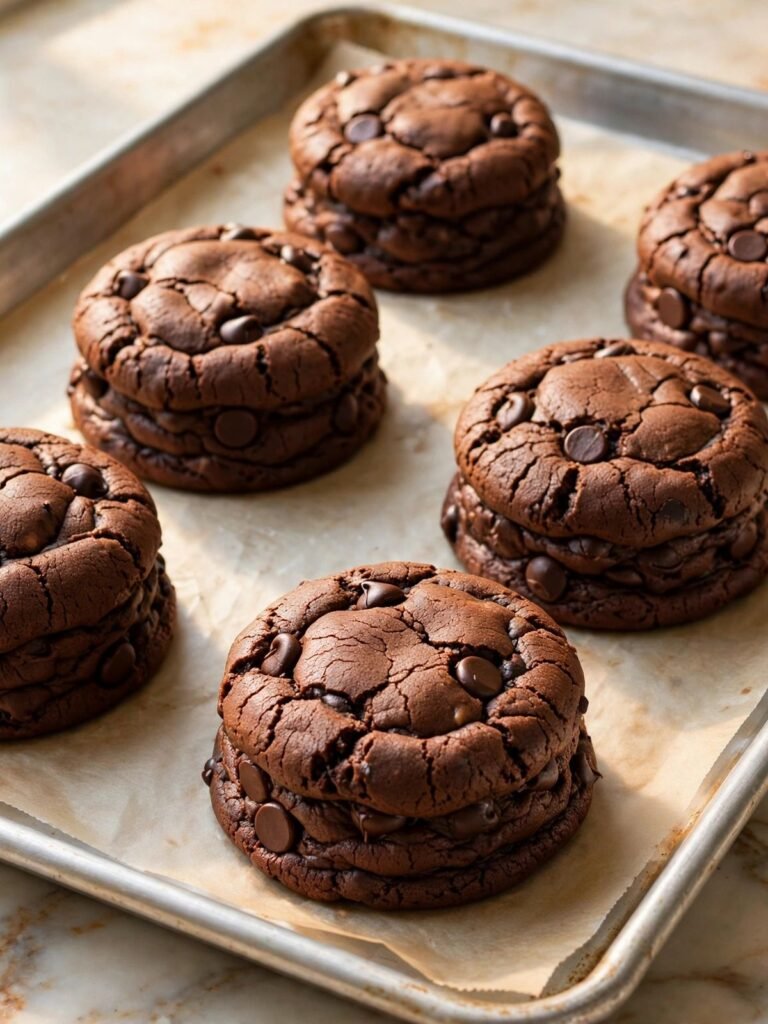
Bake one pan at a time on the middle rack at 350°F (175°C) for 12 to 14 minutes. Start checking at 12 minutes. The cookies are done when the surface looks set and matte with a faint crackle across the top, and the dough has spread enough that the ball shape has relaxed into a slightly domed round — not when it looks fully dark or dry.
Because there is a dense, cool Oreo core inside each ball, the outside of these cookies will look and feel done a little before the very center has finished — pull at the first sign of that crackled, matte surface rather than waiting for the color to deepen further, or the edges overbake while the center is still catching up.
Do not open the oven door before 10 minutes — the temperature drop can stall the last bit of spread these need to finish rounding out. Your first pan is done — it comes out now, and the second pan goes in.
Step 8: Cooling — On the Pan, Then on the Rack
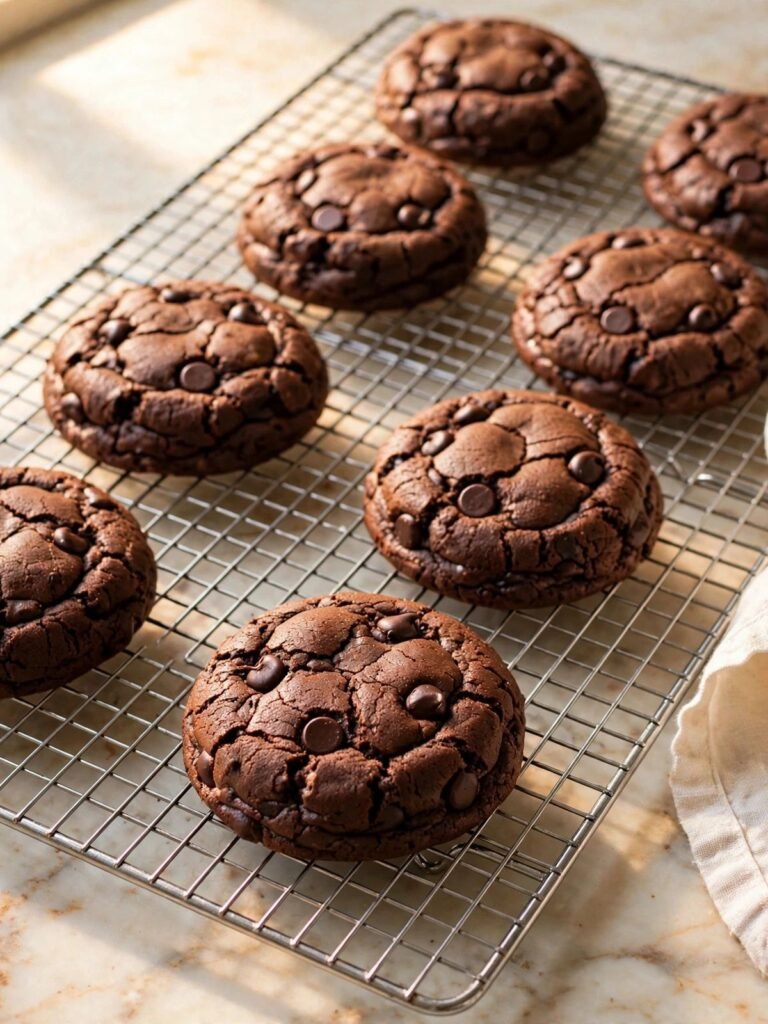
Leave the cookies on the hot pan for exactly 5 minutes before moving them — do not move them sooner. During this time, carryover heat from the pan continues cooking the base of the cookie and finishes setting the dough around the Oreo without drying it out; moving them too soon can tear a still-soft cookie apart at the seam you spent real time sealing.
After 5 minutes, transfer the cookies to a wire rack and let them cool completely, about 20 minutes, before decorating — warm cookies melt candy melts on contact and the drizzle slides right off instead of setting into a clean line. The cookies are ready to decorate once they are fully cool to the touch, with no warmth at all remaining at the center. Your cookies are now baked and cooled — Step 9 is where they become Halloween cookies.
Step 9: Melting the Candy and Building the Spiderweb
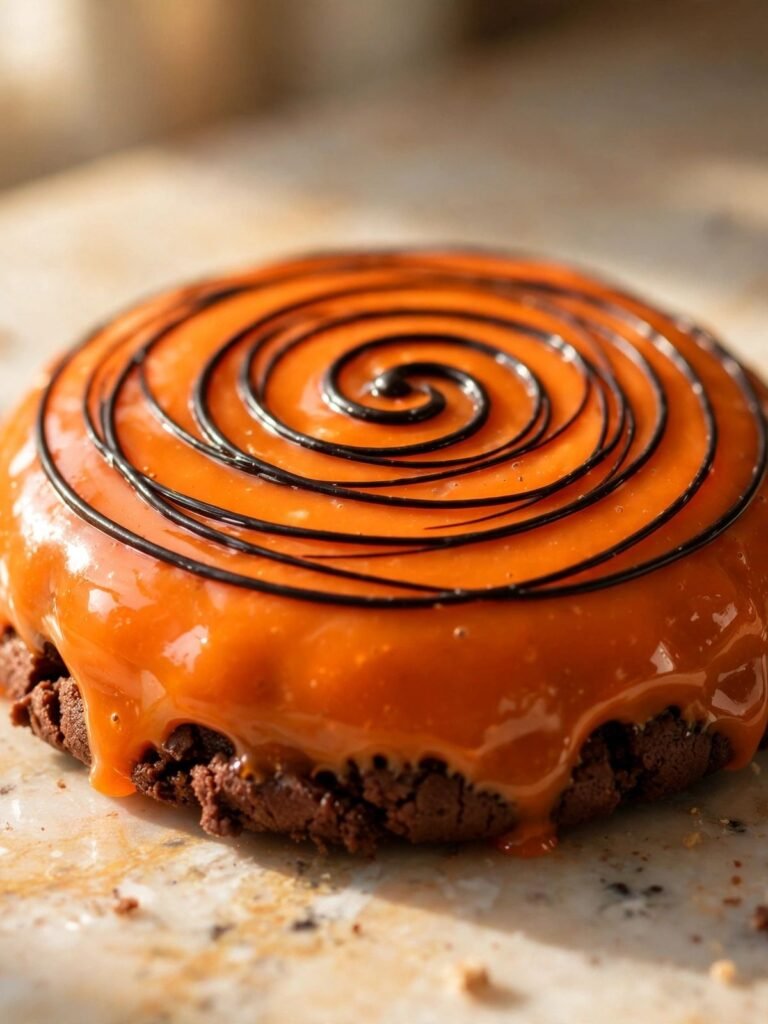
In one small microwave-safe bowl, melt your 1 cup (170g) orange candy melting wafers in 20-second bursts, stirring between each, until smooth and pourable — about 60 to 90 seconds total. In a second small bowl, do the same with your ¼ cup (45g) black candy melting wafers. Spoon or dip the top of each cooled cookie into the orange candy, letting the excess drip off, then set it back on the rack.
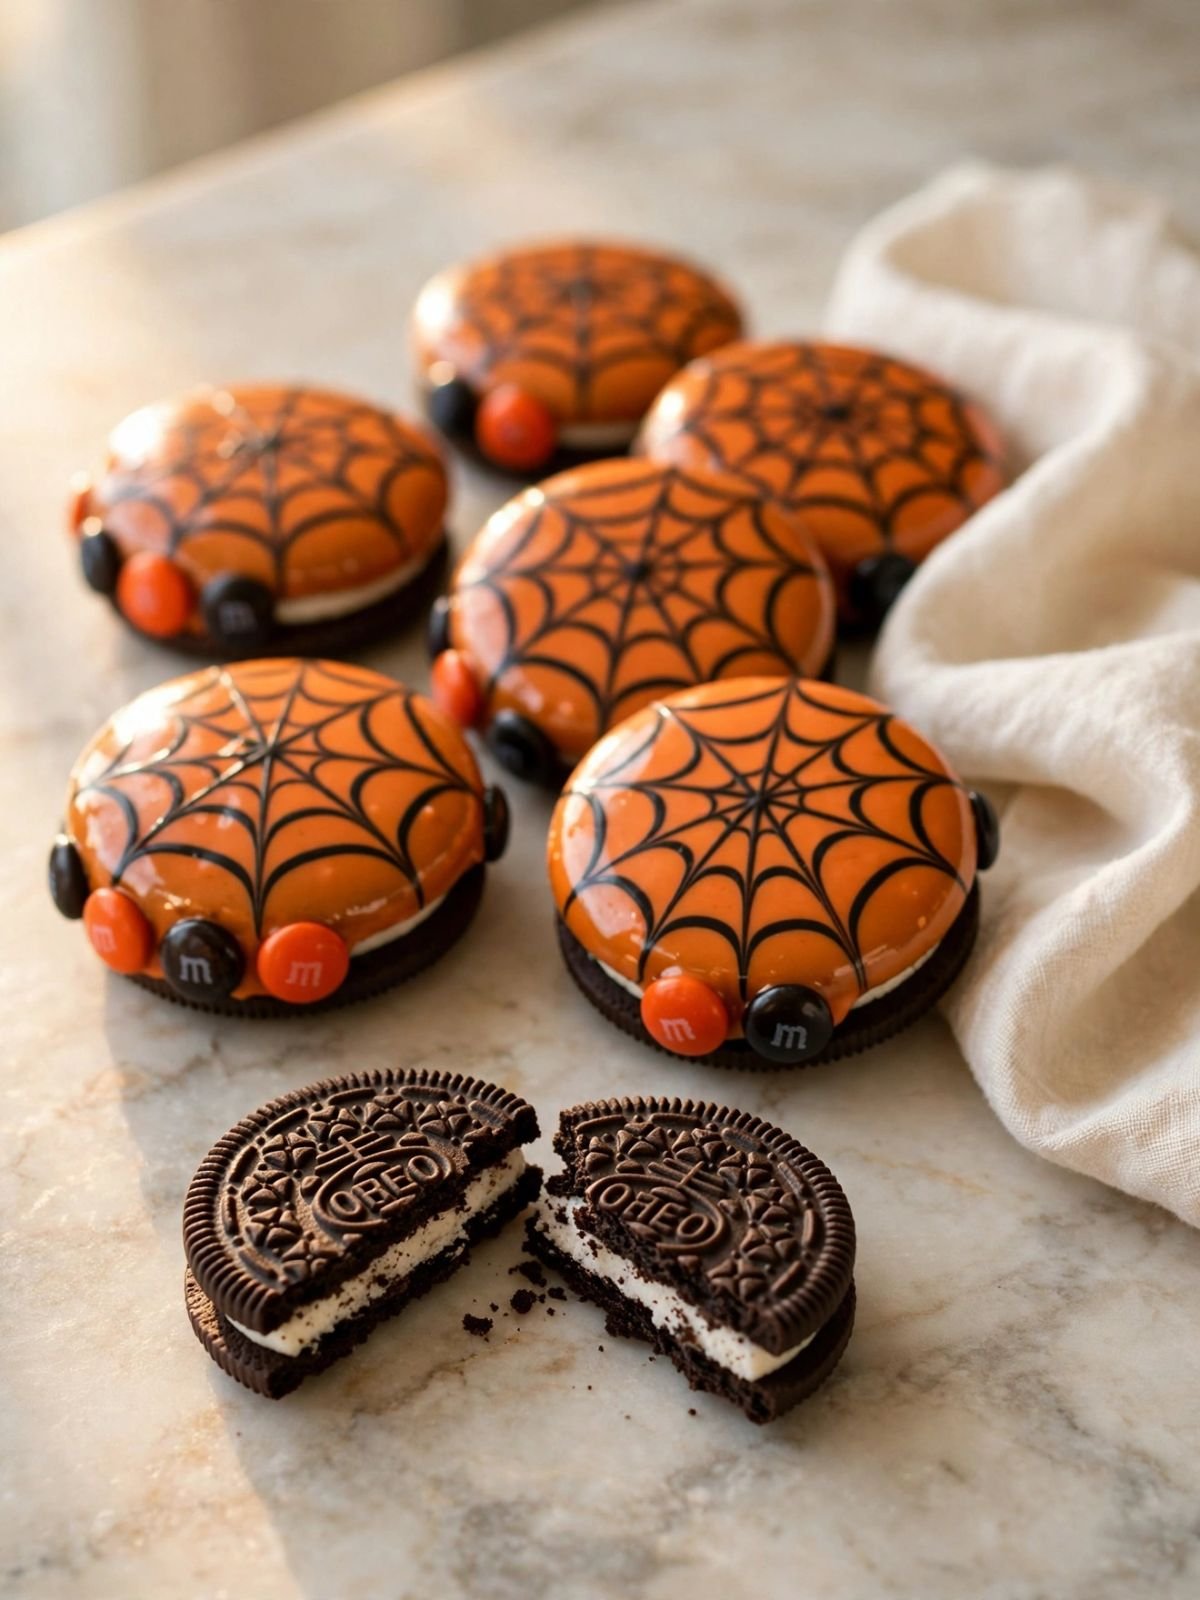
While the orange coating is still wet, use a fork or a small squeeze bottle to drizzle thin black lines across the top in a rough spiral, then drag a toothpick from the center outward through the lines in 6 to 8 evenly spaced strokes to pull them into a web pattern. Press 3 to 4 Halloween M&Ms into the wet candy near the edge of each cookie immediately after the web is drawn — the candy needs to still be tacky, not dry, or the M&Ms will not hold.
The web should look like fine black lines radiating outward through the orange base, slightly blurred at the points where you dragged the toothpick — a perfectly crisp, unblurred web means you waited too long and the candy had already started to set. In a warm, low-humidity kitchen like mine, this whole window runs about 60 to 90 seconds per cookie before the surface starts to skin over; in a cooler or more humid kitchen, you’ll have closer to 2 minutes, which is more forgiving for a first attempt.
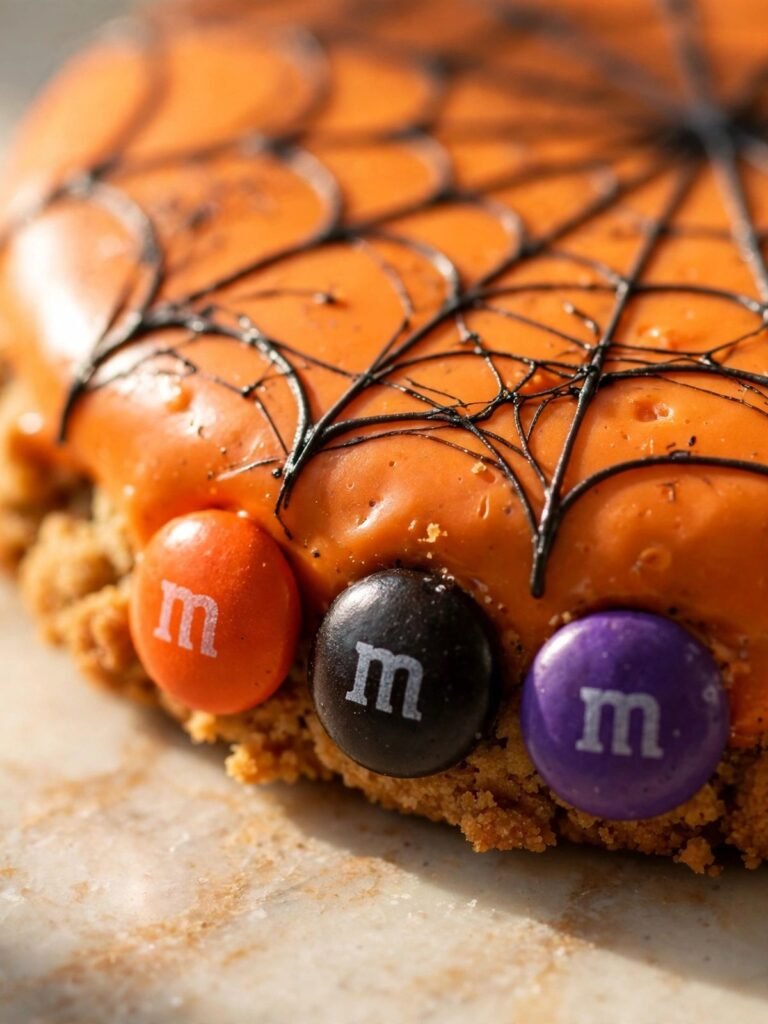
🗒 Luna’s Note: I use Wilton candy melting wafers for this, not almond bark. I have tried almond bark to save a trip to the craft store, and it runs thinner — the black lines bleed into the orange before you can drag them into a web, and the whole design goes muddy. Wilton holds a cleaner line. That is my preference, based on what actually happened when I tried the cheaper option.
Let the decorated cookies sit undisturbed at room temperature for 15 to 20 minutes, or in the refrigerator for 10 minutes, until the candy coating is fully set and no longer tacky to the touch. Your cookies are finished once the candy shell feels hard and dry, not soft or sticky, when you press it lightly. That is the full recipe — these are ready to serve or store.
The Science Behind Halloween Oreo Cookies
Why the Seal Matters More Than the Amount of Dough
I used to think the fix for cracked stuffed cookies would be more dough — a thicker shell, more insurance against a blowout. That is not actually what fixes it. Cookie dough spreads as it bakes because heat softens the fat inside it before the structure (the egg proteins and the gluten network) has fully set — this is completely normal and it’s what gives a cookie its shape.
The problem with a stuffed cookie is that this spreading motion pulls at the dough from every direction at once, and it pulls hardest exactly where the seam is, because a seam is a seam, not a continuous piece of dough — it is always the weakest point in the structure, no matter how thick the dough around it is. A thick shell with a weak, single-pinched seam will still split right along that seam, while a thinner shell with a genuinely fused double-pinched seam holds, because the seam itself, not the dough thickness, is what determines whether the cookie survives contact with oven heat.
Underneath that seam, the Oreo’s cream filling is also softening and very slightly expanding as it warms, which adds outward pressure at the exact same spot from the inside. A well-sealed seam resists that pressure. An undersealed one gives way to it — which is exactly what happened in four of my first six test batches, all cracked at the seam, none cracked anywhere else on the cookie.
🗒 Luna’s Note: on the batch where I deliberately skipped the second pinch as a control test, every single cookie cracked in the same spot — right where I’d stopped pressing a half-second early. That is not a coincidence you get to ignore.
How Baking Soda and Natural Cocoa Create the Crackled Top
The faint crackle you see across the top of each finished cookie comes from a genuine chemical reaction, not from anything decorative. Natural cocoa powder is mildly acidic, and baking soda is a base — when they meet in a wet dough and go into a hot oven, they react and release small bubbles of carbon dioxide gas.
Those bubbles push up against the surface of the cookie as it bakes, and as the surface sets faster than the interior does, it stretches slightly over the gas pockets underneath and forms the thin, dry crackle lines you see once the cookie cools.
This is the same basic mechanism behind a crackled brownie top, at a smaller scale. It’s also the reason Dutch-process cocoa — which is treated with an alkalizing agent specifically to neutralize its acidity — does not produce the same crackle here: without the acid, the baking soda has nothing to react against, and you’d need baking powder instead to get any real lift at all. If your cookies come out of the oven looking flat and smooth on top with no crackle, that is close to always either expired baking soda or a swap to Dutch-process cocoa without changing the leavener.
Why the Oreo Core Changes How This Cookie Bakes
Here is something I did not expect the first time I made these: the doneness cues you’d use for a normal cookie do not translate directly, because there is a dense, room-temperature disc sitting at the center of every single one, absorbing heat instead of setting like dough does.
Heat moves into the cookie from the outside in, the same as any baked good, but that Oreo core acts almost like a heat sink — it takes longer to come up to temperature than the surrounding dough does, which means the outer dough finishes setting and starts to look visually done while the innermost layer, right against the Oreo, is still a few degrees and a minute or two away from fully baked. Pull these purely by color and you will consistently underbake the center layer even as the edges look perfect.
This is why Method Step 7 tells you to watch for the crackled, matte surface texture rather than waiting for deeper color — by the time the color has visibly deepened further, the outer layer is already overbaked while you’re still working to catch the center up.
If you want the crushed-Oreo version of this idea instead — where the Oreo is broken into pieces and folded through the dough rather than sitting as one solid core — the doneness behavior is completely different, because there’s no single heat sink to account for, and I cover that approach start to finish in my Cookies and Cream Cookies recipe.
Troubleshooting & Pro-Tips for Halloween Oreo Cookies
Common Mistakes
1. The candy drizzle turns grainy and clumped instead of smooth. Symptom: the melted candy looks thick, seized, and lumpy instead of glossy and pourable, and it won’t drizzle into a clean line no matter how long you microwave it. Cause: this almost always means chocolate chips were used instead of actual candy melting wafers, or a drop of water got into the bowl while melting. Chocolate chips are formulated to hold their shape at baking temperature and seize into a grainy paste the instant they contact any moisture — including condensation from an unevenly heated microwave bowl. Fix: if it has already seized, you cannot rescue it into a smooth drizzle — but you can still use it. Spread the seized candy in a thin layer instead of drizzling it, or break it into small chunks once it cools and press them on as a topping instead of a web. Start a fresh batch of real candy melts for the drizzle itself. Prevention: use candy melting wafers specifically, melt in a completely dry bowl, and stir between every 20-second microwave burst rather than melting straight through in one long stretch.
2. The bottoms burn before the centers finish baking. Symptom: the underside of the cookie is dark, dry, and slightly bitter-tasting, while the very center around the Oreo still tastes slightly underbaked. Cause: a dark non-stick pan, a bottom oven rack, or foil used in place of parchment — all three absorb and conduct more heat than a light-colored aluminum pan with parchment does, and this dough ball is thick enough that the bottom has to survive several extra minutes of exposure compared to a flat drop cookie. Fix: if this happens mid-batch, move the pan up to the middle rack immediately and check every minute after that rather than waiting the full time again. Prevention: use a light-colored aluminum half-sheet pan lined with parchment, positioned on the middle rack, every time — not only for this batch.
3. The cookie cracks open and leaks cream filling during baking. Symptom: a visible split along one side of the cookie, sometimes with a small amount of white cream filling seeping out through the crack and caramelizing on the pan. Cause: a seam that was pinched once instead of twice, or a thin patch of dough somewhere on the wrap that wasn’t fully re-patched before chilling — see Method Step 5 and the Science section above for the full mechanism. Fix: this one is a salvage, not a loss. A cracked cookie still tastes exactly the same — cool it fully, then use the crack to your advantage by drizzling extra candy melt directly over it. The web design hides a crack better than almost any other decorating style would. Prevention: double-pinch every seam, check each wrapped ball for visible Oreo edges before it goes on the pan, and never skip the 30-minute chill.
4. The dough balls spread into each other and merge on the pan. Symptom: two or more cookies bake together into one large, irregular shape with no clean edges between them. Cause: the dough was too warm when it went into the oven, or the balls were spaced closer than 3 inches apart. Fix: if this happens, let the merged cookies bake through fully rather than pulling them apart hot — you’ll get a slightly larger, oddly shaped cookie that still tastes fine, only less photogenic. Separate with a sharp knife once fully cooled if you want distinct pieces. Prevention: chill the full 30 to 45 minutes, and space the balls a genuine 3 inches apart, not “close enough.”
5. The M&Ms slide off or melt into a puddle on the finished cookie. Symptom: the candy shell coating is either sunk in a wet puddle around the M&M, or the M&M has slid off entirely once the cookie cools. Cause: the M&Ms were pressed onto candy that was either too hot and wet (causing sinking) or already fully set and dry (giving nothing for the M&M to adhere to). Fix: if an M&M has already slid off a set cookie, a small fresh dab of melted candy underneath it will re-adhere it once it sets again. Prevention: press the M&Ms in within the same 60-to-90-second window you drew the web, while the candy is tacky rather than wet or dry — see Method Step 9.
6. No crackle on top, and the cookies taste faintly flat. Symptom: the baked cookies look smooth and matte with no surface texture at all, and the flavor tastes slightly dull rather than deep and chocolatey. Cause: expired baking soda, most often — it loses potency 3 to 6 months after opening, and without an active leavener, the reaction with the natural cocoa that creates lift and crackle doesn’t happen at all. Fix: nothing to do for the current batch — the cookies are still safe to eat — visually flatter and a little denser than intended. Prevention: run the freshness test in Before You Start every time you open a new container, not only the first time.
Humidity and altitude: in a humid kitchen, refrigerate the wrapped dough balls for closer to 45 minutes rather than 30, and expect the candy drizzle to take longer to set — give it a few extra minutes before handling. At altitudes above 3,500 feet (1,067 meters), reduce the baking soda to ¾ tsp, increase the flour by 2 tablespoons, reduce the sugar by 1 tablespoon, and check for doneness starting at 10 minutes rather than 12 — leavening gases expand faster and liquids evaporate quicker at altitude, which shifts both spread and timing earlier than sea level.
Expert Pro-Tips
1. Want an actual spider instead of a web? Skip the toothpick-drag step and instead press a small plastic Halloween spider ring or a chocolate candy spider directly into the wet orange candy before it sets, positioned slightly off-center. This is the format I get asked about most alongside the web design — it reads as more literally “spider cookie” at a glance, where the web reads as more generally “Halloween.”
2. For a bat instead of a spider theme, swap the black candy melt drizzle for small black bat-shaped sprinkles or quins pressed into the wet orange base instead of drawing a web — press them on within the same 60-to-90-second window as the M&Ms in Method Step 9.
3. These freeze well unbaked. Wrap and seal the dough balls through the end of Method Step 5, then freeze them on a parchment-lined tray until solid, about 2 hours, before transferring to a freezer bag. Bake straight from frozen, adding 3 to 4 extra minutes to the bake time — no thawing needed. This is the move if you want fresh Halloween cookies without the full prep window on the day itself.
4. Work in small batches when you decorate. Dip and drizzle 4 or 5 cookies at a time rather than the full 20 at once — candy melts start to thicken and lose their pourable texture after sitting for a few minutes, even off the heat, and a thickened batch drizzles in thick, clumsy lines instead of thin ones. Re-warm in 10-second bursts if it starts to stiffen before you’re through.
How to Store Halloween Oreo Cookies
Room Temperature
Store the fully decorated, fully set cookies in a lidded hard-sided container with parchment paper between each layer, at room temperature, for 3 to 5 days. Do not use a zip-top bag — the weight of stacked cookies flattens the candy shell and can crack the decorating before it’s had a chance to fully cure. Keep the container somewhere cool and out of direct sun; the candy coating will soften and lose its shine in a warm spot.
Refrigerator
Not recommended for the fully decorated cookies. Refrigeration can cause condensation to form on the candy shell once you bring them back out to room temperature, which dulls the glossy finish and can make the black web lines bleed slightly into the orange. If your kitchen runs genuinely hot, a brief refrigerator stay is fine — bring them back to room temperature before serving, uncovered, so any condensation evaporates rather than sitting on the surface.
Freezer — Baked and Decorated
Freeze the fully decorated cookies individually wrapped in plastic wrap, then placed in a freezer bag, for up to 2 months. Thaw at room temperature, still wrapped, for about 1 hour — unwrapping a frozen cookie immediately invites condensation directly onto the candy shell. The dough itself holds up well to freezing; the candy decorating is the more fragile part, so handle thawed cookies gently until they’ve come fully back to room temperature.
Freezer — Unbaked
See Expert Pro-Tip 3 above for the full method — wrap through the seal step, freeze solid on a tray, then bag, and bake straight from frozen with 3 to 4 extra minutes added.
Serving Suggestion
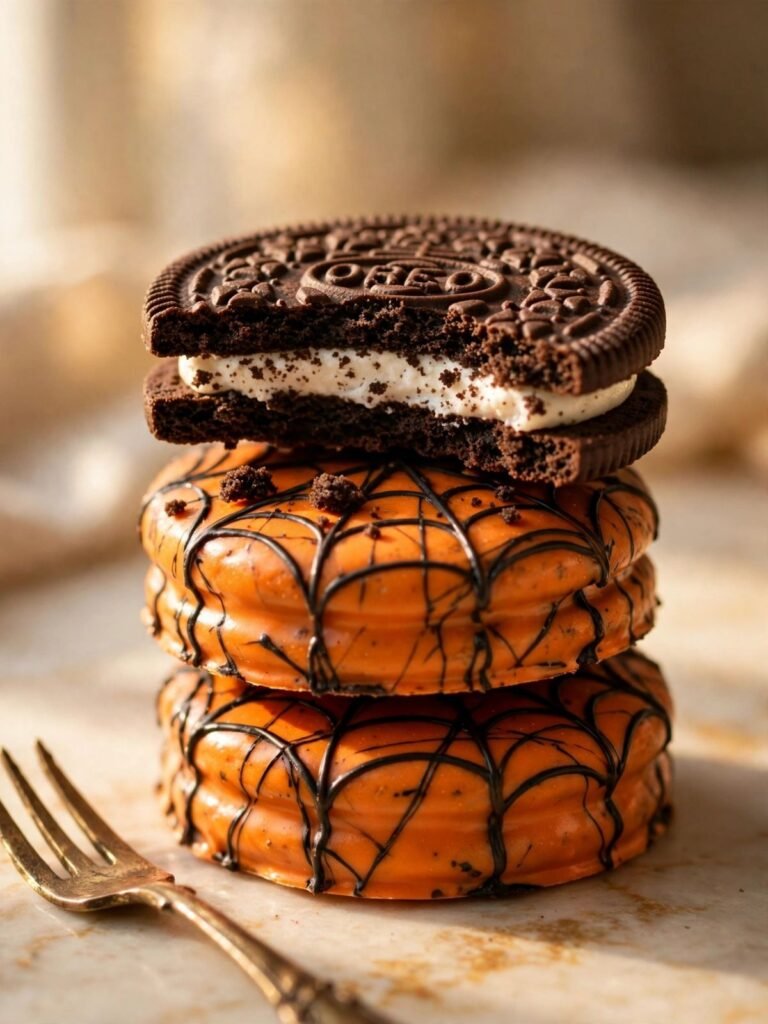
Serve these fully cooled and fully set, at room temperature — the candy shell needs to be hard, not tacky, or it sticks to whatever plate or napkin it touches. I put these out on a plain cream plate with nothing else on it; the orange-and-black design does not need competition from a fall-leaves napkin or a pile of other treats.
These are what I set out specifically for a Halloween classroom party plate or a small trick-or-treat gathering — not a recipe I make for myself on a random Tuesday, and not one I’d bother with outside of the last two weeks of October.
On Day 2, the dough softens slightly and the chocolate flavor deepens a touch, while the candy shell stays equally crisp — genuinely a better cookie the next day, not merely an acceptable one. I would not recommend these for shipping or a bake sale table that sits outside for hours; the candy shell is sturdy at room temperature indoors, but it softens and can smear in direct heat or full sun, and there’s no fixing that once it happens.
🗒 Luna’s Note: I keep a few undecorated, unbaked wrapped dough balls in the freezer separate from the rest of the batch, specifically so I have plain Oreo-stuffed cookies on hand without the Halloween candy shell whenever I want one — not everyone wants orange candy melt with their coffee in July.
Frequently Asked Questions About Halloween Oreo Cookies
Can I make Halloween Oreo cookies ahead of time?
Yes, two ways. The wrapped, unbaked dough balls freeze for up to 2 months and bake straight from frozen with a few extra minutes added — see Expert Pro-Tip 3. Fully baked and decorated cookies keep at room temperature for 3 to 5 days in a lidded container with parchment between layers.
Can I use Double Stuf Oreos instead of regular Oreos?
You can, but I would not recommend it as a direct swap. Double Stuf has nearly double the cream filling of a regular Oreo, and that extra filling softens and expands more as it heats, pushing harder against the seam — the same mechanism that causes cracking, covered in the Science section above. If you use it anyway, wrap with a thicker layer of dough and double-pinch the seam more deliberately.
Can I mix crushed Oreos into the dough instead of stuffing a whole one?
Yes — that’s a different technique entirely, with its own doneness cues and none of the sealing concerns in this article, since there’s no dense core to crack around. My Cookies and Cream Cookies article folds crushed Oreo pieces evenly through the dough instead of encasing a whole one. For a no-bake option this Halloween, my Oreo Poke Cake skips the oven and the stuffing both.
Why did my cookies spread too much, or not spread at all?
Too much spread usually means warm dough — skip the full 30-to-45-minute chill and the fat is still soft enough to flatten before the outer structure sets. Too little spread usually means the dough was mixed too dry, often from packing the flour instead of spooning and leveling it. Weighing the flour at 300g is the most reliable fix for inconsistent spread, since it removes the scooping variable entirely.
How do I get a clean spiderweb design with the candy melts?
Work within 60 to 90 seconds of drizzling the black lines, while the orange base is still wet, and drag a toothpick outward from the center through the lines rather than in a circle — that outward drag is what turns straight lines into a web. Candy melts form a thin skin as they cool, and once that skin sets, dragging through it tears the surface instead of blending the colors, which reads as messy rather than deliberate.
How does humidity or altitude affect this recipe?
In a humid kitchen, chill the dough balls closer to 45 minutes instead of 30, and let the candy drizzle set longer before handling. At altitudes above 3,500 feet (1,067 meters), reduce baking soda to ¾ tsp, increase flour by 2 tablespoons, reduce sugar by 1 tablespoon, and check doneness at 10 minutes instead of 12 — leavening gases expand faster and moisture evaporates quicker in thinner air, shifting spread and bake time earlier.
Can I double this recipe?
Yes. Double every ingredient except the baking soda — use 1½ tsp total, not a full 2 tsp, or the cookies can pick up a faintly soapy edge. Bake in separate batches on separate pans rather than crowding one; bake time doesn’t change per batch, but expect three to four rounds through the oven for 40 cookies, and check each round starting at 12 minutes rather than assuming it matches the first.
More Halloween Treats You’ll Love
- No Bake Chocolate Cookies — a quick, oven-free chocolate cookie for filling out a Halloween treat table alongside these.
Halloween Oreo Cookies
Ingredients
Equipment
Method
- Line two light-colored aluminum half-sheet pans with parchment paper, position the oven rack in the middle, and preheat the oven to 350°F (175°C).
- In a stand mixer with the paddle attachment on medium speed, beat the butter, granulated sugar, and brown sugar for 3 minutes until pale and fluffy.
- Add the egg, egg yolk, and vanilla extract, and beat for 1 minute until glossy and smooth, scraping the bowl once.
- Whisk the flour, cocoa powder, baking soda, and salt together separately, then add to the wet mixture in two additions, mixing on low only until no flour streaks remain.
- Portion the dough into 20 balls of about 2 tablespoons each, flatten each into a disc, wrap it fully and evenly around one whole Oreo with no gaps, and pinch the seam closed twice to fully seal it.
- Place the sealed dough balls on the prepared pans, spaced 3 inches apart, and refrigerate for 30 to 45 minutes until firm.
- Bake one pan at a time for 12 to 14 minutes, until the surface looks set and matte with a faint crackle.
- Leave the cookies on the hot pan for exactly 5 minutes, then transfer to a wire rack and cool completely, about 20 minutes, before decorating.
- Melt the orange and black candy melting wafers separately in 20-second microwave bursts, dip the top of each cooled cookie in orange candy, drizzle black lines across the wet surface, drag a toothpick outward through the lines to form a web, and press 3 to 4 Halloween M&Ms into the wet candy near the edge before it sets.