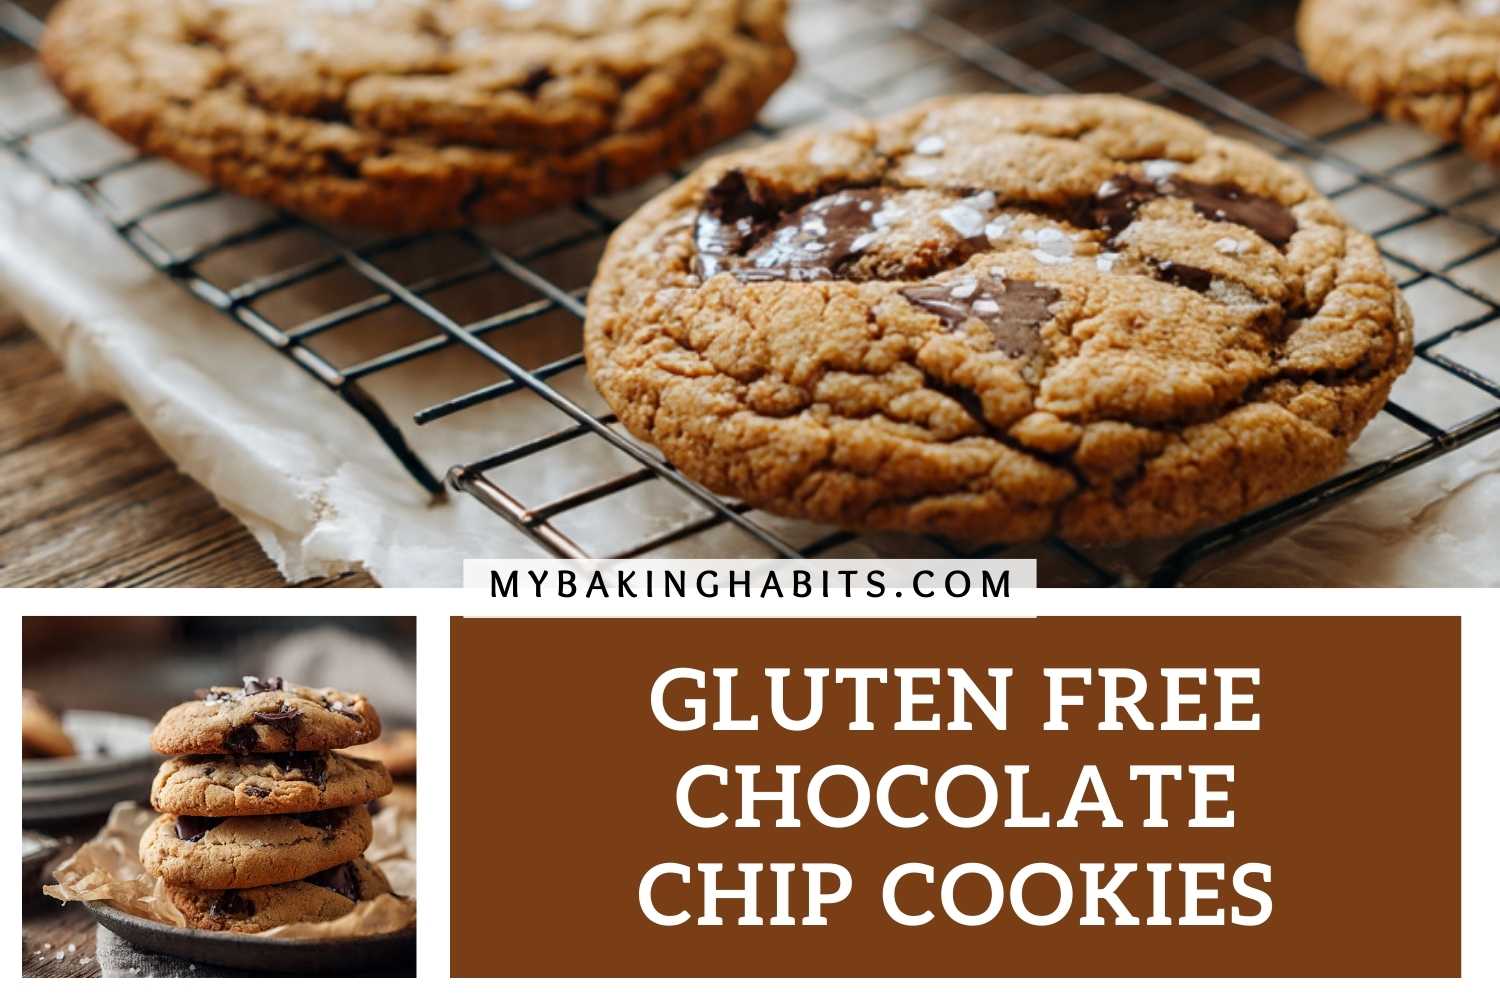
Gluten-Free Chocolate Chip Cookies
Gluten-free chocolate chip cookies have a reputation problem, and almost all of it is the flour. Pick the wrong blend, skip the xanthan gum, or swap in straight almond flour where a structured blend belongs, and you get cookies that spread into puddles, crumble when you pick them up, or bake up with a gritty, chalky texture that reminds you exactly what is missing. The problem is never that these cookies cannot be good. The problem is that most recipes do not tell you which flour actually works and why.
I have made this recipe more than twenty times across four months of testing, and the version here is the one I am genuinely proud of. I went through six different gluten-free flour blends before I settled on one. I tested almond flour-only versions — twice. They spread flat every time and the texture was too soft to hold a chunk. The structured GF all-purpose blend is what gives these cookies their dome, their chew, and the edge crispness you can see in the photos. I would not change it.
I tested melted butter versus softened creamed butter in back-to-back batches. Melted butter gave a denser, fudgier center and required no mixer — the dough came together in one bowl with a spatula. The creamed version was slightly cakey in the center and took significantly longer. The melted butter version is the one in these photos. I kept it without hesitation.
I tested with one whole egg versus one egg plus one yolk. The extra yolk added richness and helped the interior stay fudgy without making the cookie greasy. The whole-egg-only version was noticeably less satisfying in the center — functional, but not what I wanted. The yolk version is in the recipe.
I tested chilling the dough versus baking straight from the bowl. Chilled dough produced marginally thicker cookies — maybe a quarter of an inch. The difference was not worth an hour of refrigerator time. This dough goes straight from the bowl to the baking sheet, and the result is exactly what you see here.
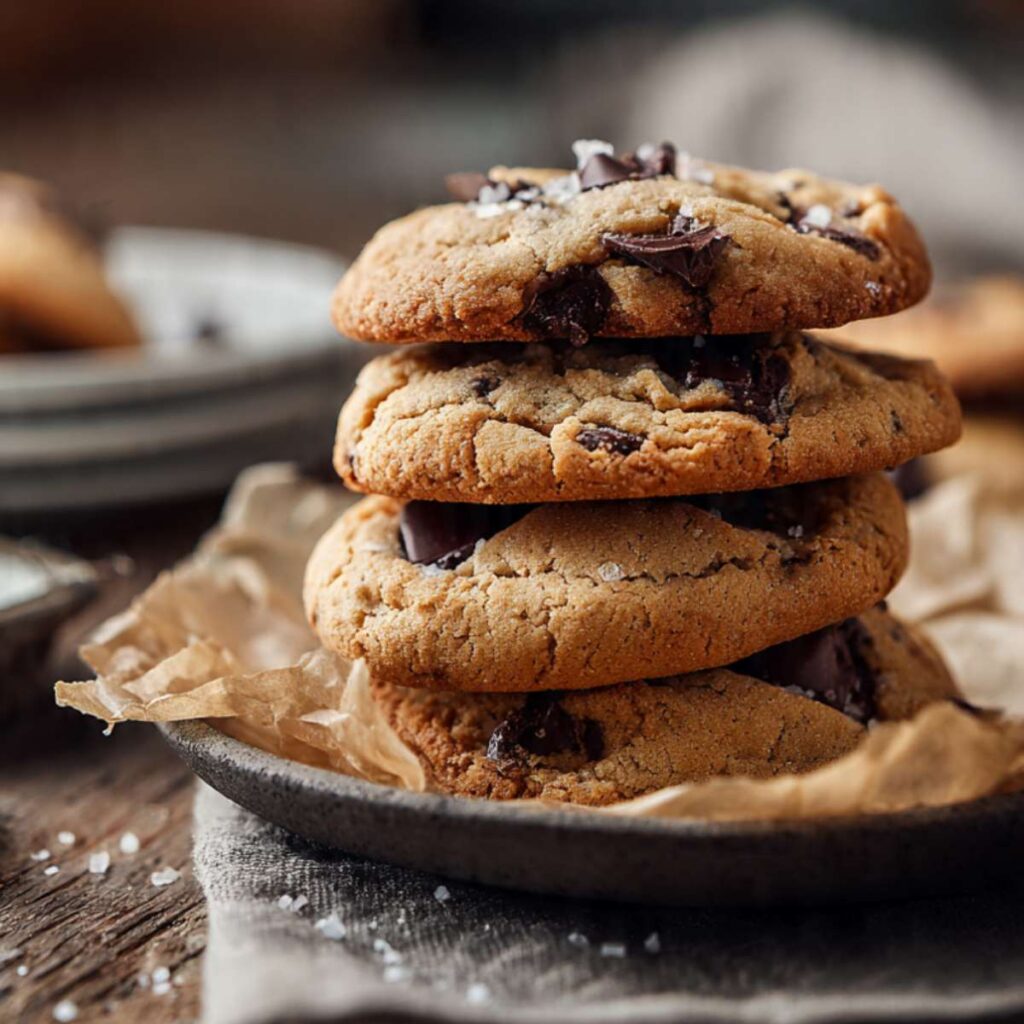
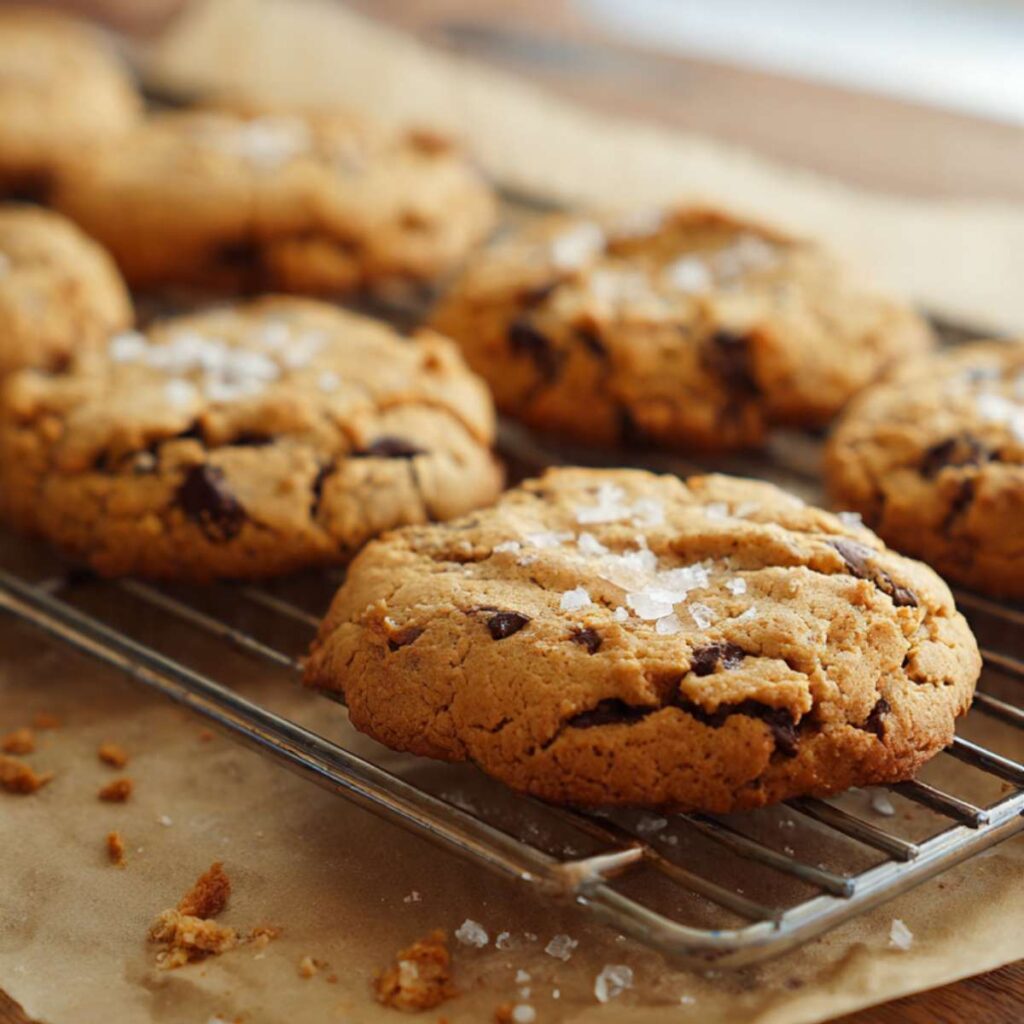
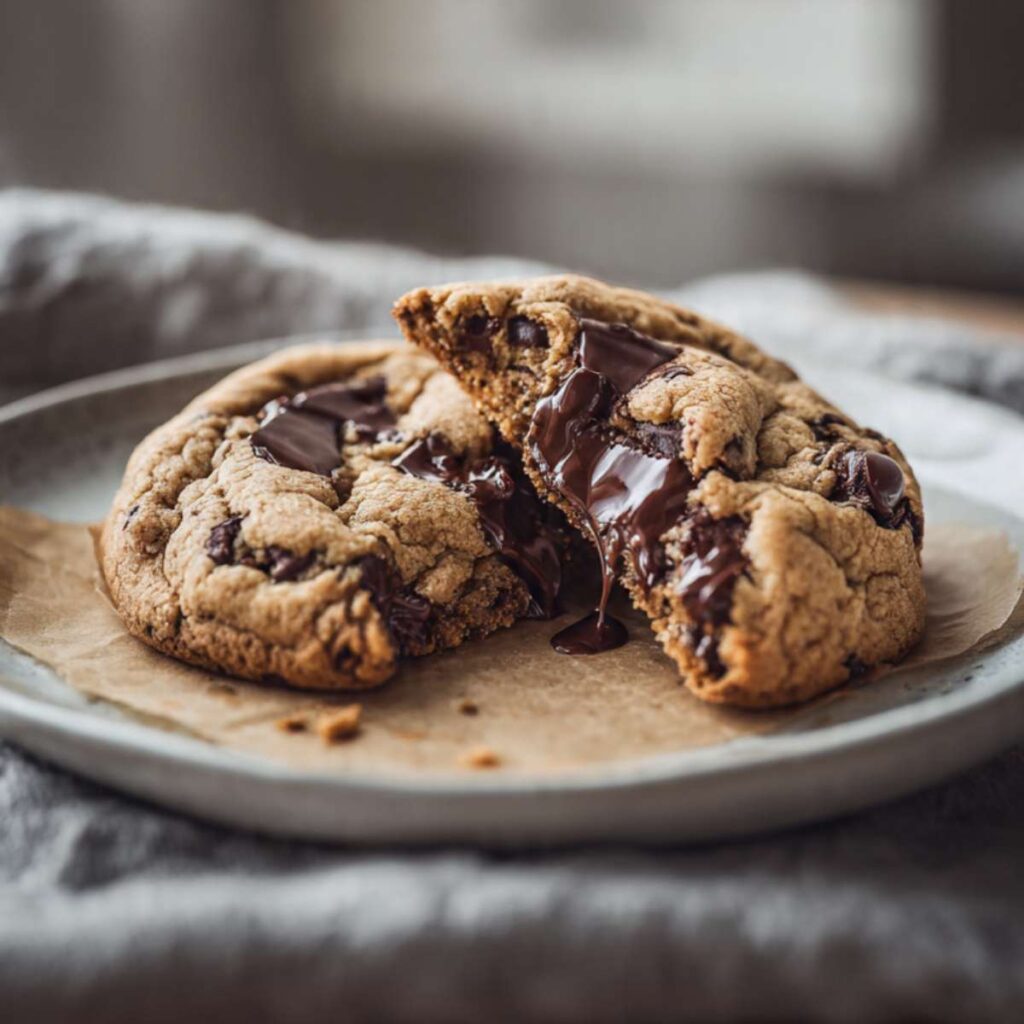
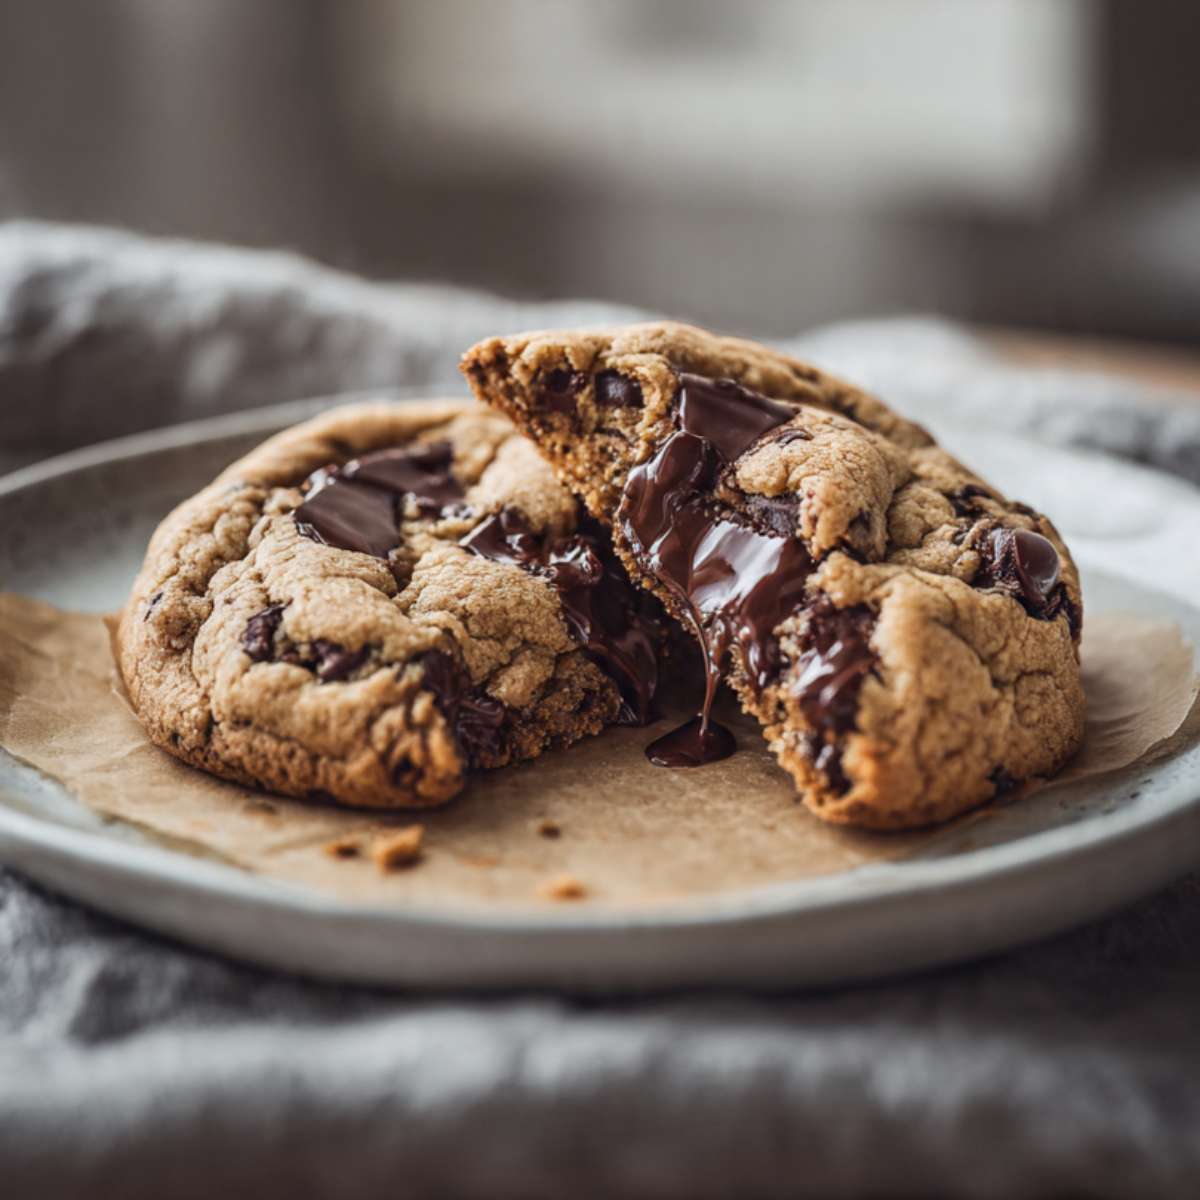
The finished cookie has deep golden edges that are just crisped at the rim, a soft fudgy center packed with dark chocolate chunks, and flaked sea salt on every surface. The chocolate in these is not chips — it is chopped dark chocolate bar at 60–70% cacao, and when you pull one apart warm, the interior pools. That is the cookie in Image 5. That is the one you are making.
No mixer required. No chilling. One bowl and a spatula. These are also dairy-free if you swap the butter for vegan butter — I have tested that version and it works.
🗒 Luna’s Note: Gluten-free baking broke every intuition I had built from years of conventional cookie testing. These cookies taught me that structure in a GF cookie comes from the blend — specifically from xanthan gum — not from technique. The first time I got a thick, fudgy GF cookie with a real dome, I had done nothing differently except change the flour. That is the lesson this recipe is built on.
| Prep Time | Cook Time | Total Time | Yield | Difficulty |
|---|---|---|---|---|
| 15 min | 11 min | 26 min | 13 cookies | Easy |
| Calories | Fat | Carbs | Sugar | Protein |
|---|---|---|---|---|
| ~298 kcal | ~16g | ~37g | ~22g | ~3g |
Macros are approximate and will vary based on ingredient brands and serving size.
Ingredients & Tools for Gluten-Free Chocolate Chip Cookies Recipe
For the Cookies
- 1¾ cups (210g) certified gluten-free all-purpose flour blend — must contain xanthan gum (see Before You Start)
- ½ cup (113g) unsalted butter, melted and cooled to room temperature (65–68°F / 18–20°C)
- ¾ cup (150g) packed brown sugar
- ¼ cup (50g) plain white granulated cane sugar
- 1 large egg (approximately 50g without shell), room temperature
- 1 large egg yolk (from a second large egg), room temperature
- 1½ tsp pure vanilla extract
- ¾ tsp baking soda, checked for freshness
- ½ tsp fine sea salt
- 1½ cups (255g) dark chocolate chunks, 60–70% cacao — chopped from a bar, not standard chips (such as Guittard or Valrhona 70% bars)
For the Topping
- 1–1½ tsp flaked sea salt (such as Maldon) — applied immediately post-bake, non-optional
Before You Start
Gluten-free flour blend — the single most important decision in this recipe: Not all gluten-free flour blends behave the same way. This recipe requires a 1:1 gluten-free all-purpose flour blend that already contains xanthan gum — such as Bob’s Red Mill 1-to-1 Baking Flour, King Arthur Measure for Measure, or Cup4Cup. Check the ingredient label before you start. If your blend does not list xanthan gum, add ½ tsp per cup of flour. Without xanthan gum, the dough will have no structural binder and the cookies will spread flat and crumble when cooled. Straight almond flour, coconut flour, or oat flour cannot be substituted 1:1 — they behave completely differently and this recipe was not tested with them.
Butter temperature: Melt the butter and set it aside to cool before mixing. The butter must be liquid but not warm — if it is hot when the sugars go in, it will begin to dissolve them unevenly and if it is hot when the egg goes in, it will begin to cook it. Test with your finger: it should feel barely warm, not hot. If you are in a hurry, spread the melted butter across the bottom of your mixing bowl — it will cool in 5 minutes.
Eggs: Both the whole egg and the yolk must be at room temperature before mixing. Cold eggs do not emulsify smoothly into a butter-sugar mixture and the dough can look broken or separated. Pull eggs from the fridge 30 minutes before starting, or place them in a bowl of warm (not hot) water for 10 minutes.
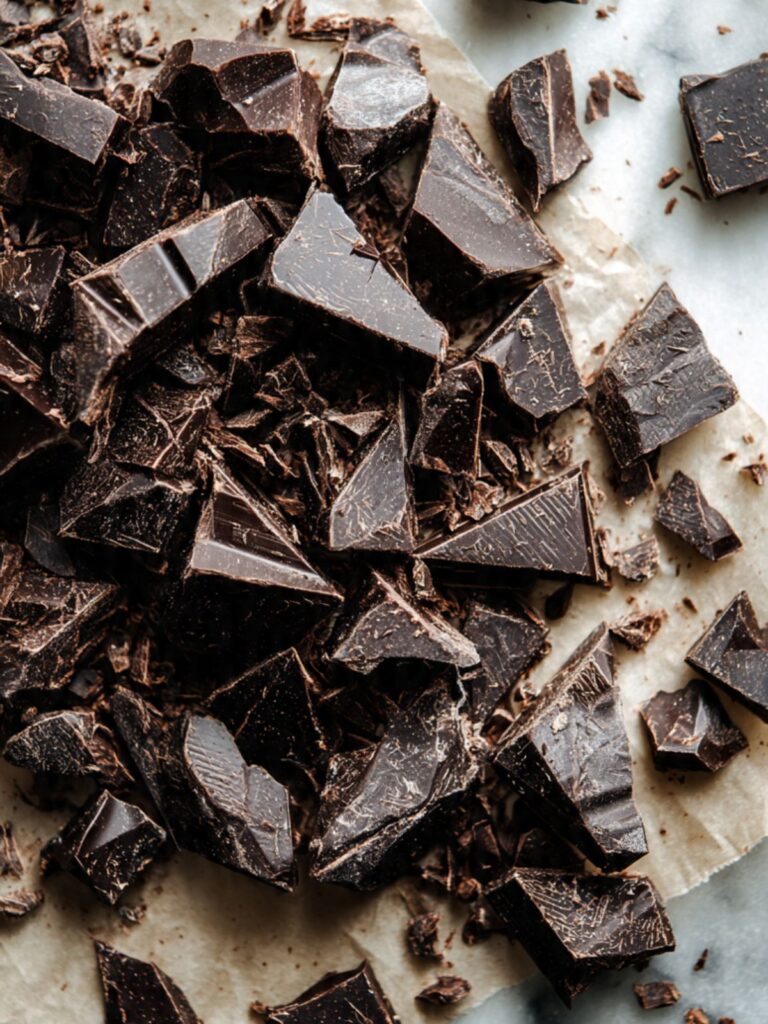
Chocolate: Chop the chocolate bar into rough, uneven chunks ranging from small shards to pieces about the size of a thumbnail. The variation in size is intentional — smaller pieces melt into the dough and larger pieces create the visible pools shown in the interior photo. Do not use standard chocolate chips in place of chopped bar chocolate. Chips contain stabilizers that prevent them from melting fully — you will not get the molten interior shown in Image 5.
Leavening freshness check: Drop ½ tsp (3g) of baking soda into a small bowl with 1 tablespoon of hot water and a splash of white vinegar. It should bubble aggressively within 2 seconds. If it fizzes weakly or not at all, replace the box — expired baking soda will produce flat cookies with no surface crackle.
Brown sugar freshness check: If your brown sugar has hardened, place it in a microwave-safe bowl with a damp paper towel draped over the top. Microwave in 20-second increments until it is soft and pliable. Hard brown sugar cannot be packed accurately and will give you less moisture and sweetness than the recipe requires.
Gram weight priority: This recipe was developed and tested using a kitchen scale set to grams. The gram weights are what I tested with — they are the most reliable way to match my result. Volume measurements are provided as a reference, but if you have a scale, use it.
Mixing method: This entire recipe comes together in one large mixing bowl with a silicone spatula — no electric mixer needed. The melted butter method means there is no creaming step and no aeration required.
Oven position: Position your oven rack in the middle of the oven before preheating. Top rack burns tops. Bottom rack burns bottoms. For gluten-free cookies specifically, the bottom rack is especially problematic — the GF flour blend browns faster than conventional flour and dark bottoms happen quickly.
Pan prep: Line a large light-colored aluminum baking sheet with unbleached parchment paper. Do not grease the parchment. Do not use a dark non-stick pan — dark pans absorb more heat and will overbrown the bottoms of gluten-free cookies before the centers are set. Do not use foil — cookies stick and bottoms burn unevenly.
Necessary Tools
- Large mixing bowl
- Silicone spatula
- Kitchen scale (strongly recommended)
- Light-colored aluminum half-sheet baking pan
- Unbleached parchment paper
- Medium cookie scoop (2 tablespoon / 45g capacity) or tablespoon measure
- Wire cooling rack
- Oven thermometer (recommended — most home ovens run 15–25°F / 8–14°C off)
- Sharp chef’s knife and cutting board for chopping chocolate
How to Make Gluten Free Chocolate Chip Cookies
Step 1: Your Oven and Pan Are Ready Before the Dough Is
Preheat your oven to 350°F (175°C). Position the rack in the middle of the oven now — before you start mixing — so it is fully heated and in the right position when the pan goes in. Most home ovens run 15–25°F (8–14°C) off their displayed temperature. If you have an oven thermometer, confirm the actual temperature before the first pan goes in. A low oven is one of the most common reasons gluten-free cookies spread flat instead of holding their dome.
Line a large light-colored aluminum half-sheet baking pan with unbleached parchment paper. Set it aside. Do not preheat the pan — a hot pan causes the butter in the dough to melt before the structure sets, and the cookies will spread more than intended.
The pan should be room temperature, lined with parchment, and sitting on the counter waiting. The oven should be fully preheated before a single scoop of dough goes on the sheet.
⚠️ Do not use a dark non-stick pan for this recipe — gluten-free flour blends brown significantly faster than conventional flour, and dark pans will overbrown and harden the bottoms before the centers are set. Light-colored aluminum only.
Your oven is preheating and your pan is ready — now mix the dough.
Step 2: A Thick, Glossy Sugar Paste Is Your Starting Point

This recipe uses the one-bowl, no-mixer method. Everything comes together with a large mixing bowl and a silicone spatula — no stand mixer, no hand mixer, no creaming step. The melted butter is what makes this possible and what gives these cookies their fudgy, dense center rather than a cakey one.
Add the ¾ cup (150g) packed brown sugar and ¼ cup (50g) plain white granulated cane sugar to a large mixing bowl. Pour the ½ cup (113g) melted and cooled unsalted butter over the sugars. Using your silicone spatula, stir vigorously for 60–90 seconds until the mixture looks smooth, cohesive, and slightly glossy — the sugars will not fully dissolve at this stage, and that is correct. You are looking for a uniform paste with no dry sugar clumps sitting at the bottom of the bowl.
The mixture should look like a thick, glossy caramel-colored paste — uniform in color, no dry pockets, no visible separation between the butter and sugar. If the butter looks like it is floating on top of the sugar after 60 seconds of stirring, the butter was too warm. Set the bowl aside for 5 minutes and stir again.
⚠️ Do not use hot melted butter — if the butter is still warm when the sugar goes in, it will begin to melt the sugar unevenly, and when the egg goes in next, the residual heat can begin to cook it. The butter should feel barely warm to the touch, not hot.
The sugars and butter are combined — now add the eggs.
Step 3: The Mixture Turns Smooth, Emulsified, and Slightly Lighter
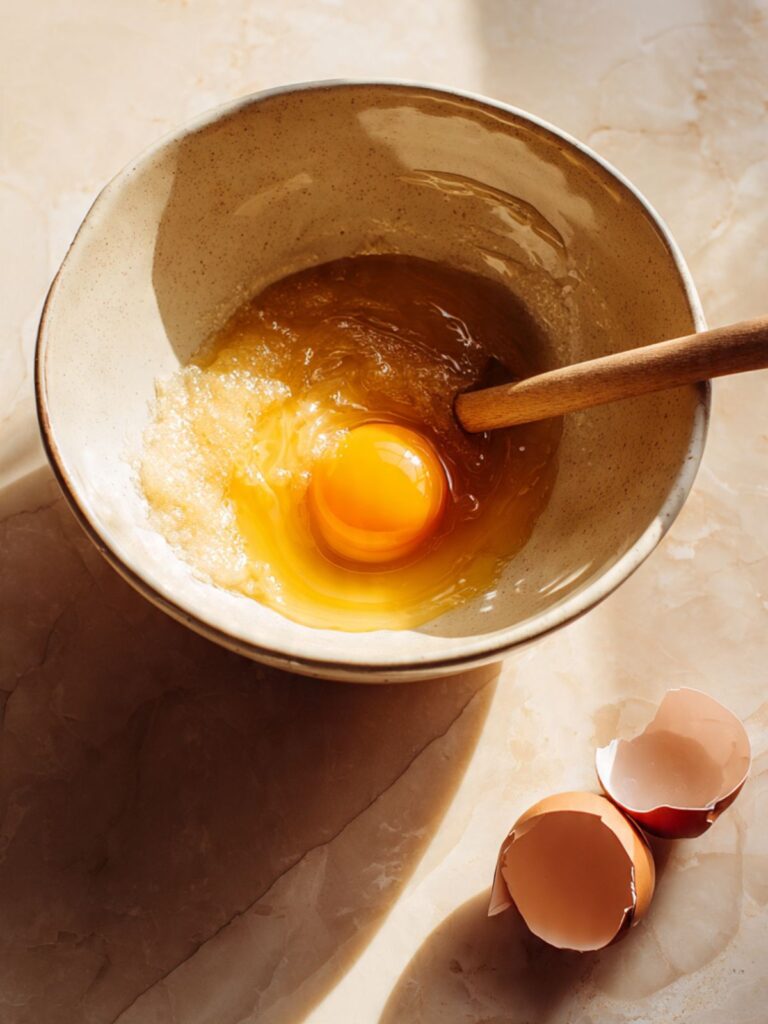
Add the 1 large room-temperature egg and 1 room-temperature egg yolk directly to the butter-sugar mixture. Add the 1½ tsp pure vanilla extract at the same time. Stir with the spatula for 45–60 seconds until the mixture looks fully emulsified — smooth, slightly lighter in color, and cohesive with no streaks of egg white visible.
The extra yolk is doing specific work here. In a gluten-free cookie dough, where there is no gluten network to provide structure and chew, the yolk adds fat and lecithin — both of which contribute to the fudgy, dense interior and the richness you can see in the pulled-apart cookie in the close-up photo. A whole-egg-only version produces a slightly leaner, less satisfying center.
The mixture should look smooth, glossy, and slightly thickened — noticeably more cohesive than it was before the eggs went in. No visible egg streaks, no broken or greasy appearance. If it looks curdled or separated, the eggs were too cold. This will not ruin the cookies but the texture will be slightly less uniform — continue and fold in the dry ingredients.
🗒 Luna’s Note: I always crack the egg and yolk into a small bowl before adding them — not because I am precious about it, but because fishing a shell out of butter-sugar paste is significantly harder than fishing it out of an empty bowl.
The wet mixture is ready — now add the dry ingredients.
Step 4: The Dough Comes Together Thick, Sticky, and Ready to Hold Its Shape
Add the 1¾ cups (210g) certified gluten-free all-purpose flour blend, ¾ tsp baking soda, and ½ tsp fine sea salt directly to the wet mixture. Do not add them separately — combine them in a small bowl and stir once with a fork to distribute the baking soda evenly through the flour before adding to the wet ingredients. Uneven baking soda distribution causes uneven lift and surface crackle — some cookies dome, others do not.
Fold the dry ingredients into the wet mixture using the spatula, turning the bowl as you go. Fold — do not stir aggressively. Count your strokes: 15–20 slow folds is enough. Stop the moment no dry flour streaks are visible.
The baking soda in this recipe reacts with the brown sugar — an acidic ingredient — to produce the surface crackle and slight dome visible in the finished cookies. This reaction begins the moment the baking soda contacts the wet ingredients, which is why you bake this dough immediately rather than chilling it. Chilling slows the reaction and reduces the crackle.
The dough should look thick, uniform, and slightly sticky — it will pull away from the sides of the bowl in one mass when you run the spatula around the edge. If it looks wet and loose, the butter was too warm or the flour was under-measured. If it looks dry and crumbly and will not come together, the butter may have been slightly short or the flour was over-measured — add 1 teaspoon of melted butter and fold again.
⚠️ Do not overfold after the flour is incorporated — in a gluten-free dough, overmixing does not develop gluten the way it does in conventional dough, but it does incorporate excess air that causes uneven rise and a slightly gummy, dense texture in the finished cookie rather than the soft fudgy result shown in the photos.
The dough is ready — fold in the chocolate now.
Step 5: A Heavily Studded Dough, Reserved Chunks Ready for the Tops
Add 1½ cups (255g) of the chopped dark chocolate chunks to the dough. Reserve a small handful — approximately 2 tablespoons (30g) — to press onto the tops of the portioned dough balls before baking. Fold the chocolate into the dough with the spatula using 8–10 slow strokes. You want the chunks distributed throughout but not broken down further — the irregular sizes are intentional and create the variation between melted chocolate pools and intact chunk pieces visible throughout the baked cookies.
The dough should look thick and heavily studded with chocolate — chunks visible throughout, dough holding together around them. If the chocolate chunks are breaking apart as you fold, you are folding too aggressively. Slow down and use wider strokes.
As you can see in the stacked cookie photos, the chunks sit proud of the surface and create visible pools of dark chocolate across the top of each cookie — this only happens when enough chocolate is pressed onto the exterior before baking, which is why the reserved handful matters.
The dough is mixed and ready to portion — move to scooping immediately.
Step 6: Dough Balls Loaded, Chocolate Pressed On, Pan Ready to Bake
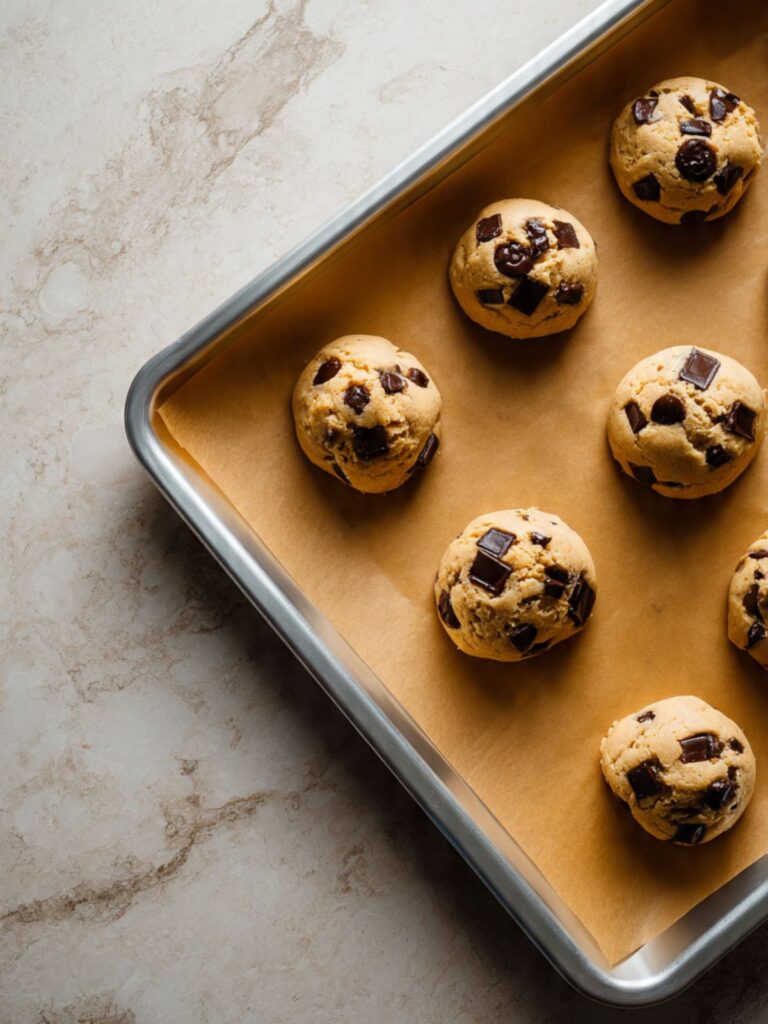
Scoop 2 tablespoons (45g) of dough per cookie — weigh the first one on your kitchen scale, use that as your calibration, then portion the remaining 12 cookies to match. This batch yields exactly 13 cookies at this scoop size. Space them at least 2 inches (5cm) apart on the parchment-lined pan — gluten-free cookies spread slightly less than conventional cookies but still need room. Do not crowd the pan. Bake in two batches if needed.
Once all dough balls are on the pan, press 3–5 of the reserved chocolate chunks onto the top of each ball, gently pressing them just far enough to sit securely without flattening the dough ball. This takes 60 seconds and it is what makes the difference between cookies that look like the hero photo and cookies that look like the chocolate is buried inside. The chunks pressed on top are what create the glossy visible chocolate you see across the surface of every cookie in the photos.
The dough balls should be round, domed, and holding their shape on the pan — not spreading or flattening at this stage. If they are spreading before they go into the oven, the butter was too warm. Refrigerate the pan for 15 minutes before baking.
🗒 Luna’s Note: I use a medium OXO cookie scoop for this — it portions exactly 2 tablespoons and releases cleanly from GF dough, which can be slightly stickier than conventional dough. A spoon works but the cookies will be less uniform.
The pan is loaded — into the oven now.
Step 7: Eleven Minutes and a Specific Pull Cue
Slide the pan into the preheated 350°F (175°C) oven on the middle rack. Set a timer for 10 minutes and do not open the oven door before it goes off — the temperature drop from an opened door during the first 8 minutes causes the cookies to deflate and the centers to sink rather than hold their dome.
Bake for 10 to 12 minutes. Start checking at exactly 10 minutes. The cookies are ready to come out when: the edges look set and lightly golden, the surface shows visible crackle across the top, and the centers still look slightly underdone and puffy — not raw, but not fully matte and set. Pull the pan at this exact moment. The centers will look like they need another 2 minutes. They do not.
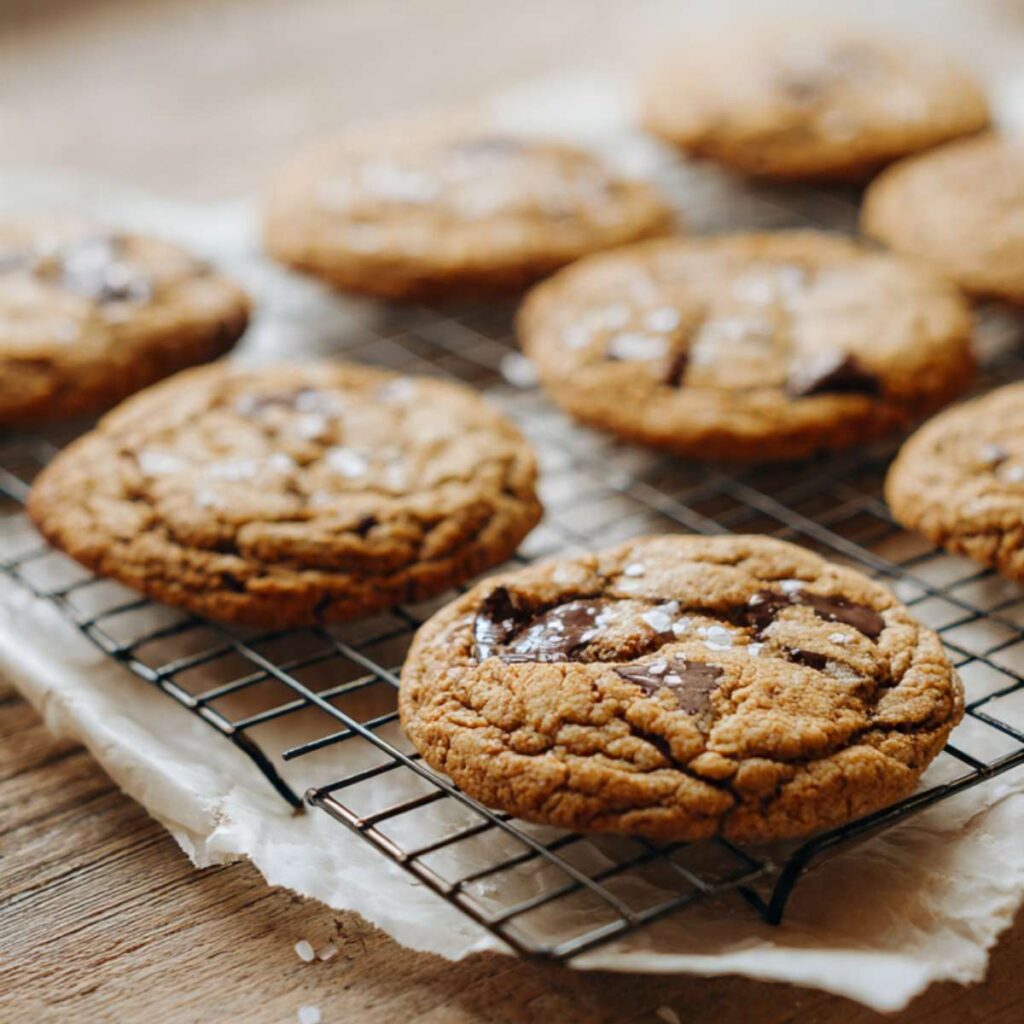
As you can see in the cooling rack photos, the finished cookies have set edges with a slightly crisped rim and a center that is still domed and soft-looking — this is exactly what carryover cooking produces in the 5 minutes after the pan comes out of the oven.
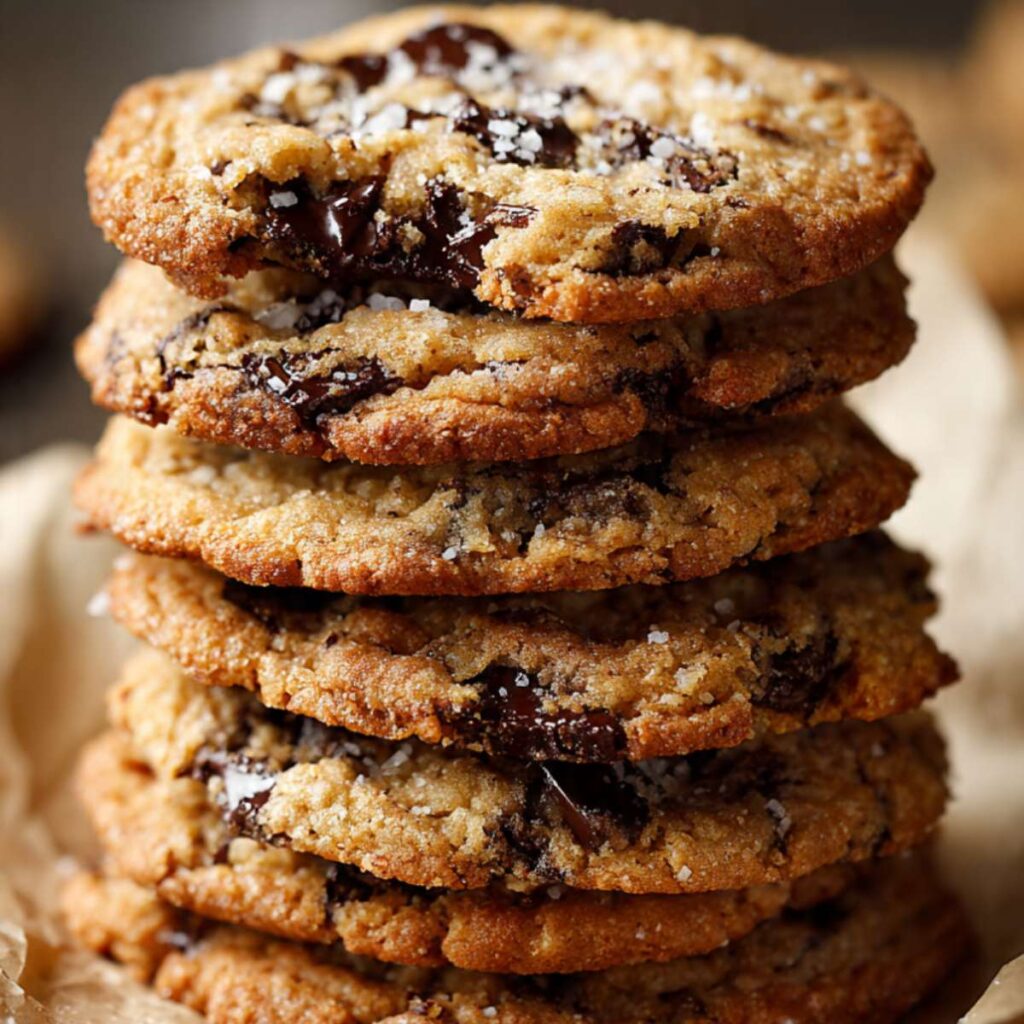
The edges should be golden and set. The surface should show crackle and — in some spots, particularly where brown sugar has migrated to the surface — a slightly granulated, crystallized texture that catches the light. This is visible in the tall stack photo and is exactly what this brown sugar-forward dough produces naturally. The centers should still look slightly soft and puffy. If the surface looks pale and smooth with no crackle and no granulation, the oven was not fully preheated or the cookies need 60–90 more seconds.
⚠️ Do not wait for the centers to look done in the oven — by the time the center looks baked, the edges are overbaked and the interior will be dry and crumbly rather than fudgy when cooled.
The pan is out of the oven — now the flaked salt goes on immediately.
Step 8: Flaked Salt While the Chocolate Is Still Molten
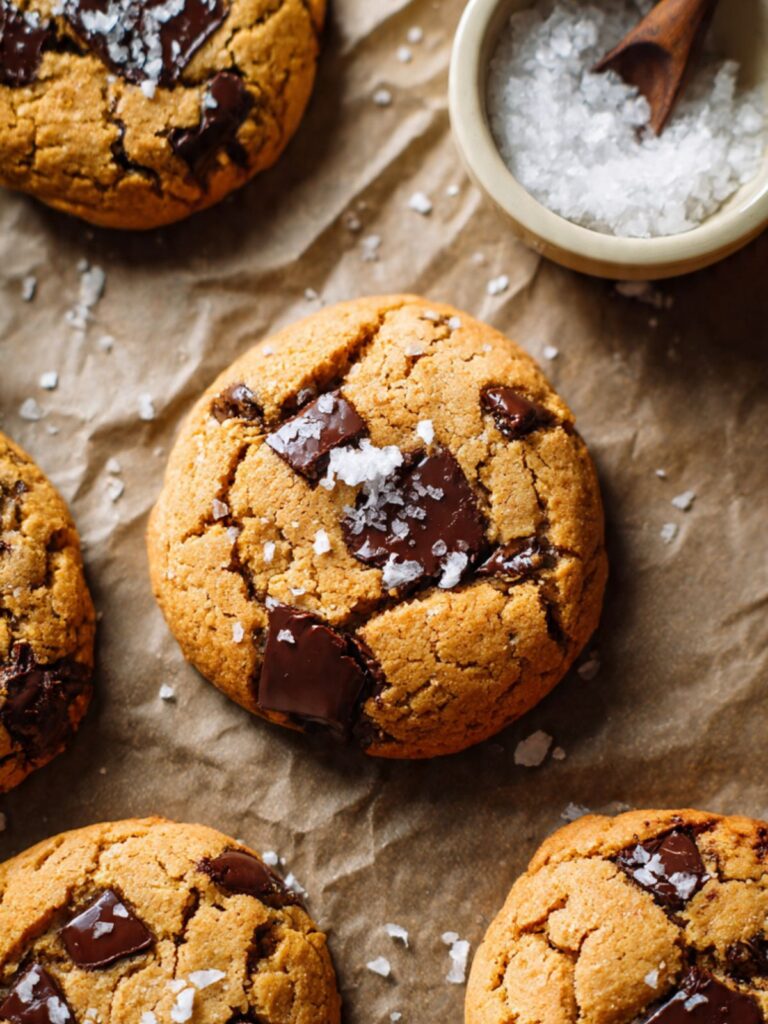
The moment the pan comes out of the oven, immediately pinch a generous amount of flaked sea salt between your fingers and drop it across the surface of each cookie — 4–6 large flakes per cookie, distributed evenly. Do not wait. The chocolate chunks on top are still partially melted at this moment, and the flaked salt anchors into the soft surface as it cools. If you wait until the cookies have cooled, the salt will not adhere and will fall off when you pick up the cookie.
This is not a finishing garnish for aesthetics only — the salt is structural to the flavor of this cookie. The contrast between the dark 60–70% cacao chocolate and the burst of salt on the surface is what makes these taste more complex than a standard chocolate chip cookie. It is visible in every image for a reason.
Every cookie should have visible white flakes on the surface — not dissolved, not invisible, clearly present. This is exactly what you see in all five photos. If your flaked salt is dissolving immediately into the surface, the cookies are too hot — wait 60 seconds and try the next pan.
Leave the cookies on the hot pan for exactly 5 minutes after the salt goes on. Do not move them before this point. The pan continues to conduct heat into the cookie base during this window — this carryover cooking is finishing the center without the oven drying it out. Moving them before 5 minutes breaks the structural base of a warm gluten-free cookie, which is more fragile than a conventional cookie at this stage. Waiting more than 8 minutes starts to over-dry the bottoms. Set a timer.
After 5 minutes, use a thin spatula to transfer the cookies to a wire cooling rack. They will feel soft and slightly fragile at this point — this is correct. They will firm up as they cool to room temperature, approximately 15 minutes on the rack.
The cookies should feel set at the edges and slightly soft at the center when you transfer them — not raw-soft, but yielding. If you press the center very gently with one finger and it springs back slowly rather than collapsing, they are correctly baked. If it collapses completely, return the pan to the oven for 90 seconds.
The cookies are cooling — if you can wait 15 minutes, they will be at their best. If you cannot, Image 5 shows you exactly what happens when you pull one apart warm. That is also acceptable.
The Science Behind Gluten Free Chocolate Chip Cookies
What Xanthan Gum Is Actually Doing in Your Dough
Every conventional chocolate chip cookie recipe relies on gluten — the elastic protein network that forms when water contacts the proteins in wheat flour. Gluten does three things in a cookie: it traps gas bubbles from the leavening reaction, it provides the chew you feel when you bite through the edge, and it holds the cookie together structurally as it cools. Remove wheat flour and you remove all three functions simultaneously.
Xanthan gum is not a perfect replacement for gluten — nothing is — but it is the closest thing that works at small quantities. It is a polysaccharide produced by bacterial fermentation, and it behaves in dough the way gluten does: it creates a viscous, stretchy network that traps gas, resists spread, and holds the structure together as the cookie cools. At the concentration present in a quality 1:1 GF blend — typically 0.5–1% of the flour weight — it provides enough binding that the cookie domes, holds its shape, and does not crumble when cooled. Without it, the dough has no network and the cookies spread flat, lose their dome, and fall apart at the edges exactly as my almond-flour-only test batches did.
This is why the flour blend specification in this recipe is not negotiable. A blend without xanthan gum produces a fundamentally different structural result — not a slightly worse version of this cookie, but a different cookie entirely.
🗒 Luna’s Note: I spent two weeks convinced the problem with my early GF batches was the fat ratio. I kept adjusting the butter. It was never the butter. It was always the xanthan gum. Once I understood what it was actually doing, I stopped treating it as an additive and started treating it as the structural ingredient it is.
Why Melted Butter Produces a Fudgier Cookie Than Creamed Butter
Fat state at the time of mixing determines the texture of the finished cookie more directly than almost any other variable. When butter is creamed with sugar — beaten at room temperature until pale and aerated — it traps thousands of tiny air bubbles. Those bubbles expand in the oven heat and push the structure of the cookie upward, producing a cakey, lighter crumb. When butter is melted before mixing, there is no aeration step and no trapped air. The fat coats the flour particles and the sugar more completely, the dough is denser going into the oven, and the result is a tighter, fudgier, more compact interior.
In a gluten-free cookie this effect is amplified. Because there is no gluten network providing structural scaffolding, a cakey texture in a GF cookie tends to feel dry and loose rather than light and tender. The melted butter method counteracts this by producing a denser dough that bakes up with more cohesion — the fudgy interior you see in the broken-open cookie in Image 5 is a direct result of the fat state going into the bowl, not of underbaking.
If you want to understand how fat state drives texture across different cookie types, the brown butter chocolate chip cookies article covers the same principle in detail — brown butter is melted butter taken one step further, and the texture comparison between the two methods is documented there with the same testing framework used here.
How Dark Chocolate Cacao Percentage Changes the Finished Cookie
The chocolate in this recipe is specified at 60–70% cacao for a precise reason. Chocolate in this range has significantly less sugar and more cocoa butter than milk chocolate or semi-sweet chips. The lower sugar content means the chocolate does not compete with the sweetness of the dough — it contrasts with it. The higher cocoa butter content means the chocolate melts at a lower temperature and flows more freely during baking, which is what creates the pools visible in the interior of the broken cookie in the close-up photo.
Below 60% cacao — into milk chocolate or standard semi-sweet chip territory — the chocolate is sweeter, the contrast with the dough diminishes, and the chunks set firmer after baking rather than pooling. The cookie is still good but the flavor profile is flatter and the interior texture is less dramatic. Above 75% cacao, the bitterness begins to compete with the overall balance of the cookie rather than complementing it — the finish becomes sharp rather than rich.
The 60–70% range is where the chocolate behaves correctly for this specific dough, which is why bar chocolate matters over chips. Chips in this cacao range contain stabilizers — typically polyglycerol polyricinoleate or additional emulsifiers — that prevent the fat from fully releasing during baking. Bar chocolate does not contain these stabilizers, which is why it melts into pools while chips hold their shape.
Gluten-Free Chocolate Chip Cookies Troubleshooting & Pro-Tips
Common Mistakes
Cookies Spread Completely Flat and Crumble Apart When Picked Up
Symptom: The cookies spread completely flat on the pan, have no dome, and crumble or fall apart when you try to pick them up. The edges may look lightly golden but the center is thin and brittle rather than soft and fudgy.
Cause: Without xanthan gum, the dough has no structural binder to replace the gluten network that wheat flour provides. Single-ingredient flours — almond flour, coconut flour, oat flour, rice flour alone — cannot substitute 1:1 for a GF all-purpose blend in this recipe. Each behaves differently in terms of moisture absorption, fat interaction, and structural binding. A blend without xanthan gum or a single-ingredient flour used in place of the blend will produce a fundamentally different result, not a slightly worse version of this cookie.
Fix: There is no fix once the cookies are baked flat and crumbly — this is a before-you-start error. Discard or repurpose the batch as a crumble topping for ice cream or yogurt.
Prevention: Read the ingredient label on your flour blend before measuring. The words “xanthan gum” must appear on the list. If they do not, add ½ tsp xanthan gum per cup (120g) of flour before mixing. Recommended blends: Bob’s Red Mill 1-to-1 Baking Flour, King Arthur Measure for Measure, Cup4Cup.
Bottoms Are Dark and Burnt Before the Centers Have Set
Symptom: The bottoms of the cookies are dark brown to burnt before the centers have set. The tops look underdone — pale, soft, not crackled — while the bottoms are overdone. The cookies stick to the pan and break when you try to remove them.
Cause: Dark non-stick pans absorb significantly more heat than light-colored aluminum pans. Gluten-free flour blends contain more starch than conventional flour and brown faster when exposed to direct high heat from the pan surface. The result is a bottom that overcooks before the top has received enough heat to set. Skipping parchment increases direct contact between the dough and the hot pan surface, which intensifies this effect.
Fix: If the bottoms are dark but not fully burnt, transfer the cookies immediately to a wire rack — the parchment insulates slightly and the cooling rack removes the heat source. Do not leave them on the pan a moment longer.
Prevention: Always use a light-colored aluminum half-sheet pan lined with unbleached parchment paper. If you only own dark pans, reduce the oven temperature to 325°F (163°C) and add 2–3 minutes to the bake time, checking frequently from the 10-minute mark.
Cookies Are Wide, Thin, and Have No Dome Despite Correct Flour
Symptom: The cookies spread wide and thin on the pan — wider than 4 inches in diameter — with no dome and minimal surface crackle. The edges may be crispy but the centers are thin and almost crisp rather than soft and fudgy.
Cause: The most common cause is butter that was too warm when mixed. Melted butter that is still hot — above 80°F (27°C) — begins to melt the sugar before the structure is built, and the dough goes into the oven with less viscosity than it needs to hold its shape. A second cause is dough balls that were too small — under 40g each — which spread faster and thinner before the exterior sets. A third cause is an oven that had not fully preheated, which allows the butter in the dough to melt and spread before the exterior begins to set.
Fix: If you catch the spread before the cookies have set — within the first 3 minutes of baking — open the oven, use a spatula or spoon to gently push the edges back toward the center, and close the door immediately. This works only in the first few minutes. After that, the structure is set and cannot be corrected.
Prevention: Cool the melted butter until it feels barely warm to the touch before mixing. Weigh dough balls at 45g each. Confirm the oven has fully preheated with an oven thermometer before the first pan goes in. If spreading remains an issue, refrigerate the portioned dough balls on the pan for 15 minutes before baking.
Surface Is Smooth and Pale With No Crackle and Almost No Dome
Symptom: The cookies bake up with a smooth, pale, matte surface and almost no dome. They look dense and flat compared to the photos. The flavor may taste slightly off — heavier and less complex than expected.
Cause: Baking soda loses potency after 3–6 months once the box is opened. The surface crackle visible on every cookie in the photos is a direct result of the baking soda reacting with the brown sugar — an acidic ingredient — to produce carbon dioxide gas that pushes through the surface as the cookie sets. No active baking soda means no reaction, no gas, no crackle, and a significantly flatter dome.
Fix: There is no fix for an already-baked batch. The baking soda cannot be added after mixing begins.
Prevention: Before you start, drop ½ tsp (3g) of baking soda into a small bowl with 1 tablespoon of hot water and a splash of white vinegar. It should bubble aggressively within 2 seconds. If it does not, replace the box before mixing.
Cookies Feel Dry, Crumbly, and Tough After Cooling
Symptom: The cookies feel dry at the edges and crumbly at the center when cooled. They do not have the soft, fudgy interior shown in the interior photo. Breaking one apart produces crumbs rather than the flowing chocolate and soft crumb visible in Image 5.
Cause: Gluten-free cookies dry out faster than conventional cookies once they cross the doneness threshold because GF flour blends contain more starch and less protein than wheat flour — starch sets firm when overbaked and does not retain moisture the way gluten does. Overbaking by even 90 seconds past the correct pull point produces a noticeably drier cookie. A second cause is flour that was over-measured — scooping directly from the bag packs 20–30% more flour than spooning and leveling, and the extra starch accelerates drying.
Fix: Place the overbaked cookies in a zip-lock bag with a slice of white bread and seal overnight. The bread releases moisture into the sealed environment and the cookies will be noticeably softer the next morning. This does not fully restore a severely overbaked cookie but it improves it significantly.
Prevention: Pull the pan the moment the edges look set and lightly golden and the centers still look slightly underdone. Weigh the flour at 210g rather than measuring by volume. Never bake past the 12-minute mark without visual confirmation that the edges are not yet set — in which case add time in 60-second increments only.
Flaked Salt Slides Off or Dissolves Invisibly Into the Surface
Symptom: The flaked sea salt slides off the cookies when you try to apply it, or dissolves immediately into an invisible layer rather than sitting as visible white flakes.
Cause: If the salt is sliding off, the cookies have cooled too long before application — the chocolate on the surface has set and there is nothing for the salt crystals to adhere to. If the salt is dissolving immediately, the cookies are too hot — the surface moisture is absorbing the salt crystals before they can set as visible flakes.
Fix: For cookies where the salt has slid off once cooled: lightly press a few flakes into any soft chocolate chunk still on the surface — the chocolate holds the salt even when the cookie surface has set.
Prevention: Apply the flaked salt within 30–60 seconds of the pan coming out of the oven. The surface should feel hot but the chocolate chunks should not be fully liquid — there is a 60-second window where the surface is tacky enough to hold the salt and cool enough not to dissolve it immediately. Work quickly across the pan.
Cookies Spread More Than Expected at High Altitude or High Humidity
Symptom (high altitude above 3,500 feet / 1,067 meters): Cookies spread more than expected, dome less, and the surface crackle is more pronounced and uneven. The bake time may be shorter than the recipe states.
Adjustment: Reduce the baking soda from ¾ tsp to ½ tsp. Increase the GF flour blend by 2 tablespoons (15g). Reduce both sugars by 1 tablespoon each. Increase oven temperature to 365°F (185°C) and begin checking at 9 minutes.
Symptom (high humidity above 70% relative humidity): Cookies spread more than expected and take longer to look set on the surface. The surface may feel slightly tacky even when fully baked — this is moisture from the air, not underbaking.
Adjustment: Refrigerate the portioned dough balls on the pan for 20 minutes before baking. This firms the butter in the dough and slows the initial spread. Extend bake time by 1–2 minutes and rely on the edge-set visual cue rather than time alone.
Expert Pro-Tips
Chop your chocolate with intention — size variation is the technique. Do not chop the chocolate bar into uniform pieces. Use the heel of your knife to break the bar into rough chunks, then run the knife over the larger pieces once to create a mix of sizes — some pieces as small as 3–4mm, some as large as 12–15mm. The small shards melt completely into the dough during baking and create pockets of chocolate flavor throughout the crumb. The large chunks melt partially, pool on the surface, and create the glossy visible chocolate you see across the top of every cookie in the photos. Uniform chip-size pieces give you neither effect.
The reserved chocolate press-on is not optional — it is the difference between the photo and a home bake. Pressing 3–5 chunks onto the top of each dough ball immediately before the pan goes into the oven takes 60 seconds and it is what makes the cookies look like the hero image. Chunks folded into the dough get partially buried as the cookie spreads. The chunks pressed on top stay visible, melt into glossy pools across the surface, and catch the flaked salt. Skip this step and the finished cookies will look significantly less intentional.
Pull the pan earlier than feels right. Gluten-free cookies finish baking on the hot pan after they come out of the oven — more so than conventional cookies, because GF flour sets firmer once the starch fully gelatinizes. The center should look visibly underdone when the pan leaves the oven. If it looks done in the oven, it will be dry when cooled. Trust the 5-minute rest on the hot pan and resist the urge to add oven time.
How to Store Gluten Free Chocolate Chip Cookies
Room Temperature
Store completely cooled gluten-free chocolate chip cookies in a hard-sided lidded container — a glass cookie jar with a lid or a rigid plastic container with a snap-top lid. Place a sheet of unbleached parchment paper between each layer if stacking. Do not use zip-lock bags — the soft sides press against the cookies and flatten the domed surface, and the flaked salt gets knocked off in transit. Do not use an open plate or uncovered container — gluten-free cookies lose moisture faster than conventional cookies and will dry out and become crumbly within 24 hours if left uncovered.
At room temperature these cookies keep well for up to 3 days. Day 1 is the peak — the edges are still slightly crisped, the center is soft and fudgy, and the flaked salt is fully intact. Day 2 the center softens slightly further as the brown sugar draws ambient moisture — some people prefer Day 2 for this reason. Day 3 the texture is still acceptable but noticeably less fudgy at the center. Beyond Day 3, the starch in the GF flour blend begins to retrograde — a process where gelatinized starch firms and loses moisture — and the texture becomes dry and dense rather than soft.
If your kitchen runs warm — above 75°F (24°C) — move to refrigerator storage after Day 1 to prevent the chocolate chunks from blooming or softening excessively.
Refrigerator
Refrigerating baked gluten-free chocolate chip cookies is not recommended for short-term storage — the cold temperature accelerates starch retrogradation, which firms the cookie texture and makes the center feel dense and dry rather than soft and fudgy. If you refrigerate them, you will not get the texture shown in the photos without rewarming first.
If you need to refrigerate — because your kitchen is warm, or you are storing beyond Day 3 — place the cookies in the same hard-sided lidded container with parchment between layers. They will keep refrigerated for up to 6 days. Before serving, bring them to room temperature for 20–30 minutes, or microwave a single cookie for 12–15 seconds. The microwave method remelts the chocolate chunks and brings the center back to something close to fresh-baked texture. Do not overheat — 15 seconds is the ceiling, or the cookie becomes tough rather than soft.
Freezer — Baked
Gluten-free chocolate chip cookies freeze well baked and cooled. Allow the full 15 minutes of rack cooling before wrapping — wrapping warm cookies traps steam and produces a gummy texture after thawing.
Wrap each cookie individually in plastic wrap — make sure the cookie is completely cooled before wrapping or condensation will form and the texture will be gummy when thawed. Place the individually wrapped cookies in a zip-lock freezer bag or rigid freezer-safe container, pressing out as much air as possible before sealing. Label with the date. Baked cookies keep in the freezer for up to 2 months.
To thaw: remove from the freezer and unwrap. Let sit at room temperature for 45–60 minutes, or microwave a single cookie for 20–25 seconds from frozen. The microwave from frozen method remelts the chocolate chunks and produces a texture very close to fresh-baked — soft center, yielding crumb, warm chocolate. This is the method I use when I want one cookie on a Tuesday night without baking a full batch.
Freezer — Unbaked Dough
This dough freezes exceptionally well unbaked, and frozen dough balls are arguably more useful than frozen baked cookies because they bake up fresher.
Portion the dough into 45g balls and press the reserved chocolate chunks onto the tops as directed. Place the dough balls on a parchment-lined baking sheet and freeze uncovered for 1 hour until solid — this flash-freeze step prevents them from sticking together in storage. Transfer the frozen dough balls to a zip-lock freezer bag, press out the air, label with the date, and freeze for up to 3 months.
To bake from frozen: do not thaw. Place the frozen dough balls directly on a parchment-lined pan, add the flaked sea salt to the tops, and bake at 350°F (175°C) for 13–15 minutes — 2–3 minutes longer than the fresh dough bake time. The pull cue is identical: edges set and lightly golden, center still looking slightly underdone. The flaked salt goes on immediately as they come out of the oven.
🗒 Luna’s Note: I almost always have a bag of these dough balls in my freezer. Baking two or three from frozen takes fifteen minutes from the moment I decide I want a cookie. That is a more useful thing to have in the freezer than almost anything else I can think of.
Serving Suggestion
Serve these warm — not hot, warm. Pull them off the cooling rack at the 12–15 minute mark, when the centers are still slightly soft and the chocolate chunks are still yielding when you press them. If you pull one apart at this point, the interior looks exactly like Image 5 — flowing dark chocolate, soft crumb, flaked salt catching the light on the broken surface. That is the moment these are best.
I eat these with a strong black coffee — no sugar, no milk. The bitterness of the coffee against the 70% cacao chocolate and the hit of flaked salt is a specific combination that makes the cookie taste more intentional than it would alongside something sweeter. A cold glass of whole milk is the classic pairing if you want something that leans into the richness rather than cutting it.
These are the cookies I make when someone needs something real and I do not have time to make something elaborate. A Tuesday night, a friend who has had a bad week, the end of a long afternoon in the kitchen when I want to eat something I actually made. They are not a party cookie — the flaked salt makes them feel considered, but they are too rustic to plate formally and too good to serve as an afterthought at a larger event. Make them for the moment when one excellent cookie is the right answer.
Day 2 these cookies are actually worth knowing about — the brown sugar has had time to draw moisture from the air overnight and the centers are slightly softer and more fudgy than Day 1. The surface crackle softens a touch and the flaked salt has settled into the surface rather than sitting proud of it. Day 1 has the better texture contrast. Day 2 has the better center. Day 3 is still good with a 12-second microwave. Beyond that, freeze them.
These do not travel well at room temperature in warm weather — the chocolate chunks soften and the cookies lose their structural integrity if they sit in a warm car or bag for more than 30 minutes. Make them where you are serving them, or transport them in a cooler bag if the temperature is above 72°F (22°C).
Frequently Asked Questions About Gluten-Free Chocolate Chip Cookies
What is the best gluten free flour for chocolate chip cookies?
The best gluten-free flour for chocolate chip cookies is a certified gluten-free all-purpose flour blend that contains xanthan gum. Using a structured 1-to-1 blend—such as Bob’s Red Mill 1-to-1, King Arthur Measure for Measure, or Cup4Cup—is essential for consistent results. Note that single-ingredient flours like almond, coconut, oat, or rice cannot be substituted 1:1 without reformulating the entire recipe. If your chosen blend does not already include xanthan gum, be sure to add ½ tsp per cup of flour before mixing.
Can I double this gluten free chocolate chip cookie recipe?
Yes, you can double this gluten-free chocolate chip cookie recipe by doubling all ingredients except for the baking soda. To prevent a soapy aftertaste from over-leavening, use only 1 1/4 tsp of baking soda for a doubled batch instead of the full 1 1/2 tsp.
Can you taste the difference between gluten free and regular chocolate chip cookies?
Most people cannot identify the difference between gluten-free and regular chocolate chip cookies in a blind taste test, provided a high-quality flour blend is used. While the flavor profile remains essentially identical when using the same quality of butter, brown sugar, and dark chocolate, the primary “tell” is the texture. Because gluten-free dough lacks the elastic protein network found in wheat flour, the resulting cookies often have a slightly denser, more compact crumb rather than a traditional elastic chew. However, this textural gap closes significantly when using a structured flour blend and pulling the cookies from the oven at the precise moment they are set.
Why did my gluten free cookies go flat?
Gluten-free cookies typically go flat due to a lack of xanthan gum in the flour blend, butter that was too warm during mixing, or an oven that hasn’t fully preheated. Without xanthan gum, the dough lacks a structural binder to hold its shape; similarly, warm butter reduces the dough’s viscosity, causing it to spread before the exterior can set. To ensure a perfect dome in your next batch, verify your flour ingredients and use an oven thermometer to confirm your temperature is accurate.
How do I keep gluten free cookies from crumbling?
To keep gluten-free cookies from crumbling, you must ensure your flour blend contains xanthan gum and allow the cookies to rest on the hot baking sheet for at least five minutes after removal from the oven. Because gluten-free dough is significantly more fragile than conventional dough, the xanthan gum and egg proteins require this “carryover” heat window to fully set their structure. Additionally, avoid under-measuring your flour and always use a thin spatula to transfer the cookies to a cooling rack—never attempt to lift them by hand while they are still warm.
Can I make gluten free chocolate chip cookies ahead of time?
Yes, the best way to make gluten-free chocolate chip cookies ahead of time is to freeze the unbaked dough balls. Simply portion the dough into 45g balls, press extra chocolate chunks on top, and flash-freeze them for one hour before transferring to a freezer bag for up to three months. When you are ready to eat, bake them directly from frozen at 350°F (175°C) for 13–15 minutes with no thawing required. If you prefer to bake them first, they will stay fresh in a hard-sided container at room temperature for up to three days, though you may find the centers are slightly softer on Day 2 due to the moisture-absorbing properties of the brown sugar.
Can I substitute butter with coconut oil or vegan butter in this recipe?
Yes, you can substitute butter with stick-format vegan butter as a 1:1 replacement by weight, while coconut oil works structurally but will alter the flavor profile. For the best results, use a high-quality vegan stick like Miyoko’s or Earth Balance, which maintains the cookie’s signature dome, crackle, and fudgy center. While coconut oil is a functional substitute, its distinct taste can compete with dark chocolate, and it may result in a slightly greasier texture once the cookies have fully cooled.
How does altitude or humidity affect gluten free chocolate chip cookies?
Gluten-free cookies are highly sensitive to altitude and humidity because GF flour blends lack the protein structure needed to stabilize rapidly expanding gases or resist moisture absorption. At altitudes above 3,500 feet, you should reduce the baking soda to ½ tsp, increase the flour by 2 tablespoons, and raise the oven temperature to 365°F (185°C) to prevent excessive spreading. In high-humidity environments (above 70%), the dough absorbs ambient moisture; to counteract this, refrigerate the dough balls for 20 minutes before baking and extend the bake time by 1–2 minutes.
More Cookies You’ll Love
- Peanut Butter Chocolate Chip Cookies — thick, fudgy centers with no dairy butter and deep roasted peanut flavor in every bite
- No Bake Chocolate Oatmeal Cookies — stovetop cookies that set firm in 30 minutes with no oven required
- Oatmeal Chocolate Chip Cookies — chewy, golden cookies with rolled oats and dark chocolate chunks that hold their shape beautifully
Gluten-Free Chocolate Chip Cookies
Ingredients
Equipment
Method
- Step 1 — Preheat and prep: Preheat your oven to 350°F (175°C) and position the rack in the middle of the oven. Line a large light-colored aluminum baking sheet with unbleached parchment paper and set aside. Do not use a dark non-stick pan — gluten-free flour blends brown faster than conventional flour and dark pans will overbrown the bottoms before the centers are set.
- Step 2 — Combine sugars and butter: Add the ¾ cup (150g) packed brown sugar and ¼ cup (50g) granulated sugar to a large mixing bowl. Pour the ½ cup (113g) melted and cooled butter over the sugars and stir vigorously with a silicone spatula for 60–90 seconds until the mixture looks smooth, glossy, and uniform with no dry sugar pockets at the bottom of the bowl.
- Step 3 — Add eggs and vanilla: Add the 1 large room-temperature egg, 1 room-temperature egg yolk, and 1½ tsp pure vanilla extract to the butter-sugar mixture. Stir for 45–60 seconds until fully emulsified — smooth, slightly lighter in color, and no streaks of egg white visible.
- Step 4 — Add dry ingredients: Combine the 1¾ cups (210g) GF flour blend, ¾ tsp baking soda, and ½ tsp fine sea salt in a small bowl and stir once with a fork to distribute evenly. Fold the dry ingredients into the wet mixture using 15–20 slow folds with the spatula — stop the moment no dry flour streaks are visible. Do not overfold.
- Step 5 — Fold in chocolate: Reserve approximately 2 tablespoons (30g) of the dark chocolate chunks. Fold the remaining chocolate chunks (approximately 225g / 1⅓ cups) into the dough using 8–10 slow strokes. The dough should look thick and heavily studded with chocolate.
- Step 6 — Portion dough: Scoop 2 tablespoons (45g) of dough per cookie — weigh the first one to calibrate, then portion the remaining 12 to match for 13 cookies total. Space at least 2 inches (5cm) apart on the parchment-lined pan. Press 3–5 reserved chocolate chunks onto the top of each dough ball.
- Step 7 — Bake: Slide the pan into the preheated 350°F (175°C) oven on the middle rack. Bake for 10 to 12 minutes. The cookies are ready when the edges look set and lightly golden, the surface shows visible crackle, and the centers still look slightly underdone and puffy. Do not wait for the centers to look fully set in the oven — they will be overbaked and dry when cooled.
- Step 8 — Salt and rest: The moment the pan comes out of the oven, immediately pinch flaked sea salt across the surface of each cookie — 4–6 large flakes per cookie. Leave the cookies on the hot pan for exactly 5 minutes — carryover heat from the pan finishes setting the centers during this window. After 5 minutes, transfer to a wire cooling rack for 15 minutes before serving.