
Gingersnap Cookies
I have tested this gingersnap cookie recipe across eleven batches in my kitchen, adjusting the molasses ratio, the spice blend, and the chilling time until every single variable was locked in. The problem with most gingersnap recipes is that they promise a crisp, crackled cookie and deliver something either too hard to enjoy or so soft the crackle disappears by the time the cookies cool. These do neither.
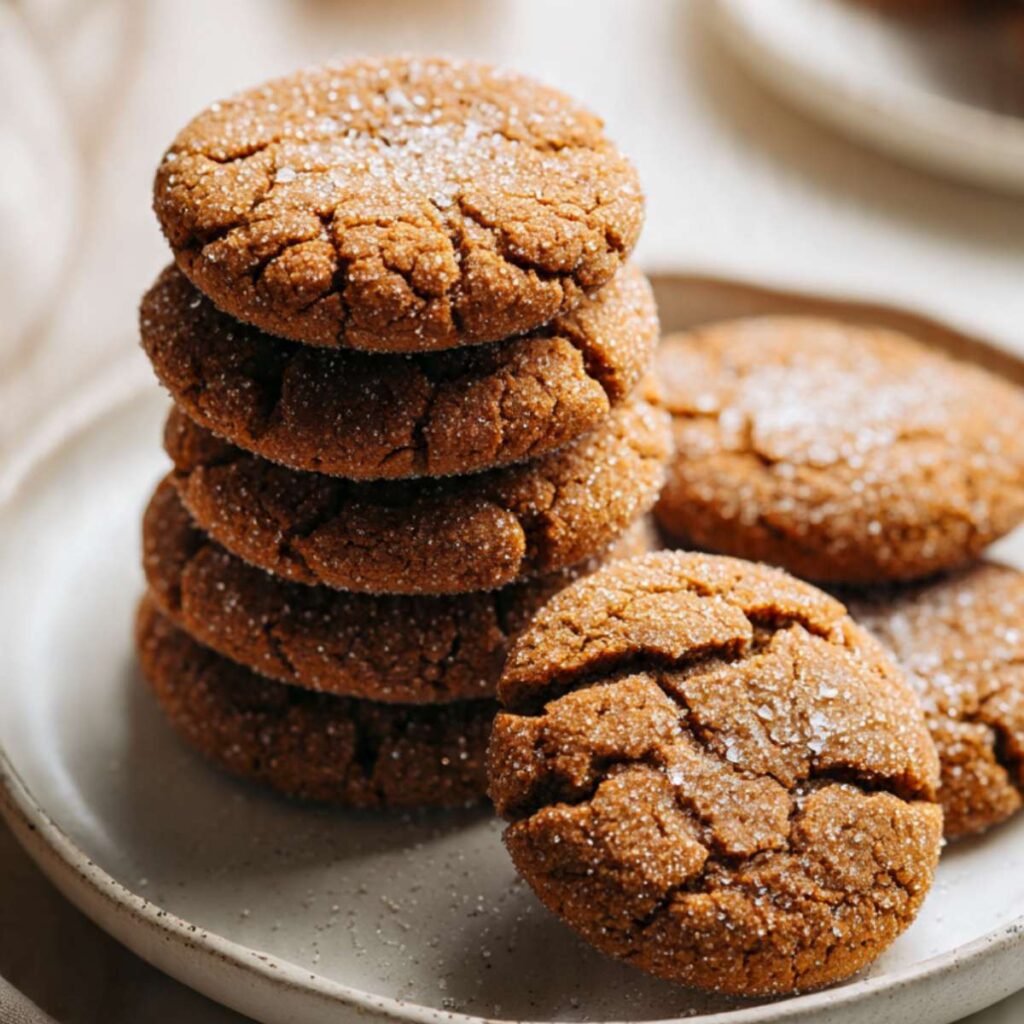
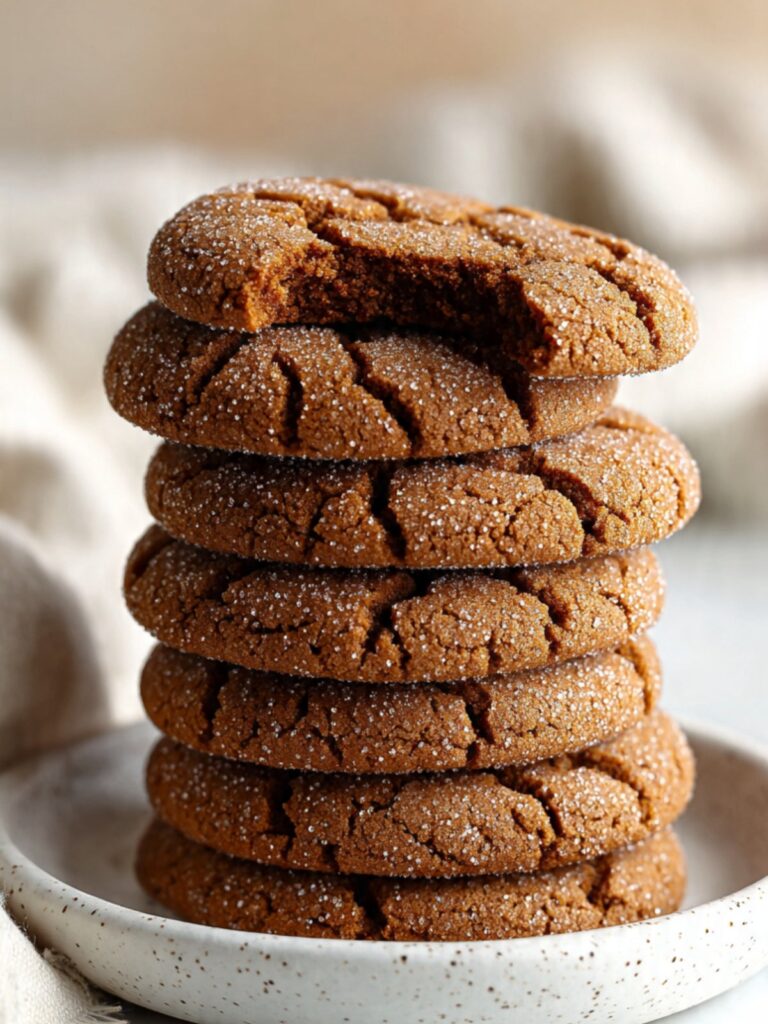
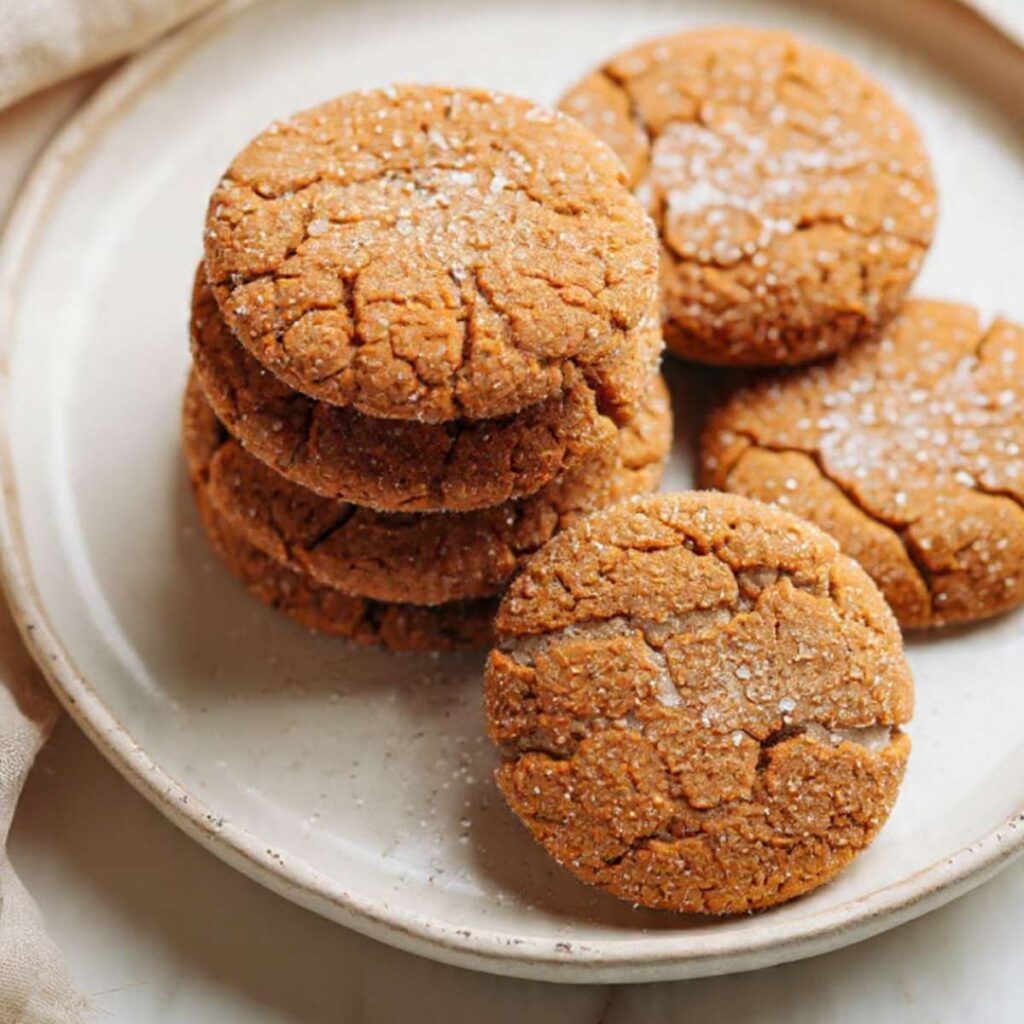
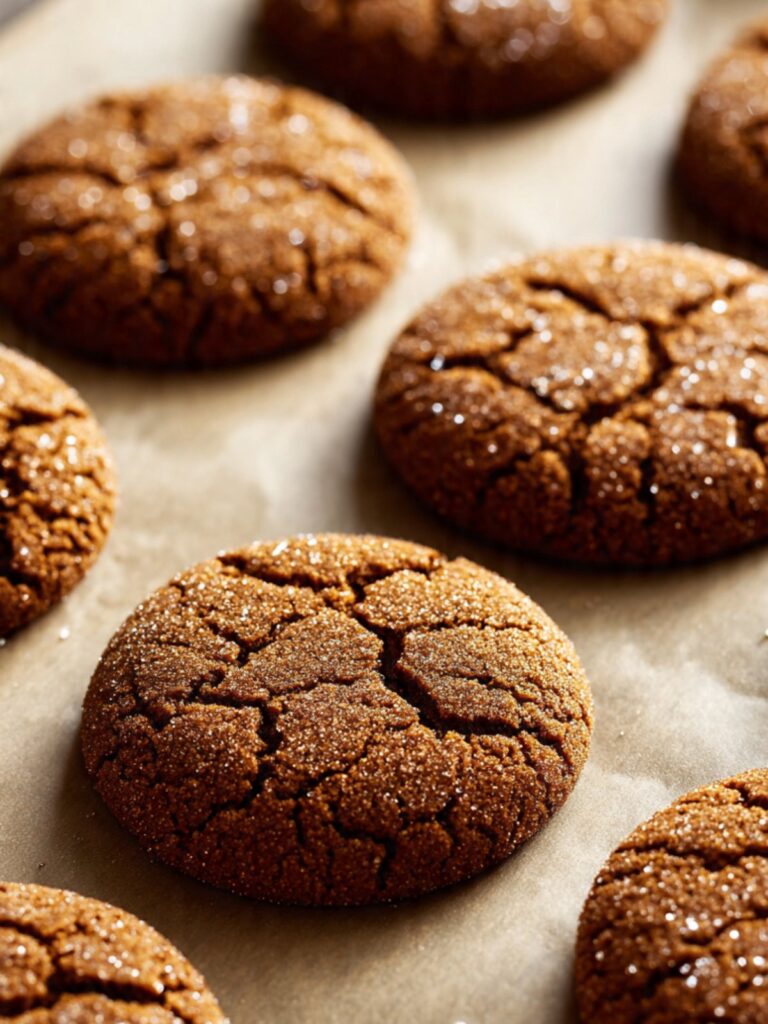
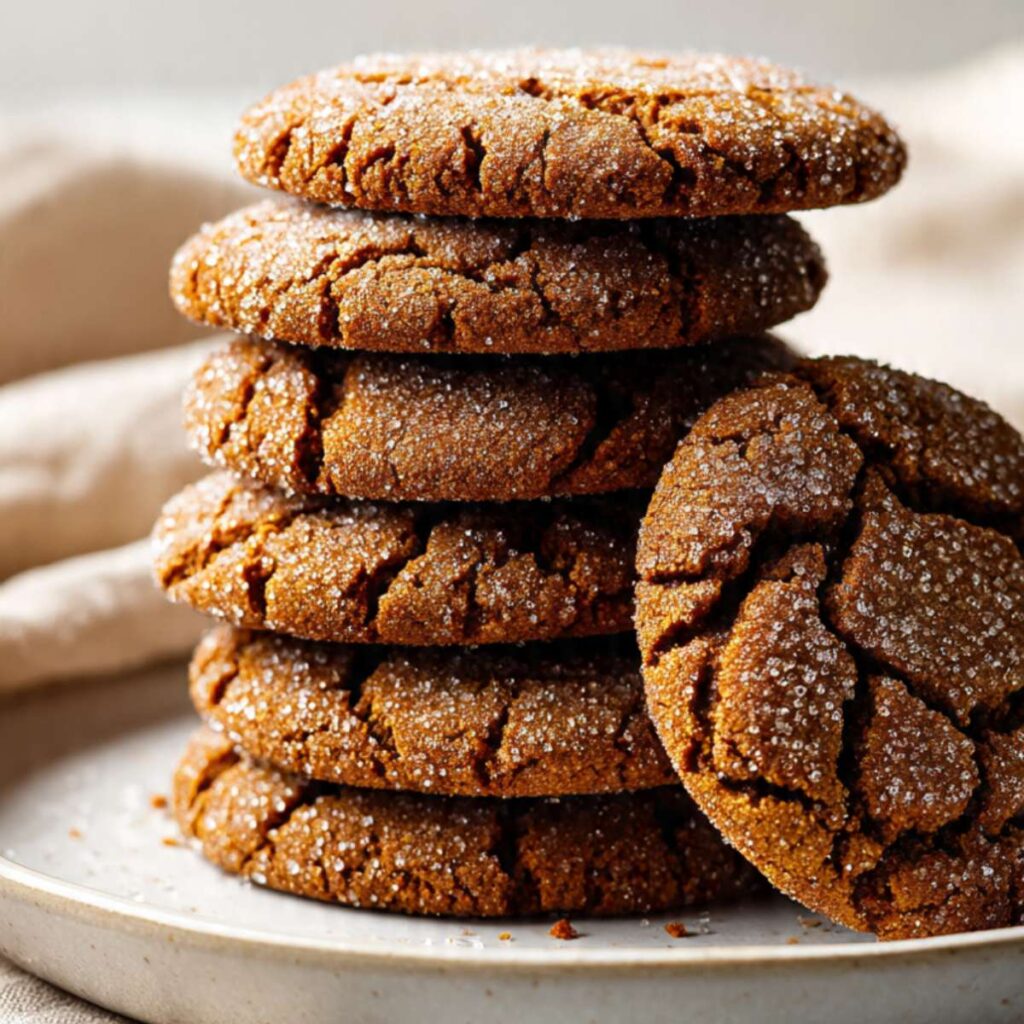
What you get here is a deep mahogany cookie with a shatteringly crisp granulated sugar crust on the outside and a center that stays just slightly chewy — dense and fudgy rather than dry and snap-hard. The crackle pattern spreads across the entire top surface, exactly as you can see in the stacked photos. The flavor is assertively spiced — ground ginger leads, cinnamon rounds it out, and cloves add that faint bitter warmth underneath everything. The molasses gives it color and depth without tipping into bitterness.
🗒 Luna’s Note: I pull these out of the oven when the centers still look slightly underdone and puffed. The carryover heat from the pan finishes the job. Every time I’ve left them an extra two minutes, the centers go dry and the chew disappears.
I tested chilling the dough versus baking immediately from room temperature. Room-temperature dough spread slightly more but still held the domed shape and produced a better crackled surface because the sugar coating had more contact with the warm dough before baking. Chilled dough (20 minutes) baked slightly thicker but the surface crackle was less defined. I kept the 20-minute chill — the modest thickness gain is worth it and the dough handles better when firm.
I tested the molasses quantity at three levels — 3 tablespoons (60g), ¼ cup (80g), and ⅓ cup (107g). The 3-tablespoon batch was too pale and the ginger flavor felt unanchored. The ⅓ cup batch was very dark and the molasses flavor competed too heavily with the spices. The ¼ cup (80g) batch hit the deep mahogany color visible in the photos with a balanced molasses-to-spice ratio. That is the version in this recipe.
One thing to know before you start: this recipe uses unsulfured molasses — not blackstrap. Blackstrap molasses is more bitter and significantly darker. If you use it here, the cookies will taste medicinal and the color will be nearly black rather than the warm mahogany shown in the photos. Check the label before you buy.
This recipe uses a hand mixer or stand mixer for the creaming step — a spoon alone will not aerate the butter and sugar enough to build the correct texture. No chilling beyond the 20-minute rest the dough needs before rolling. One bowl for wet ingredients, one for dry — minimal cleanup.
| Yield | Prep Time | Chill Time | Cook Time | Total Time | Difficulty |
|---|---|---|---|---|---|
| 16 cookies | 15 minutes | 20 minutes | 10–12 minutes | ~50 minutes | Easy |
| Calories | Carbohydrates | Sugar | Fat | Saturated Fat | Protein | Sodium |
|---|---|---|---|---|---|---|
| ~230 kcal | 35g | 22g | 9g | 5.5g | 2g | ~95mg |
Nutrition is calculated from gram weights using USDA data. Values are estimates — your results may vary slightly depending on exact ingredient brands and how much sugar coating adheres to each cookie.
Ingredients & Tools
For the Cookie Dough
- 2¼ cups (281g) all-purpose flour, spooned into the measuring cup and leveled — or weighed at 281g
- 2 teaspoons (5g) ground ginger, checked for freshness — should smell sharp and warm when opened
- 1 teaspoon (2.5g) ground cinnamon, checked for freshness — should smell strong and spicy when opened
- ¼ teaspoon (0.6g) ground cloves, checked for freshness — should smell pungent and sharp when opened
- 1 teaspoon (6g) baking soda, checked for freshness
- ½ teaspoon (3g) fine sea salt
- ¾ cup (170g) unsalted butter, softened to room temperature (65–68°F / 18–20°C)
- 1 cup (220g) packed brown sugar
- ¼ cup (80g) unsulfured molasses (not blackstrap)
- 1 large egg (approximately 50g without shell), room temperature
For Rolling
- ½ cup (100g) plain white granulated cane sugar — do not substitute coarse, turbinado, or raw sugar; the crystal size difference prevents the glassy crust from forming
Before You Start
Butter temperature: Pull your unsalted butter from the fridge 60–90 minutes before baking. At the correct temperature of 65–68°F (18–20°C), it should hold a clean indent when you press your finger in without feeling greasy or slick. If your finger slides through it or the surface looks shiny, the butter is too warm — put it back in the fridge for 10 minutes before proceeding. Butter that is too warm will cause the cookies to spread flat and lose the domed shape visible in the photos.
Egg temperature: Pull your egg from the fridge 30 minutes before baking. A cold egg added to creamed butter can break the emulsion and produce a slightly curdled batter. If you are short on time, set the egg in a bowl of warm (not hot) water for 10 minutes.
Molasses check: Confirm your molasses says “unsulfured” on the label — not blackstrap. Blackstrap has a harsh, medicinal bitterness that overwhelms the spice blend in this recipe.
Spice freshness check: Open each spice jar and smell it. Ground ginger, cinnamon, and cloves should hit you immediately — sharp, warm, and strong. If the smell is faint or dusty, the spices are too old and the cookies will taste flat no matter how closely you follow the recipe. Ground spices lose potency within 6 months of opening.
Brown sugar check: Pack the brown sugar firmly into your measuring cup — or weigh it at 220g. If your brown sugar has hardened into a solid brick, lay a damp paper towel over the top of the open bag and microwave in 20-second increments until the sugar is pliable enough to pack. Do not use granulated white sugar as a substitute — packed brown sugar contributes the molasses moisture that keeps the centers chewy. Substituting white sugar produces a drier, crisper cookie without the chew visible in the photos.
Baking soda freshness test: Drop ½ teaspoon (3g) of baking soda into a small bowl with 2 tablespoons of hot water and a splash of white vinegar. It should bubble aggressively within 2 seconds. If it fizzes weakly or not at all, replace the box — dead baking soda produces flat cookies with no crackle.
Flour measuring: If you are not using a kitchen scale, spoon the flour into your measuring cup and level it off with a straight edge. Scooping directly from the bag packs 20–30% more flour and produces dry, crumbly cookies. The gram weight in this recipe — 281g — is the number I tested with and the most reliable way to get the same result I got.
Scale priority statement: For the most accurate results, use a kitchen scale set to grams. Volume measurements can vary significantly depending on how ingredients are scooped or packed. The gram weights in this recipe are the numbers I tested with — they are the most reliable way to replicate my result.
Mixing method: This recipe requires a hand mixer or stand mixer fitted with the paddle attachment for the creaming step. Mixing by hand will not incorporate enough air into the butter and sugar, and the texture will be denser and flatter than what is shown in the photos.
Dough chill: The dough needs exactly 20 minutes in the fridge before rolling and baking. Do not skip this step — unchilled dough is too soft to roll into clean balls and spreads wider in the oven, producing flatter cookies that do not hold the thick domed shape visible in the photos. Do not chill longer than 30 minutes — very cold dough cracks when rolled and produces surface fissures rather than a smooth ball going into the rolling sugar.
Oven rack: Position your oven rack in the middle before preheating. Cookies baked on the top rack brown too fast on the surface. Cookies baked on the bottom rack overbrown on the base before the centers are set.
Necessary Tools
Required:
- Hand mixer or stand mixer fitted with the paddle attachment
- Two medium mixing bowls (one for dry, one for wet)
- Kitchen scale (strongly recommended)
- Light-colored aluminum half-sheet baking pan — dark non-stick pans absorb more heat and overbrown the cookie bottoms before the centers are done
- Parchment paper
- Silicone spatula
- Cookie scoop or tablespoon measure (1.5 tablespoon / 45g capacity)
- Wire cooling rack
- Small shallow bowl for the rolling sugar
Optional but helpful:
- Oven thermometer — most home ovens run 15–25°F (8–14°C) off from the displayed temperature. If your cookies consistently overbrown or underbake, this is usually why.
- Kitchen timer
How to Make Gingersnap Cookies
This recipe follows the creamed butter method — fat and sugar are beaten together first to build aeration before any other ingredients are added. The order matters. Do not shortcut the creaming step and do not add ingredients out of sequence.
Step 1: Preheating the Oven and Preparing the Pan
Position your oven rack in the middle slot and heat your oven to 350°F (175°C). While the oven heats, line your light-colored aluminum half-sheet baking pan with parchment paper and set it aside.
Most home ovens run 15–25°F (8–14°C) hotter or cooler than the display reads. If you have an oven thermometer, place it on the middle rack now and confirm the actual temperature before the first pan goes in. A 25°F difference at this stage means overbaked edges and underbaked centers — the crackle will still form but the texture underneath will be off.
Do not use a dark non-stick pan here — dark pans absorb significantly more radiant heat and will overbrown the cookie bottoms before the centers are set. Do not grease the parchment or substitute foil. Greased parchment makes the dough slide and spread unevenly. Foil conducts heat too aggressively at the base and produces burnt bottoms.
The oven should be fully preheated — not still climbing — before the first pan goes in. A partially preheated oven produces cookies that spread before the structure sets, giving you flat cookies instead of the domed shape in the photos.
Your pan is ready when it is lined flat with parchment that reaches the edges. Set it near your workstation so it is ready when the dough is portioned.
Step 2: Whisking the Dry Ingredients Until the Spices Are Fully Distributed

In a medium mixing bowl, whisk together your 2¼ cups (281g) all-purpose flour, 2 teaspoons (5g) ground ginger, 1 teaspoon (2.5g) ground cinnamon, ¼ teaspoon (0.6g) ground cloves, 1 teaspoon (6g) baking soda, and ½ teaspoon (3g) fine sea salt using a balloon whisk.
Whisk for a full 30 seconds using wide, circular strokes that reach the bottom and edges of the bowl. The baking soda needs to be evenly distributed throughout the flour — pockets of concentrated baking soda cause uneven lift and irregular crackle patterns across the batch. The spices need to be uniformly mixed so every cookie tastes the same from the first to the last.
The baking soda in this recipe reacts with the natural acidity in the molasses and brown sugar to create the carbon dioxide bubbles that lift the dough quickly in the oven — this fast rise is what causes the surface to crack. If your baking soda is expired, the lift will not happen and the surface will stay smooth instead of crackled.
Do not skip this step or add the dry ingredients directly to the wet without pre-mixing. Unmixed baking soda sitting on top of wet ingredients creates uneven pockets of lift and a metallic flavor in finished cookies.
The dry mixture should look uniform and evenly tan-colored with no visible white streaks of baking soda and no visible clumps of spice. If you can see distinct pockets of cinnamon or ginger, whisk for another 15 seconds.
Set this bowl aside and move to the wet ingredients.
Step 3: Creaming the Butter and Brown Sugar Until Pale and Fluffy
In your large mixing bowl, using your hand mixer or stand mixer fitted with the paddle attachment, add your ¾ cup (170g) unsalted butter, softened to room temperature (65–68°F / 18–20°C) and 1 cup (220g) packed brown sugar.
Beat on medium speed (speed 4 on a KitchenAid, medium on a hand mixer) for exactly 3 minutes — set a timer. Do not estimate. At the 90-second mark the mixture will look crumbly and sandy. Keep going. By 3 minutes it should look noticeably lighter in color — from a deep tan to a pale golden — and significantly increased in volume. This is aeration happening. The air you are beating in now is what creates lift in the oven and keeps the centers tender rather than compressed.
The packed brown sugar is doing two jobs here: it adds moisture from its molasses content which keeps the finished cookie chewy, and its slightly acidic pH will help activate the baking soda later. Do not substitute light brown sugar for dark brown sugar or vice versa without knowing the difference — dark brown sugar has more molasses and will produce a deeper flavor and darker color.
Do not rush the creaming step by cranking the mixer to high speed. High speed at this stage warms the butter from friction, which undoes the crystallization you are trying to build. Medium speed for the full 3 minutes is the correct technique.
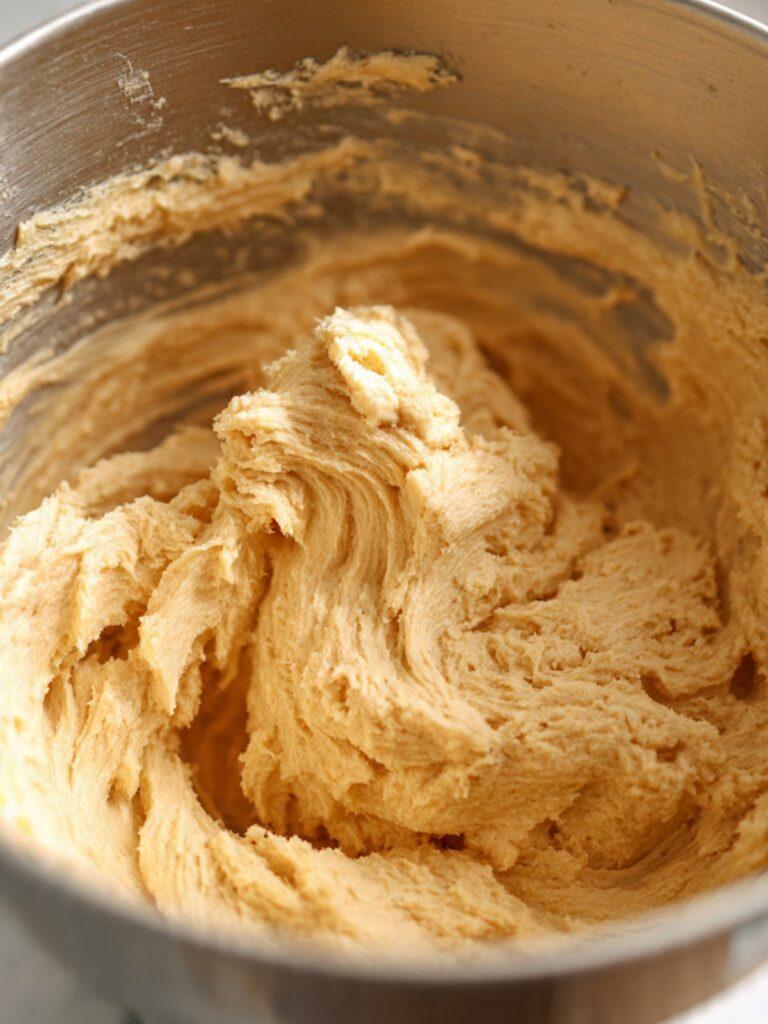
The creamed mixture should look pale golden-tan, nearly doubled in volume compared to when you started, and hold a soft ribbon for 2 seconds when you lift the beater. If it still looks dense and dark tan at 3 minutes, beat for another 60 seconds and check again.
Scrape down the sides and bottom of the bowl with your silicone spatula before the next step.
Step 4: Adding the Molasses and Egg Until the Dough Looks Thick and Glossy
With the mixer on low speed, pour in your ¼ cup (80g) unsulfured molasses in a slow, steady stream — not all at once. Once the molasses is incorporated, increase to medium speed and beat for 20 seconds.
Add your 1 large egg (approximately 50g without shell), room temperature, and beat on medium speed for 30 seconds until fully incorporated. Scrape the sides and bottom of the bowl with your silicone spatula — the molasses tends to pool at the bottom — then beat for another 10 seconds.
The molasses is the source of the deep mahogany color you see in the photos, the primary moisture contributor in this dough, and the acid that activates the baking soda. This is why the molasses type matters so much — unsulfured molasses has a clean, rounded bitterness that balances with the spices. Blackstrap has a sharp, medicinal bitterness that does not.
🗒 Luna’s Note: I always scrape the bowl twice after adding the molasses — once right after it goes in and once after the egg. Molasses is thick and heavy and it settles at the very bottom of the bowl. If you miss it, you get one or two cookies at the end of the batch with way more molasses flavor than the rest.
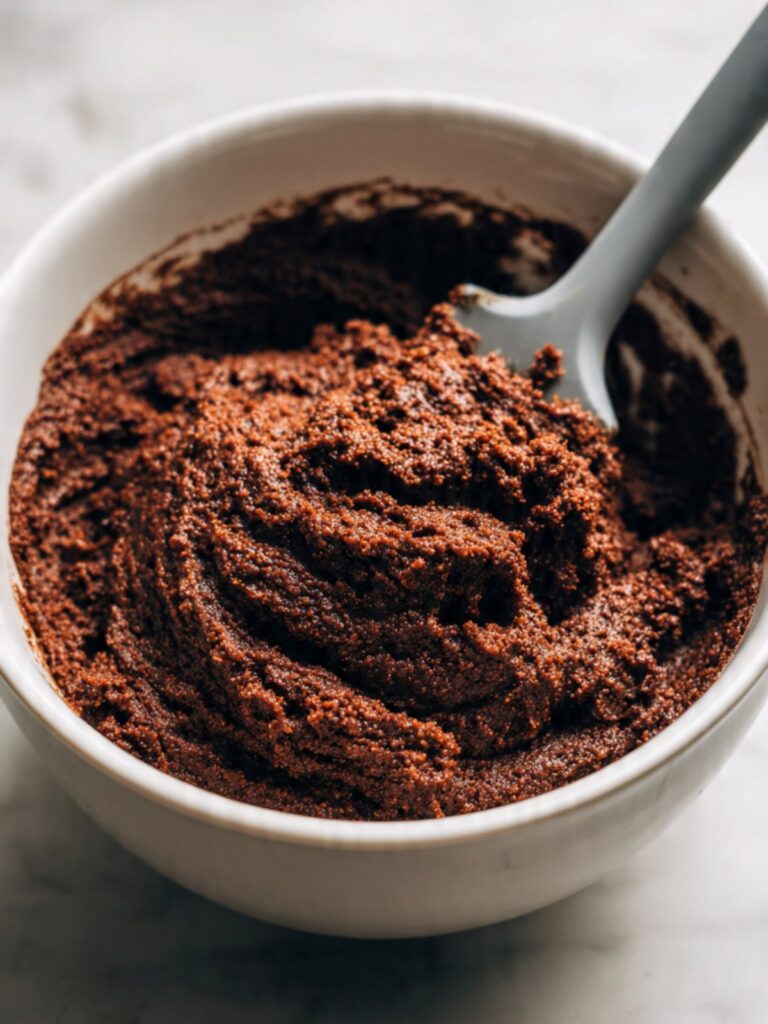
Do not add the egg to cold butter or a cold batter. A cold egg hits warm fat and breaks the emulsion — the mixture will look curdled and slightly separated. It will bake out but the texture suffers. Room temperature egg emulsifies smoothly and gives you the thick, uniform dough visible in the photo.
The mixture should look thick, smooth, and deeply glossy — dark brown and uniform with no visible butter streaks or separation. If you see any greasy streaks around the edges of the bowl, scrape and beat for another 15 seconds.
Step 5: Folding in the Dry Ingredients Without Overworking the Dough
With your mixer on the lowest speed, add the dry ingredient mixture to the wet ingredients in two additions — roughly half at a time. After each addition, mix only until no dry flour streaks remain. Stop the mixer immediately once the dough comes together.
Do not dump all the dry ingredients in at once. Adding in two additions gives the flour time to hydrate evenly and reduces the risk of flour pockets at the bottom of the bowl. Do not mix beyond the point where the flour disappears — every additional second of mixing after that point develops gluten, which makes the finished cookie tighter and tougher rather than the slightly chewy texture visible when the cookie is broken open in the photos.
The baking soda in the dry mixture is about to meet the molasses and brown sugar in the wet mixture — this is when the leavening chemistry activates in the presence of moisture. This is exactly why the cookies need to go into the oven without excessive delay after mixing.
The finished dough should look thick, cohesive, and dark brown — it will feel slightly tacky but not sticky enough to coat your hands. It should hold a mound shape when scooped and pull away cleanly from the sides of the bowl. If it looks wet and slack, your butter was too warm. If it looks dry and crumbly, your flour was over-measured.
As you can see in the stacked cookie photos, the finished cookie has a dense, tight crumb — that texture starts here with a properly mixed dough. Do not overmix chasing smoothness.
Step 6: Chilling the Dough for 20 Minutes
Cover the bowl with plastic wrap and place it in the refrigerator for exactly 20 minutes. Set a timer.
The chill does three things: it firms the butter back up after the mixing friction has slightly warmed it, it makes the dough significantly easier to roll into clean balls, and it slows the initial spread in the oven so the cookies build height before they flatten. The domed shape you see in the photos — thick and rounded rather than disc-flat — is partly a result of this chill step.
Do not skip the chill. Unchilled dough is sticky and difficult to roll into smooth balls, and the cookies spread slightly more than ideal. Do not chill longer than 30 minutes — very cold dough cracks when rolled and the balls will have surface fissures rather than a smooth exterior going into the rolling sugar.
After 20 minutes, the dough should feel firm enough to scoop cleanly and hold its shape when pressed — it should not be warm or soft, but it also should not be rock-hard. If you press your finger in, it should leave a clean indent without the dough crumbling.
Step 7: Portioning and Rolling in Granulated Sugar
Pour your ½ cup (100g) plain white granulated cane sugar into a small shallow bowl and set it next to your lined baking pan.
Using your cookie scoop or tablespoon measure, portion the dough into balls of approximately 1.5 tablespoons (45g) each. Weigh the first ball on your kitchen scale — use that as your calibration reference for the remaining 15. At 45g per ball, this batch yields exactly 16 cookies. If your balls are larger, your yield drops and the bake time increases. If they are smaller, your yield increases and the bake time decreases.
Roll each ball between your palms until smooth and round, then drop it into the shallow bowl of granulated sugar. Roll it around until the entire surface is fully coated — no bare patches. The sugar coating is not decorative. It melts against the hot dough in the oven and forms the crisp, sparkly crust visible in every photo. Bare patches produce soft spots with no crackle.
Do not use coarse sugar, turbinado, or raw sugar for rolling. The larger crystal size of these sugars does not melt and fuse the same way plain white granulated sugar does — you get a gritty exterior rather than the smooth, glittery crust in the photos.
Each ball should look uniformly white with no visible dark dough showing through the sugar coating. If you can see brown through the coating, roll it again.
Place each coated ball onto the parchment-lined pan, spacing them at least 2 inches (5cm) apart. The pan holds 8 balls comfortably in two rows of four. You will bake in two batches.
Step 8: Baking Until the Tops Crack and the Centers Are Still Domed
Slide the first pan onto the middle rack of your 350°F (175°C) oven and bake for 10 to 12 minutes. Start checking at the 10-minute mark.
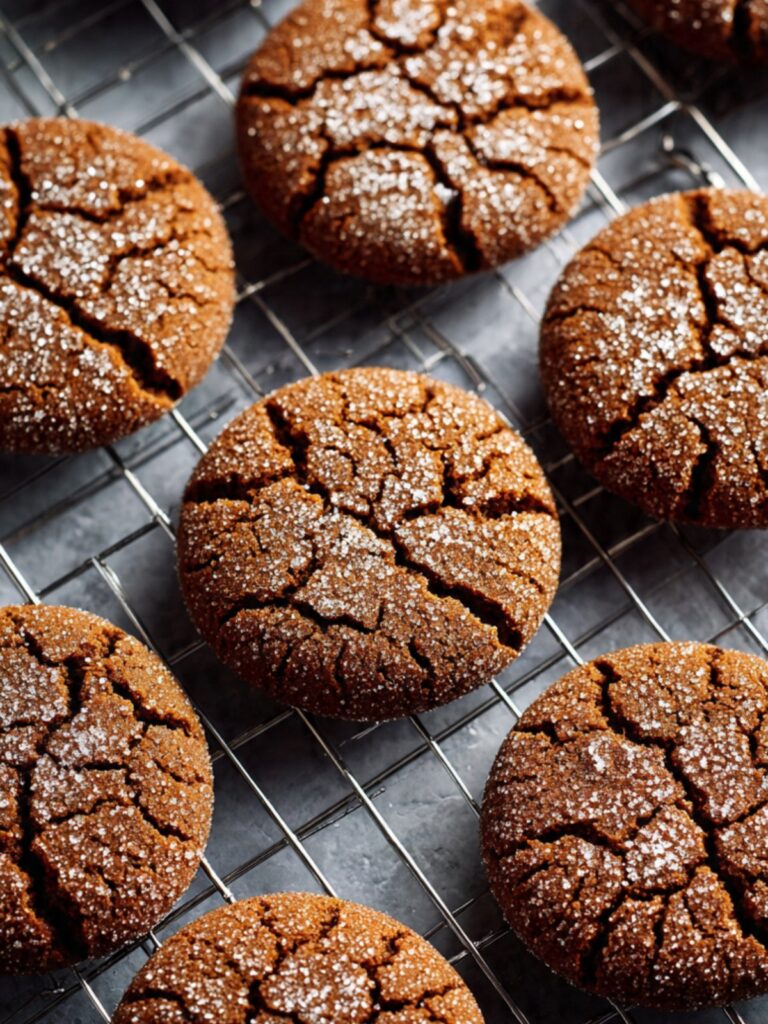
The cookies are done when the tops have cracked into the spiderweb pattern visible across all the photos and the surface looks fully set and matte from edge to edge. Unlike lighter cookies where you look for golden edges as your pull signal, these cookies are uniformly deep mahogany brown across the entire surface — there is no color contrast between edge and center to guide you. Your only reliable visual cue is the dome. The centers should still look slightly raised and puffed at the pull point. Once the center drops flat and the entire surface looks level, you have gone two minutes too far.
As you can see in all five stacked photos, the finished cookie is consistently dark from the sugar crust all the way to the center top — this color is from the molasses and Maillard reaction, not from overbaking. Do not mistake the deep color for a sign that they need more time. Pull them the moment the crackle pattern is fully defined and the center dome is still visible.
Do not open the oven door before the 10-minute mark. Opening the door drops the oven temperature and interrupts the fast initial rise that creates the crackle. Do not rotate the pan mid-bake — the cookies are structurally fragile before the edges are fully set.
At the correct pull point: the crackle pattern is clearly defined across the entire top surface, the cookie is uniformly deep mahogany brown all over, and the center still appears slightly raised — not flat. If the entire top surface has dropped level and looks uniformly flat with no dome, it is overbaked. The texture will still be acceptable but the chew will be gone.
Step 9: Resting on the Pan and Transferring to the Cooling Rack
Leave the cookies on the hot pan for exactly 5 minutes after pulling from the oven — do not move them. Set a timer.
The pan continues to conduct heat into the base of each cookie during this rest period. This carryover cooking finishes setting the centers without the dry heat of the oven pulling moisture out. Moving the cookies before 5 minutes breaks the structural base — the cookies are fragile immediately out of the oven and will crack across the bottom if transferred too early. Waiting more than 8 minutes starts to over-dry the bottoms against the hot pan.
🗒 Luna’s Note: I use this 5-minute window to get the second pan of dough balls ready and coated in sugar. By the time the first batch transfers to the rack, the second pan is ready to go straight into the oven.
After 5 minutes, use a flat spatula to transfer the cookies to a wire cooling rack. They should feel firm at the edges and slightly soft in the center — exactly what you want. The centers will continue to firm up as they cool to room temperature, approximately 15 minutes.
Do not stack the cookies while they are still warm — the weight flattens the soft centers and the sugar crusts stick together.
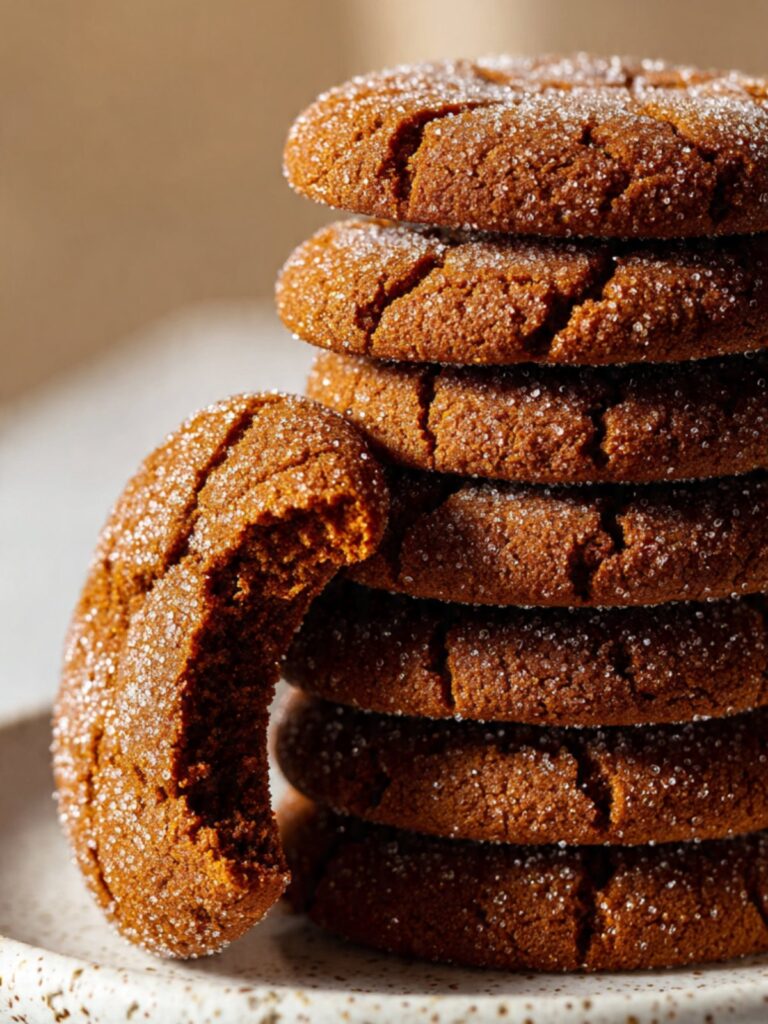
The fully cooled cookie should feel crisp when you tap the top surface and give a slight resistance when you press the center — not hard all the way through, but not soft enough to indent easily. This matches the texture visible in the broken-open cookie in the photos.
Repeat the baking and cooling process with the second pan.
The Science Behind Gingersnap Cookies
Understanding why each element of this recipe works the way it does makes you a better baker — not just with this recipe, but with every spiced cookie you make after it. These three science points explain the three most visible results in the photos: the deep crackle, the mahogany color, and the chewy-but-crisp texture contrast.
Why Gingersnap Cookies Crack on Top
The crackle pattern visible across every cookie in the photos is not random — it is a predictable result of two forces working against each other at exactly the right moment. When the dough balls go into the hot oven, the exterior layer — coated in granulated sugar — sets and firms first from direct contact with the oven heat. The interior, still cold and dense from the 20-minute chill, continues to expand as the baking soda reacts with the molasses and brown sugar acidity and generates carbon dioxide. That expanding interior pushes outward against the already-set exterior crust, and the crust fractures — producing the spiderweb pattern you see in the photos.
This is why oven temperature and baking soda freshness are non-negotiable for this recipe. An oven that is not fully preheated allows the exterior to firm slowly rather than rapidly — the interior and exterior rise at the same rate and the surface stays smooth. Expired baking soda produces no carbon dioxide expansion at all. Both failures produce the same result: a flat, uncracked cookie. If you want the crackle, you need a verified oven temperature and fresh leavening — full stop.
If you enjoy making other molasses-forward cookies, my molasses cookies article covers a softer, chewier variation that uses the same leavening science with a different spice ratio and no sugar rolling step.
The Maillard Reaction and Molasses — Why These Cookies Are So Dark
The deep mahogany color in the photos comes from two simultaneous browning processes happening at once. The first is the Maillard reaction — the chemical reaction between proteins and sugars at temperatures above 280°F (138°C) that produces the golden-brown color and roasted flavor in most baked goods. The second is caramelization of the sugars in both the packed brown sugar and the molasses, which occurs at similar temperatures and produces a deeper, more complex color than white sugar alone would.
Molasses is already a byproduct of the sugar refining process — it is essentially concentrated, partially caramelized cane juice. When it goes into a hot oven inside this dough, it caramelizes further and contributes a bittersweet depth that white or brown sugar alone cannot replicate. This is why the color of these cookies is so much darker than a standard sugar or snickerdoodle cookie baked at the same temperature for the same amount of time — the molasses has a head start on browning before the pan ever goes in.
This is also why the pull timing is so precise. Molasses-heavy doughs go from perfectly baked to over-dark very quickly. The 10 to 12 minute window in this recipe is narrow by design.
Sugar Hygroscopicity — Why the Texture Is Crisp Outside and Chewy Inside
The contrast between the crisp sugar crust and the chewy interior visible in the broken-open cookie photo is not accidental — it is controlled by two different sugar behaviors happening in two different locations in the same cookie.
On the outside, the granulated rolling sugar melts against the hot dough surface and fuses into a thin, glassy layer during baking. As the cookie cools, this layer re-solidifies into the crisp, sparkly crust you can see and hear when you tap the top. Sugar in this state — fully melted and reset — is rigid and moisture-resistant.
In the interior, the packed brown sugar and molasses behave differently. Brown sugar is hygroscopic — it actively draws moisture from the surrounding environment, including from inside the cookie itself. This is what keeps the center soft and chewy even after the cookie has fully cooled. The brown sugar is essentially holding onto water that would otherwise evaporate during cooling, maintaining the tender, slightly fudgy chew visible in the cross-section. This is the same science that keeps brown sugar cookies softer longer than white sugar cookies at room temperature.
🗒 Luna’s Note: I store these in a hard-sided container with a small piece of bread on top of the cookies. The bread releases just enough moisture to keep the centers from drying out over several days without making the sugar crust go soft.
Gingersnap Cookies Troubleshooting & Pro-Tips
Common Mistakes
The cookies spread flat and lost their domed shape The most common cause is butter that was too warm when it went into the mixer. Butter at the correct temperature of 65–68°F (18–20°C) holds its crystalline fat structure during creaming and provides resistance to spread in the oven. Butter that is too warm — shiny, greasy, or finger-sliding soft — has already lost that structure. The cookies will spread wide and flat before the exterior has a chance to set. If your dough looks very soft and slack after mixing, refrigerate it for 30 minutes instead of 20 before portioning. Going forward, pull your butter from the fridge 60–90 minutes before baking and check the temperature with your finger before starting.
The tops did not crack — the surface stayed smooth Two causes produce this result. The first is an oven that was not fully preheated when the pan went in. A partially preheated oven allows the interior and exterior of the cookie to rise at the same rate — the surface never gets the rapid crust-set it needs to fracture under the expanding interior. Always let the oven preheat for a full 15 minutes after it signals ready. The second cause is expired baking soda. Without active leavening, there is no carbon dioxide expansion pushing against the set exterior — no expansion means no crackle. Run the freshness test from the Before You Start section before every batch.
The cookies taste flat and the spice flavor is weak This is almost always a spice freshness problem. Ground ginger, cinnamon, and cloves lose their volatile oils within 6 months of opening. A recipe that depends on three spices for its entire flavor profile is extremely sensitive to stale spices — you can follow every other step perfectly and still get a flat-tasting cookie if the spices are old. Open each jar and smell it before you start. If the smell does not hit you immediately and sharply, replace it. Fresh spices from a newly opened jar will produce a noticeably more assertive flavor than spices that have been open for a year.
The cookies are too hard all the way through — no chew in the center Overbaking is the cause. These cookies need to come out of the oven when the centers still look slightly puffed and underdone. The carryover heat from the hot pan finishes the centers during the mandatory 5-minute rest. If you wait until the centers look set in the oven, they will be fully dry and hard by the time they cool. Check at 10 minutes on every batch — oven temperatures vary and your cookies may be done closer to 10 minutes than 12. A cookie that looks slightly underdone on the pan is a correctly baked gingersnap.
The sugar coating did not form a crisp crust — the exterior feels soft This happens when the wrong sugar is used for rolling or when the coating was too thin. Plain white granulated cane sugar melts cleanly against the dough surface and re-solidifies into a glassy crust as the cookie cools. Coarse sugar, turbinado, or raw sugar does not melt at the same rate — the larger crystals stay gritty rather than fusing. Make sure the entire surface of each dough ball is fully coated with no bare dark patches showing through before it goes onto the pan. If the crust is still soft after cooling, your oven temperature may be running low — verify with an oven thermometer.
The cookies crumbled when I tried to move them off the pan The pan rest was too short. These cookies are structurally fragile immediately out of the oven — the base is still soft and the interior has not finished setting from carryover cooking. Moving them before the full 5-minute rest breaks the base apart. If your cookies crumbled on transfer, the rest time was under 5 minutes or you used a thin spatula that flexed under the cookie rather than supporting the full base. Use a wide, flat metal spatula and wait the full 5 minutes. Set a timer — do not estimate.
Leavening failure — the cookies did not rise at all Expired baking soda is the cause. Baking soda loses its potency 3–6 months after opening. Run the freshness test before every batch: drop ½ teaspoon (3g) into a small bowl with 2 tablespoons of hot water and a splash of white vinegar. It must bubble aggressively within 2 seconds. A weak fizz or no reaction means the box needs to be replaced. Do not try to compensate by adding more baking soda — too much produces a metallic, soapy flavor in the finished cookie.
My cookies behave differently at high altitude or in high humidity. At altitudes above 3,500 feet (1,067m), reduce the baking soda to ¾ teaspoon (4.5g) — excess leavening at altitude causes cookies to rise too fast, spread too wide, and collapse before the structure sets. Reduce the oven temperature by 15°F (8°C) and check the cookies at 9 minutes. In high humidity environments above 70% relative humidity, the granulated sugar coating absorbs moisture from the air and loses its crispness within a few hours of baking. Bake these cookies as close to serving time as possible in humid conditions, and store them in a hard-sided container rather than a zip-lock bag.
The finished cookies taste metallic or slightly soapy. This is a baking soda problem — specifically, too much baking soda relative to the available acid in the dough. It happens in two scenarios: the baking soda was measured by volume using a packed or heaped teaspoon rather than a level one, or the recipe was scaled up and the baking soda was doubled rather than multiplied by 1.5x. Baking soda needs acid to fully neutralize during baking — any excess that does not react remains in the finished cookie and registers as a metallic or soapy aftertaste on the back of the tongue. The fix going forward is to measure the baking soda as a level teaspoon using a straight edge and to follow the scaling note in the FAQ section if doubling. There is no fix for an already-baked batch — the flavor does not bake out.
Expert Pro-Tips
Roll each dough ball twice through the sugar. Drop the ball in the sugar, roll to coat, lift it out, and drop it back in for a second pass. The double coat produces a thicker, more even sugar crust that fuses into the deep sparkly finish you can see across all the photos. A single coat is enough to produce crackle but the visual result is thinner and less defined.
Bake one test cookie first. Before committing the full batch, bake a single dough ball on a small piece of parchment on your pan. This tells you exactly how your oven behaves with this dough — spread level, crackle formation, and correct pull timing — before you risk the full batch. Adjust temperature or timing based on the test cookie, then bake the rest.
Use cookies scooped to the same weight, not the same volume. Cookie scoops vary in actual capacity between brands. Weigh the first ball at 45g on your kitchen scale and use that as your calibration reference. Uniform weight means uniform bake time across the entire batch — one or two oversized cookies in a pan will be underbaked when the rest are done.
How to Store Gingersnap Cookies
Room Temperature
Store fully cooled gingersnap cookies in a hard-sided lidded container — a cookie tin or a rigid plastic container with a snap-fit lid. Layer the cookies with a single sheet of parchment paper between each layer to prevent the sugar crusts from fusing together. They will keep at room temperature for up to 5 days.
Do not store these in a zip-lock bag. The flexible sides of a zip-lock bag press against the cookies and flatten the sugar crust. More importantly, zip-lock bags trap humidity inside, which softens the exterior crust within 24 hours and turns the sparkly coating into a sticky, soft shell. The hard-sided container allows just enough air circulation to keep the crust intact.
Do not store gingersnap cookies in the same container as soft cookies like chocolate chip or molasses cookies. Soft cookies release moisture as they sit, and that moisture will transfer to the gingersnaps and soften the sugar crust. Keep spiced cookies in their own container.
🗒 Luna’s Note: I place a single slice of white sandwich bread on top of the top layer of cookies before I close the lid. The bread releases just enough ambient moisture to keep the centers from drying out over several days without making the sugar crust go soft. Replace the bread slice on day 3 if the cookies are still going.
Day-by-day texture guide: Day 1 — crisp sugar crust, slightly chewy center, peak texture. Day 2 — crust holds, center softens slightly, still excellent. Day 3 — crust begins to soften slightly, center is chewier, still very good. Day 4–5 — noticeably softer throughout but flavor deepens as the spices meld. Still worth eating.
Refrigerator
I do not recommend refrigerating these cookies. The refrigerator is a low-humidity, high-airflow environment that pulls moisture out of baked goods faster than room temperature storage does. Gingersnaps stored in the fridge become hard and dry within 24 hours — the chewy center disappears entirely and the texture becomes uniformly brittle throughout. Room temperature storage in a hard-sided container is the correct method for these cookies.
If you do refrigerate these cookies for any reason — or if they have been stored overnight in a cooler environment — set them on the counter for 20–30 minutes before eating. The brown sugar center firms significantly when cold and the chew does not return until the cookie warms back to room temperature.
Freezer — Baked
Gingersnap cookies freeze well. Allow them to cool completely to room temperature — at least 1 hour — before freezing. Wrap each cookie individually in a single layer of plastic wrap, then place all the wrapped cookies into a zip-lock freezer bag or a rigid freezer-safe container. Freeze for up to 2 months.
To thaw, remove the cookies from the freezer and unwrap them onto a wire rack at room temperature for 30–45 minutes. Do not thaw in the microwave — the sugar crust heats unevenly and the exterior goes from cold to hot before the interior thaws, producing a gummy, sticky shell. Do not thaw in a sealed bag — condensation forms inside the bag and softens the crust permanently.
The texture after freezing and thawing is approximately 85–90% of fresh-baked. The spice flavor is fully intact — some bakers find the flavor actually deepens slightly after freezing. The sugar crust will be slightly less crisp than day-one fresh but will still have good structure.
Freezer — Unbaked Dough
This dough freezes exceptionally well before baking. After portioning and rolling the dough balls in granulated sugar, place them on a parchment-lined baking sheet and freeze until solid — approximately 1 hour. Transfer the frozen sugar-coated dough balls to a zip-lock freezer bag and freeze for up to 3 months.
To bake from frozen, place the frozen dough balls directly onto a parchment-lined pan — do not thaw first. Add 2–3 minutes to the bake time, checking at the 12-minute mark for the crackle and set edges. The sugar coating bakes identically from frozen — no adjustment needed there.
Freezing the dough balls already coated in sugar saves a step on bake day and means you can have fresh gingersnap cookies in about 15 minutes any time the craving hits.
Serving Suggestion
I serve these stacked on a small white ceramic plate — the contrast between the dark mahogany cookie and the white plate makes the sugar crust catch the light exactly the way it does in the photos. A mug of strong black tea or a black coffee is my standard pairing — the slight bitterness of both cuts through the sweetness of the sugar crust and makes the spice notes in the cookie sharper and more defined.
When I want something more indulgent, I sandwich two cookies around a scoop of vanilla bean ice cream. The crisp sugar crust holds up against the cold ice cream long enough to get through the whole thing without the cookie going soggy — which is exactly what you want from a gingersnap.
Frequently Asked Questions About Gingersnap Cookies
What makes gingersnap cookies crispy?
The crispness in gingersnap cookies comes from two sources working together: the granulated sugar rolling coat and the relatively low moisture content of the dough. When the sugar-coated dough ball hits the hot oven, the granulated sugar melts against the surface and fuses into a thin, glassy shell as the cookie cools. This is the crisp exterior you hear when you tap the top of a finished cookie. The dough itself — with its higher ratio of dry ingredients to fat — bakes out drier than a standard chocolate chip cookie dough, which contributes the overall crispness throughout. If your cookies are coming out soft rather than crisp, the most common causes are underbaking, expired baking soda, or a sugar coating that was too thin.
Why did my gingersnap cookies go flat?
Flat gingersnaps almost always trace back to butter temperature. Butter that is too warm going into the mixer — shiny, greasy, or too soft to hold a clean indent — has lost its crystalline fat structure and cannot provide spread resistance in the oven. The cookies hit the heat and spread wide before the exterior has a chance to set and hold the shape. The second most common cause is skipping the 20-minute dough chill. The chill firms the butter back up after mixing friction has warmed it slightly and gives the dough enough resistance to hold its dome in the first critical minutes of baking. If your cookies went flat, check your butter temperature first and confirm the dough was fully chilled before portioning.
What is the difference between gingersnap cookies and gingerbread cookies?
Gingersnaps and gingerbread cookies share the same primary spices — ginger, cinnamon, and cloves — but they are structurally different recipes with different textures and techniques. Gingersnaps use more sugar and less flour relative to the fat, which produces a thinner, crispier cookie with a pronounced sugar crust. They are also rolled in granulated sugar before baking, which drives the crisp exterior. Gingerbread cookies use more flour and are typically rolled and cut into shapes — the higher flour ratio produces a firmer, more structural cookie that holds edges cleanly and is designed for decorating with royal icing. Gingersnaps are a drop cookie. Gingerbread is a rolled and cut cookie. The spice intensity also differs — gingersnaps tend to have a sharper, more forward ginger flavor while gingerbread is more evenly balanced across the spice blend. If you enjoy making spiced rolled cookies, my gingerbread men cookies article covers the full cut-out technique with royal icing decoration.
What is the difference between chewy and crispy gingersnaps?
The difference between a chewy gingersnap and a crispy one comes down to bake time and butter ratio. A chewy gingersnap — like the ones in this recipe — is pulled from the oven when the centers are still slightly domed and underdone, then finished by carryover heat on the hot pan. The shorter bake time leaves residual moisture in the center that the brown sugar and molasses hold onto as the cookie cools, producing the soft, fudgy chew visible in the broken-open cookie photo. A crispy gingersnap is baked 3–4 minutes longer until the centers drop fully flat and all residual moisture evaporates. Both are correct — they are just different results from the same dough. If you want a crispier cookie from this recipe, add 3 minutes to the bake time and check for a completely flat surface before pulling.
Can I substitute molasses in gingersnap cookies?
You can substitute molasses but the result will be a meaningfully different cookie. The closest substitute is an equal volume of dark corn syrup — it provides similar moisture and a similar texture but lacks the bittersweet depth and the acidity that activates the baking soda. Without that acidity, you will get less rise and less crackle on the surface. You can compensate partially by adding ¼ teaspoon (1.5ml) of apple cider vinegar to the dough to restore some acidity. Honey is another option at the same volume — it produces a slightly sweeter, lighter-colored cookie with a more floral flavor profile. Do not substitute maple syrup — it has a higher water content than molasses and will produce a wetter, stickier dough that spreads more than intended. None of these substitutes will produce the deep mahogany color visible in the photos — that color is specific to molasses.
Can I make gingersnap cookies ahead of time?
Yes — and these cookies are actually an excellent make-ahead option. The baked cookies keep well at room temperature in a hard-sided lidded container for up to 5 days, with the best texture on days 1 and 2. For longer make-ahead, freeze the unbaked sugar-coated dough balls on a parchment-lined sheet until solid, then transfer to a zip-lock freezer bag for up to 3 months. Bake directly from frozen — no thawing needed — adding 2–3 minutes to the standard bake time. This is my preferred make-ahead method because the cookies come out tasting genuinely fresh-baked rather than stored. The dough can also be made and refrigerated — without portioning — up to 48 hours ahead. Let it sit at room temperature for 10 minutes before scooping if it has been chilled overnight, as very cold dough is harder to portion cleanly.
How do you get gingersnap cookies to crack on top?
The crackle requires three conditions to all be true at the same time: a fully preheated oven, fresh and active baking soda, and a complete granulated sugar coating on every dough ball. The crackle forms when the sugar-coated exterior sets rapidly from the preheated oven heat while the baking soda drives an interior expansion that fractures the set crust. If any one of these three conditions fails — the oven is still warming up, the baking soda is expired, or the sugar coating has bare patches — the crackle will be partial or absent. Verify your oven temperature with a thermometer, run the baking soda freshness test before mixing, and double-coat every dough ball in sugar before it goes onto the pan.
How do I scale this gingersnap cookie recipe up or down?
This recipe doubles reliably — all ingredients scale linearly at 2x with one exception. Do not double the baking soda. Use 1½ teaspoons (9g) for a double batch rather than 2 teaspoons (12g). Too much baking soda relative to the available acid in the dough produces a metallic, soapy aftertaste and causes the cookies to over-expand and then collapse rather than holding their dome. Bake time stays the same at 350°F (175°C) for 10 to 12 minutes regardless of batch size — what changes is that you will be running more pans through the oven. To halve the recipe, use half of every ingredient including the baking soda. A halved batch yields 8 cookies — bake all 8 on a single pan.
More Cookies You’ll Love
- Snickerdoodle Cookies — a cinnamon-sugar rolled drop cookie with the same crisp exterior and soft center contrast as these gingersnaps but a tangier, cream-of-tartar-forward flavor and a paler finish. A natural next recipe if you love the sugar-crust technique.

Chewy Gingersnap Cookies
Ingredients
Equipment
Method
- Position your oven rack in the middle slot and heat your oven to 350°F (175°C), then line a light-colored aluminum half-sheet baking pan with parchment paper and set it aside.
- In a medium mixing bowl, whisk together the 2¼ cups (281g) all-purpose flour, 2 teaspoons (5g) ground ginger, 1 teaspoon (2.5g) ground cinnamon, ¼ teaspoon (0.6g) ground cloves, 1 teaspoon (6g) baking soda, and ½ teaspoon (3g) fine sea salt for 30 seconds until fully combined and no streaks of baking soda remain.
- In a large mixing bowl using a hand mixer or stand mixer fitted with the paddle attachment, beat the ¾ cup (170g) unsalted butter and 1 cup (220g) packed brown sugar on medium speed for 3 minutes until pale golden-tan, noticeably increased in volume, and holding a soft ribbon when the beater is lifted.
- With the mixer on low speed, pour in the ¼ cup (80g) unsulfured molasses in a slow steady stream, then increase to medium speed and beat for 20 seconds, then add the 1 large room temperature egg and beat for 30 seconds until fully incorporated, scraping down the sides and bottom of the bowl with a silicone spatula between each addition.
- Add the dry ingredient mixture to the wet ingredients in two additions on the lowest mixer speed, mixing only until no dry flour streaks remain after each addition — stop the mixer immediately once the dough comes together.
- Cover the bowl with plastic wrap and refrigerate for exactly 20 minutes.
- Pour the ½ cup (100g) plain white granulated cane sugar into a small shallow bowl, then scoop the dough into 1.5-tablespoon (45g) balls, roll each ball between your palms until smooth, and roll each ball twice through the granulated sugar until the entire surface is fully coated with no bare patches.
- Place the coated dough balls on the parchment-lined pan at least 2 inches (5cm) apart and bake on the middle rack at 350°F (175°C) for 10 to 12 minutes, pulling the pan the moment the tops have cracked into a spiderweb pattern and the edges look set and matte — the centers will still look slightly puffed and underdone, which is correct.
- Leave the cookies on the hot pan for exactly 5 minutes without moving them, then transfer to a wire cooling rack and cool for 15 minutes before serving — repeat with the second pan of dough balls.