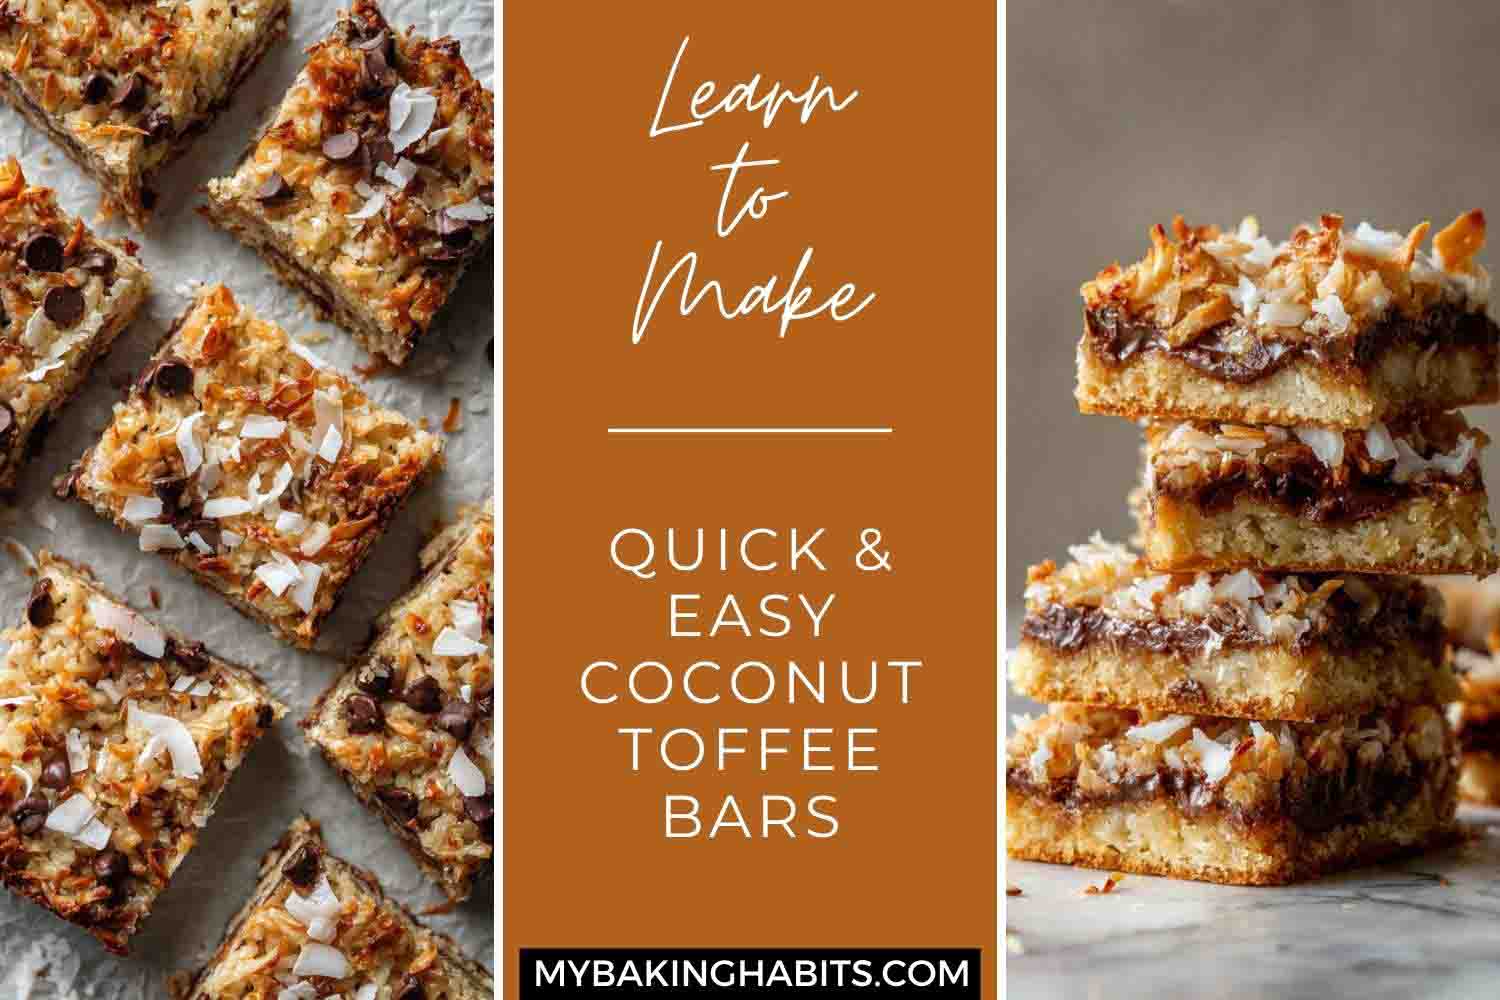
Fudgy Coconut Toffee Bars Recipe
The name tells you exactly what these bars are, but it does not prepare you for how the layers actually behave together. Most shortbread-base bars are one-note — a sweet, buttery base with something pressed on top. These are not that. The toffee layer changes the structural logic of the entire bar. It acts as a binding layer between the shortbread and the chocolate ganache above it, and it pulls the whole thing into something that reads closer to a confection than a baked good. I have made these fourteen times. The layer sequence is not flexible.
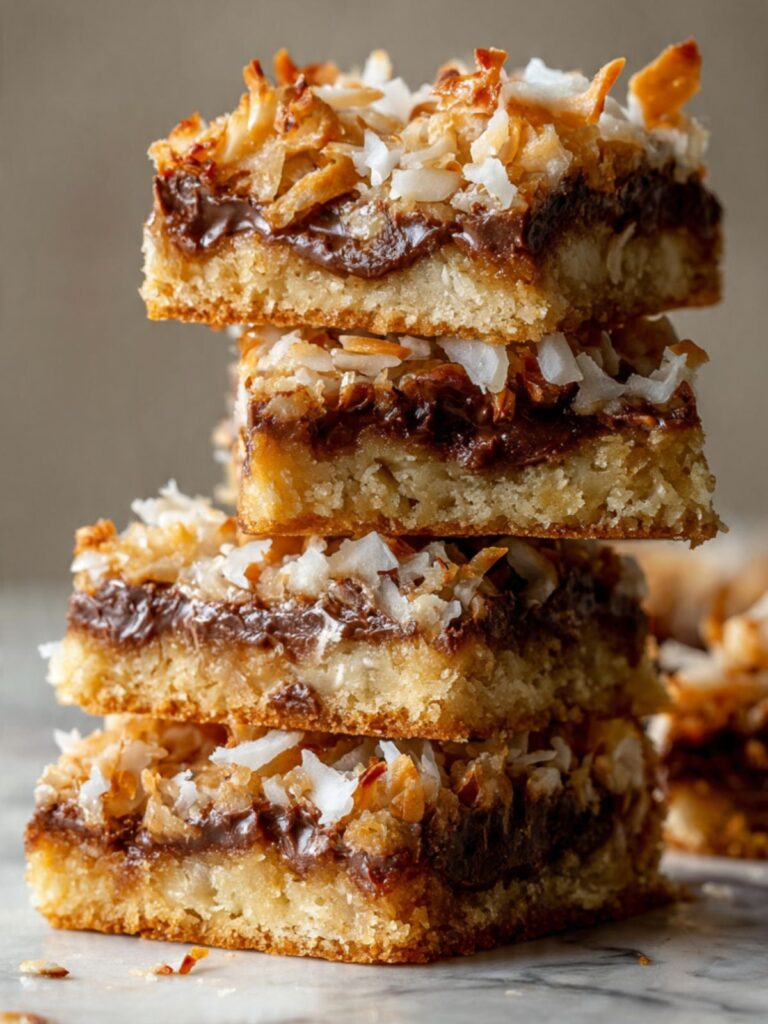
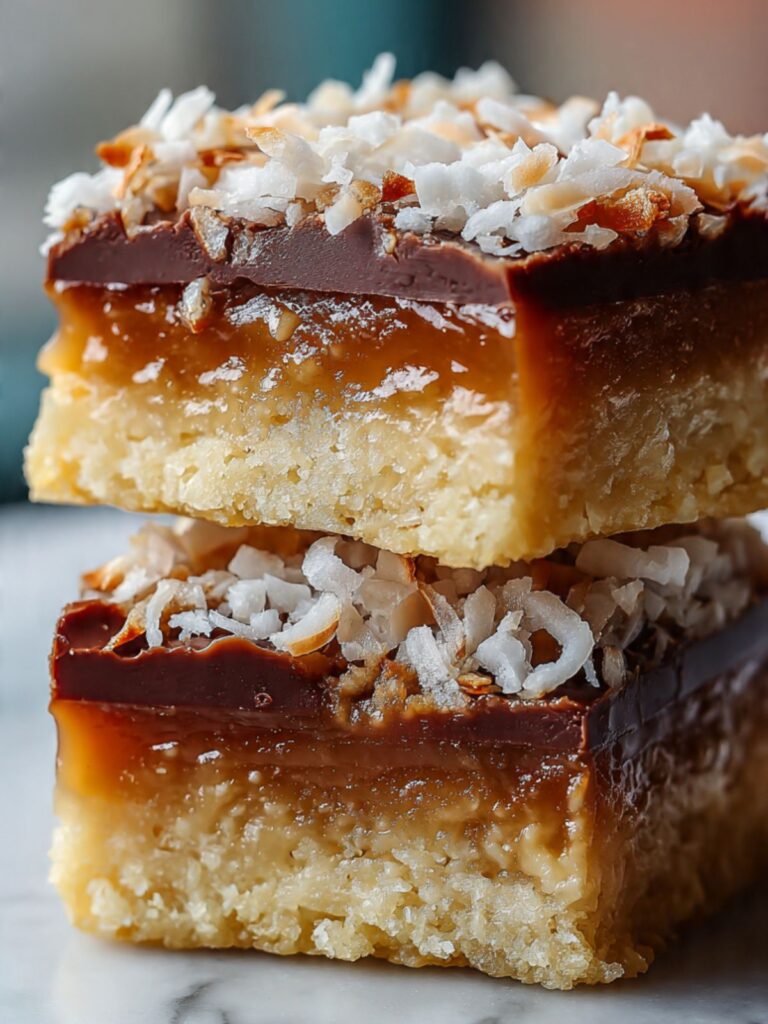
The bars have four distinct layers: a dense, sandy shortbread base that stays pale and buttery; a thick amber toffee layer that sets firm and cuts cleanly; a dark chocolate ganache that goes in as a pour and sets to a fudgy, barely-yielding layer; and a blanket of sweetened shredded coconut that toasts directly in the oven until the tips turn deep copper. A finish of flaked sea salt and a scatter of large white coconut flakes goes on last. Every layer is mandatory. I tested a version without the toffee — it was fine. Fine is not what I was after.
I tested the toffee layer at three different temperatures. At soft ball stage (235°F), the layer was too soft — it oozed when the bars were cut at room temperature and made a mess of every clean edge I tried for. At hard crack stage (310°F+), it was brittle and shattered when sliced. Firm ball stage — 248°F on a candy thermometer — produced the layer visible in these photos: fully set, cleanly sliceable, with that amber-glass sheen. Do not skip the thermometer on this step. The window between correct and wrong is about 15 degrees.
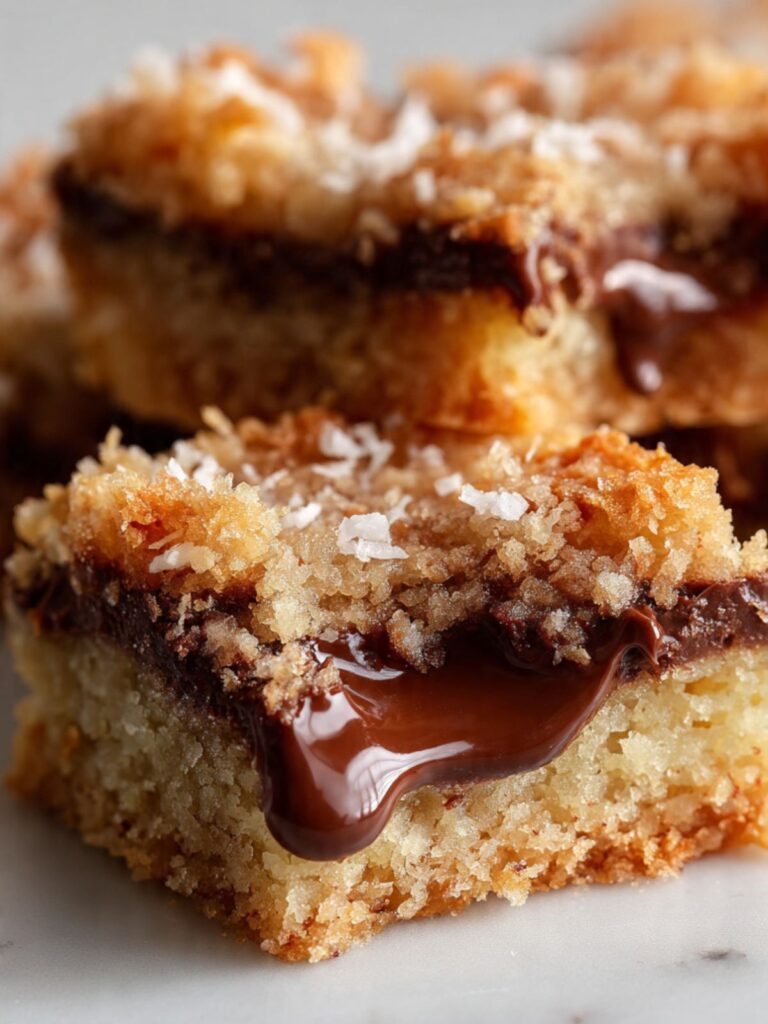
I tested the chocolate layer two ways: ganache versus straight melted chips. Straight melted chips set too firm — the bar became hard to bite through cleanly, and the chocolate layer separated from the toffee underneath when chilled. Ganache — semi-sweet chocolate chips melted with heavy cream at a 2:1 ratio by weight — sets to exactly the fudgy, yielding layer visible in the close-up. It adheres to the toffee below it and stays supple even when the bars are cold.
No mixer required. The shortbread base comes together with melted butter and a bowl. The toffee cooks on the stovetop. The ganache is a microwave melt. This is a multi-layer recipe but it is not technically complicated — the only step that requires real attention is the toffee temperature.
🗒 Luna’s Note: This is the recipe I bring when someone asks me to bring something and I want them to remember it. It photographs well, it transports cleanly, and the four-layer cross-section does the work of impressing people so I do not have to explain it.
| Prep Time | Cook Time | Chill Time | Total Time | Yield | Difficulty |
|---|---|---|---|---|---|
| 20 min | 35 min | 2 hours | 2 hours 55 min | 16 bars (from one 8×8 pan) | Intermediate |
| Calories | Fat | Carbs | Sugar | Protein | Sodium |
|---|---|---|---|---|---|
| ~300 kcal | ~19g | ~31g | ~22g | ~2g | ~70mg |
Macros are approximate and will vary based on ingredient brands and exact serving size.
Ingredients & Tools for Coconut Toffee Bars Recipe
For the Shortbread Base
- 1 cup + 2 tablespoons (150g) all-purpose flour — spooned and leveled, not scooped. King Arthur unbleached all-purpose flour is what I use. Do not substitute self-rising flour or cake flour — both will change the texture of the base.
- ½ cup (115g) unsalted butter, melted and cooled to room temperature — do not use salted butter. The salt in salted butter varies by brand and will throw off the balance of the toffee and chocolate layers above it. Kerrygold unsalted is my preference here.
- ¼ cup (60g) powdered sugar, sifted — not granulated sugar. Powdered sugar produces the sandy, melt-in-your-mouth shortbread texture visible in the cross-section. Granulated sugar will make the base gritty and harder.
- ¼ teaspoon (1.5g) fine sea salt
For the Toffee Layer
- 6 tablespoons (85g) unsalted butter, cut into cubes — must be at room temperature before it goes into the pan. Cold butter causes the toffee to seize and separate. Do not use margarine or a butter substitute — the fat content of real butter is what gives this toffee its structure.
- ¾ cup (165g) packed light brown sugar — light brown sugar, not dark. Dark brown sugar has a higher molasses content and will make the toffee taste bitter rather than clean and caramel-forward. Pack it firmly — loose brown sugar will give you the wrong volume and the layer will be too thin.
- ¼ cup (60g) heavy cream — full-fat heavy whipping cream, minimum 36% fat. Do not use half-and-half or light cream. Lower-fat creams do not emulsify correctly with the hot sugar and butter and the toffee will not set to the firm, cleanly sliceable layer shown in these photos.
- ½ teaspoon (2g) fine sea salt
- ½ teaspoon (2g) pure vanilla extract — Nielsen-Massey pure vanilla extract is what I use. Do not use imitation vanilla in the toffee layer. The toffee cooks at high heat and imitation vanilla turns acrid at temperature.
For the Chocolate Ganache Layer
- 1 cup (170g) semi-sweet chocolate chips — Ghirardelli 60% cacao semi-sweet chips are my standard here. Do not use milk chocolate chips — the ganache will be too sweet and too soft and will not set firmly enough to slice cleanly. Do not use chocolate wafers or baking bars without adjusting the cream ratio — chips are formulated differently and melt more smoothly for ganache at this ratio.
- ⅓ cup (85g) heavy cream — full-fat heavy whipping cream, minimum 36% fat. Same rule as the toffee layer: lower-fat cream will produce a ganache that is too thin and will bleed into the toffee layer below it rather than sitting as a distinct layer.
For the Topping and Finish
- 1½ cups (120g) sweetened shredded coconut — Baker’s Angel Flake sweetened shredded coconut is what I use and what produces the bake color visible in these photos. Do not use unsweetened shredded coconut — the sugar in sweetened coconut is what drives the deep copper toasting at the tips. Unsweetened coconut will toast unevenly and turn dry rather than chewy-crisp. Do not use coconut flakes — the shred size matters for coverage density.
- ¼ cup (10g) large unsweetened coconut flakes — these are the wide, irregular white flakes scattered on top after baking. They are a garnish, not a baked-in ingredient. Do not toast them — they go on after the bars come out of the oven and their whiteness is the visual contrast against the deep copper coconut beneath.
- ½ teaspoon (1.5g) flaked sea salt — Maldon flaked sea salt is the right tool here. Do not use fine sea salt or kosher salt as a finish — neither has the flat, irregular geometry that gives you the visual contrast and the burst of salt you get from a proper flaked finish. This goes on immediately after the bars come out of the oven.
Before You Start
This recipe has four distinct components made in sequence. Read through the full method before you begin. The toffee step moves quickly and requires your full attention — do not start it if you are distracted.
Temperature prep: The butter for the shortbread base is melted — no temperature prep needed there. The butter for the toffee layer must be cut into cubes and brought to room temperature before it goes into the pan. Cold butter dropped into hot caramelizing sugar causes the mixture to seize and the toffee to separate. Set it out at least 30 minutes before you start. In a warm kitchen (above 72°F), 20 minutes is enough — press a cube with your finger. It should give with very little resistance.
Flour measuring: Spoon the flour into your measuring cup using a separate spoon and level it off with a straight edge. Do not scoop the cup directly into the flour bag — scooping packs in 20–30% more flour than the recipe needs and will make the shortbread base dense and dry rather than sandy and short. For guaranteed accuracy, weigh the flour at 150g on a kitchen scale. Gram weight always takes priority over volume in this recipe.
Gram weight priority: For the most consistent results, use a kitchen scale set to grams. The gram weights in this recipe are what I tested with — they are the most reliable way to match my result, especially for the toffee layer where the butter-to-sugar-to-cream ratio matters.
Mixing method: This entire recipe comes together with a large mixing bowl, a medium heavy-bottomed saucepan, and a silicone spatula. No electric mixer needed for any component.
Pan prep: Use a light-colored aluminum 8×8 inch (20×20cm) square baking pan. Line it with parchment paper leaving a 2-inch overhang on all four sides — you will use this overhang to lift the entire slab out of the pan before slicing. Do not skip the overhang. If you skip it, the bars cannot be lifted cleanly and the edges will break when you try to cut them in the pan. Do not use a glass or ceramic pan — both retain heat longer than aluminum, which will overbake the shortbread base before the coconut topping has finished toasting. If you use a dark non-stick pan, reduce the oven temperature by 25°F (15°C) and check the base early.
Oven position: Position your oven rack in the middle of the oven before preheating. Top rack will burn the coconut tips before the base is set. Bottom rack will overbrown the shortbread base.
Candy thermometer: The toffee step requires a candy thermometer or instant-read digital thermometer. The target temperature is 248°F (120°C) — firm ball stage. Do not attempt the toffee step without a thermometer. The visual cues for toffee color are not reliable enough at this temperature range — the difference between 240°F and 248°F looks almost identical in the pan but produces completely different results in the finished bar.
Ingredient freshness:
- Brown sugar hardened in the bag? Microwave it with a damp paper towel draped over the top in 20-second increments until it loosens.
- Chocolate chips showing a white or grey bloom (dusty coating)? Still safe — they will melt fine — but ganache made from bloomed chips may be slightly less glossy than what is shown in these photos.
- Vanilla extract: smell it. If it smells flat or alcoholic without the warm vanilla note, it is old. Replace it.
Necessary Tools
Required — in order of use:
- Kitchen scale — strongly recommended. Gram weights are more accurate than volume for every component in this recipe, particularly the toffee.
- 8×8 inch (20×20cm) light-colored aluminum baking pan — not glass, not dark non-stick, not ceramic.
- Parchment paper — must be cut with a 2-inch overhang on all four sides for lifting.
- Large mixing bowl — for the shortbread base.
- Medium heavy-bottomed saucepan — for the toffee. Thin-bottomed pans create hot spots that cause the sugar to burn unevenly. A 2–3 quart saucepan is the right size.
- Silicone spatula — heat-safe, for stirring the toffee and scraping the ganache.
- Candy thermometer or instant-read digital thermometer — required for the toffee step. A clip-on candy thermometer works best — clip it to the side of the saucepan with the bulb submerged in the liquid but not touching the bottom of the pan.
- Small microwave-safe bowl — for melting the ganache.
- Offset spatula or the back of a spoon — for spreading the ganache evenly over the toffee layer.
- Wire cooling rack — for cooling the pan after baking.
- Sharp chef’s knife — for slicing. A dull knife will drag through the chocolate and toffee layers and ruin the clean edges. Wipe the blade clean between each cut.
Optional:
- Oven thermometer — recommended. Most home ovens run 15–25°F off their displayed temperature. My oven runs 15°F hot and I keep a thermometer in it permanently. If your coconut is toasting faster than the timeline in the method suggests, your oven is running hot.
- Bench scraper — useful for scoring cut lines in the chilled slab before slicing through.
- Ruler — for marking even 2×2 inch cuts before slicing.
How to Make Coconut Toffee Bars
Step 1: A Pale Golden, Compact Shortbread Base Is the Foundation Every Layer Depends On
This recipe uses a one-bowl, no-mixer melt-and-mix method for the shortbread base. No electric equipment needed for any component. Most home ovens run 15–25°F (8–14°C) off their displayed temperature — if you have an oven thermometer, confirm the actual temperature before the pan goes in.
Preheat your oven to 350°F (175°C) with the rack positioned in the middle of the oven. Line your 8×8 inch (20×20cm) light-colored aluminum pan with parchment paper, pressing it into the corners and leaving a 2-inch (5cm) overhang on all four sides. Set it aside.
In a large mixing bowl, whisk together the 150g all-purpose flour, 60g sifted powdered sugar, and 1.5g fine sea salt until evenly combined — about 20 seconds. Pour in the 115g melted, cooled unsalted butter and stir with your silicone spatula until the mixture comes together. The powdered sugar is what gives the base its sandy, melt-in-your-mouth texture — granulated sugar would produce a gritty, harder base that would fight the toffee layer above it. The melted butter (not softened, not creamed) is what keeps this a one-bowl recipe with a dense, short crumb rather than a cakey or aerated texture. It will look dry and crumbly at first. Keep stirring — after about 30 seconds it will pull together into a cohesive mass that holds when you press a piece between your fingers.
Transfer the dough into the lined pan and press it into an even, compact layer using your fingers and then the flat bottom of a straight-sided glass or measuring cup. Press firmly and methodically — move from the center outward, then reinforce each corner individually with the bottom edge of the glass. Thin spots will overbake and crumble when sliced. Even corners are not optional — they are the difference between a clean cut and a ragged one.
Bake at 350°F (175°C) for 18–20 minutes, until the edges have just turned pale golden and the center looks matte and completely dry — not wet, not shiny, not deep golden. The base should look like the pale sandy layer visible at the bottom of the stacked cross-section bars — uniform, compact, with just a faint golden border at the very edges. If the entire base has turned golden, it has gone too far. Do not bake until it is deeply golden all over — it will return to the oven later under the coconut layer and continue to color.
Baker's Warning: If the base looks pale and almost underdone at 18 minutes, do not add more time yet — pull it. An underbaked base firms as it cools and will hold the toffee layer correctly. An overbaked base becomes dry and crumbly, and the shortbread will shear away from the toffee above it when the bars are sliced.
Pull the pan from the oven and set it on a wire cooling rack — do not remove the base from the pan. The base needs 10 minutes to cool before the toffee goes on — a hot base will cause the toffee to thin out and run into the edges rather than sitting as a defined layer above it.
🗒 Luna’s Note: I use the bottom of a straight-sided rocks glass instead of a measuring cup for pressing — the flat base gives me better contact in the corners. The corners matter more than the center.
Step 2: The Toffee Layer Reaches Exactly 248°F — Not 235°F, Not 260°F
While the shortbread base cools on the rack — give it at least 10 minutes — make the toffee. Have your silicone spatula, candy thermometer, and the 60g heavy cream measured and standing by before you turn on the heat. This step moves fast once the sugar reaches temperature and you cannot step away from the pan.
Place the 85g room-temperature cubed unsalted butter and 165g packed light brown sugar together in your medium heavy-bottomed saucepan over medium heat. Stir constantly with the silicone spatula as the butter melts and the sugar dissolves into it — about 3–4 minutes. The light brown sugar (not dark) keeps the toffee flavor clean and caramel-forward — dark brown sugar has a higher molasses content that turns the layer bitter at this cooking temperature. The heavy-bottomed saucepan is not optional — thin-bottomed pans create hot spots that burn the sugar unevenly before the center reaches temperature.
The mixture will look grainy at first, then smooth and glossy as the butter and sugar emulsify. It should look unified and glossy, not separated, with no visible pools of butter floating on top. Do not increase the heat to speed this up — high heat breaks the emulsion and you will see pools of melted butter separating from a grainy sugar mass. If that happens, add 1–2 tablespoons of warm water and stir vigorously over low heat to bring it back.
Once the mixture is smooth and just beginning to bubble, clip your candy thermometer to the side of the pan with the bulb submerged but not touching the bottom. Continue stirring and cooking over medium heat. Watch the thermometer, not the clock. The mixture will bubble vigorously and deepen from pale gold to a rich amber as it climbs.
Baker's Warning: At around 235°F (113°C) the toffee will smell intensely caramel and the color will look finished. It is not finished. A toffee pulled at soft ball stage will feel correct in the pan but will be too soft once cooled — it will ooze from between the layers at room temperature and the bars will not hold a clean cut edge. Hold your nerve and keep cooking until the thermometer reads exactly 248°F (120°C).
At 248°F (120°C), remove the pan from the heat immediately. Pour in the 60g heavy cream in a slow, steady stream while stirring constantly — the mixture will bubble up violently when the cold cream hits the hot sugar. This is expected. Keep stirring until fully incorporated and smooth. Stir in the 2g fine sea salt and 2g pure vanilla extract.
Pour the hot toffee over the par-baked shortbread base immediately — do not let it sit and begin to set in the pan. Use your offset spatula or the back of a spoon to spread it quickly and evenly to all four edges. Work fast — toffee begins to firm within 60–90 seconds of leaving the heat. The finished toffee layer should look exactly like the amber, jewel-toned layer visible in the two-bar stacked close-up photo — clear, even, and fully covering the shortbread base beneath it with no bare patches.
Let the toffee layer cool and set at room temperature for exactly 15 minutes before adding the ganache — the surface needs to be tacky but not hot. A hot toffee surface will thin the ganache and the two layers will merge.
Step 3: The Ganache Pours at the Right Temperature and Sets as a Distinct Layer
Place the 170g semi-sweet chocolate chips and 85g heavy cream together in a small microwave-safe bowl. The 2:1 ratio by weight — double the chocolate to cream — is what gives this ganache the physical state visible in the cross-section photos: firm enough to hold a clean cut edge when cold, soft enough to yield under the tooth rather than shatter or snap. Do not adjust this ratio without understanding that more cream produces a ganache too soft to slice cleanly; less cream produces one that is brittle and separates from the toffee layer.
Microwave on 50% power in 30-second intervals, stirring between each, until the chips are mostly melted — about 60–90 seconds total. Do not microwave on full power. Full power scorches the chocolate at the edges of the bowl before the center has melted, and scorched chocolate cannot be rescued — it turns grainy and seizes. After the last interval, stir slowly and continuously from the center outward until the ganache is completely smooth, glossy, and uniform. If a few small pieces remain unmelted, let the bowl sit undisturbed for 2 minutes — the residual heat will finish them.
The ganache should fall from the spatula in a slow, thick ribbon — not a thin stream, not a solid mass. If it is running thin and watery, let it cool at room temperature for 3–4 minutes. If it has thickened too much to pour evenly, microwave for 10 seconds on 50% power and stir again.
Pour the ganache over the set toffee layer and spread with the offset spatula in smooth, even strokes to all four edges. The ganache layer should be approximately 6–8mm thick — even across the full surface. Tap the pan gently on the counter twice to level any ridges left by the spatula.
Baker's Warning: Do not rush the ganache onto a hot toffee layer — if the toffee surface is still warm when the ganache goes on, the two layers will blend at the boundary and the distinct dark chocolate band visible in the stacked cross-section photos will disappear. The 15-minute cooling window after the toffee is not optional.
The ganache is now ready for the coconut topping — scatter it on immediately while the ganache is still wet so the coconut adheres without pressing.
Step 4: Deep Copper Coconut Tips and Flaked Salt — Baked In, Finished Right
Immediately — while the ganache is still wet — scatter the 120g sweetened shredded coconut evenly across the entire surface. Use your fingers to distribute it in an even layer and press very lightly into the ganache so it adheres. Do not press hard. The coconut should sit proud on the surface, not be pushed down into the ganache layer. The sweetened coconut (not unsweetened — the added sugar drives the toasting color) needs to cover the full surface with no bare ganache patches visible. Any bare patch will look raw and unfinished after baking.
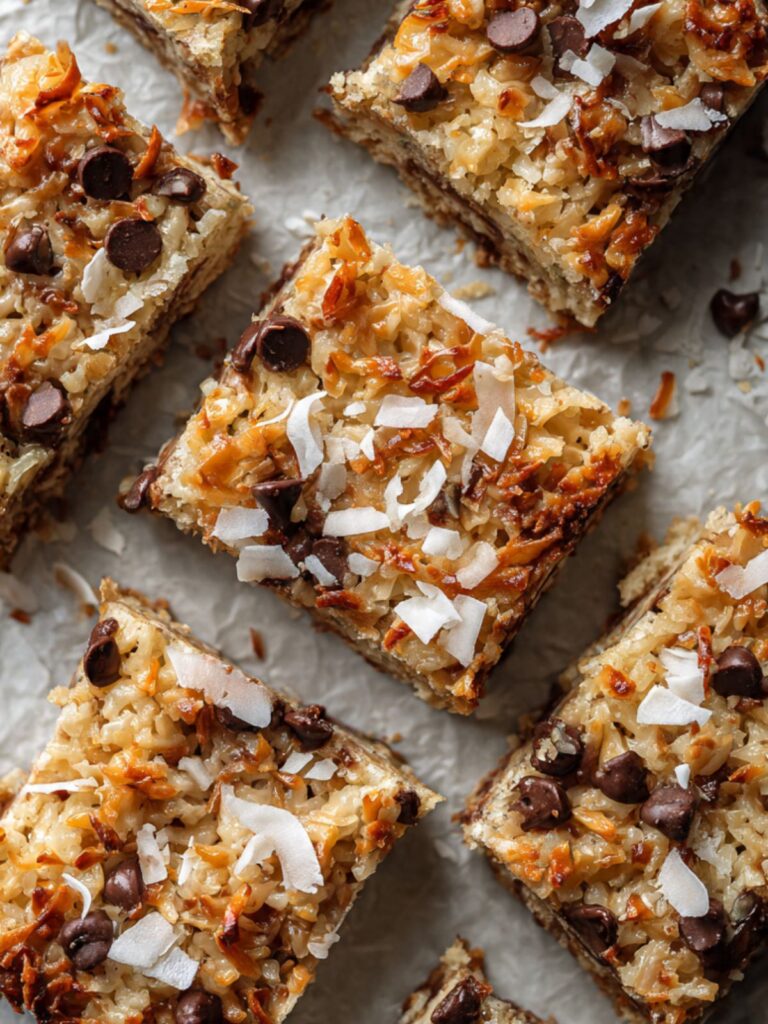
Transfer the pan back into the oven at 350°F (175°C) and bake for 14–17 minutes. Rotate the pan 180 degrees at the 8-minute mark for even toasting. You are looking for the tips of the shreds to turn deep copper — the burnt-orange color visible across the top of these bars — while the base of the coconut layer remains golden. The correct doneness looks exactly like the overhead batch photo — a graduated color across each shred from golden at the root to deep copper at the tip, with the overall surface reading warm amber rather than uniformly brown. The edges of the coconut will color before the center — this is expected. Rotate at the 8-minute mark to prevent one side from running ahead.
Baker's Warning: The coconut moves from deep copper to genuinely burnt in under 2 minutes at 350°F (175°C). Do not leave the oven in the final 3 minutes. The moment the tips hit deep copper — not dark brown, not uniformly dark — pull the pan. Uniformly dark coconut is overbaked, will be bitter, and cannot be fixed.
Pull the pan from the oven. While the bars are still hot, scatter the 1.5g Maldon flaked sea salt evenly across the coconut surface. Press each flake very lightly with a fingertip — just enough contact so it does not slide off when the bars are cut. Do not press hard or the flakes will dissolve into the surface and the visual contrast is lost.
Set the pan on a wire cooling rack and cool at room temperature for 45 minutes. Do not transfer to the refrigerator while the pan is still warm — the rapid temperature change causes the set chocolate layer to contract and crack across the surface. After 45 minutes at room temperature, transfer to the refrigerator and chill for a minimum of 2 hours — 3 hours is the number I would not go below for clean slicing. All three filling components — the butter fat in the shortbread base, the toffee, and the ganache — must be fully cold and set before a knife can move through them without smearing or dragging.
After chilling, scatter the 10g large white unsweetened coconut flakes across the surface as the final garnish — these go on after chilling, not before. They are fragile and crush under refrigerator condensation if added earlier. Their whiteness against the deep copper toasted coconut beneath is the visual contrast that gives these bars their finished look.
To slice: lift the entire slab from the pan using the parchment overhang and set it on a cutting board. Score the surface along your cut lines first — 4 cuts in one direction, 4 in the other for 16 bars at 2×2 inches (5×5cm). Then press the knife straight down through all four layers in one clean motion per cut. Wipe the blade clean with a damp cloth between every single cut.
🗒 Luna’s Note: I refrigerate my chef’s knife blade for 5 minutes before slicing. A cold blade moves through the set chocolate and toffee layers cleanly in a way a room-temperature blade does not. 5 minutes, worth it every time.
The Science Behind Coconut Toffee Bars
Firm Ball Stage — Why 248°F Is the Only Correct Temperature for This Toffee
I kept pulling my first batches of toffee too early because the color looked right at 235°F and the smell told me it was done. Both of those signals were wrong. What I did not understand yet was that the temperature of a sugar syrup determines its physical state after cooling — and the difference between 235°F and 248°F is the difference between a layer that oozes at room temperature and one that holds a clean edge under a knife.
Here is what is happening inside the pan: as the sugar-butter-cream mixture heats, water evaporates out of the system. The higher the temperature climbs, the more water has left, and the more concentrated — and structurally firm — the cooled result will be. At 235°F (soft ball stage), enough water remains that the cooled toffee behaves like a soft caramel — pliable, slightly sticky, incapable of holding a vertical edge. At 248°F (firm ball stage), the water concentration has dropped to the point where the cooled toffee sets to a solid, stable layer that can be cut cleanly and will not deform at room temperature. The amber color visible in the cross-section of these bars — that clear, jewel-toned layer between the shortbread base and the dark ganache above — is the visual evidence of a correctly cooked firm ball toffee. You cannot get that layer by color or smell alone. The thermometer is the only reliable instrument for this step.
This is also why the salted caramel chocolate chip cookie bars on this site use a different temperature target — that recipe uses a softer caramel that stays fluid and chewy at room temperature, which requires pulling the sugar syrup earlier, at the soft ball stage. Same ingredients, different temperature, completely different physical result.
The 2:1 Ganache Ratio — Why It Sets Firm Enough to Slice But Not Hard Enough to Shatter
Ganache ratio is not arbitrary. The proportion of chocolate to cream determines the physical state of the ganache at room temperature — and for a bar that needs to be lifted, sliced, and stacked, the physical state of the ganache layer matters as much as the flavor.
At a 1:1 ratio by weight (equal parts chocolate and cream), ganache stays soft and pourable at room temperature — it is the consistency used for cake glazes and truffle centers. Too soft for a sliceable bar layer. At a 3:1 ratio (three parts chocolate to one part cream), ganache sets very firm and brittle when cold — it snaps rather than yields, and the layer separates from the toffee below it when the bars are cut. The 2:1 ratio used in this recipe — 170g chocolate to 85g cream — produces a ganache that sets to a fudgy, slightly yielding layer when chilled: firm enough to hold a clean cut edge, soft enough to give under the tooth without cracking. This is the state visible in the stacked bar photos — the chocolate layer holds its shape at the cut edge but does not shatter or separate from the toffee beneath it.
The semi-sweet chocolate percentage matters here too. Milk chocolate contains more sugar and less cocoa butter, which means it sets softer at the same cream ratio. Dark chocolate above 70% cacao sets firmer. At 60% semi-sweet — the Ghirardelli chips used in this recipe — the 2:1 ratio lands exactly in the fudgy, sliceable zone. If you use a different chocolate percentage, the ratio needs to adjust with it.
Sugar Content and Coconut Toasting — Why Sweetened Coconut Browns Faster and More Evenly
The deep copper color on the coconut tips in these photos is not just a function of oven time. It is a function of sugar content — and it is the reason the recipe specifies sweetened shredded coconut rather than unsweetened.
Sweetened shredded coconut contains added sugar — typically sucrose — distributed throughout the shreds. When it hits oven heat, two reactions happen simultaneously: the Maillard reaction between the amino acids in the coconut and the reducing sugars, and caramelization of the sucrose itself. Both reactions accelerate in the presence of more sugar, which is why sweetened coconut browns faster, more deeply, and more evenly than unsweetened coconut at the same oven temperature and time. The result is the layered color visible across the topping — golden at the base of each shred, deepening to copper and burnt orange at the exposed tips where the sugar concentration and heat exposure are highest.
Unsweetened coconut contains no added sugar. The Maillard reaction still occurs, but without the accelerant of the added sucrose, the browning is slower, patchier, and never reaches the deep copper color visible here without risking burning the individual shreds. If you use unsweetened coconut in this recipe, the topping will look pale and uneven at the same bake time — and extending the bake time to compensate will dry out the shreds rather than toast them. The sweetened version stays chewy beneath the crisp surface because the sugar retains moisture even as the exterior caramelizes.
🗒 Luna’s Note: I grew up watching my grandmother make pitha — Bengali rice cakes — where the surface color from the tawa told you everything about the heat and the sugar content of the batter underneath. The logic is identical here. The color of the coconut tips is a direct read of what is happening at the sugar level inside the shred. Once you understand that, you stop watching the clock and start watching the color.
Coconut Toffee Bars Troubleshooting & Pro-Tips
Common Mistakes
1. The Toffee Looks Greasy and Separated — or Sets Grainy Instead of Smooth
Symptom: The toffee looks greasy and separated in the pan — pools of melted butter floating on top of a grainy sugar mass. After cooling, the toffee layer is either too soft and sticky or grainy and crystallized rather than smooth and amber.
Cause: Salted butter, margarine, or a butter substitute was used in the toffee. Margarine and butter substitutes have a different fat composition and water content than unsalted dairy butter — they do not emulsify correctly with the hot sugar syrup and the toffee breaks. Salted butter introduces an inconsistent sodium level that can interfere with the crystallization behavior of the sugar.
Fix: If the toffee has separated and looks greasy in the pan, add 1–2 tablespoons of warm water and stir vigorously over low heat — the added liquid can sometimes bring a broken toffee back together. If it does not come back within 2 minutes of stirring, discard it and start the toffee step again. The shortbread base can wait — it holds well at room temperature for up to 2 hours.
Prevention: Use unsalted dairy butter only, cut into cubes and brought fully to room temperature before it goes into the pan. Cold butter is the second most common cause of a broken toffee after wrong butter type.
2. The Base Is Darker Than Shown and the Bars Won’t Lift Cleanly
Symptom: The bars stick to the pan. The edges crack and crumble when you try to lift or cut them. The shortbread base is darker than shown — almost brown rather than pale golden — and the coconut topping has overbaked.
Cause: A glass, ceramic, or dark non-stick pan was used without adjustment. Glass and ceramic retain heat longer than aluminum and continue cooking the base after the pan comes out of the oven — the shortbread overbakes underneath while the coconut topping looks correct on top. Dark non-stick pans absorb more radiant heat from the oven floor and overbrown the base. A pan lined without sufficient parchment overhang means the slab cannot be lifted cleanly.
Fix: If the base is darker than shown but not burnt, the flavor will be fine — the caramelization adds a slight butterscotch note that works with the toffee layer. Serve them as-is. If the base is genuinely burnt on the bottom, there is no fix — the bitterness will come through every layer above it. Next batch: light-colored aluminum pan, middle rack, correct parchment overhang.
Prevention: Use a light-colored aluminum 8×8 inch pan lined with parchment paper cut with a 2-inch overhang on all four sides. If you only have a glass pan, reduce the oven temperature by 25°F (15°C) and check the base at the 15-minute mark of the first bake.
3. The Toffee Layer Oozes at Room Temperature and the Bars Won’t Hold Their Shape
Symptom: After chilling, the toffee layer is soft, sticky, and deforms when you press it. When the bars are sliced, the toffee squeezes out from between the shortbread and chocolate layers rather than holding a clean vertical edge. At room temperature the bars feel unstable.
Cause: The toffee was pulled before it reached 248°F (120°C). It cooked only to soft ball stage (235°F) or below, leaving too much residual water in the sugar syrup. The cooled toffee does not have enough structural rigidity to hold its shape as a sliceable layer.
Fix: There is no fix once the toffee has been poured and baked over. The bars are still completely edible — serve them cold, straight from the refrigerator, where the chill firms the toffee enough to hold. Do not leave them at room temperature for more than 20 minutes or they will soften and lose their shape. For the next batch, trust the thermometer over the color and smell.
Prevention: Clip a candy thermometer to the side of the pan before the toffee starts bubbling and do not pour until the display reads exactly 248°F (120°C). If you only have an instant-read thermometer, dip it into the center of the liquid every 30 seconds as the mixture approaches temperature.
4. The Chocolate and Toffee Layers Have Merged — No Visible Distinction in the Cross-Section
Symptom: After chilling, there is no visible distinction between the toffee layer and the chocolate layer in the cross-section. The two layers have merged into a single dark, muddy layer rather than two distinct bands of color and texture.
Cause: The ganache was too warm and fluid when poured — either the cream ratio was off, or the ganache was not given the brief cooling window before it went onto the toffee. A very warm ganache has low viscosity and flows into the still-tacky toffee surface below it rather than sitting on top of it as a distinct layer.
Fix: If the ganache has already been poured and has merged with the toffee, proceed with the coconut topping and bake as directed. The flavor will be identical — the visual distinction between layers is lost but the taste is not. Refrigerate for the full 3 hours minimum. For the next batch, cool the ganache to room temperature — it should fall in a slow, thick ribbon from the spatula — before pouring.
Prevention: After making the ganache, let it cool at room temperature for 3–5 minutes before pouring. Test it by lifting the spatula — it should fall slowly and thickly, not run off in a thin stream. If it is still too fluid, wait another 2 minutes and test again.
5. The Coconut Topping Is Dark Brown All Over and Tastes Bitter
Symptom: The coconut topping is uniformly dark brown across the entire surface rather than the graduated copper-at-tips, golden-at-base color visible in these photos. The shreds taste bitter and dry rather than chewy-crisp with a caramelized sweetness.
Cause: The bars were left in the oven past the correct pull point, or the oven was running hot. The sugar in sweetened coconut accelerates browning rapidly — the window between deep copper and burnt is narrow at 350°F.
Fix: An overbaked coconut topping cannot be reversed, but the bars are not necessarily unsalvageable. The bitterness lives in the very tips of the shreds — if you can scrape the darkest, most burnt shreds off the surface with the flat side of a knife while the bars are still warm, the layer below will be less bitter. If the bitterness is severe throughout, crush the bars and use them as a crumble topping over vanilla ice cream — the cold and cream temper the bitterness.
Prevention: Rotate the pan at the 8-minute mark and position yourself at the oven in the final 3 minutes of baking. Pull the moment the tips hit deep copper. Use an oven thermometer — if your coconut is toasting faster than the 14–17 minute window suggests, your oven is running hot. Reduce by 15–25°F and retest.
6. The Bars Fall Apart When the Knife Goes Through — Layers Separate and Edges Crumble
Symptom: When the knife comes down, the shortbread base crumbles away from the toffee layer above it. The cut edges are ragged rather than clean. The bars fall apart when lifted.
Cause: The bars were not chilled long enough before slicing, or the knife was dragged rather than pressed straight down. Warm toffee and ganache layers are adhesive — they grip the coconut above and drag against the shortbread below when a blade moves horizontally through them. The shortbread base, which has no adhesive properties of its own, shears off under that lateral force.
Fix: Press the crumbled pieces back together gently and refrigerate for another hour. Cold fats are more forgiving — the toffee and ganache firm up enough that re-slicing a chilled bar will sometimes produce a cleaner edge the second time. If the bars are too far gone to reassemble, press the pieces into ramekins, add a scoop of vanilla ice cream, and serve warm — they are excellent this way.
Prevention: Chill for a minimum of 2 hours — 3 hours is the number I would not go below for clean results. Use a cold, sharp knife. Score the surface first, then press straight down in one clean motion. Wipe the blade between every cut.
7. Humidity and altitude adjustments
High humidity (above 60% relative humidity): Sweetened coconut absorbs ambient moisture and can feel sticky or clumped before baking — this is normal and does not affect the baked result. The shortbread base may take 1–2 minutes longer to look set in humid conditions. After baking, store the bars in a lidded hard-sided container rather than loosely covered — exposed coconut absorbs humidity quickly and loses its crisp texture within a few hours in a humid kitchen.
High altitude (above 3,500 feet / 1,067 meters): The toffee step is the most affected. At high altitude, liquids boil at lower temperatures, which means the temperature reading on your thermometer does not correspond to the same sugar concentration it would at sea level. Add approximately 2°F for every 1,000 feet above sea level to your target temperature — at 5,000 feet, cook the toffee to approximately 253°F rather than 248°F to achieve the same firm ball result. The shortbread base may bake slightly faster — check it at the 15-minute mark rather than 18.
Expert Pro-Tips
1. Press the shortbread base with a straight-sided glass for perfect corner contact. The flat bottom of a straight-sided glass — a rocks glass or a short tumbler — gives better contact in the corners of the pan than a round measuring cup. Even corners are essential for clean slicing. A thick corner produces a ragged cut every time. Press from the center outward, then reinforce each corner individually with the bottom edge of the glass.
2. Score the surface before slicing all the way through. After chilling and removing the slab from the pan, use a sharp knife to score the top of the coconut layer along your cut lines before pressing all the way through. Scoring gives the blade a channel to follow and prevents the coconut from dragging and shifting as you cut. One firm score through the coconut, then one clean press through all four layers beneath it.
3. Add the white coconut flake garnish after chilling, not before baking. The large white coconut flakes scattered across the top are a post-chill garnish, not a baked ingredient. They go on immediately before serving or plating. Added before baking, they toast to the same copper as the shredded coconut beneath and lose their visual contrast — the whiteness is the point. Added after chilling but before slicing, they can be pressed gently into the coconut surface so they hold during cutting.
4. For the cleanest possible cut edges, use a cold blade. Refrigerate your chef’s knife for 5 minutes before slicing. A cold blade moves through the set chocolate and toffee layers without dragging or smearing in the way a room-temperature blade does. Combined with wiping the blade between every cut, this produces the sharp, layered edge visible in the stacked bar photos.
5. The bars improve on day two. The toffee layer firms slightly overnight in the refrigerator as the residual moisture continues to leave the sugar system. The ganache layer also develops a denser, fudgier texture after 24 hours. On day one the bars are excellent. On day two they are better — the layers are more defined, the toffee is cleaner, and the shortbread base has had time to absorb the faint toffee flavor from the layer above it. I would not serve these the same day I make them if I have the option.
How to Store Coconut Toffee Bars
Room Temperature
These bars can be stored at room temperature for up to 2 days, but only under the right conditions. The toffee layer is the limiting factor — it is stable when cold but begins to soften and become tacky in a warm room. If your kitchen runs above 72°F, room temperature storage is not recommended. Refrigerate instead.
Store the bars in a lidded hard-sided container — a glass or plastic container with a snap-fit lid. Do not use zip-lock bags. Bags compress the coconut topping and flatten the texture of the shreds. Do not use plastic wrap directly on the surface — it pulls the coconut flakes and the flaked sea salt off when you remove it.
Layer the bars in a single layer if possible. If you need to stack them, place a sheet of unbleached parchment paper between layers. The coconut topping is fragile once cut — stacking without parchment causes the shreds from the bottom of one bar to embed into the chocolate layer of the bar below it.
At room temperature, the coconut topping will begin to soften after 24 hours as it absorbs ambient moisture from the air. The bars are still good — the flavor does not change — but the texture of the topping shifts from chewy-crisp to simply chewy. If crisp coconut topping matters to you, refrigerate and bring individual bars to room temperature for 10 minutes before serving rather than storing the full batch at room temperature.
Refrigerator
Refrigerator storage is the recommended method for these bars. The cold firms the toffee layer, keeps the ganache at its best fudgy-but-stable texture, and extends the life of the coconut topping.
Store in a lidded hard-sided container with parchment between layers, as above. Do not store uncovered in the refrigerator — the coconut topping absorbs refrigerator odors within 24 hours and the flavor shifts noticeably.
Refrigerated bars keep well for up to 5 days. The toffee and ganache layers actually improve between day 1 and day 3 as the layers settle and the flavors deepen. By day 4 and 5 the shortbread base begins to soften slightly from contact with the toffee moisture above it — still good, but the texture of the base is no longer as sandy and distinct as it was on day 1 or 2.
Before serving refrigerated bars, set them on the counter for 10 minutes. Straight from the refrigerator, the ganache layer is very firm and the toffee is almost brittle — the texture is correct but the flavor does not bloom at refrigerator temperature the way it does at room temperature. 10 minutes is enough. Do not microwave to speed this up — microwave heat melts the ganache and softens the toffee unevenly and the layered texture is lost.
🗒 Luna’s Note: I eat these cold, straight from the refrigerator, more often than I serve them at room temperature. The toffee has a different quality when it is firm and cold — almost like a hard caramel — and the ganache is dense and fudgy in a way that reads more like a chocolate bar than a baked good. Both temperatures are correct. The cold version is my personal preference and I am not going to apologize for it.
Freezer — Baked Bars
These bars freeze well. The shortbread base, toffee layer, and ganache all hold their structure through a freeze-thaw cycle without significant texture loss. The coconut topping softens slightly after freezing but retains its flavor.
Before freezing: Add the white coconut flake garnish and flaked sea salt after thawing, not before freezing. Both are fragile and do not survive the freeze-thaw cycle with their texture intact. Freeze the bars without the garnish and finish them fresh after thawing.
How to freeze: Slice the bars first, then wrap each bar individually in a single layer of plastic wrap, pressing the wrap close to all surfaces to exclude air. Place the individually wrapped bars in a zip-lock freezer bag or a lidded hard-sided freezer-safe container. Label with the date. Freeze for up to 2 months.
How to thaw: Transfer the wrapped bars from the freezer to the refrigerator and thaw overnight — at least 8 hours. Do not thaw at room temperature. Room temperature thawing causes condensation to form on the surface of the chocolate layer and the toffee can weep moisture as it warms too quickly. Refrigerator thawing is slow and controlled — the layers come back to their correct texture without condensation or moisture separation.
After thawing, add the white coconut flake garnish and a fresh pinch of flaked sea salt before serving.
Make-ahead note: These bars are an excellent make-ahead dessert. The full slab — baked, layered, and chilled but not yet sliced — can be wrapped tightly in plastic wrap and refrigerated for up to 3 days before slicing and serving. The layers continue to settle and firm during this time and the bars are actually easier to slice cleanly after 48–72 hours in the refrigerator than they are after the minimum 2-hour chill.
Serving Suggestion
Serve these bars at room temperature or with a 10-minute rest from the refrigerator — cold enough that the layers hold their shape but warm enough that the toffee is pliable and the ganache has softened to its fudgy best.
My preference is alongside a small cup of strong black coffee or an Americano. The bitterness of the coffee cuts directly through the sweetness of the toffee layer and resets the palate between bites — the bars are rich, and the coffee makes it possible to eat two without the sweetness becoming overwhelming. A glass of cold whole milk is the other pairing that works without exception.
These are the bars I make when someone asks for something to bring to a gathering and I want it to travel well, look impressive on a plate, and require no explanation. They stack cleanly, they hold at room temperature for 2 hours without losing their structure, and they look exactly as layered and intentional on a serving platter as they do in these photos. They are not the recipe for a casual Tuesday. They are the recipe for when the occasion asks for something that looks like you spent more time on it than you did.
Day two is when these bars are at their best. The toffee layer firms and clarifies overnight, the ganache densifies, and the shortbread base takes on a faint toffee flavor from the layer above it that it does not have on the day of baking. If you are making these for an event, make them the day before. The texture and flavor on day two is not a consolation prize — it is the intended result.
These bars are not good for warm outdoor events in summer. The toffee layer softens above 72°F and the ganache will begin to lose its shape above 75°F. For outdoor serving in warm weather, keep them refrigerated until the last possible moment and serve in small batches rather than leaving the full platter out.
Frequently Asked Questions About Coconut Toffee Bars
What are coconut toffee bars made of?
Coconut toffee bars are built from four layered components: a pressed shortbread base of flour, melted butter, powdered sugar, and salt; a brown sugar toffee cooked with butter and heavy cream to 248°F (firm ball stage); a semi-sweet chocolate ganache at a 2:1 chocolate-to-cream ratio; and a toasted sweetened shredded coconut top baked directly onto the wet ganache. Finished with flaked sea salt and white coconut flake garnish. Every layer is structural — none are optional.
Can you freeze coconut toffee bars?
Yes — these bars freeze well for up to 2 months. The key is to freeze them without the white coconut flake garnish and the flaked sea salt finish, both of which lose their texture through a freeze-thaw cycle. Wrap each bar individually in plastic wrap, place in a zip-lock freezer bag, and freeze. Thaw overnight in the refrigerator — not at room temperature, which causes condensation on the chocolate surface and can make the toffee weep moisture as it warms too quickly. Add the garnish and salt fresh after thawing. The toffee and ganache layers both hold their structure through freezing without significant texture loss because the high fat content in both components resists ice crystal formation better than water-based fillings do.
How do you keep coconut toffee bars from falling apart?
Three things keep these bars intact: correct toffee temperature, sufficient chilling time, and a cold clean knife. The toffee must reach exactly 248°F (firm ball stage) — a toffee pulled too early at soft ball stage will not have enough structural rigidity to hold the layers together at room temperature. The bars must chill for a minimum of 2 hours — preferably 3 — before slicing, because all three filling layers (butter in the shortbread, toffee, ganache) need to be fully cold and set before a knife can move through them cleanly. And the knife must be cold, sharp, and wiped between every cut — a warm or dull blade drags laterally through the toffee and ganache and shears the shortbread base away rather than pressing cleanly through all four layers. If your bars are falling apart, one of these three variables is the cause.
Can I use unsweetened coconut in toffee bars?
You can, but the result will be visually and texturally different from what is shown in these photos. Unsweetened coconut contains no added sucrose, which means the Maillard reaction and caramelization that produce the deep copper toasting on the tips of the shreds happen more slowly and less evenly. At the same oven temperature and time, unsweetened coconut will look pale and uneven — extending the bake time to compensate dries the shreds out rather than toasting them, because there is no sugar present to retain moisture as the exterior caramelizes. If you use unsweetened coconut, increase the bake time by 3–5 minutes and watch closely. The topping will be less chewy, less deeply colored, and less visually dramatic than the sweetened version — but the flavor will be less sweet, which some people prefer alongside the toffee layer.
How long do coconut toffee bars last?
At room temperature in a lidded hard-sided container, 2 days — provided your kitchen stays below 72°F. Above that temperature the toffee layer begins to soften and the bars lose their structural integrity. In the refrigerator in a lidded container with parchment between layers, up to 5 days — the layers actually improve between day 1 and day 3 as they settle and firm. In the freezer, individually wrapped, up to 2 months. The limiting factor at every storage condition is the coconut topping — it absorbs moisture from the air faster than any other component and shifts from chewy-crisp to simply soft within 24–48 hours at room temperature. Refrigerator storage preserves the topping texture significantly longer than room temperature storage does.
For the shortbread cookies recipe on this site, the storage rules are simpler because there are no layered fillings to account for — bars with wet layers always have a shorter window than unfilled shortbread.
What is the difference between toffee and caramel in baking?
Both are cooked sugar syrups, but temperature determines the result. Caramel is pulled at soft ball stage (235°F / 113°C) and stays soft and chewy. Toffee is cooked higher — to firm ball or beyond — driving off more water, which is what makes the cooled result structurally firm rather than sticky. In this recipe the toffee cooks to 248°F (firm ball stage) — firm enough to slice cleanly at room temperature, pliable enough not to shatter. The brown sugar, butter, and vanilla give it a toffee flavor profile rather than the cleaner, more neutral taste of a white sugar caramel.
Can I make coconut toffee bars ahead of time?
Yes — and I would actively recommend it. The full slab can be baked, layered, and chilled without slicing for up to 3 days in the refrigerator before serving. The layers settle and firm significantly over 48–72 hours — the toffee clarifies and becomes more structurally defined, the ganache densifies, and the shortbread base absorbs a faint toffee flavor from the layer above it that it does not have on the day of baking. The bars are easier to slice cleanly after 48 hours than they are after the minimum 2-hour chill. Add the white coconut flake garnish and the final scatter of flaked sea salt after slicing, immediately before serving — not during the make-ahead window. For freezing ahead, see the storage section above.
Can I double this coconut toffee bars recipe?
Yes — double all ingredients and bake in a 9×13 inch (23×33cm) light-colored aluminum pan. This recipe contains no leavening, so the standard leavening non-linear scaling note does not apply here. The toffee temperature target stays at 248°F (120°C) regardless of batch size — temperature does not scale. The first bake time increases by 3–5 minutes in the larger pan; the coconut bake time increases by 2–3 minutes. Watch the coconut visually, not by time. The chilling time remains the same — minimum 2 hours, 3 hours preferred. Do not attempt to bake a doubled batch in two 8×8 pans simultaneously unless your oven can maintain temperature with two pans — a crowded oven drops temperature and the coconut will toast unevenly.
More Bar Recipes You’ll Love
If you made these coconut toffee bars and want to explore more layered bar recipes from this site, these three are the ones I would point you to next.
Nestlé Toll House Cookie Bars — The classic pressed cookie bar with no layering complexity. If the toffee step in this recipe felt like too much for a weeknight, this is the bar to make instead. One bowl, one layer, thirty minutes.
Oatmeal Chocolate Chip Bars — A chewy oat-based bar with semi-sweet chocolate chips folded through. The texture is completely different from this recipe — chewy and soft where these are firm and layered — but the chocolate and caramel flavor notes overlap enough that readers who like one tend to like the other.

Fudgy Coconut Toffee Bars Recipe
Ingredients
Equipment
Method
- Preheat oven to 350°F (175°C) with the rack in the middle position and line an 8×8 inch (20×20cm) light-colored aluminum baking pan with parchment paper leaving a 2-inch overhang on all four sides.
- Whisk together 150g all-purpose flour, 60g sifted powdered sugar, and 1.5g fine sea salt in a large bowl until evenly combined, then pour in 115g melted cooled unsalted butter and stir with a silicone spatula until the mixture comes together into a soft, sandy dough.
- Transfer the dough to the lined pan and press into an even, compact layer using your fingers then the flat bottom of a measuring cup or straight-sided glass, working from the center outward and reinforcing the corners.
- Bake the shortbread base for 18–20 minutes until the edges are pale golden and the center looks matte and dry, then remove from the oven and set on a wire rack — do not remove from the pan.
- While the base cools for 10 minutes, make the toffee: place 85g room-temperature cubed unsalted butter and 165g packed light brown sugar in a medium heavy-bottomed saucepan over medium heat and stir constantly with a silicone spatula until the butter melts and the mixture is smooth and glossy — about 3–4 minutes.
- Clip a candy thermometer to the side of the pan and continue cooking and stirring over medium heat until the mixture reaches exactly 248°F (120°C) — firm ball stage — watching the thermometer closely as the toffee deepens from pale gold to rich amber.
- Remove the pan from the heat immediately at 248°F and pour in 60g heavy cream in a slow steady stream while stirring constantly — the mixture will bubble vigorously, which is normal — then stir in 2g fine sea salt and 2g pure vanilla extract until smooth.
- Pour the hot toffee immediately over the par-baked shortbread base and spread quickly and evenly to all four edges with an offset spatula, then allow the toffee layer to cool and set at room temperature for 15 minutes.
- Place 170g semi-sweet chocolate chips and 85g heavy cream in a small microwave-safe bowl and microwave on 50% power in 30-second intervals, stirring between each, until mostly melted — about 60–90 seconds total — then stir slowly from the center outward until the ganache is completely smooth and glossy.
- Allow the ganache to cool at room temperature for 3–5 minutes until it falls in a slow thick ribbon from the spatula, then pour it over the set toffee layer and spread with an offset spatula in smooth even strokes to all four edges, tapping the pan gently on the counter twice to level.
- Immediately scatter 120g sweetened shredded coconut evenly across the wet ganache surface and press very lightly with your fingers so it adheres — the coconut should sit proud on the surface, not be pushed into the ganache layer below.
- Bake for 14–17 minutes, rotating the pan 180 degrees at the 8-minute mark, until the coconut tips are deep copper and the base of the coconut layer is golden — watch closely in the final 3 minutes as the coconut can go from correct to burnt quickly.
- Remove from the oven and immediately scatter 1.5g flaked sea salt evenly across the coconut surface, pressing each flake very lightly with a fingertip to make contact with the coconut beneath.
- Cool on a wire rack at room temperature for 45 minutes, then transfer to the refrigerator and chill for a minimum of 2 hours — 3 hours is better, overnight is best — until all layers are fully cold and set.
- After chilling, scatter 10g large white coconut flakes across the surface as the final garnish, then lift the slab from the pan using the parchment overhang, set on a cutting board, score the surface along cut lines, and slice into 16 even 2×2 inch (5×5cm) squares with a cold sharp knife wiped clean between every cut.