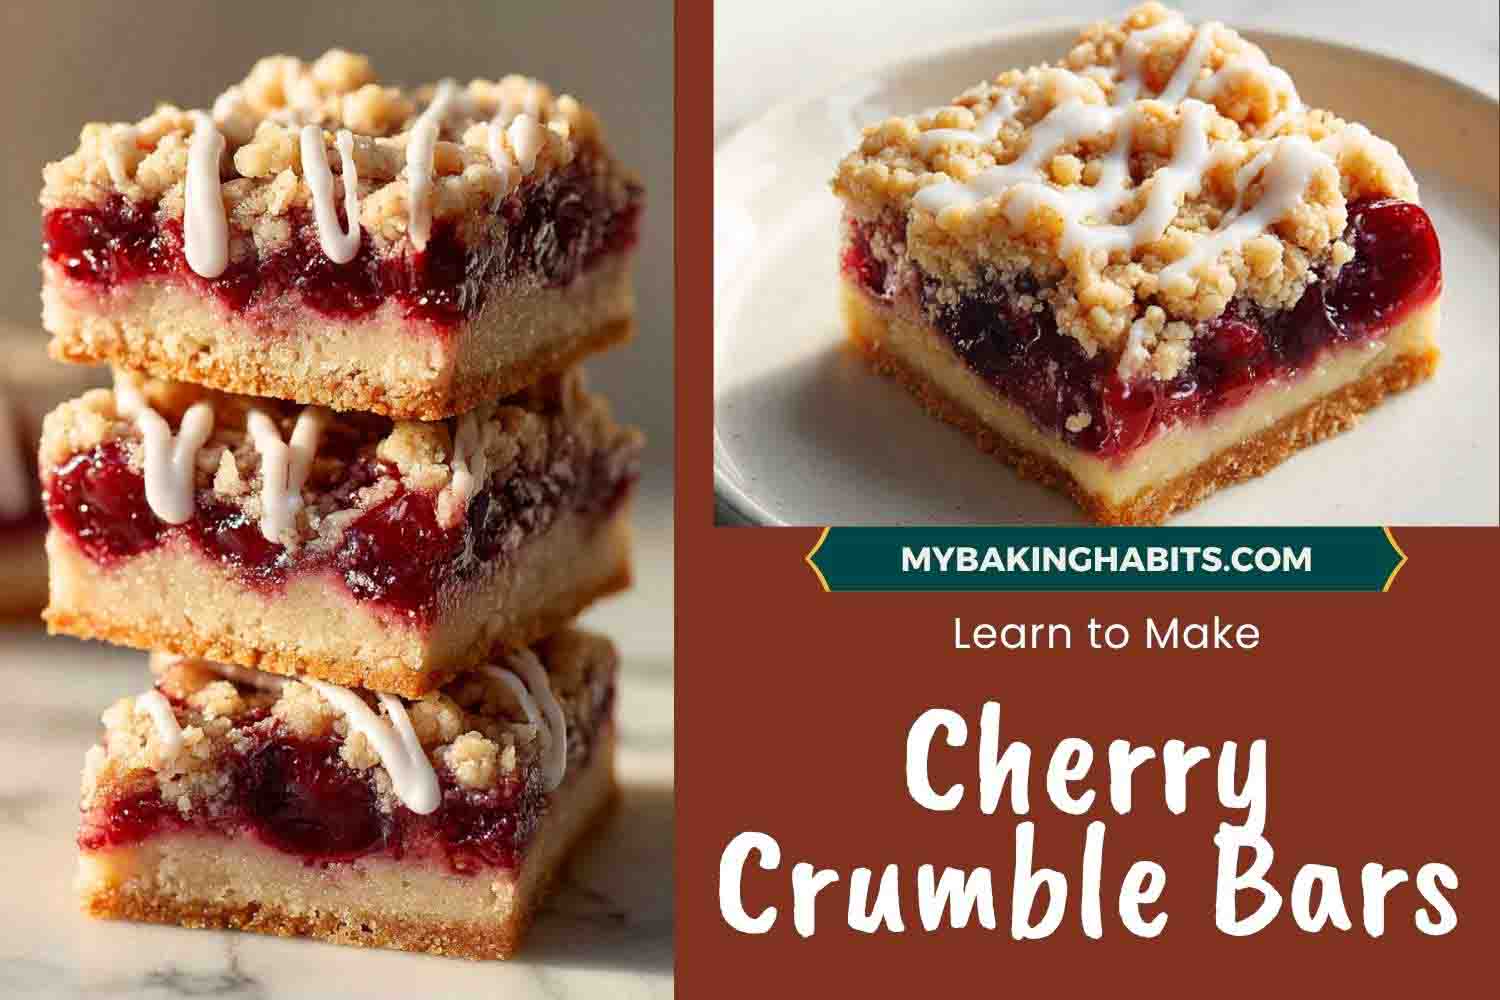
Thick Cherry Crumble Bars Recipe
The first time I cut into these, the filling ran. The bars were technically baked — the crumble was golden, the bottom crust had pulled from the edges, and everything smelled right. The problem was I cut them at 20 minutes after pulling the pan from the oven. The cornstarch-thickened cherry filling had not finished gelling. I watched it collapse through the cut like warm jam and understood immediately that I had made the same mistake people make with brownies: trusting the surface instead of waiting.
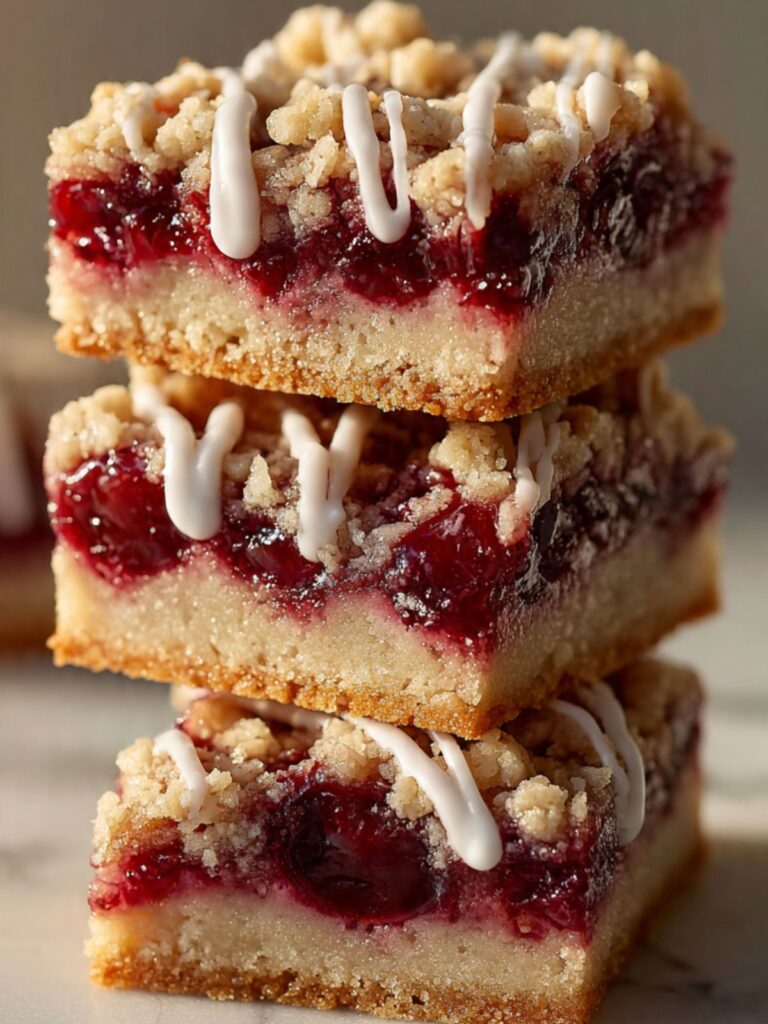
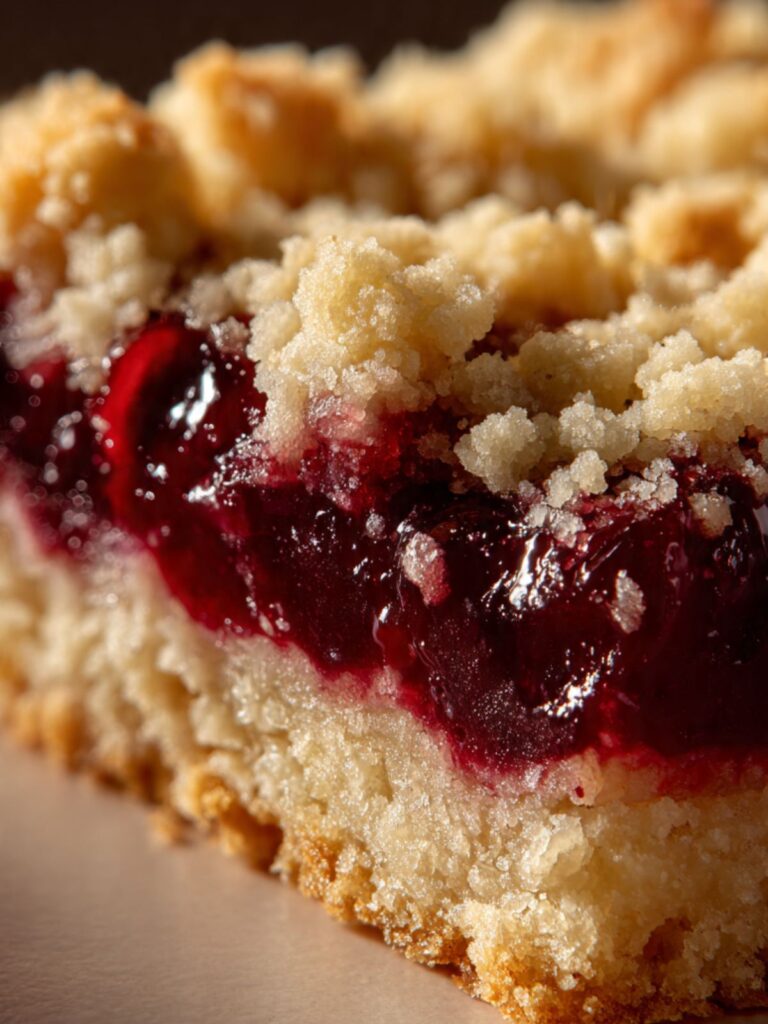
Batch two. I waited a full two hours. The filling held. Three layers — a firm, sand-textured shortbread-style crust that stays intact when you bite through it, a thick glossy cherry center with whole cherry pieces suspended in a ruby gel, and a rough golden crumble topping with visible oat clumps — stacked in a clean, precise cross-section exactly like what you see in the stacked bar photos above. The crust does not crumble when you pick up a bar. The filling does not run when the knife goes through. That is what waiting produces.
I tested old-fashioned rolled oats against quick oats in the crust and topping. Quick oats absorbed into the dough during baking and disappeared entirely — the finished topping looked like a plain sandy shortbread with no oat texture. Old-fashioned rolled oats held their shape, creating the distinct clumped, pebbled crumble visible on the surface of every bar. Quick oats are not a substitute here. The texture difference is not subtle.
I tested the crust pre-bake time at 8 minutes, 12 minutes, and 15 minutes before adding the filling. At 8 minutes the crust was still visibly raw in the center and absorbed cherry juice during the second bake, producing a permanently wet layer that no amount of additional bake time could fix. At 12 minutes the crust was set, matte, and dry — the interface with the filling stayed clean and firm in every cut bar. At 15 minutes the edges had gone slightly too golden and the crust was slightly too firm after the second bake. Twelve minutes is the number.
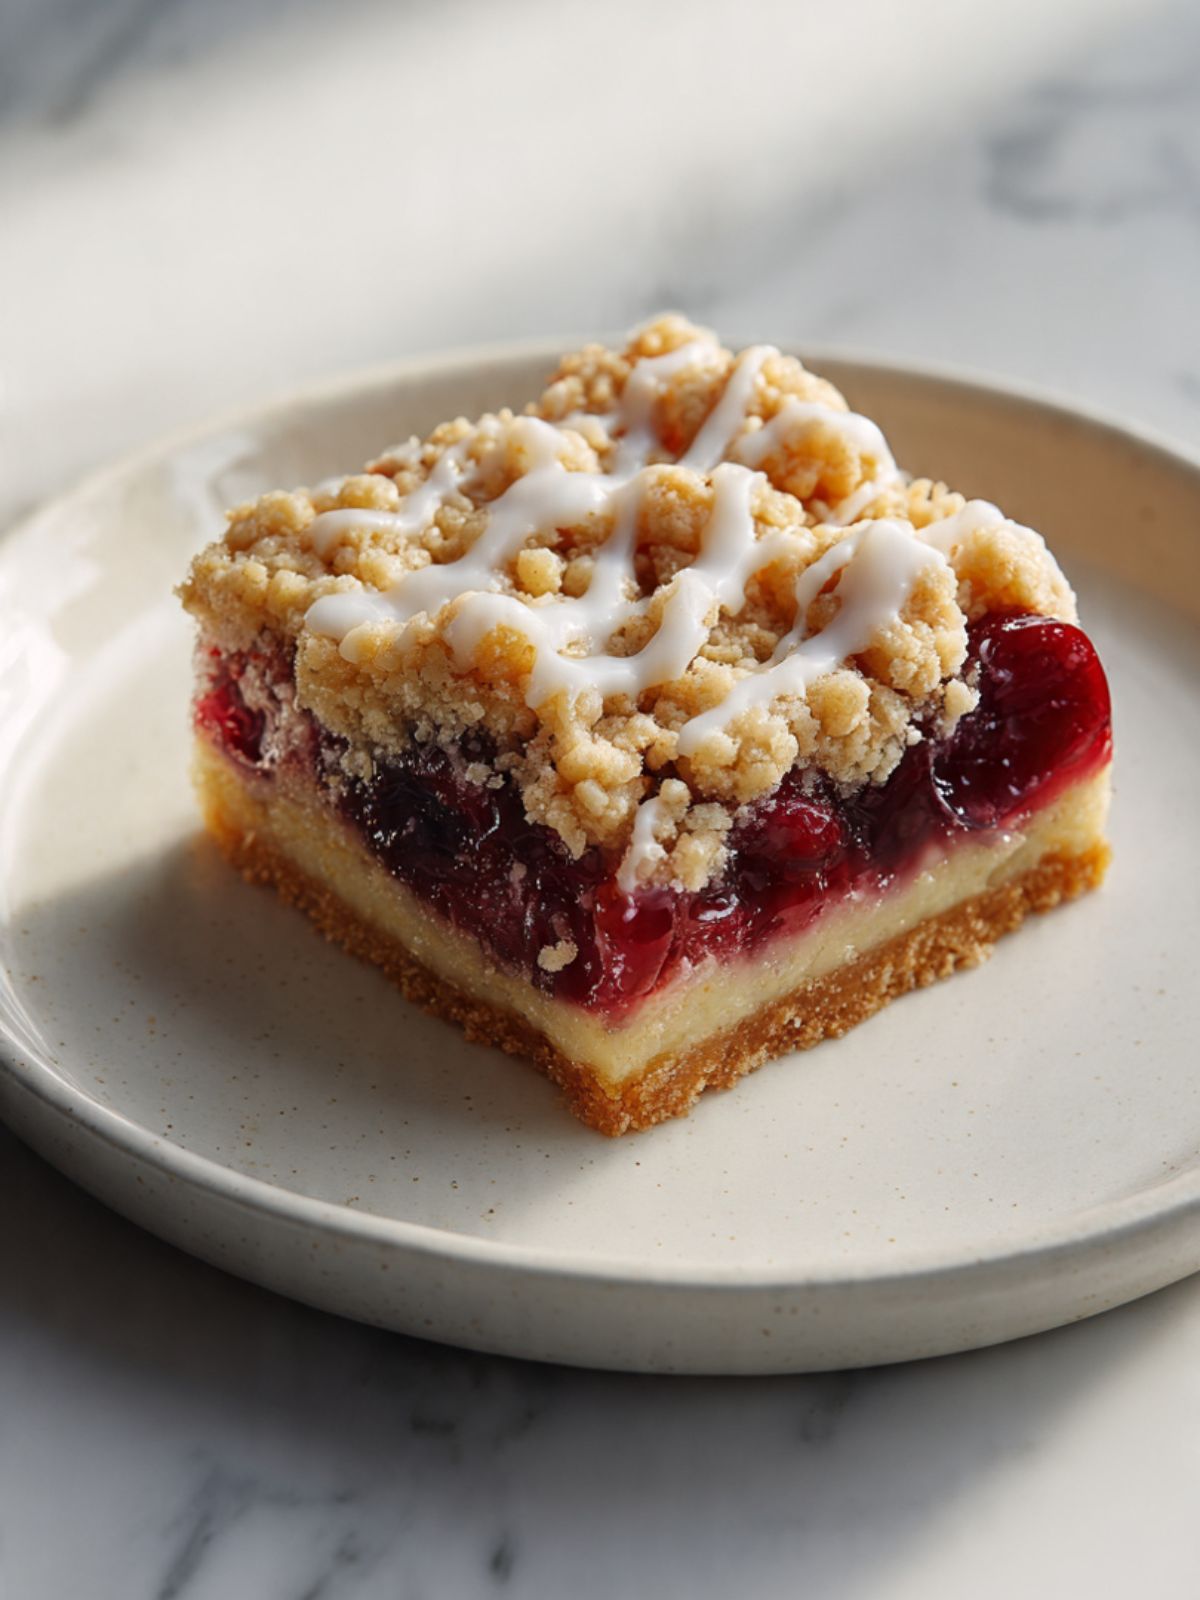
These cherry crumble bars use one dough for everything. The same buttery, oat-forward mixture becomes the pressed crust on the bottom and the clumped crumble on top. The cherry filling sits in between — thick, gelled, intensely flavored, made from either fresh, frozen, or high-quality canned cherries depending on what you have. A powdered sugar drizzle goes over the slab before it is sliced, which is why the sides of every bar stay clean.
No mixer required for any of this. A large bowl, a pastry blender or two forks, and cold butter cut into dry ingredients. The cold fat is what creates the crumble texture — it stays in distinct pieces rather than melting into a smooth dough, which is exactly what you want.
🗒 Luna’s Note: I tested this with both fresh Bing cherries (pitted and halved) and canned tart cherry pie filling. Both produce the glossy ruby filling you see here. The fresh version is brighter in flavor — more tart, more alive. The canned version is faster and more consistent across different seasons. I give you both paths.
| Prep Time | Cook Time | Total Time | Yield | Difficulty |
|---|---|---|---|---|
| 25 min | 40–45 min | 3 hrs 15 min (includes 2 hr cooling) | 24 bars | Intermediate |
| Calories | Fat | Carbs | Sugar | Protein | Sodium |
|---|---|---|---|---|---|
| ~285 kcal | ~12g | ~42g | ~22g | ~3g | ~95mg |
Macros are approximate and will vary based on ingredient brands, cherry type, and serving size.
Ingredients & Tools for Cherry Crumble Bars Recipe
For the Oat Crust and Crumble Topping
- 2¼ cups (280g) all-purpose flour (spooned into the measuring cup and leveled — never scooped directly from the bag) — or weighed at 280g on a kitchen scale
- 1½ cups (135g) old-fashioned rolled oats (not quick oats or instant oats — the texture difference is visible in the finished bars)
- ¾ cup (165g) packed light brown sugar
- ¼ cup (50g) plain white granulated cane sugar
- ½ tsp fine sea salt
- 1 cup (226g) cold unsalted butter, cut into ½-inch (1.25cm) cubes — cold from the refrigerator, not softened
For the Cherry Filling
Option A — From scratch:
- 4 cups (600g) fresh sweet cherries, pitted and halved — or frozen sweet cherries, do not thaw, use directly from frozen
- ⅓ cup (67g) plain white granulated cane sugar
- 2½ tablespoons (20g) cornstarch (also called cornflour outside the US)
- 1 tablespoon (15ml) fresh lemon juice (from approximately half a medium lemon)
- ½ teaspoon pure vanilla extract
Option B — Shortcut:
- 1 can (21 oz / 595g) high-quality canned cherry pie filling (such as Lucky Leaf Premium or Comstock Original) — not the cheapest store brand, which contains mostly syrup and very few whole cherries
For the Powdered Sugar Glaze
- 1 cup (120g) powdered sugar (also called confectioners sugar or icing sugar), sifted to remove lumps
- 2–3 tablespoons (30–45ml) whole milk (3.5% fat) — added one tablespoon at a time to control consistency
- ¼ teaspoon pure vanilla extract (optional — adds warmth to the glaze flavor)

Before You Start
Butter temperature is the most important variable in this recipe. The cold-fat cut-in method only produces the crumble texture you see in the photos if the butter stays cold throughout mixing. Pull the butter from the refrigerator only when you are ready to cut it in — not 30 minutes before, not at room temperature. Cold butter creates distinct fat pockets in the dough that stay as separate crumble clumps during baking. Warm or softened butter melts into the flour and produces a smooth, dense slab with no crumble texture at all.
Flour measuring matters. Spoon the flour into your measuring cup using a separate spoon and level it off with a straight edge. Never scoop the measuring cup directly into the flour bag — scooping packs in 20–30% more flour than the recipe needs and produces a dry, crumbly bar that falls apart when cut. For guaranteed accuracy, weigh the flour at 280g on a kitchen scale. Gram weights are always the priority in this recipe.
No mixer needed. This entire recipe comes together with a large mixing bowl and a pastry blender or two forks for the dough, and a medium saucepan for the filling. A stand mixer will overwork the butter and destroy the crumble texture — do this by hand.
Pan prep. Use a 9×13 inch (23×33cm) light-colored aluminum baking pan. Line it with two overlapping sheets of parchment paper — one running the length, one running the width — leaving at least 2 inches (5cm) of overhang on all four sides. This overhang is your handle for lifting the entire slab out of the pan cleanly after cooling. If you skip the parchment overhang, you will not be able to remove the bars without breaking every single one.
Dark pans. Do not use a dark non-stick pan. Dark pans absorb more heat and will overbrown and harden the bottom crust before the top crumble has a chance to turn golden. Light-colored aluminum only.
Cooling time is non-negotiable. These bars need a minimum of 2 full hours to cool at room temperature before cutting. The cherry filling thickens further as it cools — cutting before 2 hours means the filling is still molten underneath the surface and will collapse into a gummy layer when the knife goes through. Set a timer. Walk away from the pan.
Gram weight priority. For the most consistent results, use a kitchen scale set to grams. The gram weights in this recipe are what I tested with — they are the most reliable way to match my result.
Brown sugar freshness check. Hardened brown sugar cannot be packed accurately — the volume measurement will be significantly off, which changes both the sweetness and the moisture content of the dough. If your brown sugar has hardened into a solid block, place it in a microwave-safe bowl with a damp paper towel draped over the top and microwave in 20-second increments until it is pliable and can be pressed into the cup. Do not skip this check.
No dough resting or chilling required. The cold-fat cut-in method used here does not require any resting time — the dough goes from the bowl directly into the pan. Cold butter maintains its own temperature naturally during the short mixing time. If your kitchen is very warm (above 78°F / 26°C), work quickly and press the crust immediately after mixing.
Oven position. Position your oven rack in the middle of the oven before preheating. Top rack scorches the crumble topping. Bottom rack overbrowns the crust before the center sets.
Necessary Tools
Required:
- Kitchen scale (strongly recommended — gram weights are more accurate than volume)
- 9×13 inch (23×33cm) light-colored aluminum baking pan
- Parchment paper (2 sheets — for full overhang on all sides)
- Large mixing bowl
- Pastry blender or two forks (for cutting butter into dough)
- Medium saucepan (for the scratch-made cherry filling — skip if using canned)
- Silicone spatula or wooden spoon
- Whisk
- Wire cooling rack
- Sharp chef’s knife or bench scraper (for clean bar cuts)
Optional but useful:
- Oven thermometer — most home ovens run 15–25°F (8–14°C) off the dial setting
- Flat-bottomed measuring cup or drinking glass (for pressing the crust layer evenly)
- Piping bag or zip-lock bag with corner snipped (for the icing drizzle)
How to Make Cherry Crumble Bars
Step 1: Preheating the Oven and Preparing the Pan for a Clean Release
Position your oven rack in the middle position and preheat to 350°F (175°C). Most home ovens run 15–25°F (8–14°C) off the dial — if you have an oven thermometer, confirm the actual temperature before the pan goes in. While the oven preheats, line your 9×13 inch (23×33cm) light-colored aluminum baking pan with two overlapping sheets of parchment paper — one running lengthwise, one running widthwise — pressing the paper into the corners and leaving at least 2 inches (5cm) of overhang on every side. Crease the corners firmly so the paper lies flat against the pan walls.
The overhang is not optional. If you skip it or use a single sheet that only covers the bottom, you will not be able to lift the slab out of the pan after cooling. The bars must come out as one piece to get the clean cuts visible in the photos — attempting to cut them in the pan produces broken, crumbling edges.
The pan should feel cold to the touch and ready to go before the dough comes together — you want to press the crust immediately after mixing, not let the dough sit and warm up on the counter.
Step 2: Cutting Cold Butter Into the Dry Ingredients Until the Crumble Forms
This is a cold-fat cut-in method — no mixer, no creaming, no softening anything. The bowl and pastry blender are your only tools for this dough.
In your large mixing bowl, whisk together your 2¼ cups (280g) all-purpose flour, 1½ cups (135g) old-fashioned rolled oats, ¾ cup (165g) packed light brown sugar, ¼ cup (50g) plain white granulated cane sugar, and ½ tsp fine sea salt until evenly combined — about 15 seconds of whisking. The brown sugar acts as both sweetener and moisture contributor here: its molasses content is what gives the crust and crumble their warm, slightly caramel-like flavor and their golden color during baking.
Scatter your 1 cup (226g) cold unsalted butter cubes over the dry mixture. Using a pastry blender — or two forks held parallel and drawn through the mixture in opposite directions — begin cutting the butter into the dry ingredients. Work quickly and deliberately: press the pastry blender down through the mixture, rotate the bowl a quarter turn, press again. Continue for 3 to 4 minutes until the largest butter pieces are the size of small peas and the mixture holds together when you squeeze a handful firmly in your palm but falls apart again when released.
🗒 Luna’s Note: I use a pastry blender rather than two forks because it gives me more control over the butter piece size. Two forks work — they just take longer. What I do not use is my hands. Body heat transfers quickly into butter and the moment the fat starts to melt, the crumble texture is gone. Work fast, touch as little as possible.
The mixture should look shaggy and uneven — dry and crumbly in some spots, clumped in others. This unevenness is correct. A mixture that looks uniform and smooth means the butter has been overworked. Do not try to make it look neat. Those irregular clumps are exactly what becomes the golden crumble topping you see on the finished bars.
Baker's Warning: If the mixture starts feeling greasy or the butter smears rather than breaking into pieces, your butter has warmed up. Press plastic wrap over the bowl and refrigerate for 10 minutes before continuing — warm butter at this stage means the topping will bake into a flat, dense slab instead of distinct golden crumble clumps.
Your dough is ready — set it aside and make the cherry filling next, or if using canned filling, proceed directly to Step 4.
Step 3: Cooking the Cherry Filling Until It Thickens and Holds Its Shape
(Skip this step if using Option B — canned cherry pie filling. Go directly to Step 4.)
In your medium saucepan, combine your 4 cups (600g) pitted and halved sweet cherries (fresh or still-frozen — do not thaw frozen cherries before adding), ⅓ cup (67g) plain white granulated cane sugar, 2½ tablespoons (20g) cornstarch (cornflour outside the US), and 1 tablespoon (15ml) fresh lemon juice. Stir everything together with a silicone spatula until the cornstarch dissolves into the liquid released by the cherries — about 30 seconds of stirring. The lemon juice serves two purposes: it brightens the cherry flavor and its acidity helps the cornstarch activate cleanly without clouding the filling.
Place the saucepan over medium heat and cook, stirring constantly with your spatula — scraping the bottom and sides of the pan in slow, thorough strokes — for 6 to 9 minutes. The filling will go through three visible stages: first the cherries release their juice and the mixture looks thin and purple-red; then small bubbles begin appearing at the edges; then the filling thickens noticeably, the bubbles move to the center, and the color deepens to a glossy dark ruby. Remove the pan from heat the moment the filling reaches that glossy, thickened state and the bubbles are active throughout — not just at the edges.
Stir in your ½ teaspoon pure vanilla extract off the heat. The filling will thicken further as it cools — it does not need to look fully set in the pan, only thick enough to coat the spatula and hold its shape briefly when you draw a line through it.
The filling should look glossy, deep ruby-red, and thick enough that it moves slowly when you tilt the pan — not runny, not solid, somewhere between a loose jam and a pie filling. This is exactly the consistency that produces the gelled cherry layer visible in the cross-section photos.
Baker’s Warning: Do not walk away from the pan during this step. Cornstarch-thickened fillings go from perfect to scorched on the bottom in under a minute. Constant stirring is the only thing that prevents a burnt layer forming on the pan floor, which will make the entire filling taste bitter.
Set the filling aside to cool slightly — 5 to 10 minutes — while you press the crust. It should be warm but not steaming when it goes over the crust layer.
Step 4: Pressing the Crust Layer Firmly and Evenly Into the Pan
Measure out approximately two-thirds of the oat-crumble mixture — roughly 560g if you weighed the full batch, or about 3 heaped cups by volume — and scatter it evenly across the bottom of your parchment-lined pan. Using the flat bottom of a measuring cup or a drinking glass, press the mixture firmly and evenly into a compact, uniform layer. Apply real pressure — press down hard enough that the mixture compacts into a solid slab rather than sitting as a loose layer. Work from the center outward, pressing the edges flush against the pan walls.
The pressed layer should be approximately ¼ inch (6mm) thick and completely even across the full surface of the pan. Hold the pan at eye level and look across the surface — any high spots or thin patches will bake unevenly. Press again until the surface is level.
The crust should look and feel like a solid, compacted slab — dense and tight, with no loose spots or gaps at the edges. If it looks like granola loosely scattered across the pan bottom, press harder. The dense pressing is what gives the bottom crust its firm, shortbread-like texture visible in the clean cuts in the photos.
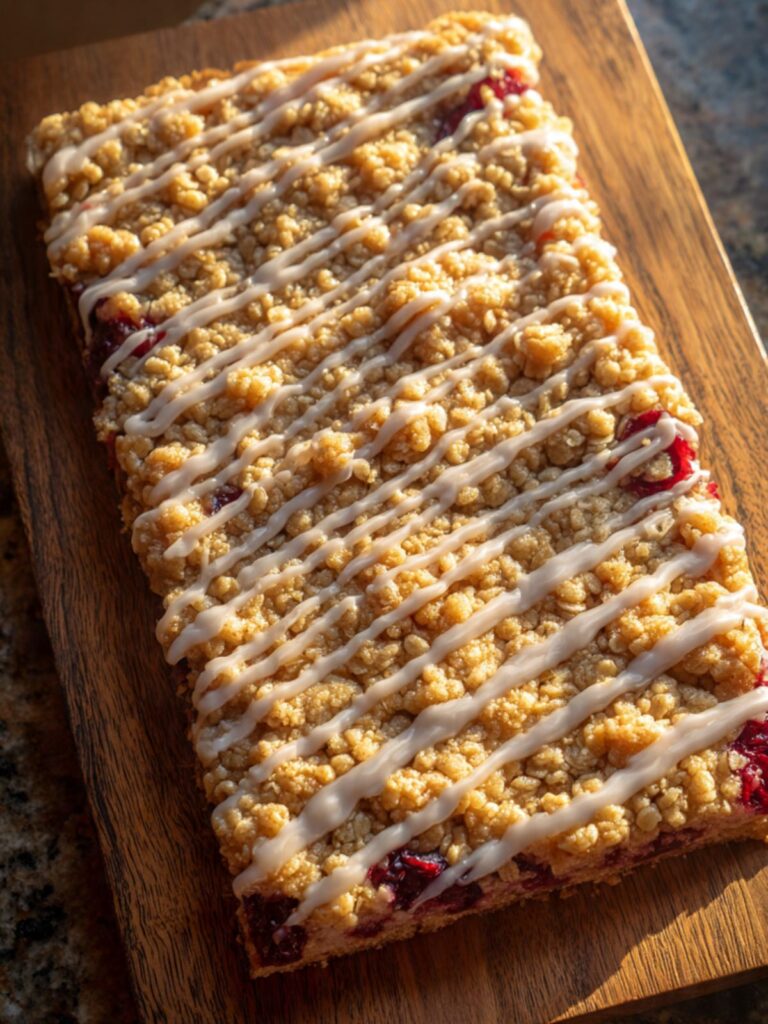
As you can see in the photo of the whole uncut glazed slab on the wooden board, the pan proportions confirm a 9×13 inch baking vessel — use this as your reference for how filled the pan should look before the filling and topping go on.
The pressed base goes into the oven now — bake it alone first.
Step 5: Partially Baking the Crust Before the Filling Goes On
Slide the pan into your preheated 350°F (175°C) oven and bake the crust alone for 12 to 15 minutes — until the surface looks matte and set and the very edges have just begun to turn the faintest golden color. The center should look dry but still pale — not golden, not brown. You are not baking the crust to completion here; you are setting it so it does not become soggy when the cherry filling sits on top.
Pull the pan from the oven at the 12-minute mark and check: if the edges look golden and the center looks dry and set, it is ready. If the center still looks raw and slightly translucent, give it 2 more minutes.
Baker's Warning: Do not turn the oven off during this step. The pan returns to the oven immediately after the filling is added — if the oven cools down even 25°F during the assembly window, the second bake will require additional time and the crust-filling interface will not bond correctly. Keep the oven running throughout.
The surface should look matte and pale golden at the edges, dry to the eye, and firm enough that pressing the center lightly with your fingertip leaves no indent. A crust that goes back into the oven wet will absorb cherry juice during the full bake and turn gummy at the base — the partial pre-bake is what creates the distinct, firm crust layer you see in every cross-section image.
Do not turn the oven off. The pan comes straight back in after the filling is added.
Step 6: Spreading the Cherry Filling and Adding the Crumble Topping
Working quickly while the crust is still hot from the oven, pour your cherry filling — scratch-made or canned — directly over the warm pre-baked crust. Use your silicone spatula to spread it in an even layer all the way to the edges of the pan, making sure the corners are fully covered. The filling layer should be approximately ½ inch (12mm) thick and completely even.
Take the remaining one-third of the oat-crumble mixture and scatter it evenly over the top of the cherry filling. Do not press the topping down — scatter it in loose, irregular clumps, letting the pieces fall naturally. The uneven, pebbled surface you see in the photos comes from not pressing: packed-down topping bakes flat, scattered topping bakes into distinct golden clumps with texture variation.
The assembled pan should show three visible layers from the side — compact pale crust at the bottom, deep red cherry filling in the middle, and a rough, uneven crumble topping sitting on top. The crumble does not need to cover every inch of the filling — some ruby cherry peeking through the clumps is correct and is exactly what you see in the finished bars.
Baker's Warning: Do not let the pre-baked crust cool before adding the filling. A cold crust creates a barrier that prevents the crust and filling from bonding during the second bake — the layers will separate when cut. Work with the crust still warm from the oven.
The fully assembled pan goes back into the oven immediately.
Step 7: Baking Until the Crumble Is Golden and the Cherry Filling Is Bubbling at the Center
Return the fully assembled pan to your 350°F (175°C) oven and bake for 28 to 32 minutes. Start checking at 28 minutes. You are looking for three simultaneous signals before pulling the pan:
First — the crumble topping peaks have turned light to medium golden, matching the warm honey-gold color visible on the finished bars. Second — the bottom crust edges where they meet the sides of the pan are deep golden, not pale. Third — the cherry filling is actively bubbling through the gaps in the crumble topping, and those bubbles are reaching the center of the pan, not just the edges.
Pull the pan the moment all three signals are present. The crumble peaks should look light to medium golden — not pale, not dark brown. The cherry filling visible through the crumble gaps should be glossy, bubbling, and deeply colored. This is the exact bake state visible in the overhead slab photo. Waiting longer risks a dry, overly hard bottom crust and a filling that loses its glossy gel quality.
Baker's Warning: The center of the filling will not look fully set when you pull the pan — it will still move slightly if you shake the pan. This is correct. The filling continues to firm up through carryover heat and then through cooling. A filling that looks completely firm in the oven has been overbaked and will be thick and gummy rather than glossy and gelled in the finished bars.
Place the pan on a wire cooling rack immediately. The pan and filling continue conducting heat for 10 to 15 minutes after the oven door closes — this is carryover cooking, and it is finishing the job the oven started. The starch chains in the filling are still active and still firming during this window. Moving the pan to the refrigerator now shocks the filling into an uneven set — the exterior firms too fast and the center stays loose underneath. Moving it to a warm surface extends the bake. The wire rack at room temperature is the correct environment. Set a timer for 2 hours. Do not guess.
The color and surface texture visible in the whole slab photo — golden crumble peaks with deep ruby filling showing through the gaps and the zig-zag white glaze running diagonally across the full length — is what your pan should look like before the glaze goes on. If the crumble peaks look pale or the filling looks thin and watery at the edges rather than glossy and set, the bake was pulled too early.
Step 8: Glazing the Slab and Cutting Into Bars for Clean, Precise Layers
After the full 2-hour cooling period, the cherry filling will have firmed completely and the bars will hold their shape when cut. Do not skip the cooling — this is the step that separates clean bars from collapsed ones.
In a small bowl, whisk together your 1 cup (120g) sifted powdered sugar, 2 tablespoons (30ml) whole milk, and ¼ teaspoon pure vanilla extract until completely smooth with no lumps. The glaze should fall from the whisk in a thick, slow ribbon. If it is too thick to drizzle, add the remaining 1 tablespoon (15ml) whole milk in a thin stream and whisk again. If it is too thin and runs off the whisk immediately, add powdered sugar one tablespoon at a time until it ribbons.
Transfer the glaze to a piping bag or a zip-lock bag with a small corner snipped off. Working over the uncut slab still in the pan, drizzle the glaze in diagonal lines across the entire surface — moving the bag steadily from one corner to the other in parallel passes, as you see on the finished slab. Allow the glaze to set for 10 minutes at room temperature until it is no longer wet to the touch.
🗒 Luna’s Note: The glaze goes on the slab before slicing — not on the individual bars. This is what gives the finished bars their clean, undrizzled sides. If you drizzle individual bars, the glaze runs down the cut edges and pools at the bottom. Glaze the slab, let it set, then cut.
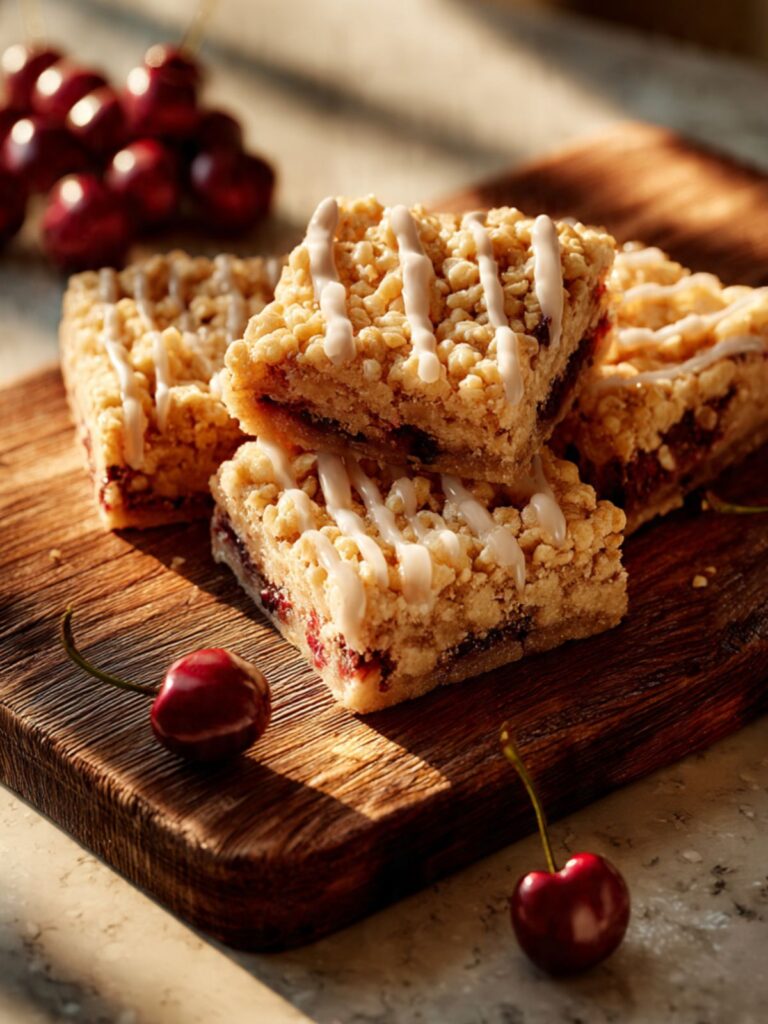
Use the parchment overhang to lift the entire slab out of the pan and onto a cutting board. Using a sharp chef’s knife, cut into 24 bars — 4 cuts across the width, 6 cuts along the length. Wipe the blade clean with a damp cloth between every single cut. A clean blade is the difference between the pristine cut edges visible in the stacked bar photos and bars with smeared, dragged filling on the sides. Do not rush the cutting.
Each bar at this cut size weighs approximately 85 to 95g — weigh the first bar on your kitchen scale to confirm your cut size is on track. Twenty-four bars is the correct yield from a 9×13 inch pan at 4×6 cuts. If your bars are coming out heavier than 95g, your cuts are too large and you will get fewer than 24 bars from the slab.
The finished bars should show three perfectly distinct layers in cross-section — a firm pale crust base approximately ¼ inch thick, a glossy deep ruby cherry layer approximately ½ inch thick, and a golden crumble top. This is exactly what is visible in the close-up cross-section photo. If the layers look muddy or the filling has soaked into the crust, the bars were cut before the 2-hour cooling was complete.
Your bars are ready to serve or store.
The Science Behind Cherry Crumble Bars
Why Cold Butter — Not Softened — Is What Creates the Crumble Texture
I noticed this before I understood it. The first time I made a crumble topping with softened butter — because softened butter is what most baking recipes call for and I was not thinking about it — the topping baked into a flat, solid sheet. No clumps. No texture. Just a dense golden slab sitting on top of the filling. I pressed another batch with cold butter and the difference was immediate and obvious.
The mechanism is fat crystallization. Cold butter contains fat in a semi-crystalline state — the fat molecules are partially ordered and rigid. When you cut cold butter into dry ingredients with a pastry blender, those crystalline fat pieces stay intact as discrete pockets within the flour-oat mixture. Each pocket remains surrounded by dry ingredients rather than fully coating them. In the oven, those individual fat pockets melt outward into their surrounding flour, creating a network of separate, distinct clumps — the irregular, pebbled crumble surface visible on every bar in the photos. Softened butter, by contrast, is already in a liquid-adjacent state. It coats the flour and oat particles uniformly during mixing rather than staying in discrete pockets, which produces an even, cohesive dough that bakes into a solid layer rather than crumble.
The same dough does two jobs in this recipe — pressed base and scattered topping — and the cold fat is what makes both work correctly. The pressed crust bakes dense and firm because it is compacted, trapping the fat pockets into a solid structure. The scattered topping bakes into clumps because the fat pockets remain irregular and separate. One ingredient, two textures, entirely determined by temperature.
If you have made a shortbread cookie before, you have worked with this same principle — the shortbread cookies recipe on this site uses the same cold-fat logic for a different application.
How Cornstarch Controls the Cherry Filling’s Gel State
Starch gelatinization is what turns the cherry filling from thin, running fruit juice into the thick, glossy layer that holds its shape when the bar is cut. Cornstarch granules are insoluble in cold liquid — when you first mix them with the cherries, they simply sit suspended in the juice. The transformation happens during heating. Between 140°F and 160°F (60°C and 71°C), the starch granules absorb water, swell significantly, and rupture — releasing long starch chains that entangle with each other and with the water molecules around them, forming a continuous gel network.
What this means practically is that the filling must reach a full, active boil on the stovetop before it has fully gelled — the bubbling you look for at the center of the pan during baking is the same signal that the starch has activated completely throughout the filling. A filling that only bubbled at the edges has not fully activated the starch in the center, which is why those bars weep and collapse when cut even though the edges look perfect.
The 2-hour cooling period is the second part of this process. Starch gels continue to firm as they cool — a process called retrogradation, where the starch chains realign into a tighter, more ordered structure at lower temperatures. This is why the filling looks slightly loose when the pan comes out of the oven and completely set two hours later. Cutting into the bars at 30 minutes feels like the filling is done because the surface is set. It is not done. The center is still warm and the starch chains are still mobile. Patience here is not optional — it is chemistry.
Why the Pre-Baked Crust Prevents a Soggy Bottom
This is the step most home bakers skip because it adds 12 minutes and feels unnecessary when the whole thing is going back in the oven anyway. Skipping it produces a crust that tastes like damp flour and separates from the filling when you try to pick up a bar.
The mechanism is moisture migration. Raw, unbaked flour-and-fat dough is porous — it readily absorbs liquid from anything sitting on top of it. Cherry filling, even cornstarch-thickened, still contains significant free moisture. When raw dough and wet filling go into the oven together, the filling releases steam as it heats, and the dough absorbs that steam before it has a chance to form a solid structure. The result is a crust that never fully dries out — it stays dense and gummy at the interface between the crust and filling layers.
Partially baking the crust first accomplishes two things. The Maillard reaction begins at the surface — proteins and sugars brown and form a partially sealed layer that resists moisture absorption. Gluten development also progresses to the point where the structure has set enough to resist further liquid intrusion. The 12-minute pre-bake is enough to get both processes started without fully baking the crust, which means it still has structural room to finish setting during the second bake with the filling on top.
🗒 Luna’s Note: I tested skipping the pre-bake on two batches. Both had identical-looking surfaces after baking. The difference was entirely in the cross-section — the pre-baked crust had a clean, firm interface with the filling. The skipped-pre-bake crust had a soft, wet layer at the bottom of the filling that never dried out. You cannot see this failure from the top. You only see it when you cut.
Cherry Crumble Bars Troubleshooting & Pro-Tips
Common Mistakes
Wrong oat type or butter state used in the dough
Using quick oats or instant oats instead of old-fashioned rolled oats produces a topping that bakes into a plain, sandy shortbread layer with no visible oat texture — the quick oats absorb completely into the dough and disappear. The pebbled, clumped crumble surface visible in the photos only exists when old-fashioned rolled oats are used. Using softened or room-temperature butter instead of cold butter produces the same flat, textureless result from the opposite direction — softened butter coats the flour and oats uniformly, creating a smooth dough that bakes solid rather than crumbled. Both substitutions produce a bar with identical flavor but completely wrong texture. There is no fix after baking — serve as-is and label it a shortbread cherry bar. Next time: old-fashioned oats only, butter straight from the refrigerator.
Wrong pan size, material, or preparation
A dark non-stick pan absorbs significantly more heat than light-colored aluminum and will overbrown and harden the bottom crust before the crumble topping has reached the golden color visible in the photos. The bottom edge of the crust will be dark brown or scorched while the topping is still pale. A glass or ceramic pan retains heat differently — reduce oven temperature by 25°F (14°C) and add 5 minutes to both the pre-bake and the full bake. Skipping the parchment lining means the slab cannot be lifted from the pan cleanly — the bars must be dug out individually, which breaks every cut edge. If you have already baked without parchment, run a thin offset spatula around the perimeter and under each bar carefully before attempting to remove. Next time: light-colored aluminum only, two overlapping parchment sheets with full overhang on all four sides.
The cherry filling is too runny and collapses when the bars are cut
The filling needs two things to set correctly: the right amount of cornstarch activated fully on the stovetop, and the full 2-hour cooling period. If the filling runs when cut, one or both of these failed. Undercooked cornstarch — filling removed from the heat before the bubbles reached the center of the pan — never fully activates its thickening potential, leaving the gel weaker than it appears. Cutting before 2 hours means the starch chains are still mobile. Fix: refrigerate the cut bars uncovered for 1 hour — the cold will firm what the cooling period did not. Next time: cook until bubbles are active at the center, not just the edges, and wait the full 2 hours before the knife goes in.
The bars crumble and fall apart when cut
Two causes, different fixes. If the bars crumble immediately when the knife touches them, the flour was over-measured — scooping flour directly from the bag packs 20–30% more than spooning and leveling, producing a crust with too little fat relative to dry ingredients. The structure cannot hold. If the bars hold their shape on the surface but the layers separate when lifted, the bars were cut before full cooling. Salvage: press crumbled pieces firmly into ramekins, warm at 300°F (150°C) for 8 minutes, and serve with vanilla ice cream. The deconstructed version is genuinely good. Next time: weigh flour at 280g and wait the full 2-hour cool.
The crumble topping baked flat instead of in distinct clumps
The butter was too warm when cut into the dry ingredients. Warm butter coats the flour and oat particles uniformly rather than staying in discrete fat pockets, producing a dough that bakes into a solid layer. This happens when butter sat on the counter before use, when mixing took too long in a warm kitchen, or when hands were used instead of a pastry blender. Salvage: flat crumble topping still tastes correct — serve as-is and call it a shortbread-topped cherry bar. Next time: butter pulled directly from the refrigerator, pastry blender only, work in under 4 minutes.
The crumble topping is too pale or too dark
Too pale: the oven temperature was lower than 350°F (175°C) or the bars were pulled before the center filling was bubbling. Use an oven thermometer to verify actual temperature — most home ovens run 15–25°F off the dial. Too dark: the oven runs hot, or the bars stayed in past the point where the filling was actively bubbling at the center. If the topping has gone too dark while the filling is still not bubbling at center, tent the pan loosely with aluminum foil and continue baking. The foil slows surface browning without stopping the filling from setting.
The bars overbaked — the crust is hard and the filling is thick and gummy rather than glossy
The bars stayed in the oven past the three-signal pull point. Overbaked cornstarch filling loses its glossy quality and turns opaque and pasty. The crust simultaneously hardens. Salvage: slice bars thin — ½ inch (1.25cm) rather than full thickness — and serve warm with a scoop of vanilla ice cream. The ice cream’s moisture counterbalances the tight, dry texture and makes the bars genuinely enjoyable. Next time: pull at the first moment all three signals appear simultaneously.
The powdered sugar glaze is streaky, lumpy, or soaks into the crumble
Streaky or lumpy glaze means the powdered sugar was not sifted before mixing. Lumps do not dissolve during whisking — always sift. Glaze that soaks into the crumble means it was applied before the bars had fully cooled — warm crumble is porous and absorbs liquid readily. A second thin drizzle applied after the first has set can partially restore the appearance.
High altitude and humidity
At high altitude above 3,500 feet (1,067 meters): increase oven temperature by 15 to 25°F (8 to 14°C) and begin checking at 25 minutes rather than 28. The cherry filling will bubble more aggressively — use the center-bubbling signal as your primary pull cue. In high humidity above 70% relative humidity: the powdered sugar glaze will take longer to set and the crumble topping may feel less crisp at the surface. Add 1 extra tablespoon of powdered sugar to the glaze and allow an additional 20 to 30 minutes of setting time before cutting.
Expert Pro-Tips
Chill the slab before cutting for surgical precision. After the 2-hour room temperature cool, slide the pan into the refrigerator for 30 additional minutes before cutting. Cold filling is firmer than room-temperature filling and holds its shape more cleanly when the knife passes through. The difference between the pristine cross-section visible in the close-up photo and a smeared, dragged cut is often just this 30 minutes of refrigeration before slicing.
Use the weight of the knife, not the pressure of your hand. When cutting chilled bars, let the blade’s own weight do the work — place the knife edge on the surface and apply steady downward pressure without sawing back and forth. A sawing motion drags the filling sideways and smears the layers. One clean downward stroke per cut, knife wiped between each one.
Toast the oats before mixing for a deeper, nuttier crumble flavor. Spread the rolled oats on a dry baking sheet and bake at 350°F (175°C) for 8 minutes, stirring once, until they smell nutty and turn a shade darker. Cool completely before adding to the dough. This step is not in the base recipe because it adds 20 minutes, but the flavor difference is significant — the toasted oat version has the same texture with a noticeably richer, more complex crumble taste.
Reserve 2 tablespoons of the crumble mixture before pressing the base. After cutting the butter into the dry ingredients, pull out 2 tablespoons of the finest, sandiest mixture — the portions with the smallest butter pieces — and set aside. Use this reserved portion to patch any thin spots in the pressed crust before it goes into the oven. Thin spots in the crust are the most common cause of soggy patches in the finished bars, and this takes ten seconds to fix.
For frozen cherries, add 1 extra teaspoon of cornstarch to the filling. Frozen cherries release significantly more liquid than fresh as they cook — the extra moisture requires additional thickening power to reach the same gel state. Using the standard quantity of cornstarch with frozen cherries produces a filling that is slightly looser than what you see in the photos. One extra teaspoon brings it back to the correct consistency.
How to Store Cherry Crumble Bars
Room Temperature
Store cut bars in a lidded hard-sided container with a sheet of parchment paper between each layer of bars. Room temperature storage works well for up to 3 days — the crust stays firm, the filling holds its gel, and the crumble topping retains enough texture to still feel like crumble rather than softened bread. Do not use zip-lock bags. The pressure of sealing compresses the crumble topping flat and the bars arrive at the bottom of the bag in pieces.
Keep the container away from direct sunlight and heat sources. A warm counter — anything above 75°F (24°C) — will soften the butter in the crust and make the bars feel greasy rather than firm. If your kitchen runs warm, refrigerate instead.
One note on uncut slabs: if you are not serving the full batch immediately, leave the slab uncut and store it whole, covered loosely with plastic wrap, at room temperature for up to 24 hours before glazing and cutting. Uncut bars stay significantly fresher than cut ones because the exposed cherry filling in cut bars begins to dry at the edges within a day.
Refrigerator
Refrigeration is recommended if you are storing past 3 days or if your kitchen is warm. Place bars in a lidded hard-sided container with parchment between layers — the same method as room temperature storage. Refrigerated bars keep well for up to 6 days.
Pull refrigerated bars out 20 minutes before serving. Cold bars straight from the refrigerator have a firmer, slightly denser crust texture — not bad, but not the same as room temperature. The cherry filling also tastes less bright when cold. Twenty minutes on the counter brings everything back to the texture and flavor visible in the photos.
Do not store the bars uncovered in the refrigerator. Exposed bars absorb refrigerator odors quickly — the powdered sugar glaze acts as a sponge for whatever else is stored nearby. A lidded container is non-negotiable for refrigerator storage.
Freezer — Baked Bars
These bars freeze well. Wrap each bar individually in plastic wrap — press the wrap snugly against all cut surfaces to prevent freezer burn on the exposed cherry filling — then place the wrapped bars in a zip-lock freezer bag or lidded freezer-safe container. Freeze for up to 2 months.
To thaw: transfer bars from the freezer to the refrigerator the night before serving and allow to thaw overnight — approximately 8 hours. Then pull from the refrigerator 20 minutes before eating to return to room temperature. Do not microwave to thaw — the cherry filling turns watery and the crust goes soft in the microwave, and neither recovers once heated.
Frozen and thawed bars are approximately 90% as good as fresh. The crumble topping softens slightly during freezing and does not fully return to its original crisp texture after thawing — everything else holds well. If the topping texture matters to you, these bars are best consumed within 3 days of baking rather than frozen.
Freezer — Unbaked
The assembled, unbaked pan can be frozen before the second bake — but not before the pre-bake. Pre-bake the crust through Step 5, add the filling and crumble topping through Step 6, then wrap the assembled pan tightly in two layers of plastic wrap and freeze for up to 1 month.
To bake from frozen: unwrap the pan, place directly into a cold oven, then set the temperature to 350°F (175°C) and allow the oven to preheat with the pan inside. Add 15 to 20 minutes to the standard bake time — start checking at 43 minutes rather than 28. The filling must reach an active, center-bubbling state before pulling, same as the standard bake. Do not attempt to thaw the pan before baking — thawing releases liquid from the frozen cherries into the unbaked crust and produces the same soggy-bottom result as skipping the pre-bake.
Serving Suggestion

These bars are best served at room temperature, pulled from wherever they have been stored 15 to 20 minutes before they go to the table. That brief rest period is what separates a bar that tastes like it just came out of the refrigerator and one that tastes like it was made that morning.
I serve these on the cutting board they were sliced on — no plate, no rearranging. The crumble topping is fragile enough that moving individual bars too many times before serving breaks the edges. The white glaze drizzle holds up well at room temperature for several hours, so there is no rush once they are cut.
The pairing I keep coming back to is strong black tea — Assam or English Breakfast, brewed properly dark. The tannins in the tea cut through the sweetness of the glaze and the richness of the buttery crust in a way that coffee does not quite manage. It is the combination I make for myself when the rest of the batch has already been given away.
🗒 Luna’s Note: These bars belong to a specific kind of afternoon — the kind where someone is coming over and you want something on the counter that looks like you thought about it. They are not a weeknight-after-dinner dessert. They take too long to cool for that. They are a plan-ahead recipe, which is exactly why I make them when I want to give something rather than just feed someone.
Day 2 note: these bars are genuinely better on Day 2 than Day 1. The oat crust softens very slightly overnight and the cherry filling flavor deepens — the brightness from the lemon juice mellows and the filling tastes more complex and less sharp. Day 1 is excellent. Day 2 is the version I would serve to someone I was trying to impress. Day 3 at room temperature is still good. Day 4 — refrigerate anything that remains.
One honest limitation: these do not travel well if the destination involves more than 20 minutes in a car. The crumble topping shakes loose during transport and arrives at the bottom of the container. If you are bringing these somewhere, transport the uncut slab in the pan and cut on arrival. The pan travels without incident. Individual bars do not.
Frequently Asked Questions About Cherry Crumble Bars
Can I make cherry crumble bars ahead of time?
Yes — and they are better made a day ahead. Bake, cool, and glaze the uncut slab, then store loosely covered at room temperature overnight. The filling flavor deepens and the layers bond more cleanly, which makes cutting easier. Cut the day of serving — exposed cut edges dry out within 24 hours.
Can I use frozen cherries instead of fresh?
Yes, with one adjustment: add 1 extra teaspoon of cornstarch to the filling. Frozen cherries release more liquid than fresh during cooking because ice crystals rupture their cell walls during freezing. The extra cornstarch absorbs that additional moisture and brings the gel to the correct firm, glossy consistency. Add the cherries directly from frozen — do not thaw first.
Can I use canned cherry pie filling?
Yes — this is Option B in the recipe. Use a premium brand like Lucky Leaf Premium or Comstock Original, which contains whole cherry pieces in a thick gel. Budget canned filling is mostly syrup with very few cherries and produces a thin, flat filling layer. One 21 oz (595g) can is the correct quantity. Skip the stovetop step entirely.
Why did my cherry bars fall apart when I cut them?
The most likely cause is cutting before the 2-hour cooling was complete. Cornstarch gel firms through starch retrogradation as temperature drops — the filling looks set on the surface at 45 minutes but is still mobile at the center. The second cause is over-measured flour from scooping rather than spooning. Weigh at 280g and wait the full 2 hours. If you enjoy making other bar recipes, you’ll find the same oat-forward base works beautifully in oatmeal chocolate chip bars.
Do cherry crumble bars need to be refrigerated?
Not for the first 3 days if your kitchen stays below 75°F (24°C). Cornstarch-thickened fillings are shelf-stable at room temperature because they contain no dairy or protein to support bacterial growth. Beyond 3 days, refrigerate. Pull refrigerated bars out 20 minutes before serving — cold bars have a denser crust texture and a less vibrant filling flavor than bars at room temperature.
Can I double this cherry crumble bars recipe?
Yes — multiply every ingredient by exactly 2 and bake in two separate 9×13 inch pans. This recipe contains no leavening, so all ingredients scale linearly without adjustment. Two pans bake in the same time as one because the depth is identical. Do not bake a doubled batch in one oversized pan — a deeper filling layer requires significantly longer bake time, overbaking the crust and topping.
How do I bake cherry crumble bars at high altitude or in a humid climate?
At high altitude above 3,500 feet (1,067 meters): increase oven temperature by 15 to 25°F (8 to 14°C) and check at 25 minutes — the filling bubbles more aggressively at altitude because water boils at a lower temperature, so use center-bubbling as your pull signal rather than crumble color. In high humidity above 70%: add 1 tablespoon extra powdered sugar to the glaze and allow 30 additional minutes of setting time before cutting.
More Bars You’ll Love
- Chocolate Chip Cookie Bars — the same pressed-and-baked bar format with a thick, gooey chocolate chip center and crisp golden edges, no rolling or chilling required.
- Peanut Butter Chocolate Chip Bars — dense, fudgy peanut butter bars studded with semi-sweet chocolate chips, with the same one-bowl simplicity as these cherry bars.
Thick Cherry Crumble Bars Recipe
Ingredients
Equipment
Method
- Position oven rack in the middle and preheat to 350°F (175°C), then line a 9×13 inch (23×33cm) light-colored aluminum baking pan with two overlapping sheets of parchment paper leaving at least 2 inches of overhang on all sides.
- In a large mixing bowl, whisk together the all-purpose flour, rolled oats, brown sugar, granulated sugar, and fine sea salt until evenly combined — about 15 seconds.
- Scatter the cold butter cubes over the dry mixture and cut in using a pastry blender or two forks, working quickly for 3 to 4 minutes until the largest butter pieces are pea-sized and the mixture holds together when squeezed but falls apart when released.
- For Option A (scratch filling): combine pitted cherries, granulated sugar, cornstarch, and lemon juice in a medium saucepan, stir until the cornstarch dissolves, then cook over medium heat stirring constantly for 6 to 9 minutes until the filling thickens, turns glossy dark ruby, and bubbles actively at the center — remove from heat, stir in vanilla, and set aside to cool for 5 to 10 minutes.
- Measure out two-thirds of the oat mixture (approximately 3 heaped cups) and scatter evenly across the prepared pan, then press firmly and evenly into a compact ¼-inch (6mm) layer using the flat bottom of a measuring cup, making sure to press all the way to the edges and corners.
- Bake the crust alone at 350°F (175°C) for 12 to 15 minutes until the surface looks matte and dry and the very edges have just begun to turn faintly golden, then remove from the oven without turning it off.
- Pour the cherry filling (scratch-made or canned) over the warm pre-baked crust and spread evenly to the edges using a silicone spatula, then scatter the remaining one-third of the oat crumble mixture loosely over the filling in irregular clumps without pressing down.
- Return the assembled pan to the oven and bake at 350°F (175°C) for 28 to 32 minutes until the crumble peaks are light to medium golden, the bottom crust edges are deep golden, and the cherry filling is actively bubbling at the center of the pan — not just at the edges.
- Transfer the pan to a wire cooling rack and cool at room temperature for the full 2 hours without moving to the refrigerator — the cherry filling continues to firm through cooling and cutting earlier will cause the filling to collapse.
- After the 2-hour cool, whisk together the sifted powdered sugar, 2 tablespoons of whole milk, and vanilla extract until smooth, adding the remaining tablespoon of milk if needed to reach a thick drizzle consistency, then transfer to a piping bag or zip-lock bag with a small corner snipped and drizzle diagonally over the uncut slab.
- Allow the glaze to set for 10 minutes, then use the parchment overhang to lift the slab onto a cutting board and cut into 24 bars using a sharp knife wiped clean between every cut — 4 cuts across the width and 6 cuts along the length.