
Halloween Sugar Cookies

The first batch of ghost cookies I cut for this recipe came out of the oven as ghost-shaped puddles. Every point on every raised arm had rounded itself into a soft curve. I creamed the butter and sugar the way I cream it for every other cookie on this site — medium speed, three minutes, pale and doubled in volume. That was the mistake. The second batch used the exact same dough, creamed for barely ninety seconds until it was barely combined, and every point held. Same recipe. Same oven. One variable changed everything.
I have made three different versions of decorated Halloween cookies this year, and this is the one I kept — a from-scratch cut-out sugar cookie with a real vanilla-almond flavor underneath the icing, not a blank canvas. The edges come out pale and matte, not golden, because color is not what you want here. You want a flat, dry surface that holds a design the way a wall holds paint. The dough rolls to an even ¼ inch (6mm), holds crisp corners on a bat wing, and does not need a stand mixer running for five minutes to get there.
I did not always think decorated cut-out cookies were worth the trouble. For years I skipped them — a plain drop cookie takes twenty minutes and tastes better per minute of effort. What changed my mind was learning to make royal icing in two consistencies instead of one. A stiffer icing for outlines, a thinned icing for flooding the inside. Once I understood that the two consistencies are doing two different jobs — one holds a border, one levels itself flat — the whole process stopped feeling like a craft project and started feeling like a recipe with steps I could actually explain.
There is no chilling shortcut in this recipe, and I am not going to pretend there is one. The dough chills once as a disc before rolling, and the cut shapes chill again on the pan before they go into the oven. Skip either chill and you are back to ghost-shaped puddles. What you do not need: a stand mixer running long, a pastry bag full of buttercream, or a specialty pan. A bowl, a rolling pin, and two bags of icing get you the full set.
I tested the dough with almond extract added alongside the vanilla, and without it. Without almond extract, these taste like a good, competent sugar cookie. With it — a quarter teaspoon, no more — they taste like the cookies from a real bakery counter, the ones with a flavor you can’t immediately name. I kept the almond extract. If you have a tree nut allergy in the house, leave it out; the recipe holds its structure and flavor fine without it, only less distinctive.
I also tested the amount of flour down to the gram. Three cups measured by scooping straight from the bag came out to nearly 420g in my kitchen — that dough was dry, cracked at the edges when rolled, and needed extra water to come together. The same three cups, spooned into the cup and leveled, measured 375g and rolled clean on the first try. This is not a recipe where “close enough” on the flour works. Weigh it.
This is the one recipe on this site where I draw the design before I touch the dough. Every other recipe on this blog starts with the butter. This one starts with a sketch of a ghost’s face on the back of an envelope, because the icing decisions — how many colors, how much detail, whether the spiderweb gets dragged lines or piped ones — are easier to make on paper than mid-batch with a bag of icing already mixed.
🗒 Luna’s Note: I sketch every design in a $2 notebook before I start mixing icing colors. It takes ten minutes and saves me from mixing a fourth color I decide halfway through I don’t need.
No stand mixer is required — a hand mixer does this dough fine, since you are creaming for under two minutes, not five. What is required: two separate chill times, which is the trade this recipe makes for cookies that look exactly as sharp as the shape you cut.
| Prep Time | Chill Time | Cook Time | Total Time | Yield | Difficulty |
|---|---|---|---|---|---|
| 35 min | 2 hr 20 min | 9 min per batch (27 min total) | 3 hr 20 min (dough to cooled cookie — decorating and drying time is separate, see Before You Start) | 24 cookies (3-inch cutters) | Intermediate |
| Calories | Fat | Carbs | Sugar | Protein | Sodium |
|---|---|---|---|---|---|
| ~230 kcal | ~9g | ~35g | ~24g | ~2g | ~65mg |
Macros are approximate per iced cookie and will vary based on cutter size, icing thickness, and ingredient brands.
Ingredients & Tools for Halloween Sugar Cookies
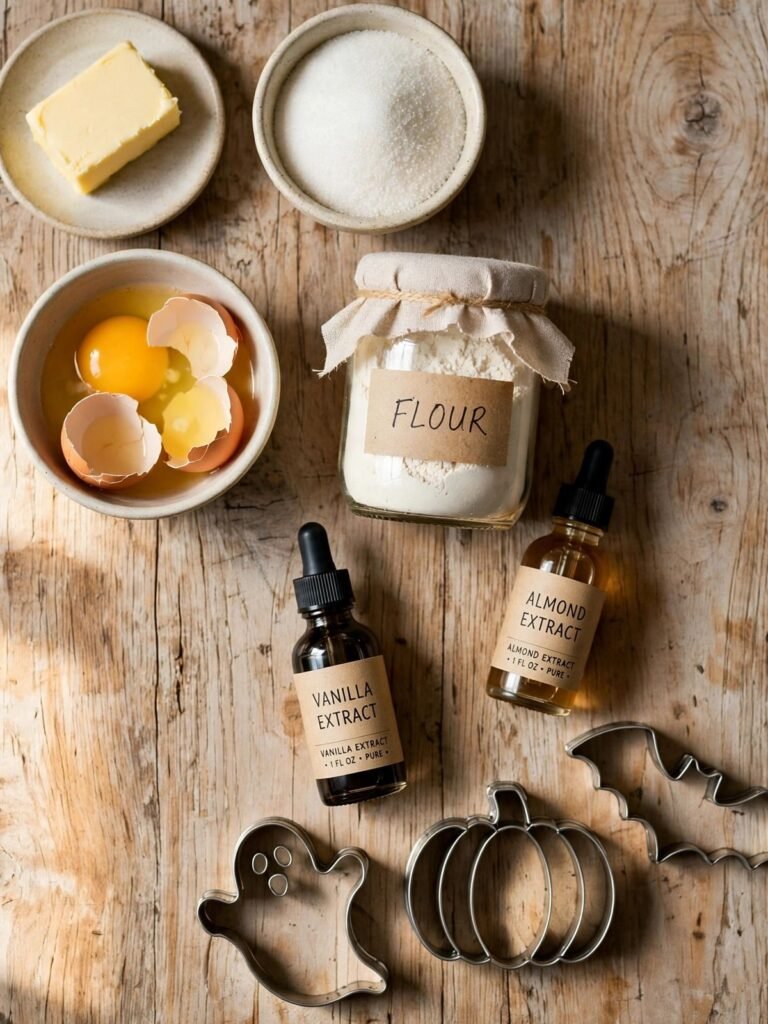
For the Cookies
- 1 cup (226g) unsalted butter, softened to 65–68°F (18–20°C) — see Before You Start for the exact timing and visual check
- 1 cup (200g) plain white granulated cane sugar — no brown sugar and no substitutes in this recipe; see the Science section for why
- 1 large egg (approximately 50g without shell), room temperature
- 2 tsp (8g) pure vanilla extract
- ½ tsp (2g) pure almond extract (optional but part of Luna’s tested version — see the Hook testing note; leave out for tree nut allergies with no structural change to the dough)
- 3 cups (375g) all-purpose flour, spooned into the measuring cup and leveled — or weighed, which is strongly recommended for this specific recipe
- ½ tsp (2g) baking powder, checked for freshness
- ¾ tsp (4g) fine sea salt
For the Royal Icing
- 4 cups (480g) powdered sugar (also called confectioners sugar or icing sugar), sifted
- 3 tbsp (24g) meringue powder, such as Wilton — not egg white powder, which is a different product
- 9–10 tbsp (135–150ml) warm water, divided — start with the lower amount and add more 1 teaspoon at a time
- ½ tsp (2g) clear vanilla extract or clear imitation almond extract — a deliberate exception to pure extract in every other recipe on this site; pure vanilla extract tints white icing a pale ivory, which shows on a “ghost white” or black cookie. Use pure vanilla only for colored icing where a slight ivory cast will not show.
- Gel food coloring (not liquid) — orange, black, green, purple, and white as needed for your designs
- Optional: black and orange sprinkles, nonpareils, or sanding sugar for wet-on-wet garnish
Before You Start
Butter: pull from the fridge and cube it 60–90 minutes before you start in a cool room (65–68°F / 18–20°C), or 45 minutes in a warm kitchen. Press your finger into it — it should leave a clean indent without feeling greasy or slick. If your finger slides through it, it is too warm, and this dough will spread in the oven no matter how carefully you chill it later.
Egg: 30 minutes at room temperature, or set in a bowl of warm (not hot) water for 10 minutes if you forgot.
Flour measuring: spoon the flour into your measuring cup with a separate spoon and level it with a straight edge — do not scoop directly from the bag. Scooping packs in 20–30% more flour and produces a dry, cracking dough that will not roll cleanly. For the most reliable result, weigh 375g on a kitchen scale — the gram weights in this recipe are what I tested with.
Mixing method: this recipe needs a stand mixer or hand mixer for the creaming stage, but only briefly — see Method Step 1 for exactly how long. Overmixing at any stage after the flour goes in is the single biggest risk to sharp edges in this recipe.
Baking powder freshness test: drop ½ tsp (2g) into a small bowl of hot water. It should bubble immediately and vigorously. Weak or no bubbling means it has lost potency — replace the box before baking.
Pan: two light-colored aluminum half-sheet pans, lined with parchment paper — never greased, never foil. A dark or nonstick pan will overbrown the bottoms of these pale cookies before the tops are even set; foil sticks and tears when you try to lift the baked cookies off. Check out our Pan Size Converter tool.
Oven rack: middle position. Most home ovens run 15–25°F (8–14°C) off from their dial — confirm with an oven thermometer if you have one. Mine runs 15°F hot, which is exactly why I check.
Royal icing timing: plan for this recipe to take two full days if you are decorating multiple designs — one day to bake the cookies, one day to ice and dry them fully. In my kitchen in Los Angeles, where humidity sits at 30–50% year-round, iced cookies are dry to the touch and stackable in 6–8 hours. If you live somewhere humid, give it 12–24 hours, run a fan pointed at the cookies, or use a dehumidifier in the room — do not stack or box them until they are fully hard, not only dry on top.
Allergens: contains gluten, dairy, and eggs (the egg in the dough; meringue powder is dried egg whites). Naturally free of tree nuts if the almond extract is omitted.
Necessary Tools for Halloween Sugar Cookies
- Kitchen scale (strongly recommended — this recipe is unusually sensitive to flour measurement)
- Stand mixer with paddle attachment, or hand mixer
- Rolling pin — rolling guide rings or dowels in ¼-inch (6mm) thickness are genuinely useful here, not only a nice-to-have
- Halloween cookie cutters: ghost, pumpkin, bat, and a plain round cutter (about 3 inches / 7.5cm) for jack-o’-lantern faces and spiderwebs
- Two light-colored aluminum half-sheet pans (Nordic Ware or similar)
- Parchment paper
- Thin metal offset spatula, for transferring cut shapes without stretching them
- Wire cooling rack
- Small bowls, one per icing color
- Fine mesh sieve, for sifting the powdered sugar
- Piping bags or plastic condiment squeeze bottles, plus small round tips (Wilton #2 for outlines; a slightly larger opening or a plain snipped squeeze-bottle tip for flooding)
- Toothpicks or a scribe tool, for popping air bubbles and dragging spiderweb lines
- Optional: oven thermometer (most home ovens run 15–25°F off)
- Optional: bench scraper, for lifting scraps of rolled dough cleanly
How to Make Halloween Sugar Cookies
This recipe uses the creamed butter method for the dough — but with less creaming time than you are used to. Read Method Step 1 carefully before you start the mixer. The ingredient order after that follows the standard sequence: fat and sugar first, then egg and extracts, then dry ingredients folded in last.
Step 1: Combining the Butter and Sugar Without Overaerating

In the bowl of your stand mixer fitted with the paddle attachment, add your 1 cup (226g) unsalted butter, softened to 65–68°F and 1 cup (200g) plain white granulated cane sugar. The granulated sugar here is doing double duty — it sweetens the dough and it is the only sugar in this recipe, which matters more than it sounds like it should (see Science). Beat on medium-low speed — speed 2 on a KitchenAid — for exactly 90 seconds. Set a timer. Do not estimate this one.
The mixture should look pale and barely combined, with the texture of wet sand that has started to clump — not fluffy, not doubled in volume, and no visible air pockets when you scrape the paddle.
If it looks light and airy the way you’d want for a birthday cake, you have gone too far — stop, scrape the bowl, and move on anyway; the damage from overcreaming happens in the oven, not in the bowl, so there is nothing to fix here except starting the next batch with a shorter timer. This is the dough moving toward the next stage — add the egg once the timer stops, whether or not the mixture looks the way you expect.
Step 2: Adding the Egg and Extracts for a Smooth, Emulsified Base
Still on medium-low speed, add your 1 large egg (about 50g), room temperature, 2 tsp (8g) pure vanilla extract, and ½ tsp (2g) pure almond extract if using. The egg is what binds the fat and the dry ingredients into one cohesive dough instead of a crumbly mixture — a cold egg will not emulsify smoothly and can make the batter look curdled and separated at the edges of the bowl. Mix for 30 seconds, only until the egg disappears into the butter-sugar mixture.
The dough should look smooth and slightly glossy, with no visible streaks of egg white and no greasy separation at the bowl’s edge.
Do not walk away and let the mixer run longer than 30 seconds here — the egg only needs to disappear, not to be beaten. Scrape the bowl once with a spatula. Your wet base is done — the dry ingredients go in next, and this is the stage where the risk of overmixing goes up.
Step 3: Folding In the Dry Ingredients Until Barely Combined
In a separate bowl, whisk together your 3 cups (375g) all-purpose flour, spooned and leveled, ½ tsp (2g) baking powder, checked for freshness, and ¾ tsp (4g) fine sea salt — whisking distributes the baking powder and salt evenly so you don’t get a bitter or salty pocket in one cookie. With the mixer on the lowest speed, add the flour mixture in two additions, mixing only until the last streak of flour disappears each time — about 20 seconds per addition.
The dough should look like a cohesive, slightly stiff mass that holds together when pressed between two fingers — not sticky, not crumbly, and no dry flour pockets visible at the bottom of the bowl. Do not overmix once the flour is in. Every extra ten seconds of mixing here develops more gluten, and more gluten means a tougher, less tender cookie that also shrinks unevenly as it bakes.
🗒 Luna’s Note: I run my hand mixer for this stage instead of the stand mixer, even though I creamed the butter in the stand mixer. Lower torque means I physically cannot overmix by accident while I’m scraping the bowl with my other hand.
Do not skip scraping the bottom of the bowl before you call this done — dry ingredients hide there. The dough is ready for chilling now — divide it and move directly to Step 4 without letting it sit out on the counter.
Step 4: Dividing and Chilling the Dough
Turn the dough out onto your counter and divide it into two equal discs, each about 1 inch (2.5cm) thick, using a kitchen scale to confirm the split is even — each disc should weigh close to 325g. Wrap each disc tightly in plastic wrap.
Refrigerate for a minimum of 2 hours, or up to 48 hours ahead. This chilling step does two things at once: it relaxes the gluten you developed in Step 3, so the dough does not shrink and distort when you roll and cut it, and it firms the butterfat back into a solid state, which is what will let the cut shapes hold their edges through the oven’s heat instead of collapsing outward.
Do not skip this or shorten it below 2 hours — dough chilled less than that is still soft in the center and will stick to your rolling pin and tear when you try to lift cut shapes off the counter. If the dough has chilled overnight and feels rock-hard, let it sit at room temperature for 10 minutes before rolling — it should give slightly when pressed but not feel soft. Your dough is ready to roll the moment it holds a fingerprint without cracking.
Step 5: Rolling and Cutting the Shapes

On a lightly floured surface, or between two sheets of parchment paper (my preference — no extra flour worked into the dough), roll one disc to an even ¼ inch (6mm) thickness, using rolling guide rings if you have them. Rolling guides matter more here than in almost any other cookie: uneven thickness means uneven bake time across one pan, and a thin edge will darken and dry out before a thick center is even set.
Cut shapes using your ghost, pumpkin, bat, and round Halloween cookie cutters, spacing the cuts as close together as you can without touching — this dough does not re-roll infinitely well, and scraps get tougher each time you gather and re-roll them. Transfer each cut shape to your parchment-lined pan using a thin metal offset spatula, leaving 1½ inches (4cm) between shapes since they will not spread much but do need airflow to bake evenly.
The cut edges should look sharp and defined, holding the exact silhouette of the cutter with no dragging or stretching at the corners. Gather scraps, re-roll once, and cut again — a second re-roll produces a noticeably tougher cookie, so stop there and set any remaining scraps aside for a baker’s snack rather than a third pass.
Step 6: The Second Chill — Non-Negotiable for Sharp Edges
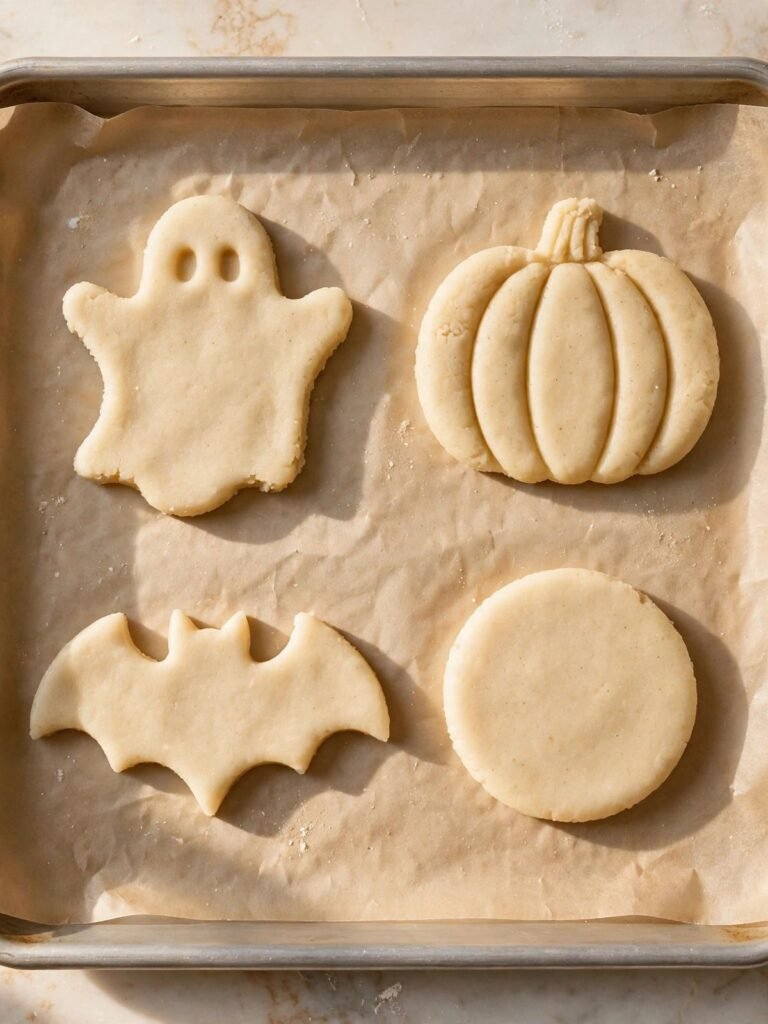
Once a pan is full of cut shapes, place the entire pan in the refrigerator for 15 minutes, or the freezer for 10 minutes, before it goes in the oven. Do not skip this step even though the dough was already chilled once as a disc — rolling and cutting warms the dough again from the friction of the rolling pin and your hands, and shapes that go into a hot oven still warm from cutting will lose the crisp definition you cut, spreading at the edges into rounded, blurred versions of themselves.
The dough should feel firm and cold to the touch again, not soft or tacky, before the pan goes into the oven. While this pan chills, roll and cut your second disc, then repeat the chill for that pan too — this staggers your batches so you are never waiting on an empty oven.
Step 7: Baking at a Lower-Than-Instinct Temperature

Bake at 350°F (175°C) for 8 to 10 minutes — start checking at 8 minutes. This is a lower bake than most drop cookies get on this site, and the pull point is different too: you are not looking for any golden color at all. Pull the pan the moment the edges look matte, dry, and set, while the surface is still pale ivory with no browning anywhere — golden edges on this cookie mean it has gone too far and the surface will look uneven under icing. Rotate the pan halfway through baking if your oven runs hot on one side, as mine does.
The cookies are ready when a gentle touch to the center leaves no indent and the surface has gone from glossy-raw to matte-dry — move the pan to a wire rack the moment you see that, since carryover heat continues to set the very center for another minute or two even off the heat.
Step 8: Cooling Completely Before Icing
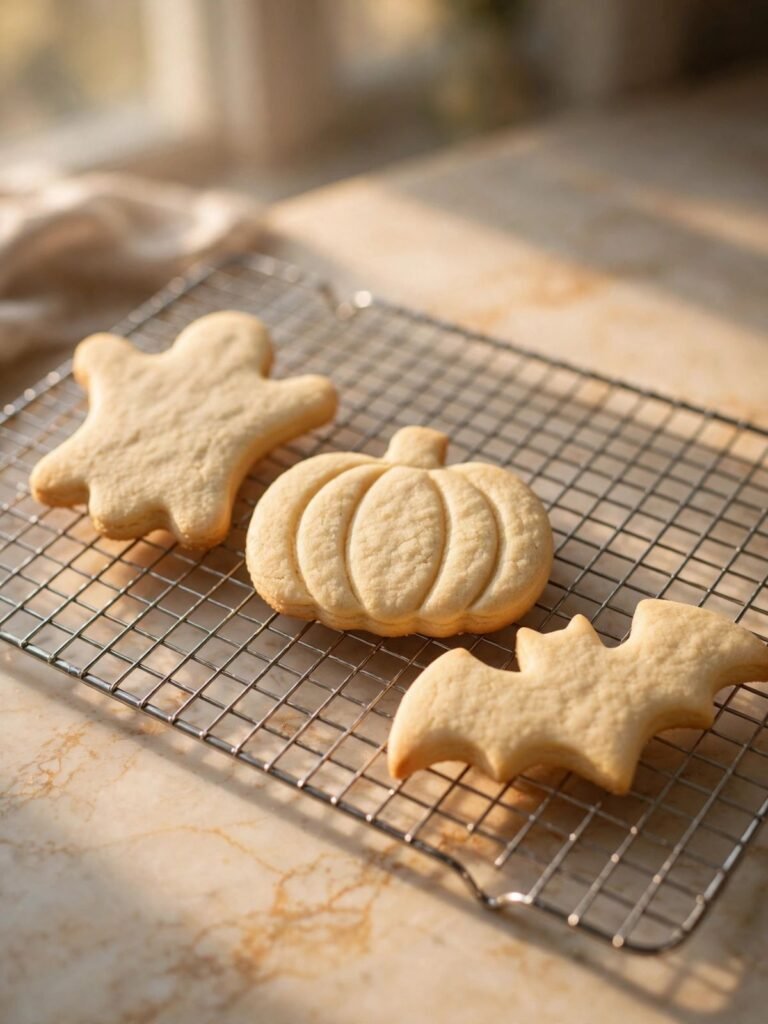
Leave the cookies on the pan for exactly 5 minutes, then transfer them to a wire cooling rack using your offset spatula. Cool completely — a full 30 to 45 minutes at room temperature — before any icing touches them.
The cookies should feel completely cool to the touch with no warmth radiating from the center when you hold the back of your hand near the surface. Icing a warm cookie is one of the most common reasons a first attempt at decorated cookies looks messy: warm cookies melt the icing’s edge as you pipe it, and a flooded design on a warm surface never sets with a clean, glossy finish.
🗒 Luna’s Note: I set a kitchen timer the moment cookies come off the pan, not when I remember to check. Twice I have started icing five minutes early because I “felt” like they were cool, and both times the outline blurred before I noticed.
Step 9: Making the Royal Icing Base
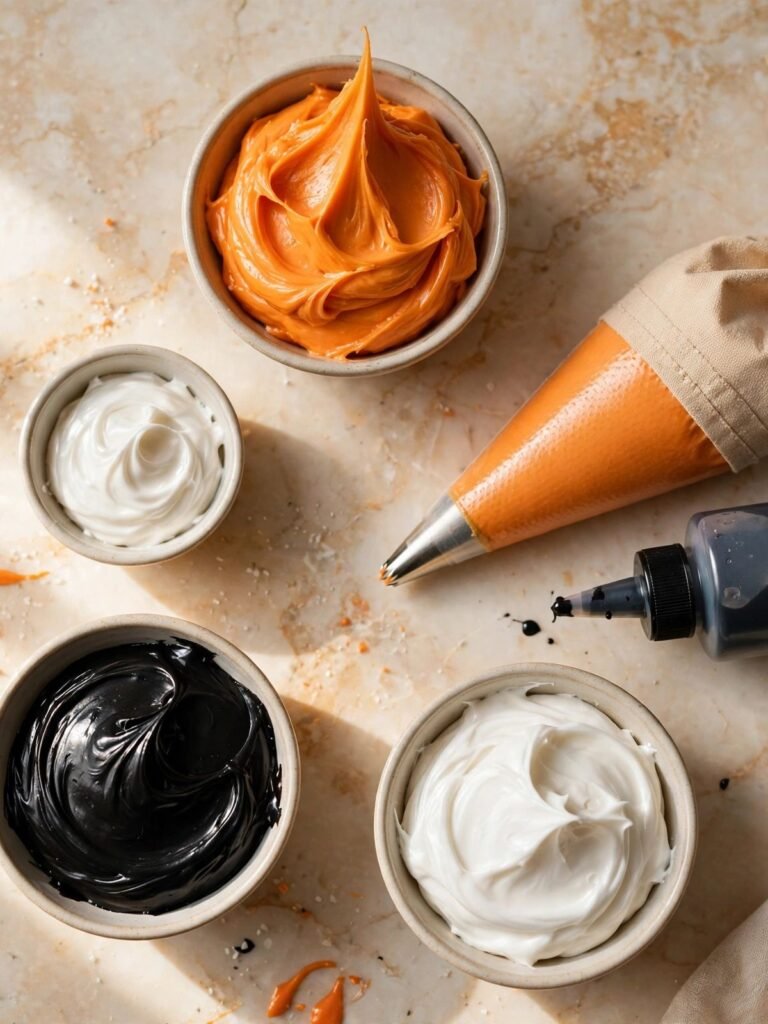
In a large bowl, using your hand mixer on low speed, combine your 4 cups (480g) sifted powdered sugar, 3 tbsp (24g) meringue powder, and 9 tbsp (135ml) warm water. The meringue powder is what gives this icing structure without any raw egg white or any heat — it dries through moisture evaporation and sugar recrystallization, not through cooking, which is why this icing sets hard at room temperature over hours rather than minutes. Beat on low for 1 minute to combine, then increase to medium-high and beat for 3 to 4 minutes more.
The icing should look glossy, thick, and hold a stiff peak that stands straight up when you lift the beater — this is your outline consistency, and it is the base every other consistency comes from. If it looks dull or slightly grainy rather than glossy, keep beating another minute — underbeaten royal icing does not build the sugar structure it needs to dry hard.
Step 10: Dividing, Thinning, and Coloring
Divide the stiff outline-consistency icing into small bowls, one per color you are using, and set aside about a third of the total for outlining. Take the remainder in each bowl and thin it to flood consistency by adding warm water ½ teaspoon at a time, stirring after each addition. Flood consistency is correct when a spoonful dropped back into the bowl disappears into the surface within 10 to 15 seconds, self-leveling into a flat pool with no visible ridge — this is the 10-second test, and it is the single most important visual check in this entire recipe.
Add your gel food coloring a toothpick-tip at a time to both the outline and flood bowls — gel coloring is concentrated enough that liquid coloring would water down the consistency you built. Transfer outline icing to a piping bag fitted with a small round tip (Wilton #2), and transfer each flood color to its own squeeze bottle or piping bag.
Step 11: Piping the Outlines
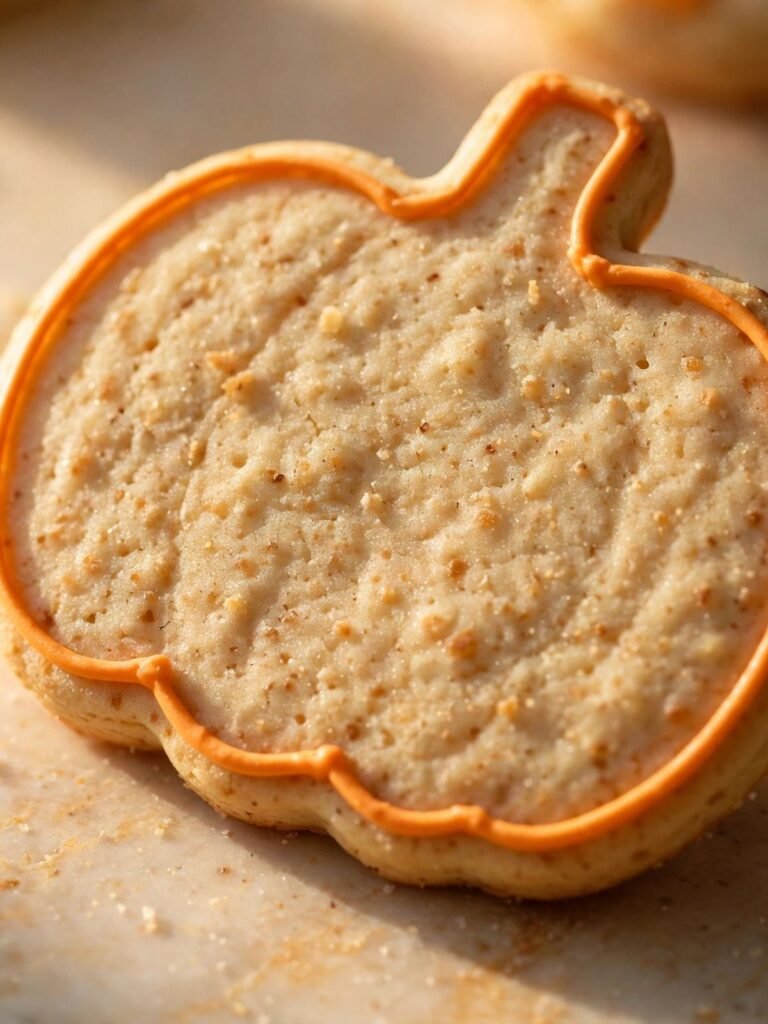
Pipe a thin, continuous outline around the border of each cooled cookie, following the shape’s edge closely — this outline is a dam that will hold the thinner flood icing inside it. The outline should sit as a raised, unbroken line with no gaps — a gap in the outline is where flood icing will escape and run off the cookie’s edge later.
Let the outlines sit for 15 to 20 minutes at room temperature before flooding — this gives them time to form a light skin, which is what keeps the border from dissolving into the flood icing the moment you add it. Leave any interior detail lines (a jack-o’-lantern’s face, a spiderweb’s radial lines) unpiped for now — those come after flooding, in Step 13.
Step 12: Flooding the Interior

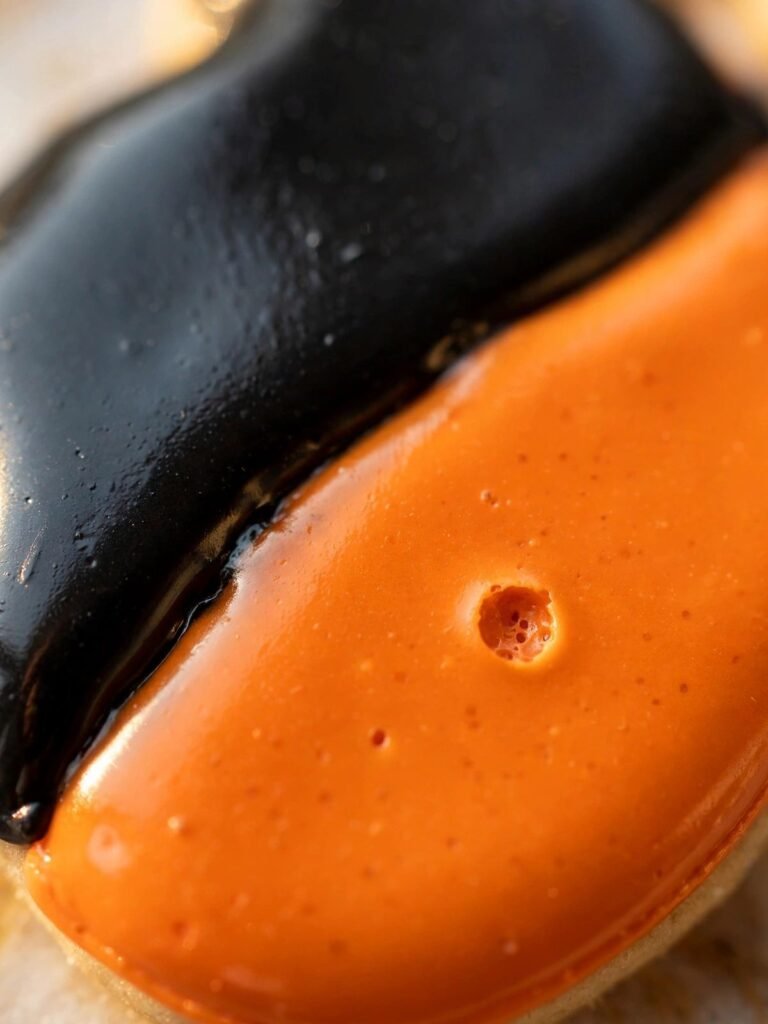
Working one cookie at a time, fill the outlined border with your thinned flood icing, starting from the center and working outward. The icing should spread and level itself flat within a few seconds of touching the surface, filling every corner up to the piped border without your help. If it does not reach a corner on its own, use a toothpick to gently coax it there rather than adding more icing, which can overflow the dam. Immediately run a toothpick through the surface in a zigzag or a few quick strokes to pop any trapped air bubbles — bubbles that survive to the drying stage leave visible craters in the finished glossy surface.
Work through one full color across all the cookies that need it before moving to the next color, since flood icing starts to skin over within a couple of minutes and needs to stay workable.
Step 13: Wet-on-Wet Detail Work and Drying

While the flood icing is still wet — within the first 2 to 3 minutes — pipe any interior detail directly into the surface: two dots and a jagged mouth for a jack-o’-lantern face, radial lines dragged outward from the center with a toothpick for a spiderweb, small dots for ghost eyes. This is called wet-on-wet piping, and it works because the detail color sinks slightly into the still-wet base color and dries as one continuous, flat surface instead of sitting on top as a raised bump.
My grandmother shaped pitha by hand in Chattogram with no molds and no guides — freehand patterns pressed into rice dough with steady fingers, nothing measured. Dragging a toothpick through wet icing to pull a spiderweb’s lines is the closest I have come to that same kind of control since. If using sprinkles, scatter them onto the wet icing now — sprinkles added after the surface skins over will not stick and will roll off the second you pick the cookie up. Let the finished cookies dry, completely undisturbed, on a flat surface for 6 to 8 hours in a low-humidity kitchen or 12 to 24 hours in a humid one.
The icing is fully dry when it feels hard and matte to a light fingertip tap, with no give and no tackiness anywhere on the surface — that is your signal these are ready to stack, box, or gift.
The Science Behind Halloween Sugar Cookies
I kept getting rounded, softened edges on cut-out cookies for longer than I want to admit, and I assumed the problem was my oven or my dough temperature. It was neither.
Every cookie recipe I had ever written up to that point told me to cream butter and sugar until pale and fluffy — that instruction is correct for a drop cookie, where you want lift and a soft, aerated crumb. It is the wrong instruction for a cut-out cookie. Creaming incorporates thousands of tiny air pockets into the fat. In the oven, those air pockets expand exactly the way they are supposed to in a birthday cake, pushing the dough up and slightly outward in every direction — including sideways, past the sharp line you cut. A cookie with a well-defined bat wing does not want that lift. It wants the fat to stay dense and mostly un-aerated, so the only thing happening in the oven is the dough setting in place, not rising away from the shape you gave it.
That is why Step 1 caps the creaming time at 90 seconds on a low-medium speed instead of the 3 to 5 minutes you’d use for a cake or a soft cookie — you are deliberately choosing less aeration, which looks like an unfinished step but is the entire point.
Why This Dough Uses Only White Sugar — No Brown Sugar, No Exceptions
Brown sugar contains molasses, which is hygroscopic — it pulls moisture from the air and holds onto it inside the dough. That extra moisture softens a dough’s structure and encourages more spread in the oven, which is exactly the effect that produces the soft, chewy edges you want in a drop cookie and exactly the effect you do not want on a shape you need to hold still. Plain white granulated sugar carries no extra moisture beyond what the recipe already accounts for, and its crystal structure resists melting into the dough the way brown sugar’s finer, moisture-laden crystals do. Cut Out Sugar Cookies Recipe uses this same all-white-sugar logic, and it is the reason both recipes hold a shape a drop cookie recipe never could.
Why Royal Icing Sets Hard at Room Temperature With No Oven Involved
I did not understand for a long time why an icing with no eggs cooked and no heat applied at any point still turns into something as hard as a piece of candy by morning. Royal icing hardens through a process closer to what happens when a saturated sugar solution recrystallizes than anything resembling baking. As the water in the icing evaporates into the air, the powdered sugar’s crystal structure locks back into a rigid lattice, and the meringue powder’s dried egg-white proteins stiffen alongside it, holding that structure in a thin, smooth shell.
This is also exactly why humidity is the enemy of a fast dry time: in a humid room, water evaporates out of the icing more slowly because the air is already holding as much moisture as it can, so the sugar lattice has less incentive to lock into its dry, crystalline state.
In my kitchen, at 30–50% relative humidity year-round, that evaporation happens fast enough that decorated cookies are dry to the touch in 6 to 8 hours. Bakers in humid climates are not doing anything wrong when the same icing takes overnight or longer — the chemistry is working exactly the same way, only against more resistance in the air.
🗒 Luna’s Note: I keep a small desk fan pointed at my cooling rack whenever I’m decorating more than two dozen cookies at once. It cuts my dry time by roughly two hours and costs nothing.
Troubleshooting & Pro-Tips
Common Mistakes
My cookies spread and lost their crisp edges — they look like soft blobs instead of ghosts and bats. This is almost always the sugar. If you swapped in brown sugar for part or all of the white sugar — even “to use up what’s open in the pantry” — the added molasses moisture softened the dough enough to spread past your cut lines. There is no fix once these are baked; if the shapes are unrecognizable, crumble them into a Halloween trifle with whipped cream and crushed candy instead of trying to decorate a puddle. Prevention: use only plain white granulated sugar, exactly as written, with no substitutions.
My cookies browned or burned on the bottom before the tops even looked set. A dark-colored or nonstick pan absorbs and holds more heat than light aluminum, and it will overbrown these pale cookies from the bottom up while the tops are still raw and glossy. If this has already happened, trim the darkened base off with a serrated knife once cool — the icing will hide the cut edge completely. Prevention: use light-colored aluminum half-sheet pans, parchment-lined, every time — never dark metal, never foil.
My dough cracked at the edges when I tried to roll it. Dough straight from the fridge after a long chill is often too cold to roll without cracking, especially if you measured the flour by scooping instead of spooning and leveling — extra flour makes an already firm dough drier still. Let the disc sit at room temperature for 8 to 10 minutes before rolling if it cracks on contact. Prevention: weigh your flour at 375g rather than measuring by volume, and give a fridge-cold disc a short rest before you pick up the rolling pin.
My cookies puffed up and domed instead of staying flat with sharp corners. This is the creaming step. If the butter and sugar were beaten until pale and fluffy — the way you would for a birthday cake or a soft drop cookie — the trapped air expanded in the oven and pushed the dough up and outward, rounding off every point you cut. There is no fixing a domed batch after baking; it is still a perfectly edible cookie, though not a sharp one for decorating detail work — save it for cookies that don’t need fine points, like a plain round shape. Prevention: cap the creaming stage at 90 seconds on low-medium speed, checking for a barely-combined, slightly sandy texture rather than fluffy volume.
My royal icing ran off the cookie or bled past the outline. This means either the outline hadn’t skinned over enough before you flooded (give it the full 15 to 20 minutes), or the flood icing was thinned past the 10-second test into something closer to syrup. If icing has already run off the edge, let it dry completely, then pipe a second, tighter border directly over the mess and reflood a smaller interior area — most viewers never notice a slightly smaller design. Prevention: test flood consistency with an actual spoon drop before piping the first cookie, not by eye.
Two colors of wet icing bled together into a muddy line. Adjacent colors flooded within a minute or two of each other, before either had a chance to skin over, will bleed into a soft gradient where they meet. If this has happened and the design still reads clearly enough, let it dry as-is — a slight blend at a border between orange and black on a jack-o’-lantern often looks intentional. Prevention: flood one color fully across your entire batch and let it sit for at least 5 minutes before starting an adjacent color, especially with high-contrast pairs like orange and black.
My finished icing dried dull and matte instead of glossy, and I noticed small cracks across the surface. Icing dried in a very warm, dry spot — near a heater vent or in direct sun — can dry too fast on the surface while the interior is still wet, which shows up as dullness or fine surface cracks once fully hard. This is cosmetic only; the cookie is still safe and structurally fine. If the cracking bothers you, a light dusting of edible glitter or a thin second flood coat over the top disguises it completely. Prevention: dry cookies at normal room temperature, out of direct sun and away from heat vents, ideally under a small fan for even, gradual airflow rather than concentrated heat.
My baking powder didn’t seem to do anything — the cookies still came out flat and a little dense. Baking powder loses potency 6 to 12 months after opening, and this recipe uses so little (½ tsp) that expired powder produces no lift at all, rather than a dramatic failure. Run the freshness test from Before You Start: ½ tsp in hot water should bubble immediately and vigorously. If it doesn’t, replace the box — there is no way to add lift back into a baked cookie, so this is a next-batch fix only.
In a humid climate, my icing still feels tacky after a full day. This isn’t a mistake in your technique — it’s the chemistry described in the Science section working against more resistance in humid air. Water in the icing evaporates more slowly when the surrounding air is already holding a lot of moisture, so the sugar’s crystal structure takes longer to lock into its hard, dry state. Give it 24 hours minimum in a humid climate, run a fan or a dehumidifier in the room, and resist the urge to stack or box the cookies before they pass the fingertip-tap test in Method Step 13.
Expert Pro-Tips
Buttercream is a real alternative here — know the trade-off before you choose it. Royal icing dries hard and stackable; American buttercream never fully hardens and stays soft to the touch indefinitely, which means it smudges in a gift box and can’t hold the crisp wet-on-wet detail lines this recipe relies on for spiderwebs and faces. If you want a softer bite and don’t need to stack or ship these, pipe a thin layer of vanilla buttercream instead and skip the two-consistency system entirely — Luna’s Sugar Cookies with Frosting article has a tested buttercream recipe that pairs well with this same cookie base.
Use a plastic condiment squeeze bottle instead of a piping bag for flood icing. I stopped using piping bags for the flood stage years ago — a bottle from the grocery store’s condiment aisle holds the icing, controls the flow with one hand, and rinses clean in the sink instead of turning into a sticky bag I have to throw away. I have not gone back to a bag for flooding since.
Press extra sprinkles into the wet flood icing at a slight angle, not straight down. Sprinkles dropped in flat lie invisibly on the surface once the icing dries and levels around them. Pressed at a slight angle, they catch the light and stay visibly raised, which reads much better in a photo and on the cookie itself.
Bake a test cookie from your first re-rolled scraps before committing a full pan. Re-rolled dough behaves slightly differently than a first roll — it can brown a shade darker at the same bake time because it has picked up a little extra flour from the surface. One test cookie tells you whether to shave 30 seconds off the bake time for that batch.
How to Store Halloween Sugar Cookies
Room Temperature
Store fully dried, decorated cookies in a lidded hard-sided container with parchment or wax paper between layers, at room temperature, for 5 to 7 days. Never use a zip-lock bag for iced cookies — the icing will scratch, smear, or stick to the plastic under any pressure, and stacking flattens delicate details. Undecorated baked cookies keep the same way for up to a week.
Refrigerator
Not recommended. Refrigeration introduces condensation onto the icing’s surface as the cookies come back to room temperature, which dulls the glossy finish and can cause colors to run slightly. Room temperature storage, away from direct sunlight and heat, is correct for both the undecorated and decorated versions.
Freezer — Baked / Decorated
Undecorated baked cookies freeze well: wrap individually in plastic wrap, then place in a freezer-safe container for up to 2 months. Thaw at room temperature for about an hour before icing. Fully dried, decorated cookies can also be frozen — flash-freeze unwrapped on a tray for 1 hour first so the icing sets hard before any plastic touches it, then wrap individually and freeze up to 1 month. Thaw at room temperature, still wrapped, to avoid condensation forming directly on the icing.
Freezer — Unbaked
The dough discs freeze beautifully: wrap tightly in plastic wrap, then foil, for up to 3 months. Thaw overnight in the refrigerator, then let sit at room temperature for 10 minutes before rolling — it should give slightly when pressed but not feel soft. This is the make-ahead move I actually use: dough goes in the freezer in October of most years, and I bake and decorate in smaller batches over the following two weeks instead of one long day.
Serving Suggestion
Serve these at room temperature, never straight from the fridge — cold sugar cookie is a noticeably different, blander bite than one that’s had twenty minutes on the counter. I set these out on a plain white or cream plate, never anything patterned, because a black-and-orange spiderweb design gets visually lost against a busy background.
These are the cookies I make for a classroom party or a small gathering where a plate of something homemade needs to look intentional without me spending the whole morning on it — they are not the cookies I’d bring somewhere I needed forty of them by 9am, because the two-day timeline does not compress well under a deadline.
On day two, the cookie underneath the icing is noticeably softer than day one — the icing’s outer shell locks in moisture that would otherwise evaporate, so a lot of people, myself included, actually prefer these a day after baking rather than the same afternoon. What this recipe is not good for: transporting loose in a bag. The icing chips at the corners if the cookies knock against each other without a rigid container and parchment between layers — pack them flat, one layer at a time, or don’t pack them at all.
🗒 Luna’s Note: I set the flat box of decorated cookies on the car floor for the drive, not the seat. A shallow footwell keeps the box level through turns in a way a seat cushion never does, and a level box is the only thing standing between a finished spiderweb and a chipped one.
Frequently Asked Questions About Halloween Sugar Cookies Recipe
Can I make Halloween sugar cookies ahead of time?
Yes, at every stage. Dough freezes up to 3 months, undecorated baked cookies up to 2 months, and fully dried decorated cookies up to 1 month once flash-frozen first so the icing doesn’t smudge. For an event, make the dough a week ahead, bake two days before, and decorate the day before so icing dries fully overnight.
Can I use Pillsbury refrigerated cookie dough for Halloween sugar cookies?
It works as a shortcut but bakes differently. Pillsbury’s dough stays soft at full bake time, so shapes round off more than this dough’s, and the surface comes out shinier, not matte. Fine for a faster, softer cookie — not a swap-in for sharp decorated edges, since those depend on this recipe’s chilling and creaming method.
Can I decorate Halloween sugar cookies with buttercream instead of royal icing?
Yes, and the results genuinely differ. Buttercream stays soft indefinitely instead of hardening, so it suits same-day serving better than gifting or shipping. What it can’t do is hold crisp wet-on-wet detail lines, since it doesn’t self-level flat the way thinned royal icing does. Sugar Cookies with Frosting has a tested buttercream version if you’d rather use that.
Why did my Halloween sugar cookies spread and lose their shape?
Overcreaming is the usual cause — beating butter and sugar pale and fluffy traps air that expands in the oven and pushes dough past the edges you cut. Capping creaming at 90 seconds until barely combined fixes it. Skipping the second chill after cutting is the other cause — warm, handled dough spreads even when the disc itself chilled properly earlier.
Why is my royal icing still tacky and not drying?
Royal icing dries through water evaporation, not heat, so anything slowing evaporation slows drying — high humidity is the usual cause. In my low-humidity Los Angeles kitchen, icing dries in 6 to 8 hours; in a humid climate, plan for 12 to 24 hours and use a fan. A too-thick flood layer dries slower too, since it holds more water to evaporate.
Can I double this Halloween sugar cookie recipe?
Yes. Double every dough ingredient except the baking powder — use 1 tsp total, not a full double, since leavening doesn’t scale linearly and too much tastes faintly soapy. Divide the dough into four discs instead of two, since larger discs take longer to chill through the center. The royal icing doubles cleanly at 1:1 with no adjustment needed.
What’s the best way to get smooth, clean royal icing on decorated cookies?
Run the 10-second flood test instead of guessing — a spoonful dropped into the bowl should disappear within 10 to 15 seconds and self-level flat. Drag a toothpick through the wet surface right away in quick zigzag strokes to pop air bubbles before they set as craters. Flood one color across the batch before starting the next so each skins over first.
More Sugar Cookies You’ll Love
- Sugar Cookies Recipe — the year-round base recipe this Halloween version builds on, with a softer bake and no cut-out shaping required.
- Gingerbread Men Cookies — the same cut-out shaping and royal icing decorating technique, built around a spiced holiday dough instead.
- Pumpkin Chocolate Chip Cookies — a softer, drop-style fall cookie if you want pumpkin flavor without the decorating project.

Halloween Sugar Cookies
Ingredients
Equipment
Method
- Beat the softened butter and granulated sugar on medium-low speed for exactly 90 seconds until barely combined and slightly lightened, not pale and fluffy — this controlled creaming is what keeps the cut shapes sharp in the oven.
- Add the egg and both extracts and mix on medium-low for 30 seconds until smooth and glossy with no streaks.
- Whisk the flour, baking powder, and salt together separately, then mix into the wet ingredients on low speed in two additions, stopping the moment no dry flour remains.
- Divide the dough into two even discs, wrap tightly in plastic, and refrigerate for a minimum of 2 hours or up to 48 hours.
- Roll one disc to an even 1/4 inch thickness between parchment sheets, cut shapes with Halloween cookie cutters spaced close together, and transfer to a parchment-lined pan.
- Chill the cut shapes on the pan for 15 minutes in the refrigerator or 10 minutes in the freezer before baking.
- Bake at 350°F for 8 to 10 minutes, pulling the pan the moment the edges look matte and set with no golden color anywhere on the surface.
- Cool on the pan for 5 minutes, then transfer to a wire rack and cool completely, about 30 to 45 minutes, before icing.
- Beat the sifted powdered sugar, meringue powder, and 9 tablespoons of warm water on low then medium-high speed for 4 to 5 minutes total until it holds a stiff peak.
- Divide the icing into bowls, thin most of each portion to flood consistency with warm water added a half teaspoon at a time, and color with gel food coloring.
- Pipe an outline around each cookie’s border with the stiffer icing and let it sit for 15 to 20 minutes to skin over.
- Flood the interior with the thinned icing, popping air bubbles with a toothpick immediately after filling each cookie.
- While the flood icing is still wet, pipe interior details or drag spiderweb lines with a toothpick, add sprinkles if using, then let the cookies dry fully and undisturbed for 6 to 24 hours depending on humidity before stacking or storing.