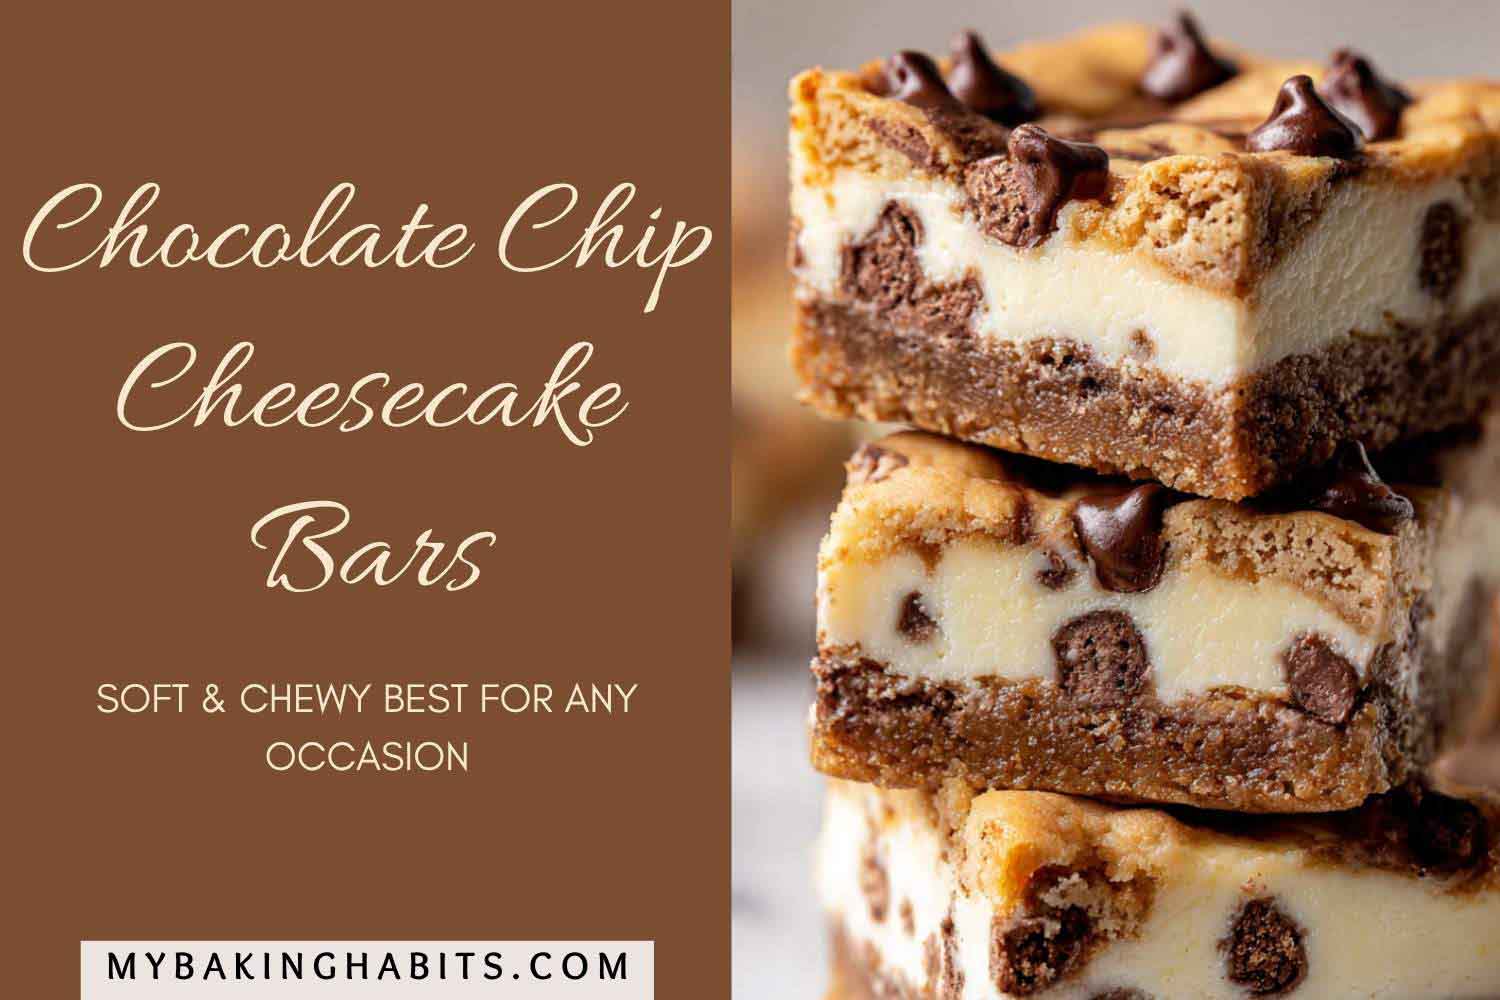
Chocolate Chip Cheesecake Bars
The first batch of these I pulled out of the oven looked perfect. I let them cool for an hour, sliced in, and watched the cheesecake layer collapse into a wet, underset mess. The cookie base was done. The top was golden. The center was not even close. I had overbaked the cookie and underbaked the cheesecake at the same time — the two layers do not finish at the same rate, and I had been treating them as if they did.
The second problem was the bake temperature. I ran the first three batches at 350°F (175°C) — the standard temperature for the cookie dough on its own. The cheesecake layer was rubbery every time. I dropped to 325°F (165°C) on batch four and pulled at the jiggle. The center was creamy, smooth, and held a clean edge after overnight chilling. That is the recipe. Six total test batches. The last two were identical, which is how I know it is right.
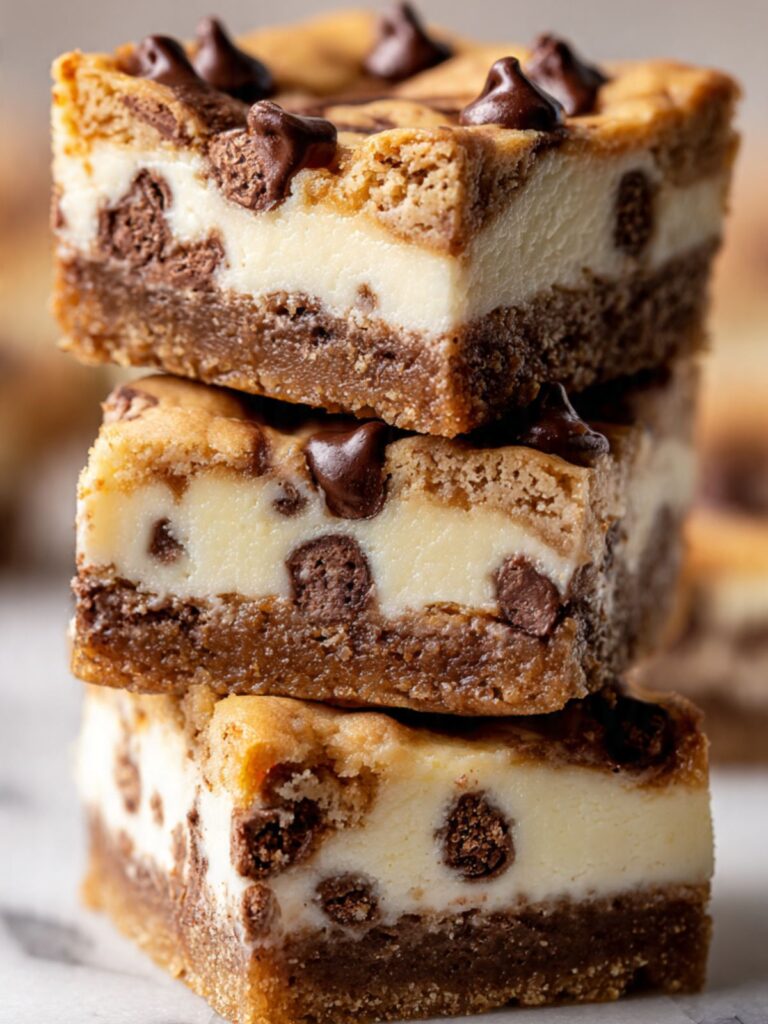
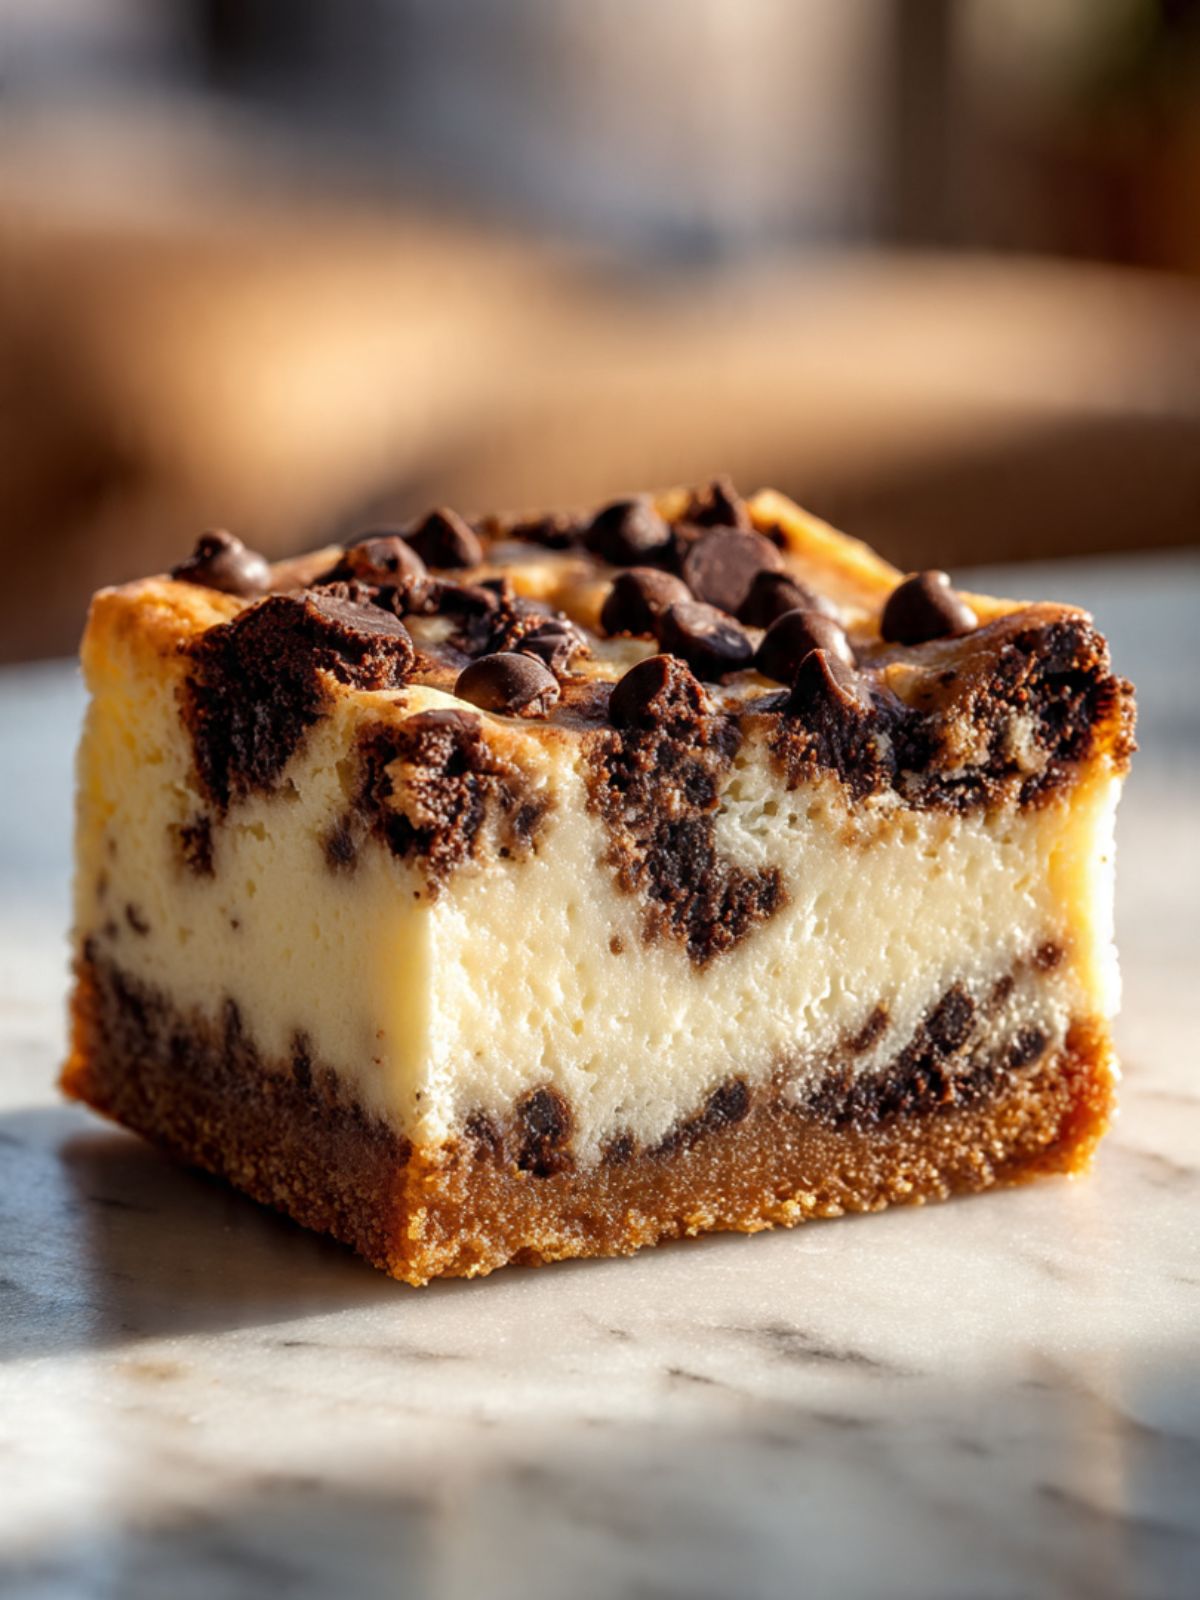
These are a triple-layer bar with three distinct textures in every bite: a dense, golden cookie dough base that holds a clean 90-degree edge when cold; a smooth, creamy white cheesecake filling loaded with semi-sweet chocolate chips; and an irregular patchwork of golden cookie dough across the top with more chips pressed in before baking. The cross-section you see in the stacked photograph is what this recipe produces — tight golden base at the bottom, pale ivory cheesecake through the middle, chip-studded cookie canopy across the top.
A few things to know before you start. This recipe uses one batch of cookie dough for both the base and the top — you divide it and use roughly two-thirds for the crust and one-third for the topping, so there is no second dough to make. The cheesecake filling is four ingredients: full-fat block cream cheese, sugar, one egg, and pure vanilla extract. No water bath required for this bar format. And the chilling step after baking is not optional — these need a minimum of two hours in the refrigerator after they reach room temperature before you cut them. Skip the chill and the cheesecake layer will not hold its shape when the knife goes through.
🗒 Luna’s Note: I divide the dough by weight. Two-thirds of the total dough weight goes into the pan first — pressed firm and flat. The remaining one-third gets torn into rough tablespoon-sized pieces and dropped over the cheesecake. Weighing the division keeps the base thick enough to hold the cheesecake layer without cracking when you lift the bars from the pan.
Recipe Overview & Nutrition Table
| Yield | 12 bars (3×4 grid, from one 9×9 inch / 23×23cm pan) |
| Serving Size | 1 bar (approximately 2.25″ × 2.25″ / 5.7×5.7cm) |
| Prep Time | 25 minutes |
| Chill Time (ingredients) | 60–120 minutes (cream cheese + eggs to room temperature) |
| Bake Time | 35–40 minutes |
| Cooling Time | 2 hours room temperature + minimum 2 hours refrigerator |
| Total Time | ~5 hours (including all resting and chilling) |
| Difficulty | Intermediate |
| Method | Creamed butter (cookie dough) + Cheesecake method (filling) |
| Equipment | Hand mixer or stand mixer, 9×9 inch (23×23cm) light-colored aluminum pan, parchment paper |
| Nutrient | Per Bar (1 of 12) |
|---|---|
| Calories | ~620 |
| Carbohydrates | ~67g |
| Fat | ~37g |
| Protein | ~8g |
| Sugar | ~42g |
| Sodium | ~210mg |
Ingredients & Tools for Chocolate Chip Cheesecake Bars Recipe
For the Cookie Dough (Base and Topping)
- 1 cup (226g) unsalted butter, softened to room temperature (65–68°F / 18–20°C) — pull from the fridge 60–90 minutes before starting. When you press your finger into the butter, it should leave a clean indent without the butter feeling greasy or slick. If the butter looks shiny or your finger slides through it, it is too warm.
- ¾ cup (150g) plain white granulated cane sugar — do not substitute coconut sugar, raw sugar, or turbinado. Different crystal structures change spread and surface texture.
- ¾ cup (165g) packed brown sugar — pack it firmly into the measuring cup. If your brown sugar has hardened, place a damp paper towel over it and microwave in 20-second increments until pliable before measuring.
- 2 large eggs (approximately 50g each without shell), room temperature — pull from the fridge 30 minutes before starting, or place in a bowl of warm (not hot) water for 10 minutes.
- 2¼ cups (270g) all-purpose flour, spooned into the measuring cup and leveled — or weighed at 270g. Do not scoop directly from the bag — scooping packs 20–30% more flour than spooning and leveling, which produces a dry, stiff dough that will not press flat or drop cleanly.
- 1 teaspoon (6g) baking soda, checked for freshness — drop ½ teaspoon (3g) into a small bowl of hot water with a splash of white vinegar. It should bubble aggressively within 2 seconds. If it fizzes weakly or not at all, replace the box before baking.
- 1 teaspoon (6g) fine sea salt — do not substitute table salt or kosher salt at the same volume. Table salt measures denser and will over-salt the dough.
- 1 teaspoon (5ml) pure vanilla extract — not imitation vanilla. Imitation vanilla has a sharper, synthetic flavor that is noticeable in this dough where vanilla is a primary note.
- 1½ cups (255g) semi-sweet chocolate chips (45–55% cacao), such as Nestlé Toll House or Ghirardelli — for the cookie dough base and topping. Reserve an additional small handful to press onto the top surface before baking.
For the Cheesecake Filling
- 16 oz (452g) full-fat block cream cheese (not low-fat, not whipped), softened to room temperature — pull from the fridge 60–120 minutes before starting. Do not soften in the microwave — it changes the fat structure and produces a grainy filling. Cold cream cheese will not beat smooth no matter how long you mix it; the lumps will bake in permanently.
- ½ cup (100g) plain white granulated cane sugar
- 1 large egg (approximately 50g without shell), room temperature — same timing as the cookie dough eggs. A cold egg added to a cream cheese mixture causes the fat to seize and produces a lumpy, curdled-looking filling.
- 1 teaspoon (5ml) pure vanilla extract
- ½ cup (85g) semi-sweet chocolate chips (45–55% cacao), such as Nestlé Toll House or Ghirardelli — folded directly into the cheesecake filling before pouring. These are the chips visible suspended through the white filling layer in the cross-section photographs.
Before You Start
- Room temperature is not optional for this recipe. The cream cheese needs 60–120 minutes out of the fridge. The butter needs 60–90 minutes. The eggs need 30 minutes. Set everything out at the same time — the cream cheese takes longest and governs the schedule. Cold cream cheese produces a lumpy filling that baking cannot fix. Cold butter produces a dough that does not cream properly and bakes up dense.
- Use a kitchen scale. The gram weights in this recipe are the numbers tested. Flour measured by volume can vary by 20–30% depending on how it is scooped. Too much flour in the cookie dough makes it stiff and difficult to press flat into the pan and to drop in clean pieces over the filling.
- Set the oven rack to the middle position before preheating. Middle rack gives the most even heat circulation. Bottom rack will overbrown the cookie base before the cheesecake sets. Top rack will brown the cookie topping too aggressively and leave the base underdone. Test your baking soda before starting. Drop ½ teaspoon (3g) into a small bowl of hot water with a splash of white vinegar. It should bubble aggressively within 2 seconds. Weak fizz or no reaction means the baking soda is expired — replace the box. This takes 30 seconds and prevents a batch of dense, flat cookie layers with no lift. For the most accurate results, use a kitchen scale set to grams. Volume measurements like cups and tablespoons can vary by 20–30% depending on how the ingredient is scooped or packed. The gram weights in this recipe are the numbers I tested with — they are the most reliable way to get the same result I got. Add an oven thermometer to the list if you have one. Most home ovens run 15–25°F (8–14°C) off from the dial setting. At 325°F (165°C) this matters more than at higher temperatures — a 25°F variance at this bake temp is enough to tip the cheesecake layer from set to rubbery.
- Line the pan with parchment with overhang on all four sides. Use a 9×9 inch (23×23cm) light-colored aluminum pan. Cut the parchment so at least 2 inches hang over each edge — these are your handles. Without the overhang, you will not be able to lift the slab out of the pan cleanly and the bars will break at the cheesecake layer when you try to cut them.
- Do not use a dark non-stick pan. Dark pans absorb more heat and will overbrown the cookie base before the cheesecake layer has had time to set. Light-colored aluminum only.
- The chilling step after baking is required. These bars need to reach room temperature fully (approximately 2 hours on a wire rack) before going into the refrigerator, then a minimum of 2 additional hours chilled before slicing. The cheesecake layer sets as it cools — cutting warm or even room-temperature bars produces a soft, collapsing center. For the sharpest edges shown in the photographs, refrigerate overnight.
- This recipe requires a hand mixer or stand mixer for both the cookie dough and the cheesecake filling. Mixing the cream cheese by hand will not produce a smooth, lump-free filling.
- No water bath is required for this bar-format cheesecake. The cookie layers on top and bottom insulate the filling from direct oven heat and significantly reduce the risk of cracking.
Necessary Tools
- 9×9 inch (23×23cm) light-colored aluminum baking pan
- Parchment paper cut with 2-inch overhang on all sides
- Hand mixer or stand mixer fitted with the paddle attachment
- Two large mixing bowls
- Silicone spatula
- Kitchen scale (strongly recommended)
- Measuring cups and spoons
- Wire cooling rack
- Sharp knife and cutting board for slicing (wiped clean between cuts)
- Oven thermometer (optional but recommended — most home ovens run off from the dial setting)
I use a bench scraper to divide the dough rather than a spoon. It cuts through the dough cleanly and lets me portion straight into the scale bowl without dragging. A spoon works. The bench scraper is faster.
How to Make Chocolate Chip Cheesecake Bars
Step 1: Preparing the Pan and Preheating the Oven
Set your oven rack to the middle position and preheat to 325°F (165°C). Most home ovens run 15–25°F (8–14°C) off — if you have an oven thermometer, confirm the actual temperature before the pan goes in. A too-hot oven will overbrown the cookie base and crack the cheesecake layer before the center has set.
Line your 9×9 inch (23×23cm) light-colored aluminum baking pan with parchment paper, pressing it into the corners and leaving at least 2 inches of overhang on all four sides. Run a small piece of butter along the pan sides above the parchment line to anchor the paper flat — this prevents it from folding inward when you press the dough down.
The parchment should lie completely flat against the base and sides with no air pockets underneath it. If the parchment keeps lifting, crease the corners sharply before placing it. This is the only pan prep step — do not grease the parchment itself.
Set the lined pan aside and move to the dough.
Step 2: Creaming the Butter and Both Sugars Until Pale and Aerated
This recipe uses the creamed butter method for the cookie dough — fat and sugar beaten together until aerated before the eggs go in. This order is not flexible. Creaming first creates the fat-coated air pockets that give the base its structure and the topping its golden, slightly open crumb.
In your large mixing bowl, using your hand mixer or stand mixer fitted with the paddle attachment on medium speed, add your 1 cup (226g) unsalted butter, softened to room temperature (65–68°F / 18–20°C). Beat the butter alone for 60 seconds until it looks smooth and slightly glossy — this brief solo beat ensures no cold spots remain before the sugar goes in.
Add your ¾ cup (150g) plain white granulated cane sugar and ¾ cup (165g) packed brown sugar all at once. The granulated sugar drives the slight crispness at the cookie base edges and controls spread — the brown sugar provides moisture, chew, and the warm caramel undertone visible in the golden color of the baked base. Beat on medium speed (speed 4 on a KitchenAid) for exactly 3 minutes — set a timer. Do not estimate.
The mixture should look noticeably paler than when you started — a light tan rather than the deep brown of the raw sugars — and it should feel slightly fluffy when you scrape the sides of the bowl. If it still looks dense and dark after 3 minutes, beat for another 60 seconds and check again.
Do not rush this step. Under-creamed butter and sugar produces a cookie base that bakes up dense and flat rather than holding the structured, compressed layer visible in the cross-section photographs.
Scrape down the sides and bottom of the bowl thoroughly with your silicone spatula before moving to the next step.
Step 3: Adding the Eggs One at a Time
With the mixer running on low speed, add your 2 large eggs (approximately 50g each without shell), room temperature, one at a time. Add the first egg and mix on low for 20 seconds, then scrape the bowl before adding the second. The eggs emulsify the fat and water in the mixture together — adding both at once or adding cold eggs can cause the batter to look broken or curdled. If that happens, keep mixing on medium for 30 seconds — it will almost always come back together.
Add your 1 teaspoon (5ml) pure vanilla extract with the second egg.
After both eggs and vanilla are incorporated, the mixture should look smooth, glossy, and cohesive — no visible butter streaks, no grainy patches, no separated pools of liquid at the bottom of the bowl.
Scrape down the bowl one more time before the flour goes in.
Step 4: Adding the Dry Ingredients Without Overworking the Dough
Before adding anything to the mixer bowl, whisk together your 2¼ cups (270g) all-purpose flour (spooned and leveled), 1 teaspoon (6g) baking soda, checked for freshness, and 1 teaspoon (6g) fine sea salt in a separate bowl. Whisking the dry ingredients together first distributes the baking soda and salt evenly through the flour — if either one lands in a concentrated pocket, you will get uneven rise or sharp salty bites in the finished bar.
The baking soda reacts with the small amount of natural acidity in the brown sugar during baking — this is what gives the cookie layers their slight lift and tender crumb rather than a compressed, dense texture.
Switch the mixer to the lowest speed and add the flour mixture in two additions, mixing only until the last visible streak of flour disappears after each addition. Do not mix beyond that point.
The dough should look thick, cohesive, and slightly sticky — it will pull away from the bowl sides cleanly when you scrape it. If it looks wet or slack, your butter was too warm. If it looks dry and crumbly, your flour was over-measured. Neither problem is fatal at this stage — a slightly warm dough can be refrigerated for 15 minutes to firm up before pressing.
Do not overmix after the flour goes in — the edges of the baked bars will look fine, but the interior will bake up tight and tough rather than the tender, slightly chewy result shown in the photographs of the stacked bars.
Step 5: Folding in the Chocolate Chips and Dividing the Dough
Remove the bowl from the mixer. Add your 1½ cups (255g) semi-sweet chocolate chips (45–55% cacao) to the dough and fold them in by hand using your silicone spatula — slow strokes from the bottom of the bowl upward, rotating the bowl as you go. Count approximately 15 strokes from the moment the chips touch the dough. The chips should be evenly distributed with no large chipless patches remaining.
Now divide the dough by weight. Weigh the full dough batch, then transfer two-thirds of the total weight into the lined pan. Keep the remaining one-third in the bowl, covered, at room temperature while you press the base.
The two-thirds portion going into the pan should weigh approximately 680–700g depending on your exact measurements. The one-third topping portion should weigh approximately 340–350g.
Press the base portion firmly and evenly across the bottom of the parchment-lined pan using your fingers and the flat bottom of a measuring cup. Work from the center outward, pressing into the corners. The base should be completely flat and uniform in thickness — no thin patches at the edges and no mounded center.
The pressed base should look like the dense, even golden layer visible at the bottom of the cross-section photograph of the stacked bars — approximately ⅓ of the total bar height.
Set the pan aside and move immediately to the cheesecake filling.
Step 6: Making the Cheesecake Filling Until Completely Smooth
Wash and dry your mixer bowl, or use your second large mixing bowl. Add your 16 oz (452g) full-fat block cream cheese, softened to room temperature, to the clean bowl. Beat on medium speed alone for 90 seconds — scraping the sides and bottom of the bowl at 45 seconds. This solo beat is the most important step in the filling. Every lump that exists after this stage will still be there in the finished bar. The cream cheese must be completely smooth before anything else goes in.
🗒 Luna’s Note: I press a small piece of cream cheese against the side of the bowl with my spatula before I start mixing. If it smears completely smooth with no resistance, it is ready. If it leaves any grainy or firm patches, it needs another 20 minutes on the counter.
Add your ½ cup (100g) plain white granulated cane sugar and beat on medium for 30 seconds. The sugar does two things in the filling: it sweetens the cream cheese and — more importantly — it disrupts the protein structure of the cream cheese slightly during beating, which is part of what produces the smooth, spreadable consistency. Without it the filling would be dense and slightly grainy even when fully beaten. Scrape the bowl. Add your 1 large egg (approximately 50g without shell), room temperature and your 1 teaspoon (5ml) pure vanilla extract. Switch the mixer to the lowest speed and mix only until the egg disappears — approximately 15 to 20 seconds. Stop the mixer the moment it is incorporated.
Do not overmix after the egg goes in. Overmixing incorporates air into the filling — that trapped air expands in the oven and causes the cheesecake layer to puff and then crack as it cools. Low speed, minimum time, stop early.
Remove the bowl from the mixer and fold in your ½ cup (85g) semi-sweet chocolate chips by hand using the silicone spatula — these are the chips that will be suspended through the white filling layer.
The finished filling should look thick, smooth, and glossy — it should fall off the spatula in a slow, heavy ribbon. If it looks thin or runny, your cream cheese was too warm. If it looks lumpy, the cream cheese was not at full room temperature.
Step 7: Assembling the Layers
Pour the cheesecake filling over the pressed cookie base in the pan. Use your silicone spatula to spread it evenly all the way to the edges, covering the cookie base completely. Work gently — pressing too hard will disturb the base layer beneath.
The filling should cover the base fully with a smooth, level surface — no visible cookie dough patches showing through, no raised center.
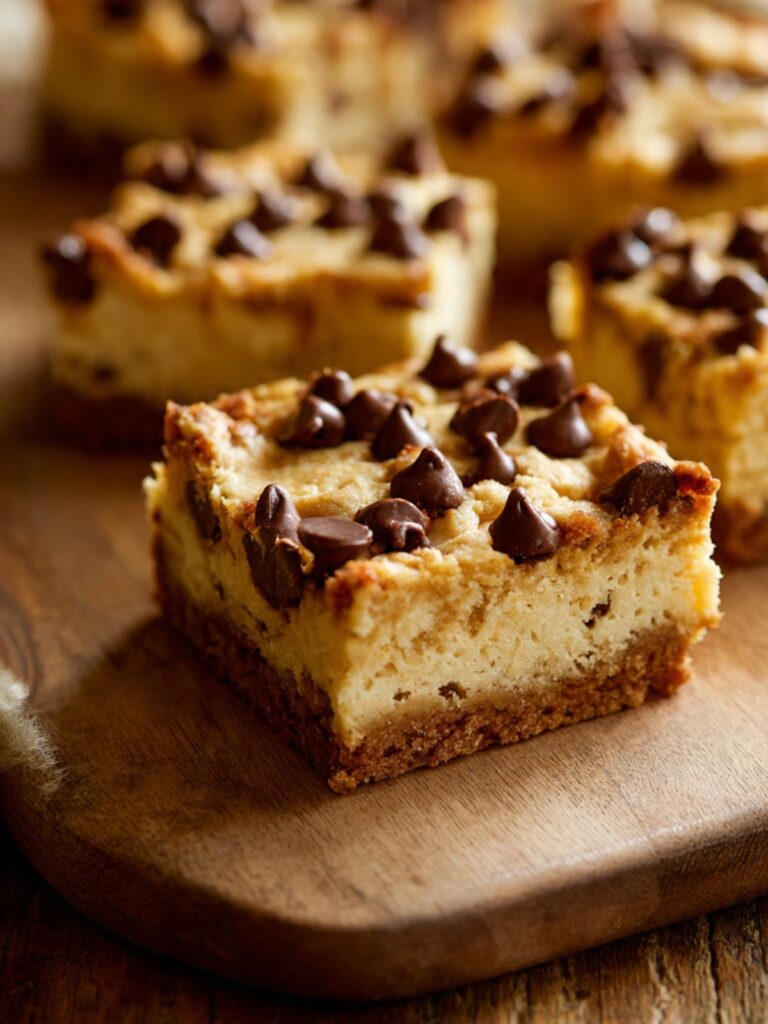
Now take the reserved one-third cookie dough portion and tear or pinch off rough tablespoon-sized pieces. Drop them across the surface of the cheesecake filling in an irregular pattern — do not try to cover the entire surface. You want a patchwork: golden dough islands with cheesecake visible between them, exactly as shown in the overhead photograph of the full batch before baking. Space the pieces so roughly 30–40% of the cheesecake surface remains exposed.
Press your reserved extra handful of semi-sweet chocolate chips across the top of the dough pieces and into any exposed cheesecake surface.
The assembled pan should show a mosaic of dough pieces and chips over a white cheesecake base — not a solid dough sheet, not a sparse scattering. The overhead grid photograph of the finished cut bars shows the correct topping density: significant golden dough coverage with defined cheesecake gaps.
Step 8: Baking to the Correct Soft-Set Doneness
Place the assembled pan on the middle rack of your preheated 325°F (165°C) oven. Bake for 35 to 40 minutes. Do not open the oven door before the 30-minute mark — the sudden temperature drop can cause the cheesecake layer to sink in the center before it has had time to set structurally.
Start checking at 35 minutes. You are looking for three simultaneous signals:
1. The cookie dough pieces on top are golden brown and set to the touch — they should not indent when you gently press the surface through the oven rack with the back of a spoon.
2. The visible cheesecake edges have puffed slightly and look matte rather than wet and shiny.
3. The center has a 2-inch uniform jiggle when you gently shake the pan side to side. The whole pan should not slosh — only the very center should move, and it should move as a single mass, not as a liquid.
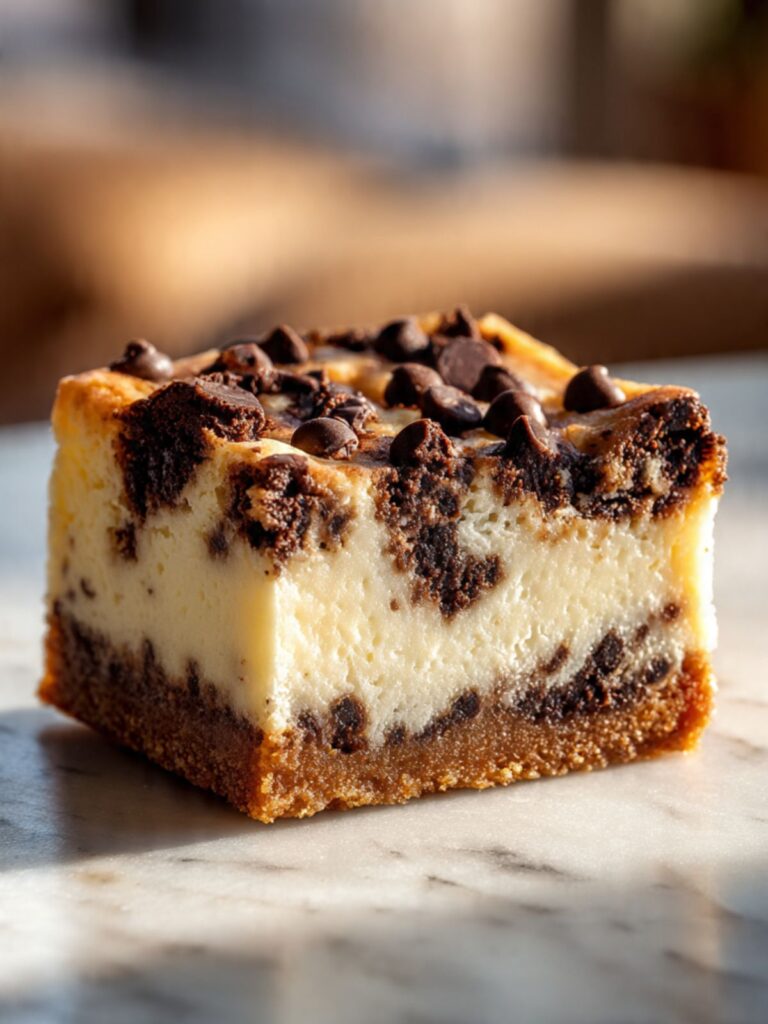
If you are unsure what the correct set looks like from the side, look at the close-up photograph of the single bar on the marble surface — the cheesecake layer is a uniform, pale ivory color all the way through with no darker or denser band along the edges. That even color is only possible if the pan was pulled at the jiggle. A pan left five minutes longer produces a visible darker ring at the outer edge of the filling where the protein coagulated past the correct temperature.
Pull the pan at this exact moment. The center that looks underdone right now will finish setting during cooling — this is carryover cooking at work. The residual heat in the pan and the cheesecake filling itself continues to cook the center for the next 20–30 minutes outside the oven. If you wait until the center looks fully set before pulling, the cheesecake layer will bake to a rubbery, tight texture that is impossible to correct.
Do not wait for the center to look done. The jiggle is the signal. Pull it.
Step 9: Cooling and Chilling for Clean-Cut Bars
Remove the pan from the oven and place it on a wire cooling rack immediately. Do not move it from the rack, do not cover it, and do not refrigerate it yet. Let it cool at room temperature for a full 2 hours. The cheesecake layer is still actively setting during this time — moving it to the refrigerator while it is still warm traps steam under the surface and can cause the top to weep moisture.
After 2 hours at room temperature, transfer the pan uncovered to the refrigerator. Chill for a minimum of 2 hours — overnight is better and produces noticeably sharper edges. The bars shown in the stacked cross-section photograph were chilled overnight before slicing.
To slice: lift the slab out of the pan using the parchment overhang and place it on a cutting board. Use a sharp knife wiped clean with a damp cloth between every single cut. Press straight down — do not drag or saw. Cut into a 3×4 grid for 12 bars.
Each bar weighs approximately 115–125g after cutting — weigh the first one as a reference check. The full slab divided into a 3×4 grid yields exactly 12 bars at this weight. If your bars are running significantly heavier, your pan may have been smaller than 9×9 inches and the layers thicker — adjust your serving size note accordingly.

The bars should hold a clean 90-degree edge with all three layers visible and distinct — golden cookie base at the bottom, creamy white cheesecake through the middle, golden cookie and chip patchwork across the top. If the cheesecake layer is soft and collapses when the knife goes through, return the slab to the refrigerator for another hour before continuing.
The Science Behind Chocolate Chip Cheesecake Bars
Why the Center Still Jiggles When These Are Done
I pulled my first batch of these at what looked like the right moment — the top was golden, the edges were set, and the center looked almost firm. By the time they had cooled two hours and I sliced in, the cheesecake layer was rubbery and dense, with a texture closer to a hard-boiled egg than a creamy filling. I had overbaked it by at least ten minutes and had no idea, because the surface gave no signal.
What I did not understand at the time was protein coagulation. Cream cheese is predominantly fat and protein. When egg proteins are added to that base and the mixture is heated, the egg proteins begin to set at around 145°F (63°C) — slowly, gradually, from the outside edges of the pan inward. The center of the cheesecake filling reaches that temperature last. By the time the center looks visually set through the oven window, the edges have been at or above 145°F for several additional minutes — they have crossed from set into contracted, rubbery, and tight. The correct pull moment is before the center reaches full visual set. The residual heat in the filling and the pan completes the coagulation outside the oven over the next 20 to 30 minutes. This is why the jiggle test exists — not as a rough guide, but as the precise scientific signal that the edges are done and the center has enough stored heat to finish on its own.
The bars in the cross-section photographs were pulled at the exact jiggle moment. The creamy white, smooth interior visible through the middle layer is the result of hitting that window correctly. Overbake by ten minutes and the filling turns ivory-yellow and contracts visibly away from the cookie layers.
How the Cookie Layers Protect the Cheesecake from Cracking
Traditional baked cheesecakes crack for a specific reason: the outer edges of the filling set and become rigid before the center finishes cooking. As the center continues to expand from heat, it has nowhere to go — the rigid outer ring tears, and you get a crack across the top. The standard fix is a water bath, which slows and equalizes the heat distribution across the entire filling so the edges do not race ahead of the center.
These bars do not require a water bath because the cookie dough layers perform the same function by a different mechanism. The dense pressed cookie base insulates the bottom of the filling from direct pan heat. The irregular dough pieces dropped across the top insulate portions of the surface from direct oven heat. Together, they slow and moderate the heat reaching the cheesecake from both directions — the filling heats more gradually and more evenly than it would in an exposed springform pan. This is also why the bake temperature is 325°F (165°C) rather than the 350°F (175°C) used for the cookie dough alone. The lower temperature gives the cheesecake filling time to catch up to the cookie layers without the edges racing ahead and tearing.
If you are familiar with making chocolate chip cookie bars, this principle will feel familiar — the same moderate temperature that keeps bar cookies from overbrowning on the bottom is doing double duty here to protect a much more temperature-sensitive layer in the middle.
Why the Dough Division Ratio Changes the Finished Texture
The two-thirds base / one-third topping division is not arbitrary — it is the ratio that produces the layer balance visible in the photographs. The base needs to be substantial enough to support the weight of the cheesecake filling without cracking when the bars are lifted from the pan by the parchment overhang. A base that is too thin — less than one-third of the total dough — compresses under the weight of the filling and produces a barely-there bottom layer that crumbles when cut. A base that uses too much dough leaves too little for the topping, and the bars lose the patchwork top that defines this recipe visually.
The cookie dough in this recipe uses the creamed butter method — butter and sugar beaten together until aerated before the eggs go in. This aeration creates a network of tiny fat-coated air pockets that expand during baking through the Maillard reaction, producing the golden color and slightly open crumb visible at the edges of the base layer. The same dough pressed flat behaves differently than it would if scooped and dropped as individual cookies — pressed flat, the expansion is constrained, and the result is a dense, structured layer rather than a domed, individual cookie. This structural density is exactly what the recipe needs: a base firm enough to hold everything above it and cut cleanly after chilling.
🗒 Luna’s Note: The Maillard reaction is also why the very bottom edge of the base turns a deeper golden brown than the interior of the cookie layers — it is in direct contact with the metal pan, which conducts heat faster than the surrounding air. This is normal and correct. It is the same browning you see on the underside of any well-baked cookie.
Chocolate Chip Cheesecake Bars Troubleshooting & Pro-Tips
Common Mistakes
The cheesecake filling is lumpy after baking
The cause is cream cheese that was not at full room temperature before mixing. Cold cream cheese does not break down under the mixer — it stays in firm, granular chunks that bake into the finished filling permanently. The mixer cannot fix cold cream cheese no matter how long it runs; it will only smear the chunks smaller, not dissolve them.
Prevention: pull the cream cheese from the fridge 60–120 minutes before starting and test it by pressing a small piece against the side of the bowl with your spatula — it should smear completely smooth with no resistance. If your filling already went into the pan lumpy, the bars are still edible but the texture will be grainy rather than creamy through the center layer. Serve chilled and cut small — the texture is less noticeable in smaller portions.
Wrong pan size or pan material produced overbrowning on the bottom
A dark non-stick pan absorbs significantly more radiant heat than a light-colored aluminum pan and will overbrown the cookie base before the cheesecake filling has had time to set. A glass or ceramic pan retains heat longer and bakes unevenly — the edges will set before the center, increasing the risk of a cracked filling. If you only have a dark pan: reduce the oven temperature by 25°F (15°C) to 300°F (150°C) and add 5 minutes to the bake time.
If you only have a 9×13 inch (23×33cm) pan: the bars will be thinner, the cheesecake layer will be shallower, and the bake time will decrease to approximately 25–28 minutes — start checking at 22 minutes.
The cheesecake layer is rubbery and dense rather than creamy
The filling was overbaked. Once egg proteins coagulate past the set point, the texture contracts and tightens — there is no way to reverse this after baking. The bars are still fully edible. Slice thin, serve cold with a drizzle of warm ganache or a spoonful of whipped cream over each piece — the contrast of temperature and texture compensates significantly for the tighter filling.
Prevention: pull at the jiggle. The center should still move as a single mass when the pan is gently shaken at the 35-minute mark. Do not wait for it to look set.
The bars collapsed or became gummy when cut
They were cut before the cheesecake layer had fully set. The filling needs the full cooling sequence — 2 hours at room temperature followed by a minimum of 2 hours in the refrigerator — before the egg proteins and fat structure have stabilized enough to hold a clean edge under a knife.
If your bars collapsed on the first cut, press the pieces back into the pan and return the whole slab to the refrigerator for another 2 hours before attempting again. The texture recovers well after additional chilling. For the cleanest edges going forward, chill overnight before cutting.
The cookie base cracked when lifting the slab from the pan
The parchment overhang was either too short or the base was too thin. A base built from less than two-thirds of the total dough weight will not have enough structural integrity to support the weight of the cheesecake layer when lifted. If the base has already cracked: leave the slab on the parchment on the cutting board and cut around the crack first, separating the affected bars from the intact ones. The cracked bars taste identical — present them on a plate rather than as a stack.
Prevention: weigh the dough division precisely, press the base to an even thickness across the full pan, and use parchment with a full 2-inch overhang on all sides.
The top cookie dough merged into a continuous sheet rather than staying as distinct patches
The reserved topping dough was too warm and too soft when dropped over the filling. Warm dough spreads aggressively in the oven and the individual pieces merge before they can set. If the topping has already baked into a flat sheet, the bars still taste correct — the visual distinction between layers is less pronounced from above but fully intact in cross-section. Prevention: if the reserved dough feels soft or tacky when you go to drop it, refrigerate it for 15 minutes before assembling the topping layer.
The leavening produced no visible lift in the cookie layers
The baking soda was expired. Baking soda loses potency after 3–6 months once the box is opened. Expired baking soda produces flat, dense cookie layers with no tender crumb — they bake up compressed and hard. Test before every batch: drop ½ teaspoon (3g) into a small bowl of hot water with a splash of white vinegar. Aggressive bubbling within 2 seconds means it is active. Weak fizz or no reaction means replace the box.
This batch cannot be salvaged in terms of texture — the cookie layers will be dense and compressed with no tender crumb. The bars are still fully edible. Crumble them into a bowl, layer with vanilla ice cream and a drizzle of warm caramel sauce, and serve as a deconstructed cheesecake parfait. The dense cookie texture works well as a crumble base in a way it does not work as a bar.
Altitude and humidity adjustments
At high altitude (above 3,500 feet / 1,067m): reduce baking soda to ¾ teaspoon (4.5g), increase flour by 2 tablespoons (15g), and increase oven temperature by 15°F (8°C) to 340°F (170°C). The lower air pressure causes leavening gases to expand faster — the extra flour provides additional structure to hold the expansion. In high humidity environments: the cookie dough will feel stickier than usual due to flour absorbing ambient moisture. Add 1 tablespoon (8g) of additional flour to the dough if it is too soft to press flat without sticking to your fingers.
Expert Pro-Tips
Weigh every cut with a clean knife. Wipe the knife blade with a damp cloth between every single cut — not just occasionally. Cheesecake filling clings to the blade and drags through subsequent cuts, smearing the white layer and tearing the cookie base. A clean blade on every cut is what produces the distinct, defined layers visible in the stacked photograph.
Press extra chips onto the dough pieces immediately before the pan goes in. Chips folded into the dough get partially buried as the cookie bakes and spreads. Pressing additional chips directly onto the surface of the dropped dough pieces in the final 30 seconds before the pan goes into the oven guarantees visible, glossy chocolate on the surface of every finished bar — exactly the chip density visible across the top in the overhead photograph of the full batch.
Score the top lightly with a knife before refrigerating. After the slab has cooled to room temperature and before it goes into the refrigerator, use a sharp knife to lightly score the surface in a 3×4 grid — just enough to mark the cut lines without cutting through. When you slice the next day, you follow the scored lines and the knife goes straight through each bar cleanly rather than finding its own path and producing uneven pieces.
Use the parchment overhang as a sling, not a lift. When removing the chilled slab from the pan, grip both sides of the parchment overhang simultaneously and slide the slab straight up and out in one motion — do not tilt or angle it. Tilting puts lateral stress on the cheesecake layer and can cause it to separate from the cookie base along the interface. Straight up, then set flat on the cutting board.
How to Store Chocolate Chip Cheesecake Bars
Room Temperature
These bars contain a baked cream cheese filling and cannot be stored at room temperature for more than 2 hours after cutting. The cream cheese layer is a dairy-based filling that requires refrigeration — leaving it out longer than 2 hours creates a food safety risk regardless of how the bars look or smell on the surface. Do not use a lidded container on the counter as a substitute for refrigeration with this recipe. If you are serving these at a gathering, set them out no more than 90 minutes before the end of serving and return any remaining bars to the refrigerator immediately.
Refrigerator
Store cut bars in a single layer in a hard-sided lidded container — not a zip-lock bag, which compresses the bars and damages the clean-cut edges of the cookie layers. Place a sheet of parchment paper between layers if you need to stack them. Do not wrap the container tightly in plastic wrap — the trapped moisture softens the cookie layers. A loosely fitted lid allows minimal airflow that keeps the cookie base from becoming soggy.
Refrigerated bars keep well for up to 5 days. The texture changes slightly across those days in a way worth knowing: on Day 1 (the day of baking and chilling), the cookie layers are at their firmest and the cheesecake is at its creamiest. On Day 2, the bars are better — the flavors from the brown sugar and vanilla have deepened overnight and the cheesecake layer has a slightly denser, more set texture that holds its shape even more cleanly when cut. Day 3 and Day 4 remain very good. By Day 5 the cookie layers begin to soften noticeably from the moisture of the cheesecake layer migrating into them — still edible, but the textural contrast between layers has diminished.
Pull bars from the refrigerator 15 minutes before serving — not longer. The cheesecake layer is creamiest when slightly cold rather than fully at room temperature, and the cookie layers hold their structure better cold.
Freezer — Baked
These bars freeze well. Wrap each bar individually in a double layer of plastic wrap, pressing the wrap tightly against all surfaces to exclude air. Place the wrapped bars in a zip-lock freezer bag or a hard-sided freezer container. Freeze for up to 2 months.
To thaw: transfer the individually wrapped bars from the freezer to the refrigerator and thaw overnight — minimum 8 hours. Do not thaw at room temperature; the cheesecake layer will become wet and soft on the outside before the interior has thawed, and the cookie base will absorb that surface moisture. Do not microwave to thaw — it melts the cheesecake layer unevenly and makes the cookie base rubbery.
The texture after freezing and thawing is very close to fresh — the cheesecake layer holds its creaminess well and the cookie layers retain their structure. The one difference worth noting: the chocolate chips in the cheesecake layer may develop a faint white bloom after freezing. This is fat bloom — cocoa butter migrating to the surface of the chip as it freezes and thaws. It does not affect flavor at all and disappears once the bar reaches serving temperature.
Freezer — Unbaked
The assembled unbaked pan can be frozen before baking, though with one important caveat: the cheesecake filling must be assembled and poured over the base in the pan, then the topping dough dropped on top, and the whole assembled pan covered tightly in two layers of plastic wrap and frozen immediately — within 30 minutes of assembly. Do not freeze the components separately and assemble later.
To bake from frozen: thaw the assembled pan overnight in the refrigerator. Let it sit at room temperature for 20 minutes before going into the oven — a fully cold pan going into a 325°F (165°C) oven can cause the cheesecake layer to crack from thermal shock. Bake as directed, adding approximately 5 to 8 minutes to the total bake time and watching the jiggle test rather than the clock.
The unbaked assembly keeps in the freezer for up to 6 weeks. Beyond that the cookie dough begins to develop freezer odor and the cheesecake filling can separate slightly on thawing.
Serving Suggestion

Serve these cold — pulled from the refrigerator 15 minutes before plating, not longer. The cheesecake layer is at its best when it is still slightly firm from the refrigerator rather than softened to full room temperature. This is not a warm dessert. Attempting to serve these warm or at room temperature undoes the chilling work entirely — the layers lose their definition and the cheesecake filling becomes soft enough to slide.
I serve these with a strong black coffee, no sugar. The bitterness cuts through the cream cheese richness in a way that milk or a sweet drink does not — it resets the palate between bites and makes the second bar taste as good as the first.
This is the recipe I make when someone asks me to bring a dessert to something and I want to hand it over cold, sliced, and already done. A dinner party, a potluck, a birthday where a whole cake feels like too much. It travels flat in a container, it does not need to be served warm, and it portions cleanly into identical pieces without a serving utensil. It looks more technically involved than it is, it travels well when kept cold, and it slices cleanly into identical portions that stack without losing their shape. Those three things together make it genuinely useful in a way a cake or a soft cookie is not.
🗒 Luna’s Note: I always make these the day before I need them and let them chill overnight. The Day 2 texture is genuinely better — firmer layers, deeper flavor — and it means there is nothing to do on the day of serving except slice and plate. For a gathering, I slice the full slab into 12 bars the night before, return them to the container in a single layer, and refrigerate until 15 minutes before serving. Zero day-of work.
Day 2 is the better bar. Make these the night before without exception.
This is not a recipe for situations where you need something warm, soft, and comforting straight from the oven. It requires patience with the cooling and chilling sequence, and it rewards that patience with a result that looks and tastes precise. If you need something immediate, make the brookie recipe instead — two layers, no chilling, ready to cut in two hours.
Frequently Asked Questions About Chocolate Chip Cheesecake Bars
Can I use low-fat or whipped cream cheese for cheesecake bars?
Full-fat block cream cheese is the only version that works correctly in this recipe. Low-fat cream cheese contains significantly more water than full-fat — that excess moisture has nowhere to go during baking and produces a filling that is wet, loose, and does not set to a clean, sliceable texture. Whipped cream cheese has a different fat-to-air ratio and an entirely different density than block cream cheese — it behaves like a mousse in the oven rather than a firm filling and will not hold its shape when cut. Use full-fat block cream cheese only, softened to full room temperature before mixing.
Why did my cheesecake layer crack on top?
Cracking in a baked cheesecake filling has three common causes: overmixing after the egg was added (which incorporated air that expanded and tore the surface as it cooled), overbaking past the jiggle stage (which caused the filling to contract and pull away from itself), or cooling too quickly (moving the pan directly from the oven to the refrigerator without the 2-hour room temperature rest). In this bar format the cookie topping covers most of the surface, so minor cracks are hidden automatically. If cracking is significant and visible through the gaps in the topping, it is almost always an overmixing issue — the egg should go in on the lowest mixer speed and the mixer should stop the moment the egg disappears.
Can I make chocolate chip cheesecake bars ahead of time?
Yes — and they are genuinely better made ahead. The full cooling and chilling sequence takes a minimum of 4 hours from the time the pan comes out of the oven, and overnight chilling produces noticeably sharper edges and deeper flavor than a same-day chill. Make the bars the day before you need them, chill overnight in the pan, slice the following day, and refrigerate cut bars in a lidded hard-sided container until 15 minutes before serving. The bars keep well for up to 5 days refrigerated, so a 2-day lead time is well within the quality window.
Can I use a 9×13 inch pan instead of a 9×9 inch pan?
You can, with adjustments. A 9×13 inch (23×33cm) pan has roughly 60% more surface area than a 9×9 inch (23×23cm) pan. Using the same quantity of dough and filling will produce noticeably thinner bars — the cookie base will be shallower, the cheesecake layer will be thinner, and the bake time will decrease to approximately 25–28 minutes. Start checking at 22 minutes and watch the jiggle test rather than the clock. The yield increases to approximately 18–20 bars at the same portion size. If you want the same layer thickness in a 9×13 pan, increase the cookie dough by 50% and the cheesecake filling by 50% — this keeps the layer ratios identical and the bake time returns to approximately 35–38 minutes.
How do I know when cheesecake bars are done baking?
The correct doneness signal is the jiggle test, not visual color. At 35 minutes, gently shake the pan side to side. The outer 2 inches of the filling should be fully set and not move. The center 2 inches should jiggle as a single cohesive mass — not slosh like liquid, but move as one unit like a very firm gelatin. The cookie dough pieces on top should be golden brown and set to the touch. If the entire surface jiggles as liquid, it needs more time — return it to the oven for 3-minute intervals and check again. If there is no jiggle anywhere, it is overbaked. Pull at the moment the edges are set and only the center moves.
Can I substitute the semi-sweet chocolate chips with another type of chocolate?
Yes, with predictable results for each substitution. Milk chocolate chips (30–35% cacao) are sweeter and melt more readily — the bars will be noticeably sweeter and the chips in the cheesecake layer will partially melt into the filling rather than staying distinct. Bittersweet or dark chocolate chips (60–70% cacao) have less sugar and more cocoa butter — the bars will be less sweet with a more intense chocolate flavor and the chips will hold their shape better in the filling. White chocolate chips do not contain cocoa solids — they will melt almost completely into the cheesecake filling and contribute sweetness and vanilla flavor rather than distinct chocolate pockets. Any substitution works technically — choose based on your sweetness preference. The semi-sweet range (45–55% cacao) was used in testing because it balances the sweetness of both the cookie dough and the cream cheese filling without either dominating.
Can I scale this recipe up or down?
The recipe scales up to a 9×13 inch (23×33cm) pan by increasing all ingredients by 50% — see the pan substitution answer above for bake time adjustments. Scaling down to a half batch in an 8×8 inch (20×20cm) pan works well — reduce all ingredients by one-third and reduce bake time to 28–32 minutes, watching the jiggle test from 25 minutes. One important note: the baking soda does not scale perfectly linearly.
For a half batch, use slightly less than half — ⅜ teaspoon (2.25g) rather than a full half teaspoon — excess baking soda in a smaller batch can produce a faint metallic aftertaste in the finished cookie layers. For a double batch, bake in two separate 9×9 inch pans rather than one very large pan — a deeper, larger slab will not bake evenly through the cheesecake layer.
For a related bar recipe that scales easily into larger batches, the Nestlé Toll House cookie bars use a similar dough and a 9×13 pan as the base format.
Do I need to adjust this recipe for high altitude or humidity?
At high altitude (above 3,500 feet / 1,067m), reduce the baking soda to ¾ teaspoon (4.5g), add 2 tablespoons (15g) of additional all-purpose flour to the cookie dough, and increase the oven temperature by 15°F (8°C) to 340°F (170°C). Lower air pressure at altitude causes leavening gases to expand faster — the extra flour provides structure to hold that expansion without the dough puffing and then collapsing. The cheesecake filling requires no altitude adjustment. In high humidity, the cookie dough will feel stickier than usual because the flour absorbs ambient moisture from the air — add 1 tablespoon (8g) of additional flour to the dough if it is too soft to press flat without sticking to your fingers.
Chocolate Chip Cheesecake Bars
Ingredients
Equipment
Method
- Set oven rack to middle position and preheat to 325°F (165°C). Line a 9×9 inch (23×23cm) light-colored aluminum pan with parchment paper leaving a 2-inch overhang on all four sides.
- In a large bowl using a hand mixer or stand mixer fitted with the paddle attachment, beat 1 cup (226g) softened unsalted butter on medium speed for 60 seconds until smooth. Add ¾ cup (150g) granulated sugar and ¾ cup (165g) packed brown sugar and beat on medium speed for exactly 3 minutes until pale and slightly fluffy.
- Add 2 large room-temperature eggs one at a time on low speed, mixing for 20 seconds after each and scraping the bowl between additions. Add 1 teaspoon (5ml) pure vanilla extract with the second egg.
- In a separate bowl whisk together 2¼ cups (270g) all-purpose flour, 1 teaspoon (6g) baking soda, and 1 teaspoon (6g) fine sea salt. Add the flour mixture to the butter mixture in two additions on the lowest speed, mixing only until the last streak of flour disappears after each addition.
- Remove bowl from mixer and fold in 1½ cups (255g) semi-sweet chocolate chips by hand using a silicone spatula with approximately 15 strokes. Weigh the full dough batch and divide — transfer two-thirds (approximately 680–700g) to the lined pan and keep the remaining one-third (approximately 340–350g) in the bowl. Set aside a small extra handful of chips (approximately 2 tablespoons / 30g) separately — these go on top of the assembled bars before baking.
- Press the two-thirds dough portion firmly and evenly across the bottom of the pan using your fingers and the flat bottom of a measuring cup, pressing into the corners until completely flat and uniform.
- In a clean bowl beat 16 oz (452g) full-fat block cream cheese on medium speed for 90 seconds, scraping the bowl at 45 seconds, until completely smooth with no lumps. Add ½ cup (100g) granulated sugar and beat 30 seconds. Add 1 large room-temperature egg and 1 teaspoon (5ml) pure vanilla extract on the lowest speed and mix only until the egg disappears — approximately 15 to 20 seconds. Fold in ½ cup (85g) semi-sweet chocolate chips by hand.
- Pour the cheesecake filling over the pressed cookie base and spread evenly to the edges with a silicone spatula. Tear the reserved one-third cookie dough into rough tablespoon-sized pieces and drop them across the surface in an irregular patchwork pattern, leaving 30–40% of the cheesecake surface exposed between pieces. Press the reserved extra 2 tablespoons (30g) of semi-sweet chocolate chips across the top of the dough pieces and into any exposed cheesecake.
- Bake on the middle rack at 325°F (165°C) for 35 to 40 minutes, until the cookie topping pieces are golden brown, the cheesecake edges are set and slightly puffed, and the center has a 2-inch uniform jiggle when the pan is gently shaken. Do not open the oven before 30 minutes.
- Remove from oven and place on a wire rack. Cool at room temperature for exactly 2 hours — do not refrigerate during this time. Transfer to the refrigerator uncovered and chill for a minimum of 2 hours, preferably overnight.
- Lift the slab from the pan using the parchment overhang and place on a cutting board. Wipe a sharp knife clean with a damp cloth between every cut and slice into a 3×4 grid for 12 bars. Serve cold.