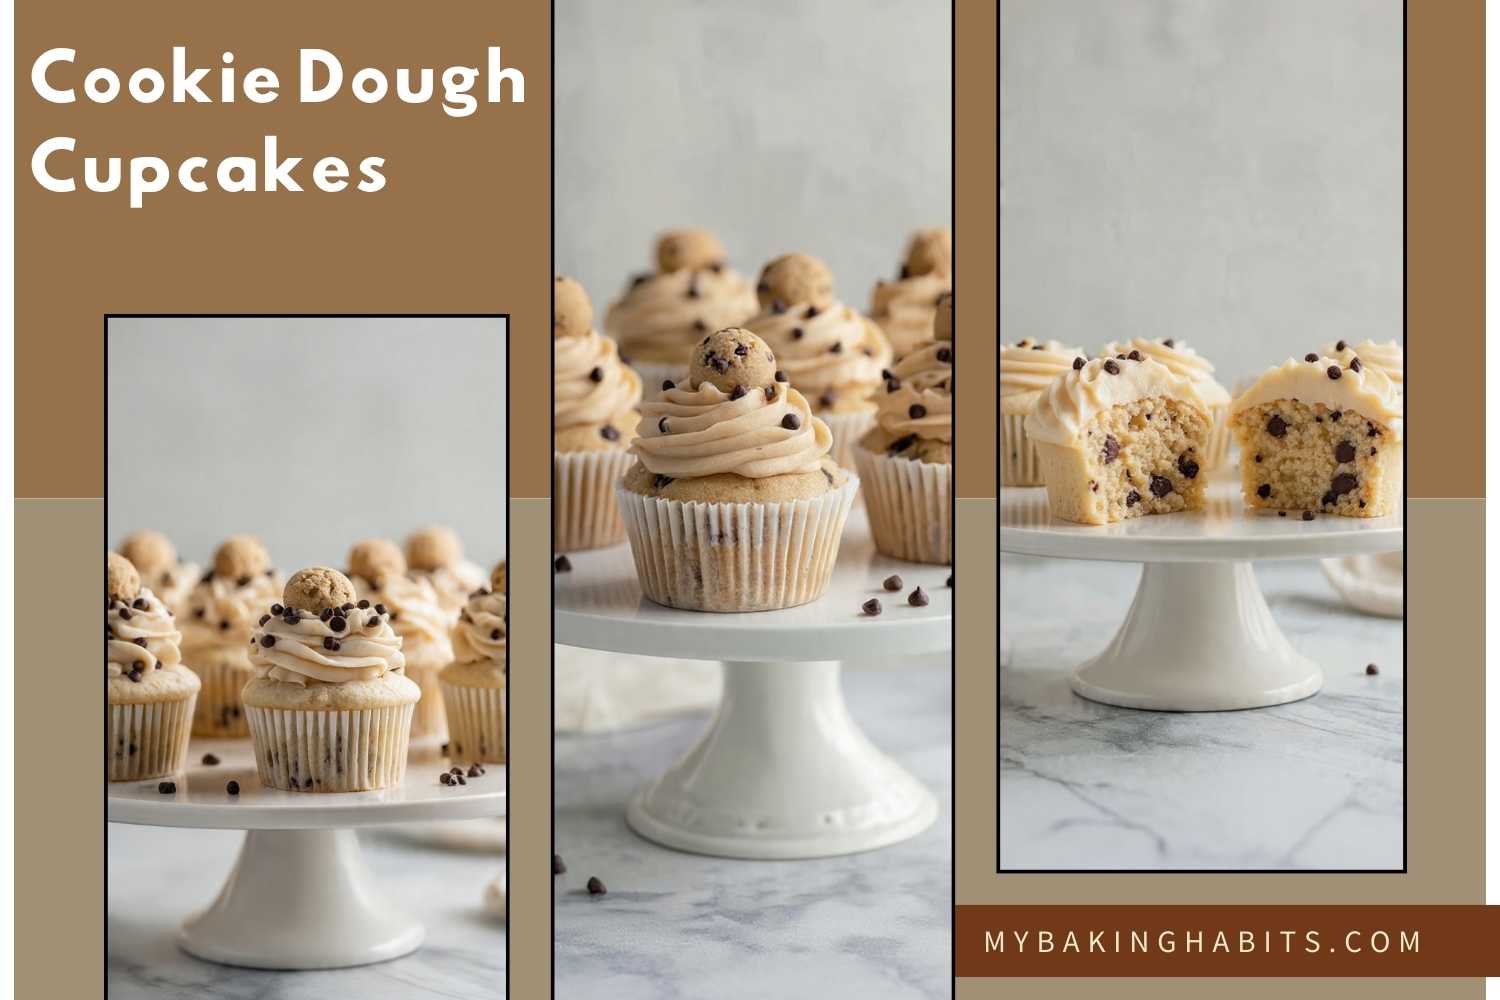
Cookie Dough Cupcakes
I have made these cookie dough cupcakes in my Los Angeles kitchen more than fifteen times across three rounds of testing, and I have figured out exactly where each component can go wrong — the cupcake base, the buttercream, and the edible cookie dough truffles. This recipe solves all of it.
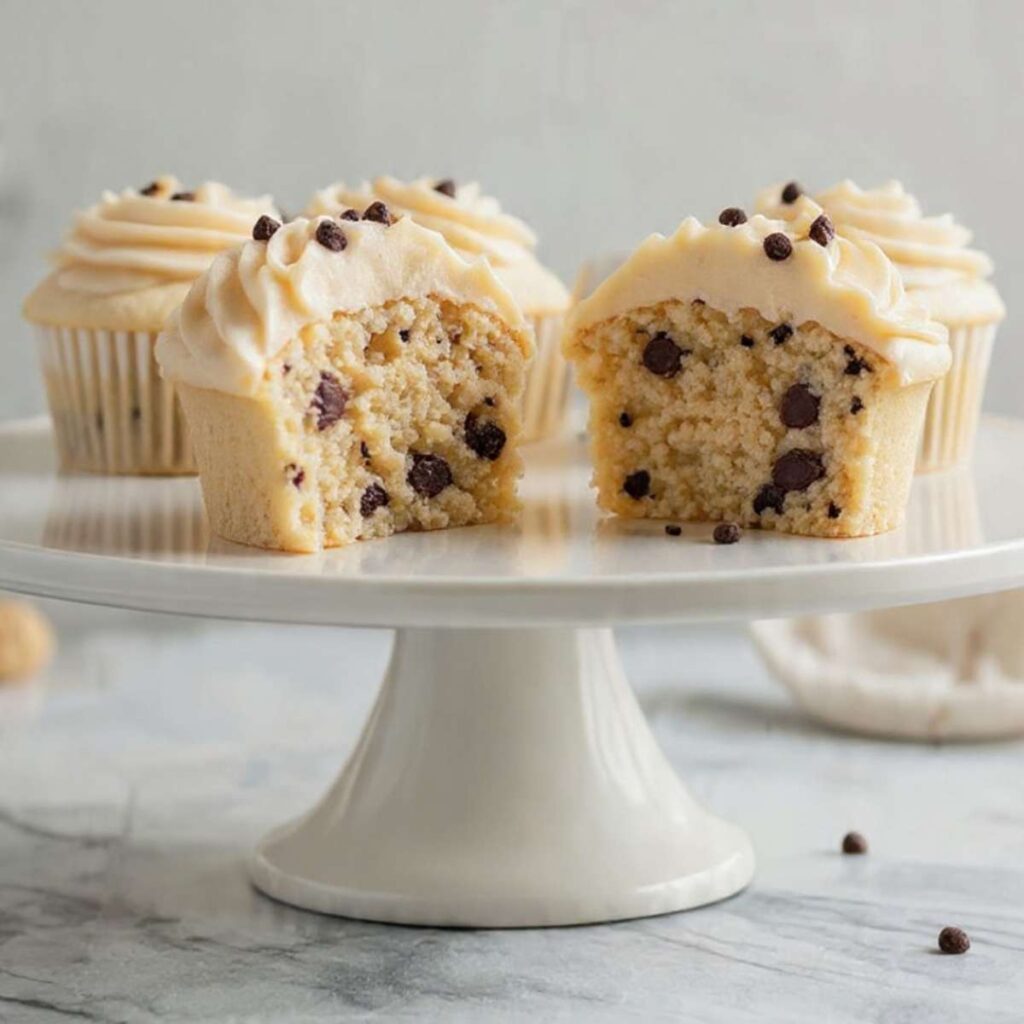
The cupcake base bakes up with a soft, open crumb and a flat-to-slightly-domed top that holds a piped swirl without sliding. The edges come out lightly golden and tender. The centers stay moist all the way through — no dry pockets, no rubbery texture from overmixing. Each bite has a clean vanilla flavor with pockets of semi-melted chocolate, and then you hit the cookie dough truffle on top: soft, raw-dough texture, brown sugar forward, studded with mini chocolate chips. It tastes exactly like eating a cookie dough ball sitting on top of a cupcake — because that is exactly what it is.
I tested the flour ratio in the cupcake batter at 1¼ cups (150g) versus 1½ cups (180g). The lower amount produced a batter that spread too flat and the tops domed unevenly. At 1½ cups (180g) the tops came out flat with only a slight dome — the ideal shape for a piped swirl — and the crumb was open and cakey rather than dense. That is the version I kept.
I tested the cookie dough truffle with and without heat-treating the flour. Raw all-purpose flour contains bacteria that survive at room temperature — heat-treating it at 350°F (175°C) for 5 minutes kills that risk while keeping the flour flavor neutral. The texture difference is undetectable. Every batch I tested used heat-treated flour, and that is the only version I will give you here.
🗒 Luna’s Note: The cookie dough truffles need 30 minutes in the fridge to firm up before you place them on the frosted cupcakes. If you skip this and place a soft truffle on warm buttercream, it sinks and tilts. I chill the truffles first, frost the cupcakes, then add the truffles last — in that order every time.
This recipe requires a stand mixer or hand mixer for the cupcake batter and the buttercream. No chilling is required for the cupcake batter itself. The cookie dough truffles chill for 30 minutes while the cupcakes bake and cool — so the timing works out with no wasted waiting. This makes 12 standard cupcakes.
| Prep Time | 30 minutes |
| Chill Time | 30 minutes (cookie dough truffles) |
| Bake Time | 18–22 minutes |
| Total Time | approximately 1 hour 25 minutes |
| Yield | 12 standard cupcakes |
| Serving Size | 1 cupcake with frosting and one cookie dough truffle |
| Difficulty | Intermediate — three components, straightforward methods |
Calories: ~624 kcal | Fat: ~35.2g | Carbs: ~75.6g | Protein: ~5g | Sugar: ~50g | Sodium: ~181mg
Ingredients & Tools for Cookie Dough Cupcakes
Weights are the standard I bake to. Volume measurements are included for reference, but a kitchen scale gives you the most consistent result — especially for flour, where a packed cup can add 20–30g more than the recipe intends. Always weigh when you can.
For the Cupcake Batter
- 1½ cups (180g) unbleached all-purpose flour, spooned into the measuring cup and leveled — not scooped directly from the bag
- 1½ tsp (6g) baking powder, checked for freshness (drop a pinch into hot water — it should bubble immediately)
- ¼ tsp (1.5g) fine sea salt — not table salt, not kosher salt
- ½ cup (113g) unsalted butter, softened to 65–68°F (18–20°C) — it should indent easily when pressed but hold its shape, not grease your finger
- ¾ cup (150g) plain white granulated cane sugar
- 2 large eggs (approximately 50g each without shell), at room temperature — cold eggs cause the batter to break and curdle
- 2 tsp (10ml) pure vanilla extract — not imitation
- ½ cup (120ml) whole milk, at room temperature
- ¾ cup (128g) semi-sweet standard-size chocolate chips (45–55% cacao), such as Nestlé Toll House or Ghirardelli — not chunks, not milk chocolate, not bittersweet
For the Cookie Dough Truffles
- ½ cup (60g) unbleached all-purpose flour, heat-treated (instructions in Before You Start)
- ¼ cup (57g) unsalted butter, softened to 65–68°F (18–20°C)
- ¼ cup (55g) packed light brown sugar — pack it firmly into the measuring cup; if it has hardened, microwave with a damp paper towel in 20-second intervals until pliable before measuring
- 2 tbsp (25g) plain white granulated cane sugar
- 1 tbsp (15ml) whole milk
- ½ tsp (2.5ml) pure vanilla extract
- 1 pinch (0.5g) fine sea salt
- ¼ cup (43g) mini semi-sweet chocolate chips (45–55% cacao), such as Nestlé Toll House Mini Morsels — folded into the dough
For the Vanilla Buttercream
- 1 cup (226g) unsalted butter, softened to 65–68°F (18–20°C)
- 3 cups (360g) powdered sugar, sifted — sifting removes lumps that no amount of beating will fully smooth out
- 2–3 tbsp (30–45ml) heavy cream, at room temperature — start with 2 tbsp and add more to reach pipeable consistency
- 1½ tsp (7.5ml) pure vanilla extract
- 1 pinch (0.5g) fine sea salt
For Garnish
- 3 tbsp (32g) mini semi-sweet chocolate chips (45–55% cacao), such as Nestlé Toll House Mini Morsels — scattered across the frosted surface
Before You Start
Gram weights are the standard for this recipe. All quantities are given in both Imperial and Metric. Where the two differ in practice — especially flour — the gram weight is the reliable number. A scooped cup of flour can weigh anywhere from 130g to 160g depending on how tightly it is packed. The recipe is written to 180g. Use a scale where you can.
Heat-treat the flour for the cookie dough truffles first. Position your oven rack in the middle. Preheat to 350°F (175°C). Spread ½ cup (60g) all-purpose flour in a thin, even layer on a parchment-lined baking sheet. Bake for 5 minutes, then remove and let cool completely before using. Raw flour contains bacteria that survive at room temperature — this step eliminates that risk with no impact on flavor or texture. Do not skip this step.
Soften your butter properly — all three components depend on it. The target temperature for all butter in this recipe is 65–68°F (18–20°C). Press your finger into the butter — it should leave a clean indent without the butter feeling greasy or slick. If it looks shiny or your finger slides through it, it is too warm. In my Los Angeles kitchen, butter softens from fridge temperature in about 30–40 minutes on the counter. In a warmer kitchen, check at 20 minutes. Pull all butter at the same time so it is ready when you need it.
Bring eggs and milk to room temperature. Cold eggs added to creamed butter cause the batter to curdle — the fat and liquid separate and the batter looks broken. Pull eggs and milk from the fridge at the same time as the butter. Eggs need 30 minutes at room temperature, or place them in a bowl of warm (not hot) water for 10 minutes if you forgot.
Check your baking powder for freshness. Drop 1 tsp (4g) into ½ cup (120ml) of hot water — it must bubble immediately and vigorously. If the reaction is weak or delayed, replace the can. Expired baking powder produces flat, dense cupcakes that no amount of extra baking time will fix.
Check your brown sugar for hardening. Packed brown sugar that has hardened cannot be measured accurately. If yours has solidified, place it in a bowl with a damp paper towel laid on top and microwave in 20-second intervals until it becomes pliable again before measuring.
Sift the powdered sugar before you start the buttercream. Unsifted powdered sugar has small clumps that do not fully dissolve during beating. The result is a gritty buttercream that no amount of extra mixing will fix. Sift it into a bowl before anything else.
Flour-coat the chocolate chips before folding them into the batter. Toss your ¾ cup (128g) semi-sweet standard-size chips in 1 teaspoon of the measured all-purpose flour before adding them to the batter. This prevents them from sinking to the bottom of the cupcake during baking — exactly as shown in the cross-section photo where the chips are distributed evenly throughout the crumb, not pooled at the base.
Equipment needed: This recipe requires a stand mixer fitted with the paddle attachment. A hand mixer with standard beaters will work but may need an extra 30–60 seconds on any beating step — hand mixers generate less torque than stand mixers at equivalent speed settings. You will also need: standard 12-count light-colored aluminum muffin tin, 12 cupcake liners (white or parchment kraft — both work), parchment-lined baking sheet (for flour heat-treating), large piping bag, Wilton 1M open-star tip or any large open-star tip, kitchen scale, wire cooling rack.
Tools and Equipment
Stand mixer or hand mixer (required). This recipe requires a stand mixer fitted with the paddle attachment. A hand mixer with standard beaters will work but add 30–60 seconds to any beating step — hand mixers generate less torque than stand mixers at equivalent speed settings. Do not attempt to cream the butter and sugar or beat the buttercream by hand with a whisk or spatula — you will not incorporate enough air and the texture of both components will be wrong.
Standard 12-count light-colored aluminum muffin tin (required). Light-colored aluminum bakes most evenly — the cupcake sides and base brown at the same rate as the center sets. Dark non-stick tins absorb more radiant heat and the sides overbrown before the centers are done. This recipe was tested in a light aluminum tin. If a dark non-stick tin is all you have, reduce the oven temperature by 25°F (14°C) and start checking doneness at 15 minutes.
12 standard cupcake liners (required). White or natural parchment kraft liners both work — the liner color does not affect baking performance, only the finished look. Both appear across the photos in this article.
Parchment-lined baking sheet (required). Used to heat-treat the flour for the cookie dough truffles. Any standard half-sheet pan works. Do not skip the parchment — bare flour on a metal pan can scorch at the edges in 5 minutes even at 350°F (175°C).
Large piping bag with Wilton 1M open-star tip (required for the frosting finish shown in photos). The tall, ridged swirl visible in every photo is piped with a large open-star tip — the Wilton 1M is the standard. A closed-star tip produces a tighter, less defined swirl. If you do not have a piping bag, a large zip-lock bag with one corner snipped works as a substitute, though the swirl definition will be softer. An offset spatula spread is an option if you prefer a simpler finish, but will not produce the look shown in the images.
Kitchen scale (strongly recommended). Gram weights are the standard for this recipe. A kitchen scale eliminates the single largest variable in home baking — flour measurement — and takes 10 seconds per ingredient.
Wire cooling rack (required). The cupcakes must transfer from the tin to a wire rack after 5 minutes in the pan. A wire rack allows air to circulate under the base and prevents condensation from making the liner soggy while the cupcakes finish cooling.
Oven thermometer (optional but recommended). Most home ovens run 15–25°F (8–14°C) off from the dial setting. An oven thermometer confirms the actual temperature and prevents the two most common oven-related failures in this recipe — underbaked centers from an oven running cold, and overbrowned bases from an oven running hot.
Instant-read thermometer (optional). Useful for confirming butter temperature across all three components — cupcake batter, truffle dough, and buttercream all require butter at 65–68°F (18–20°C). At that narrow range, a thermometer takes the guesswork out entirely.
How to Make Cookie Dough Cupcakes
Step 1: Heat-Treating the Flour and Prepping the Oven
Position your oven rack in the middle — not the top third, not the bottom — and preheat to 350°F (175°C). Most home ovens run 15–25°F (8–14°C) off from the dial setting. If you have an oven thermometer, confirm the actual temperature before anything goes in. On your parchment-lined baking sheet, spread your ½ cup (60g) all-purpose flour for the cookie dough truffles in a thin, even layer. Bake for exactly 5 minutes, then remove and set aside to cool completely on the counter. While the flour cools, line your standard 12-count light-colored aluminum muffin tin with 12 cupcake liners and set aside.
The heat-treated flour is safe to eat raw because the brief oven exposure eliminates the bacteria present in untreated flour. It must be completely cool before it goes into the truffle dough — warm flour melts the softened butter on contact and produces a greasy, un-rollable dough.
The flour should look and smell identical to raw flour when it comes out — no browning, no toasting. If it has any color at all, it went too long and will give the truffles a faint baked taste rather than a raw dough flavor.
Your oven is now preheated and ready — move to the cupcake batter.
Step 2: Creaming the Butter and Sugar Until Pale and Fluffy
In the bowl of your stand mixer fitted with the paddle attachment — or a large mixing bowl if using a hand mixer — add your ½ cup (113g) softened unsalted butter and ¾ cup (150g) plain white granulated cane sugar. Beat on medium speed (speed 4 on a KitchenAid, medium on a hand mixer) for exactly 3 minutes. Set a timer — do not estimate. The granulated sugar is what creates the structure in this batter. It cuts into the butter during creaming and aerates the mixture, which is what gives the cupcakes their lift and their open crumb. Under-creaming at this stage is the single most common reason cupcakes come out flat and dense.
After 3 minutes, the mixture should be noticeably pale — almost white rather than yellow — and visibly fluffy, with a volume roughly 1.5 times larger than when you started. If it still looks yellow and dense, beat for another 60 seconds and check again.
Do not rush this step. Over-creaming is almost impossible here — under-creaming is the actual risk.
Your creamed butter and sugar is ready — add the eggs next.
Step 3: Adding the Eggs and Vanilla Without Breaking the Emulsion
With the mixer on low speed, add your 2 large room-temperature eggs (approximately 50g each without shell) one at a time, waiting until the first egg is fully incorporated before adding the second. After both eggs are in, add your 2 tsp (10ml) pure vanilla extract. Increase to medium speed and beat for 30 seconds.
The eggs provide structure and richness — they are also the emulsifier that holds the fat and liquid together in a stable batter. Adding cold eggs to warm creamed butter is the fastest way to break this emulsion. You will know the batter has broken if it looks curdled and separated rather than smooth and cohesive after the eggs go in. A slightly curdled-looking batter at this stage can sometimes recover when the dry ingredients are added, but it is not guaranteed — and it will affect the crumb texture.
The batter should look smooth, pale, and cohesive after both eggs are incorporated — not grainy, not separated, not pooling liquid at the edges of the bowl. If it looks slightly curdled, add 1 tablespoon of your measured flour and beat for 15 seconds. This usually brings it back together.
Your egg mixture is fully incorporated — alternate the dry ingredients and milk next.
Step 4: Adding the Dry Ingredients and Milk Without Developing Gluten
In a separate medium bowl, whisk together your 1½ cups (180g) all-purpose flour (spooned and leveled), 1½ tsp (6g) baking powder, and ¼ tsp (1.5g) fine sea salt. Whisking the dry ingredients together first distributes the baking powder and salt evenly — uneven distribution means some cupcakes get more lift than others and some get more salt.
With the mixer on low speed, add the dry ingredients and ½ cup (120ml) room-temperature whole milk in three alternating additions: dry → milk → dry → milk → dry. Start and end with the dry ingredients. Add each portion and mix only until just combined before adding the next — approximately 8–10 slow rotations of the mixer between each addition. Stop the mixer as soon as the last streak of flour disappears.
Overmixing at this stage develops gluten — the protein network in the flour that gives bread its chew. In cupcakes, developed gluten produces a tight, rubbery crumb and creates tunnels through the center of the baked cupcake. The alternating addition method keeps the batter hydrated evenly without requiring extra mixing to incorporate the liquid.
The finished batter should look smooth, thick, and ribbon-like — it falls from the spatula in a slow, even sheet rather than clumping or running. There should be no visible streaks of flour and no lumps.
Your batter is ready — fold in the chocolate chips and portion into the tin next.
Step 5: Folding in the Chocolate Chips and Filling the Tin
Remove the bowl from the mixer stand. Before adding the chips to the batter, toss your ¾ cup (128g) semi-sweet standard-size chocolate chips (45–55% cacao) in 1 teaspoon of the measured all-purpose flour — shake them in a small bowl until each chip has a thin flour coating. This coating increases friction between the chip surface and the surrounding batter, which slows settling before the batter sets around them during baking. Add the coated chips to the batter and fold in by hand using a silicone spatula — slow strokes from the bottom of the bowl upward, rotating the bowl as you go. Count approximately 10–12 strokes. Do not use the mixer for this step — the paddle will break the chips and over-develop the gluten in the same motion.
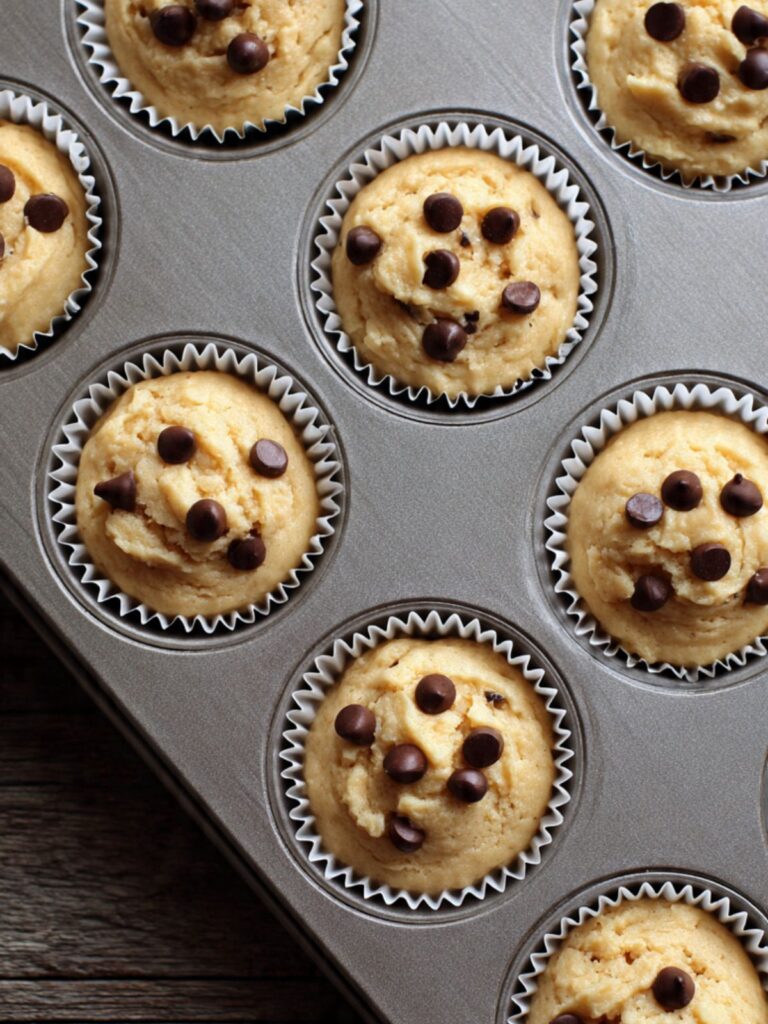
Using a standard cookie scoop or a spoon, divide the batter evenly among the 12 lined cups. Fill each liner to exactly ⅔ full — no more. Overfilling is the most common reason cupcake tops overflow the liner and bake flat and wide rather than slightly domed. Weigh the first filled liner on your kitchen scale, note the weight, and use it as a reference for the remaining 11. This batch produces approximately 45–50g of batter per cupcake at standard 12-count yield.
As you can see in the cross-section photo, the baked cupcakes have chocolate chips distributed evenly throughout the crumb from top to bottom — not pooled at the base. The flour-coating technique applied before folding is exactly what produces that even distribution. Chips added without the flour coating sink to the bottom before the batter sets.
⚠️ Do not open the oven door before 18 minutes — the sudden temperature drop causes the centers to sink before the structure has set. Set a timer.
Your filled tin is ready — into the oven now.
Step 6: Baking Until the Tops Spring Back
Place the filled muffin tin on the middle rack of your 350°F (175°C) oven. Bake for 18–22 minutes — start checking at 18 minutes. The correct doneness signal for these cupcakes is a top that springs back immediately when lightly pressed with one finger, and a toothpick inserted into the center of the tallest cupcake that comes out with a few moist crumbs — not wet batter, not completely clean. A completely clean toothpick means the cupcakes are already overbaked.
Do not pull the pan early because the tops look set. The center of the cupcake is always the last part to set, and the top surface sets before the interior does. The spring-back test is more reliable than visual color for this recipe because the tops stay pale rather than browning deeply.
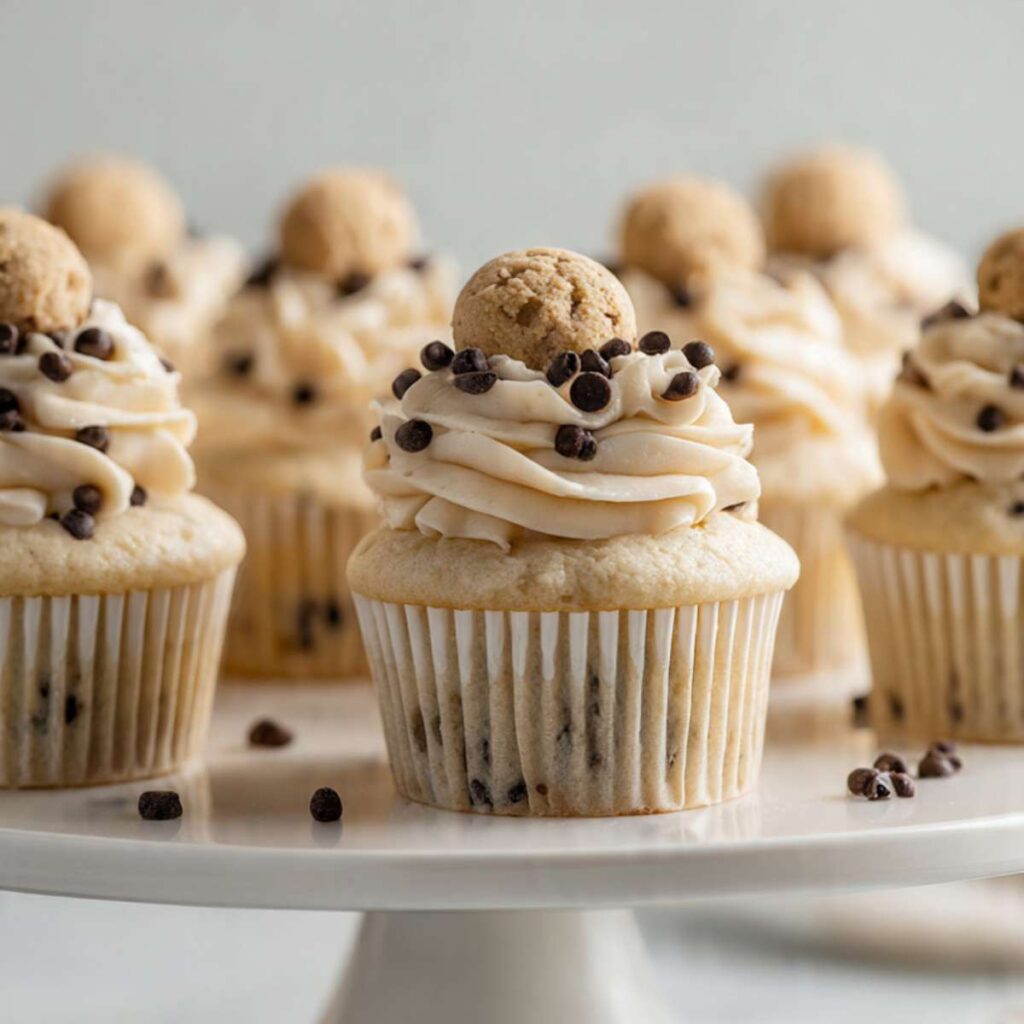
The finished cupcakes should look like the ones visible through the white liners in the hero photo — lightly golden at the base with a flat, pale top. They should not have cracked peaks, which would signal overfilled liners or an oven running too hot.
Remove the tin from the oven and leave the cupcakes in the tin for exactly 5 minutes — no more than 8 minutes. The hot metal continues to conduct heat into the base of each cupcake during this window, finishing the bake on the bottom without the oven drying out the top. After 5 minutes, transfer the cupcakes to a wire rack and cool completely — at least 1 hour at room temperature — before frosting. Frosting applied to a warm cupcake melts immediately and slides off.
Step 7: Making the Cookie Dough Truffles
While the cupcakes bake and cool, make the cookie dough truffles. In a medium mixing bowl, beat your ¼ cup (57g) softened unsalted butter, ¼ cup (55g) packed light brown sugar, and 2 tbsp (25g) plain white granulated cane sugar together with a hand mixer or sturdy silicone spatula until smooth and fully combined — approximately 1 minute by hand or 30 seconds with a mixer on medium. The brown sugar is what gives the truffles their raw cookie dough flavor — that deep, molasses-forward sweetness that reads immediately as unbaked dough rather than frosting or candy.
Add your 1 tbsp (15ml) whole milk, ½ tsp (2.5ml) pure vanilla extract, and 1 pinch (0.5g) fine sea salt. Mix until combined. Add your ½ cup (60g) cooled heat-treated all-purpose flour and stir with the spatula until a smooth, soft dough forms — approximately 15 strokes. Fold in your ¼ cup (43g) mini semi-sweet chocolate chips.
Roll the dough into 12 equal balls, approximately 1 tablespoon (18–20g) each. Place them on a parchment-lined plate or small baking sheet. Refrigerate for 30 minutes minimum — the truffle must be firm enough to sit upright on top of the frosting without sinking or tilting.
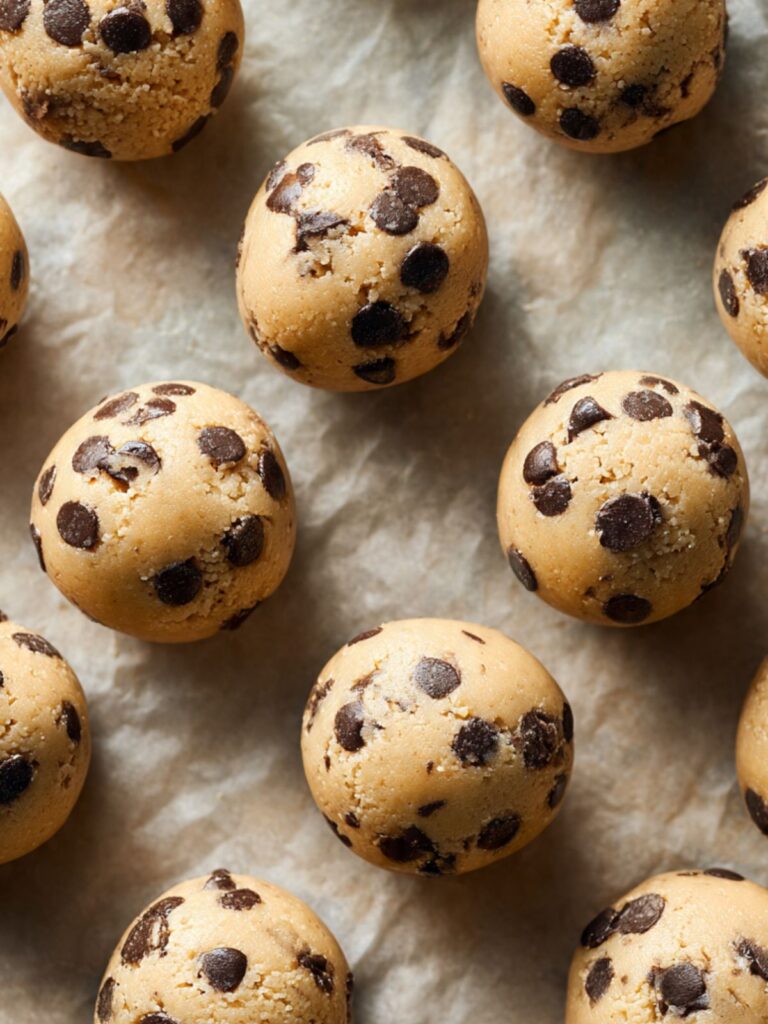
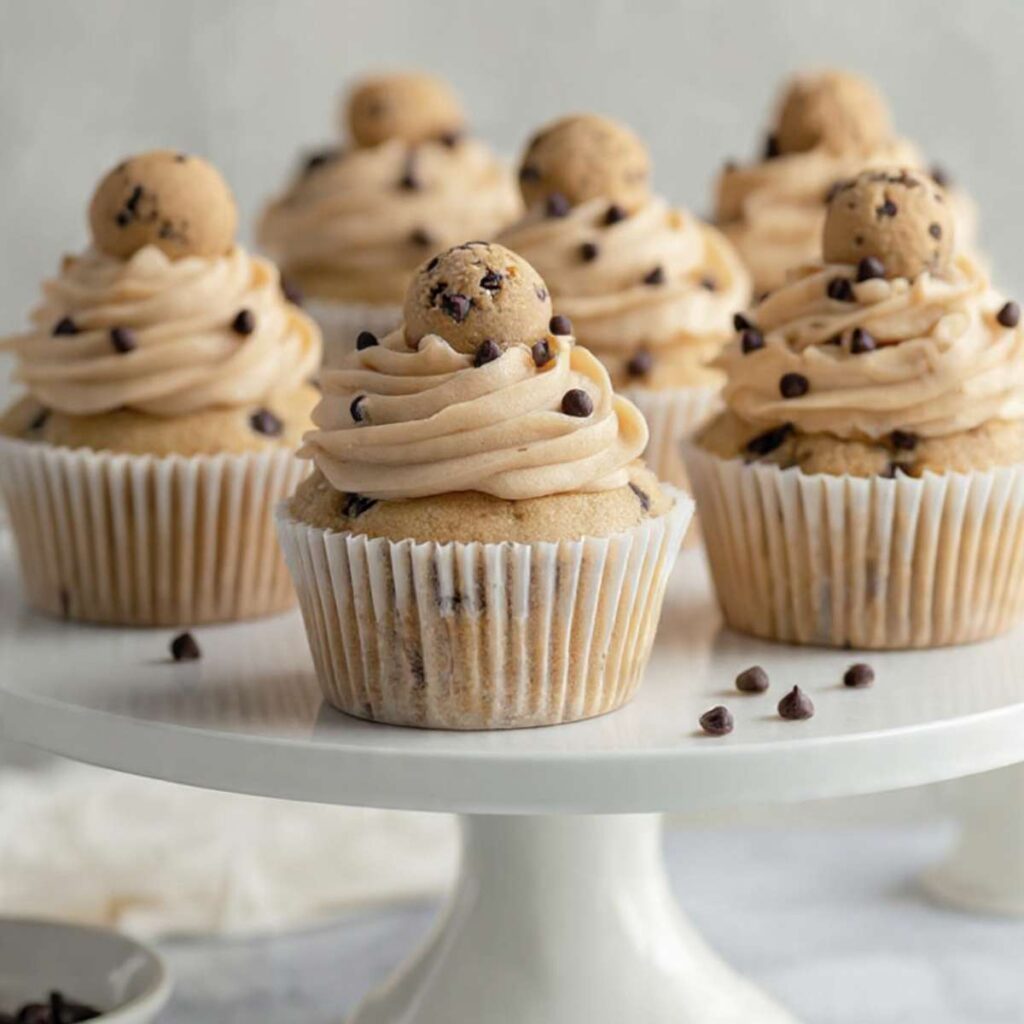
The rolled truffles should look like small, rough-textured dough balls with visible mini chips embedded on the surface — exactly as shown in the close-up photo. They should hold their round shape when placed on the parchment and not flatten or spread.
Your truffles are chilling — make the buttercream next.
Step 8: Beating the Vanilla Buttercream to a Pipeable Consistency
In the bowl of your stand mixer fitted with the paddle attachment — cleaned and dried from the cupcake batter — add your 1 cup (226g) softened unsalted butter. Beat on medium speed for 2 full minutes until the butter is pale, smooth, and creamy. This pre-beating step aerates the butter before the sugar goes in — it is what separates a light, fluffy buttercream from a dense, heavy one.
Reduce to low speed. Add your 3 cups (360g) sifted powdered sugar in three additions, approximately 1 cup (120g) at a time, waiting until each addition is fully incorporated before adding the next. Adding all the sugar at once creates a dust cloud and causes the sugar to compress unevenly into the butter. After all the sugar is in, add your 1½ tsp (7.5ml) pure vanilla extract, 1 pinch (0.5g) fine sea salt, and 2 tablespoons (30ml) of heavy cream. Increase to medium-high speed and beat for 3 full minutes. Set a timer.
If the buttercream looks too stiff to pipe — it drags rather than flows through the tip — add the remaining 1 tablespoon (15ml) of heavy cream and beat for 30 more seconds. If it looks too loose — it does not hold a peak when you lift the beater — refrigerate the bowl for 10 minutes and beat again.
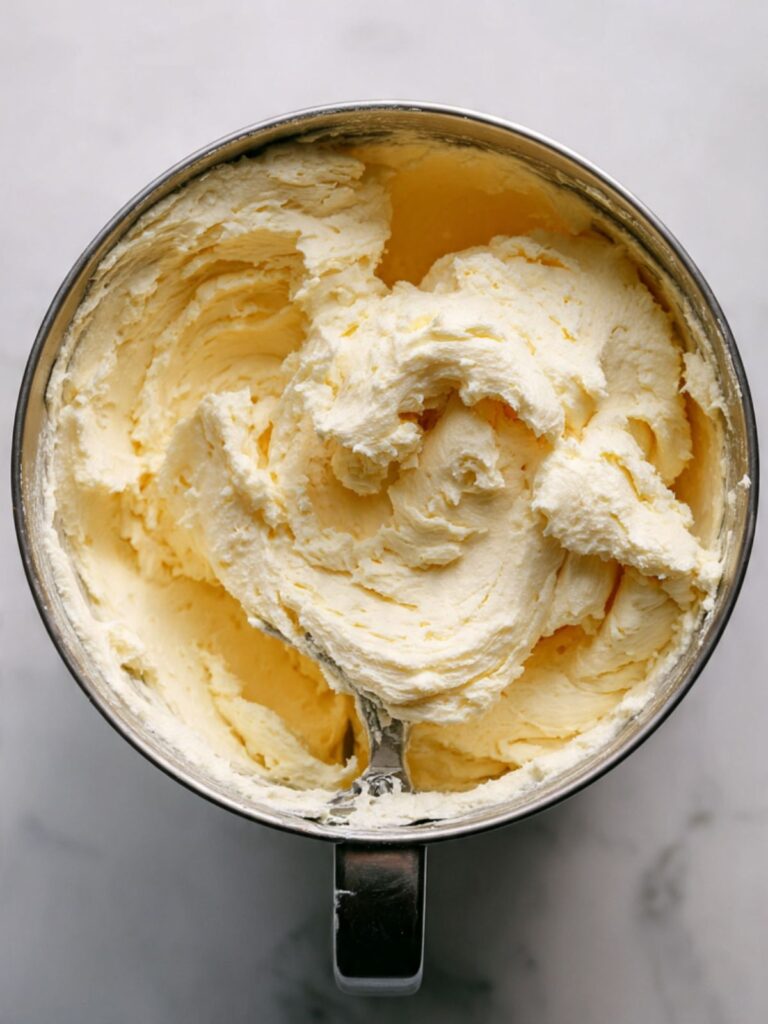
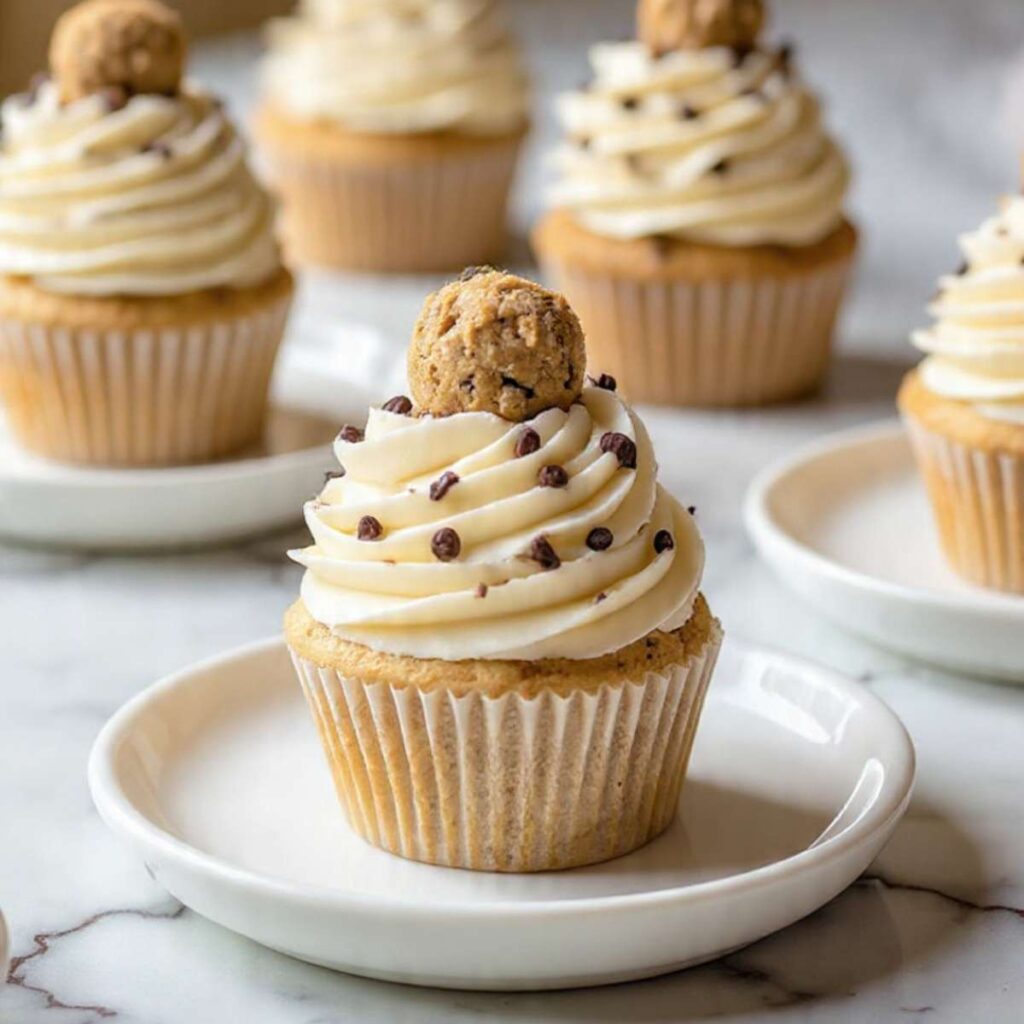
The finished buttercream should hold a firm, clean peak for at least 5 seconds when you lift the beater. It should be bright white or very pale ivory, smooth with no visible sugar grains, and spread without dragging or tearing. This is the consistency visible in the close-up frosting shot — thick enough to hold the defined ridges of the 1M tip after piping.
🗒 Luna’s Note: I always beat my buttercream for the full 3 minutes even when it looks done at 2. That extra minute is what takes it from good to the bright white, cloud-like consistency that photographs well and holds its shape for hours at room temperature.
Your buttercream is ready — pipe and assemble now.
Step 9: Piping the Frosting and Assembling the Cupcakes
Fit a large piping bag with a Wilton 1M open-star tip. Fill the bag no more than two-thirds full — overfilling makes the bag hard to control and causes the buttercream to warm from your hand faster. Twist the top of the bag closed and hold it with your dominant hand, using your other hand to guide the tip.
Position the tip directly above the center of the first completely cooled cupcake, holding it approximately ½ inch (1.25cm) above the surface. Apply steady, even pressure and pipe in a spiral motion starting from the outside edge and working inward and upward — one continuous motion. Release pressure before lifting the tip to prevent a peak. Repeat for all 12 cupcakes.
Remove the chilled cookie dough truffles from the refrigerator. Press one truffle gently into the center top of each frosted cupcake — press just enough for it to grip the buttercream without sinking. Scatter your 3 tbsp (32g) mini semi-sweet chocolate chips (45–55% cacao) evenly across all 12 cupcakes — approximately 8–10 chips per cupcake.
As you can see in the close-up photo, the finished cupcake has a tall, defined swirl with clean ridges from the 1M tip, the truffle seated upright and level at the center — not tilted, not sunk — and mini chips scattered across every ridge of the frosting surface, not clustered in one spot. That is the finish you are working toward.
Serve at room temperature within 2 hours of assembly, or refrigerate and bring back to room temperature for 30–45 minutes before serving.
The Science Behind Perfect Cookie Dough Cupcakes
Why Creaming Time Controls Cupcake Texture
The 3-minute creaming window in this recipe is not arbitrary. When softened butter and granulated sugar are beaten together, the sharp edges of the sugar crystals cut microscopic air pockets into the fat. Those air pockets expand in the oven when heat causes the trapped air to rise, and the baking powder releases carbon dioxide into the same structure. The result is the open, cakey crumb you want in a chocolate chip cupcake with cookie dough frosting — uniform air distribution, no dense pockets, no collapsed center.
Under-creaming at 1 minute produces a mixture that looks combined but has not aerated properly. The batter goes into the oven with fewer air pockets, the rise is lower, and the finished cupcake has a tighter, denser crumb that reads as heavy rather than light. Over-creaming past 5 minutes incorporates too much air and can cause the cupcake tops to dome excessively and then collapse as the structure cannot support the volume. Three minutes at medium speed is the reliable window for this recipe. If you are using a hand mixer rather than a stand mixer, add 30 seconds to the creaming time — hand mixers generate less torque and beat more slowly at the equivalent speed setting.
My snickerdoodle cupcakes use the same creaming method and the same 3-minute window — if you want to see how the technique translates across a different flavor profile, that article walks through it in the same depth.
How Heat-Treated Flour Makes Cookie Dough Safe to Eat
Raw all-purpose flour carries a genuine food safety risk. Grain is harvested in open fields and is not treated to eliminate pathogens before milling — the flour in your bag has not been exposed to any heat process that would kill bacteria like E. coli or Salmonella. This risk is separate from the raw egg risk, which is why heat-treated flour matters even in egg-free cookie dough recipes.
Baking the flour at 350°F (175°C) for 5 minutes raises the internal temperature of the flour above 165°F (74°C) — the threshold at which common foodborne pathogens are destroyed. The flavor impact is negligible at this short exposure time. The flour does not toast, does not brown, and does not develop any cooked flavor. What you get is flour that behaves exactly like raw flour in the dough but carries none of the bacterial risk.
The alternative — microwaving the flour — works but requires stirring every 15 seconds and temperature-checking with an instant-read thermometer to confirm the flour has reached 165°F (74°C) throughout. The oven method is more consistent and requires no monitoring. Both methods are safe when done correctly.
Why Butter Temperature Affects All Three Components
This recipe has three separate butter-dependent components — the cupcake batter, the cookie dough truffles, and the buttercream — and all three require butter at the same temperature range: 65–68°F (18–20°C). The reason is the same across all three, but the failure mode in each looks different.
In the cupcake batter, butter that is too warm cannot hold the air pockets created during creaming — the fat is too fluid to maintain structure and the batter looks greasy and broken before the eggs even go in. In the cookie dough truffles, butter that is too warm produces a dough that is too soft to roll into balls that hold their shape through the 30-minute chill. In the buttercream, warm butter produces a frosting that looks glossy rather than matte, will not hold a piped peak, and will slide off the cupcake surface within minutes of application.
Cold butter fails in the opposite direction in each case: it will not cream with the sugar, it produces lumps in the truffle dough, and it makes the buttercream stiff, grainy, and impossible to pipe without tearing the cupcake top. The 65–68°F (18–20°C) window is narrow but forgiving — a few degrees in either direction is recoverable. More than 5°F outside that range in either direction requires correction before continuing.
🗒 Luna’s Note: I use an instant-read thermometer to check butter temperature when I am making a recipe with multiple butter-dependent components like this one. It takes 10 seconds and it has saved me from remaking an entire batch of buttercream more than once.

Why the Alternating Addition Method Prevents a Broken Batter
Adding all the flour at once to a creamed butter batter overloads the fat-based emulsion — the fat cannot absorb that volume of dry ingredient without the liquid present to help it hydrate. The batter seizes, clumps, and requires aggressive mixing to incorporate, which develops gluten and produces a tough crumb.
Adding all the milk at once has the opposite problem — too much liquid floods the emulsion before it has enough dry ingredient present to absorb it, and the batter breaks into a curdled, separated mass.
The alternating method — dry, milk, dry, milk, dry — keeps the emulsion in a stable state throughout incorporation. Each addition of dry ingredient is small enough for the fat to absorb, and each addition of liquid is small enough for the flour proteins to hydrate evenly without overwhelming the structure. The result is a smooth, cohesive batter that requires minimal mixing to come together — which is exactly what keeps gluten development low and the finished crumb tender.
Troubleshooting Cookie Dough Cupcakes
The Buttercream Is Greasy and Will Not Hold a Piped Shape
This is the most common ingredient-type failure in this recipe, and it comes from using butter that was too warm when it went into the mixer. Butter above 70°F (21°C) has already lost its ability to trap air — it is too fluid to build the emulsified structure that gives buttercream its body. The frosting will look glossy, feel greasy rather than smooth, and collapse immediately after piping rather than holding the ridged shape of the tip. The fix is to refrigerate the entire bowl of buttercream for 10–15 minutes, then re-beat from medium to medium-high for 2 minutes. Do not add more powdered sugar to compensate — it makes the frosting gritty without fixing the underlying temperature problem. If the kitchen is very warm — above 75°F (24°C) — chill the cupcakes themselves before frosting and work quickly once the buttercream is piped. The same principle applies to the cookie dough truffle dough: butter above 70°F (21°C) produces a dough that is too soft to roll.
The Cupcake Tops Overflow the Liner and Bake Flat and Wide
This is a pan preparation and fill-level failure. If you are using a dark non-stick muffin tin, the sides and bottom of the cupcake bake faster than they should — the exterior sets before the center has fully risen, which pushes the batter up and over the liner rim rather than directing the rise upward. Switch to a light-colored aluminum tin, or reduce the oven temperature by 25°F (14°C) if a dark tin is all you have and start checking at 15 minutes. Fill level is the second cause — each liner should be exactly two-thirds full, approximately 45–50g of batter per cup. At two-thirds full, the batter rises and domes slightly within the liner. Above two-thirds, the batter reaches the rim before the structure sets and spills over. If you have leftover batter after filling 12 liners correctly, bake it in a separate liner rather than topping up the existing ones.
The Cupcake Tops Are Flat or Sunken in the Center
The most common cause is under-creaming the butter and sugar. If the creaming step ran for less than 3 minutes at medium speed, the batter went into the oven without enough aerated structure to support a rise. The cupcakes bake up with a flat or concave top because there were not enough air pockets to expand. The fix for the next batch is a full 3 minutes at medium speed — set a timer rather than estimating. The second cause is expired baking powder. Drop 1 tsp (4g) into ½ cup (120ml) of hot water — it must bubble immediately. If the reaction is weak, the baking powder is spent and needs to be replaced before baking. The third cause is opening the oven door before 18 minutes. The sudden temperature drop deflates the structure before the proteins have set. Once the center has sunk, no amount of additional baking time will recover it.
The Cupcake Crumb Is Tight and Rubbery With Tunnels Through the Center
This is an overmixing problem at the dry ingredient stage. Once flour meets liquid in a batter, gluten development begins with every rotation of the mixer. Tunnels — long vertical air channels through the crumb — form when carbon dioxide from the baking powder escapes through a gluten network that is too tight to hold it in place as small, evenly distributed bubbles. The texture reads as rubbery because the protein structure has become too developed relative to the fat and sugar content.
The fix is to stop the mixer the moment the last streak of flour disappears — not before, not after. If you are hand-mixing, count strokes rather than mixing by feel. Fifteen to twenty strokes from the point the flour touches the batter is the ceiling.
The Chocolate Chips Have All Sunk to the Bottom of the Cupcake
Chips sink when they are added to the batter without the flour-coating step. Toss your ¾ cup (128g) semi-sweet chocolate chips in 1 teaspoon of the measured all-purpose flour before folding them into the batter. The flour coating increases friction between the chip surface and the surrounding batter, which slows the rate at which the chips settle before the batter sets around them. This is the same mechanism used in fruit-studded quick breads and muffins.
Do not add extra flour to the batter itself — only the thin coating on the chips is needed. If you skipped this step and the chips sank in your current batch, the only fix is a restart — the chips cannot be redistributed once the batter is in the tin.
The Cookie Dough Truffles Are Too Soft to Roll
The butter in the truffle dough was too warm, or the dough was not chilled long enough. Truffle dough at the right consistency rolls cleanly into a smooth ball that holds its shape on the parchment. Dough that is too soft sticks to your palms, flattens when placed on the parchment, and will not stay round on the frosted cupcake. If the dough is too soft to roll after mixing, refrigerate it for 15 minutes before attempting to portion it. If the rolled truffles are softening on the parchment before the 30-minute chill is complete, move the plate to the freezer for 10 minutes instead — they firm faster without freezing solid. The truffles must be cold and firm before they go onto the frosted cupcakes.
High Humidity or High Altitude Is Affecting the Bake
In high humidity — above 60% relative humidity — the buttercream absorbs ambient moisture and softens faster than it should. The mini chip garnish also blooms (develops a white haze on the surface) within hours of being placed on the frosting. In humid conditions, assemble and garnish as close to serving time as possible, store the finished cupcakes in an air-conditioned room, and add the mini chip garnish immediately before they hit the table.
At high altitude above 3,500 feet (1,067m), the baking powder acts faster than the cupcake structure can support — tops rise sharply and then collapse. Reduce the baking powder to 1 tsp (4g), add 2 tablespoons (15g) extra flour, and increase the oven temperature to 365°F (185°C). The truffle dough and buttercream are not affected by altitude.
Pro-Tips
Use a light-colored aluminum muffin tin. Dark non-stick pans absorb radiant heat faster and produce cupcakes with overdone sides and bottoms before the centers are set.
Make the cookie dough truffles first if you are working ahead. They keep in the refrigerator for up to 5 days in a lidded container, which means you can make them two or three days before you need the finished cupcakes and the assembly step takes minutes.
Do not skip the salt in the buttercream. A single pinch of fine sea salt cuts the sweetness of 3 cups of powdered sugar just enough that the frosting tastes like vanilla rather than pure sugar. It is not detectable as salt — it functions as a flavor amplifier.
If the buttercream looks curdled or separated after beating — small white lumps in a greasy base — the butter was too cold. Do not throw it out. Set the mixer bowl over a pan of warm water for 30 seconds, then beat again on medium-high for 1 minute. The gentle warmth brings the temperature into range and the buttercream comes back together.
How to Store Cookie Dough Cupcakes
Room Temperature
Store fully assembled cupcakes in a hard-sided lidded container — not a zip-lock bag, which compresses the piped frosting and causes the truffles to dislodge. Stand the cupcakes upright with enough vertical clearance that the truffle does not press against the container lid. Do not layer them.
Room temperature storage is suitable for up to 2 days in a cool, dry environment — below 72°F (22°C). On day 1, the buttercream is at peak texture — light, fluffy, and holding its piped shape. By day 2, the frosting will have firmed slightly and the mini chip garnish may show early signs of blooming in a humid kitchen. The cupcake base stays moist on both days. Above 72°F (22°C), move to the refrigerator after the first day — warm buttercream softens and the truffle loses its firm texture faster than it should.
Humidity accelerates softening in both the frosting and the truffle. In a humid environment — above 60% relative humidity — the mini chip garnish on the frosting surface will begin to bloom within 24 hours. This does not affect flavor but does affect appearance. In humid conditions, add the mini chip garnish immediately before serving rather than during assembly.
Refrigerator
Refrigeration is recommended if you are storing beyond 2 days or if your kitchen runs warm. Place the cupcakes in a hard-sided container with a loose-fitting lid — a fully airtight seal traps condensation and makes the cupcake liners soggy and the frosting surface tacky. Refrigerate for up to 5 days.
Cold buttercream firms significantly in the refrigerator and loses its light, fluffy texture when eaten straight from the fridge. Pull the cupcakes out 30–45 minutes before serving and allow them to come to room temperature on the counter. The buttercream softens back to its original texture and the cookie dough truffle, which firms considerably when cold, returns to its soft, raw-dough consistency. Do not microwave refrigerated cupcakes to speed this up — the frosting melts before the cupcake base warms.
Freezer — Assembled
Fully assembled cupcakes do not freeze well. The buttercream develops ice crystals during freezing and the truffle texture changes on thawing — the mini chips become waxy and the dough loses its soft, raw consistency. Freeze components separately instead.
Freezer — Components
Cupcake bases (unfrosted): Wrap each cooled, unfrosted cupcake individually in plastic wrap, then place in a zip-lock freezer bag. Freeze for up to 2 months. Thaw at room temperature for 1 hour still wrapped — unwrapping before thawing causes condensation to collect on the cupcake surface and makes the top sticky.
Cookie dough truffles (unplaced): Place the chilled, rolled truffles in a single layer in a zip-lock freezer bag with a sheet of parchment between layers if stacking. Freeze for up to 6 weeks. Thaw in the refrigerator overnight — do not thaw at room temperature, as they soften too quickly and lose their shape before they are fully thawed through the center.
Buttercream: Transfer to a zip-lock freezer bag, press out the air, and freeze for up to 3 months. Thaw overnight in the refrigerator, then bring to room temperature and re-beat with the paddle attachment on medium speed for 2 minutes before piping. The re-beating restores the aerated texture — buttercream thawed without re-beating is dense and does not pipe cleanly.
Freezer — Unbaked Cupcake Batter
Cupcake batter does not freeze well once mixed — the baking powder begins reacting with moisture immediately after mixing, and frozen batter loses most of its leavening power by the time it thaws. Bake the cupcakes first, then freeze the unfrosted bases as described above.
Serving Suggestion
🗒 Luna’s Note: I serve these at room temperature, pulled from the fridge 40 minutes before the plate hits the table. The truffle needs that time to soften from cold-firm back to the raw-dough texture that makes the whole cupcake work — a cold truffle straight from the fridge has lost that soft, almost-melting quality that makes it taste like actual cookie dough rather than a dense sugar ball.
I serve these at room temperature with a glass of cold whole milk — the fat in the milk cuts through the sweetness of the buttercream in the same way it does with an actual chocolate chip cookie. These are the cupcake I make when someone’s birthday falls on a weeknight and a full layer cake is too much to ask of a Tuesday evening. They look bakery-finished but the components can be staged across two days — truffles and cupcake bases made ahead, assembly taking fifteen minutes the day of.
Frequently Asked Questions About Cookie Dough Cupcakes
Can I make cookie dough cupcakes ahead of time?
Yes — and this recipe is designed for it. Bake the cupcake bases up to 2 days ahead and store them unfrosted at room temperature wrapped in plastic wrap, or freeze them individually wrapped for up to 2 months. Make the cookie dough truffles up to 5 days ahead and refrigerate them in a lidded container. Make the buttercream up to 3 days ahead and refrigerate it in a zip-lock bag — bring it to room temperature and re-beat on medium speed for 2 minutes before piping. Assemble on the day you plan to serve them for the best frosting texture and truffle consistency.
How do I get domed cupcake tops?
Domed tops on cupcakes come from two variables: fill level and oven temperature. Fill each liner to exactly two-thirds full — underfilling produces flat tops because there is not enough batter to rise above the liner rim. A slightly higher oven temperature — 375°F (190°C) for the first 5 minutes, then reduced to 350°F (175°C) for the remaining bake time — causes the exterior to set faster while the center is still rising, which pushes the top upward into a dome before the crust forms. This recipe is written at a consistent 350°F (175°C) and produces a flat-to-slightly-domed top that is ideal for piping. If you want a more pronounced dome, use the temperature method above but watch carefully — the faster-setting exterior can crack if the oven runs hot.
How do you make edible cookie dough safe to eat?
The two raw ingredients in conventional cookie dough that carry food safety risk are raw eggs and raw flour. This recipe eliminates both. There are no eggs in the cookie dough truffle component — eggs are only in the cupcake batter, which is fully baked. The flour is heat-treated at 350°F (175°C) for 5 minutes before it goes into the truffle dough, which raises the flour’s internal temperature above 165°F (74°C) and eliminates the bacterial risk present in untreated raw flour. The finished truffles are safe to eat without baking. Do not substitute untreated raw flour — the heat-treatment step is not optional.
Can I use store-bought cookie dough for the topping?
Store-bought refrigerated cookie dough is not safe to eat raw — it contains untreated flour and raw eggs in most formulations. Some brands now sell heat-treated, egg-free edible cookie dough specifically for eating without baking — these are safe and will work as a substitute for the homemade truffles in this recipe. Check the packaging to confirm the product is labeled safe to eat raw before using it. If you use a store-bought edible dough, portion it into 12 equal balls of approximately 18–20g each, chill for 30 minutes, and place on the frosted cupcakes as directed.
For the from-scratch version that gives you full control over flavor and texture, my small batch chocolate chip cookies article covers the dough mechanics in detail if you want to understand the ratios further. If you are looking for the best cookie dough cupcakes recipe that gives you full control over every component — texture, sweetness, and truffle size — this from-scratch version is the one I come back to every time.
Can I double this cookie dough cupcake recipe?
Yes, with one adjustment. Double every ingredient quantity exactly — except the baking powder. At double the recipe, use 2½ tsp (10g) of baking powder rather than 3 tsp (12g). Leavening does not scale linearly — doubling the baking powder in a doubled batch produces too much gas too quickly, which causes the cupcakes to dome sharply, then collapse before the structure sets. Bake time remains 18–22 minutes at 350°F (175°C) — do not increase the bake time for a doubled batch. Bake in two separate 12-count tins on the same middle rack if your oven is wide enough, or bake in two sequential batches. Do not stack the tins.
Does altitude or humidity affect these cupcakes?
Altitude above 3,500 feet (1,067m) causes the leavening to work faster than the batter structure can support — the cupcakes rise quickly and then collapse. At high altitude, reduce the baking powder to 1 tsp (4g), add 2 tablespoons (15g) extra flour, and increase the oven temperature to 365°F (185°C). High humidity affects the buttercream and the cookie dough truffles more than the cupcakes themselves — the frosting absorbs ambient moisture and softens faster, and the mini chip garnish blooms within hours. In humid conditions, assemble and garnish the cupcakes as close to serving time as possible and store in an air-conditioned room rather than on a counter.
Can I substitute the butter in the cupcake batter with oil?
Partially, but not as a full replacement. Oil produces a moister crumb than butter because it remains liquid at room temperature — a cupcake made with oil stays soft longer on day 2 and day 3 than a butter-based cupcake. However, oil cannot be creamed with sugar, which means you lose the aeration that gives this recipe its open, cakey crumb and light texture. If you replace all the butter with oil, the cupcakes will be denser, moister, and flatter. A half-and-half substitution — ¼ cup (57g) softened butter creamed with the sugar, plus ¼ cup (60ml) neutral oil added with the eggs — preserves some aeration while improving moisture retention.
Do not substitute oil in the buttercream or the cookie dough truffles — oil-based frosting does not hold a piped shape, and oil in the truffle dough prevents it from firming properly during chilling.
More Cupcakes You’ll Love
- Carrot Cake Cupcakes — warmly spiced, ultra-moist one-bowl cupcakes topped with a thick tangy cream cheese frosting
- Strawberry Crunch Cupcakes — light vanilla cupcakes with a strawberry buttercream and a golden Oreo and freeze-dried strawberry crunch coating on top

Cookie Dough Cupcakes
Ingredients
Equipment
Method
- Preheat oven to 350°F (175°C) and position the rack in the middle. Spread ½ cup (60g) all-purpose flour in a thin layer on a parchment-lined baking sheet and bake for 5 minutes, then remove and cool completely. Line a standard 12-count light-colored aluminum muffin tin with cupcake liners and set aside.
- In the bowl of a stand mixer fitted with the paddle attachment, beat ½ cup (113g) softened unsalted butter and ¾ cup (150g) granulated sugar on medium speed for exactly 3 minutes until pale, fluffy, and nearly doubled in volume.
- With the mixer on low, add 2 large room-temperature eggs one at a time, fully incorporating the first before adding the second. Add 2 tsp (10ml) pure vanilla extract, increase to medium speed, and beat for 30 seconds until smooth and cohesive.
- In a separate bowl, whisk together 1½ cups (180g) all-purpose flour, 1½ tsp (6g) baking powder, and ¼ tsp (1.5g) fine sea salt. With the mixer on low, add the dry ingredients and ½ cup (120ml) whole milk in three alternating additions — dry, milk, dry, milk, dry — mixing only until each addition just disappears before adding the next. Stop as soon as the last streak of flour is gone.
- Remove the bowl from the mixer. Toss ¾ cup (128g) semi-sweet chocolate chips in 1 teaspoon of flour, then fold into the batter with a silicone spatula using 10–12 slow strokes. Divide the batter evenly among the 12 lined cups, filling each to exactly two-thirds full (approximately 45–50g per cup).
- Bake at 350°F (175°C) for 18–22 minutes until the tops spring back when lightly pressed and a toothpick inserted in the center comes out with a few moist crumbs. Leave in the tin for exactly 5 minutes, then transfer to a wire rack and cool completely — at least 1 hour — before frosting.
- In a medium bowl, beat ¼ cup (57g) softened unsalted butter, ¼ cup (55g) packed light brown sugar, and 2 tbsp (25g) granulated sugar until smooth. Add 1 tbsp (15ml) whole milk, ½ tsp (2.5ml) vanilla extract, and 1 pinch fine sea salt and mix to combine. Add ½ cup (60g) cooled heat-treated flour and stir until a smooth dough forms. Fold in ¼ cup (43g) mini semi-sweet chocolate chips. Roll into 12 equal balls of approximately 18–20g each and refrigerate on a parchment-lined plate for 30 minutes.
- In the cleaned stand mixer bowl, beat 1 cup (226g) softened unsalted butter on medium speed for 2 minutes until pale and creamy. Reduce to low and add 3 cups (360g) sifted powdered sugar in three additions. Add 1½ tsp (7.5ml) vanilla extract, 1 pinch fine sea salt, and 2 tbsp (30ml) heavy cream. Increase to medium-high and beat for 3 full minutes. Add the remaining 1 tbsp (15ml) heavy cream if needed to reach pipeable consistency.
- Fit a large piping bag with a Wilton 1M open-star tip and fill two-thirds full with buttercream. Pipe a swirl onto each completely cooled cupcake starting from the outer edge and spiraling inward and upward in one continuous motion. Press one chilled cookie dough truffle into the center of each frosted cupcake, then scatter 3 tbsp (32g) mini semi-sweet chocolate chips evenly across all 12 cupcakes.