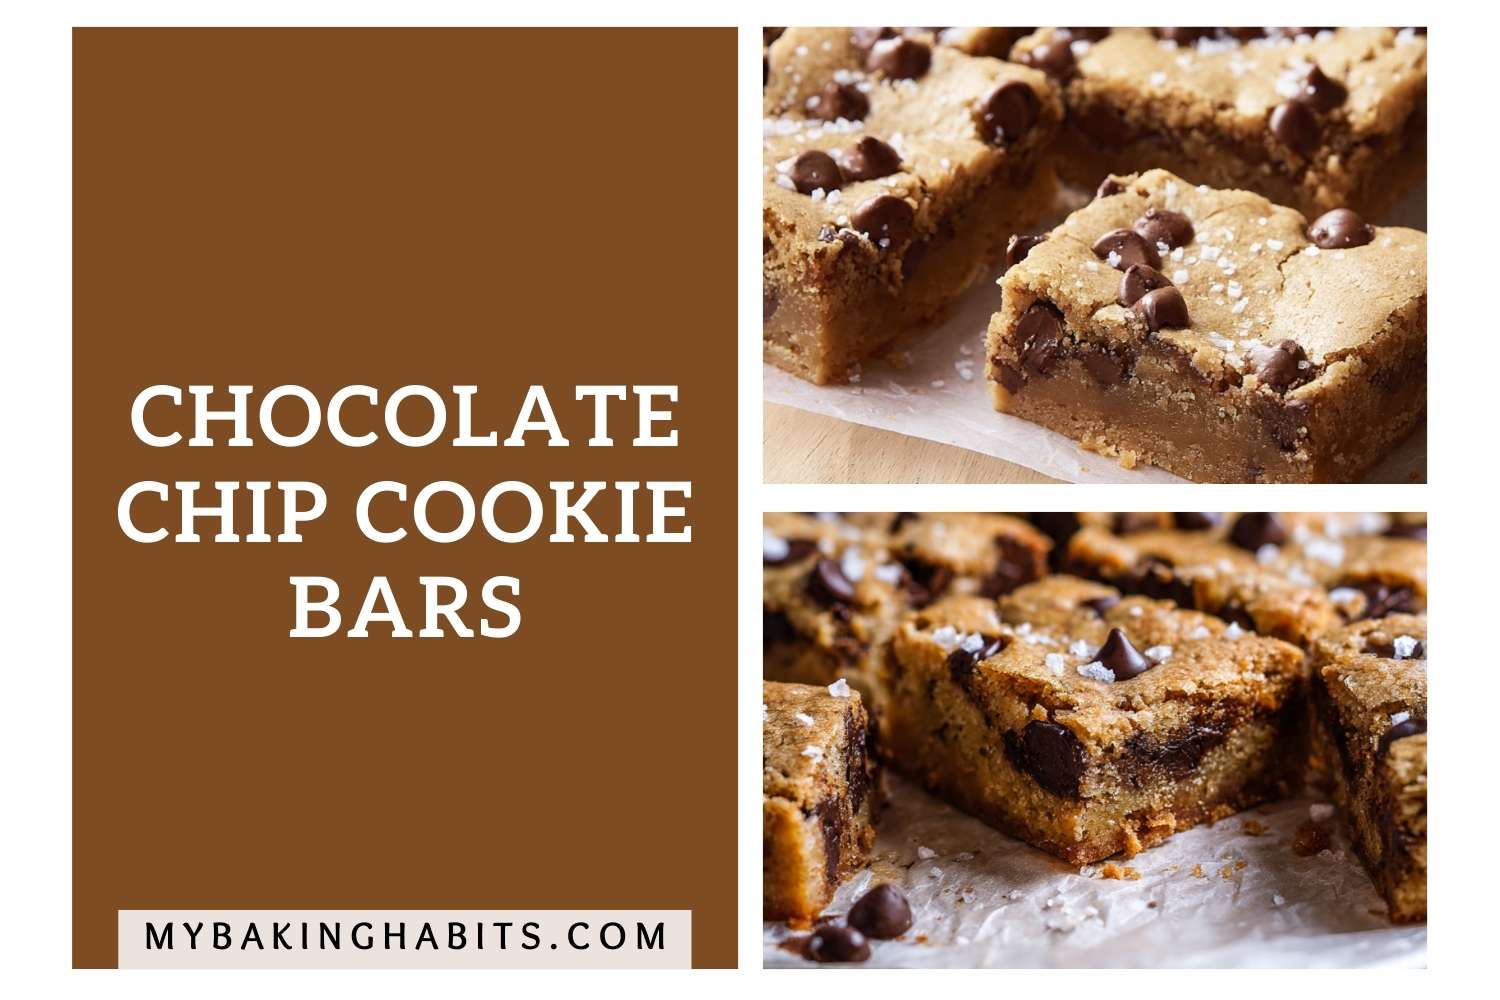
Chocolate Chip Cookie Bars (Soft, Chewy, One Pan)
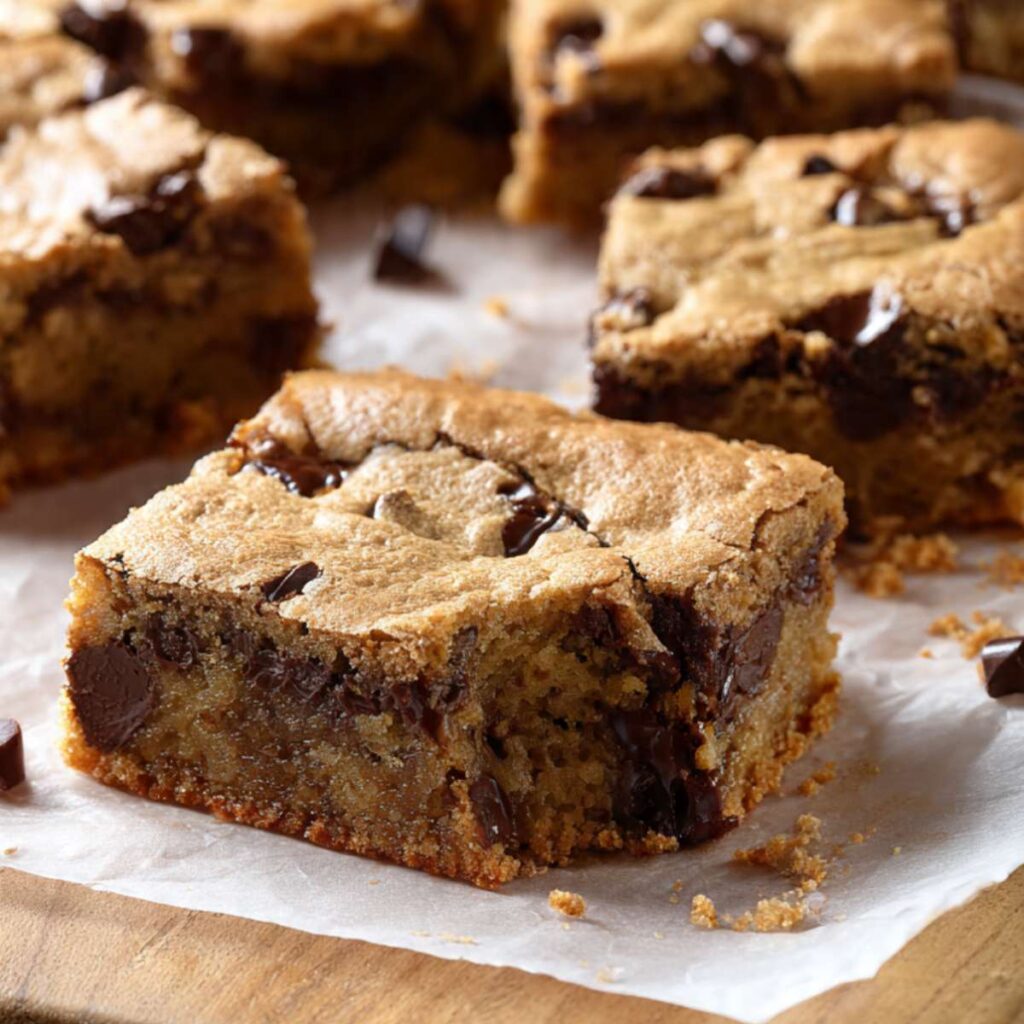
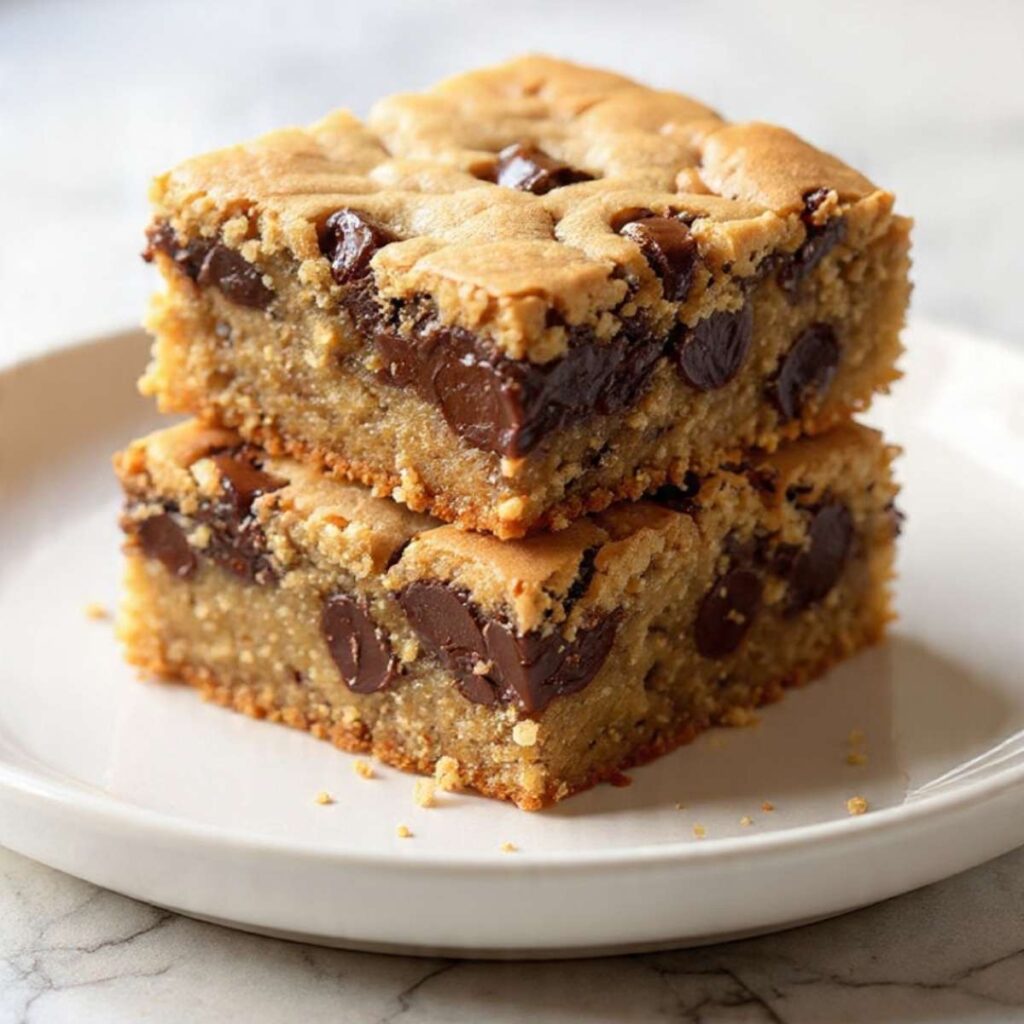
Some weeks I do not want to scoop a single cookie. This is that recipe. One bowl, one pan, 40 minutes, and you get 16 thick, chewy bars loaded with melted chocolate.
I have made this recipe more times than I can count, and I overbaked it twice before I understood what “done” actually looks like in a 9×13 pan. The center will look underdone when you pull it. That is correct. Carryover heat finishes the job on the counter. Pull too late and you lose the fudgy middle that makes these worth making.
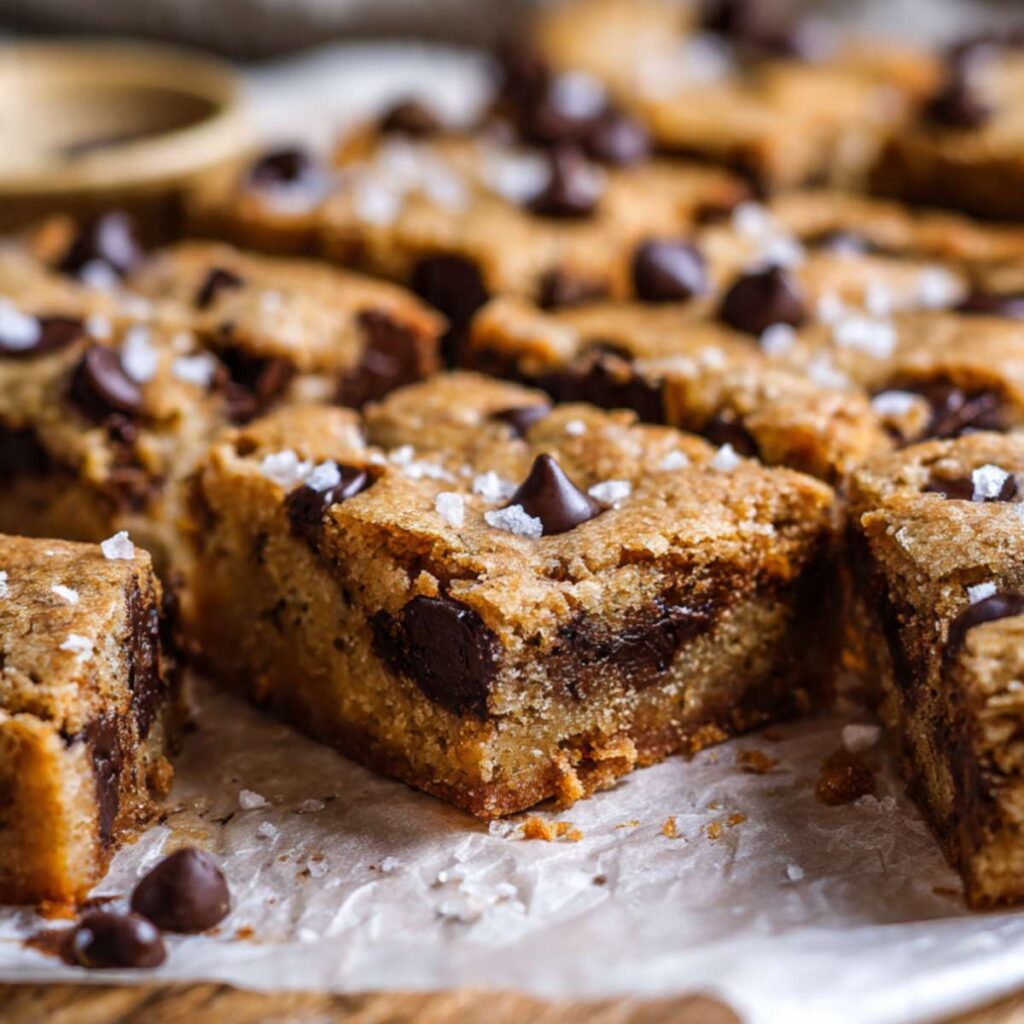
The other thing I changed from my first version: the sugar. I used all granulated sugar in my early tests. The bars were fine. But fine is not what the photos show. Switching to a blend of brown and granulated sugar gave me that deep golden color, the caramel undertone, and the dense, moist crumb you see here. Brown sugar holds more moisture than granulated because of the molasses content. That moisture stays in the bar.
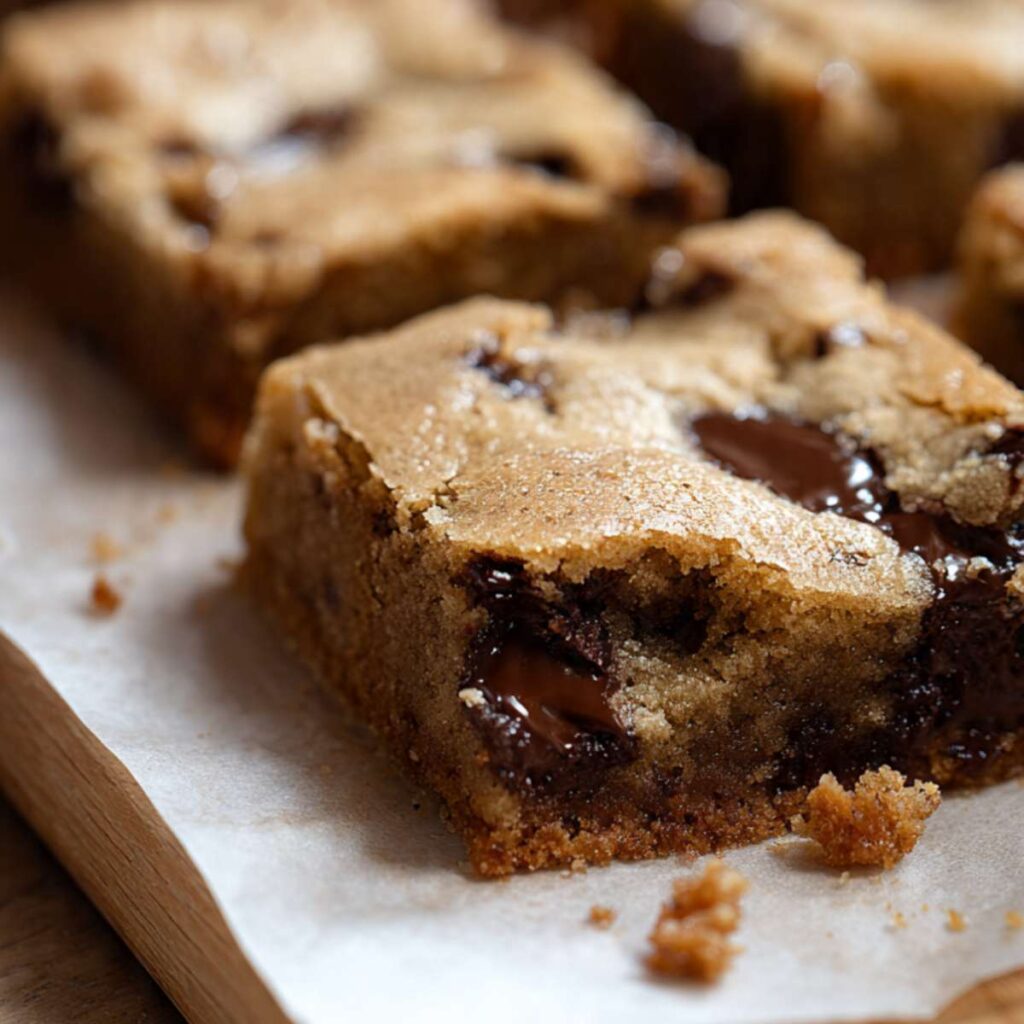
The chocolate is also a two-part situation. Chips alone give you even distribution but not those melted chocolate pockets you see in the cross-section. I use chips for distribution and chunks for the melt. Both matter.
This is not a complicated recipe. But there are 3 things that separate a good bar from a great one: the sugar blend, the chocolate combination, and knowing exactly when to pull the pan.
Ingredients & Tools for Chocolate Chip Cookie Bars Recipe
Unsalted Butter, 1 cup (226g), melted and slightly cooled Melted butter is the reason these bars are dense and chewy instead of fluffy and cakey. When butter is melted rather than creamed, it does not trap air. No air means no lift. That is what you want here. A flat, fudgy, dense bar. Let it cool for 5 minutes before mixing. Hot butter will scramble your eggs.
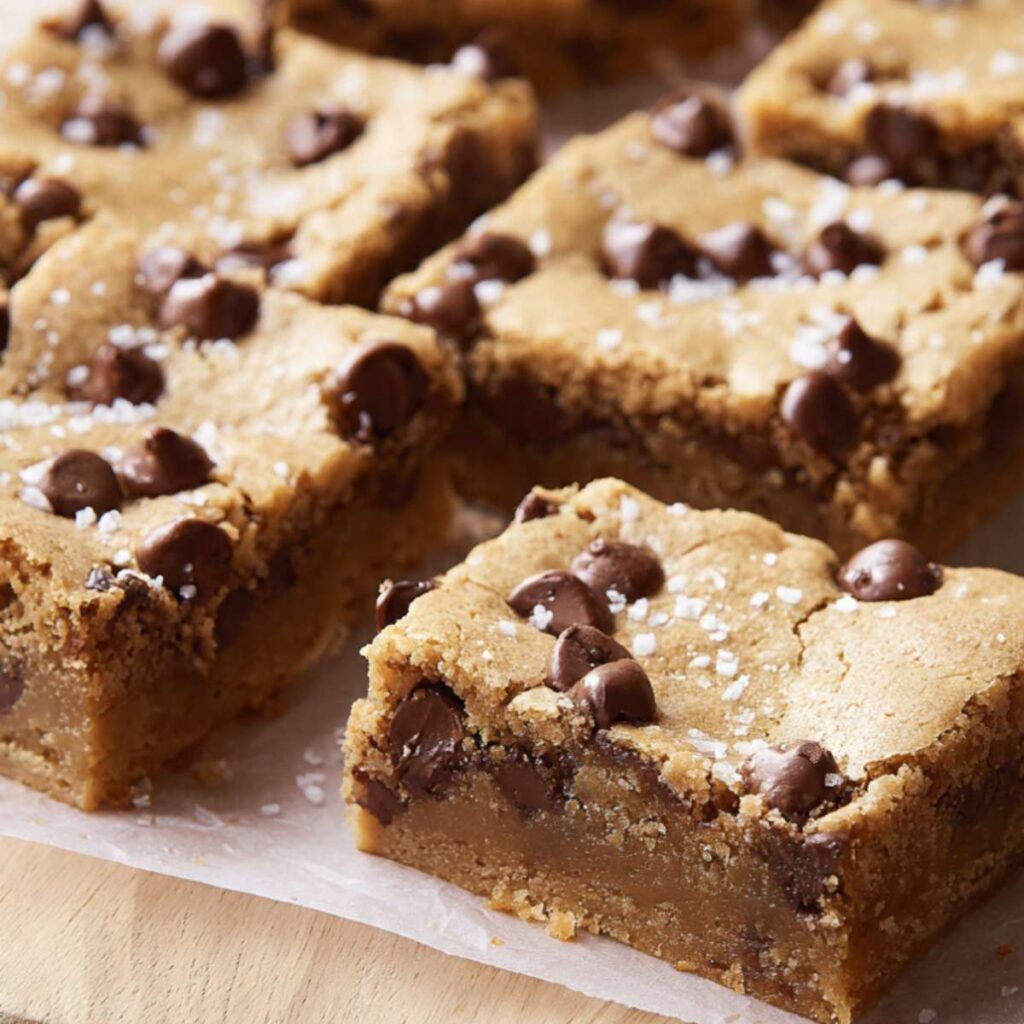
Light Brown Sugar, 1 cup (200g), packed Brown sugar is the most important ingredient in this recipe for texture and color. It contains molasses, which adds moisture and keeps the bars soft for days after baking. It also drives the Maillard reaction faster than granulated sugar, which is why these bars turn that deep golden caramel color you see in the photos.
Granulated Sugar, ½ cup (100g) The granulated sugar balances the brown sugar. It pulls some moisture out during mixing, which creates a slightly crisp edge and helps the top of the bar set with that faint crackle you see in the photos.
2 Large Eggs, room temperature Eggs provide structure and bind the dough. Room temperature eggs incorporate more evenly than cold eggs. Cold eggs can cause the melted butter to seize and separate, which leads to greasy, uneven bars.
Pure Vanilla Extract, 2 teaspoons (10ml) Vanilla does not add vanilla flavor to this recipe in any obvious way. What it does is round out the chocolate and brown sugar notes and make the bar taste complete rather than flat.
All-Purpose Flour, 2 ½ cups (315g), spooned and leveled Flour provides structure. Too little and the bars will not hold their shape when sliced. Too much and the bars turn dry and dense in the wrong way. Spoon the flour into your measuring cup and level it off. Do not scoop directly from the bag. Scooping compacts the flour and can add up to 20% more than the recipe needs.
Baking Powder, 1 teaspoon (5g) Baking powder gives a small amount of lift to keep the bars from being completely flat. It is not here to make them cakey. Just enough to give the crumb a little openness without compromising the dense chew.
Fine Sea Salt, 1 teaspoon (6g) Salt is not optional. It balances the sweetness and sharpens every other flavor in the bar. Fine sea salt dissolves evenly into the dough. Do not substitute kosher salt without adjusting the quantity.
Semi-Sweet Chocolate Chips, 1 ½ cups (255g) Chips hold their shape during baking and give you even chocolate distribution throughout the bar. Every bite gets chocolate. Use a good quality semi-sweet chip, around 50 to 55% cacao.
Semi-Sweet Chocolate Chunks, ½ cup (85g) Chunks melt completely during baking and create those pools of liquid chocolate you see in the cross-section photos. Chips alone will not do this. You need both.
Reserved Chips for Top, ¼ cup (42g) Pressed onto the surface before baking, these give the bars their finished look. They stay intact on top while the chunks below melt into the crumb.
Flaky Sea Salt, ½ teaspoon Added immediately after the bars come out of the oven. Flaky salt dissolves slightly into the warm surface and creates a contrast against the sweet chocolate. Maldon is my go-to. Do not skip this if you have it.
Tools You Need
- 9×13-inch (23x33cm) light-colored metal baking pan
- Parchment paper with overhang on both long sides
- Large mixing bowl
- Whisk
- Rubber spatula or wooden spoon
- Kitchen scale (strongly recommended)
- Measuring cups and spoons
Luna’s Habit Hack: Portion and freeze the mixed dough in the pan before baking. Cover tightly with plastic wrap and freeze for up to 1 month. When ready to bake, go straight from freezer to oven at 325°F (163°C) and add 8 to 10 minutes to the bake time. No thawing needed.
How to Make Chocolate Chip Cookie Bars
Step 1. Prepare Your Pan and Preheat the Oven
Set your oven rack to the center position. Preheat to 350°F (175°C). A center rack gives the bars even heat from top and bottom. Too high and the top browns before the center sets.
Line your 9×13-inch (23x33cm) light-colored metal baking pan with parchment paper. Let the paper hang over both long sides by at least 2 inches. These overhangs are your handles. Without them, getting the bars out in one clean piece is difficult. Press the parchment flat into the corners so the bars bake into clean edges.
Your pan should look fully lined with no exposed metal on the bottom or sides.
Baker’s Warning: Do not use a dark-colored pan. Dark metal absorbs more heat and will overbake the bottom crust before the center is set.
Step 2. Mix the Butter and Sugars
In a large mixing bowl, whisk together the melted butter (1 cup / 226g), brown sugar (1 cup / 200g), and granulated sugar (½ cup / 100g).
Whisk for a full 60 seconds. Not until just combined. A full 60 seconds. This dissolves the sugar into the butter and builds the base structure of the bar. The mixture should look thick, smooth, and glossy, like a caramel sauce that has just come together.
Baker’s Warning: If your melted butter is still hot, stop here. Hot butter will cook the eggs in the next step. The bowl should feel warm, not hot, to the touch.
Step 3. Add the Eggs and Vanilla
Add 2 large eggs and 2 teaspoons (10ml) of vanilla extract to the butter and sugar mixture. Whisk until fully incorporated, about 30 seconds.
The batter should look smooth and even in color with no visible streaks of egg white or yolk.
This step builds the emulsification of the batter. The eggs bind the fat from the butter with the water-based sugars. If the mixture looks broken or greasy at this stage, your butter was too hot.
Baker’s Warning: Do not over-whisk after adding eggs. Excess aeration here will make the bars rise and fall in the oven, creating a sunken center.
Step 4. Add the Dry Ingredients
Add the flour (2 ½ cups / 315g), baking powder (1 tsp / 5g), and fine sea salt (1 tsp / 6g) directly into the bowl.
Switch from your whisk to a rubber spatula. Fold the dry ingredients into the wet until you no longer see dry flour streaks. The dough will be very thick. That is correct.
Stop mixing the moment the flour disappears. The dough should feel like thick, heavy cookie dough, not a pourable batter.
Baker’s Warning: Stop mixing immediately once the flour streaks disappear. Every fold after that point develops gluten and moves the texture from chewy toward tough.
Step 5. Fold in the Chocolate
Add the semi-sweet chocolate chips (1 ½ cups / 255g) and chocolate chunks (½ cup / 85g) to the dough. Fold with your spatula until the chocolate is evenly distributed throughout the dough. About 8 to 10 folds is enough.
The dough should have chocolate pieces visible throughout with no large clumps of chips sitting in one spot.
Baker’s Warning: Do not stir aggressively here. The dough is stiff and overworking it at this stage will tighten the gluten structure and make the bars dense in the wrong way.
Step 6. Press the Dough into the Pan
Transfer the dough to your lined pan. Use your spatula or clean hands to press it into an even layer. Work from the center outward, pushing the dough into the corners and edges.
The layer should be flat and consistent in thickness across the entire pan. Uneven pressing means uneven baking. Thin spots will overbake before the thick center is done.
Sprinkle the reserved chocolate chips (¼ cup / 42g) evenly over the surface. Press them in gently with your fingertips so they stay in place during baking.
The surface should look flat and even with chips distributed across the entire top.
Baker’s Warning: Do not leave gaps or mounds in the dough. High spots will brown too fast and low spots will stay underdone.
Step 7. Bake the Cookie Bars
Place the pan on the center rack of your preheated 350°F (175°C) oven. Bake for 22 to 28 minutes.
At 22 minutes, start checking. The edges should be set and golden brown, pulling very slightly away from the parchment. The center should look matte on the surface but still have a faint jiggle when you gently shake the pan.
Pull the bars when the center looks just barely set. Not firm. Not dry. The bars will continue to cook from carryover heat for 10 to 15 minutes after they leave the oven.
The correct pull point: golden edges, matte but soft-looking center, slight movement when the pan is nudged.
Baker’s Warning: Do not wait for the center to look fully baked before pulling. A fully set center in the oven means an overbaked, dry center once cooled.
Step 8. Add Flaky Salt and Cool Completely
The moment the pan comes out of the oven, sprinkle ½ teaspoon of flaky sea salt evenly over the surface. The residual heat will melt the salt slightly into the top, which is exactly what you want.
Set the pan on a wire rack and let it cool completely at room temperature. This takes at least 30 minutes, but 45 minutes gives cleaner slices. Do not rush this step by refrigerating the pan. Rapid cooling makes the bars contract unevenly and can crack the surface.
Once fully cooled, lift the bars out of the pan using the parchment overhangs. Place on a cutting board and slice into 16 squares using a sharp knife. Wipe the knife between cuts for clean edges.
The bars should feel firm enough to hold their shape when lifted but still yield slightly when pressed in the center.
The Science Behind Chewy Chocolate Chip Cookie Bars
Why Melted Butter Makes These Bars Chewy, Not Cakey
Melted butter produces a chewy, dense bar because it does not trap air during mixing. When butter is creamed with sugar at room temperature, the process forces air bubbles into the fat. Those bubbles expand in the oven and create a cakey, open crumb. Melted butter skips that process entirely. No air pockets means no lift, and no lift means a flat, dense, fudgy bar.
Melted butter also increases gluten development slightly compared to creamed butter. The extra water content in melted butter hydrates the flour more fully, which produces longer gluten strands. Longer gluten strands equal more chew.
Why Brown Sugar Gives Cookie Bars Their Color and Texture
Brown sugar produces 2 distinct effects in this recipe. First, the molasses content adds hygroscopic moisture, meaning it actively pulls water from the air and holds it inside the bar. This is why these bars stay soft at room temperature for 3 to 4 days without drying out. Granulated sugar does not do this.
Second, brown sugar accelerates the Maillard reaction. The Maillard reaction is the chemical process that browns baked goods and creates complex flavor. It happens between amino acids and reducing sugars at temperatures above 280°F (138°C). Brown sugar contains more reducing sugars than granulated sugar, which is why the bars turn that deep golden caramel color rather than pale yellow.
Why the Two-Chocolate System Works
Using semi-sweet chips and chunks together produces 2 different results in the same bar. The chips, which contain stabilizers to help them hold their shape, stay mostly intact during baking. They give you defined chocolate pieces in every bite and visible chips on the surface. The chunks, which are pure chocolate without stabilizers, melt completely. They create the pools of liquid chocolate you see in the cross-section photos. One provides distribution. The other provides the melt. You need both to get the bar in the photos.
Why Carryover Heat Is the Most Important Variable in This Recipe
Carryover heat is the continued cooking that happens inside a baked good after it leaves the oven. In a thin cookie, carryover heat is minimal because the mass is small. In a thick 9×13-inch bar that is 1 to 1.25 inches deep, carryover heat can raise the internal temperature by 5 to 10°F (3 to 6°C) after the pan leaves the oven. That is enough to fully set the center without overbaking it.
Pulling the bars when the center still looks slightly underdone is not a mistake. It is the correct technique. The bars reach their final texture on the cooling rack, not in the oven. Bakers who wait for a fully set center in the oven consistently produce dry, overbaked bars.
Why Flour Measurement Method Changes the Entire Recipe
Scooping flour directly from the bag compacts it into the measuring cup. A compacted cup of all-purpose flour can weigh up to 155g instead of the correct 125g per cup. That is a 24% difference. In a recipe that uses 2 ½ cups of flour, scooping instead of spooning and leveling can add up to 75g of extra flour. That extra flour tightens the crumb, dries out the bar, and pushes the texture from chewy toward cakey. Always spoon flour into the measuring cup and level with a straight edge. Better still, use a kitchen scale.
Troubleshooting Chocolate Chip Cookie Bars
Why Are My Cookie Bars Dry and Cakey?
Dry, cakey bars are caused by too much flour, overbaking, or using all granulated sugar. There are 3 specific causes to check. First, measure your flour by spooning into the cup and leveling, not scooping. Scooping can add up to 75g of extra flour to this recipe. Second, pull the bars when the center still has a faint jiggle. A fully set center in the oven is an overbaked center once cooled. Third, make sure you are using the brown and granulated sugar blend, not all granulated. All granulated sugar produces a drier, crisper bar with less moisture retention.
Why Did My Cookie Bars Sink in the Center?
A sunken center is caused by underbaking, over-whisking the eggs, or opening the oven door too early. If the center sinks and stays wet, the bars needed more time. If the center rose and then collapsed, the batter was over-aerated during the egg-mixing step. Whisk the eggs for 30 seconds only. Do not whisk vigorously. Also avoid opening the oven door before the 22-minute mark. Cold air rushing into the oven causes the structure to collapse before it sets.
Why Are My Cookie Bars Greasy?
Greasy bars are caused by butter that was too hot when mixed, or incorrect flour measurement. If the melted butter was still steaming when you added the eggs, the heat partially cooked the egg proteins and broke the emulsification. The fat separates from the batter and pools during baking. Let the butter cool until the bowl feels warm, not hot, before mixing. If the butter temperature was correct, check your flour. Under-measured flour cannot absorb the fat properly, which also leads to greasy bars.
Why Did My Cookie Bars Stick to the Pan?
Bars that stick are caused by insufficient parchment overhang or lifting before fully cooled. The parchment needs to hang over both long sides of the pan by at least 2 inches. Without those overhangs, you have no way to lift the bars cleanly. Also make sure the bars are fully cooled before lifting. Warm bars are fragile. The structure is still setting as they cool. Attempting to lift them at 15 minutes instead of 45 minutes will cause them to crack and break at the center.
Why Are the Edges Overbaked and the Center Underdone?
Uneven baking is caused by a dark-colored pan, uneven dough pressing, or an oven rack that is too high or too low. Dark metal pans absorb more heat and overbake the bottom and edges before the center catches up. Use a light-colored aluminum pan. Also check that the dough is pressed to an even thickness across the entire pan. Thin edges will always overbake before a thick center is done. Keep your oven rack in the center position.
Pro Tips for the Best Chocolate Chip Cookie Bars
Use a Kitchen Scale for Every Dry Ingredient
A kitchen scale removes the single biggest variable in bar baking: flour measurement. Volume measurements for flour have a margin of error of up to 20% depending on how the flour was scooped or settled. A scale eliminates that entirely. This recipe was developed by weight. Baking by weight gives you the same result every single time.
Do Not Skip the Cooling Time
30 minutes is the minimum. 45 minutes gives cleaner slices. The bars are still finishing their internal structure during the first 20 to 30 minutes on the rack. Cutting too early gives you bars that fall apart at the chocolate pockets because the melted chunks have not re-solidified. If you want clean, sharp squares, wait the full 45 minutes.
Add Flaky Salt the Moment the Pan Comes Out
Flaky salt added to a hot surface dissolves slightly into the top layer of the bar. This creates a salt-and-sweet contrast that is built into the surface rather than sitting on top of it. Salt added after cooling sits on the surface and falls off when the bars are handled. The 10-second window right after pulling the pan from the oven is the only correct moment for this step.
How to Store Chocolate Chip Cookie Bars
Room Temperature Storage
Store fully cooled bars in an airtight container at room temperature for up to 4 days. Place a sheet of parchment paper between layers if stacking to prevent the bars from sticking together at the chocolate contact points. Do not refrigerate for short-term storage. Refrigeration pulls moisture out of the crumb and makes the bars dry and firm faster than room temperature storage does.
The bars taste best on day 2. The brown sugar continues to distribute moisture through the crumb overnight, and the texture becomes more even and fudgy than it was on the day of baking.
How to Store Cookie Bars in the Freezer
Chocolate chip cookie bars freeze well for up to 2 months. There are 2 ways to freeze them depending on how you plan to use them.
Option 1: Freeze as a full slab. After baking and cooling completely, do not slice. Wrap the entire slab tightly in 2 layers of plastic wrap, then one layer of aluminum foil. Label with the date. Thaw at room temperature for 2 to 3 hours before slicing. Slicing after thawing gives cleaner edges than slicing before freezing.
Option 2: Freeze as individual bars. Slice the cooled slab into 16 squares. Place on a parchment-lined baking sheet and freeze for 1 hour until solid. Transfer to a zip-lock freezer bag with parchment between each bar. This method lets you pull one bar at a time without thawing the entire batch. Individual bars thaw at room temperature in 30 to 45 minutes.
How to Freeze the Raw Dough
Raw dough freezes better than baked bars in terms of texture. Press the mixed dough into your lined pan as directed. Cover tightly with 2 layers of plastic wrap and freeze for up to 1 month. When ready to bake, place the frozen pan directly into a preheated 325°F (163°C) oven. Do not thaw first. Add 8 to 10 minutes to the standard bake time and check for the same visual cues: golden edges, matte but soft center with a faint jiggle.
The bars baked from frozen dough are slightly denser and chewier than bars baked fresh. In my testing, most people preferred the frozen-dough version.
How to Reheat Cookie Bars
Reheating brings the chocolate back to a melted state and makes the bars taste freshly baked. There are 2 reliable methods.
Microwave: Place one bar on a microwave-safe plate. Heat for 15 to 20 seconds. The chocolate chunks will soften and the crumb will warm through. Do not exceed 25 seconds or the edges will toughen.
Oven: Place bars on a parchment-lined baking sheet. Warm at 300°F (149°C) for 5 to 7 minutes. This method restores a slight crispness to the edges while keeping the center soft. Better than the microwave if you are reheating multiple bars at once.
Frequently Asked Questions About Chocolate Chip Cookie Bars
Can I Use Salted Butter Instead of Unsalted?
Salted butter works in this recipe, but reduce the fine sea salt in the dough to ½ teaspoon (3g) instead of the full teaspoon. Salted butter contains approximately 90mg of sodium per tablespoon, which varies by brand. Using it with the full salt measurement risks an overly salty bar. Unsalted butter gives you full control over the sodium level, which is why I default to it.
Can I Use All Brown Sugar or All Granulated Sugar?
All brown sugar produces a darker, fudgier, more moist bar. All granulated sugar produces a lighter, crispier, drier bar. Both work, but neither gives you the exact texture in the photos. The 2:1 brown to granulated ratio in this recipe is the balance point between moisture retention and structure. If you only have one type, all brown sugar is the better substitution for this style of bar.
Can I Add Mix-Ins Other Than Chocolate Chips?
Yes. This dough supports up to 2 ½ cups (425g) of total mix-ins without changing the bake time or texture significantly. Reliable additions include chopped walnuts or pecans (up to 1 cup / 100g), white chocolate chips, peanut butter chips, or toffee bits. Avoid fresh fruit or high-moisture additions. They release water during baking and make the center wet and underdone regardless of bake time.
Can I Make These Bars in a Different Pan Size?
Yes, but bake time changes with pan size. Use an 8×8-inch (20x20cm) pan for thicker bars. Reduce the recipe by half and bake at 350°F (175°C) for 28 to 34 minutes. Use a 10×15-inch (25x38cm) jelly roll pan for thinner bars. Keep the full recipe and reduce bake time to 16 to 20 minutes. In both cases, use the same visual cues: golden edges and a center with a faint jiggle.
Why Do My Bars Fall Apart When I Cut Them?
Bars that fall apart when sliced are either underbaked or cut before fully cooled. If the chocolate pockets are still liquid and the crumb crumbles at the cut line, the bars needed more time in the oven or more time on the cooling rack. Wait a full 45 minutes before slicing. Use a sharp chef’s knife and press straight down rather than dragging the blade. Wipe the knife clean between each cut. A warm, dirty blade drags crumbs and melted chocolate through the cut and makes clean edges impossible.
Can I Make These Cookie Bars Without Eggs?
Substitute each egg with 1 tablespoon (15g) of ground flaxseed mixed with 3 tablespoons (45ml) of water, rested for 5 minutes before adding. This produces a slightly denser, less structured bar. The flax egg does not provide the same protein network as a chicken egg, so the bars will be more fragile when sliced. Cool completely and refrigerate for 20 minutes before cutting for cleaner slices. The flavor is not affected.
How Do I Know When the Bars Are Done Baking?
The bars are done when the edges are golden brown and set, and the center looks matte but still moves slightly when the pan is nudged. Do not use a toothpick test for this recipe. The chocolate chunks melt completely during baking and will coat any toothpick regardless of whether the crumb is done. Rely on visual and physical cues only. Golden edges, matte surface, and a faint jiggle at the center. That is the correct pull point every time.
Can I Double This Recipe?
Yes. Double all ingredients and use two 9×13-inch (23x33cm) pans baked simultaneously on the center rack. Do not attempt to bake a doubled recipe in a single pan. The increased depth changes the heat penetration and makes it nearly impossible to bake the center without overbaking the edges. Rotate the pans front to back at the 15-minute mark for even browning. Bake time stays the same at 22 to 28 minutes.

Chocolate Chip Cookie Bars (Soft, Chewy, One Pan)
Ingredients
Equipment
Method
- Preheat and Prep the Pan Set the oven rack to the center position and preheat to 350°F (175°C). Line a 9×13-inch (23x33cm) light-colored metal baking pan with parchment paper, leaving at least 2 inches of overhang on both long sides.
- Mix Butter and Sugars In a large mixing bowl, whisk the melted butter, brown sugar, and granulated sugar together for a full 60 seconds until thick, smooth, and glossy.
- Add Eggs and Vanilla Add the eggs and vanilla extract. Whisk for 30 seconds until fully combined with no visible streaks.
- Add Dry Ingredients Add the flour, baking powder, and fine sea salt. Switch to a rubber spatula and fold until no dry flour remains. Stop mixing as soon as the flour disappears. The dough will be thick.
- Fold in the Chocolate Add the chocolate chips and chunks. Fold with the spatula for 8 to 10 strokes until evenly distributed.
- Press into Pan Transfer the dough to the lined pan. Press into an even layer using a spatula or clean hands. Sprinkle the reserved ¼ cup (42g) of chips over the surface and press in gently.
- Bake Bake on the center rack for 22 to 28 minutes. The edges should be golden and set. The center should look matte but still have a faint jiggle when the pan is nudged. Do not wait for the center to look fully firm.
- Salt and Cool Immediately sprinkle flaky sea salt over the hot bars. Transfer the pan to a wire rack and cool completely, at least 30 to 45 minutes. Lift out using the parchment overhangs. Slice into 16 squares with a sharp knife, wiping the blade between cuts.
Notes
- Flour measurement is critical. Spoon into the measuring cup and level. Do not scoop. Use a kitchen scale for best results.
- Do not use a dark-colored pan. It will overbake the bottom and edges before the center sets.
- The bars taste best on day 2. Brown sugar continues to distribute moisture through the crumb overnight.
- Freeze raw dough for up to 1 month. Bake from frozen at 325°F (163°C), adding 8 to 10 minutes to the bake time.
- Storage: Airtight container at room temperature for up to 4 days. Freeze baked bars for up to 2 months.