3 Ingredient Peanut Butter Cookies
Three ingredients. No flour. No butter. No mixer.
The first time I made these I was certain they would fail. A cookie without flour felt structurally impossible — the kind of thing that spreads flat, turns sandy, and crumbles the moment it cools. The first batch proved every one of those assumptions wrong. They came out thick, domed, and dense in a way that flour-based peanut butter cookies often are not. I have made them at least thirty times since. I have never gone back to the flour version for a quick batch.
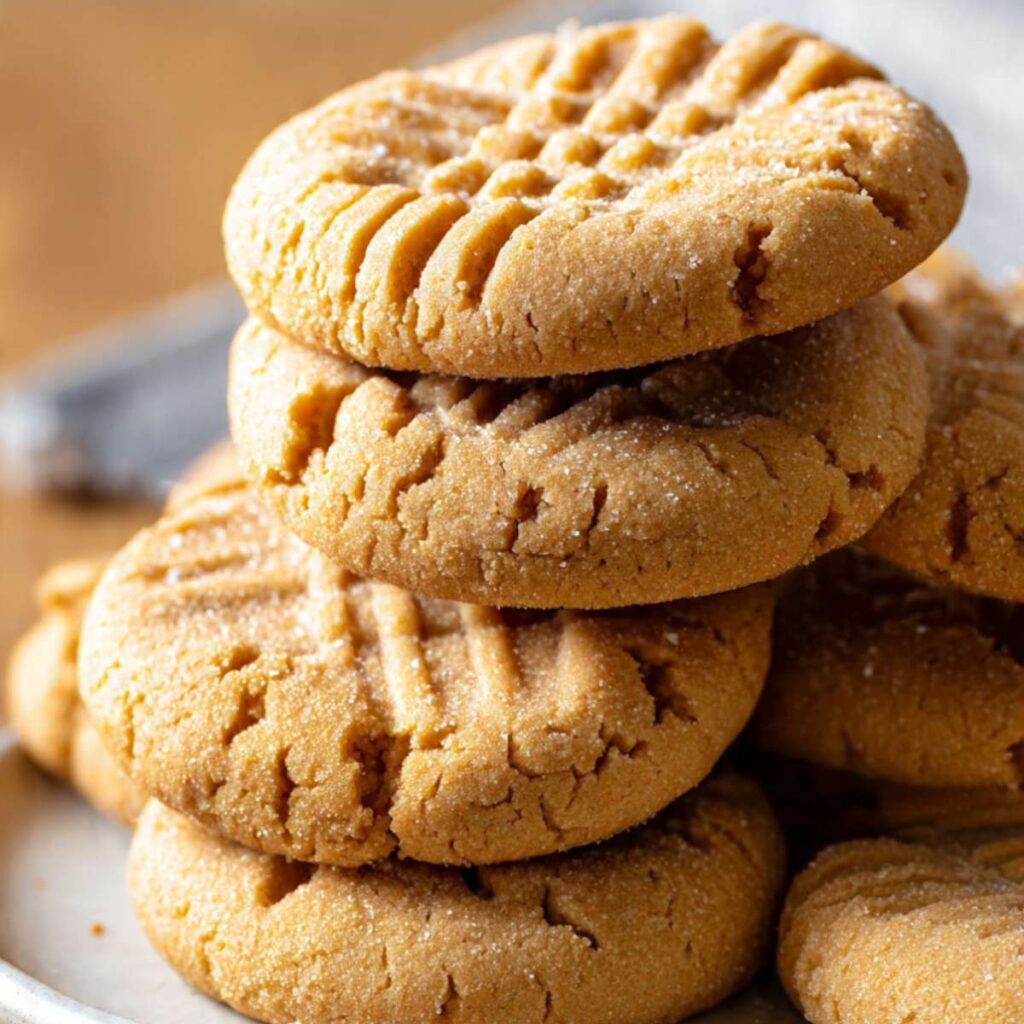
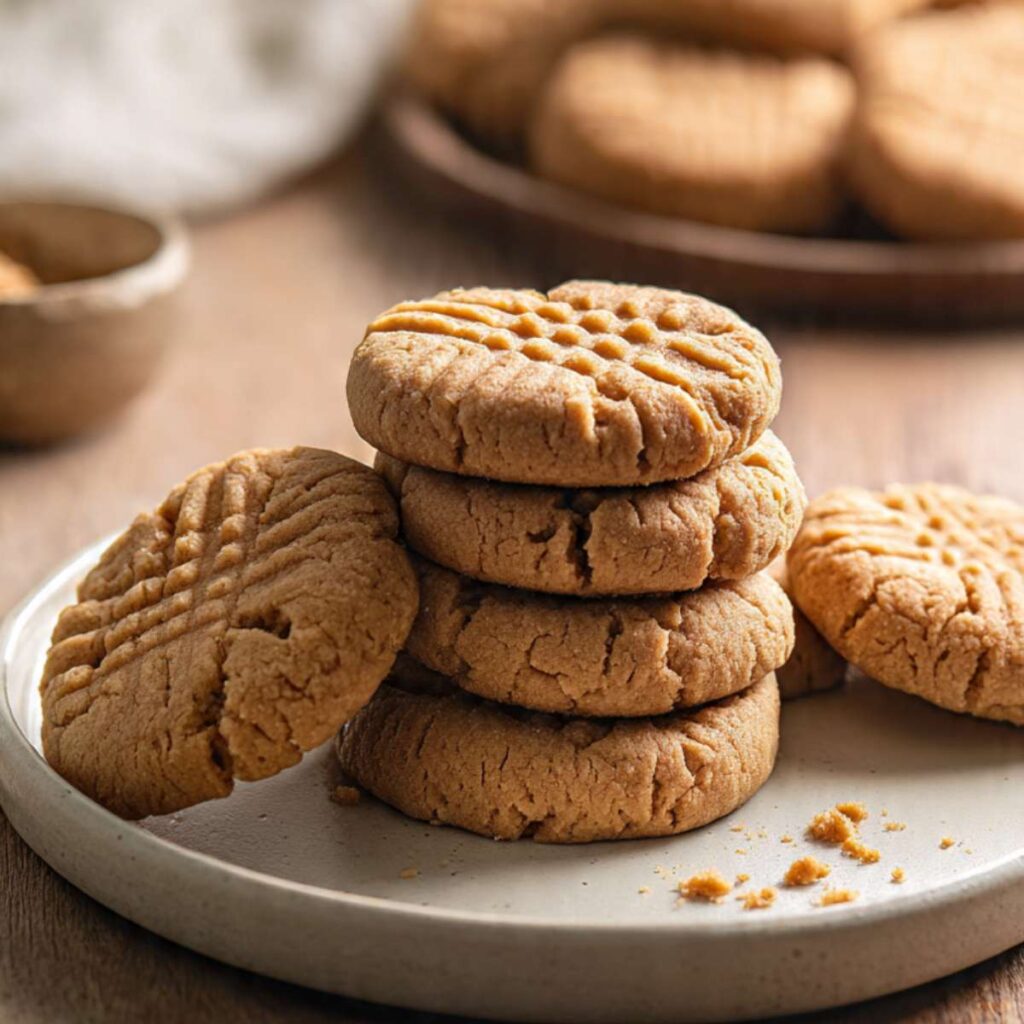
The edges bake to a deep golden amber with a soft, defined crackle where the fork pressed through the sugar coating. The centers stay dense and yielding — not cakey, not dry, not crumbly. The sugar rolling coat creates a faint crystalline sparkle on the surface that you can see in every photo here. One bite and the roasted peanut flavor comes through completely, uncut by butter or flour. That is the texture this recipe produces every time.
There is no dairy butter in this recipe. The commercial peanut butter provides all the fat and binding the dough needs, which is exactly why the peanut butter type matters more here than in any other recipe I make.
I tested natural peanut butter against commercial peanut butter in six back-to-back batches. Natural peanut butter — the kind where the oil separates and you have to stir it in — produced a dough that looked right in the bowl and completely fell apart in the oven. The cookies spread into crumbly, greasy puddles with no structure. Commercial peanut butter, such as Jif or Skippy, produced a dough that held together, scooped cleanly, and baked into the thick, domed cookies you see in the photos. I kept the commercial version. This is not a preference — it is a functional requirement.
I tested the recipe with and without rolling the dough balls in granulated sugar before baking. Without the sugar roll, the cookies baked up with a plain matte surface — fine, but flat-looking and missing the exterior texture that makes these worth making. With the sugar roll, the exterior develops a light crystalline sparkle and the crosshatch pattern stays defined and sharp through the entire bake. The rolled version is what the photos show and what I make every time.
🗒 Luna’s Note: I use Jif. I have tested Skippy and two store brands. They all work. Jif gives me a slightly richer, more consistent result and I have not felt the need to change.
I do not own a cookie scoop in every size. I own one — a medium 2-tablespoon scoop — and I use it for everything from these cookies to muffin batter. It is the single most useful $12 tool in my kitchen for portioning uniformity.
These cookies are naturally gluten-free and naturally dairy-free — that is a genuine advantage, not a happy accident. They are also the recipe I reach for when someone tells me they cannot have flour and I want to give them something that actually tastes like a real cookie rather than a compromise.
No chilling required. This dough goes straight from the bowl to the oven.
| Prep Time | Cook Time | Total Time | Yield | Difficulty |
|---|---|---|---|---|
| 10 min | 10–12 min | 22 min | 20 cookies | Easy |
| Calories | Fat | Carbs | Sugar | Protein | Sodium |
|---|---|---|---|---|---|
| ~125 kcal | ~7g | ~14g | ~13g | ~4g | ~60mg |
Macros are approximate and will vary based on ingredient brands and serving size.
Ingredients & Tools
For the Cookies
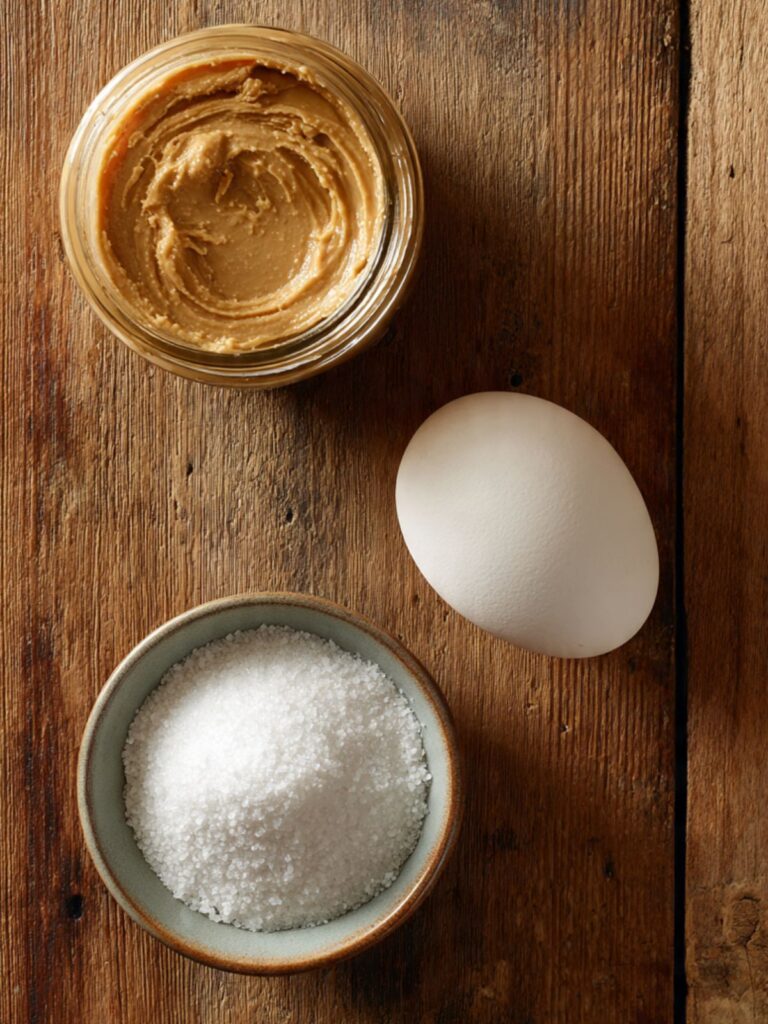
- 1 cup (258g) creamy commercial peanut butter, such as Jif or Skippy — not natural peanut butter where the oil separates
- 1 cup (200g) plain white granulated cane sugar — not coconut sugar, not raw sugar, not brown sugar
- 1 large egg (approximately 50g without shell), room temperature
For Rolling
- 2 tablespoons (25g) plain white granulated cane sugar — same sugar as above
Before You Start
Peanut butter type — read this before anything else. Use creamy commercial peanut butter only — Jif, Skippy, or a store-brand equivalent that does not separate. Natural peanut butter, where the oil pools at the top and must be stirred in, has inconsistent fat distribution. It will produce a dough that looks fine in the bowl and collapses into a crumbly, greasy mess in the oven. This is the single most common failure point in this recipe. Check the jar before you start.
Egg temperature. Pull your egg from the fridge 30 minutes before you begin. A cold egg does not incorporate as smoothly into the peanut butter and can cause the dough to feel slightly broken or uneven. In an emergency, place the egg in a bowl of warm (not hot) water for 10 minutes. The egg should feel neutral — neither cold nor warm — when it goes into the dough.
Gram weight priority. This recipe is short enough that the ratios matter in every gram. For the most consistent results, use a kitchen scale set to grams. The gram weights here are exactly what I tested with — 258g peanut butter, 200g sugar, 50g egg. Volume measurements work but the scale is more reliable, especially if your peanut butter is packed differently between brands.
Mixing method. This entire recipe comes together in a large mixing bowl with a sturdy silicone spatula. No electric mixer needed. No stand mixer. One bowl, one spatula, done.
Baking sheet preparation. Line a light-colored aluminum half-sheet baking pan (approximately 18×13 inches / 46x33cm) with unbleached parchment paper. Do not grease the parchment — it is not necessary and extra grease causes the bottoms to over-brown. Do not use a dark non-stick pan — dark pans absorb more heat and will burn the bottoms of these cookies before the centers are set. Do not use foil — foil conducts heat unevenly and produces crispy, overbrowned edges.
Oven rack position. Position your oven rack in the middle of the oven before preheating. Top rack burns tops. Bottom rack burns bottoms. Middle rack is the only position that gives even heat to both surfaces of the cookie.
No chilling required. This dough goes straight from the bowl to the oven. Do not refrigerate it — cold dough is stiffer and harder to roll in the sugar, and it does not change the final texture in any meaningful way.
Necessary Tools
Required:
- Large mixing bowl
- Sturdy silicone spatula
- Light-colored aluminum half-sheet baking pan (18×13 inch / 46x33cm)
- Unbleached parchment paper
- Standard fork (for the crosshatch press)
- Medium cookie scoop (2 tablespoon / 30ml capacity) — or a kitchen scale for portioning
- Small shallow bowl (for the rolling sugar)
- Wire cooling rack
Strongly recommended:
- Kitchen scale (for gram-weight accuracy)
Optional:
- Oven thermometer (most home ovens run 15–25°F / 8–14°C off from the dial — an oven thermometer confirms your actual baking temperature)
How to Make 3 Ingredient Peanut Butter Cookies
This recipe uses the one-bowl method — no creaming, no mixer, no separate wet and dry bowls. Everything comes together in a single large mixing bowl with a silicone spatula. The egg provides all the structure a cookie normally gets from flour and leavening combined. That is the reason mixing technique matters more here than it does in a standard cookie recipe.
Step 1: Preheating the Oven and Preparing the Pan
Position your oven rack in the middle of the oven. Heat the oven to 350°F (175°C) — turn it on before you mix anything and give it a full 15 minutes to come to temperature. An oven that is not fully preheated will cause these cookies to spread before they set. Line your light-colored aluminum half-sheet baking pan with unbleached parchment paper and set it aside.
Do not skip the parchment — without it, the sugar coating on the bottom of each cookie fuses directly to the pan and the cookies will tear when you try to lift them. Do not substitute foil — foil conducts heat aggressively into the cookie base and will burn the bottoms before the centers are set.
Most home ovens run 15–25°F (8–14°C) hotter or cooler than the dial reads. If you have an oven thermometer, place it on the middle rack now and confirm the actual temperature before the pan goes in.
The pan should be room temperature when the dough goes on it — never warm from a previous batch. A warm pan starts spreading the fat in the dough before the oven heat can set the structure.
Pour your 2 tablespoons (25g) plain white granulated cane sugar into a small shallow bowl and set it beside the baking sheet. You will roll each dough ball through this before it goes on the pan.
Your oven is preheating and your station is set — mix the dough now.
Step 2: Combining the Three Ingredients Into a Smooth, Cohesive Dough
In your large mixing bowl, add your 1 cup (258g) creamy commercial peanut butter, 1 cup (200g) plain white granulated cane sugar, and 1 large egg (approximately 50g without shell), room temperature.
The sugar is doing two jobs in this recipe — it sweetens the dough and it is the only ingredient providing structure alongside the egg. Plain white granulated cane sugar is non-negotiable here. Coconut sugar, raw sugar, or brown sugar all have different moisture contents and crystal structures that change the dough consistency and prevent the exterior from developing the clean crystalline sparkle you can see on the cookies in the photos above.
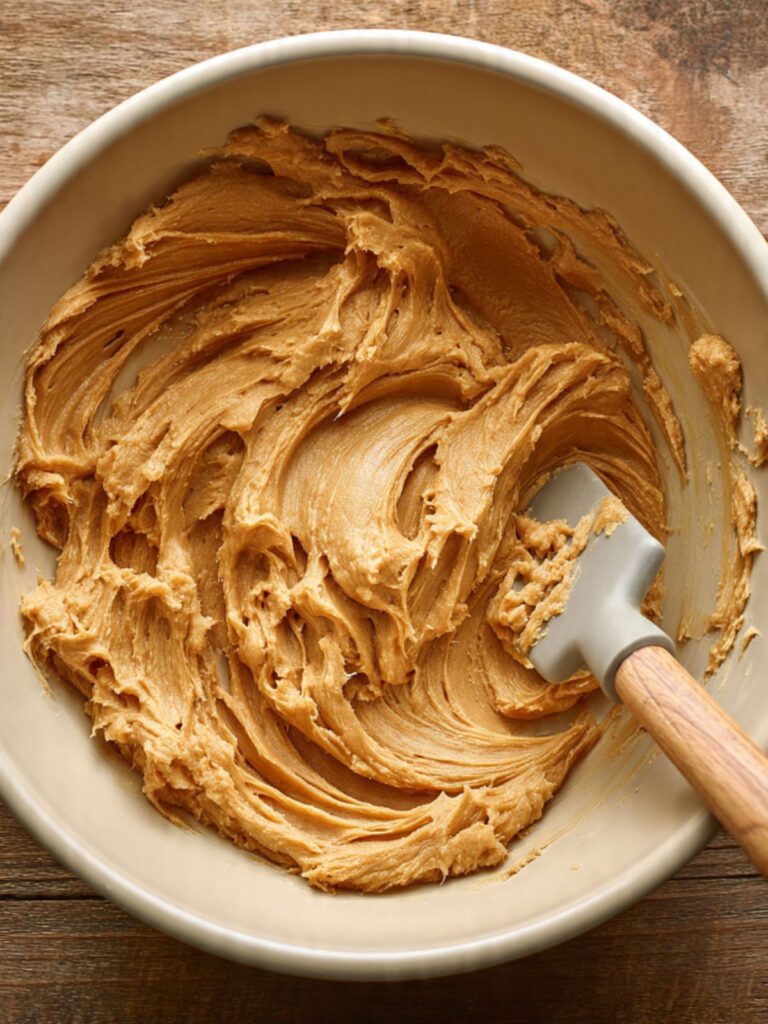
Using your sturdy silicone spatula, stir from the bottom of the bowl upward in wide, deliberate circular strokes. Press the spatula against the sides of the bowl to incorporate any peanut butter that clings. Continue for approximately 40 to 50 strokes — the dough will look rough and streaky at first, then it will suddenly come together into a uniform mass.
The finished dough should look thick, smooth, and slightly glossy — no sugar streaks visible, no dry patches of peanut butter unmixed at the bottom of the bowl, and it should pull away from the sides of the bowl cleanly when you lift the spatula. If the dough looks crumbly or grainy, the egg was too cold — mix for 10 more strokes and it will come together.
Do not overmix past the point where the dough is uniform — the egg proteins begin to tighten with excess agitation, and the cookies will bake up denser and slightly rubbery rather than the soft, yielding texture shown in the photos.
Scoop the dough now while it is at room temperature — it is easiest to portion at this stage.
Step 3: Portioning and Rolling Each Dough Ball in Sugar
Using your medium cookie scoop (2 tablespoon / 30ml capacity), portion the dough into balls directly from the bowl. Each dough ball should weigh approximately 25g — weigh the first one on your kitchen scale, use it as your reference, and portion the remaining balls to match. This batch yields exactly 20 cookies at this scoop size.
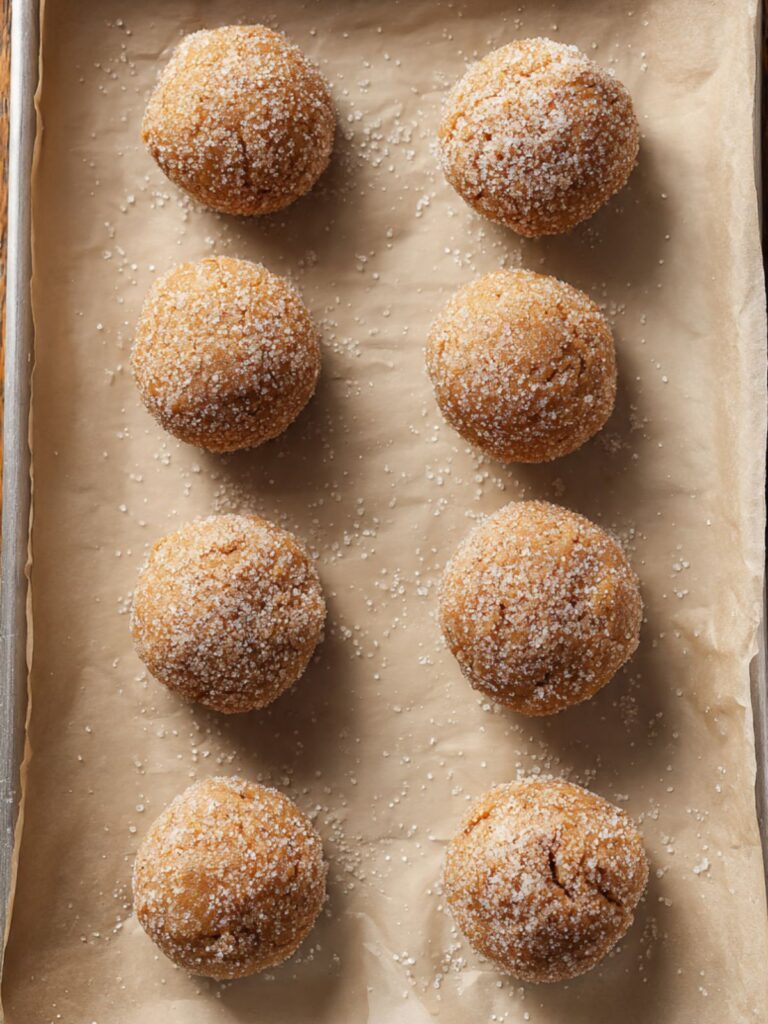
Roll each dough ball between your palms until it is smooth and round — any cracks in the surface will open further during baking and the crosshatch marks will not press as cleanly. Drop each ball into the shallow bowl of granulated sugar and roll it until the entire surface is coated. The sugar coating is what creates the crystalline sparkle visible on the finished cookies and keeps the crosshatch definition sharp through the bake.
🗒 Luna’s Note: I roll each ball twice — once quickly to coat, then I set it on the pan and press it slightly, then roll my palm lightly over the top to press any loose sugar into the surface. It sounds fussy but it takes five seconds and the sugar stays on rather than falling off in the oven.
Place each sugar-coated ball on the prepared parchment-lined baking sheet, spacing them at least 2 inches (5cm) apart. These cookies do not spread dramatically, but they need room for even airflow around each one.
Each ball should be smooth, evenly coated in sugar with no bare patches, and sitting upright — not leaning or lopsided. The spacing in the overhead photo above shows exactly how far apart they should be before the pan goes in.
Fit no more than 12 cookies per half-sheet pan — two rows of six, evenly spaced. Bake in two batches if needed.
Step 4: Pressing the Crosshatch and Getting the Pan Into the Oven
Before baking, use the tines of a standard fork to press a crosshatch pattern into each dough ball. Press the fork down firmly into the center of the ball, flattening it slightly, then rotate the fork 90 degrees and press again in the perpendicular direction. The cookies should flatten to approximately half their original height — about ½ inch (1.2cm) thick after pressing.
The crosshatch serves two purposes. It flattens the dough to an even thickness so every cookie bakes at the same rate, and it creates the signature visual that identifies a peanut butter cookie. Press firmly and consistently — a light press produces a shallow, undefined mark that disappears in the oven.
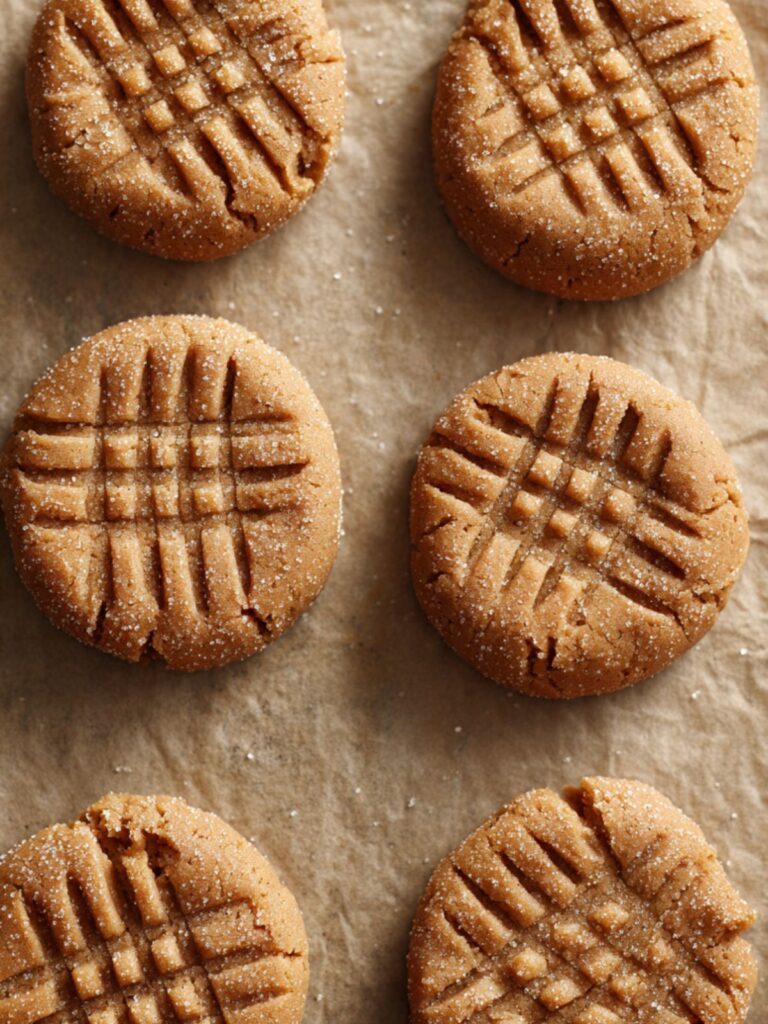
After pressing, each cookie should show a clearly defined crosshatch grid, edges that are smooth and round, and a surface evenly coated in granulated sugar. This is exactly the pattern visible on every cookie in the stacked photos — deep, defined lines with the sugar sparkle intact around them.
Do not press so hard that the cookie cracks at the edges and breaks apart — if this happens, the dough is slightly dry, which means the peanut butter was measured by volume rather than weight. Re-roll the broken pieces and press more gently.
Slide the pan into the preheated 350°F (175°C) oven on the middle rack. Set a timer for 10 minutes.
Step 5: Baking Until the Edges Are Set and the Centers Are Just Done
Bake at 350°F (175°C) for 10 to 12 minutes. Start checking at 10 minutes. These cookies move from perfectly baked to overbaked in under 90 seconds — watch them, not the clock, after the 10-minute mark.
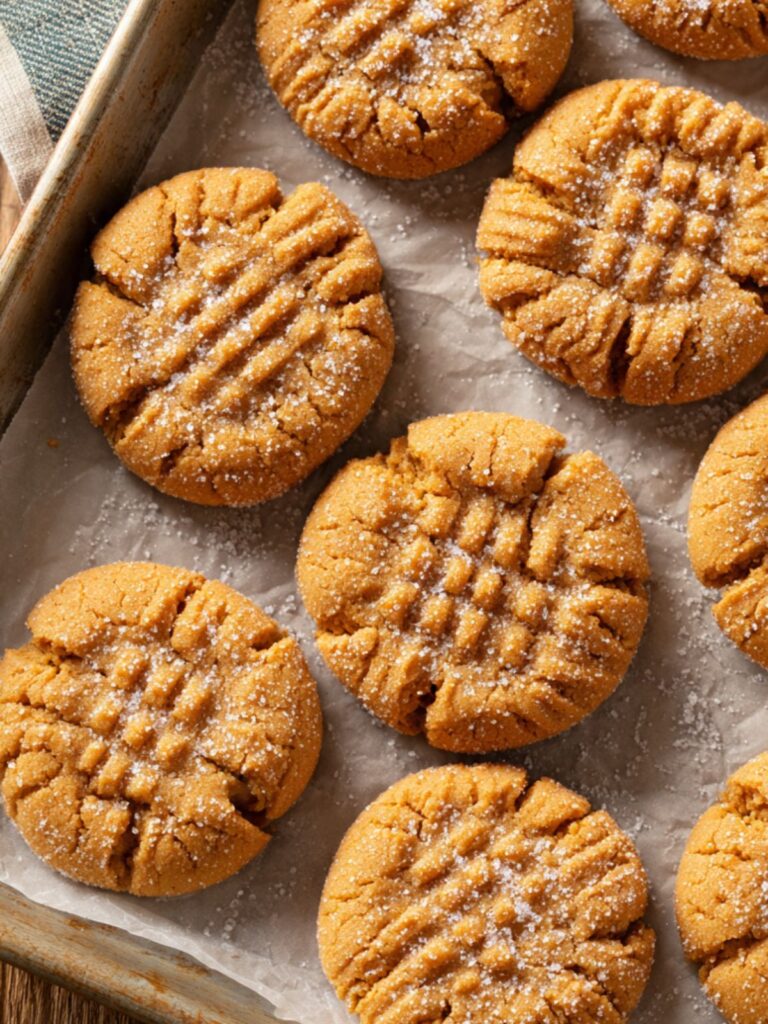
Pull the pan the moment the edges look set and deep golden — exactly the color visible in the close-up stacked photo — and the centers look just barely done, still slightly soft when you observe them from oven height. The cookies will look slightly underdone in the center when they come out. This is correct. Do not wait for the centers to look fully set in the oven — by the time the center looks done under oven heat, the edges will be overbaked and dry.
The surface should look matte and lightly set across the whole cookie, with the crosshatch lines still clearly defined and the granulated sugar coating intact and slightly darkened at the groove edges. If the surface looks shiny or wet, give the cookies 60 more seconds. If the edges are pulling away from the parchment and darkening to brown rather than golden, the cookies are overbaked — pull them immediately.
Do not open the oven door before 10 minutes. The temperature drop deflates the gentle structure the egg has built, and the centers will sink slightly rather than holding their dome.
Your pan is coming out of the oven — leave the cookies exactly where they are for the next 5 minutes.
Step 6: Resting on the Pan Before Moving to the Cooling Rack
Leave the cookies on the hot pan for exactly 5 minutes after pulling from the oven. Do not move them. Do not slide the parchment off the pan. The pan continues to conduct heat into the cookie base during this time — this carryover heat finishes setting the centers without the oven drying them out. Moving the cookies before 5 minutes breaks the structural base, which is fragile in a flourless cookie because the egg proteins are still completing their set. Waiting more than 8 minutes starts to over-dry the bottoms. Set a timer.
After exactly 5 minutes, use a thin spatula to transfer the cookies to a wire cooling rack. They will feel firm on the bottom and slightly soft on top — this is correct. They will firm to their final texture as they cool completely on the rack, approximately 10 more minutes.
The finished cookies should look exactly like the cookies in the stacked plate photo — deep golden edges, a defined crosshatch, a sugar-sparkle surface, and a slightly domed center that holds its shape when lifted. If a cookie feels soft and fragile after the 5-minute rest, give it 2 more minutes on the pan — the egg structure needs a little more time.
Cool completely before stacking or storing — stacking warm cookies collapses the soft centers and fuses the sugar coating.
The Science Behind 3 Ingredient Peanut Butter Cookies
Why a Cookie With No Flour Still Holds Together

The question every first-time maker of these cookies asks is the right one: how does a cookie with no flour, no leavening, and no butter stay together at all?
The answer is the egg. In a standard cookie, flour provides two things — starch for body and gluten for structure. When you remove flour entirely, the egg has to do both jobs. Egg protein begins to coagulate at around 145°F (63°C) and sets fully by 160°F (71°C). At 350°F (175°C) oven temperature, the interior of these cookies reaches that range in approximately 10 to 11 minutes — exactly the bake window in this recipe. The proteins tighten, the cookie solidifies, and what was a soft dough ball becomes a cookie that holds its shape when lifted.
The peanut butter contributes to this too. Commercial peanut butter contains an emulsifier — usually hydrogenated vegetable oil — that keeps the fat and protein evenly distributed throughout the jar. That uniform fat distribution binds the dough cohesively in a way that natural peanut butter, with its separated oil and inconsistent texture, physically cannot replicate. This is why natural peanut butter fails in this recipe regardless of how well you stir it before using.
The 5-minute rest on the hot pan is not optional — it is the step where carryover cooking from the pan surface finishes what the oven started, setting the egg proteins in the base of the cookie without the oven’s dry heat pulling moisture from the top.
What the Sugar Is Actually Doing in Three Different Ways
Sugar in this recipe is not just sweetness. It is performing three distinct functions simultaneously, which is why substituting it changes the cookie in ways that are immediately obvious.
First, the granulated sugar inside the dough controls spread. Sugar melts during baking and becomes liquid before it re-solidifies as the cookie cools. This temporary liquefaction is what allows the cookie to relax and spread slightly rather than staying in a tight compressed ball. Plain white granulated cane sugar melts at a consistent rate. Coconut sugar, turbinado, and raw sugar have larger, irregular crystals and different moisture content — they melt unevenly and produce a cookie with a different spread, different surface texture, and a slightly caramelized flavor that competes with the peanut butter.
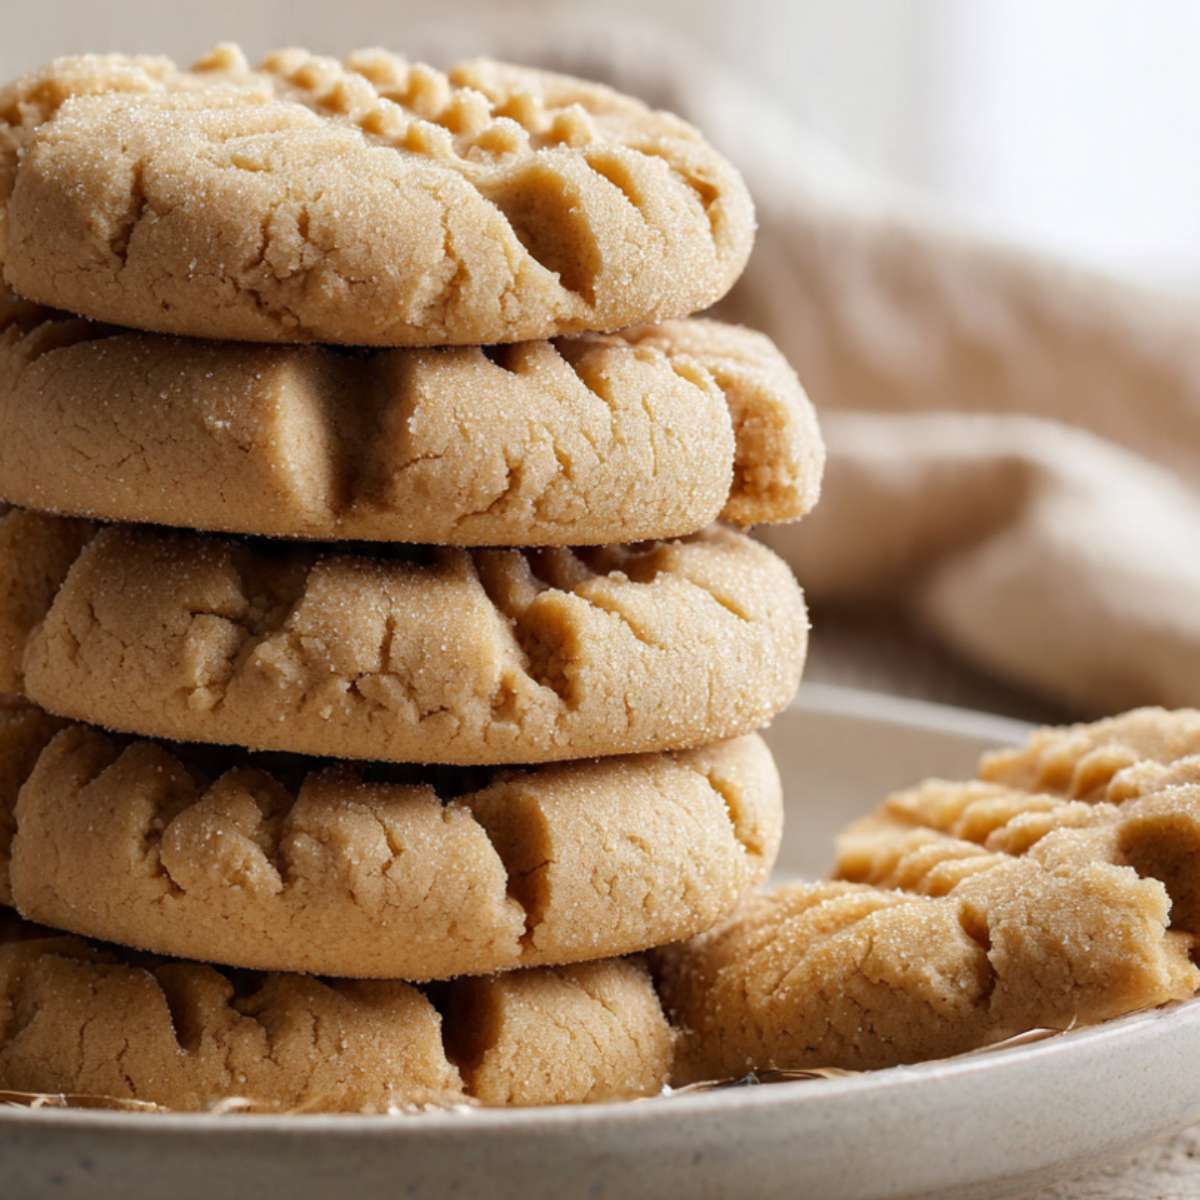
Second, the granulated sugar in the rolling coat creates the crystalline sparkle visible on the finished cookies. Rolling sugar does not melt completely at 350°F — it partially caramelizes at the surface while retaining its crystal structure underneath. The result is the slightly crunchy, sparkly exterior you can see in the close-up photo, which contrasts with the soft dense interior.
Third — and this is the part most people do not think about — sugar is hygroscopic. It draws moisture from the air after baking. This is why these cookies stay soft for days in a sealed container. The sugar actively pulls ambient moisture back into the cookie between Day 1 and Day 3, keeping the interior from drying out the way a low-sugar cookie would.
If you want to understand more about how sugar behaves differently across cookie recipes, my peanut butter oatmeal cookies article covers the interaction between brown sugar’s molasses content and cookie texture in detail — a useful comparison to what plain granulated sugar does here.
Why the Crosshatch Press Is Not Just Decorative
The fork crosshatch is the signature of a peanut butter cookie. Most people assume it is purely aesthetic. It is not.
A raw dough ball of this recipe is dense and compact — approximately 25g of peanut butter, sugar, and egg pressed into a tight sphere. Without flattening, the exterior of the cookie would set before the heat penetrated to the center. The result would be a cookie that looks done on the outside and is still raw dough in the middle, with an abrupt textural boundary between the two zones rather than the even, consistent crumb these cookies have.
The crosshatch press flattens the ball to approximately ½ inch (1.2cm) thickness. At that thickness, the oven heat reaches the center at the same rate it sets the exterior — the cookie bakes through evenly in the 10 to 12 minute window. The two-direction press also creates more surface area contact with the hot parchment, which helps the base set quickly and gives the cookie a stable platform to cool on.
🗒 Luna’s Note: I press firmly enough that the fork tines leave a clear impression but not so hard that the edges crack. If the edges crack during pressing, the dough is too dry — almost always from measuring the peanut butter by volume rather than weight. A packed cup of peanut butter and a correctly weighed 258g are not the same thing.
The crosshatch lines that remain defined and sharp after baking — visible in every photo here — are the visual confirmation that the pressing was done correctly and that the sugar coating held through the bake. A shallow or hesitant press produces lines that blur and disappear.
3 Ingredient Peanut Butter Cookie Troubleshooting & Pro-Tips
Common Mistakes
The cookies crumbled apart or spread into a greasy, flat mess
Symptom: The cookies lost their shape in the oven — they either spread flat and look greasy around the edges, or they cracked apart into crumbly pieces rather than holding a domed shape.
Cause: Natural peanut butter. This is the cause in almost every case. Natural peanut butter has inconsistent fat distribution — the oil separates and even when stirred back in, it does not bind the dough the way the emulsified fat in commercial peanut butter does. The dough may look fine in the bowl and completely fall apart once oven heat hits it.
Fix: There is no fix once the cookies are in the oven. Discard the batch. Start again with creamy commercial peanut butter — Jif, Skippy, or a store brand that does not separate.
Prevention: Check the jar before mixing. If the ingredient label lists only peanuts and salt with no added oil or emulsifiers — or if the oil has pooled at the top — it is natural peanut butter. Use a different jar.
The bottoms burned before the centers were done
Symptom: The undersides of the cookies are dark brown or black while the tops still look pale and underdone. The interior is raw at the center.
Cause: Dark non-stick pan, foil lining, bottom oven rack position, or pan still warm from a previous batch. Dark pans absorb significantly more radiant heat than light-colored aluminum and transfer that heat directly into the cookie base. Foil conducts heat even more aggressively than a dark pan. A warm pan from a previous batch starts cooking the bottom of the dough ball before the oven heat has a chance to set the structure evenly.
Fix: Slide a second cool baking sheet underneath the one in the oven to create an insulating air gap — this reduces bottom heat immediately. The cookies may need 1 to 2 extra minutes to finish the tops.
Prevention: Use a light-colored aluminum half-sheet pan lined with unbleached parchment paper. Always allow the pan to return to room temperature between batches — run it under cool water and dry it completely, or use a second pan for alternating batches.
The cookies are dry, crumbly, and dense — not soft
Symptom: The finished cookies feel dry when you bite into them — grainy rather than soft, and they crumble rather than holding together in a clean bite.
Cause: Too much peanut butter measured by volume rather than weight, overbaking past the 12-minute mark, or moving the cookies off the pan before the 5-minute carryover rest. Volume measurement of peanut butter is highly inconsistent — a packed cup can contain 20 to 30% more peanut butter than a correctly weighed 258g, which throws off the sugar-to-fat ratio and produces a dry, stiff dough that bakes up crumbly.
Fix: There is no fix for an overbaked cookie. For the texture issue, the next batch should be weighed by grams and pulled from the oven at the 10-minute mark rather than 12.
Prevention: Weigh the peanut butter at 258g. Set a timer for 10 minutes and begin checking at that point. Leave the cookies on the hot pan for the full 5-minute rest — this is the step that keeps the center soft.
The crosshatch marks disappeared during baking
Symptom: The fork marks that were clearly visible before baking have blurred or vanished entirely in the finished cookie. The surface looks smooth and domed rather than showing the defined grid.
Cause: The fork press was too shallow, the dough balls were too warm when pressed, or the oven was not fully preheated. A shallow press does not compress the dough enough — the cookie puffs slightly in the early stages of baking and the shallow marks close up. Warm dough is softer and springs back more aggressively after pressing. An underheated oven allows the fat to melt slowly rather than the structure setting quickly, which causes the dough to relax and the marks to smooth out.
Fix: Nothing can be done once they are baked. The cookies will still taste correct — the crosshatch is structural as well as visual, but a slight blurring does not ruin the texture.
Prevention: Press the fork firmly and deliberately — two full passes at 90 degrees to each other, pressing each time to approximately ½ inch (1.2cm) thickness. Confirm the oven has been preheating for a full 15 minutes before the pan goes in. Work quickly when pressing so the dough does not warm from your hands.
The cookies did not set and feel soft and fragile after cooling
Symptom: The cookies feel soft and almost raw in the center even after cooling fully on the rack. They bend rather than hold their shape when picked up.
Cause: Underbaking — pulling the pan before the egg proteins had time to fully coagulate — or an oven running significantly cooler than the dial reads. These cookies rely entirely on egg protein for structure. If the interior temperature did not reach 145°F (63°C) during the bake, the proteins never set and the cookie will remain soft and fragile regardless of how long it cools.
Fix: Place the cooled cookies back on a parchment-lined pan and return them to a 325°F (163°C) oven for 4 to 5 minutes. This gentle second bake can finish setting the egg proteins without burning the exterior. Watch them closely.
Prevention: Use an oven thermometer to confirm actual oven temperature before baking. Bake for the full 10 to 12 minutes and do not open the oven door before the 10-minute mark.
High altitude and high humidity adjustments
High altitude (above 3,500 feet / 1,067 meters): These cookies have no leavening to adjust, which actually makes them more stable at altitude than most drop cookies. The main effect at altitude is faster moisture evaporation — the cookies can dry out slightly faster in the oven. Reduce bake time by 1 minute and pull at 9 to 11 minutes rather than 10 to 12. Watch the edges rather than the clock.
High humidity (above 70% relative humidity): The sugar coating may absorb ambient moisture and lose some of its crystalline sparkle before baking. Roll the dough balls in sugar immediately before pressing and baking rather than rolling all of them ahead of time and letting them sit. Baked cookies in humid climates may feel slightly stickier on the surface — this is surface moisture from the air, not underbaking.
Expert Pro-Tips
Press with a wet fork tine for cleaner crosshatch lines. Dip the fork tines briefly in the rolling sugar bowl — not water, not oil — between each cookie press. The sugar prevents the fork from sticking to the dough surface and pulling it upward when you lift the fork away. The result is a cleaner, sharper crosshatch grid with no torn edges around the marks.
Use a cookie scoop for perfectly uniform cookies. A medium cookie scoop (2 tablespoon / 30ml capacity) portions every ball at the same volume, which means every cookie presses to the same thickness and bakes in the same time. Hand-portioned cookies vary enough in size that the smaller ones overbake while the larger ones are still soft — a scoop eliminates this entirely.
Bake one test cookie first. Before committing the full batch, bake a single cookie and check the result at 10 minutes. This tells you your exact oven’s behavior with this recipe before you risk all 20. Adjust the time for the full batch based on what you see. It takes 12 extra minutes and saves the entire batch.
How to Store 3 Ingredient Peanut Butter Cookies
Room Temperature
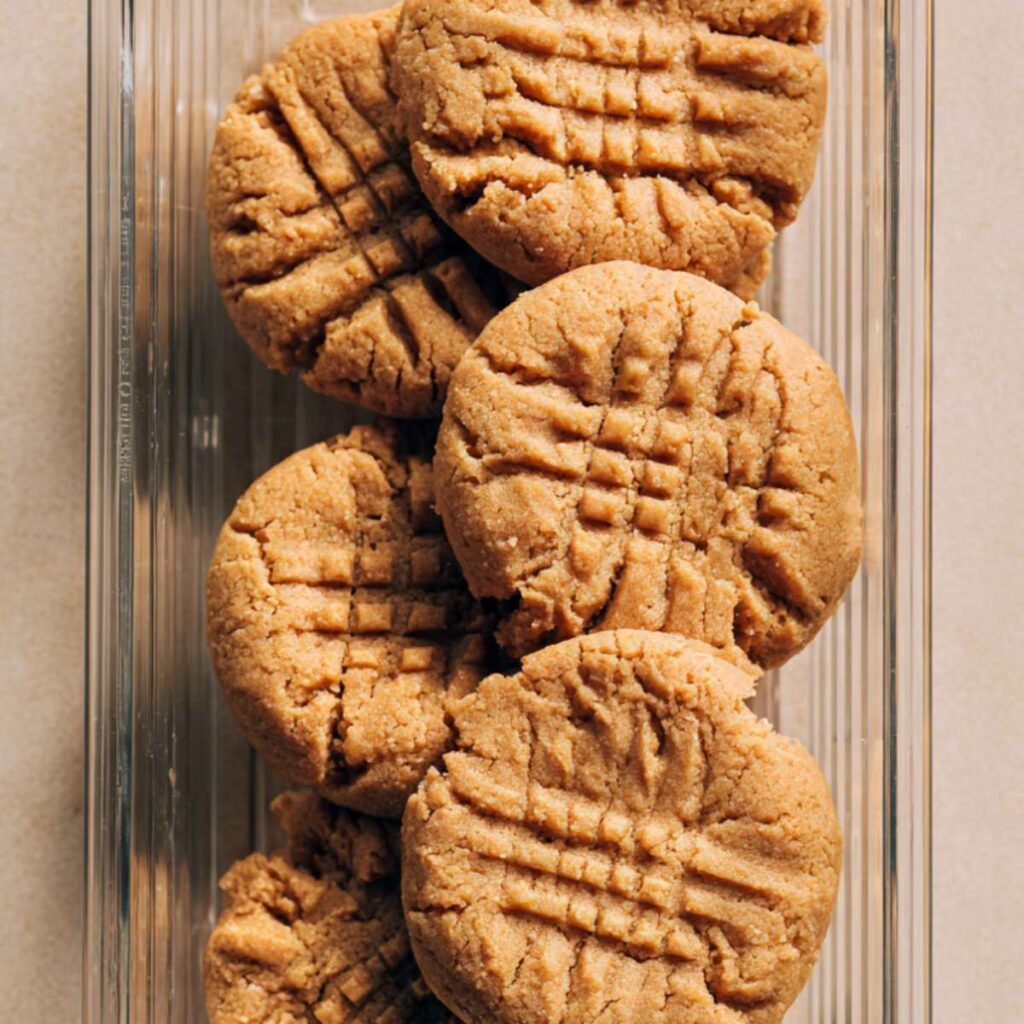
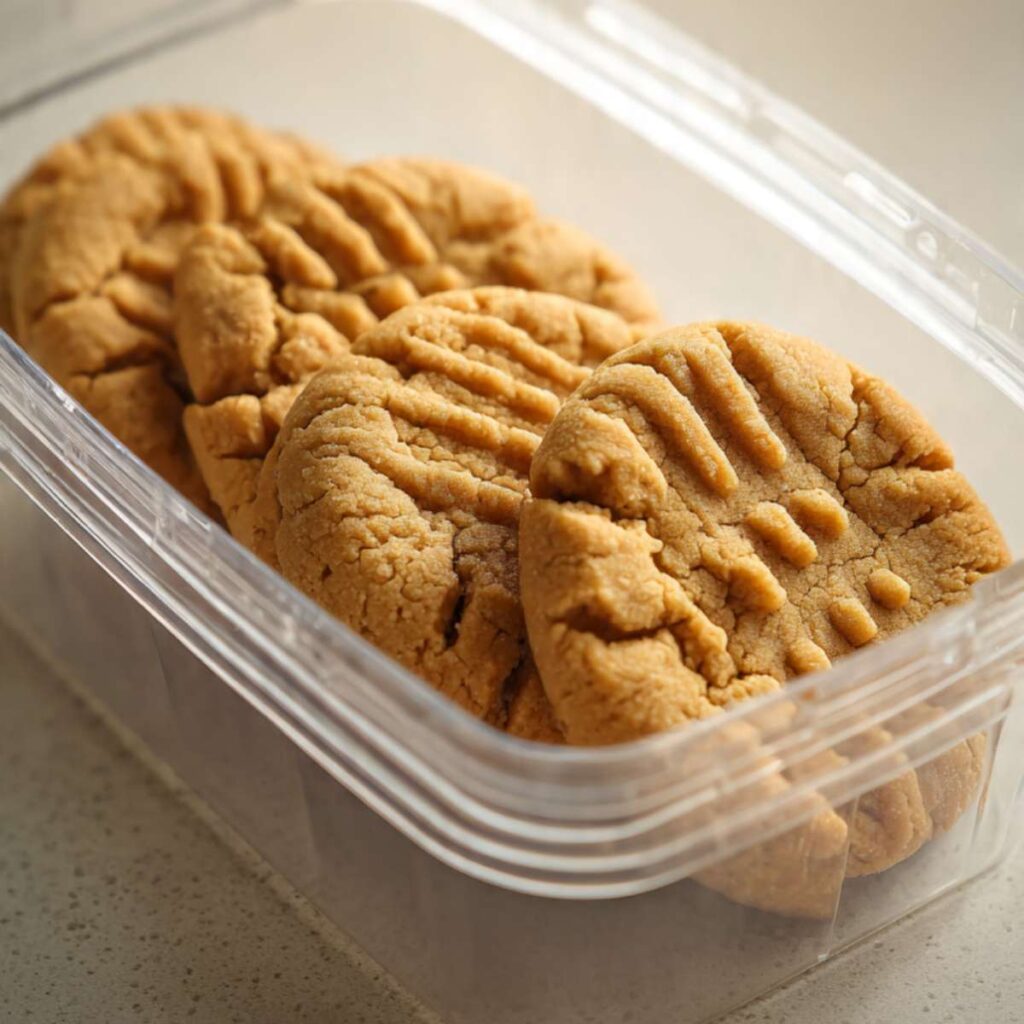
Store completely cooled cookies in a hard-sided lidded container — a tin, a glass jar with a lid, or a rigid plastic container with a tight-fitting lid. Place a sheet of unbleached parchment paper between each layer to prevent the sugar coating on the bottom of one cookie from fusing to the top of the one beneath it. Do not use zip-lock bags — the pressure of sealing flattens the cookies and the soft sugar coating sticks to the bag surface.
These cookies keep well at room temperature for up to 5 days. Day 1 they have the best crosshatch definition and the crispest sugar exterior. By Day 2 the sugar coating has softened slightly from ambient moisture — the interior is actually better on Day 2, slightly more yielding and cohesive than fresh from the oven. Day 3 through Day 5 they remain soft and fully edible. After Day 5 the texture begins to dry out.
Keep the container away from direct sunlight and away from the oven — heat softens the sugar coating and the cookies lose their shape.
Refrigerator
Refrigeration is not recommended for these cookies. The cold air draws moisture out of the peanut butter matrix faster than room temperature storage does, and the cookies become dry and crumbly within 24 hours in the fridge. If your kitchen runs very warm — above 80°F (27°C) — and you are concerned about the cookies softening too much at room temperature, store them in the fridge but bring them back to room temperature for 20 minutes before eating. Cold peanut butter cookies are dense and stiff in a way that is not pleasant.
Freezer — Baked
These cookies freeze well. Wrap each completely cooled cookie individually in plastic wrap, then place the wrapped cookies in a single layer in a zip-lock freezer bag or rigid freezer container. Squeeze out as much air as possible before sealing. Freeze for up to 2 months.
To thaw: remove cookies from the freezer and unwrap them — do not thaw in the wrapper or condensation forms on the sugar surface and dissolves the coating. Lay them on a wire rack at room temperature for 30 to 45 minutes. The texture returns to near-fresh. Do not microwave to thaw — the sugar coating liquefies and the cookie loses its shape.
Freezer — Unbaked Dough
The unbaked dough freezes reliably. Portion and roll the dough balls in sugar, then place them on a parchment-lined baking sheet and freeze until solid — approximately 1 hour. Transfer the frozen balls to a zip-lock freezer bag. Do not press the crosshatch until immediately before baking — frozen dough cracks when pressed with a fork.
To bake from frozen: place the frozen dough balls on a parchment-lined pan, press the crosshatch immediately, and bake at 350°F (175°C) for 13 to 14 minutes — 2 to 3 minutes longer than the fresh dough time. Watch the edges for the same doneness cues. Frozen dough keeps for up to 2 months.
Serving Suggestion
Serve these at room temperature — not warm from the oven, not chilled from the fridge. The texture is at its best when the peanut butter fat is fully set but not cold-stiff. Pull them from storage and give them 10 minutes on the counter if they have been anywhere cool.
I eat these with black coffee. The bitterness cuts the sweetness of the sugar coating in a way that milk does not, and the roasted peanut flavor comes through more clearly without dairy softening it. That is my honest pairing and I have not found a better one for this specific cookie.
🗒 Luna’s Note: These are the cookies I make when someone tells me they cannot eat gluten and I want to give them something that actually tastes like a real cookie. Not a substitute. Not a workaround. A cookie. That is what these are, and it is worth saying plainly.
This is the recipe I reach for on a Tuesday night when I want something that works on the first try and takes less than 25 minutes from start to finish. It is not a party recipe. It is not something I make to impress anyone. It is the recipe I make for myself.
Day 2 is better than Day 1. The interior softens and the peanut butter flavor deepens overnight — the same way a good brownie improves between the day it is baked and the next morning. If you can wait, wait.
One honest limitation: these do not travel well in warm weather. The sugar coating softens in heat and the cookies arrive at their destination looking deflated and sticky. Make them where you are serving them, or transport them in a hard-sided container with an ice pack if the distance is more than 30 minutes in summer.
Frequently Asked Questions About 3 Ingredient Peanut Butter Cookies
Can I make 3 ingredient peanut butter cookies ahead of time?
Yes — and Day 2 is genuinely better than Day 1. Bake the cookies completely, cool them on a wire rack, and store them in a hard-sided lidded container with parchment between layers at room temperature for up to 5 days. The interior softens and the peanut butter flavor deepens overnight. For longer make-ahead, freeze the unbaked sugar-rolled dough balls for up to 2 months and bake directly from frozen at 350°F (175°C) for 13 to 14 minutes.
Can I use natural peanut butter in this recipe?
No — and this is not a preference, it is a structural requirement. Natural peanut butter lacks the emulsifiers present in commercial brands like Jif or Skippy. Without those emulsifiers, the fat cannot bind the dough cohesively, and the cookies spread flat or crumble apart in the oven regardless of how well the oil was stirred in before mixing. Use creamy commercial peanut butter only. If you want a version made with natural peanut butter, it requires the addition of flour and a binding agent — that is a different recipe entirely.
Why did my 3 ingredient peanut butter cookies come out flat?
Flat cookies almost always trace back to one of three causes: natural peanut butter used instead of commercial, dough that was too warm when it went into the oven, or a pan that was still warm from a previous batch. In a flourless cookie, the commercial peanut butter’s emulsified fat is the only thing holding the structure together before the egg proteins set — anything that disrupts that fat distribution before the oven heat can stabilize it causes the cookie to collapse flat. For my full breakdown of peanut butter cookie texture troubleshooting, the peanut butter chocolate chip cookies article covers spread and texture variables in detail.
Can I double this peanut butter cookies recipe?
Yes, with one adjustment to the egg. When doubling, use 2 large eggs — not 1.5, because half an egg is not practical. Two eggs produce a very slightly more structured, slightly less tender cookie than the single-egg version, but the difference is minimal and the batch holds together correctly. Multiply the peanut butter to 2 cups (516g) and the sugar to 2 cups (400g) exactly. Bake in separate batches on separate pans — do not crowd two batches onto one pan. Bake time stays the same at 10 to 12 minutes per pan.
Are 3 ingredient peanut butter cookies gluten-free?
Yes — this recipe is naturally gluten-free. There is no flour of any kind in the dough. However, if gluten cross-contamination is a concern, check the label on your peanut butter. Most commercial brands are processed in facilities that also handle wheat. Brands that certify gluten-free on the label include Smucker’s Natural — though note that Smucker’s Natural is a natural peanut butter and will not work in this recipe without modification. For certified gluten-free results with the correct commercial texture, look for store-brand creamy peanut butter that carries a gluten-free certification on the packaging.
How do altitude and humidity affect these cookies?
These cookies are more stable at high altitude than most drop cookies because there is no leavening to over-expand. The main altitude effect is faster moisture evaporation — reduce the bake time by 1 minute and pull at 9 to 11 minutes rather than 10 to 12. In high humidity, the granulated sugar coating absorbs ambient moisture quickly and loses its crystalline texture before baking. Roll the dough balls in sugar immediately before pressing and baking rather than rolling them all at once and letting them sit. Baked cookies in humid climates may feel slightly stickier on the surface — this is surface condensation from the air, not underbaking.
Can I add mix-ins like chocolate chips or nuts to this recipe?
Yes, with a quantity limit. The dough has no flour to support heavy mix-ins — too many additions and the dough loses cohesion. Fold in no more than ½ cup (85g) of mix-ins after the base dough is fully combined. Mini chocolate chips work better than standard size — they distribute more evenly through the dough without creating structural gaps. Finely chopped roasted peanuts are a good addition if you want more texture. Avoid large chunks, whole nuts, or anything that adds significant moisture — dried fruit in particular will make the dough sticky and difficult to roll.
More Peanut Butter Cookies You’ll Love
- Peanut Butter Cup Dump Cake — for when you want peanut butter in something that requires even less effort than these cookies
3 Ingredient Peanut Butter Cookies
Ingredients
Equipment
Method
- Position your oven rack in the middle of the oven and heat to 350°F (175°C) — allow a full 15 minutes for preheating. Line a light-colored aluminum half-sheet baking pan with unbleached parchment paper and set aside. Pour 2 tablespoons (25g) granulated sugar into a small shallow bowl for rolling.
- In a large mixing bowl, combine 1 cup (258g) creamy commercial peanut butter, 1 cup (200g) plain white granulated cane sugar, and 1 large room-temperature egg. Stir with a sturdy silicone spatula in wide circular strokes from the bottom of the bowl upward — approximately 40 to 50 strokes — until the dough is thick, smooth, and uniform with no sugar streaks or dry patches remaining.
- Using a medium cookie scoop (2 tablespoon / 30ml capacity), portion the dough into 20 balls of approximately 25g each. Roll each ball between your palms until smooth, then roll in the shallow bowl of granulated sugar until the entire surface is evenly coated.
- Place the sugar-coated dough balls on the prepared baking sheet, spacing at least 2 inches (5cm) apart — no more than 12 per pan. Press a crosshatch pattern into each ball using the tines of a fork: press firmly down, then rotate the fork 90 degrees and press again, flattening each ball to approximately ½ inch (1.2cm) thickness.
- Bake at 350°F (175°C) for 10 to 12 minutes, starting to check at 10 minutes. Pull the pan when the edges are set and deep golden and the centers look just barely done — the cookies will appear slightly underdone in the center when they come out. Do not wait for the centers to look fully set in the oven.
- Leave the cookies on the hot pan for exactly 5 minutes — do not move them. This carryover rest finishes setting the egg proteins in the base. After 5 minutes, transfer to a wire cooling rack and cool completely — approximately 10 more minutes — before stacking or storing.