
Oatmeal Cream Pies
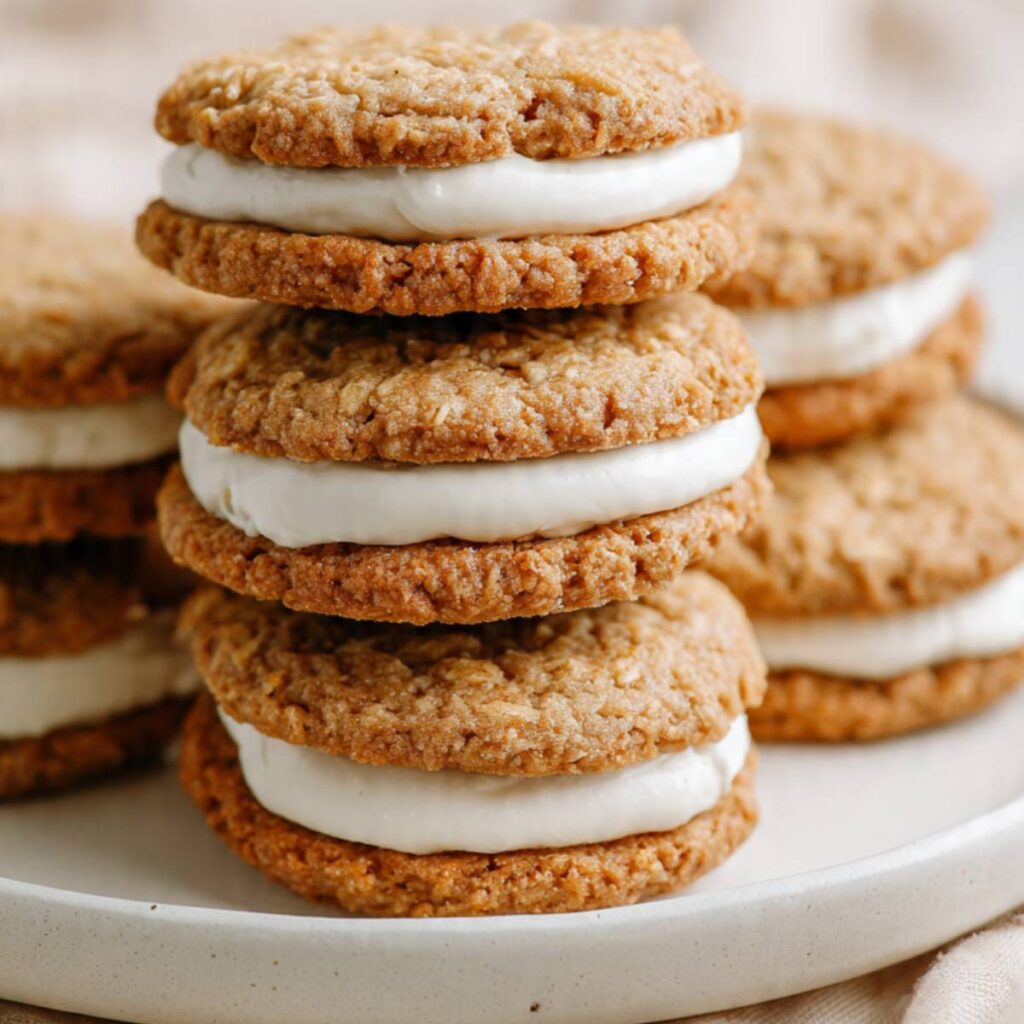
These oatmeal cream pies have been in my testing rotation for six weeks — fourteen batches, four filling formulas, and three adjustments to the oat-to-flour ratio before I had a recipe that consistently matched what you see in these photos. The cookies are soft, flat, and craggy with visible rolled oats. The filling is thick, white, and stays creamy for days. This is the homemade version that made me stop buying the packaged kind.
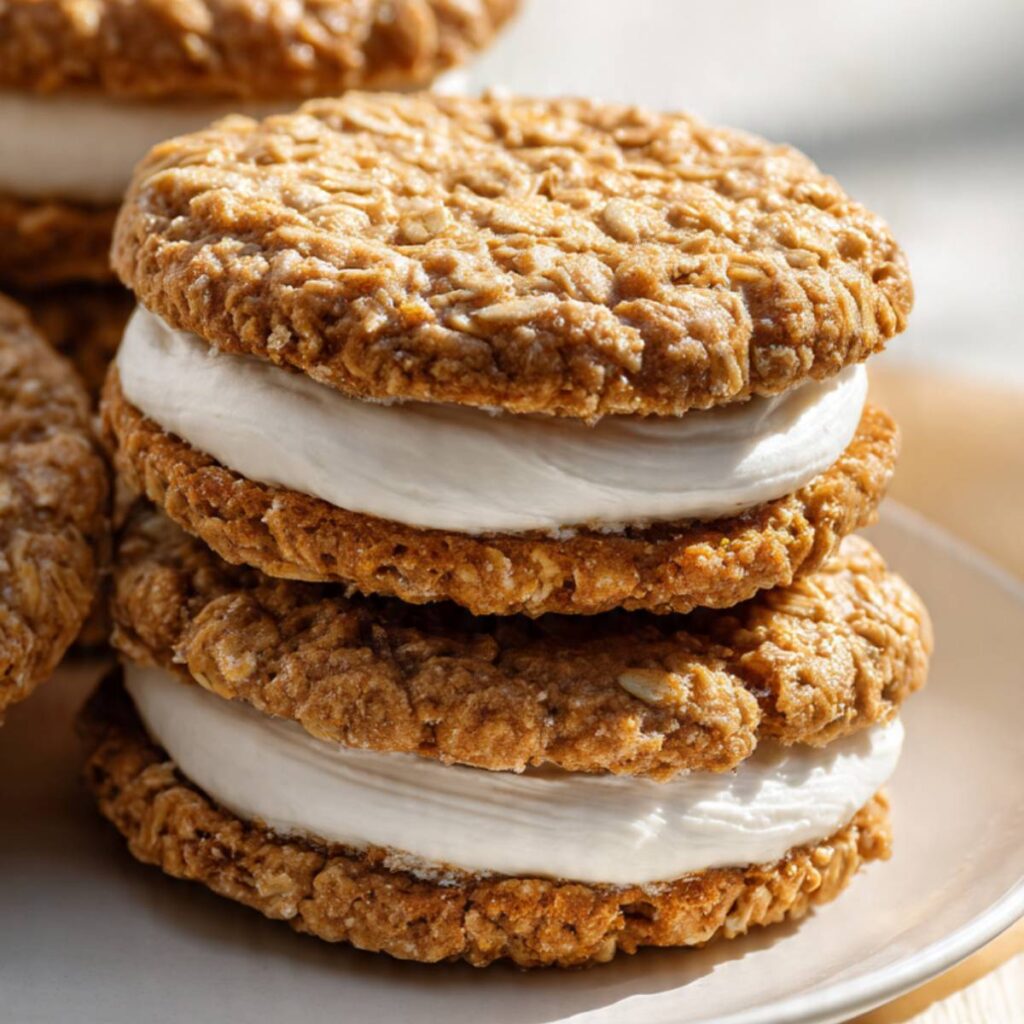
The cookies are thin and flat with a rustic, craggy surface covered in visible rolled oats. They are soft through the center, slightly chewy at the edge, and carry a deep caramel-molasses flavor from a full cup of packed brown sugar. They are not crispy. They are not cakey. They are exactly the dense, chewy oatmeal cookie you need for a sandwich — firm enough to hold the filling without cracking, soft enough to bite through cleanly.
The filling is what makes this recipe. I tested with straight buttercream, with whipped cream, and with a pure marshmallow base. The version that worked — and tastes the most like the real thing — is a combination of softened butter, sifted powdered sugar, marshmallow fluff, and a pinch of salt. It pipes smooth, holds its shape at room temperature for hours, and has that distinctive sweet, vanilla-cream flavor that anyone who grew up eating these will recognize immediately.
🗒 Luna’s Note: I tested the filling with two cups of powdered sugar versus two and a half. Two cups gave a filling that was creamy and soft without being overwhelmingly sweet — which matters here because the cookies themselves are already rich with brown sugar. The extra half cup made the filling taste like frosting, not cream. Two cups is the right call.
I tested with chilled dough versus room-temperature dough. Chilled dough gave a slightly thicker cookie with less spread. Room-temperature dough spread thinner and more evenly — which is what you see in the photos. No chilling required, and the thinner cookie is actually better for sandwiching because it does not overpower the filling.
I tested with quick oats versus old-fashioned rolled oats. Quick oats dissolved into the dough and the cookies lost their texture — soft and mushy rather than chewy with structure. Old-fashioned rolled oats are the only version that gives you the visible oat texture shown in the photos. Do not substitute.
The cookie dough is one bowl, one spatula — no mixer needed. The filling requires a stand mixer or hand mixer to beat the butter pale before anything else goes in. No chilling required for the dough.
| Prep Time | Cook Time | Total Time | Yield | Difficulty |
|---|---|---|---|---|
| 20 min | 11–13 min | ~1 hr 15 min (including cooling) | 12 sandwiches (24 cookies) | Easy |
| Calories | Fat | Carbs | Sugar | Protein |
|---|---|---|---|---|
| ~400 kcal | ~18g | ~55g | ~32g | ~4g |
Macros are approximate and will vary based on ingredient brands and serving size.
Ingredients & Tools
For the Oatmeal Cookies
- 1 cup (227g) unsalted butter, softened to room temperature (65–68°F / 18–20°C)
- 1 cup (220g) packed brown sugar (light or dark — dark gives a stronger molasses flavor)
- ½ cup (100g) plain white granulated cane sugar
- 2 large eggs (approximately 50g each without shell), room temperature
- 2 teaspoons (10g) pure vanilla extract
- 1½ cups (180g) all-purpose flour (spooned into the measuring cup and leveled — or weighed at 180g)
- 1 teaspoon (6g) baking soda, checked for freshness
- 1 teaspoon (3g) ground cinnamon, checked for freshness — should smell strong and spicy when opened
- ½ teaspoon (3g) fine sea salt
- 3 cups (270g) old-fashioned rolled oats — not quick oats, not instant oats
For the Marshmallow Cream Filling
- ½ cup (113g) unsalted butter, softened to room temperature (65–68°F / 18–20°C)
- 2 cups (240g) powdered sugar, sifted — do not skip sifting, lumps will not beat out
- 1½ cups (198g) marshmallow fluff or marshmallow cream (one 7oz / 198g jar), such as Jet-Puffed Marshmallow Creme or Marshmallow Fluff brand — room temperature. Not marshmallow sauce, which is thinner and will make the filling runny.
- 1 teaspoon (5g) pure vanilla extract
- Pinch of fine sea salt
Before You Start
Gram weights first: For the most accurate results, use a kitchen scale set to grams. Volume measurements can vary by 20–30% depending on how ingredients are scooped or packed. The gram weights in this recipe are the numbers I tested with — they are the most reliable way to get the same result shown in the photos.
Temperature prep — start here, before anything else: Pull the butter for the cookies from the fridge 60–90 minutes before you begin. In my LA kitchen where the room runs warm, 60 minutes is usually enough. In a cooler kitchen (below 68°F / 20°C), give it the full 90 minutes. The butter is ready when you press a finger into it and it leaves a clean indent without the surface looking shiny or greasy. If your finger slides straight through and the butter looks wet, it is too warm — set it in the fridge for 10 minutes and check again.
The butter for the filling needs the same temperature — 65–68°F (18–20°C). Filling butter that is too warm will not whip pale and the filling will be soft and greasy rather than holding its shape.
Pull your eggs from the fridge at the same time as the butter. Room-temperature eggs (30 minutes is enough) emulsify into the dough cleanly. Cold eggs can cause the butter to seize and look curdled.
Leavening freshness test: Drop ½ teaspoon (3g) of your baking soda into a small bowl with a splash of hot water and a few drops of white vinegar. It should bubble aggressively within 2 seconds. If the fizz is weak or absent, replace the box — old baking soda produces flat, dense cookies with no lift.
Oats — this matters: Use old-fashioned rolled oats only. The photos show visible oats with texture and chew. Quick oats and instant oats have been pre-steamed and cut — they dissolve into the dough and produce a softer, mushy cookie without the textural character shown in the images.
Flour — measure carefully: Spoon flour into your measuring cup and level it off with a straight edge — do not scoop directly from the bag. Scooping packs 20–30% more flour and produces dry, crumbly cookies. Better yet, weigh it: 180g is the number I tested with.
Powdered sugar — sift before measuring: Sift the powdered sugar before measuring. Un-sifted powdered sugar has clumps that will not fully beat out in the filling, leaving a grainy texture.
Cinnamon freshness check: Open the jar and smell. Fresh cinnamon is strong and spicy. If the smell is faint or dusty, it is past its useful window — replace it. Ground spices lose their potency within 6 months of opening.
Brown sugar check: Press your finger into the packed brown sugar before measuring. It should be soft, pliable, and pack cleanly. If it has hardened into a solid block, place a damp paper towel over the surface of the bag, seal it, and microwave in 20-second increments until it is soft enough to pack — approximately 40 to 60 seconds total. Hard brown sugar cannot be packed accurately and will throw off your moisture ratio.
Mixing method: Cookie dough: one large mixing bowl and a sturdy silicone spatula — no mixer needed for the dough. Filling: stand mixer fitted with the paddle attachment or a hand mixer with beaters — the butter needs real mechanical beating to become pale. No chilling required — the dough goes straight from bowl to pan.
Oven prep: Position your oven rack in the middle. Preheat to 350°F (175°C). Most home ovens run 15–25°F (8–14°C) off — if you have an oven thermometer, confirm the actual temperature before the first pan goes in. Use a light-colored aluminum baking sheet lined with parchment paper. Dark pans conduct more heat and will brown the cookie bottoms before the centers have time to set.
Yield check: This recipe produces 24 individual cookies and 12 assembled sandwiches. Each cookie is portioned at approximately 1.5 tablespoons (38g) of dough. Weigh the first one, use it as your calibration.
Necessary Tools
Required:
- Large mixing bowl
- Sturdy silicone spatula
- Stand mixer with paddle attachment, or hand mixer with beaters (for filling only)
- Light-colored aluminum baking sheet (2 preferred — bake in two batches)
- Parchment paper
- 1.5-tablespoon cookie scoop or kitchen scale
- Wire cooling rack
Optional but helpful:
- Kitchen scale (strongly recommended — gram weights are the most reliable path to consistent results)
- Oven thermometer
- Piping bag with large round tip, or offset spatula (for filling application)
How to Make Oatmeal Cream Pies
This is a one-bowl cookie dough — no mixer needed for the cookies themselves. The filling requires a stand mixer or hand mixer. Make the cookies first, cool them completely, then make the filling and assemble. Do not rush the cooling step — warm cookies will melt the filling on contact and the sandwiches will not hold their shape.
Step 1: Preparing Your Oven and Pans
Position your oven rack in the middle of the oven and heat to 350°F (175°C). Most home ovens run 15–25°F (8–14°C) off — if you have an oven thermometer, confirm the actual temperature before the first pan goes in. An oven running 25°F hot will overbrown the cookie bottoms and underbake the centers in the same bake.
While the oven preheats, line your light-colored aluminum baking sheet with parchment paper — Cut it to fit flat with no overhang curling up at the edges. Do not use foil — foil conducts heat differently than parchment and produces darker, crisped bottoms. Do not grease the pan without parchment — the dough will spread immediately on contact with a greased surface and the bottoms will stick and tear when you try to move them. If you only have one baking sheet, you will bake in three batches, letting the pan cool completely between each. A hot pan causes the dough to spread the moment it makes contact, before the oven heat has a chance to set the edges — the cookies will bake flat and thin rather than holding their shape.
The pan should look clean, flat, and parchment-lined before a single scoop of dough goes on it. Do not grease the parchment — the butter content in the dough is sufficient and greasing produces excess spread.
Do not put the dough on the pan yet. Set the pan aside and move to the dough.
Step 2: Creaming the Butter and Both Sugars Until Fully Combined
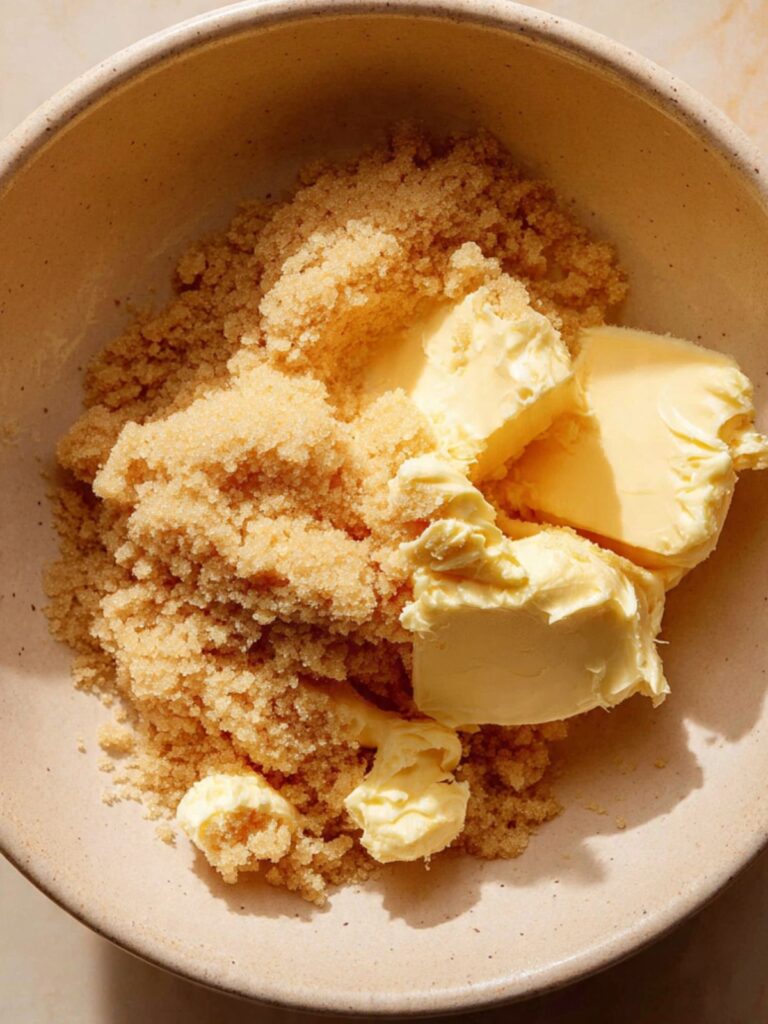
In your large mixing bowl, using your sturdy silicone spatula, add your 1 cup (227g) unsalted butter softened to 65–68°F (18–20°C), your 1 cup (220g) packed brown sugar, and your ½ cup (100g) plain white granulated cane sugar. Work the butter and both sugars together using firm pressing and folding strokes — pressing the butter flat against the bottom of the bowl, then folding it over the sugars and pressing again. Continue for approximately 2–3 minutes until the mixture looks uniform, slightly lighter in color than the butter started, and no dry pockets of sugar remain.
The brown sugar is doing two things here: it provides moisture through its molasses content, which keeps these cookies soft for days after baking, and it gives the cookies their deep caramel flavor. The granulated sugar provides just enough structure and a slight edge crispness to balance the chew. Do not substitute coconut sugar or raw sugar for the granulated — the crystal structure is different and the spread behavior changes.
The mixture should look smooth and cohesive — not greasy, not streaky, and no visible clumps of butter remaining. It will be a darker tan color from the brown sugar.
If the butter is too warm, the mixture will look shiny and almost liquid — stop and refrigerate the bowl for 10 minutes before continuing. Butter that is too warm will cause excess spread.
🗒 Luna’s Note: I use a silicone spatula rather than a wooden spoon for this step. The silicone flexes against the bowl wall and picks up every bit of butter without leaving streaks. A wooden spoon leaves too much behind.
Step 3: Adding the Eggs and Vanilla
Add your 2 large eggs (approximately 50g each without shell), room temperature, one at a time. After the first egg, stir firmly until it is fully absorbed and no streaks of egg white remain — approximately 15 strokes. Then add the second egg and repeat. Add your 2 teaspoons (10g) pure vanilla extract with the second egg.
The eggs provide structure and bind the oats and flour into a cohesive dough. Room-temperature eggs incorporate smoothly — cold eggs can cause the butter to seize and the dough to look broken or curdled. If this happens, continue stirring — it will come back together as the egg warms from the friction of mixing.
The dough should look smooth, glossy, and uniform after both eggs are incorporated — no visible egg streaks, no greasy separation. If it looks broken after adding both eggs, the butter was likely too warm going in. The cookies will still bake, but may spread more than shown in the photos.
The pan goes on the counter now — you are about to add dry ingredients and will need to work quickly.
Step 4: Adding the Dry Ingredients Without Overdeveloping the Dough
Add your 1½ cups (180g) all-purpose flour (spooned and leveled), your 1 teaspoon (6g) baking soda checked for freshness, your 1 teaspoon (3g) ground cinnamon, and your ½ teaspoon (3g) fine sea salt directly into the bowl. Fold them in with slow, deliberate strokes from the bottom of the bowl upward — not stirring in circles. Count approximately 12 to 15 strokes from the moment the dry ingredients touch the wet mixture. Stop when you no longer see dry flour pockets. A few streaks of flour still visible is fine — the oats go in next and will absorb them.
The baking soda reacts with the slight acidity in the brown sugar and the eggs during baking, producing the gentle lift that keeps the centers from baking up compressed and dense. It does not produce a crackled surface in this recipe — the all-brown-sugar ratio and the oat content keep the surface matte, which is exactly what you see in the photos.
Do not overmix after the flour goes in — the edges will look fine when baked but the centers will bake up tight and tough instead of soft and chewy. The dough should look just barely combined at this point.
The dough should look thick and slightly shaggy — not smooth, not glossy. You should still see a few flour streaks. This is correct. Add the oats immediately.
Step 5: Folding In the Oats
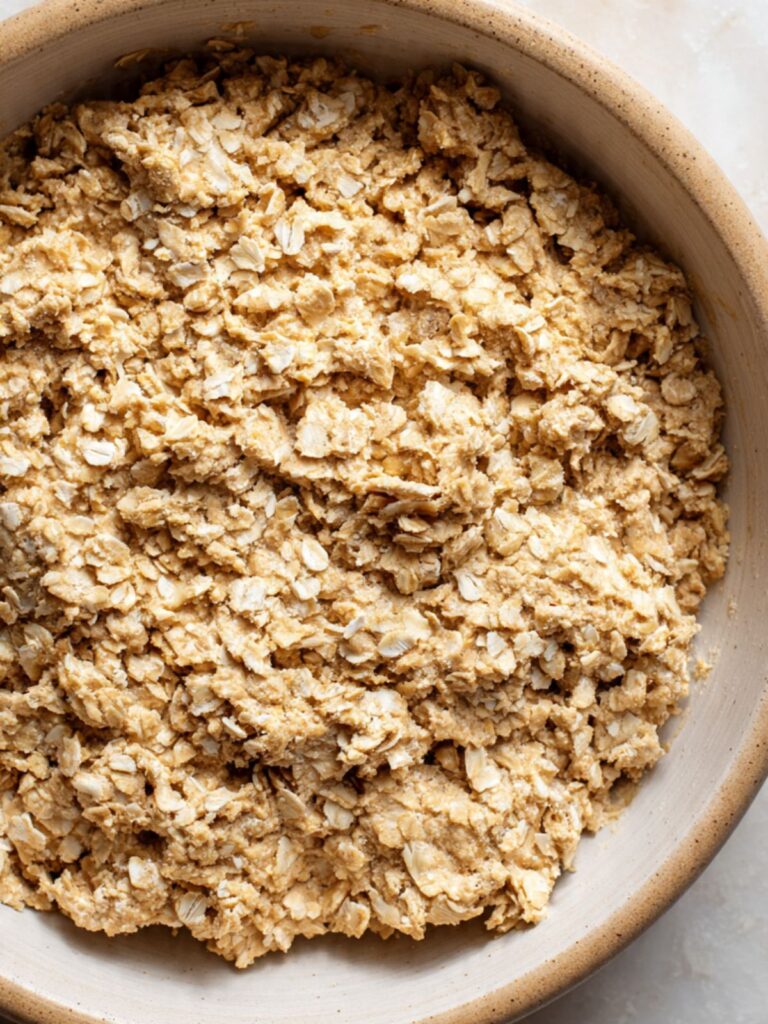
Add your 3 cups (270g) old-fashioned rolled oats to the bowl. Fold them in with the same slow bottom-to-top strokes — approximately 20 to 25 strokes — until the oats are evenly distributed and no dry flour pockets remain. The dough will be very thick and stiff at this point. This is correct — oatmeal cream pie dough is not a pourable batter.
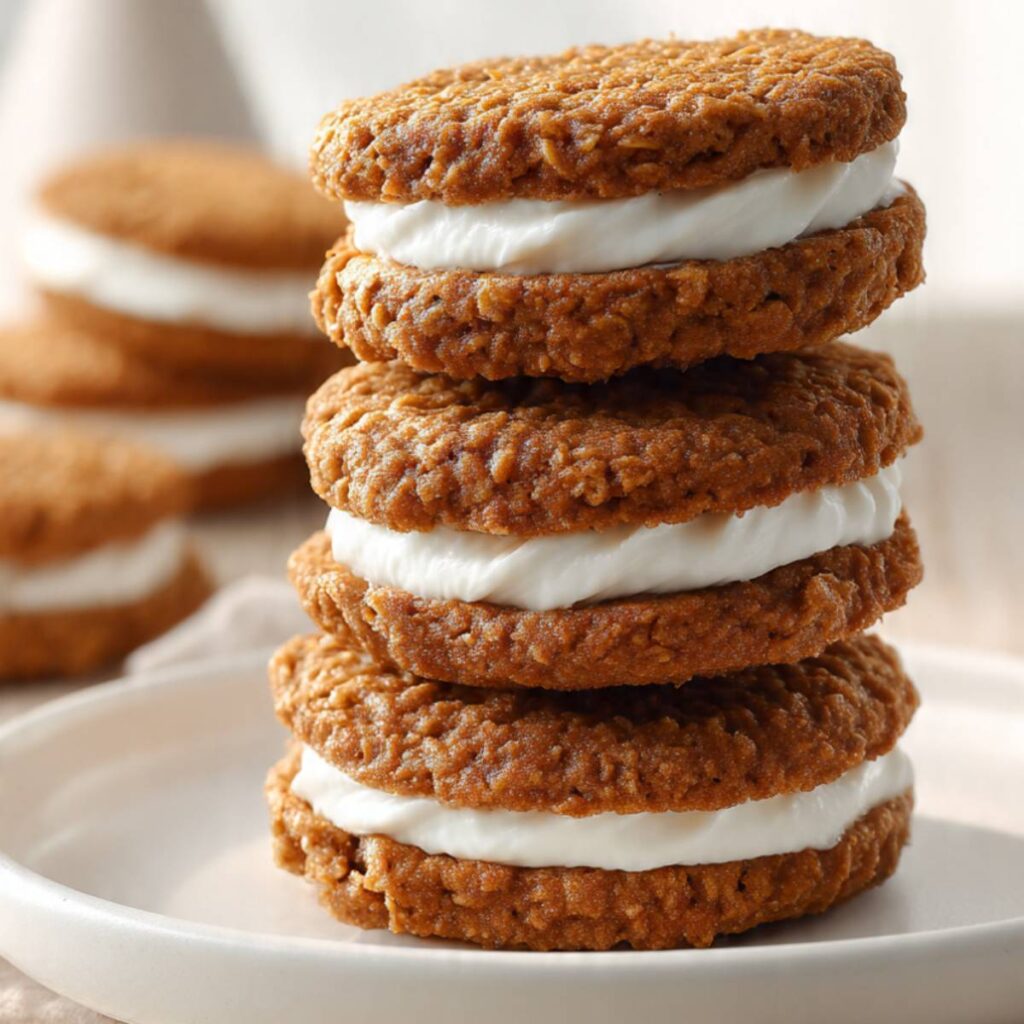
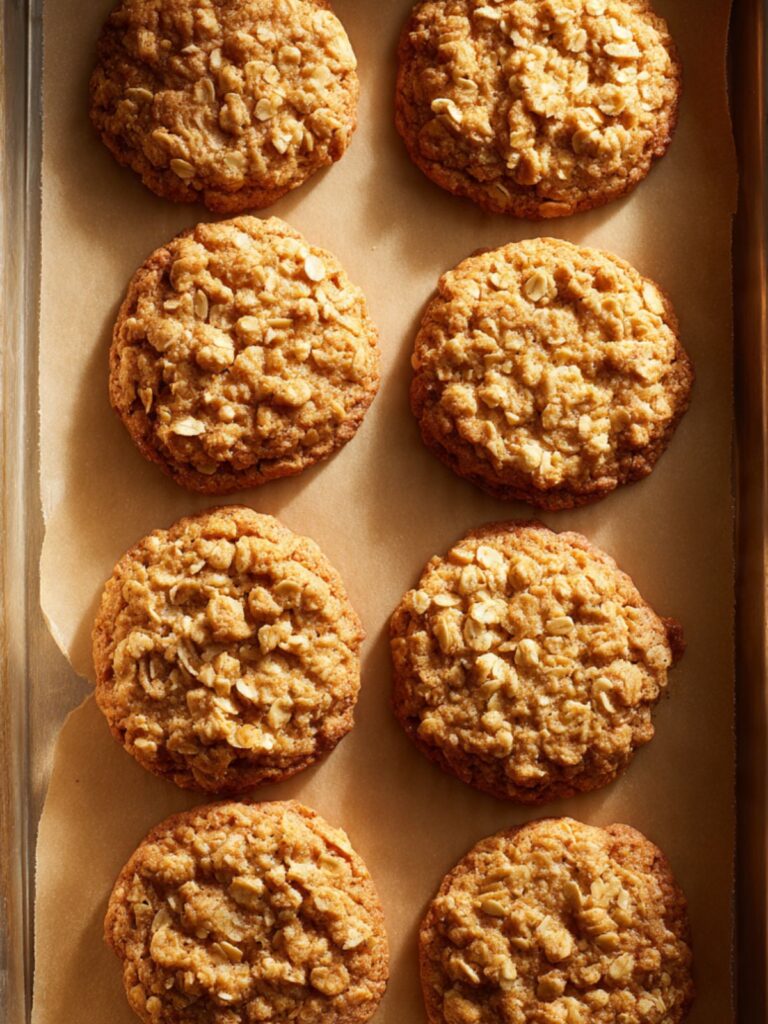
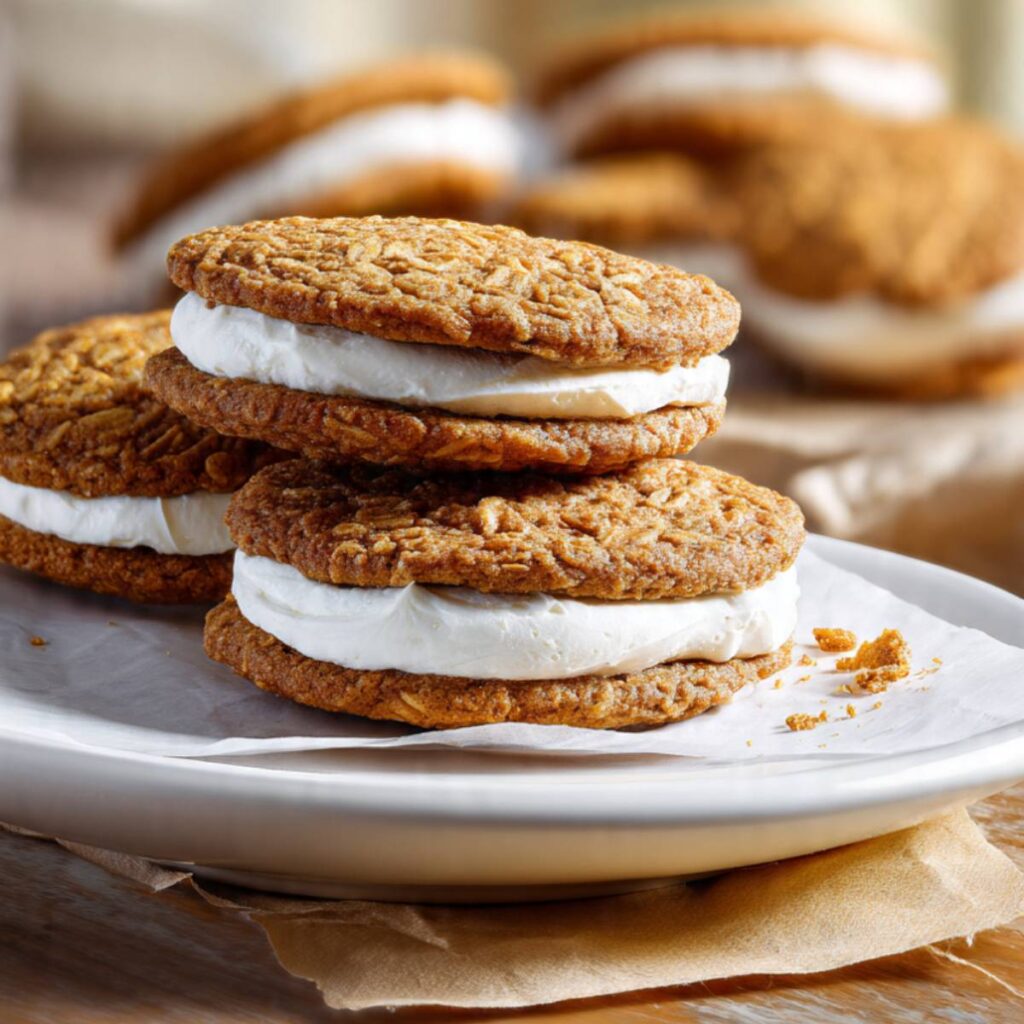
The old-fashioned rolled oats are the structural and textural foundation of this cookie. As you can see in the overhead photo showing all twelve assembled sandwiches, the oat texture is clearly visible across every cookie surface — that rustic, craggy look only comes from whole rolled oats. Quick oats would dissolve into the dough and produce a smooth, featureless surface without any of that visible texture.
The finished dough should be thick enough to hold its shape when scooped — it will not slump or spread in the bowl. If it looks unusually wet and loose, your butter was too warm going in. Refrigerate the bowl for 20 minutes before scooping.
You are ready to portion and bake.
Step 6: Portioning and Baking the Cookies
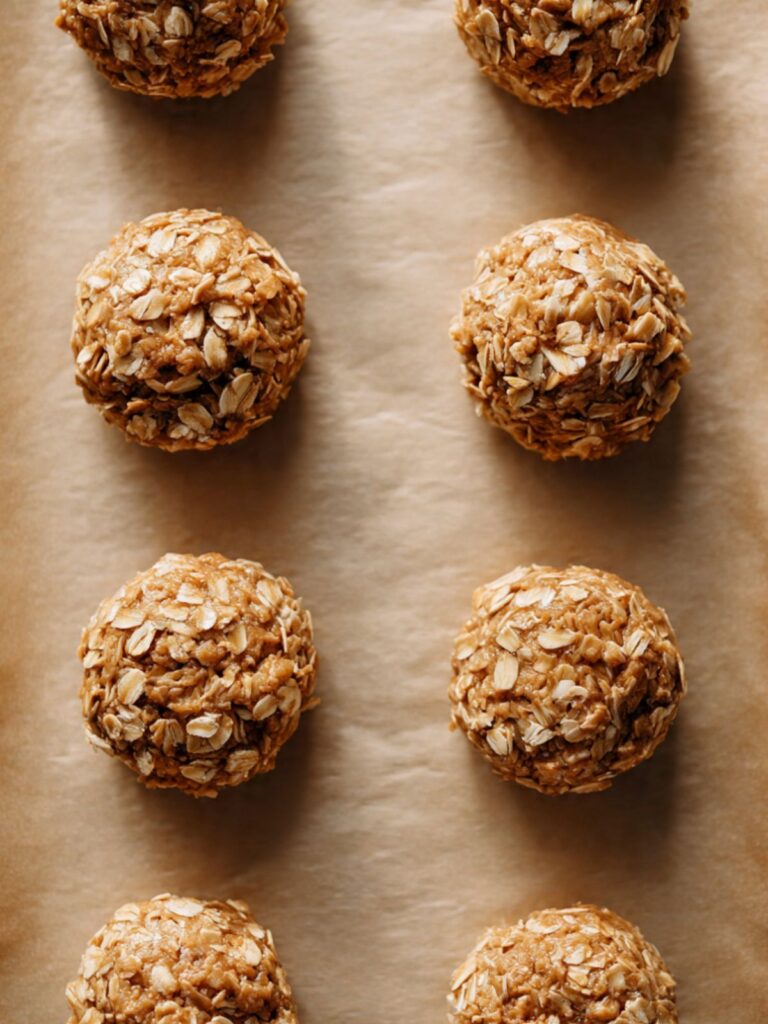
Scoop 1.5 tablespoons (38g) of dough per cookie. Weigh the first scoop on your kitchen scale, then use it as your visual reference for the remaining 23 cookies. Roll each scoop briefly between your palms to form a rough ball — it does not need to be perfect. Place them on your parchment-lined pan spaced 2 inches (5cm) apart. This batch yields exactly 24 cookies at this scoop size — bake in batches of 8 per standard half-sheet pan.
Do not flatten the dough balls before baking. The cookies will spread naturally in the oven and flatten to the thin, uniform shape visible in the photos. Pre-flattening produces cookies that spread too wide and too thin.
Bake at 350°F (175°C) for 11 to 13 minutes. Start checking at 11 minutes. The cookies are done when the edges look set and lightly golden and the centers still look slightly underdone and soft — they will not look fully baked when you pull them. As you can see in the stacked close-up photo, the finished cookies have an even golden-amber color across the full surface with no pale centers and no dark edges. This is the result of pulling them at the right moment.
Do not wait for the centers to look set in the oven — by the time the center looks done, the edges will be overbaked and the cookie will be crunchy rather than chewy.
The edges should look set and lightly golden. The centers should still look slightly soft and underdone. This is exactly when to pull the pan.
Baking firms the edges but leaves the centers soft — carryover heat from the hot pan will finish setting them off the heat.
Step 7: Cooling the Cookies Completely Before Filling
Leave the cookies on the hot pan for exactly 5 minutes after pulling from the oven. Do not move them before 5 minutes — the structural base is still setting during this time and moving them too early will crack the base. Do not leave them on the pan past 8 minutes — the residual heat from the pan will continue cooking the bottoms and start to dry them out. Set a timer for both.
After 5 minutes, transfer the cookies to a wire cooling rack using a thin spatula. Let them cool to full room temperature — approximately 45 to 60 minutes. Do not rush this step. Assembling warm cookies melts the filling on contact and the sandwiches will not hold together. The filling will squeeze out the sides when you press the top cookie down, and the assembled sandwiches will look nothing like what you see in the photos.
The cookies are ready to fill when they feel completely cool to the touch on both the top and bottom surface. If the bottom still feels warm, wait another 10 minutes.
🗒 Luna’s Note: I bake all three batches of cookies first, let them cool on the rack while I make the filling, and assemble everything in one pass at the end. The timing works out perfectly — by the time the last batch is cool, the filling is made and ready.
Step 8: Making the Marshmallow Cream Filling
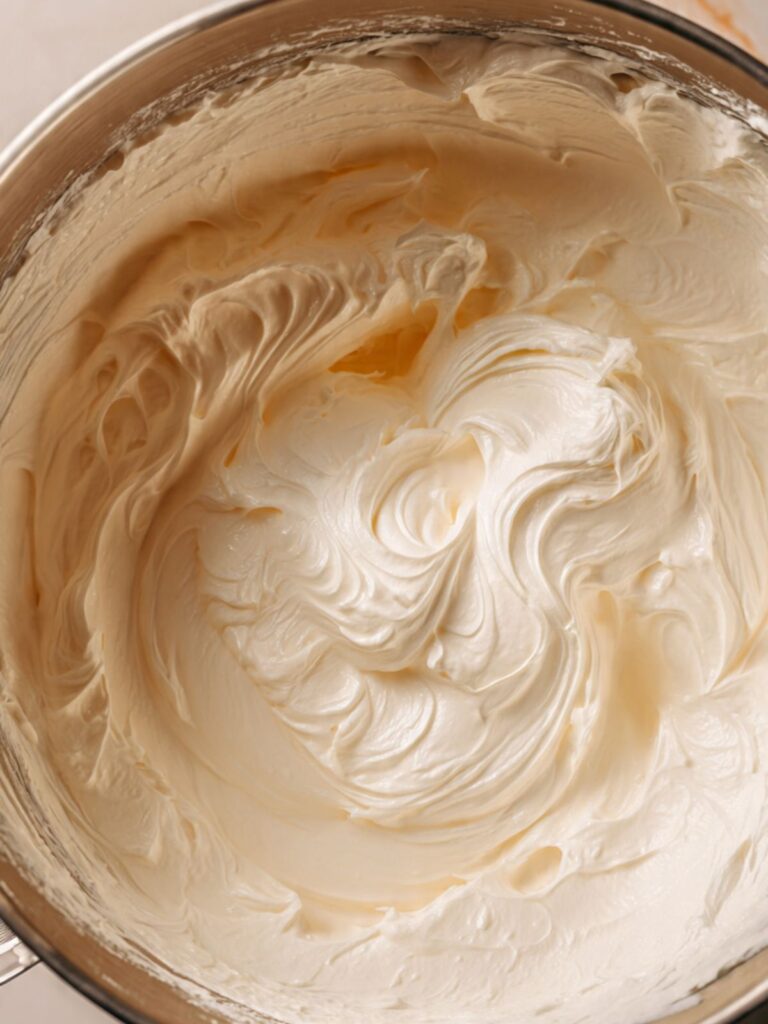
In your stand mixer fitted with the paddle attachment — or in a large bowl using a hand mixer with beaters — beat your ½ cup (113g) unsalted butter softened to 65–68°F (18–20°C) on medium speed (speed 4 on a KitchenAid) for 2 full minutes. Set a timer. Do not estimate. The butter needs to be beaten alone first, until it is pale yellow — almost white — and noticeably increased in volume. This step builds the air structure that keeps the filling light and pipeable rather than dense and heavy.
Add your 2 cups (240g) powdered sugar, sifted, one cup at a time. Add the first cup, mix on low speed (speed 2) for 30 seconds until mostly absorbed, then increase to medium and beat for 1 minute. Add the second cup and repeat. Mixing powdered sugar on high speed before it is absorbed sends a cloud of sugar across your kitchen and coats everything in a 3-foot radius.
Add your 1½ cups (198g) marshmallow fluff, your 1 teaspoon (5g) pure vanilla extract, and your pinch of fine sea salt. Beat on medium speed for 1 to 2 minutes until the filling is smooth, glossy, and completely uniform — no streaks of marshmallow remaining.
The marshmallow fluff is what distinguishes this filling from standard vanilla buttercream. It contributes a stretchy, slightly sticky quality that is distinctly cream pie — not frosting. The vanilla extract amplifies it without competing with it. The pinch of salt cuts the sweetness and makes the filling taste like more than just sugar.
The finished filling should look bright white, smooth, and hold a soft peak for 3 to 4 seconds when you lift the beater. If it looks yellow and dense, the butter was not beaten long enough — put it back on medium for another minute. If it looks runny and loose, the butter was too warm — refrigerate the bowl for 10 minutes and beat again.
Do not overmix after the marshmallow fluff goes in — excessive beating can make the fluff break down and the filling will lose its body.
Step 9: Assembling the Oatmeal Cream Pies
Pair up your 24 cookies by size — match each cookie with another of similar diameter so every sandwich is even. Flip half the cookies bottom-side up on your work surface. These are your bases.
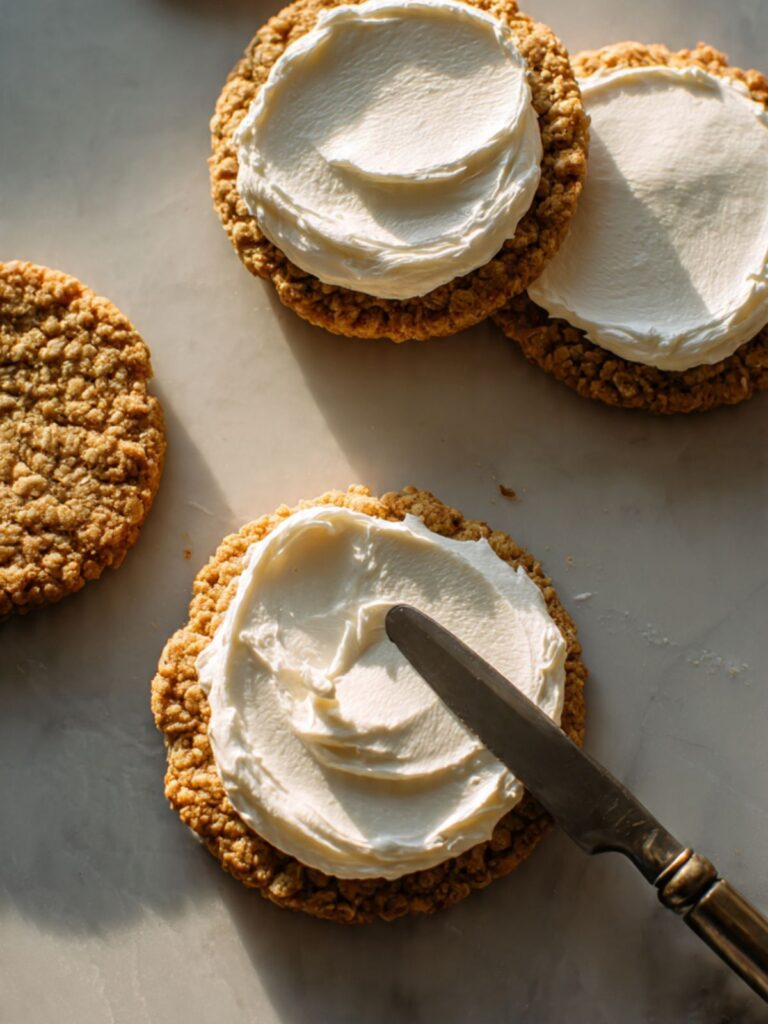
Transfer the filling to a piping bag fitted with a large round tip, or use an offset spatula. Pipe or spread approximately 2 to 2.5 tablespoons (38–45g) of filling onto each base cookie, leaving a ¼ inch (6mm) border from the edge. The filling will press to the edge when the top cookie goes on — if you fill to the edge before pressing, the filling will overflow and make a mess.
Press the top cookie down firmly but gently — enough to spread the filling to the edges without cracking the cookie. As you can see in the close-up stacked photo, the filling should be flush with the cookie edge all the way around, approximately ½ inch (1.2cm) thick. If the filling is not quite reaching the edge, give the top cookie one more gentle press.

Each assembled sandwich should look like the stacked photos — filling visible all the way around the edge, cookies flat and even, no cracking or splitting at the base. If a cookie cracks when you press, it was either underbaked, or it cooled on the pan too long and dried out.
🗒 Luna’s Note: I refrigerate the assembled sandwiches for 20 minutes after assembly before serving. The filling firms up just enough that the sandwiches hold their shape cleanly when you pick them up, without getting stiff or cold.
Let the assembled sandwiches rest at room temperature for at least 20 minutes before serving — this allows the filling to settle and firm slightly against the cookie surface. The oatmeal cream pies are ready to eat.
The Science Behind Oatmeal Cream Pies
Why Brown Sugar Makes These Cookies Stay Soft for Days
Most cookies go stiff within 24 hours of baking. These do not. The reason is the brown sugar ratio. This recipe uses a full cup of packed brown sugar and only half a cup of granulated sugar — a 2:1 ratio that tilts the moisture balance strongly toward the brown side. Brown sugar contains molasses, and molasses is hygroscopic — it actively draws moisture from the surrounding air and holds it inside the cookie crumb. This is not a passive process. Even after the cookies cool completely, the molasses in the brown sugar keeps pulling ambient moisture back into the crumb, which is why an oatmeal cream pie on day three can be just as soft as one on day one.
The granulated sugar in the recipe is not decorative. It controls spread. Granulated sugar melts cleanly during baking and then recrystallizes as the cookie cools — this recrystallization is what gives the edges a slight set and the faintest crispness at the border, creating a textural contrast between the chewy center and the barely-firm edge. A recipe with 100% brown sugar and no granulated sugar at all would produce a cookie that spreads very little and stays uniformly soft all the way to the edge — which sounds appealing but makes for a less interesting sandwich cookie. The 2:1 ratio gives you both: a soft, chewy center and an edge with just enough structure to hold the filling.
🗒 Luna’s Note: I store the unassembled cookies in a container with a slice of white bread overnight. The bread gives up its moisture to the cookies and keeps the brown sugar from drying out. By morning the cookies are even softer than they were fresh from the oven.
If you want to read more about how sugar ratios affect texture in oatmeal-based cookies, my oatmeal chocolate chip cookies article covers the same mechanism in detail.
What Old-Fashioned Rolled Oats Do That No Other Oat Can
The oat choice in this recipe is not interchangeable, and the reason goes beyond texture. Old-fashioned rolled oats are whole oat groats that have been steamed and then rolled flat — they retain most of their original starch and fiber structure. When they bake inside a cookie dough, they absorb moisture slowly and swell slightly, creating individual pockets of chew throughout the crumb. This is what produces the rustic, craggy surface visible in every photo — each oat sits slightly proud of the dough surface and sets in place as the cookie bakes.
Quick oats have been steamed longer and rolled thinner — they absorb moisture almost instantly and collapse into the dough before baking is finished. The result is a smooth, soft cookie with no distinct oat texture — closer to a thick pancake than a chewy sandwich cookie. Instant oats have been pre-cooked entirely and have essentially no structural integrity left — they disappear into the dough entirely.
The other function old-fashioned oats serve is starch gelatinization. As the oat starch granules heat up and absorb the moisture from the butter and eggs in the dough, they swell and set — this is the mechanism that creates the dense, cohesive interior of the cookie rather than a crumbly or loose crumb. Without intact oat starch, the cookie would not hold together cleanly under the pressure of assembly.
Why the Marshmallow Fluff Filling Works Better Than Plain Buttercream
Standard vanilla buttercream is butter, powdered sugar, vanilla, and a splash of cream. It is good. But it is not what makes an oatmeal cream pie taste like an oatmeal cream pie. The distinguishing characteristic of the filling in this recipe is the marshmallow fluff — and the reason it works comes down to the difference between sucrose and corn syrup solids.
Marshmallow fluff is made primarily from corn syrup, sugar, and whipped egg whites. Corn syrup does not crystallize the way sucrose does — this is what keeps the filling soft and slightly stretchy rather than stiff and crumbly. When you bite through the sandwich, the filling compresses and then pulls slightly rather than snapping cleanly — that stretch is the corn syrup at work. It also keeps the filling soft at room temperature for days without requiring cream or milk, which means the assembled sandwiches can sit out for hours without the filling weeping or separating.
The butter in the filling is not just for flavor. Beaten butter traps air — the same principle as creamed butter in a cookie dough. When butter is beaten alone for two full minutes before any sugar is added, it becomes pale, aerated, and nearly doubled in volume. That trapped air is what makes the filling light and pipeable rather than dense and heavy. Add the sugar too soon and the air never develops — you get a filling that tastes fine but sits heavy on the cookie and squeezes out the sides under pressure.
Oatmeal Cream Pies Troubleshooting & Pro-Tips
Common Mistakes
I used quick oats and my cookies have no texture — they taste soft and mushy
The oat type is the single most critical ingredient decision in this recipe. Old-fashioned rolled oats are whole oat groats that have been steamed and rolled flat — they retain their structural integrity through baking and produce the visible, craggy oat texture shown in every photo. Quick oats have been steamed longer and rolled thinner — they absorb moisture almost immediately and collapse into the dough before baking is finished. The result is a smooth, pale cookie with no visible oat structure and a texture closer to a thick soft pancake than a chewy sandwich cookie. There is no fix once quick oats are baked in — start again with old-fashioned rolled oats. Check the package before opening: “old-fashioned” or “rolled oats” on the label, not “quick-cooking” or “instant.”
My cookies baked on a dark pan and the bottoms are overdone while the centers are still soft
Dark-colored baking pans absorb more radiant heat than light-colored aluminum pans — they conduct that heat directly into the cookie bottom and overbrown it before the oven air temperature has time to set the center. A cookie baked on a dark pan will have dark, crisped bottoms and pale, underbaked centers regardless of how carefully you watch the oven time. The fix for this batch: pull 1 minute earlier and check bottoms at 10 minutes. The permanent fix: use a light-colored aluminum baking sheet. If you only have dark pans, place a second dark pan underneath as an insulating layer — this slows the bottom heat transfer and reduces but does not fully solve the problem. Do not use unlined pans — the dough will stick and the bottoms will burn before the edges set. Parchment is mandatory.
My cookies spread too flat and too thin
The most common cause is butter that was too warm when it went into the dough. Butter at the correct temperature (65–68°F / 18–20°C) holds its fat structure during mixing and releases it gradually in the oven — this controlled melt is what gives the cookies their shape. Butter that is too warm has already partially melted and releases all at once the moment the pan hits the oven heat, causing the dough to spread aggressively before the edges have time to set. The fix: next batch, pull the butter from the fridge and give it exactly 60 minutes at room temperature. Press your finger in before using — a clean indent with no shine means it is ready. The second common cause is a hot baking pan. If you are baking in batches and the pan is still warm from the previous batch, the dough will begin spreading immediately on contact. Let the pan cool completely between batches — run it under cold water and dry it if you need to speed this up.
My cookies came out hard and crunchy instead of soft and chewy
These cookies must be pulled when the centers still look slightly underdone and soft — waiting until the center looks set in the oven means the carryover heat from the pan will push them past the correct texture. Start checking at 11 minutes and pull the moment the edges are set and golden. Leaving the cookies on the hot pan past 8 minutes also overdries the bottoms — set a timer for the 5-minute rest and move them to the rack at exactly that mark.
My filling is soft and won’t hold its shape
The butter was either too warm or not beaten long enough before the sugar went in. Filling butter must be at 65–68°F (18–20°C) — on the cooler end of room temperature. Butter any warmer than this will not trap air during beating and the filling will be dense and loose rather than light and pipeable. Beat the butter alone for a full 2 minutes before adding anything else — if it is not pale yellow and noticeably increased in volume after 2 minutes, keep beating. Fix for a filling that is already made and too soft: refrigerate the bowl for 15 minutes, then beat again for 1 minute.
My filling is grainy and not smooth
The powdered sugar was not sifted before measuring. Un-sifted powdered sugar contains hard clumps that do not fully dissolve during beating — they leave a gritty texture in the filling that does not go away no matter how long you mix. Sift the powdered sugar before it goes into the bowl. If the filling is already made and grainy: add 1 teaspoon (5ml) of whole milk and beat on medium for 1 additional minute.
My cookies taste flat — no depth of flavor
Two likely culprits. First: old cinnamon. Ground cinnamon loses its potency within 6 months of opening — if the smell when you open the jar is faint rather than sharp and spicy, it is past its window. Replace it. Second: expired baking soda. To test freshness: drop ½ teaspoon (3g) of baking soda into a small bowl with a splash of hot water and a few drops of white vinegar. It should bubble aggressively within 2 seconds. If the fizz is weak or absent, the baking soda is not reacting properly with the brown sugar’s acidity during baking — the cookies will not develop the light interior structure that allows the flavors to bloom. Replace the box before starting.
My assembled sandwiches are falling apart
The filling was applied to cookies that were still warm. Even slightly warm cookies conduct heat into the filling and soften the butter fat — the filling loses its structure and cannot bind the sandwich together. Make sure both the cookies and the filling are fully at room temperature before assembling. The cookies should feel completely cool on both surfaces and the filling should hold a soft peak when you lift a spatula through it.
Expert Pro-Tips
Chill the assembled sandwiches for 20 minutes in the refrigerator before serving. The filling firms slightly against the cookie surface during this time and the sandwiches hold their shape cleanly when picked up — no filling squeeze-out, no sliding top cookie.
Match your cookies by size before assembling. The overhead photo showing all twelve sandwiches on the plate makes this clear — every sandwich is even because the cookies were paired by diameter before filling. An unmatched pair produces a sandwich where one cookie overhangs the other and the filling is uneven. Take 30 seconds to sort them before you start.
Make the cookies one day ahead if you want the oat flavor to deepen. Freshly baked oatmeal cookies taste good. Oatmeal cookies that have sat in an airtight container overnight taste noticeably better — the oats hydrate fully from the moisture in the cookie and the molasses flavor from the brown sugar intensifies. Assemble on day two for the best result.
For humidity and altitude: if you are baking above 3,500 feet (1,065m), reduce the baking soda to ¾ teaspoon (4.5g) and increase the flour by 2 tablespoons (15g). High altitude leavening reacts faster and too much baking soda at elevation causes the cookies to rise and then collapse flat. In high-humidity environments, the brown sugar may be softer and stickier than usual — this is fine and will not affect the final cookie. If your powdered sugar clumps aggressively in the humidity, sift it twice before using.
How to Store Oatmeal Cream Pies
Room Temperature
Store assembled oatmeal cream pies in a single layer in an airtight container at room temperature for up to 3 days. Do not stack them directly on top of each other — the weight of the top sandwich compresses the filling in the bottom sandwich and the cookies will stick together when you try to separate them. If you need to stack, place a sheet of parchment paper between each layer.
The container matters. A zip-top bag works but tends to trap condensation against the cookie surface — after day two the outer edge of the cookie can go slightly sticky. A rigid airtight container with a lid keeps the cookie surface drier and maintains better texture through day three. Do not use a loosely covered plate or a container with gaps — exposure to air dries the cookies faster than anything else.
Day one: cookies are soft and slightly warm-flavored, filling is light and creamy. Day two: cookies have hydrated fully overnight — this is actually the best eating day. The oat flavor is deeper and the filling has settled into the cookie surface. Day three: still good, slightly denser texture, filling is firmer. After day three the cookies begin to dry out at the edges.
Do not refrigerate assembled sandwiches for regular storage. The refrigerator dries out the cookies faster than room temperature air does and the filling becomes stiff and dense rather than creamy. Cold oatmeal cream pies lose the soft, chewy texture that makes them worth eating.
Freezing
Freezing assembled sandwiches: Place assembled sandwiches in a single layer on a parchment-lined baking sheet and freeze for 1 hour until the filling is firm. Once frozen solid, transfer to a zip-top freezer bag or airtight freezer container with parchment between layers. Freeze for up to 2 months. Thaw at room temperature for 30 to 45 minutes before eating — do not microwave, which makes the filling weep and the cookie go rubbery.
Freezing unassembled cookies: The baked cookies freeze exceptionally well on their own. Layer them in an airtight freezer container with parchment between each layer and freeze for up to 3 months. Thaw at room temperature for 20 minutes, make fresh filling, and assemble. This is the better approach if you want to make ahead — fresh filling on a thawed cookie is noticeably better than a fully assembled sandwich that has been frozen and thawed.
Freezing unbaked dough: Scoop the dough into individual balls, place on a parchment-lined sheet, and freeze until solid — approximately 1 hour. Transfer the frozen dough balls to a zip-top freezer bag and freeze for up to 2 months. Bake from frozen at 350°F (175°C) — add 2 to 3 minutes to the bake time and start checking at 13 minutes. Do not thaw the dough before baking — thawed frozen dough spreads more aggressively than fresh dough.
Serving Suggestion
Serve assembled oatmeal cream pies at room temperature — not cold, not warm. Cold filling is stiff and the sandwich loses the soft, yielding quality that makes the first bite satisfying. Warm cookies make the filling slide. Room temperature is the window where everything works together: the cookie is soft and chewy, the filling is creamy and light, and the whole sandwich holds its shape in your hand without collapsing.
🗒 Luna’s Note: I serve these with a glass of cold whole milk — not oat milk, not almond milk. The fat in whole milk cuts through the sweetness of the marshmallow filling in a way that lighter milks do not. It is the pairing that makes these taste exactly like the childhood version, which is the whole point.
These are the cookie I make when someone asks for something that feels nostalgic but tastes better than they remember. A birthday party where the guest of honor grew up on Little Debbie. A bake sale where you want something immediately recognizable that stops people in their tracks. A Saturday afternoon where the only agenda is making something that fills the kitchen with the smell of toasting oats and brown butter.
Frequently Asked Questions About Oatmeal Cream Pies
What is the filling in oatmeal cream pies made of?
The filling is softened unsalted butter beaten until pale, then combined with sifted powdered sugar, marshmallow fluff, pure vanilla extract, and a pinch of fine sea salt. The marshmallow fluff is what gives the filling its soft, slightly stretchy character — it does not crystallize the way plain buttercream does, keeping the filling creamy at room temperature for days.
How do you keep oatmeal cream pies soft?
Store assembled sandwiches in a rigid airtight container at room temperature — not in the refrigerator, which dries the cookies faster than ambient air. The packed brown sugar in the dough is hygroscopic and draws moisture back into the crumb even after baking, keeping the cookies soft for up to 3 days. A genuinely airtight container is the critical variable — a loosely covered plate dries them within 24 hours. You can find more soft-cookie techniques in my oatmeal raisin cookies article.
Can you freeze oatmeal cream pies?
Yes. Freeze assembled sandwiches in a single layer until the filling is solid, then transfer to a freezer bag with parchment between layers for up to 2 months — thaw at room temperature for 30 to 45 minutes. For better results, freeze the baked cookies unassembled for up to 3 months and make fresh filling on serving day. Unbaked dough balls also freeze well for up to 2 months — bake directly from frozen at 350°F (175°C) and add 2 to 3 minutes to bake time.
Why are my oatmeal cream pie cookies flat?
Almost always a butter temperature problem. Butter above 70°F (21°C) has already partially melted — it releases all at once in the oven before the edges can set. Butter should be 65–68°F (18–20°C): soft enough to leave a clean finger indent, firm enough that the surface looks matte not shiny. A hot pan from a previous batch causes the same problem — let it cool completely before scooping the next batch.
How long do homemade oatmeal cream pies last?
Assembled sandwiches kept in a rigid airtight container at room temperature are best within 3 days — day two is the peak, when the oats have fully hydrated overnight and the flavors have settled. Do not refrigerate for regular storage; the fridge dries the cookies faster than room temperature air does. For longer keeping, freeze unassembled cookies up to 3 months and assembled sandwiches up to 2 months.
Can I make oatmeal cream pies ahead of time?
Yes — and they are actually better made partially ahead. Bake the cookies up to 1 day in advance and store in an airtight container at room temperature — the oat flavor deepens significantly overnight as the oats hydrate fully into the crumb. Make the filling fresh on the day you plan to serve and assemble just before eating or up to 3 hours ahead. Assembled sandwiches held more than a few hours before serving benefit from 20 minutes in the refrigerator to firm the filling.
Can I double this recipe, and does the baking soda double too?
The recipe doubles cleanly for the cookie dough and filling. However, baking soda does not scale linearly beyond a double batch — if you triple or quadruple the recipe, use only 2½ teaspoons (15g) of baking soda for a triple batch rather than the full 3 teaspoons the math would suggest. Too much baking soda at a large scale makes the cookies taste metallic and slightly soapy. Bake time remains the same regardless of batch size — always bake 8 cookies per pan and judge by the visual doneness cue.
More Oatmeal Cookies You’ll Love
If these oatmeal cream pies hit the spot, here are three more oatmeal cookie recipes worth bookmarking:
Oatmeal Chocolate Chip Cookies — the same chewy, brown-sugar-forward oatmeal cookie base loaded with semi-sweet chocolate chips. One bowl, no chilling, ready in under 30 minutes.
Iced Oatmeal Cookies — thick, spiced oatmeal cookies with a crisp vanilla glaze that sets hard on top. The glaze contrast against the chewy cookie underneath is worth making these for on its own.
Oatmeal Raisin Cookies — the classic version, with plump raisins, warm cinnamon, and the same soft, chewy center that makes oatmeal cookies worth eating in the first place.

Oatmeal Cream Pies
Ingredients
Equipment
Method
- Position oven rack in the middle and preheat to 350°F (175°C), then line a light-colored aluminum baking sheet with parchment paper and set aside.
- In a large mixing bowl, use a sturdy silicone spatula to work together the softened butter, packed brown sugar, and granulated sugar with firm pressing and folding strokes for 2 to 3 minutes until smooth, uniform, and slightly lighter in color.
- Add the eggs one at a time, stirring firmly after each addition until fully absorbed with no egg streaks remaining, then stir in the vanilla extract.
- Add the flour, baking soda, cinnamon, and fine sea salt directly to the bowl and fold with slow bottom-to-top strokes for 12 to 15 strokes until just combined with no visible dry flour pockets.
- Add the old-fashioned rolled oats and fold with the same slow strokes for 20 to 25 strokes until evenly distributed — the dough will be very thick and stiff.
- Scoop 1.5 tablespoons (38g) of dough per cookie, roll briefly into a rough ball, and place 2 inches (5cm) apart on the prepared baking sheet — do not flatten.
- Bake at 350°F (175°C) for 11 to 13 minutes until the edges are set and lightly golden and the centers still look slightly underdone and soft — do not wait for the centers to look fully baked.
- Leave cookies on the hot pan for exactly 5 minutes, then transfer to a wire cooling rack and cool completely to room temperature — approximately 45 to 60 minutes — before filling.
- To make the filling, beat the softened butter alone in a stand mixer fitted with the paddle attachment on medium speed for 2 full minutes until pale yellow and increased in volume.
- Add the sifted powdered sugar one cup at a time, mixing on low speed until absorbed then increasing to medium for 1 minute after each addition.
- Add the marshmallow fluff, vanilla extract, and pinch of fine sea salt and beat on medium speed for 1 to 2 minutes until the filling is smooth, glossy, and holds a soft peak.
- Pair cookies by size, flip half bottom-side up, and pipe or spread 2 to 2.5 tablespoons (38–45g) of filling onto each base cookie leaving a ¼ inch (6mm) border from the edge.
- Press the top cookie down firmly but gently until the filling reaches the edge all the way around, then refrigerate assembled sandwiches for 20 minutes before serving to allow the filling to firm slightly.