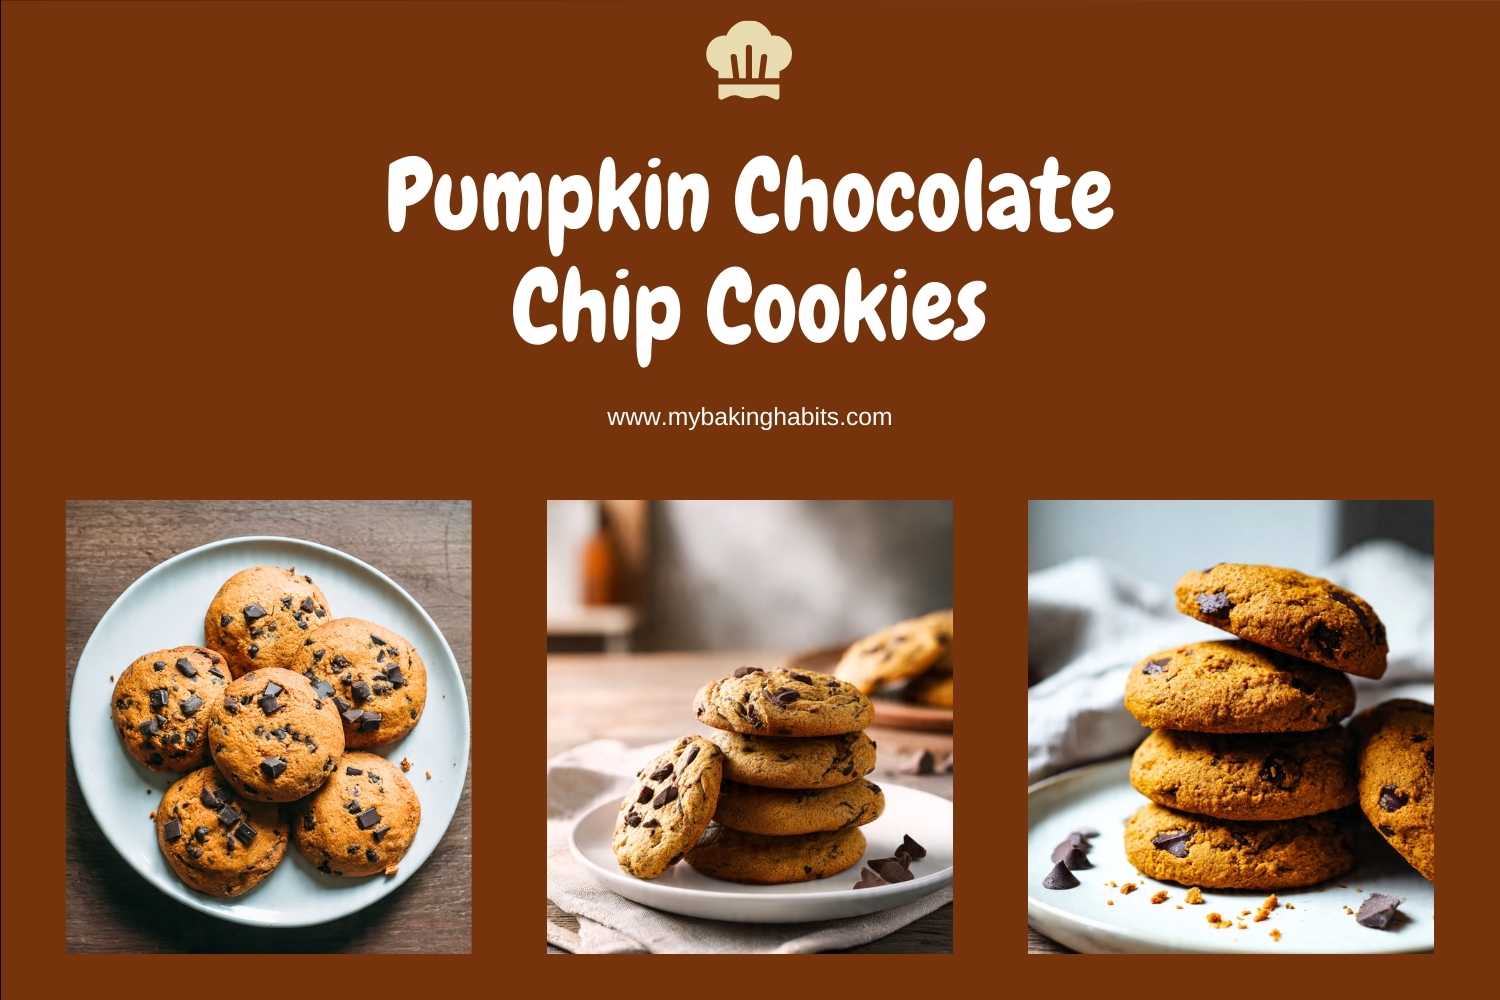
Soft & Spiced Pumpkin Chocolate Chip Cookies
The thing most people get wrong about pumpkin chocolate chip cookies is the doneness cue. There is no golden edge, no glossy crackle, no color change that tells you they are done. The surface stays matte and the dome stays puffy from the moment they go in until the moment they come out — and they look exactly the same at 9 minutes as they do at 13. I have pulled batches too early because they looked right at 10 minutes. I have also left batches in two minutes too long for the same reason. The difference between the two is everything.
I tested the spice ratio across seven batches specifically — equal amounts of all four spices produced something that tasted like potpourri. The ratio in this recipe is the one where each spice does its job without announcing itself.
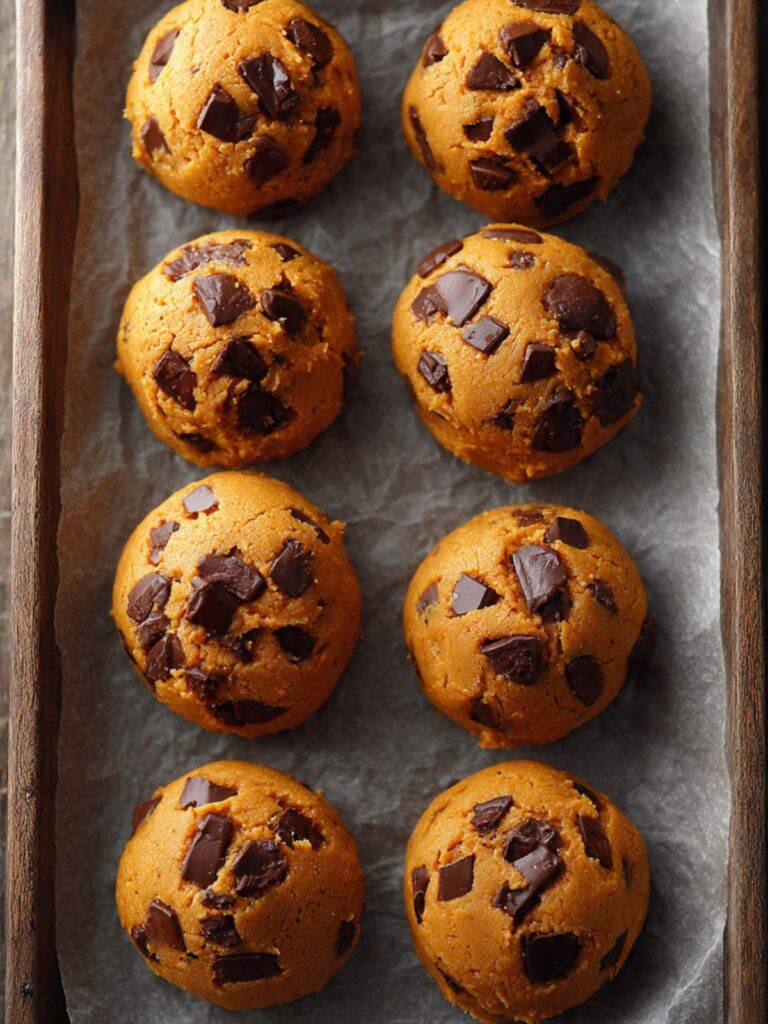
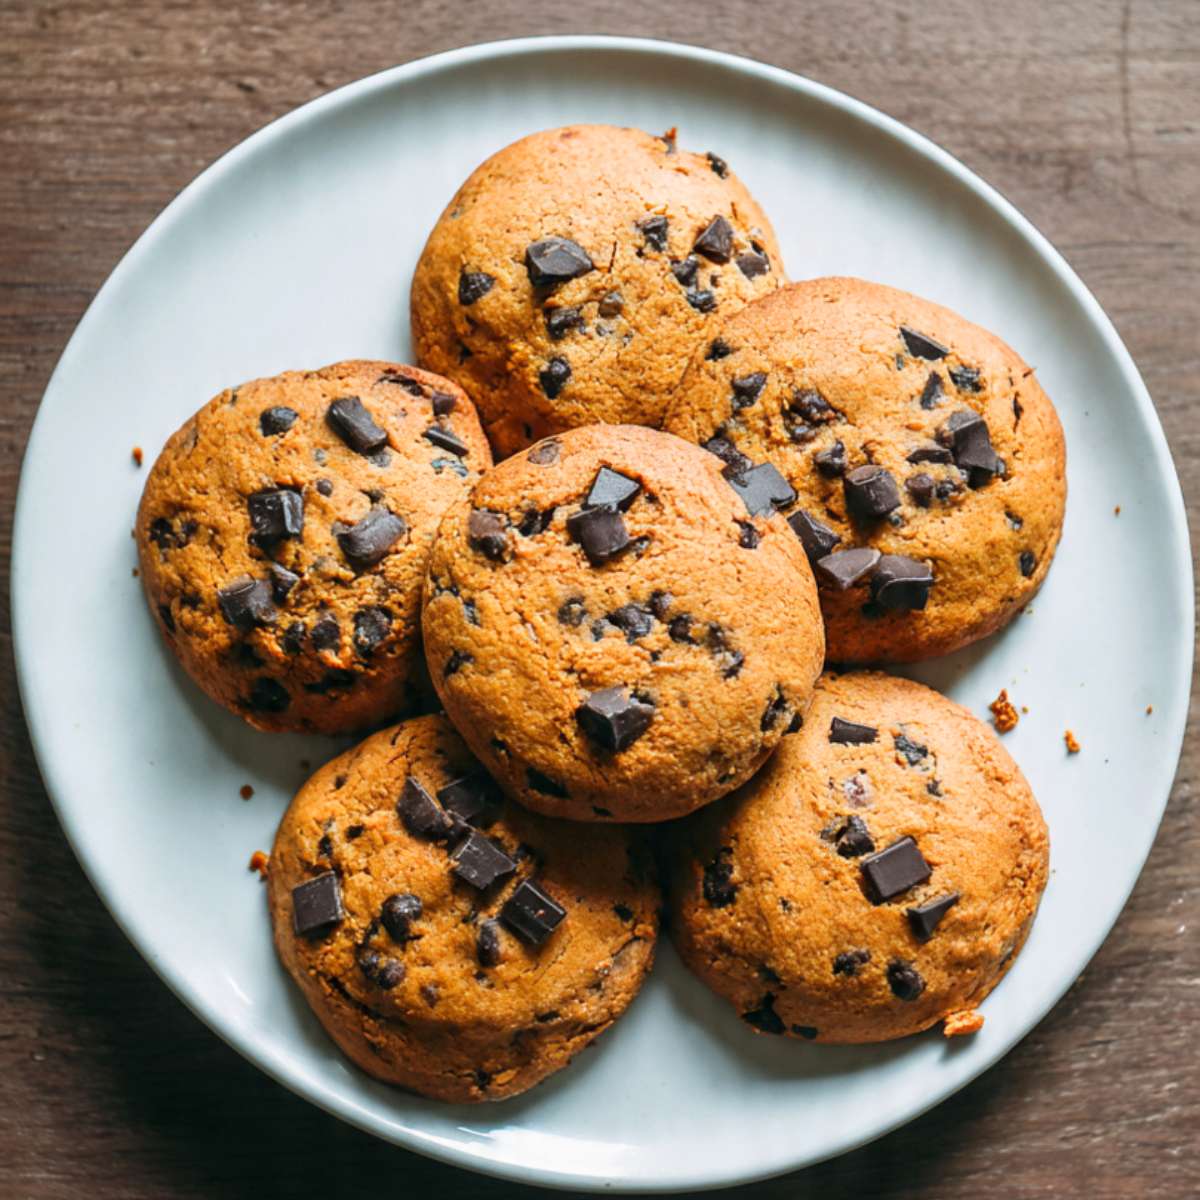
I have tested this recipe across eleven batches, adjusting pumpkin ratio, spice balance, fat type, and chilling time. The version here produces the thick, domed, cakey cookie visible in the photos above — deep amber from the pumpkin and warm spices, with large chocolate chunks that stay partially melted inside and proud on the surface.
The chilling decision took four tests on its own. The unchilled batch spread noticeably flatter and the dome never held. Thirty minutes was the minimum that made a consistent difference — longer than that produced no additional height. I kept the 30-minute chill and cut it from there.
🗒 Luna’s Note: I learned to pull pumpkin cookies by the edges, not the top. The moment the outer edge of the base looks just set — not golden, just defined — they are done. The center will look underdone. It is not.
These cookies are soft all the way through. The pumpkin keeps every layer of the crumb moist — the edges do not crisp, the bottom does not brown, and the center does not firm up into a chewy core the way a butter-only cookie does. What you get instead is a uniformly tender, spiced cookie with dark chocolate chunks that pool into glossy pockets when you break one open. That texture is not a compromise. It is the point.
No chilling required — but chilling for 30 minutes produces a noticeably taller dome and a less sticky dough that is easier to portion. I have baked both back to back. The chilled batch is better. I keep the chill in my version.
| Yield | 16 cookies |
| Serving size | 1 cookie |
| Prep time | 15 minutes + 30 minutes chilling |
| Bake time | 11–13 minutes |
| Total time | 56–58 minutes |
| Difficulty | Easy |
| Nutrient | Amount |
|---|---|
| Calories | ~187 |
| Fat | ~8g |
| Carbohydrates | ~27g |
| Protein | ~2g |
| Sugar | ~16g |
| Sodium | ~112mg |
Ingredients & Tools for Pumpkin Chocolate Chip Cookies Recipe
For the Cookies
- 2 cups (240g) all-purpose flour, spooned into the measuring cup and leveled — not scooped directly from the bag
- ¾ cup (150g) plain white granulated cane sugar
- ½ cup (100g) packed light brown sugar
- ½ cup (113g) unsalted butter, melted and cooled to room temperature — not hot
- 1 cup (245g) canned pumpkin puree — 100% pure pumpkin, not pumpkin pie filling
- 2 large eggs, room temperature
- 1½ teaspoons (7ml) pure vanilla extract — not imitation
- 1 teaspoon (4g) baking soda, checked for freshness
- ½ teaspoon (3g) fine sea salt — not table salt, not kosher salt
- 1½ teaspoons (4g) ground cinnamon — smell before using, should be strong and warm
- ½ teaspoon (1.5g) ground ginger — smell before using, sharp and bright
- ¼ teaspoon (0.5g) ground nutmeg — freshly grated preferred; pre-ground loses potency within 3 months
- ¼ teaspoon (0.5g) ground cloves — use sparingly; a strong clove smell on opening is correct
- 1 cup (170g) dark chocolate chunks, 60–72% cacao — such as Guittard Extra Dark or Valrhona Caraïbe, roughly chopped from a bar if pre-made chunks are unavailable
Before You Start
Oven rack: Position it in the middle of the oven before preheating. Middle rack ensures even heat from top and bottom elements. Cookies baked on the top rack overbrown on top; bottom rack overbrowns the base before the center sets.
Butter: I use Kerrygold unsalted butter in every recipe on this site. The higher butterfat content (82% versus the standard American 80%) produces a slightly richer result. Any quality unsalted butter works here — the fat percentage difference is noticeable but not dramatic in a melted-butter cookie. To confirm the butter has cooled enough: hold the back of a clean spoon against the surface of the melted butter for 3 seconds. It should feel neutral — not warm, not cold. If it feels warm at all, give it 5 more minutes.
Spices: Open each spice jar and smell it before the batter goes together. Ground spices lose their volatile oils within 3–6 months of opening — a faint or dusty smell means the cookie will taste flat no matter how well the rest of the recipe is executed. Cinnamon should smell warm and intense. Ginger should have a sharp, slightly hot edge. Cloves should smell almost medicinal. If any spice smells like nothing, replace it before baking.
Eggs: Pull eggs from the fridge 30 minutes before mixing. Cold eggs added to melted butter cause the fat to seize and the batter to look greasy and broken. A 10-minute warm water bath works as an emergency shortcut.
Pumpkin puree: Use only 100% pure canned pumpkin puree — Libby’s is the most consistent. Pumpkin pie filling contains sugar, spices, and thickeners already added and will throw off every ratio in this recipe. Do not drain or blot the pumpkin — the moisture is part of the recipe structure.
Flour: Spoon flour into the measuring cup and level with a straight edge. Scooping directly from the bag compacts the flour by up to 30%, which produces dry, dense cookies that do not dome correctly.
Brown sugar: Packed brown sugar that has hardened in the bag cannot be measured accurately — a hardened lump pressed into a cup measures completely differently than properly soft, packable sugar. If yours has hardened: lay a damp paper towel over the surface of the sugar in the bag and microwave in 20-second increments until pliable. Measure immediately while still soft.
Baking soda: Drop ½ teaspoon into a small bowl of hot water with a few drops of white vinegar — it should bubble aggressively within 2 seconds. Weak or no bubbles means it is expired. Replace before baking. Expired baking soda produces flat cookies with no dome and a gummy, compressed crumb.
Gram weights are more reliable than volume. A kitchen scale set to grams is the most accurate way to measure every ingredient here — especially flour and pumpkin, where volume measurements vary significantly. The gram weights in this recipe are the numbers I tested with.
Chilling: The dough is sticky and soft directly after mixing — this is correct. Chill the covered bowl for 30 minutes before scooping. Skipping the chill produces flatter cookies with less defined domes. The chill also makes the dough easier to handle and portion evenly.
No mixer needed. This recipe comes together with a large mixing bowl and a silicone spatula. Electric mixer will overwork the dough and develop the gluten, which tightens the crumb and works against the cakey texture the pumpkin produces.
Necessary Tools
- Large mixing bowl (at least 4-quart)
- Silicone spatula
- Kitchen scale (recommended)
- Light-colored aluminum half-sheet baking pan — not dark non-stick
- Parchment paper
- 2-tablespoon cookie scoop (or two spoons)
- Wire cooling rack
- Oven thermometer (recommended)
How to Make Pumpkin Chocolate Chip Cookies
This is a one-bowl, no-mixer method. Everything comes together with a large bowl and a silicone spatula. The steps follow the wet-first sequence: fats and sugars combined, eggs added, pumpkin folded in, dry ingredients last.
Step 1: Preheat the Oven and Prepare the Pan
Position a rack in the middle of your oven and preheat to 350°F (175°C). Line your light-colored aluminum half-sheet baking pan with parchment paper — do not grease it, do not use foil. Parchment creates a non-stick barrier that also insulates the cookie base from direct pan heat. Foil conducts heat directly into the bottom of the cookie and overbrowns it before the center sets. A dark non-stick pan will do the same — if that is the only pan you have, reduce the oven temperature by 25°F (15°C) and start checking at 9 minutes.
Most home ovens run 15–25°F (8–14°C) hotter or cooler than the dial reads. If you have an oven thermometer, confirm the actual temperature before the pan goes in. A 25°F error in a pumpkin cookie means the difference between a perfectly domed, moist center and a dry, overbaked crumb that no amount of cooling will fix.
The oven must be fully preheated before the pan goes in — not just signaled ready. Give it 10 minutes after the preheat tone.
Your pan is ready — set it aside and move to the batter.
Step 2: Whisking the Wet Ingredients Until Smooth and Combined
In your large mixing bowl, whisk together your ½ cup (113g) melted and cooled unsalted butter, ¾ cup (150g) granulated sugar, and ½ cup (100g) packed light brown sugar. Whisk briskly for about 30 seconds until the sugars are fully coated in the butter and the mixture looks uniform — it will be thick, grainy, and pale amber at this point.
The brown sugar is what keeps these cookies soft for days after baking — it is hygroscopic, meaning it draws moisture from the air and holds it in the crumb. The granulated sugar controls the slight surface definition on the edges. Both are doing different jobs, and neither is interchangeable with the other here.
Add your 2 large room-temperature eggs one at a time, whisking each one fully into the mixture before adding the next. Then add your 1½ teaspoons (7ml) pure vanilla extract and whisk to combine. Add your 1 cup (245g) canned pumpkin puree and whisk until the batter is fully uniform — about 20 strokes.
The vanilla does not compete with the spices here — it rounds the flavor in the background and softens the raw egg note in the batter. Pure extract only; imitation vanilla has a synthetic edge that reads as artificial against the warm spice profile.
Do not add cold eggs to warm butter — the fat seizes around the cold protein and the batter will look broken and greasy. If this happens, the batter may still bake correctly, but the texture will be tighter and less tender than it should be.
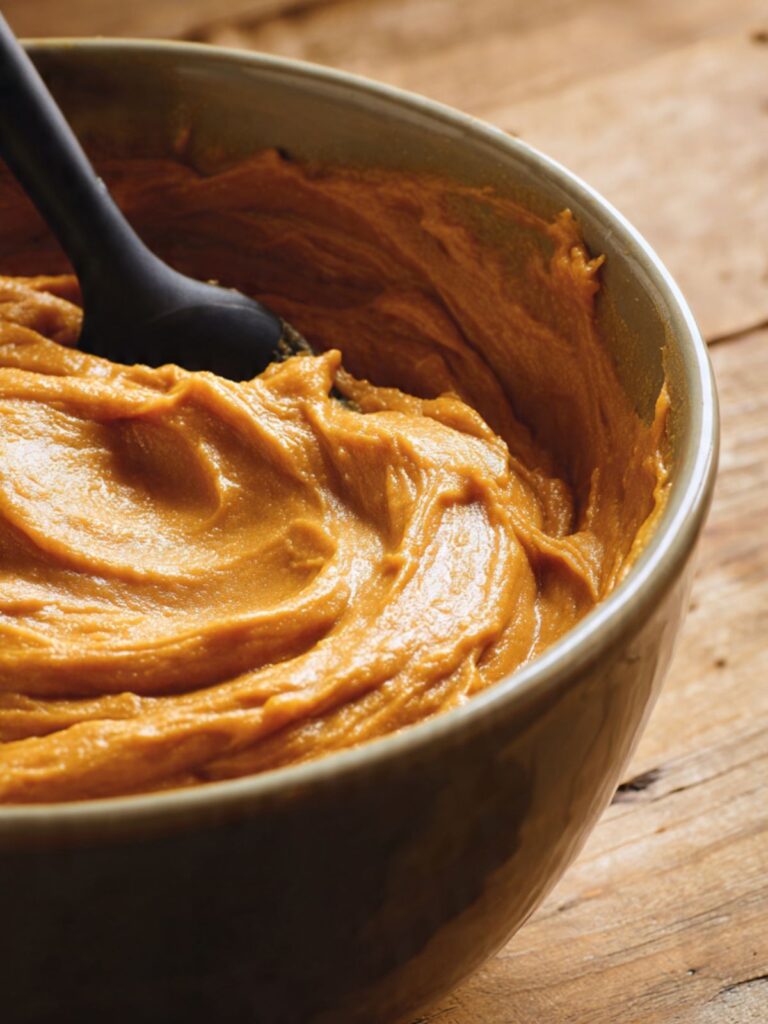
The wet batter should look smooth, deep orange, and glossy — no streaks of egg, no butter pooling at the edges of the bowl, no lumps of unmixed sugar at the bottom.
The wet base is ready — add the dry ingredients next and work quickly from this point.
Step 3: Adding the Dry Ingredients Without Overworking the Dough
Directly into the same bowl, add your 2 cups (240g) all-purpose flour, 1 teaspoon (4g) baking soda, ½ teaspoon (3g) fine sea salt, 1½ teaspoons (4g) ground cinnamon, ½ teaspoon (1.5g) ground ginger, ¼ teaspoon (0.5g) ground nutmeg, and ¼ teaspoon (0.5g) ground cloves. Switch from the whisk to your silicone spatula.
Fold the dry ingredients into the wet using slow, deliberate strokes from the bottom of the bowl upward — not stirring in circles. Count your strokes. Stop the moment no dry flour streaks remain — approximately 15 to 20 strokes. The baking soda reacts with the natural acidity in the pumpkin puree and brown sugar to create a gentle lift — this is what produces the domed profile visible in the stacked cookie photos. Overworking the dough after the flour goes in develops gluten, which tightens the crumb and flattens the dome.
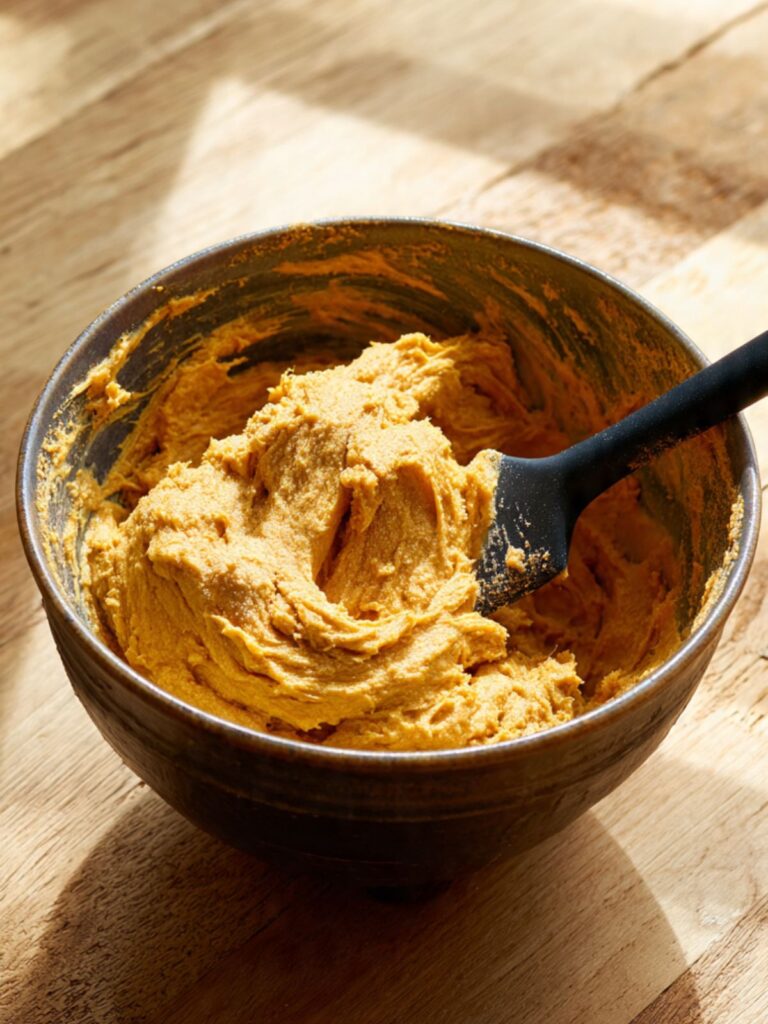
The dough will look very soft, thick, and sticky. This is correct — pumpkin adds significant moisture, and the dough at this stage is not scoopable without chilling first.
Do not add more flour to compensate for the stickiness — the ratio is intentional. Extra flour produces dry, dense cookies that lose the cakey texture entirely.
The finished dough should look like a thick, deeply orange, sticky batter — uniform color throughout, no visible dry pockets, no white flour streaks.
Cover the bowl with plastic wrap and move directly to the chill step.
Step 4: Chilling the Dough for a Taller Dome
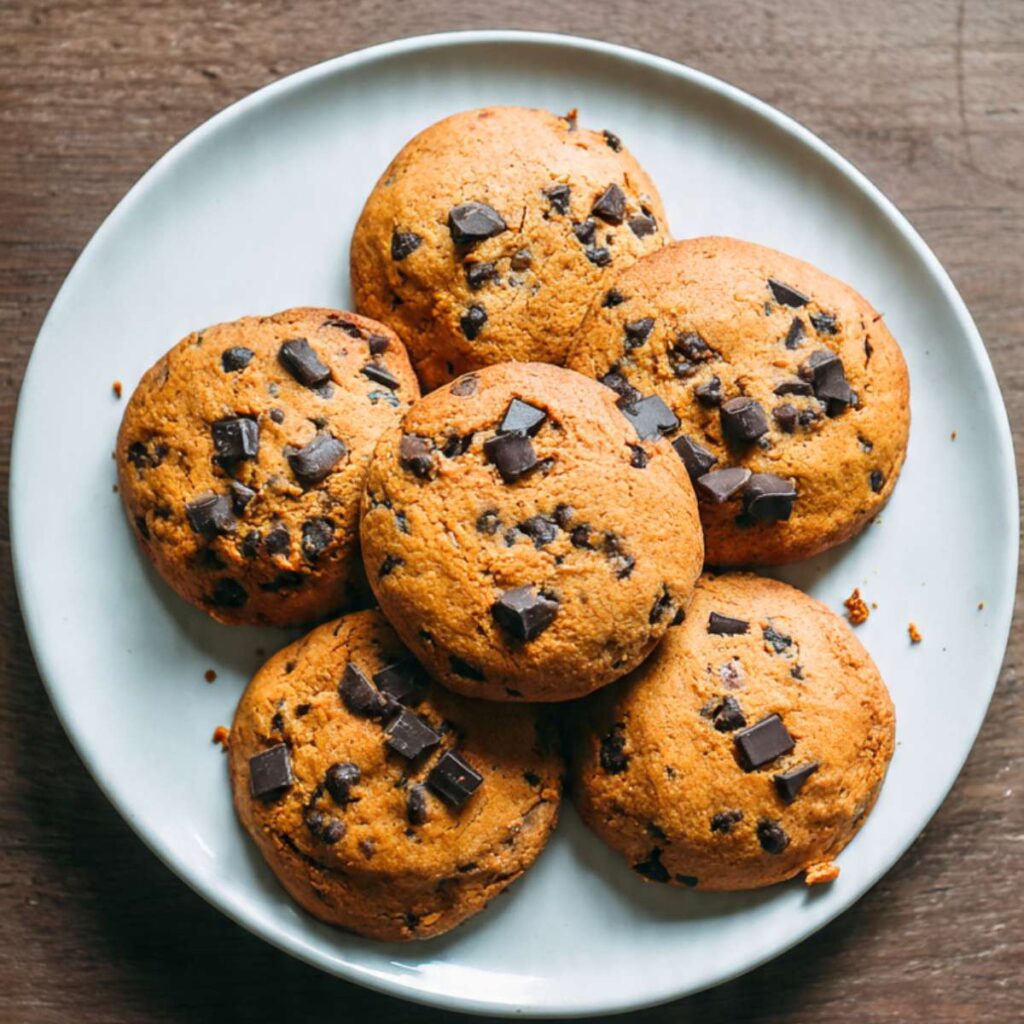
Press plastic wrap directly onto the surface of the dough and refrigerate for 30 minutes. Do not skip this step if you want the thick, domed result visible in the overhead photo showing six cookies on the plate — unchilled dough spreads significantly more in the oven and the dome flattens before the structure sets.
The chill firms the butter back up and tightens the overall dough consistency, which means the cookie holds its height in the oven long enough for the eggs and flour to set the structure. It also makes the dough much easier to scoop cleanly — at room temperature it sticks to everything.
The dough can be chilled up to 48 hours ahead. If chilling longer than 30 minutes, let it sit at room temperature for 10 minutes before scooping — very cold dough is stiff and harder to portion evenly.
After 30 minutes, the dough should feel noticeably firmer — still soft but no longer slack. It should hold a shape briefly when scooped before slowly relaxing.
Set up your pan and scoop the dough while it is cold.
Step 5: Folding in the Chocolate Chunks Without Overworking the Dough
Using your silicone spatula, add ¾ cup (128g) of your dark chocolate chunks directly to the dough. Reserve the remaining ¼ cup (42g) in a small bowl — these go on top of the dough balls before baking and are what produce the visible glossy chocolate on every finished cookie surface.
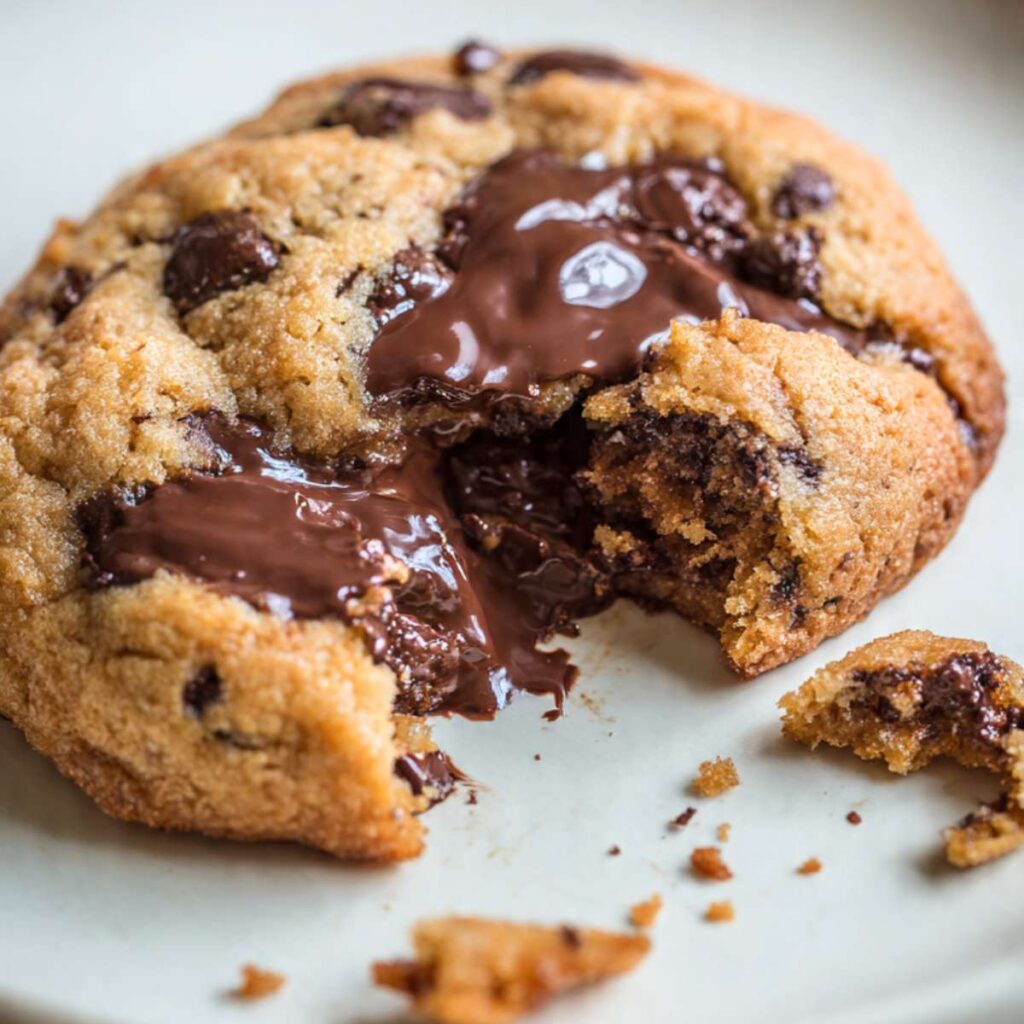
Fold the chunks in using the same slow, bottom-upward strokes from the previous step. Count 5 to 6 strokes — no more. The dough is already mixed and needs only enough movement to distribute the chocolate. Every stroke past that point develops gluten and tightens the crumb. The chunks do not need to be evenly distributed — irregular pockets of chocolate throughout the dough are correct and produce the uneven, melted interior pools visible in the broken-cookie close-up.
Do not stir in circles and do not press the spatula into the dough — fold from underneath, bringing the bottom of the dough up and over the chunks.
The dough at this point should look thick, sticky, and deeply orange with dark chocolate chunks visible throughout. Some chunks will be partially submerged, some will be sitting proud on the surface of the dough. Both are correct.
Cover and move directly to chilling — the reserved chunks go on last, right before the pan enters the oven.
Step 6: Baking Until the Edges Are Just Set — Not Until They Look Done
Slide the pan onto the middle rack and bake at 350°F (175°C) for 11 to 13 minutes. Start checking at 11 minutes. This is the most important step in the entire recipe — read it before the pan goes in, not while you are standing at the oven door.
Pumpkin cookies do not give you the visual doneness cues that butter cookies do. The surface will not turn golden. The dome will not collapse. The edges will not spread into a lacy ring. The cookies will look almost identical at 9 minutes and at 13 minutes — which is exactly how batches get overbaked.
Color will range from golden-brown to deep amber depending on your oven’s calibration — both are correct. The color cue is not the doneness signal. Use the edge, not the top. The correct pull cue is the edge of the base, not the top surface. Look at the bottom edge where the cookie meets the parchment. The moment that edge looks just set and defined — no longer wet or raw-looking — pull the pan. The center will look underdone and puffy. That is correct. Carryover heat from the hot pan will finish setting the center in the next 5 minutes off the heat.
🗒 Luna’s Note: I set a second timer for 5 minutes the moment the pan comes out. That 5-minute window on the hot pan is not optional — it is where the center finishes baking without the oven drying out the exterior.
Do not open the oven before 10 minutes — the structure is still setting and a sudden temperature drop will deflate the dome before it has a chance to hold.
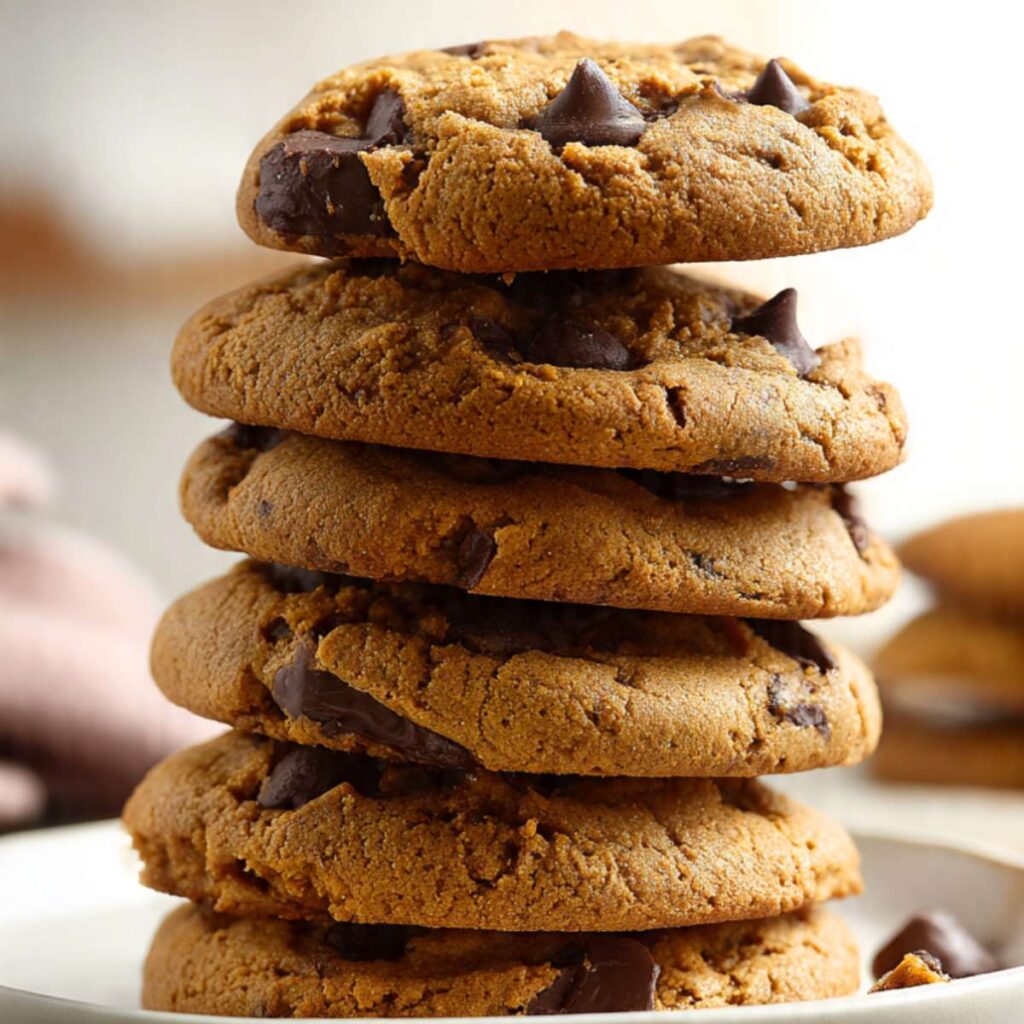
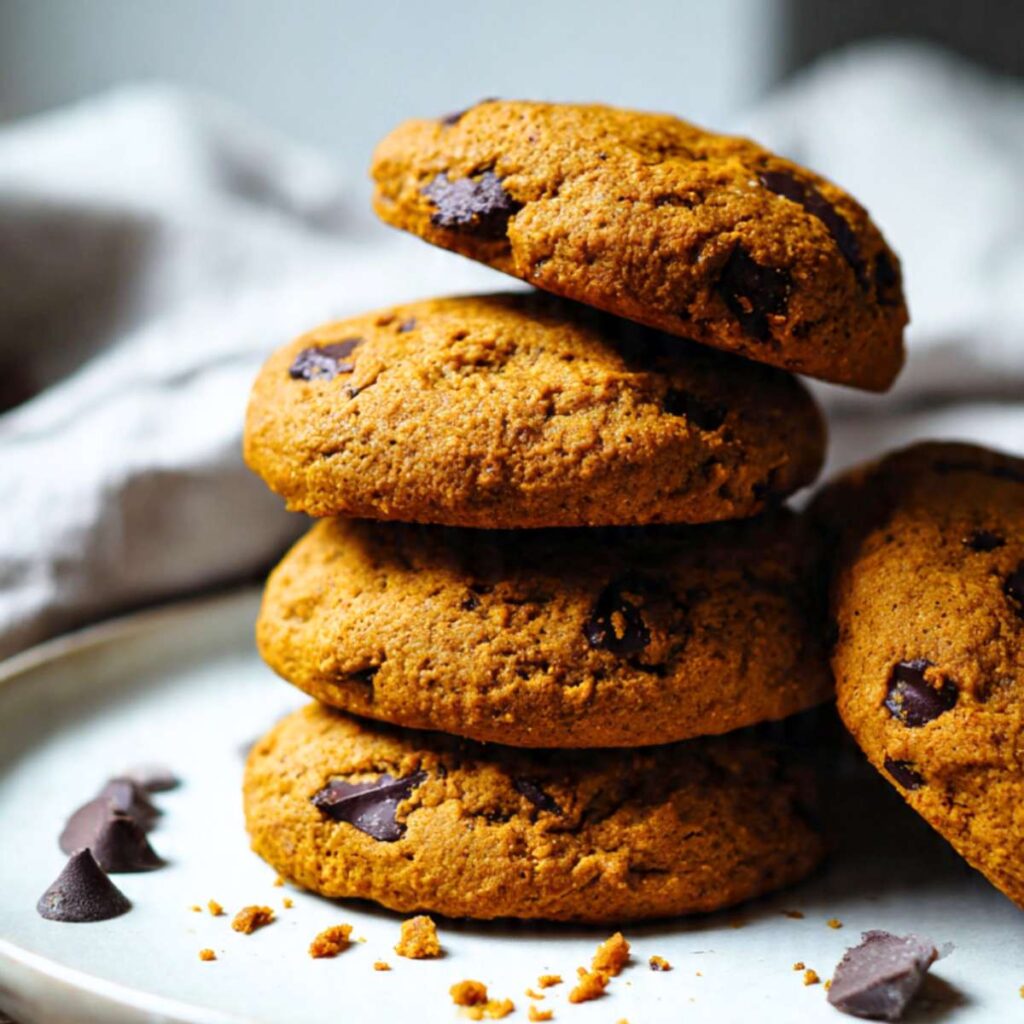
At the correct pull point, the edges of each cookie look just defined and set, the tops are matte and domed, and the centers look slightly underdone and puffy — exactly as shown in the stacked cookie photo. If the tops have started to look dry and the dome has begun to flatten, they have gone 1 to 2 minutes too long.
Pan out — leave them exactly where they are for the next step.
Step 7: Cooling on the Pan — Where the Centers Finish
Leave the cookies on the hot pan for exactly 5 minutes after pulling from the oven. Do not move them, do not slide the parchment off the pan, do not transfer them to a rack yet. The pan continues to conduct heat into the cookie base during this window — this carryover heat is what sets the centers without the oven drying out the exterior. Moving them before 5 minutes breaks the structural base. Waiting longer than 8 minutes starts to compress and dry the bottoms.
Set a timer. Do not estimate.
After exactly 5 minutes, transfer the cookies — still on the parchment — to a wire cooling rack. Leave them undisturbed for at least 10 minutes before eating. The chocolate chunks on top will still be partially melted and glossy at this point, exactly as visible in the broken-cookie close-up showing pools of dark chocolate across the interior.
After the full 5 minutes on the pan followed by 10 minutes on the rack, the cookies should feel set at the base, soft and tender through the center, and the chocolate chunks should have firmed from glossy-liquid to soft and yielding — not fully solid, not still pooling.
These are ready to eat now, or transfer to a storage container once fully cooled.
The Science Behind Pumpkin Chocolate Chip Cookies
Why These Cookies Never Look Done When They Are Done
I kept overbaking my first four batches because I was waiting for a visual cue that never came. Butter cookies tell you when they are done — the edges spread, the surface turns golden, the center loses its raw sheen. Pumpkin cookies do none of those things. The surface stayed matte at 9 minutes and at 14 minutes. The dome never collapsed. I thought something was wrong with my oven. It was not my oven.
What I did not understand was that pumpkin puree fundamentally changes how heat moves through the dough. Pumpkin is approximately 90% water. That water absorbs heat and converts to steam during baking — a process called evaporative cooling — which keeps the internal temperature of the cookie lower for longer than a fat-heavy butter dough would allow. The surface temperature rises and the exterior sets, but the interior stays cooler and wetter far into the bake time. The result is a cookie that looks underdone at the correct pull point every single time, because the moisture inside is actively resisting the heat the oven is delivering.
The visible evidence is the dome. In a standard butter cookie, the dome collapses as the fat melts and the structure spreads. In a pumpkin cookie, the dome holds because the pumpkin’s water content creates steam pressure that supports the structure from inside. That sustained dome you can see in every photo above is not a sign of underbaking. It is proof that the pumpkin is doing exactly what it is supposed to do. Pull by the edge, not the top. The edge tells the truth.
How Baking Soda Creates the Lift Without the Crackle
Pumpkin puree is mildly acidic — its pH sits between 5.0 and 5.5. Baking soda is a base. When the two meet in the dough, they react to produce carbon dioxide bubbles, which expand during baking and create the internal lift responsible for the cakey, open crumb visible when a cookie is broken open. This is the same leavening reaction that works in banana bread and carrot cake — acidic wet ingredient plus baking soda produces lift without needing an external acid like buttermilk.
What pumpkin does not produce is the surface crackle associated with high white-sugar, high-heat cookies. Crackle forms when the surface of a dough sets and dries quickly while the interior is still expanding — the skin cracks under pressure. Pumpkin’s moisture keeps the surface hydrated and flexible throughout the bake, which is why the exterior finish on these cookies is uniformly matte rather than crackled or shiny. This is not a failure of technique. It is the correct outcome of the chemistry.
The brown sugar in this recipe reinforces the effect. Brown sugar is hygroscopic — it draws ambient moisture from the air and holds it in the crumb. This is why these cookies are still soft on Day 2 and Day 3 in a way that a high-white-sugar cookie would not be. The combination of pumpkin moisture plus brown sugar hygroscopicity is what produces the sustained softness this recipe is built around. If you are looking for a pumpkin cookie with a crackled, slightly crisp exterior, you would need to reduce the pumpkin, increase the white sugar ratio, and raise the baking temperature — at which point it is a different cookie entirely.
Why the Spice Balance Matters More Than the Amount
The deep amber color visible in every photo is not just pumpkin — it is the result of the Maillard reaction working on the sugar and protein in the dough at 350°F (175°C), accelerated by the presence of warm spices. Cinnamon, ginger, nutmeg, and cloves each contribute differently: cinnamon provides the dominant warm base note, ginger adds brightness and a faint heat, nutmeg contributes a subtle floral depth, and cloves add an intensity that amplifies the other three without being identifiable on its own.
The ratio matters more than the total amount. A cookie made with twice as much cinnamon and nothing else tastes flat and one-dimensional. A cookie with balanced spices at lower total volume tastes complex and layered. I tested this recipe with and without the cloves specifically — the version without them tasted like something was missing even though I could not identify cloves individually in either batch. That is how background spices work. They do not announce themselves. They make everything else taste more like itself. You can find the same layered spice approach in my pumpkin chocolate chip cookie bars — a bar version of the same flavor profile that behaves differently because of the pan format.
Pumpkin Chocolate Chip Cookies Troubleshooting & Pro-Tips
Common Mistakes
The wrong pumpkin product
Symptom: Cookies are too sweet, over-spiced, and the texture is gummy or uneven — the spice balance tastes off and the centers do not set correctly.
Cause: Pumpkin pie filling was used instead of 100% pure pumpkin puree. Pumpkin pie filling contains added sugar, spices, and thickeners — all of which throw off every ratio in this recipe simultaneously.
Fix: There is no fix once the batter is mixed with pie filling — the sugar and thickener levels are too far off to correct. Discard and start again with pure pumpkin puree.
Prevention: Read the label before opening the can. “100% Pure Pumpkin” and “Pumpkin Pie Filling” are stocked side by side and the packaging looks nearly identical. Libby’s pure pumpkin has one ingredient: pumpkin. If the ingredient list has more than one item, it is the wrong can.
The wrong pan
Symptom: Cookie bottoms are dark brown to burnt before the centers are set, or cookies spread flat and lose their dome entirely.
Cause: A dark non-stick pan was used. Dark pans absorb significantly more radiant heat than light-colored aluminum and transfer it directly into the cookie base — the bottom overbakes before the interior has time to set. The dome collapses because the base structure fails before the top can hold it.
Fix: If the bottoms are already dark, the batch is salvageable for eating but not for photos. Double-pan for the next batch — stack two light-colored pans together to create an insulating air gap.
Prevention: Use a light-colored aluminum half-sheet pan lined with parchment. If you only own dark pans, reduce the oven temperature by 25°F (15°C) and start checking at 9 minutes.
Cookies spreading flat and losing the dome
Symptom: Cookies spread into flat discs during baking — the dome never forms or collapses within the first few minutes in the oven.
Cause: The dough was not chilled before baking, or the butter was still warm when it went into the batter. Warm fat cannot hold the dough structure long enough for the eggs and flour to set — the cookie spreads before the structure locks in.
Fix: The batch is already baked — flat pumpkin cookies still taste correct, they just lack the thick profile. For the next batch, chill the dough for the full 30 minutes and confirm the melted butter was cooled to room temperature before mixing.
Prevention: Touch the melted butter before it goes in — it should feel neutral against your wrist, not warm. After mixing, cover and refrigerate the dough for at least 30 minutes before scooping.
Cookies are dry and dense instead of soft and cakey
Symptom: The finished cookies feel dry and compact — the crumb is tight and the texture is closer to a dense biscuit than a soft, moist cookie.
Cause: Too much flour, the dough was overmixed after the flour was added, or the cookies were overbaked by even 2 minutes. Pumpkin cookies have very little margin for overbaking — the moisture that creates the soft texture evaporates quickly past the correct pull point.
Fix: Overbaked cookies that are already dry cannot be rescued to their original texture. Press a cooled cookie into the bottom of a ramekin, top with a scoop of vanilla ice cream and a drizzle of warm maple syrup or a spoonful of spiced whipped cream. The dense crumb becomes an asset against the cold cream
Prevention: Spoon and level the flour rather than scooping, stop folding the moment no dry streaks remain, and pull the pan at 11 minutes on the first batch to calibrate your oven.
The cookies look completely underdone when pulled
Symptom: The cookies look raw and puffy at 11–13 minutes — the tops are domed and matte and the centers look unset. This does not feel like the correct pull point.
Cause: This is correct. Pumpkin’s high water content keeps the surface temperature lower than a standard cookie and the visual doneness cues never arrive. The matte domed surface at the correct pull point is indistinguishable from an underdone cookie to anyone baking pumpkin cookies for the first time.
Fix: If after the full 5-minute pan rest and 10-minute rack rest the center still feels wet and collapses when pressed, the oven temperature was likely lower than stated. Return the cookies to a 325°F (165°C) oven on the same pan for 4 to 5 minutes — this finishes the interior without overbaking the base.
Prevention: Read the baking step before the pan goes in. Set two timers — one for 11 minutes in the oven, one for 5 minutes on the pan after pulling.
Leavening failure — cookies bake flat with no lift
Symptom: Cookies spread completely flat with no dome, dense crumb, no internal lift — the texture is gummy and compressed rather than cakey and open.
Cause: Expired or inactive baking soda. Baking soda loses potency over time — especially once opened — and will not react with the pumpkin’s acidity sufficiently to produce lift.
Fix: The batch cannot be corrected once baked. Test your baking soda before the next batch: add ½ teaspoon to 2 tablespoons of hot water with a few drops of white vinegar — it should bubble immediately and vigorously. No bubbles means it is expired.
Prevention: Replace baking soda every 3 months once opened. Write the opening date on the container.
High altitude and humidity adjustments
At high altitude (above 3,500 feet / 1,067m): Reduce baking soda to ¾ teaspoon, increase flour by 2 tablespoons (15g), and increase oven temperature to 375°F (190°C). Leavening acts more aggressively at altitude and will over-expand the dome before the structure sets — reducing it prevents collapse. In high humidity: The dough will be stickier than usual and will spread more easily. Extend the chill time to 45 minutes and work quickly when scooping — warm hands in a humid kitchen soften the dough fast.
Expert Pro-Tips
Press chunks on top immediately before baking, not after mixing. Chocolate chunks folded into the dough get partially buried as the cookie bakes and swells. Pressing 3 to 4 extra chunks directly onto each dough ball right before the pan goes in is the only way to guarantee visible, glossy chocolate on the surface of every finished cookie — exactly as shown in the photos. It takes 20 seconds per pan and makes every batch look intentional.
Use a cookie scoop and weigh the first portion. Pumpkin dough is too soft and sticky to portion accurately by eye or with two spoons. A 2-tablespoon scoop produces consistent portions, and weighing the first scoop at 45g calibrates the rest of the batch. Inconsistent portions mean some cookies overbake while others underbake on the same pan — pumpkin’s narrow bake window makes this worse than it would be in a forgiving butter cookie.
Bake one test cookie first. Before committing the full pan, bake a single cookie in the center of the oven and use it to calibrate your exact oven temperature and pull time. Every oven behaves differently with pumpkin cookies specifically — one test cookie costs 12 minutes and saves the whole batch.
Toast the spices briefly in a dry pan before adding them to the dough. 60 seconds over medium heat, stirring constantly, until they smell intensely fragrant. Toasting volatilizes the aromatic compounds in the spices and deepens the flavor in the finished cookie in a way that raw spices cannot replicate. Cool them for 5 minutes before adding to the wet batter.
How to Store Pumpkin Chocolate Chip Cookies
Room Temperature
Store fully cooled cookies in a hard-sided lidded container — not a zip-lock bag. Zip-lock bags compress the cookies under their own weight and flatten the dome that the chill and bake created. Layer parchment paper between each row if stacking. Keep the container away from direct sunlight and heat sources.
At room temperature, these cookies stay soft and moist for up to 4 days. The pumpkin and brown sugar work together to retain moisture better than a standard butter cookie — Day 2 and Day 3 are genuinely as good as Day 1. By Day 4 the texture is still acceptable but the moisture starts to make the base slightly sticky on the underside. Day 5 is the cutoff — past that, the pumpkin moisture begins to affect the texture in a way that feels wet rather than soft.
Do not store with other cookies — pumpkin cookies release enough moisture to soften surrounding baked goods.
Refrigerator
Refrigeration is not necessary for these cookies but it extends shelf life to 7 days. The cold firms the crumb significantly — refrigerated pumpkin cookies feel denser and more compact than room-temperature ones. If you refrigerate them, pull them out 20 minutes before eating and let them come back to room temperature. The texture recovers fully.
Do not refrigerate in an open container or loosely covered — the fridge will dry the surface and the cookies will lose the matte, moist exterior that makes them what they are.
🗒 Luna’s Note: I refrigerate the second half of a batch if I know they will not be eaten within 3 days. The texture difference after coming back to room temperature is minimal — close enough that I prefer the extended shelf life over the marginal texture compromise.
Freezer — Baked
Freeze baked, fully cooled cookies individually wrapped in plastic wrap first, then transferred to a zip-lock freezer bag or hard-sided freezer container. The individual wrap prevents freezer burn on the surface and keeps the chocolate chunks from absorbing off-flavors from the freezer environment.
Frozen baked cookies keep for up to 2 months. Thaw at room temperature for 45 minutes to 1 hour — do not microwave to thaw, it makes the crumb gummy and the chocolate chunks seize. After thawing, the texture is 90% of fresh — the pumpkin crumb holds up to freezing better than most cookies because its moisture content is high enough to survive the freeze-thaw cycle without drying out.
Freezer — Unbaked
Scoop the chilled dough into balls, press the extra chocolate chunks on top, and place on a parchment-lined pan. Freeze until solid — approximately 1 hour — then transfer the frozen dough balls to a zip-lock freezer bag. Label with the date and the bake temperature.
Unbaked frozen dough keeps for up to 3 months. Bake directly from frozen at 350°F (175°C) — add 2 to 3 minutes to the bake time and use the same edge-set pull cue. Do not thaw before baking — thawed dough balls spread more than either fresh-chilled or fully frozen dough.
This is the most practical make-ahead method for this recipe. Frozen dough balls bake into cookies that are indistinguishable from a fresh batch.
Serving Suggestion
Serve these warm — pulled from the oven and rested exactly 15 minutes, no longer. At that point the chocolate chunks are still yielding and slightly molten at the center, the crumb is at its most tender, and the spice aroma is at full intensity. Past 30 minutes the chocolate firms completely and the cookie settles into its room-temperature texture, which is still good but a different experience.
I eat these with a strong black coffee — no milk, no sugar. The bitterness cuts through the pumpkin sweetness and the spice warmth in a way that milk-based drinks do not. In the afternoons in October when I make these most, that combination is the whole point.
These belong to a specific kind of afternoon — the kind where it is just cool enough to want something warm but not cold enough to actually turn the heat on. They are not a party cookie and they are not a cookie-tin cookie. They do not travel particularly well — the dome gets compressed in transit and the moisture makes them stick together if they are not individually wrapped. Make them where you are going to eat them.
Day 2 is my preferred eating day. The spices deepen overnight in a way the fresh batch does not quite have — the cinnamon and cloves settle into the crumb and the pumpkin flavor becomes more pronounced rather than less. I have never been able to fully explain the chemistry of why, but I have eaten enough of both to know it is consistently true.
These are not the right choice if you need a cookie that holds its shape for decoration, ships well in a box, or serves a crowd at room temperature for more than 2 hours. For that, the cut out sugar cookies recipe or the molasses cookies on this site are better suited — both hold shape, travel well, and keep at room temperature for 5 days without quality loss.
Frequently Asked Questions About Pumpkin Chocolate Chip Cookies
Why are my pumpkin chocolate chip cookies so cakey?
Pumpkin cookies are cakey by design. Pumpkin puree is approximately 90% water, which creates steam during baking and produces an open, lifted crumb rather than the dense, chewy texture of a butter-only cookie. The high moisture content also prevents the spread and edge crispness that creates chewiness in standard cookies. If you want less cakey pumpkin cookies, reduce the pumpkin to ¾ cup (184g), increase the butter to ¾ cup (170g), and add an extra egg yolk — the higher fat ratio shifts the texture toward chewy without eliminating the pumpkin flavor.
Can I use fresh pumpkin instead of canned?
Fresh pumpkin puree works but requires one additional step: it must be drained before use. Fresh pumpkin puree contains significantly more water than canned — up to 20% more by weight — and using it without draining produces a batter that is too wet to hold its shape during baking. Spread the fresh puree on a clean kitchen towel or several layers of paper towel and press gently to remove excess moisture until it reaches a consistency similar to canned. Weigh it after draining and use 245g as the target. Canned pumpkin is more consistent batch to batch, which is why I use it for all tested versions of this recipe.
Do pumpkin chocolate chip cookies need to be refrigerated?
Pumpkin chocolate chip cookies do not need to be refrigerated for safety, but refrigeration extends their shelf life from 4 days to 7 days. The higher moisture content from the pumpkin means these cookies are more perishable than low-moisture butter cookies — at room temperature past Day 4, the base can become sticky and the texture shifts from soft to slightly wet. Store at room temperature in a hard-sided lidded container for up to 4 days, or refrigerate and bring back to room temperature for 20 minutes before eating. The texture recovers fully after warming.
Why do my pumpkin cookies stay puffy and not flatten?
Pumpkin cookies stay puffy because the high water content in pumpkin puree creates internal steam pressure that supports the dome structure during baking — the same pressure that would cause a butter cookie to spread instead holds the pumpkin cookie up. Additionally, the lower fat ratio in a pumpkin cookie means there is less melted fat to lubricate the spread. Chilling the dough before baking reinforces this effect by firming the butter back up so the cookie holds its height long enough for the egg and flour structure to set. A flat pumpkin cookie is almost always caused by unchilled dough or butter that was too warm when it went into the batter.
Can I make pumpkin chocolate chip cookies without eggs?
Eggs can be replaced with a flax egg in this recipe — combine 1 tablespoon (7g) ground flaxseed with 3 tablespoons (45ml) water and rest for 5 minutes until gel forms, then use as a 1:1 egg replacement. The result is a slightly denser cookie with less lift and a more compact crumb, because eggs provide both structure through protein coagulation and lift through steam from their water content. Two flax eggs will produce a workable cookie, but the dome will be lower and the texture will be closer to a dense, moist bar cookie than the cakey profile shown in the photos. For a vegan version, also replace the butter with refined coconut oil at the same weight — 113g.
How do I make pumpkin chocolate chip cookies less sweet?
Reduce the granulated sugar from ¾ cup (150g) to ½ cup (100g). Do not reduce the brown sugar — it contributes moisture retention and softness, not just sweetness, and reducing it changes the texture more than the flavor. The granulated sugar is the primary sweetness driver and can be reduced by up to one third without significantly affecting the cookie’s structure or spread. Reducing beyond one third starts to affect the surface definition and the Maillard browning that gives the cookies their deep amber color. Switching to semi-sweet chocolate chunks instead of dark will also increase the perceived sweetness, so keep the dark chocolate if you are reducing sugar elsewhere.
Can I make these ahead and freeze the dough?
Yes — this is the best make-ahead method for this recipe. Scoop the chilled dough into individual balls, press chocolate chunks on top, and freeze on a parchment-lined pan until solid before transferring to a freezer bag. Frozen dough keeps for up to 3 months. Bake directly from frozen at 350°F (175°C), adding 2 to 3 minutes to the bake time. Do not thaw the dough balls before baking — thawed dough spreads more than frozen and produces a flatter result than either a fresh-chilled or fully frozen batch. For more on working with pumpkin spice flavor profiles in a make-ahead bar format, the pumpkin chocolate chip cookie bars use the same freezer-dough method scaled to a pan.
More Recipes You’ll Love
If you love the warm spice and deep pumpkin flavor in these cookies, these recipes are worth making next:
- Molasses Cookies — deeply spiced with a crackled sugar exterior. If the warm cinnamon and clove notes in these pumpkin cookies are what you come back for, the molasses version delivers the same depth in a chewier, crispier cookie.
- Brown Butter Chocolate Chip Cookies — for when you want a chocolate chip cookie without the pumpkin. The brown butter adds a nuttiness that the pumpkin cookies trade for spice warmth.
Pumpkin Chocolate Chip Cookies
Ingredients
Equipment
Method
- Position a rack in the middle of your oven and preheat to 350°F (175°C). Line a light-colored aluminum half-sheet baking pan with parchment paper and set aside.
- In a large mixing bowl, whisk together the melted and cooled butter, granulated sugar, and brown sugar for 30 seconds until fully combined and uniform.
- Add the eggs one at a time, whisking each fully into the mixture before adding the next. Add the vanilla extract and whisk to combine. Add the pumpkin puree and whisk until the batter is fully uniform — about 20 strokes.
- Switch to a silicone spatula. Add the flour, baking soda, fine sea salt, cinnamon, ginger, nutmeg, and cloves directly to the bowl. Fold with slow strokes from the bottom of the bowl upward — stop the moment no dry flour streaks remain, approximately 15 to 20 strokes. Do not overmix.
- Fold in ¾ cup (128g) of the dark chocolate chunks using 5 to 6 strokes — reserve the remaining ¼ cup (42g) for pressing onto the tops of the dough balls before baking.
- Cover the bowl with plastic wrap pressed directly onto the dough surface and refrigerate for 30 minutes.
- Using a 2-tablespoon cookie scoop, portion the chilled dough onto the parchment-lined pan spacing each ball at least 2 inches (5cm) apart. This batch yields 16 cookies. Press 3 to 4 reserved chocolate chunks onto the top of each dough ball.
- Bake at 350°F (175°C) for 11 to 13 minutes. Pull the pan when the outer edges of the cookie base look just set and defined — the tops will still look domed and matte and the centers will look underdone. This is correct.
- Leave the cookies on the hot pan for exactly 5 minutes — do not move them. Transfer to a wire cooling rack and cool for at least 10 minutes before eating.