
Chewy Peanut Butter Spider Cookies

I found the timing on this recipe by accident. I pulled the first pan a minute late, answered the door, and by the time I got back the cookies had firmed up enough that I couldn’t press a Reese’s Cup into the center without cracking three of them straight down the middle. I have made this recipe more than a dozen times since that first mistake, and every batch after it came out clean. The window between right and wrong here is about sixty seconds, and once you know exactly where it is, you will not miss it again.
These are soft, chewy peanut butter cookies — heavier on brown sugar than white, so the edges stay matte instead of crisp and the centers stay dense instead of turning cakey. A mini Reese’s Peanut Butter Cup sits pressed into the center of every cookie, ringed by eight angled pretzel-stick legs and two candy eyes. Bite into one and you get peanut butter cookie first, then the softened edge of the Reese’s Cup a half-second later. They are not two desserts stacked on top of each other. They are one cookie that happens to be dressed as a spider.
No chilling here — this dough goes from the bowl to the pan the same afternoon, which matters if you’re making these the day before a Halloween party and not a week ahead. You do need a hand or stand mixer for the creaming step. A spoon will not aerate the butter and peanut butter enough, and under-creamed dough here bakes up dense and slightly greasy instead of soft.
I do not usually make novelty cookies. Most of what I bake does not need a costume, and I have opinions about recipes that prioritize looks over texture. This is the one exception on the site, and I make it exactly once a year — the week before Halloween, for the classroom party plate where a dozen other parents are also bringing something and mine needs to be the one a six-year-old points at before they even ask what flavor it is.
I tested this with an even split of brown and white sugar first, then again with brown sugar doing most of the work. The even-sugar version had a thinner edge with a light crackle that looked nice, but it firmed up fast enough that I lost the candy-press window before I’d decorated more than half the pan. The brown-sugar-heavy version stays soft and workable for a full minute longer once it’s out of the oven. I kept the brown sugar version, and I would not trade that extra minute back for a crisper edge.
I also tested pressing the Reese’s Cup on immediately versus waiting five minutes for the cookies to cool, the way I’d time frosting a cake. Waiting seemed like the safer choice. It is not. Five minutes is long enough for the surface to set to the point where pressing anything into it cracks the cookie instead of sinking into it. Pressing within the first thirty to sixty seconds — while the cookie is still soft from the oven — was the only version that worked without a single crack across a full batch.
🗒 Luna’s Note: I buy one extra bag of thin pretzel sticks every time I make these. Spider legs snap constantly while you’re breaking them into pieces, and running out mid-decorating is not a problem you want to be solving with 20 warm cookies on the counter.
Roasted peanuts were a paper-cone street snack sold by vendors in Chattogram long before peanut butter ever showed up in my kitchen — the flavor itself was never new to me, only the jar.
| Prep Time | Cook Time | Total Time | Yield | Difficulty |
|---|---|---|---|---|
| 20 min | 20 min | 45 min | 24 cookies | Easy |
| Calories | Fat | Carbs | Sugar | Protein | Sodium |
|---|---|---|---|---|---|
| ~210 kcal | ~11g | ~25g | ~16g | ~4g | ~210mg |
Macros are approximate and will vary based on ingredient brands and exact portion size.
Ingredients & Tools for Peanut Butter Spider Cookies
For the Cookies
- 1/2 cup (113g) unsalted butter, softened to room temperature (65–68°F / 18–20°C)
- 3/4 cup (165g) packed light brown sugar
- 1/4 cup (50g) plain white granulated cane sugar
- 3/4 cup (195g) creamy commercial peanut butter, such as Jif or Skippy — do not use natural or separated peanut butter here; see Before You Start
- 1 large egg (approximately 50g without shell), room temperature
- 1 tsp (5ml) pure vanilla extract
- 1 1/2 cups (180g) all-purpose flour, spooned into the measuring cup and leveled — or weighed at 180g
- 1 tsp (5g) baking soda, checked for freshness
- 1/2 tsp (3g) fine sea salt
For the Spiders
- 24 mini Reese’s Peanut Butter Cups, unwrapped — the mini size specifically; standard-size cups are too heavy for this dough to support
- 10–12 thin pretzel sticks (such as Snyder’s of Hanover thin pretzel sticks), broken into roughly 3/4-inch (2cm) pieces — you need 8 pieces per cookie (192 total); buy extra, they break unevenly
- 48 candy eyes (edible candy eyeballs, such as Wilton Candy Eyeballs, medium size)
- Optional: 1 tsp melted chocolate, as glue for candy eyes if the Reese’s Cup has already cooled and hardened
I buy candy eyes in the size labeled “medium.” The small ones look right sitting in the package, but once they’re pressed onto a mini Reese’s Cup they read as barely-there dots instead of eyes — medium is the size that actually shows up in the finished cookie.
Before You Start
Temperature prep. Pull the butter from the fridge 60 to 90 minutes before you start (30 to 45 minutes in a warm kitchen) — it’s ready when a finger pressed into it leaves a clean indent without feeling greasy or slick. Pull the egg out 30 minutes ahead, or set it in a bowl of warm (not hot) water for 10 minutes if you forgot.
Gram weight priority. For the most accurate results, use a kitchen scale set to grams. Volume measurements like cups and tablespoons can vary by 20–30% depending on how the ingredient is scooped or packed. The gram weights above are the numbers I tested with — they are the most reliable way to get the same result I got.
Flour measuring method. Spoon the flour into your measuring cup with a separate spoon and level it off with a straight edge — do not scoop the cup directly into the flour bag. Scooping packs in 20–30% more flour than this recipe needs, and the extra flour makes these cookies dry and crumbly instead of soft.
Mixing method. This recipe requires a hand mixer or stand mixer for the creaming step. Mixing peanut butter, butter, and sugar by hand will not incorporate enough air, and the dough bakes up dense and slightly greasy instead of soft and lightly lifted.
Pan prep. Line a light-colored aluminum half-sheet pan with parchment paper — no grease. A dark or nonstick pan absorbs more heat and browns the bottoms before the centers finish, which matters even more here since an underbaked-looking center is exactly what you want to pull for.
Oven rack position. Position your oven rack in the middle of the oven before preheating. Top rack burns tops; bottom rack burns bottoms.
Leavening freshness check. Drop ½ tsp (3g) baking soda into a small bowl of hot water with a splash of white vinegar. It should bubble aggressively within 2 seconds. If it fizzes weakly or not at all, replace the box — expired baking soda produces flat, dense cookies with no lift.
Brown sugar freshness check. If your brown sugar has hardened, place a damp paper towel over it and microwave in 20-second increments until pliable before measuring — hardened brown sugar cannot be packed accurately.
Peanut butter reminder. Use a commercial creamy peanut butter like Jif or Skippy, not a natural or separated variety. Natural peanut butter’s inconsistent fat content produces a sandy dough that will not hold together, no matter how long you mix it.
No chilling required. This dough goes straight from the bowl to the pan the same day — there is no resting or chilling step here.
A note on humidity. In a low-humidity kitchen like mine in Los Angeles, the surface of a hot cookie firms up faster once it’s out of the oven, which actually narrows the candy-press window described in the method below. If you’re baking somewhere humid, you likely have a little more than sixty seconds before the surface sets — but don’t count on more than ninety.
Necessary Tools for Peanut Butter Spider Cookies
Required:
- Kitchen scale (strongly recommended)
- Large mixing bowl
- Hand mixer or stand mixer with paddle attachment
- Silicone spatula
- Measuring cups and spoons
- Light-colored aluminum baking sheet
- Parchment paper
- Cookie scoop (2 tablespoon / 1.5 oz size)
- Wire cooling rack
Optional:
- Oven thermometer (most home ovens run 15–25°F off)
How to Make Peanut Butter Spider Cookies
This is a creamed butter method — the butter, peanut butter, and both sugars go in first and get beaten together before anything else joins the bowl. Preheat your oven to 350°F (175°C) now, with a rack in the middle position, so it’s fully up to temperature by the time the dough is ready.
Step 1: Creaming the Butter, Sugars, and Peanut Butter Until Pale and Fluffy
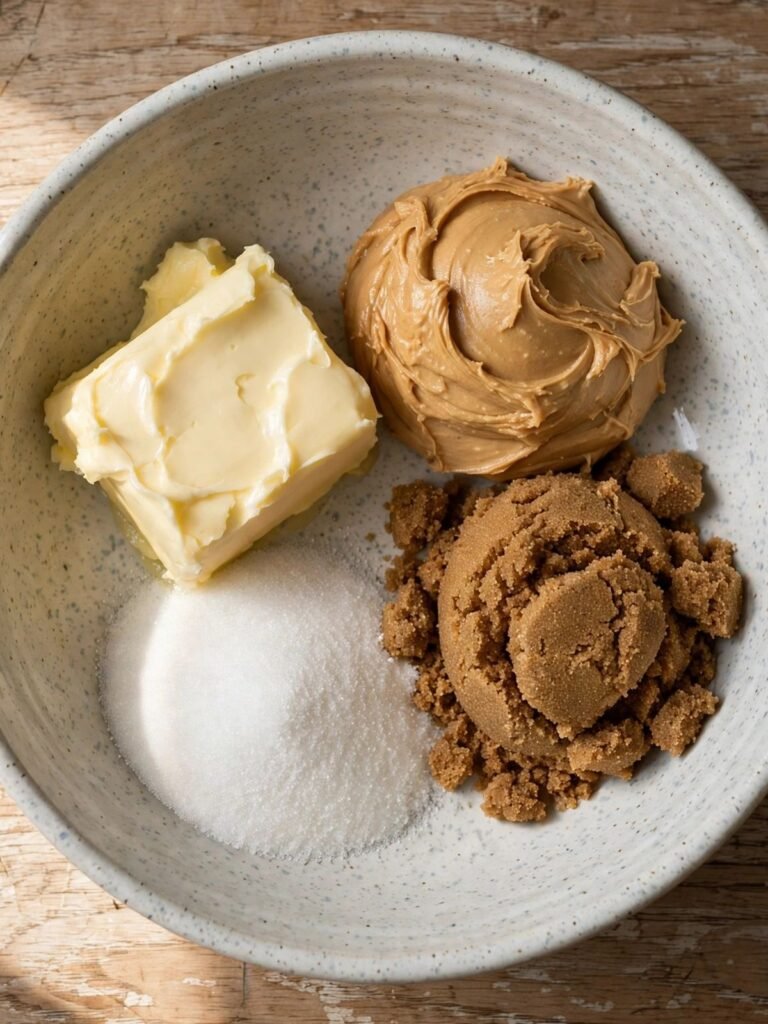
In the bowl of your stand mixer fitted with the paddle attachment (or a large bowl with a hand mixer), add your 1/2 cup (113g) unsalted butter, 3/4 cup (165g) packed light brown sugar, 1/4 cup (50g) plain white granulated cane sugar, and 3/4 cup (195g) creamy commercial peanut butter. Creaming traps air into the fat, which gives this cookie its lift despite a sugar-heavy ratio — peanut butter’s oil content also means this base needs slightly less creaming time than a butter-only dough before the fat starts to look separated.
Beat on medium speed (speed 4 on a KitchenAid) for 3 minutes, stopping once halfway through to scrape the bottom and sides of the bowl with a silicone spatula.

The mixture should look pale tan, fluffy, and slightly increased in volume — no glossy separation and no visible streaks of unmixed peanut butter along the sides. Do not skip the mid-mix scrape — peanut butter clings to the bottom of the bowl more than butter alone does, and a missed scrape leaves dense, under-creamed pockets that bake up as small dry spots inside an otherwise soft cookie. The base is aerated and ready — add the egg and vanilla next while the mixer is still running on low.
Step 2: Adding the Egg and Vanilla Without Curdling the Base
Add your 1 large egg (about 50g), room temperature and 1 tsp (5ml) pure vanilla extract together. A cold egg will not emulsify smoothly into a peanut-butter-heavy fat base, and it can make the mixture look grainy or broken instead of smooth. Beat on low speed for 30 to 45 seconds, until no streaks of egg remain visible.
The mixture should look smooth and slightly lighter in color, with no separated or curdled appearance. If it looks broken at this stage, the egg was too cold — let the bowl sit at room temperature for 2 minutes and beat again for 15 seconds before moving on; a curdled base will not smooth back out once the flour goes in. The wet base is fully combined — the dry ingredients go in next, in one addition.
Step 3: Adding the Dry Ingredients Without Overworking the Gluten
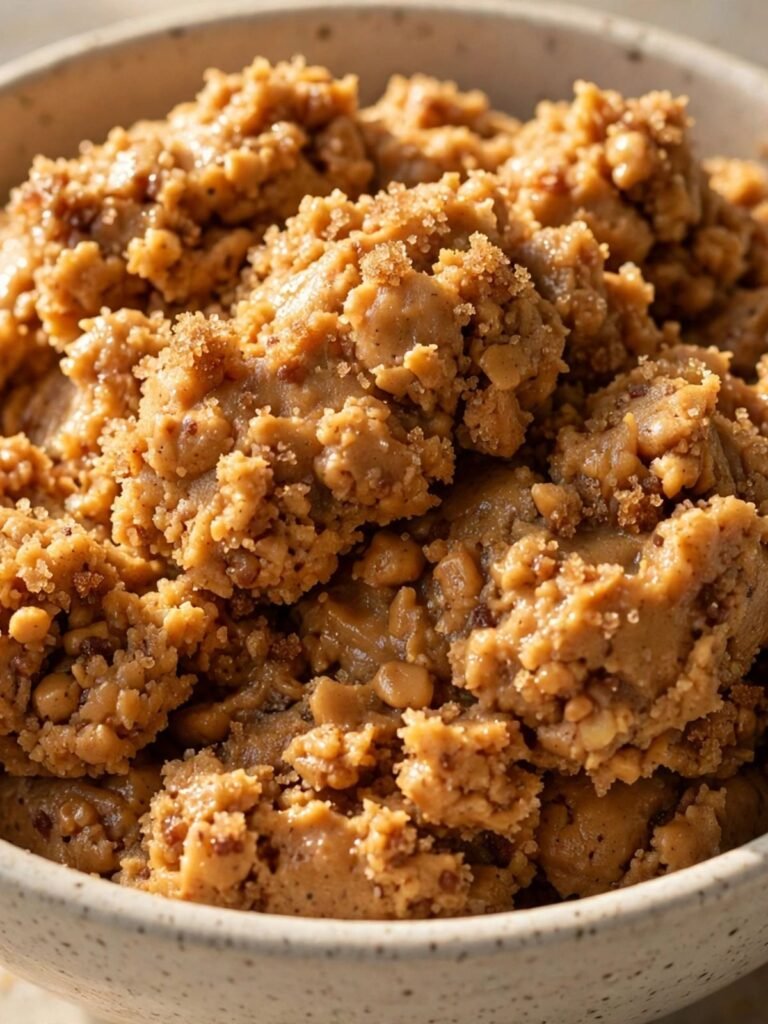
In a separate medium bowl, whisk together 1 1/2 cups (180g) all-purpose flour, 1 tsp (5g) baking soda, and 1/2 tsp (3g) fine sea salt. The baking soda needs an acidic partner to activate, and here it reacts with the natural acidity in the brown sugar and peanut butter — that reaction is what gives this dough its small amount of lift without turning it cakey.
Add the dry mixture to the wet base in one addition and mix on low speed for 30 to 40 seconds, stopping the moment the last streak of flour disappears.
The dough should look thick and slightly sticky, holding together in a mass on the paddle — no dry flour pockets, no smooth glossy shine. Do not keep mixing after the flour disappears; every extra 15 seconds develops more gluten, and dough mixed even a minute too long bakes up tough at the edges instead of tender. This is your finished dough — no chilling needed. Portion it onto the pan next.
Step 4: Portioning and Spacing the Dough Balls
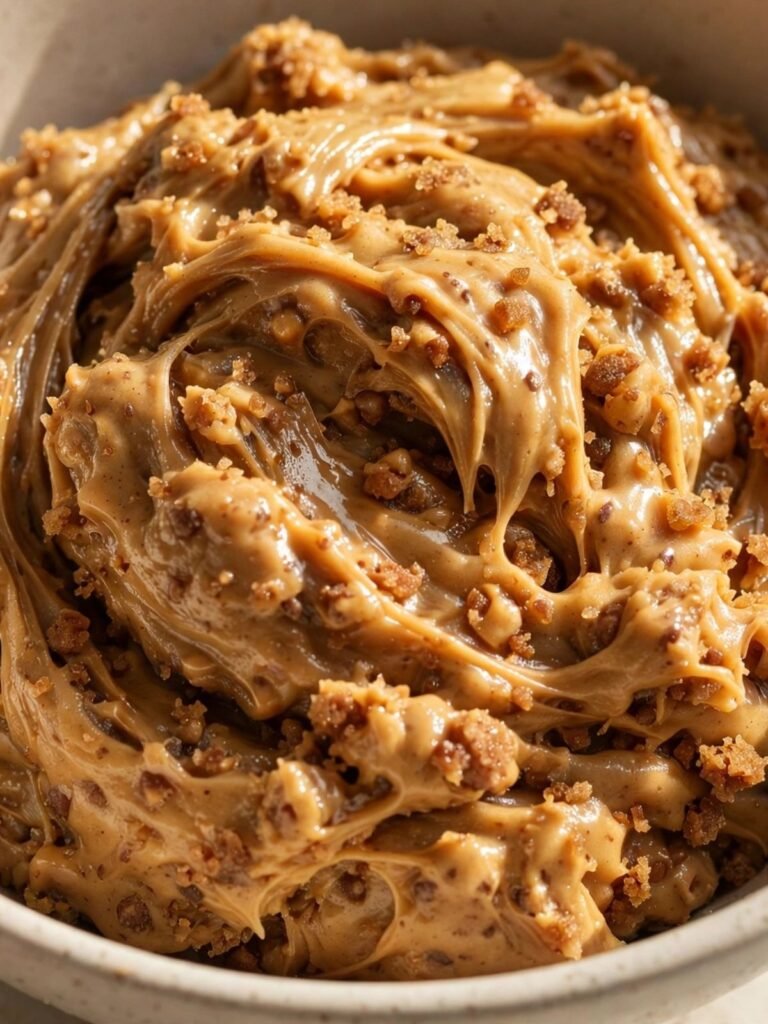
Scoop 2 level tablespoons (32g) of dough per cookie onto your parchment-lined light-colored aluminum baking sheet — weigh the first one on your kitchen scale to calibrate, then portion the rest to match. This dough weighs approximately 766g total; portioned at 32g each, that comes out to 24 cookies almost exactly, matching the yield above.
Roll each portion into a smooth ball between your palms and set it at least 2 inches (5cm) apart — this dough spreads only moderately, but the finished cookie needs open space around it for the pretzel legs.
Do not flatten the balls; a domed shape holds the Reese’s Cup better than a flat one does. Each dough ball should look smooth and fully rounded, roughly the size of a golf ball, with no surface cracks. A cracked ball bakes into a cookie with an uneven, cracked surface — if you see cracks while rolling, the dough is slightly dry; work it a few more seconds between your palms until it smooths out. A standard half-sheet pan holds 12 comfortably — the second batch bakes while the first cools.
Step 5: Baking Until the Edges Set and the Centers Still Look Underdone

Bake one pan at a time at 350°F (175°C), middle rack, for 9 to 10 minutes — start checking at 9 minutes. Most home ovens run 15 to 25°F off; if you have an oven thermometer, confirm the actual temperature before the first pan goes in.
Pull the pan the moment the edges look set and lightly golden and the centers still look soft, slightly puffed, and visibly underdone — they will look almost unfinished. This is correct. Do not wait for the centers to look fully baked. A cookie that looks done at this stage has already firmed up past the point where a Reese’s Cup will sink in cleanly, and you will crack cookies trying to press candy into a surface that has already set. The pan comes straight out of the oven now — the next step happens within the first minute, while the cookies are still hot.
Step 6: Pressing the Reese’s Cup Into the Center While the Cookie Is Still Soft

This is the step that decides whether the recipe works, so I’m putting the warning first: press within the first 30 to 60 seconds after the pan comes out. Wait longer and the surface has already firmed up enough that the candy will crack the cookie instead of sinking into it.
Working directly on the hot baking sheet, press one unwrapped mini Reese’s Peanut Butter Cup straight down into the center of each cookie with one firm, decisive push — not several small presses — until the top of the cup sits level with or slightly above the cookie’s surface.
The cup should sink about halfway into the warm dough without cracking the surrounding surface, and the cookie should hold its round shape around it. Pressing too hard pushes warm dough up over the edges of the cup and buries it; one firm push is enough. Every cookie has its spider body now — the legs go in immediately, before the dough cools any further.
🗒 Luna’s Note: I keep my mini Reese’s Cups in the freezer until the moment I need them. A cold cup buys extra seconds during the press step before it starts to soften and slide, which matters when you’re decorating 12 cookies in about a minute.
Step 7: Placing the Pretzel Legs Before the Dough Firms Up

Still working directly on the hot pan, push 4 pretzel pieces (3/4-inch / 2cm each) into the dough on each side of the Reese’s Cup — 8 legs total per cookie — angling them slightly downward and outward like an actual spider’s legs rather than straight out flat. At this stage the dough is still soft enough to hold that angle; once it cools, the surface is too firm to hold anything but a flat, horizontal position.
Each leg should stay in place at the angle you set it, held firmly by the dough without sliding down flat. Legs pushed in flat instead of angled look more like toothpicks stuck in a cookie than spider legs — angle them the moment you place them, while the dough can still hold the position. All 8 legs are placed — leave the pan alone now for the cookies to finish setting.
🗒 Luna’s Note: I don’t worry about getting all 8 legs at a perfectly identical angle. A real spider’s legs aren’t symmetrical either, and cookies where every single leg matches look more like a diagram than something I actually made.
Step 8: Resting on the Pan Before the Candy Eyes Go On
Leave the pan undisturbed for 5 minutes. Carryover heat from the pan continues finishing the center of the cookie during this time, and the Reese’s Cup and pretzel legs set firmly into place as the surface cools around them.
After 5 minutes, the cookie should feel firm enough at the edges to lift with a thin spatula, and the Reese’s Cup should no longer shift when the pan is gently tilted. Moving the cookies before the full 5 minutes risks sliding the Reese’s Cup out of place or snapping a pretzel leg loose — leave the pan alone even if it looks ready sooner.
Transfer the cookies to a wire rack now; the candy eyes go on once they’ve cooled a little further.
Step 9: Adding the Candy Eyes While the Cup Is Still Slightly Tacky
About 2 to 3 minutes after moving the cookies to the rack, press 2 candy eyes onto the top of each Reese’s Cup while its surface is still slightly soft from residual heat. The peanut butter cup’s chocolate coating is soft enough at this point to hold the eyes without any glue; once it cools past this window, the surface is too firm and they’ll slide right off.
The candy eyes should sit flush against the cup and stay in place when the cookie is tilted slightly. If the cup has already cooled and hardened by the time you get to this step, the eyes won’t stick on their own — dab a drop of melted chocolate or a bit of leftover peanut butter on the back of each eye as glue instead of pressing harder. The spiders are finished — let the cookies cool completely, about 15 more minutes, before storing or serving.
The Science Behind Peanut Butter Spider Cookies
Why Brown Sugar Keeps These Cookies Soft for Days
Brown sugar contains molasses, and molasses holds onto moisture the way a sponge does — this property is called hygroscopicity. A dough built mostly on brown sugar instead of white pulls in and holds more of that moisture through baking and storage.
That’s the mechanism behind two things in this recipe: the dough staying workable for that extra minute after baking (long enough to press the candy in cleanly), and the finished cookie still tasting soft and chewy on day three instead of drying out and turning crumbly by day two, which is what happens to an all-white-sugar peanut butter cookie.
For more on how sugar ratio shapes a peanut butter cookie’s texture across a whole batch, see my 3 Ingredient Peanut Butter Cookies — a very different dough, but the same sugar logic drives the result.
Why the Reese’s Cup Has to Go On Immediately, Not After Cooling
I didn’t understand why my first attempt at this recipe cracked three cookies before I figured out what was actually happening. My instinct was to treat the Reese’s Cup like frosting — let the cookie cool completely, then decorate it cleanly, the way you’d pipe a design onto a finished cake. What I hadn’t accounted for is that a peanut butter cookie’s surface sets through fat crystallization as it cools.
The butter and peanut butter fat that were liquid and soft in the oven start solidifying into a rigid structure within the first couple of minutes at room temperature. Press anything into that structure once it’s set, and it cracks instead of yielding.
Press within the first minute, while the fat is still soft and semi-liquid, and the surface flows around the candy instead of fighting it. The thirty-to-sixty-second window in Step 6 above isn’t an arbitrary number I picked for drama — it’s the actual window fat crystallization gives you before the surface stops being workable.
🗒 Luna’s Note: this is the exact reason I freeze the Reese’s Cups ahead of time. A cold cup takes slightly longer to soften once it touches the warm dough, which buys me a few extra seconds of press time per cookie — not a huge amount, but enough to matter when you’re decorating a full pan alone.
Why This Dough Needs More Flour Than a Typical Peanut Butter Cookie
I noticed early on that a standard peanut butter cookie ratio — built for a plain, undecorated cookie — couldn’t hold a Reese’s Cup pressed a half inch into the center without collapsing flat around it by the time it finished baking. What I hadn’t accounted for was the extra downward force of the press itself; a dough meant to stay flat and unadorned doesn’t need the structural body this one does.
Extra flour builds more of a starch-and-gluten framework as it bakes, and that’s what starch gelatinization actually does — the starch granules absorb moisture and swell into a rigid network that holds the dough’s shape under pressure instead of spreading thin and flat.
This dough uses 1 1/2 cups of flour, where a plain peanut butter cookie recipe this size would typically use closer to 1 1/4 cups. That extra quarter cup is what keeps the finished cookie thick enough to actually hold a spider’s body instead of flattening out underneath it.
Troubleshooting & Pro-Tips for Peanut Butter Spider Cookies
Common Mistakes
Dough looks sandy and won’t hold together. The peanut butter used was natural or a separated variety instead of a commercial creamy one — its inconsistent fat content can’t bind the dough the way this recipe needs, and no amount of extra mixing fixes it. If the dough is already mixed and sandy, add 1 tablespoon of softened butter and re-mix; it partially rescues the batch but won’t fully match the tested texture. Prevention: use a commercial creamy peanut butter such as Jif or Skippy.
Bottoms burn while the tops still look pale. A dark or nonstick pan absorbs and holds more heat than light aluminum, cooking the bottom of the cookie faster than everything above it — and you may not notice until you flip one over. There’s no fixing an already-burnt bottom; for the remaining batches, pull earlier and switch to a lighter pan if one’s available. Prevention: bake on a light-colored aluminum sheet lined with parchment.
The Reese’s Cup falls off after the cookies have fully cooled. It looked pressed in properly right after baking, but it was actually pressed in after the surface had already started to set — past the 30–60 second window — so it never bonded into the dough — it was only resting on top. Salvage it by microwaving the finished cookie for 8 to 10 seconds to soften the surface slightly, then pressing the cup back in immediately. Prevention: press within the first minute of pulling the pan from the oven, before anything else.
Cookies spread flatter than expected, and the legs end up flush with the surface instead of angled. The butter or dough was too warm going into the oven, or the dough was overmixed after the flour went in — both reduce the structure that holds the dome shape. Nothing corrects this once baked; for the next batch, recheck butter temperature and mixing time. Prevention: confirm butter sits at 65–68°F, not warmer, and stop mixing the moment the flour disappears.
Cracks radiate out from the Reese’s Cup after pressing. The cup was pressed too hard, more than once, or the cookie had already cooled slightly past the ideal window. A small crack here is not a failure — the pretzel legs and candy eyes draw the eye away from it, and it disappears once the spider is fully assembled. Prevention: one firm, decisive push, done inside the correct time window.
Pretzel legs turn soft and bendable within a few hours. Pretzels absorb ambient moisture from the cookie’s surface and from the air, and this happens faster in humid conditions. There’s no re-crisping a softened leg without re-baking the whole cookie, which isn’t practical here. Prevention: assemble spiders the same day you plan to serve or photograph them, and store undecorated cookies separately from the pretzels and candy until you’re ready.
Cookies come out flat and dense with no lift at all. This is almost always expired baking soda. Test yours: drop ½ tsp into hot water with a splash of vinegar — it should fizz aggressively within 2 seconds. Weak or no fizz means it’s time to replace the box; baking soda loses potency 3 to 6 months after opening.
Humidity and altitude adjustments. In humid climates, the candy-press window described in Step 6 runs slightly longer than 60 seconds rather than shorter, since the cookie surface takes more time to firm up — you have a little more room, not less. At high altitude (above 3,500 ft / 1,067m), reduce the baking soda by ¼ tsp, add 1 to 2 tablespoons more flour, and start checking for doneness 1 to 2 minutes earlier than the range above.
Expert Pro-Tips
- Buy the mini Reese’s Cups specifically, not the standard size — a full-size cup is too heavy for this dough to support once it’s pressed in, and it will sink straight through to the pan.
- For a chocolate chip spider cookie, skip the Reese’s Cup and press a tight mound of 8 to 10 mini chocolate chips into the center instead, right before adding the legs and eyes — same technique, different body.
- Break your pretzel sticks in a single clean motion instead of snapping small pieces off one at a time. A clean break leaves a pointed end that reads as a leg; a nibbled-off piece reads as a blunt stub.
- Unwrap all 24 Reese’s Cups and break all your pretzel legs before the first pan goes in the oven. Once cookies come out, you have about a minute per pan and no time to be unwrapping candy.
How to Store Peanut Butter Spider Cookies
Room Temperature
Store fully assembled spiders in a lidded hard-sided container, single layer if possible so nothing presses on the legs or eyes, at room temperature for up to 2 days. If you must stack them, separate layers with parchment. Do not use a zip-lock bag — the legs and eyes get knocked loose, and the cookies themselves flatten under any weight.
Refrigerator
Not recommended for fully assembled spiders — refrigeration speeds up moisture transfer from the cookie to the pretzel legs, softening them faster than room temperature storage does. If you do need extra days, store the undecorated cookies in the fridge (up to 5 days) and decorate right before serving.
Freezer — Baked / Undecorated
Freeze plain, undecorated cookies individually wrapped, then bagged airtight, up to 2 months. Thaw at room temperature for about 20 minutes, then proceed with the Reese’s Cup and pretzel steps as if the cookies had come straight off a fresh pan — you’ll need to warm them slightly (8 to 10 seconds in the microwave) first, since the candy-press technique depends on a soft, warm surface.
Freezer — Unbaked
Freeze scooped, undecorated dough balls on a tray until solid, then transfer to a bag, up to 2 months. Bake straight from frozen at the same 350°F (175°C), adding 2 extra minutes to the bake time, and check for the same visual doneness cues rather than relying on the clock alone.
Serving Suggestion

Serve these at room temperature — they’re at their best the day they’re assembled, not chilled and not warmed. I put out a glass of cold milk next to the plate and nothing else; these are sweet enough on their own that coffee competes with them rather than complementing them. This is the plate I bring to the one Halloween gathering a year where kids are actually present and a plain cookie will not get a second look.
Day 2 is still good — the cookie itself stays soft from the brown sugar — but the legs have usually softened by then, so I tell people day 2 is for eating, not for the photo. This is not a make-ahead centerpiece: assemble these the morning you need them, not the night before, or you’ll be re-crisping legs that can’t be re-crisped.
🗒 Luna’s Note: I always keep two or three undecorated cookies aside for myself before the candy comes out. Half these spiders get picked apart leg-first by whoever’s closest, and nobody eats a plain peanut butter cookie on my behalf.
Frequently Asked Questions Peanut Butter Spider Cookies
Can I make peanut butter spider cookies ahead of time?
You can bake and store the plain, undecorated cookies up to 2 days ahead in an airtight container. What you shouldn’t do ahead is assemble the full spider — pretzels absorb ambient moisture from the cookie’s surface the moment they touch it, going soft and bendable within a few hours rather than staying crisp for two days. Bake ahead, decorate the day you’re serving them.
Can I use Whoppers or malt balls instead of Reese’s Peanut Butter Cups?
Yes, with one adjustment: Whoppers and malt balls are smaller and lighter than a mini Reese’s Cup, so they sit on top of the dough rather than sinking halfway in, even pressed within the same 30–60 second window. Anchor the pretzel legs into the dough at the candy’s base instead of into it — a malt ball’s rounded surface won’t hold a pretzel the way a flat Reese’s Cup does. For a peanut-forward variation, see my Peanut Butter Chocolate Chip Cookies.
Can I use licorice instead of pretzels for the spider legs?
Yes. Pretzel sticks are the default because they’re rigid enough to hold an angled position, but licorice laces — black or red, cut into 3/4-inch (2cm) lengths — work as a softer substitute. Licorice bends instead of holding a fixed angle, so press it in shallower or it flops flat within minutes. The result reads as curled strands rather than spiky legs — still clearly a spider, only a different texture.
Why did my cookies spread too much?
Cookies spread more than expected when the butter is too warm or the oven wasn’t fully preheated. Warm fat melts before the structure can set, so the dough flows outward instead of holding its dome. Confirm your butter sits at 65–68°F before creaming, and confirm the oven reached full temperature — an oven thermometer catches the 15–25°F gap most home ovens run.
Can I double this recipe?
Yes. Multiply every ingredient by 2 except the baking soda — use 1.5x the amount (1 1/2 tsp instead of 2 tsp), not double, or the cookies pick up a soapy aftertaste from the excess. Bake in separate batches on separate pans rather than crowding one sheet; overcrowding traps steam and changes both spread and the timing of the candy-press window.
How does humidity or altitude affect this recipe?
In humid climates, the cookie surface takes longer to firm up once out of the oven, so your candy-press window in Step 6 runs a little longer, not shorter. At high altitude (above 3,500 ft / 1,067m), leavening gases expand faster: reduce the baking soda by ¼ tsp, add 1 to 2 tablespoons more flour, and check for doneness a minute or two earlier than Step 5 states.
Do I need candy eyes, or is there a substitute?
Candy eyes aren’t required — mini chocolate chips pressed pointed-side out into the Reese’s Cup work as a substitute, using the same tacky-surface window from Step 9. A slightly soft candy coating holds the chip without glue, the same mechanism. The look changes, though — a chip’s flat side doesn’t catch light like a glossy candy eye, so it reads as a chocolate fleck rather than an eye.
More Peanut Butter Recipes You’ll Love
- Peanut Butter Cup Dump Cake — if you like the Reese’s Cup pairing here, this turns the same combination into a 9×13 pan dessert.
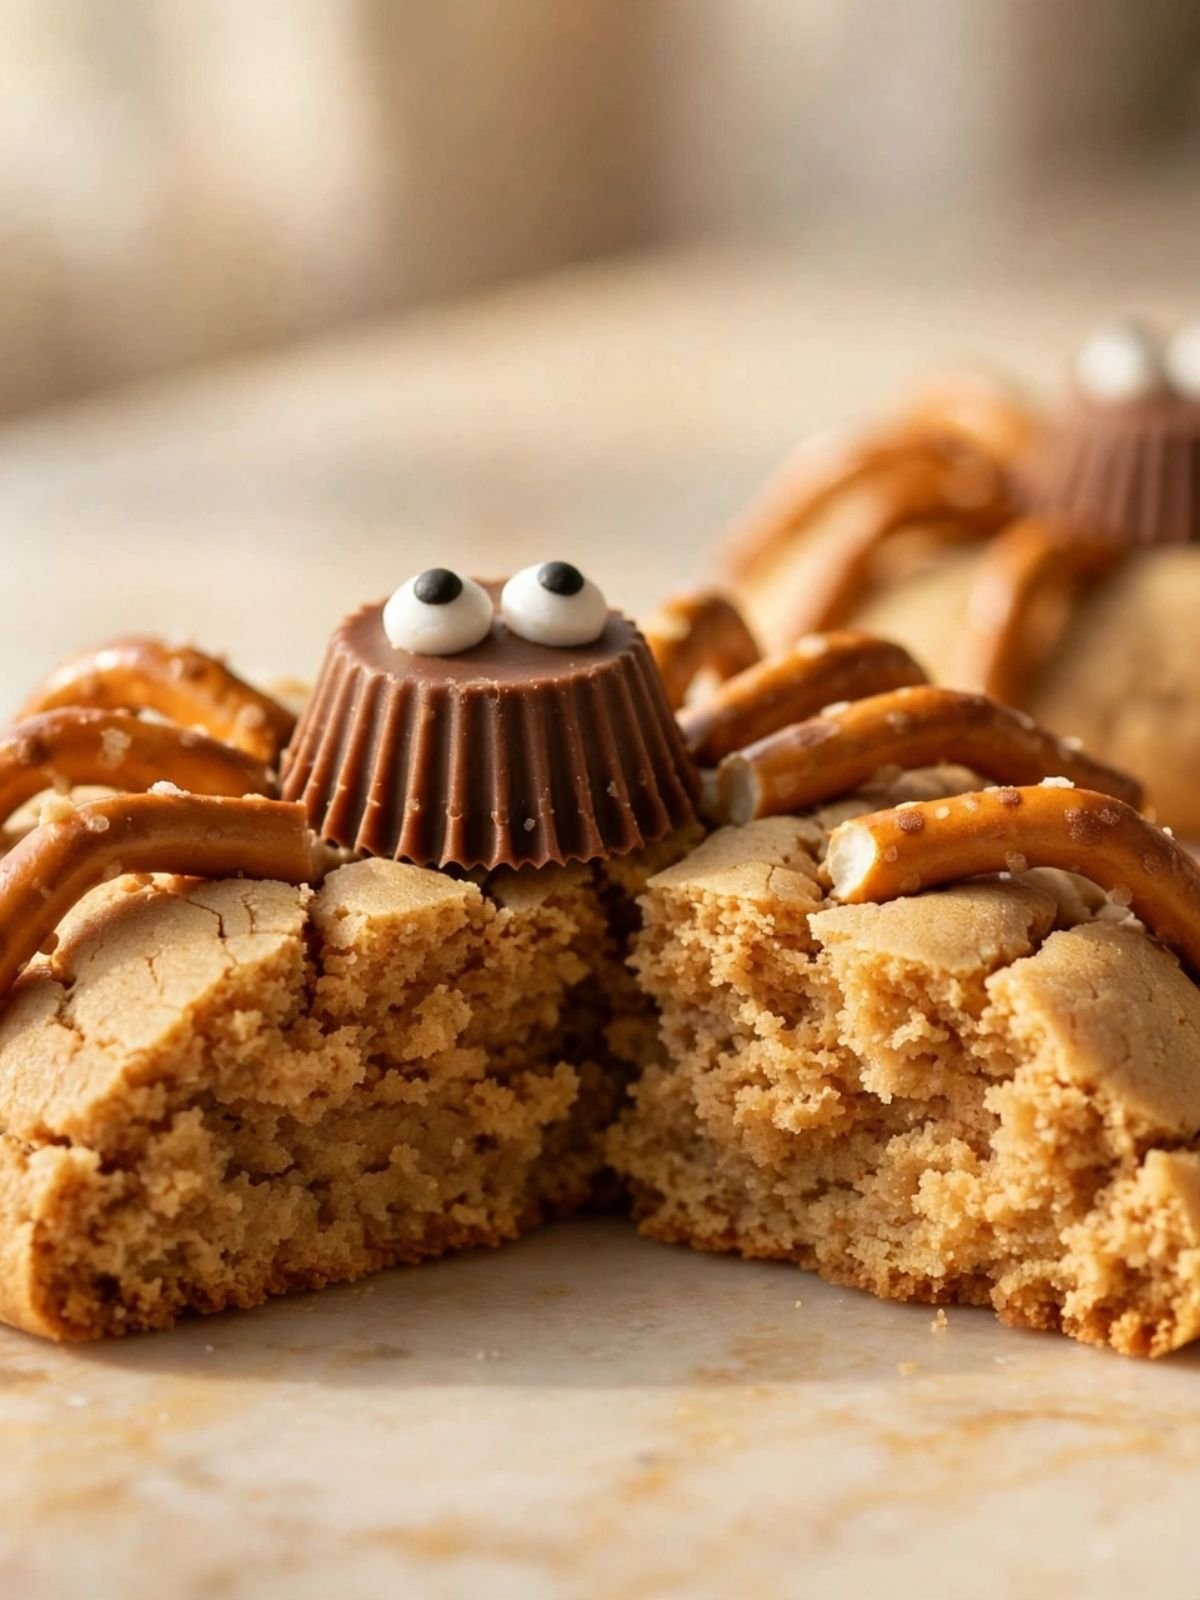
Peanut Butter Spider Cookies
Ingredients
Equipment
Method
- Preheat your oven to 350°F (175°C) with a rack in the middle position, and line a light-colored aluminum baking sheet with parchment paper.
- In a stand mixer with the paddle attachment, beat the butter, brown sugar, granulated sugar, and peanut butter on medium speed for 3 minutes, scraping the bowl once halfway through, until pale and fluffy.
- Add the egg and vanilla and beat on low speed for 30 to 45 seconds until smooth with no streaks remaining.
- Whisk the flour, baking soda, and salt together separately, then add to the wet mixture and mix on low speed for 30 to 40 seconds, stopping the moment the flour disappears.
- Scoop 2 level tablespoons (32g) of dough per cookie, roll into smooth balls, and space at least 2 inches (5cm) apart on the prepared pan without flattening.
- Bake one pan at a time for 9 to 10 minutes, until the edges look set and lightly golden and the centers still look soft and underdone.
- Working immediately on the hot pan, press one unwrapped mini Reese’s Cup firmly into the center of each cookie within 30 to 60 seconds of pulling the pan from the oven.
- Immediately push 4 pretzel pieces into the dough on each side of the Reese’s Cup per cookie, angling them downward and outward like spider legs.
- Let the cookies rest on the pan for 5 minutes undisturbed, then transfer to a wire rack.
- About 2 to 3 minutes later, press 2 candy eyes onto each Reese’s Cup while it is still slightly tacky, then let the cookies cool completely, about 15 more minutes, before serving.