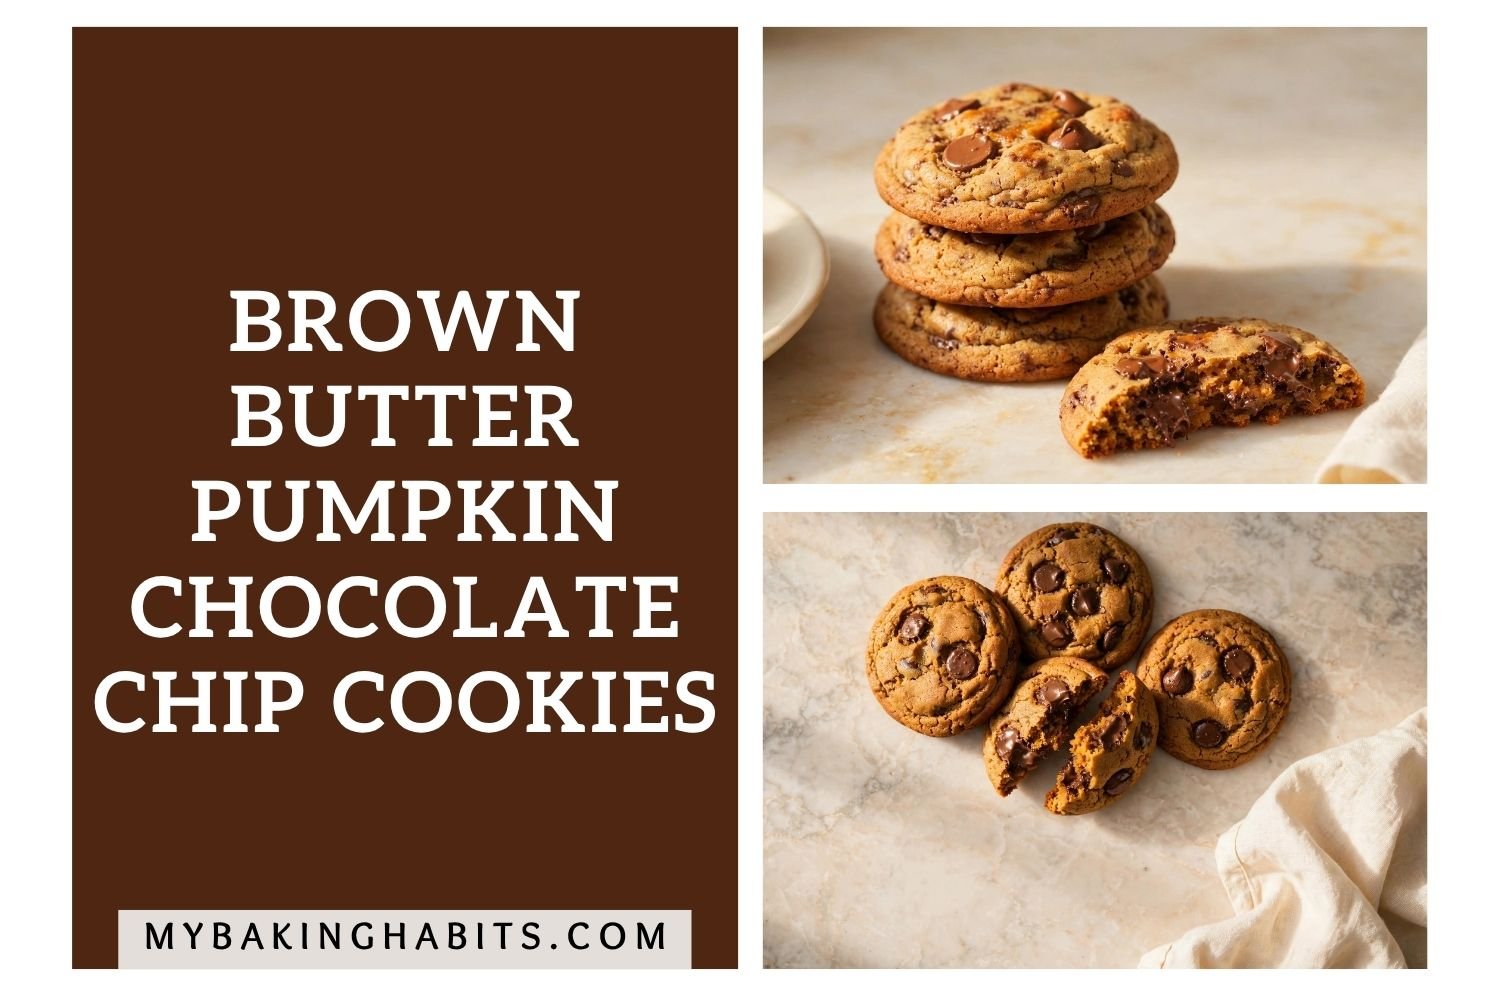
Brown Butter Pumpkin Chocolate Chip Cookies

I found the version I wanted by accident. I had set out to test whether patting the pumpkin purée dry made any difference, and I did it more aggressively than I intended — three rounds of paper towels, pressed hard, most of the visible moisture gone. That batch was the one. Thicker centers. Actual chew. None of the pillowy, puffy texture that most pumpkin cookies collapse into.
That is the recipe in this article.
Brown butter pumpkin chocolate chip cookies are a fall staple I have made in a lot of ways. The version most people make is not bad — but it is cakey. Soft in the wrong direction. You pick it up expecting a cookie and get something that behaves more like a muffin top. The brown butter helps, the spices help, but the moisture in the pumpkin is the actual problem. Canned pumpkin purée is approximately 90% water. You have to remove some of that water before it goes into the dough, or the flour absorbs it during mixing and the structure becomes open and cakey instead of tight and chewy.
I tested three levels of pumpkin moisture removal: no drying, light blotting (one round of paper towels), and aggressive drying (three rounds, pressed firmly). No drying = cakey and pale. Light blotting = slightly better texture but still more pillowy than I wanted. Aggressive drying = the version in this recipe. The edges come out with a defined matte set, the centers stay dense and chewy, and the chocolate pockets stay gooey without the batter steaming around them. I used aggressive drying and I would not change it.
I also tested egg yolk-only versus whole egg versus whole egg plus an extra yolk. Egg whites carry water and add lift — not what we want here. Yolk-only produced a rich, almost caramel-dense cookie that spread too much. One whole egg plus one extra yolk — the version in this recipe — gave the right balance: chew without richness overload, structure without cakey lift.
No chilling required, but 30 minutes in the fridge after portioning gives slightly more defined edges and a taller cookie. I include it as an option, not a requirement. Both versions are good. Chilled is slightly neater. This recipe comes together in one bowl (after the brown butter cools), no stand mixer needed — a large mixing bowl and a silicone spatula are the only tools. You can go from cold butter to baked cookies in under an hour.
| Prep Time | Cook Time | Total Time | Yield | Difficulty |
|---|---|---|---|---|
| 25 min | 12 min | ~60 min (includes brown butter cooling) | 20–22 cookies | Intermediate |
| Calories | Fat | Carbs | Sugar | Protein | Sodium |
|---|---|---|---|---|---|
| ~190 kcal | ~8g | ~26g | ~15g | ~2g | ~120mg |
Macros are approximate and will vary based on ingredient brands and serving size.
Ingredients & Tools
For the Cookies
- ½ cup (113g) unsalted butter — used to make the brown butter; must be unsalted so the final salt level is controlled
- ¾ cup (165g) packed dark brown sugar — dark brown sugar has more molasses than light brown, which deepens the caramel flavor and holds moisture for chew; do not substitute light brown sugar without expecting a flavor difference
- ¼ cup (50g) plain white granulated cane sugar — do not substitute coconut sugar, raw sugar, or turbinado; they change the spread and surface texture
- 1 large egg (approximately 50g without shell), room temperature
- 1 large egg yolk (approximately 17g), room temperature — the extra yolk adds richness and density without the moisture and lift the white would add
- ⅓ cup (75g) canned pumpkin purée — not pumpkin pie filling; check the label for “100% pure pumpkin” with pumpkin as the only ingredient; Libby’s is the brand I use — the moisture content is consistent batch to batch
- 1½ tsp pure vanilla extract
- 1¾ cups (219g) all-purpose flour, spooned into the measuring cup and leveled — or weighed at 219g — see Before You Start for the measuring method
- 1 tsp ground cinnamon
- ½ tsp ground ginger
- ¼ tsp ground nutmeg
- ⅛ tsp ground cloves
- ¾ tsp baking soda, checked for freshness — see Before You Start for the freshness test
- ½ tsp fine sea salt
- 1½ cups (255g) semi-sweet chocolate chips (45–55% cacao), such as Nestle Toll House or Ghirardelli — set aside ¼ cup (42g) for pressing on top before baking; the remaining 1¼ cups (213g) fold into the dough
Before You Start
Pumpkin purée — remove moisture first. Spread ⅓ cup of pumpkin purée in a thin layer onto three stacked paper towels. Fold the top edge of the paper towels over the pumpkin and press firmly with both hands. Hold the pressure for 10 seconds. Open the towels, discard the wet outer layers, and press again with a fresh set two more times. You are trying to remove as much visible surface moisture as possible — the pumpkin should leave a damp orange-brown stain on the towels, not puddles. This step is not optional. Undried pumpkin produces cakey cookies that do not chew correctly.
Eggs — room temperature. Both the egg and the yolk need to be at room temperature before they go into the dough. Cold eggs do not emulsify smoothly into a butter-sugar mixture and can cause a broken, curdled-looking batter. Pull them from the fridge 30 minutes before you start, or place them in a small bowl of warm (not hot) water for 10 minutes.
Brown butter — must cool completely before using. Warm brown butter melts the sugars before they can do their structural work and produces flat, greasy cookies. After browning, pour the butter into a medium mixing bowl and let it cool to room temperature — approximately 25 to 30 minutes. It should feel cool to the touch and have returned to a settled liquid state, not warm or steamy.
Flour — spoon and level, never scoop. Scooping the cup directly into the flour bag packs in 20–30% more than the recipe needs. Use a separate spoon to fill the measuring cup, then level with a straight edge. For the most accurate result, weigh the flour at 219g on a kitchen scale. Gram weight always takes priority over volume in this recipe.
Baking soda — check freshness. Dissolve ½ teaspoon of baking soda in 2 tablespoons of hot water. Active baking soda will bubble vigorously within 5 seconds. No bubbling means it is spent and the cookies will not spread or set correctly. Replace it before baking.
Ground spices — check freshness. Cinnamon, ginger, nutmeg, and cloves older than 6–8 months lose most of their potency. Smell each one before using — you should get a strong, sharp aroma immediately. If the smell is faint or flat, replace them. Old spices produce cookies that taste like butter and sugar with a faint brown tinge, not like fall.
Mixing method. This recipe requires no electric mixer — a large mixing bowl and a sturdy silicone spatula are the only tools needed for the dough. The brown butter method does not require creaming, and mixing by hand gives you more control over flour incorporation.
Pan. Use a light-colored aluminum baking sheet. Dark pans absorb more heat and will overbrown the bottoms before the centers set. Position the rack in the middle of the oven before preheating. Top rack burns tops. Bottom rack burns bottoms.
Necessary Tools
Required:
- Light-colored saucepan (for browning the butter — dark pans hide the color change)
- Medium mixing bowl (to cool the brown butter in before mixing)
- Large mixing bowl
- Sturdy silicone spatula
- Kitchen scale (strongly recommended — gram weights are more accurate than volume)
- Light-colored aluminum baking sheets
- Parchment paper
- Wire cooling rack
Optional:
- Oven thermometer (most ovens run 15–25°F / 8–14°C off — an oven thermometer eliminates this variable)
- Medium cookie scoop, 2 tablespoon / 45g capacity (ensures evenly sized cookies)
How to Make Brown Butter Pumpkin Chocolate Chip Cookies
Step 1: Browning the Butter Until the Milk Solids Turn Deep Golden
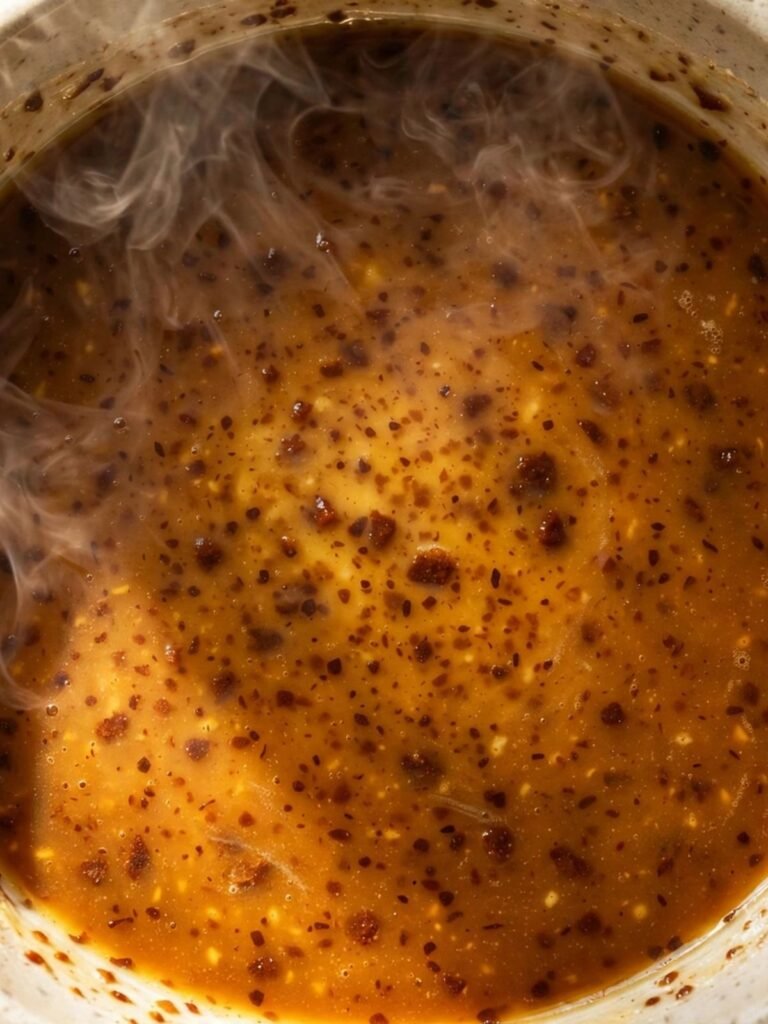
In your light-colored saucepan over medium heat, add your ½ cup (113g) unsalted butter. The light-colored pan is not decorative — the milk solids that brown at the bottom of the pan are the source of the flavor, and a dark pan hides their color change until it is too late and the butter has burned. Stir constantly with a silicone spatula or heatproof spoon as the butter melts. You will hear it crackle and sputter — that is water leaving the butter as steam. Keep stirring. The butter will go through stages: melting, then foaming, then the foam subsides slightly, and then you will see amber, then deep golden-brown specks forming at the bottom of the pan. That is the Maillard reaction in real time — milk proteins and sugars caramelizing into hundreds of flavor compounds that plain melted butter does not have.
Pull the pan off the heat the moment the specks turn deep golden brown and the butter smells unmistakably nutty and toasted — like toasted hazelnut or the inside of a bakery. This is approximately 5 to 7 minutes from when you started, but watch the color, not the clock. Immediately pour every drop of the butter — including every brown speck — into your medium mixing bowl. Do not leave anything behind in the pan. Those specks are the flavor.
🗒 Luna’s Note: Brown butter is one of those steps that looks simple and catches people the first time. Watch the color, not the clock. Thirty seconds is the difference between perfectly browned and burned.
Set the bowl aside and let the brown butter cool to room temperature before continuing — approximately 25 to 30 minutes. Adding sugars to warm butter produces greasy dough that spreads flat in the oven.
The cooled butter should look liquid, slightly opaque with visible dark flecks at the bottom, and feel cool when you dip a finger in — not warm, not steamy. That is your signal to continue.
Step 2: Removing Moisture from the Pumpkin Purée
While the brown butter cools, prep the pumpkin. Spread your ⅓ cup (75g) canned pumpkin purée in a thin, even layer across three stacked paper towels. Fold the top edge of the paper towel over the pumpkin and press firmly with the flat of both hands. Hold the pressure for 10 seconds. Open the towels, discard the wet outer layers, and press again with a fresh set two more times.
The pumpkin should leave a ring of orange-brown moisture on each round of towels. If the third round comes away mostly dry, you have done enough. The dried pumpkin will look slightly denser and slightly deeper in color than it came from the can.
Canned pumpkin purée is approximately 90% water by weight. Every teaspoon of moisture you leave in the pumpkin is moisture that the flour must absorb during mixing — and whatever the flour cannot absorb will turn to steam in the oven and create a cakey, open crumb structure instead of the dense, chewy result this recipe is built for.
Set the dried pumpkin aside on fresh paper towels until the butter is cool and you are ready for Step 3.
Step 3: Combining the Brown Butter and Sugars Until the Mixture Looks Glossy and Cohesive
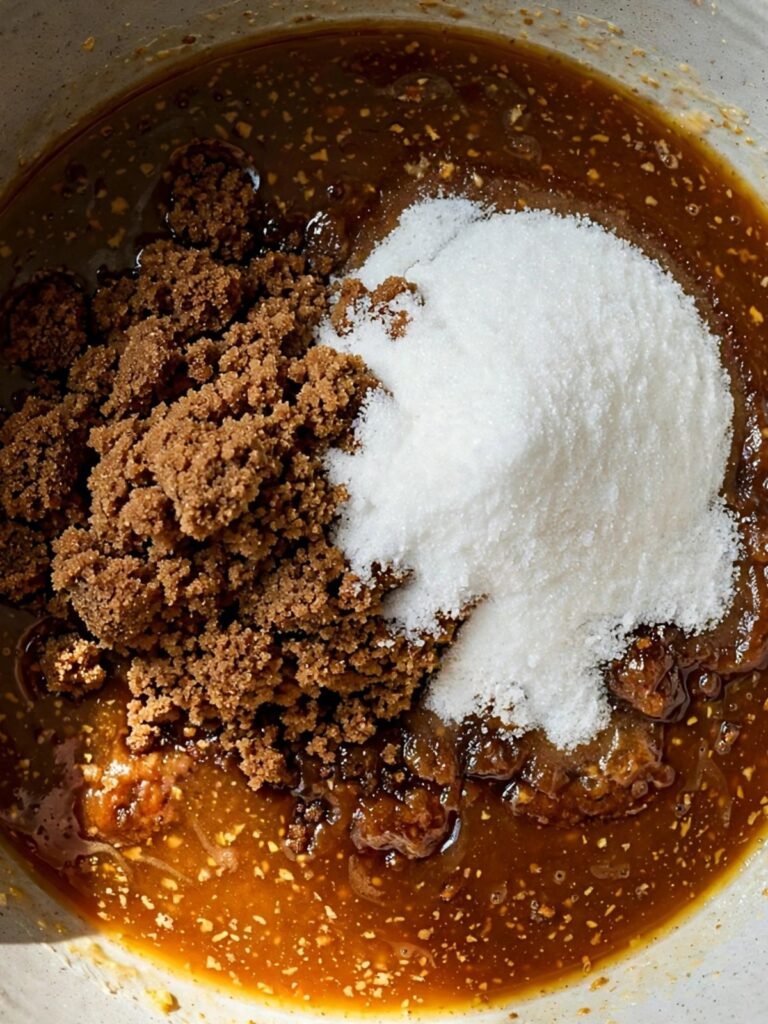
In your large mixing bowl with the cooled brown butter, add your ¾ cup (165g) packed dark brown sugar and ¼ cup (50g) plain white granulated cane sugar. Using your sturdy silicone spatula, stir from the bottom of the bowl upward in slow, deliberate strokes. The sugars will look grainy and separated at first — keep stirring. After approximately 30 to 40 strokes, the mixture starts to look cohesive: darker, shinier, and slightly thickened as the sugar begins to dissolve into the liquid fat.
The granulated sugar is what controls spread and surface finish in these cookies — substituting coconut sugar, raw sugar, or turbinado changes the crystal structure and produces cookies that spread differently. The dark brown sugar brings the molasses depth that layers with the brown butter’s caramel notes and keeps the centers chewy for days after baking. Sugar is hygroscopic — it draws and holds moisture from the air — and the high proportion of brown sugar in this dough is why these cookies stay soft on the counter without drying out.
The mixture should look thick, dark, and glossy — not grainy, not separated, not pooled with visible liquid butter on the surface. If you see puddles of butter at the edges, stir longer. This is the base. The emulsification built in the next step is what holds the whole dough together.
Step 4: Adding the Eggs, Pumpkin, and Vanilla to Build the Emulsified Dough
Add your 1 large egg (room temperature) to the brown butter-sugar mixture. Stir vigorously — 20 to 25 fast strokes — until the egg is completely incorporated and the mixture looks smooth and slightly lighter in color. Then add your 1 large egg yolk (room temperature) and stir again — another 20 strokes until fully blended.
Add your dried ⅓ cup (75g) canned pumpkin purée and your 1½ tsp pure vanilla extract. The pumpkin will streak through the mixture in orange ribbons at first. Keep stirring. After 25 to 30 strokes, the streaks should disappear and the dough should look uniformly deep amber-brown with a smooth, slightly sticky texture.
Do not rush this mixing stage. The eggs and pumpkin must fully emulsify into the fat before the flour goes in. Flour added to an incompletely emulsified wet base activates gluten unevenly and produces a cookie with inconsistent texture from batch to batch.

The dough should look unified, glossy, and smooth — no streaks of egg or pumpkin visible anywhere in the bowl. That is your signal to move to the dry ingredients.
As you can see in the overhead photo showing the completed wet base in the bowl, the texture at this stage is thick enough to coat the spatula and fall off in a slow, heavy ribbon — not watery, not lumpy. If it still looks streaky, stir 10 more strokes.
Step 5: Adding the Dry Ingredients Without Overdeveloping Gluten
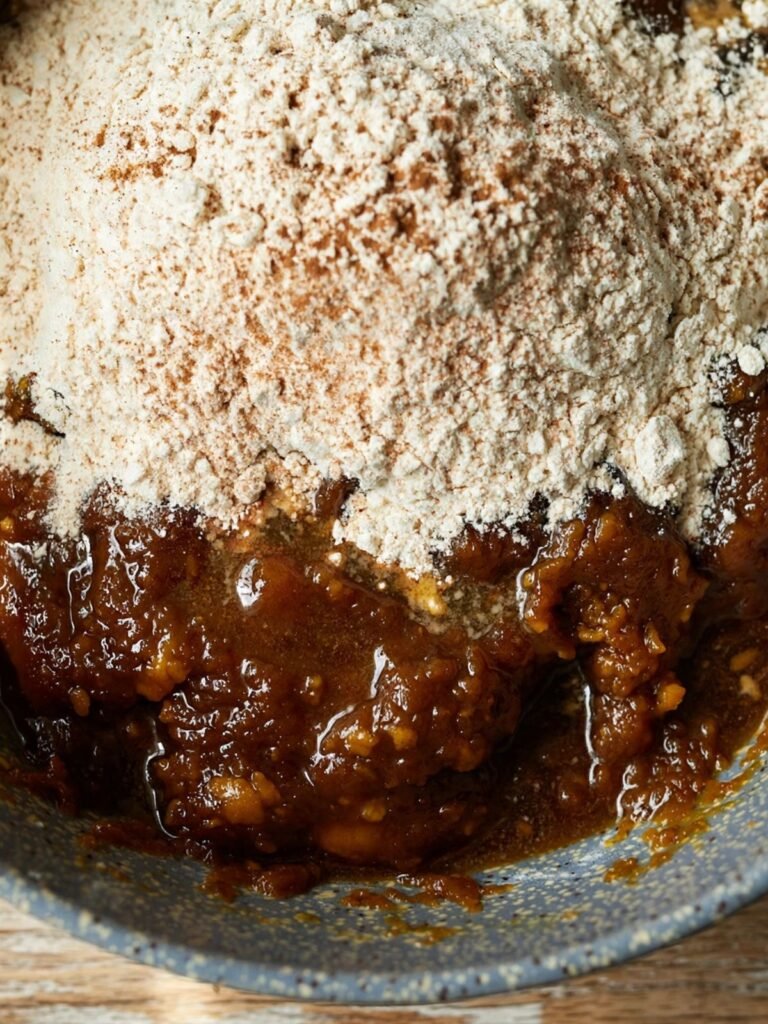
In a separate medium bowl, whisk together your 1¾ cups (219g) all-purpose flour, ¾ tsp baking soda, ½ tsp fine sea salt, 1 tsp ground cinnamon, ½ tsp ground ginger, ¼ tsp ground nutmeg, and ⅛ tsp ground cloves until the spices are evenly distributed through the flour. Whisking dry ingredients separately guarantees even distribution — clumped cinnamon or baking soda in one corner of the bowl produces uneven flavor and spotty leavening.
Pour the dry ingredients over the wet mixture all at once. Using your spatula, fold the flour in with slow, deliberate strokes from the bottom of the bowl upward. Count your strokes. After 20 strokes, check the dough — if no large pockets of dry flour remain, stop. If small dry patches are still visible, fold 5 more strokes and check again.
Do not stir in circles and do not beat the flour in aggressively — the edges will look fine but the centers will bake up tough and dense instead of the soft, chewy result in the photos. Gluten develops with mixing. Every stroke past necessary is a step toward tougher cookies. Fold just until the flour disappears.
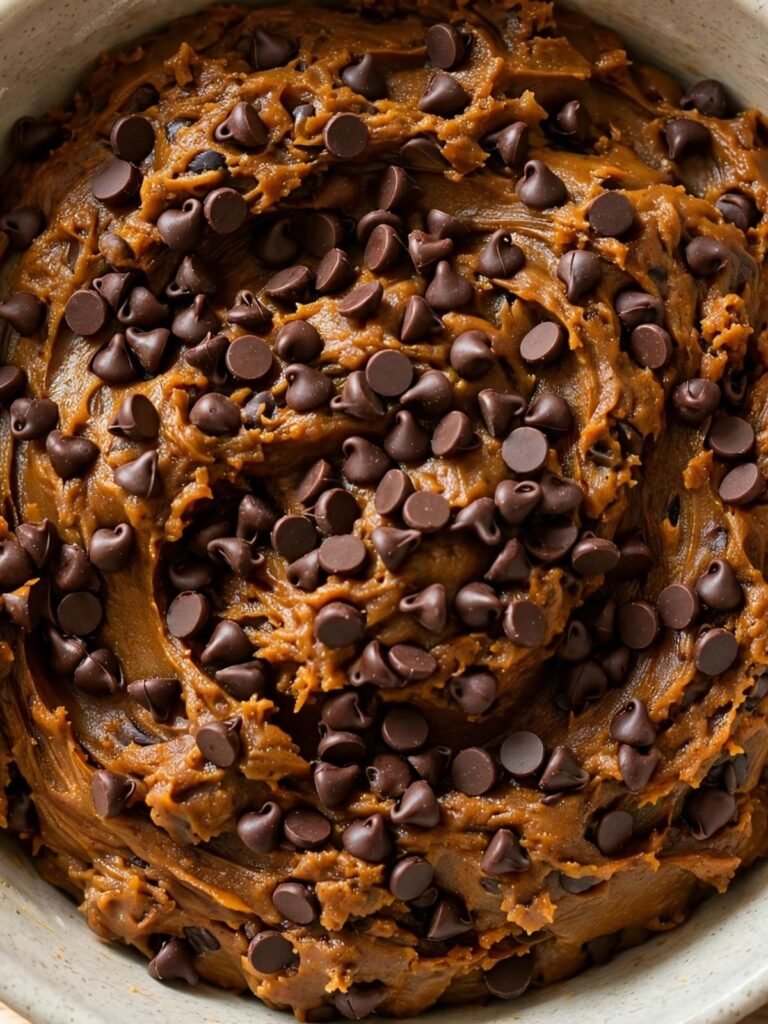
The dough should look stiff, slightly tacky, and uniformly dark brown with a faint orange undertone from the pumpkin. No white flour streaks visible. That is enough. Reserve ¼ cup (42g) of the chocolate chips for pressing on top. Add the remaining 1¼ cups (213g) semi-sweet chocolate chips (45–55% cacao) and fold in with 8 to 10 strokes until evenly distributed throughout the dough.
The finished dough should hold its shape when scooped — not flow or sag. If it seems very loose, refrigerate for 20 minutes before portioning.
Step 6: Portioning the Dough and Pressing Reserved Chips on Top
Preheat your oven to 350°F (175°C). Line your light-colored aluminum baking sheet with parchment paper. If you have an oven thermometer, verify the actual temperature before the pan goes in — most home ovens run 15–25°F (8–14°C) off from what the dial shows. Place the rack in the middle position.
Using a medium cookie scoop or a tablespoon, portion 2 tablespoons (approximately 45g) of dough per cookie. Weigh the first portion on your kitchen scale and use it as your calibration — then portion the remaining cookies to match. Place them on the prepared sheet at least 2 inches (5cm) apart. This recipe yields 20 to 22 cookies at this scoop size.
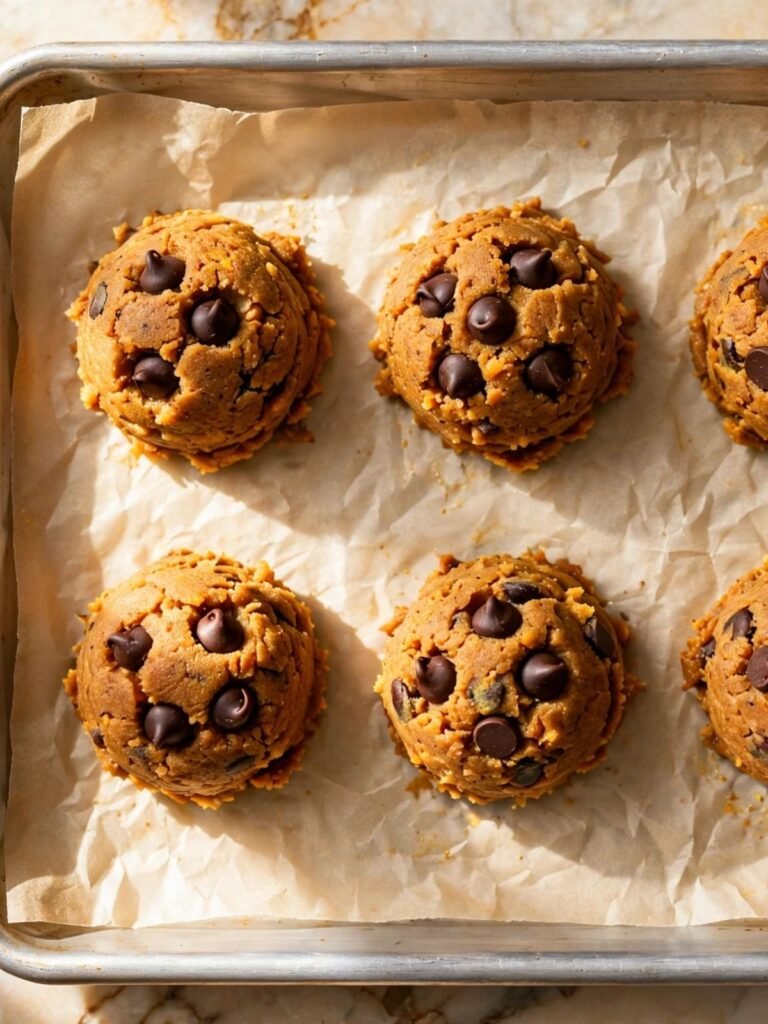
Press 4 to 6 of the reserved chocolate chips onto the top of each dough ball immediately before the pan goes in. Chips folded inside the dough get partially buried as the cookie spreads — the pressed chips on top stay visible and glossy, exactly as shown in the overhead photo of the dough balls on the parchment-lined pan.
🗒 Luna’s Note: I always press extra chips on top before baking. It takes 30 seconds and makes every cookie look like you planned it that way. The photos almost take themselves.
Optional 30-minute chill: Refrigerate the portioned dough balls on the pan for 30 minutes before baking. Chilling firms the dough and reduces spread slightly, producing taller cookies with more defined edges. Unchilled cookies spread just a touch more. Both results are correct — chilled is slightly neater.
The dough balls should go into the oven still cold if you chilled them, or at room temperature if you skipped the chill. Both paths are correct.
Step 7: Baking Until the Edges Are Set and the Centers Still Look Underdone
Bake at 350°F (175°C) on the middle rack for 11 to 13 minutes. Start checking at 11 minutes. The correct pull moment is specific: the edges should look set and slightly matte with a defined ring of color — and the centers should still look slightly puffy and underdone. The surface may appear slightly rough and crackled.
Do not wait for the centers to look fully baked before pulling. Carryover heat from the hot pan will continue cooking the centers for 4 to 5 minutes after the oven. If you wait until the centers look done in the oven, they will be overbaked by the time they cool — dry and tight instead of dense and chewy.
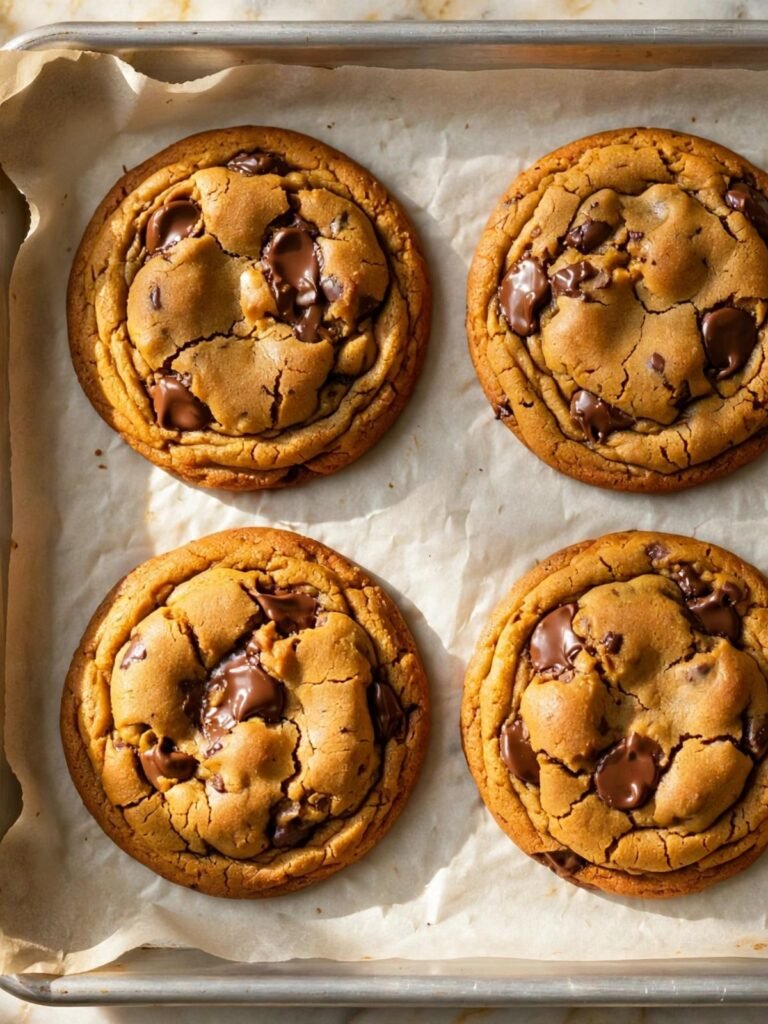
The edges should look set. The centers should look like they need 2 more minutes. That is the correct pull moment for these cookies. As you can see in the close-up photo of the just-baked cookies on parchment — the surface has slight unevenness and the center looks softer than the ring around it. That is exactly correct.
Transfer the pan to a heatproof surface immediately after pulling from the oven. Set a timer for 5 minutes and do not move the cookies.
Step 8: Resting on the Hot Pan for Exactly 5 Minutes Before Moving
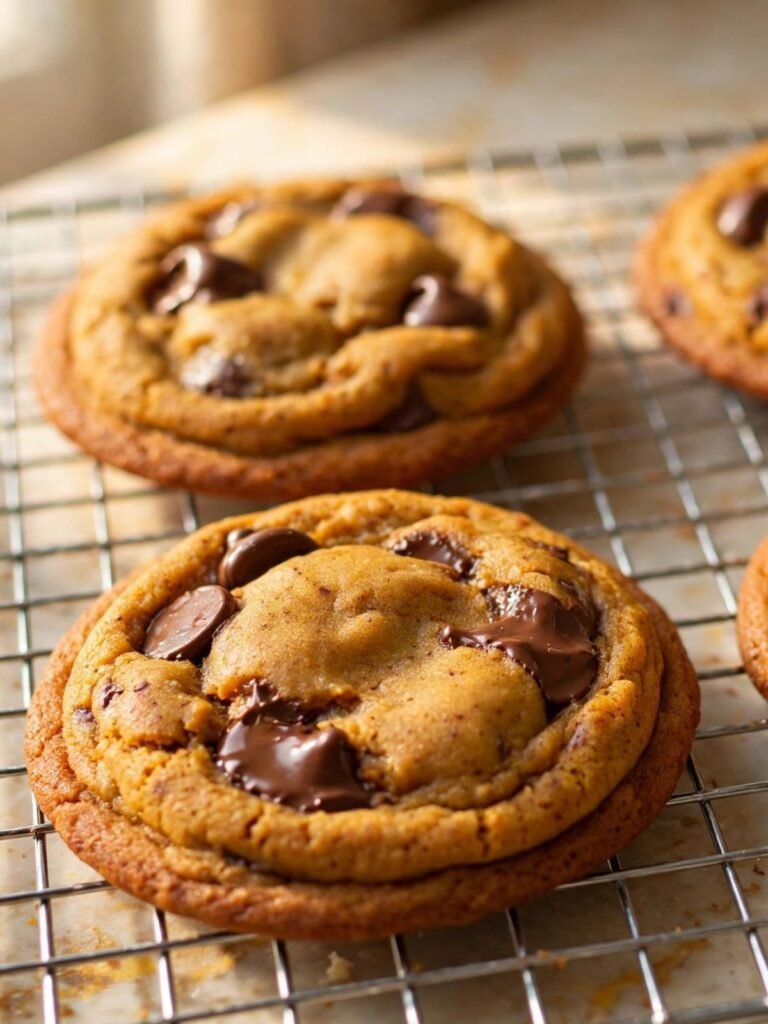
Leave the cookies on the hot pan for exactly 5 minutes after pulling from the oven. Set a timer. The pan continues to conduct heat into the base of the cookie during this time — this is carryover cooking, and it is what sets the centers without the oven drying them out. Moving the cookies before 5 minutes breaks the still-forming structure at the base. Waiting past 8 minutes starts to over-dry the bottoms.
After 5 minutes, use a flat spatula to transfer the cookies to a wire cooling rack. Let them cool for at least 10 minutes before eating — the interior structure needs this time to fully set. Breaking open a cookie at 5 minutes will show a molten, visually underdone center. At 10 minutes, that same center will be dense, chewy, and hold its shape cleanly.
The cookies should feel firm at the edges and soft in the center at the 5-minute mark. At 10 minutes, both zones should feel set — the center still soft, but no longer molten. That is the finished result.
The Science Behind Brown Butter Pumpkin Chocolate Chip Cookies
Why Brown Butter Produces a Layered Caramel-and-Toasted Flavor That Plain Butter Cannot
I noticed early in testing that the brown butter batches tasted meaningfully richer and more caramel-forward than batches made with plain melted butter, even when every other variable was identical. I assumed it was just the toasting effect — butter cooked longer. What I did not understand at the time was how dramatic the chemical transformation actually is.
When butter heats past its melting point and the water evaporates, the milk solids left behind undergo the Maillard reaction — the same reaction that browns meat, toasts bread, and caramelizes onions. At approximately 280–310°F (138–154°C), proteins and sugars in the milk solids bond and form hundreds of new flavor compounds: diacetyl (caramel), pyrazines (toasted nuts), furanones (toffee). None of these compounds exist in plain melted butter. When you pour browned butter into the bowl — including every dark fleck — all of those compounds go directly into the dough and permeate every cookie.
The result you can taste in these cookies is a layered, roasted caramel-and-toasted-nut depth that sits underneath the pumpkin spice and chocolate. It is not subtle. If you want to see the same brown butter effect in a cookie without the pumpkin, my brown butter chocolate chip cookies shows how far that single technique can carry a recipe on its own.
Why Removing Moisture from the Pumpkin Changes the Texture from Cakey to Chewy
Starch gelatinization is the process by which starch granules in flour absorb water and swell during baking — this is what gives baked goods their structure. When excess moisture is present, the flour absorbs so much water during mixing and baking that the starch network becomes loose and over-hydrated. The result is an open, cakey crumb. The cookies puff in the oven, set in a pillowy dome, and produce a texture that reads as muffin-like, not cookie-like.
By pressing the pumpkin dry before it enters the dough, you remove a portion of the free water without removing the pumpkin solids — the fiber, the pectin, and the beta-carotene that give these cookies their color and earthy sweetness. The flour can now perform its structural role correctly: forming a tight starch network that creates dense, chewy centers instead of open, cakey ones. Cookies made from undried pumpkin and cookies made from dried pumpkin are, in practice, completely different baked goods. The only variable is moisture.
Why an Extra Egg Yolk Adds Richness Without Adding Cakey Lift
Cookie texture exists on a spectrum. Cakey cookies have more liquid, more protein, and more air. Chewy and fudgy cookies have more fat, less liquid, and less air. Egg whites are approximately 88% water and high in protein — both of which add moisture and structural lift. Combined with pumpkin’s already-high moisture content, a two-egg-white recipe would push these cookies firmly into cakey territory.
Egg yolks are approximately 27% fat and contain lecithin, an emulsifier that binds fat and water into a smooth, cohesive dough without the moisture penalty of the white. The combination of one whole egg and one additional yolk gives enough protein to hold the cookie together structurally under oven heat, while the extra yolk adds richness and fat that contributes to chew. The observable result: these cookies bake into a dense, almost fudge-like center with set, matte edges — not the domed, cakey profile a two-whole-egg recipe would produce with the same pumpkin quantity.
Brown Butter Pumpkin Chocolate Chip Cookies Troubleshooting & Pro-Tips
Common Mistakes
Wrong type of pumpkin used
What you see: The cookies taste sweet and spiced but have none of the earthy, slightly savory pumpkin depth. The texture may also be looser or sweeter than intended.
Cause: Pumpkin pie filling was used instead of pure canned pumpkin purée. Pumpkin pie filling is a pre-seasoned product with added sugar, spices, and sometimes thickeners — it is not an ingredient, it is a finished component.
Fix if already made: The cookies will be edible but sweeter and imbalanced in spice. Reduce added cinnamon next time and use pure pumpkin.
Prevention: Check the label. It should read “100% pure pumpkin” with pumpkin as the only ingredient. Libby’s is the most consistent brand by moisture content batch to batch. Store-brand pure pumpkin varies.
Wrong pan type or preparation
What you see: Cookie bottoms are overbaked — dark brown to nearly black — before the centers have set. The tops still look pale and underdone.
Cause: A dark non-stick pan was used. Dark pans absorb significantly more heat than light-colored aluminum, and the cookie bases reach browning temperature before the oven heat has had time to work through the dough from the top.
Fix if already made: Cut the bottoms off and serve the top portions — the flavor is still correct. For the next batch, switch to a light-colored aluminum pan.
Prevention: Light-colored aluminum baking sheets are the correct tool. If you only own dark pans, reduce the oven temperature to 325°F (163°C) and check the cookies at 10 minutes.
Cookies spread too flat
What you see: The cookies come out thin, greasy, and almost disc-like — more spread than the thick, rounded cookies in the photos.
Cause: The brown butter was not fully cooled before mixing. Warm liquid fat melts the sugar crystals on contact, producing a looser dough that has nothing to hold its shape under oven heat.
Fix if already made: Flat cookies still taste correct. For the remaining dough, refrigerate the portioned balls for 30 minutes before baking the next batch.
Prevention: The cooled brown butter must feel cool to the touch — not just room temperature by the room. In a warm kitchen above 75°F (24°C), extend the cooling time to 40 to 45 minutes or set the bowl in the fridge for 10 minutes to finish.
Cookies came out cakey and puffy instead of chewy
What you see: The cookies dome in the oven and hold that domed shape after cooling. The interior is open and almost bread-like — not dense and fudgy.
Cause: The pumpkin was not dried thoroughly enough, or was skipped entirely. Excess moisture in the dough prevents the tight starch network that creates chewy texture from forming.
Fix if already made: These cookies are still baked and edible — they are just the cakey version of a pumpkin cookie rather than the chewy version. Serve them as-is.
Prevention: Three full rounds of paper towel pressing. The towels should come away visibly damp on each round.
The brown butter burned
What you see: The butter smells acrid and sharp — not nutty and caramel. The milk solids at the bottom of the pan are very dark brown to black. Cause: The heat was too high, or the butter was left unwatched. The window between browned and burned is approximately 30 to 60 seconds once the milk solids start turning color. A dark pan also hides the color change until it is too late. Fix if already made: Discard the batch. Burned butter is bitter throughout and cannot be corrected once it is in the dough. Salvage note: If you have already added burned butter to the sugar and mixed it, start the dough over. The flour will carry that bitter flavor through every cookie. There is no recovery path once it is mixed. Prevention: Use a light-colored saucepan and stir constantly after the butter has fully melted. Pull it off the heat the moment the specks turn deep golden — before you think it needs more time.
Leavening failure
What you see: The cookies bake into dense, flat discs with no spread and a gummy, almost raw-tasting texture even when fully baked through.
Cause: Expired baking soda. Baking soda loses its leavening power over time and needs to react with the natural acidity in the brown sugar and pumpkin to create CO2 lift during baking. Spent baking soda produces nothing.
Fix if already made: No salvage possible once leavening failure is structural.
Prevention: Test freshness before baking. Dissolve ½ teaspoon in 2 tablespoons of hot water — it should bubble immediately and vigorously. No bubbling means replace it.
Altitude and humidity: Above 3,500 feet (1,067m): reduce baking soda from ¾ tsp to ½ tsp and increase flour by 2 tablespoons (16g). Leavening gases expand faster at altitude due to lower air pressure — full-strength baking soda produces too much gas too quickly and causes cookies to rise and collapse rather than set. Start checking at 10 minutes. In high humidity above 70%: add one additional round of paper towel pressing on the pumpkin, and refrigerate the portioned dough balls for 30 minutes before baking to compensate for ambient moisture the dough absorbs from the air.
Expert Pro-Tips
Pro-Tip 1 — Use a light-colored saucepan with sloped sides for brown butter. The sloped sides let you tilt the pan at an angle while stirring to see the milk solids at the bottom clearly without moving the pan dangerously. Straight-sided pans force you to tilt too far or lean over the stove to see what is happening. One equipment choice, one fewer burned batch.
Pro-Tip 2 — Press chips onto the dough balls before baking, not after. Chips placed on top of a baked cookie do not adhere and fall off the first time someone picks it up. Chips pressed into the raw dough ball before baking sink slightly into the surface as the cookie spreads and anchor in place. The result is the glossy, studded top visible in every professional cookie photo — and it requires 30 seconds of work.
Pro-Tip 3 — Add ½ tsp of pure maple extract (not maple syrup) to the wet ingredients. Maple syrup adds liquid; the extract adds concentrated flavor without disrupting the moisture balance this recipe depends on. Maple extract + brown butter + pumpkin spice produces a flavor combination that is genuinely difficult to improve on. This is the variation I make when I want something that tastes like a specialty bakery item rather than a classic cookie.
Pro-Tip 4 — Use dark chocolate chips (60–70% cacao) instead of semi-sweet for a less sweet result. The bitterness of dark chocolate cuts through the sweetness of the dark brown sugar and the warmth of the pumpkin spice in a way that semi-sweet chips do not. Higher cacao chips also have more cocoa butter and melt more evenly in the oven, producing larger glossy pockets rather than firm chip shapes.
🗒 Luna’s Note: I use Libby’s pumpkin purée exclusively. Not because of any arrangement — because every other brand I have tested has had noticeably different moisture content from can to can. Libby’s is consistent. Consistency matters more than any other quality when testing a recipe I need to work the same way every time.
How to Store Brown Butter Pumpkin Chocolate Chip Cookies
Room Temperature
Store baked cookies in a lidded hard-sided container with a sheet of unbleached parchment paper between layers. Do not use zip-lock bags — the cookies flatten and the bottoms become sweaty from trapped moisture. At room temperature, these cookies stay soft and chewy for 4 to 5 days. The dark brown sugar and pumpkin purée both attract and hold ambient moisture, which means they stay softer longer than most standard chocolate chip cookies.
Place a small piece of white bread in the container alongside the cookies. The bread absorbs excess moisture from the air inside the container and redistributes it to the cookies, keeping them from drying out on Day 4 or 5. Replace the bread slice after two days.
Refrigerator
Refrigerating baked cookies is not recommended for this recipe. The cold draws moisture out of the cookies and into the container, producing a hard, dry texture and muting the pumpkin spice and brown butter flavor that makes these worth making. If you need to extend shelf life past 5 days, freeze them instead.
Freezer — Baked
Wrap individual baked cookies in plastic wrap, then transfer to a freezer-safe zip-lock bag or lidded container. Freeze for up to 2 months. To thaw, leave at room temperature for 30 to 45 minutes — the texture returns very close to fresh. To get a genuinely fresh-baked result, rewarm individual thawed cookies in a 300°F (150°C) oven for 4 to 5 minutes. The brown butter and pumpkin spice aroma returns fully with the heat.
Freezer — Unbaked Dough
Portion the dough into balls, place on a parchment-lined sheet, and freeze until solid — approximately 1 hour. Transfer the frozen balls to a freezer zip-lock bag and store for up to 3 months. Bake directly from frozen at 350°F (175°C) for 13 to 15 minutes — no thawing required. Use the same edge-set doneness cue. Add 2 to 3 extra minutes and watch the edges carefully.
Serving Suggestion
These cookies are best at room temperature, between 10 and 30 minutes after coming off the cooling rack — when the centers are fully set but the chocolate is still soft. I make these with black coffee, no sugar. The slight bitterness cuts through the dark brown sugar and brown butter richness in a way that milk does not.
This is the recipe I make in early October when I want something that smells and tastes unmistakably like fall without committing to an entire pie or layer cake. One bowl. One pan. No special occasion needed. It fits that specific mood.
On Day 2, these cookies are slightly softer and more settled — the spices deepen overnight and the brown butter flavor becomes more pronounced. I prefer them on Day 2. Day 3 is still very good. Day 4 depends on how well they were stored.
These do not travel well to outdoor events in warm weather — the chocolate chips soften considerably above 75°F (24°C) and the cookies lose their structural integrity. Bring them somewhere with air conditioning, or make them where you are eating them.
Frequently Asked Questions About Brown Butter Pumpkin Chocolate Chip Cookies
Can I make brown butter pumpkin chocolate chip cookies ahead of time?
Yes — and the dough actually improves with a short rest. You can make the dough up to 48 hours ahead and keep it covered in the refrigerator. The brown butter flavor deepens as the pumpkin and spices steep into the dough. When you are ready to bake, let the dough sit at room temperature for 10 to 15 minutes before portioning — cold dough straight from the fridge is too firm to scoop evenly. Alternatively, portion the dough into balls and freeze them (up to 3 months), then bake directly from frozen at 350°F for 13 to 15 minutes. The frozen dough method is how I keep a batch ready without committing to baking an entire tray at once.
Can you make pumpkin chocolate chip cookies without brown butter?
You can, and they will still taste like pumpkin chocolate chip cookies. But the depth of flavor is meaningfully different. Brown butter introduces a layered caramel and toasted-nut quality through the Maillard reaction that plain melted butter does not produce — the chemical compounds formed during browning do not exist in unbrowned butter and cannot be replicated by any other technique. The recipe works structurally with plain melted butter cooled to room temperature at the same quantity (½ cup / 113g). What you lose is the roasted complexity that separates these from a standard recipe. If you want a tested version without the brown butter step, my pumpkin chocolate chip cookies covers that recipe with its own method built for that result.
Why did my cookies spread too much?
The most common cause is brown butter that was not fully cooled before mixing. Warm liquid fat dissolves the sugar crystals on contact, producing a looser dough with less structural integrity — it spreads flat as the fat re-liquefies under oven heat, because there is nothing left to hold the cookie’s shape while it bakes. The fix is straightforward: always cool the brown butter until it feels genuinely cool to the touch, not just below body temperature. In a warm kitchen above 75°F (24°C), extend the cooling time or set the bowl in the refrigerator for 10 minutes to finish. Refrigerating the portioned dough balls for 30 minutes before baking is the most reliable insurance against spread in any warm-kitchen or warm-season session.
What makes these cookies chewy instead of crispy?
The chewy texture in these cookies comes from three factors working together: the high proportion of dark brown sugar (which is hygroscopic — it draws and holds ambient moisture, keeping the interior soft after cooling), the extra egg yolk (which adds fat without the water of an egg white, contributing to a denser crumb), and the pumpkin moisture management (removing excess water before it enters the dough, preventing the loose starch gelatinization that produces cakey texture). Crispy pumpkin cookies need low moisture, higher granulated sugar, and a longer bake time — the opposite profile. To move this recipe toward crispier results, increase the granulated sugar to ½ cup (100g), reduce the brown sugar to ½ cup (110g), and bake for 14 to 15 minutes. The result will be a thinner, snappier cookie with significantly less chew.
Can I make these gluten-free?
Yes, with a direct flour substitution. Replace the all-purpose flour with a 1:1 gluten-free baking blend that contains xanthan gum, such as Bob’s Red Mill 1-to-1 Baking Flour or King Arthur Measure for Measure. Use the same weight: 219g. The texture will be slightly less chewy — gluten-free blends do not develop the same elastic protein network as wheat flour, which is one of the contributors to chew — but the cookies will hold together correctly and taste very close to the original. Do not substitute almond flour or oat flour one-for-one without reformulating the entire recipe; both require significantly different ratios of liquid and fat to function.
Can I double this recipe?
Yes — the recipe doubles cleanly. Double every ingredient exactly, including the baking soda. Leavening does not scale linearly in very large batches (four times the recipe or more), but at double, the ratio holds. Bake in separate batches on separate pans rather than using two pans in the oven simultaneously — oven airflow is reduced with two pans on two racks and the cookies on the lower pan will bake unevenly. One pan at a time maintains consistent heat distribution.
How does altitude affect this recipe?
At high altitude above 3,500 feet (1,067m), reduce the baking soda from ¾ tsp to ½ tsp and add 2 tablespoons (16g) of additional flour. At altitude, leavening gases expand more rapidly due to lower atmospheric pressure — full-strength baking soda causes cookies to rise aggressively and then collapse before the structure sets. The additional flour compensates for the faster expansion by adding structure. Start checking the cookies at 10 minutes rather than 11, since baked goods generally cook faster at altitude.
More Pumpkin Recipes You’ll Love
- Pumpkin Chocolate Chip Cookie Bars — all the flavor of these cookies in a single pan with no portioning; the bars stay fudgy at room temperature for up to 5 days
- Pumpkin Dump Cake — three layers, one pan, no mixer needed — the fastest fall dessert on this site and one of the highest-performing recipes in the pumpkin cluster

Brown Butter Pumpkin Chocolate Chip Cookies
Ingredients
Method
- Add butter to a light-colored saucepan over medium heat and stir constantly until the milk solids turn deep golden brown and the butter smells nutty, approximately 5–7 minutes, then immediately pour into a medium bowl (including every brown speck) to stop cooking and cool completely, about 25–30 minutes.
- While butter cools, spread pumpkin purée in a thin layer onto three stacked paper towels, fold over, press firmly for 10 seconds, discard wet outer layers, and repeat with fresh towels two more times to remove excess moisture; set aside.
- Add brown sugar and granulated cane sugar to the cooled brown butter and stir vigorously with a silicone spatula until the mixture looks thick, dark, and glossy with no visible dry sugar, about 30–40 strokes.
- Add the whole egg and stir 20–25 strokes until fully incorporated, then add the egg yolk and stir 20 more strokes until the mixture is smooth.
- Add the dried pumpkin purée and vanilla extract and stir 25–30 strokes until no orange streaks remain and the mixture looks uniformly smooth and slightly glossy.
- In a separate bowl, whisk together the flour, cinnamon, ginger, nutmeg, cloves, baking soda, and salt until evenly combined.
- Add the dry ingredients to the wet mixture all at once and fold with the spatula using slow upward strokes — count 20 strokes, check for dry flour, fold 5 more if needed — stop the moment all flour disappears; do not overmix.
- Fold in 1¼ cups (213g) of the chocolate chips with 8–10 strokes until evenly distributed throughout the dough.
- Preheat oven to 350°F (175°C) and line a light-colored aluminum baking sheet with parchment paper.
- Scoop 2 tablespoons (45g) of dough per cookie, space at least 2 inches apart on the prepared sheet, and press 4–6 reserved chocolate chips onto the top of each ball.
- Optional: refrigerate portioned dough balls on the pan for 30 minutes before baking for taller, slightly more defined cookies.
- Bake on the middle rack at 350°F (175°C) for 11–13 minutes, until the edges look set and slightly matte and the centers still look slightly puffy and underdone.
- Leave cookies on the hot pan for exactly 5 minutes without moving them, then transfer to a wire rack and cool for at least 10 minutes before eating.
Notes
- Pumpkin: must be 100% pure canned pumpkin — not pumpkin pie filling. Pat completely dry before using or cookies will be cakey.
- Butter: brown butter must be fully cooled before adding sugar — warm butter causes flat, greasy cookies.
- Chocolate chips: semi-sweet 45–55% cacao. Dark chocolate 60–70% cacao works and cuts sweetness.
- Storage: lidded hard-sided container, parchment between layers, room temperature up to 5 days.
- Freeze baked: wrap individually in plastic wrap, freeze up to 2 months; thaw 30–45 min or reheat at 300°F for 4–5 min.
- Freeze unbaked: freeze portioned balls on pan 1 hour, transfer to bag; bake from frozen 13–15 min at 350°F.
- Make ahead: dough keeps refrigerated up to 48 hours; let sit 10–15 minutes before portioning from cold.
- Scaling: doubles cleanly; bake in separate batches, not simultaneously.
- Altitude: reduce baking soda to ½ tsp, add 2 tbsp flour, check at 10 minutes.
- Allergens: contains wheat, eggs, dairy, soy (chocolate chips).
- Tip: add ½ tsp pure maple extract to wet ingredients for a deeper fall flavor without adding moisture.