Raspberry Crumble Bars Recipe
The first time I made raspberry crumble bars, I cut them after one hour because the surface looked completely set. The filling was still molten underneath — the knife went through and the jam poured out the sides. I lost half the batch. The lesson is in the cooling time, and it is in this recipe in a way that is impossible to miss.
These raspberry crumble bars use one dough for everything — the same oat-and-butter mixture pressed flat becomes the shortbread base, and the portion you hold back gets scattered across the top as the crumble. Old-fashioned rolled oats, all-purpose flour, packed light brown sugar, cold unsalted butter, fine sea salt, and pure vanilla extract. That is the entire base and topping. There is no separate crumble mixture to make, no second bowl to wash. The raspberry filling is raspberries, plain white granulated cane sugar, fresh lemon juice, and cornstarch — five minutes on the stovetop. Nothing more.
I tested eight batches of these. The variables I was working through: oat-to-flour ratio, cold butter versus melted butter in the base, pre-baking the base or not, and whether the filling needed to be cooked before it went into the pan. Here is what I found. Melted butter produces a sandy base that compacts but does not hold structure — the layers separate when you pick the bar up. Cold butter, rubbed into the dry ingredients until the mixture looks like coarse wet sand, creates a base that holds its shape after cutting and a topping with distinct pebbled clumps rather than uniform sand. The filling needs to be cooked before it goes in — raw raspberries release too much liquid during baking and make the base soggy. A five-minute simmer with cornstarch sets the filling to a glossy, jammy consistency that stays in place when the knife goes through.
🗒 Luna’s Note: I always refrigerate the reserved crumble topping while I cook the filling. Cold crumble scatters into distinct pebbles. Room-temperature crumble presses itself flat and you lose the texture entirely.
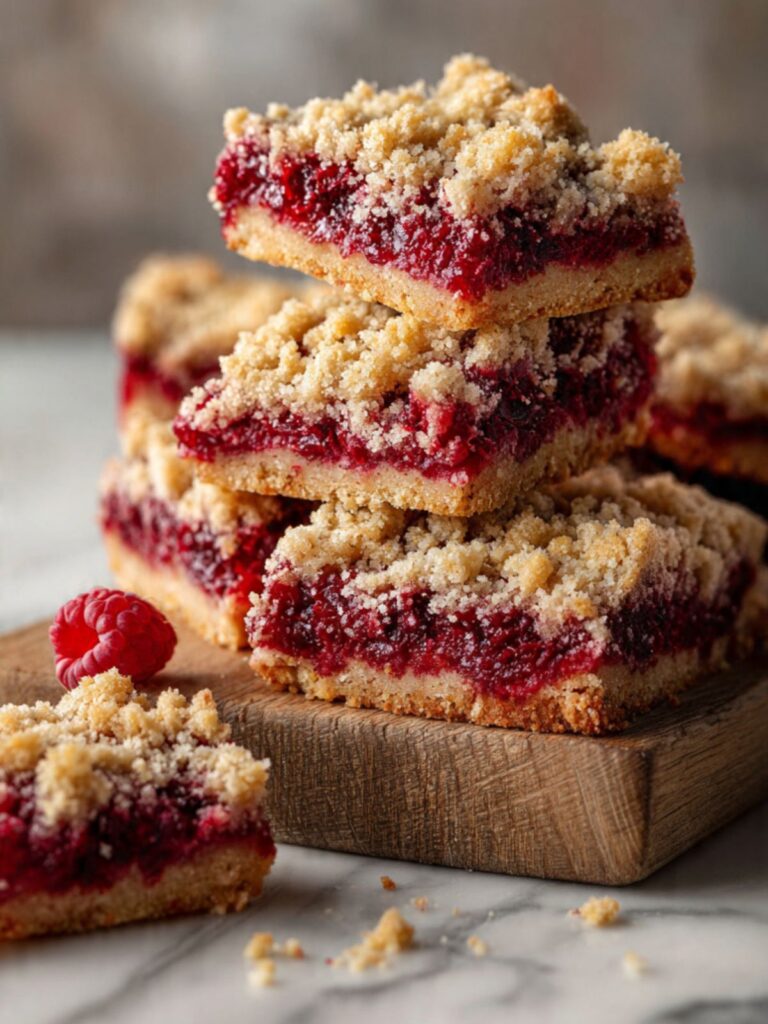
What you get: a dense, buttery oat shortbread base that holds a clean 90-degree edge. A middle layer of concentrated, ruby-red raspberry jam — glossy, intensely tart, with visible seeds scattered through. A crumble topping that has distinct irregular clumps, medium golden peaks, and a faint crunch from the oat flakes. These are not soft bars. They have structure. They cut cleanly and they stack.
No electric mixer. One bowl. The only equipment this recipe requires beyond standard baking tools is a saucepan and a kitchen scale. The chilling step before cutting is not optional — I will say it again in the method because it matters.
| Yield | 16 bars (4×4 cut pattern from an 8×8 inch pan) |
| Prep Time | 20 minutes |
| Cook Time (Filling) | 5 minutes |
| Bake Time | 35–38 minutes |
| Cooling Time | 2 hours at room temperature + 30 minutes refrigerated |
| Total Time | Approximately 3 hours (mostly hands-off) |
| Difficulty | Easy |
| Method | Rubbed-in cold butter / reserved dough |
| Pan | 8×8 inch (20×20cm) light-colored aluminum baking pan |
| Nutrient | Amount Per Bar |
|---|---|
| Calories | ~215 |
| Carbohydrates | ~29g |
| Fat | ~10g |
| Protein | ~2g |
| Sugar | ~16g |
| Sodium | ~75mg |
Ingredients & Tools for Raspberry Crumble Bars Recipe
For the Oat Shortbread Base and Crumble Topping
- 1½ cups (180g) all-purpose flour (spooned into the measuring cup and leveled — or weighed at 180g)
- 1½ cups (135g) old-fashioned rolled oats — not instant oats, not quick oats
- ¾ cup (165g) packed light brown sugar
- ½ tsp (3g) fine sea salt
- 1 tsp (5ml) pure vanilla extract
- ¾ cup (170g) unsalted butter, cold and cubed into ½-inch pieces
For the Raspberry Filling
- 3 cups (360g) fresh or frozen raspberries — if frozen, do not thaw before cooking
- ⅓ cup (67g) plain white granulated cane sugar — do not substitute coconut sugar, raw sugar, or liquid sweeteners; different crystal structures change how the filling sets and concentrates
- 2 tablespoons (16g) cornstarch
- 1 tablespoon (15ml) fresh lemon juice
- Pinch of fine sea salt
Before You Start
Use a kitchen scale. The gram weights in this recipe are the numbers I tested with. Volume measurements for flour and oats can vary by 20–30% depending on how the cup is filled. Weighing eliminates that variable entirely and gives you the same result I got.
Your butter must be cold. Pull it from the fridge right before you start. Cut it into ½-inch cubes immediately and keep it cold until it goes into the dry ingredients. Cold butter is what creates the distinct pebbled clumps in the topping — butter that has warmed to room temperature will press itself flat and the crumble texture disappears entirely. You will end up with compacted sand instead of the irregular golden peaks shown in the photos.
Check your brown sugar before you start. Packed light brown sugar that has hardened in the bag cannot be accurately measured — a hard lump pressed into a cup reads as more sugar than it is and changes the sweetness and texture of the base. If your brown sugar has hardened, place a damp paper towel over the open bag, close it loosely, and microwave in 20-second increments until the sugar is pliable and can be pressed. Let it cool for 2 minutes before measuring and packing.
Prepare your pan before you start mixing. Line your 8×8 inch (20×20cm) light-colored aluminum baking pan with parchment paper, leaving at least 2 inches of overhang on two opposite sides. These overhangs are your handles — without them, you cannot lift the bars cleanly out of the pan and the edges will break. Grease the two unlined sides lightly with butter or non-stick spray.
No electric mixer needed. This entire recipe comes together with a large mixing bowl and your hands — or a food processor if you prefer. No stand mixer, no hand mixer required.
Preheat your oven early. Set it to 350°F (175°C) at least 20 minutes before baking. Most home ovens run 15–25°F (8–14°C) off from the set temperature. If you have an oven thermometer, confirm the actual temperature before the pan goes in. An underheated oven produces a pale, underset base and a filling that does not fully activate the cornstarch thickener.
Do not substitute the oats. Old-fashioned rolled oats are structural in this recipe — they create the distinct flaked texture visible throughout the base and topping in the photos. Instant oats will dissolve into the dough and the texture becomes uniform and sandy with no visible oat structure. Quick oats are slightly better but still produce a finer, less textured result. Use old-fashioned.
Cornstarch is the correct thickener here. It produces the clear, glossy jam layer visible in the cross-section photos — the concentrated ruby-red filling with the slight sheen. Flour-thickened fillings are cloudy and pasty. Tapioca starch is an acceptable substitute at the same quantity if cornstarch is unavailable, but the set will be slightly more gel-like. Do not substitute with arrowroot — it breaks down at high oven temperatures and the filling will be runny when cut.
Use plain white granulated cane sugar in the filling. Coconut sugar and raw sugar have larger crystal structures that do not dissolve at the same rate during cooking — the filling will look grainy and will not reach the clear, glossy set shown in the cross-section photo. Liquid sweeteners like honey or maple syrup add extra moisture the cornstarch ratio is not calibrated for and the filling will be loose.
Cooling is not optional. Plan for a minimum of 2 hours at room temperature followed by 30 minutes in the refrigerator before cutting. The filling is still liquid underneath the set surface for the first 90 minutes out of the oven. Cutting early means the jam runs, the layers separate, and the bars crumble. This is a hands-off wait — use it.
Necessary Tools
- Kitchen scale (strongly recommended)
- Large mixing bowl
- Medium saucepan
- 8×8 inch (20×20cm) light-colored aluminum baking pan
- Parchment paper with overhang on two sides
- Silicone spatula or wooden spoon
- Sharp chef’s knife and cutting board
- Wire cooling rack
- Measuring cups and spoons (if not using a scale)
How to Make Raspberry Crumble Bars
Step 1: Preheating the Oven and Preparing the Pan So the Bars Release Cleanly
Set your oven to 350°F (175°C) and allow it to preheat for a full 20 minutes before anything goes in. Place the rack in the middle position — not the top third, not the bottom third. This recipe uses the cold fat / rubbed-in method with a reserved dough technique — one dough split into two uses. No electric mixer is involved at any stage. The entire method from first step to pan assembly is hands and spatula only.
The middle rack ensures the base and the crumble topping receive equal heat exposure. A pan sitting on the bottom rack will overbrown the shortbread base before the topping has time to set. A pan on the top rack will over-darken the crumble peaks while the base stays pale and underbaked.
If your only available pan is dark non-stick, reduce the oven temperature to 325°F (163°C) and begin checking at 30 minutes rather than 33. Dark pans absorb significantly more radiant heat than light-colored aluminum — at 350°F they will overbrown the shortbread base before the crumble topping reaches the correct golden color and before the filling reaches a full bubbling boil.
Line your 8×8 inch (20×20cm) light-colored aluminum baking pan with parchment paper. Leave at least 2 inches of overhang on two opposite sides — these are your handles. Press the parchment flat against the base and sides. Lightly butter or spray the two unlined sides so the bar edges do not stick. If you skip the overhang and try to cut and lift directly from the pan, the edges of the shortbread base will break and the bars will not come out in clean squares.
The pan should be completely lined and ready before you touch the dough — the butter in this recipe needs to stay cold through every stage, and stopping to prep the pan mid-mix warms everything down.
Set the pan aside. Move immediately to Step 2.
Step 2: Making the Raspberry Filling First So It Has Time to Cool
In your medium saucepan, combine your 3 cups (360g) fresh or frozen raspberries, ⅓ cup (67g) plain white granulated cane sugar, 2 tablespoons (16g) cornstarch, 1 tablespoon (15ml) fresh lemon juice, and a pinch of fine sea salt.
The cornstarch goes in dry with the fruit and sugar — do not dissolve it in water first for this method. Stir everything together with your silicone spatula until the cornstarch is no longer visible as white powder. Place the saucepan over medium heat and stir constantly as the mixture heats. The raspberries will begin to break down within 2 to 3 minutes. Keep stirring — the cornstarch will cause the filling to look lumpy and cloudy right before it clears. This is the starch gelatinizing. Keep the heat at medium and keep stirring.
Cook for 4 to 5 minutes total from the moment the mixture hits the heat — you are looking for the filling to reach a full simmer (large, slow bubbles breaking the surface) and the color to shift from dull pink to a deep, concentrated ruby-red. The lemon juice does two things here: it sharpens the raspberry flavor and its acidity helps the cornstarch set more cleanly. Do not skip it.
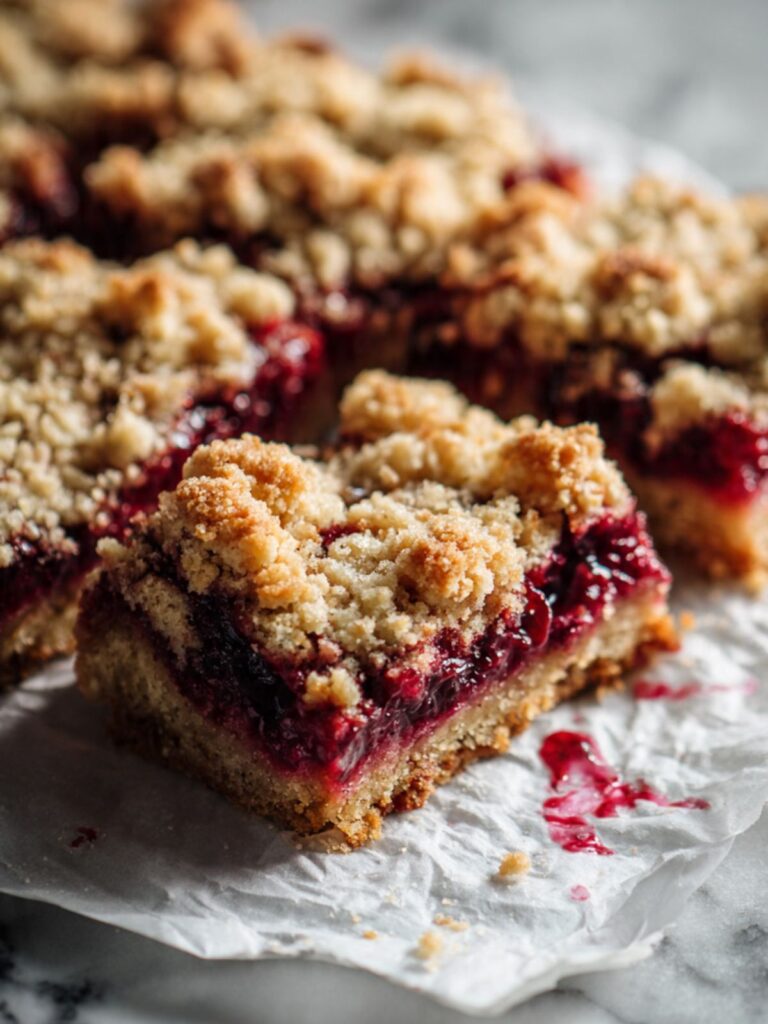
The filling is ready when it looks glossy, deep ruby-red, and coats the back of the spatula in a thick layer that does not immediately run off. This is exactly the concentrated, jammy filling you can see in the cross-section photo showing the three distinct layers — dense shortbread base, glossy ruby filling, crumbled topping.
Remove from heat immediately. Pour the filling into a heatproof bowl and set it aside to cool while you make the dough. The filling needs to be warm — not hot — when it goes onto the base. A very hot filling will melt the butter in the pressed base and cause the bottom layer to become greasy and unstable.
Do not walk away from the stove while the filling cooks — at medium heat it goes from simmering to scorching on the bottom in under a minute if left unstirred.
Step 3: Mixing the Oat Shortbread Dough Until It Clumps and Holds
In your large mixing bowl, combine your 1½ cups (180g) all-purpose flour (spooned and leveled), 1½ cups (135g) old-fashioned rolled oats, ¾ cup (165g) packed light brown sugar, and ½ tsp (3g) fine sea salt. Whisk the dry ingredients together for about 20 seconds until evenly combined — no sugar clumps, no flour pockets.
Add your 1 tsp (5ml) pure vanilla extract and stir it through with the spatula. Add your ¾ cup (170g) cold unsalted butter, cubed into ½-inch pieces. This is the step that determines the texture of both your base and your topping — the butter must go in cold.
Work the butter into the dry ingredients using your fingertips. Pick up small handfuls and press the butter cubes between your thumb and fingers, breaking them down into smaller and smaller pieces while coating them in the flour-oat mixture. Work quickly — the goal is to have no butter pieces larger than a pea remaining, and the whole mixture should look like coarse, damp sand with some irregular clumps. This should take 3 to 4 minutes of active rubbing. If the butter starts feeling greasy or the mixture starts sticking together in one mass, your hands have warmed it too much — press everything flat into the bowl and refrigerate for 10 minutes before continuing.
Alternatively, pulse everything in a food processor — 10 to 12 short pulses until the mixture reaches the coarse sand stage. Do not over-process. The moment the dough starts collecting at the sides of the bowl into one mass, stop.
The finished dough should look like this: coarse, uneven, pale golden sand with visible oat flakes throughout and irregular clumps that hold together when you squeeze a handful firmly, but crumble apart when you release the pressure. This is the correct texture for both pressing and crumbling.
🗒 Luna’s Note: I always do the squeeze test before I split the dough. Grab a small handful and squeeze firmly for 3 seconds. If it holds a rough shape when you open your hand, the fat ratio is right and the base will press without crumbling apart. If it falls straight back into powder, the butter is either too cold and hasn’t coated the flour, or there isn’t enough of it — work it a minute longer.
The finished dough will have two textures simultaneously — larger irregular clumps where the butter coated bigger portions of the oat-flour mixture, and fine sandy crumble between them. Both are correct. The clumps become the visible golden peaks in the topping; the fine crumble fills the gaps between them and forms the dense, cohesive base when pressed. Do not try to create uniform clump sizes — the variation is what produces the rustic, uneven surface visible in the photos.
Step 4: Pressing the Base and Chilling the Reserved Topping
Measure out approximately two-thirds of the dough mixture — about 360g if you are using a scale — and transfer it to your prepared pan. Keep the remaining one-third (about 180g) in the bowl and place it in the refrigerator immediately. This is your crumble topping. It needs to stay cold while the base is pressed and the filling is added. Cold crumble scatters into the distinct, pebbled clumps visible in every shot — room-temperature crumble presses itself flat and the texture disappears.
Press the two-thirds portion into an even, compact layer across the base of the pan. Use the flat bottom of a measuring cup or drinking glass to press firmly and evenly — you want a layer that is uniform in thickness from edge to edge with no thin spots at the corners. Press the edges up very slightly against the parchment walls — about ⅛ inch — so the filling has a slight border to sit within.
The pressed base should feel solid and compact — not crumbly or loose when you press your finger into it. Run your finger across the surface: it should feel smooth and even, with no thick ridges or thin patches. The base in the overhead photo shows this uniform, compressed surface before the filling goes on.
Do not pre-bake the base. It goes into the oven once — with the filling and topping already assembled.
Step 5: Assembling the Bars in the Correct Order
Pour your cooled raspberry filling over the pressed base. Use your silicone spatula to spread it into an even layer, taking it all the way to the edges of the base. The filling layer should cover the base completely with no exposed shortbread showing through. Leave no more than ¼ inch from the pan edges — the filling will bubble and expand slightly during baking and needs that margin.
Retrieve your reserved crumble topping from the refrigerator. It should have firmed slightly and feel cold to the touch. Take small pinches and scatter them across the surface of the filling. Do not press the crumble down — drop it loosely from about 2 inches above the surface so it lands in irregular piles.
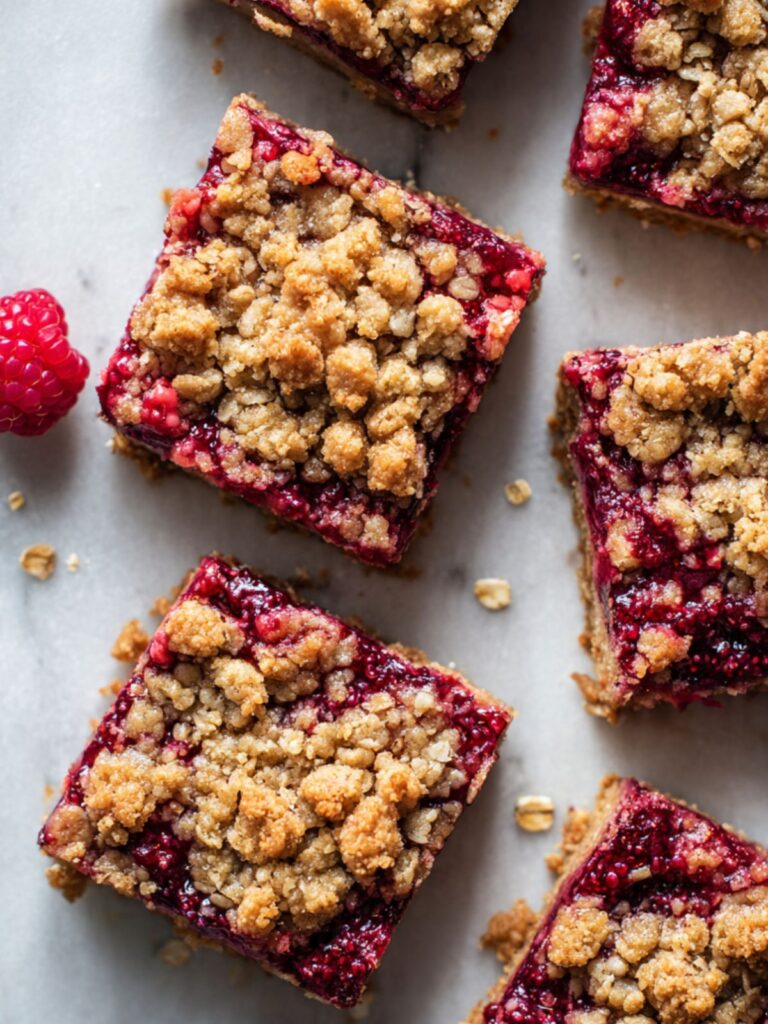
Work from the edges inward, then fill the center last. The goal is not complete coverage — it is deliberate incompleteness. Approximately 30–40% of the filling surface should remain visible between the crumble clumps. Look at the overhead flat-lay shot showing the bars cut into squares: you can clearly see deep ruby filling between every cluster of crumble. That contrast — crimson filling peeking through golden oat clumps — is what the finished bar looks like from above. A fully covered surface buries the filling color and makes the bars look like a plain crumble with no visible fruit. Do not aim for full coverage.
Once assembled, the top should look pebbled and uneven — golden crumble clumps of varying sizes scattered across the deep red filling, with the filling visible in places between the crumble. This contrast is both structural and visual — areas of exposed filling will bubble up during baking and create the caramelized jam edges you can see in the parchment-side shot.
Move immediately to baking. Do not let the assembled pan sit at room temperature — the crumble topping needs to go into the oven cold.
Step 6: Baking Until the Topping Is Golden and the Filling Is Actively Bubbling
Place the assembled pan on the middle rack of your preheated 350°F (175°C) oven. Set a timer for 33 minutes and do not open the oven door before then. Opening the oven before the base is set causes the bottom layer to lose structural integrity — it will not firm back up correctly.
Bake for 35 to 38 minutes total. Begin checking at 33 minutes. The bars are ready when all three of the following are true simultaneously: the crumble peaks are medium golden brown — not pale, not deep brown; the filling at the edges of the pan is actively bubbling and has darkened to a deep, concentrated crimson; and the base around the perimeter feels firm when you very gently press the parchment overhang and the pan does not flex.
Do not pull the bars when only the topping looks golden. The filling must be actively bubbling at the edges — this confirms the cornstarch has reached the temperature it needs to fully activate and set. Pulling too early means the filling will be loose and runny when cut, even after a full cooling time.
The surface you are looking for matches exactly what is visible in the photo of the bars fresh from the oven on parchment — crumble peaks in medium golden brown, deep ruby filling bubbling and slightly darkened at the pan edges, no pale or underdone patches across the topping.
If your oven runs hot, check at 30 minutes. If the topping is browning faster than the edges are bubbling, tent loosely with foil and continue baking until the bubbling condition is met.
Do not pull the bars from the oven until both the color and the bubbling conditions are met. Color alone is not sufficient.
Step 7: Cooling and Cutting for Clean, Intact Bars
Remove the pan from the oven and place it on a wire cooling rack. Do not move the bars, do not lift the parchment, do not touch the filling. During the first 20 minutes out of the oven, carryover heat from the pan continues to bake the base from below — the shortbread layer is still firming and the cornstarch gel in the filling is still tightening. This is not residual warmth. It is active cooking. Moving the pan, tilting it, or pressing the surface during this window interrupts the setting process and produces a base that is softer and more crumbly than the result shown in the stacked photo where the layers hold perfectly parallel and intact.
Leave the pan completely undisturbed at room temperature for a minimum of 2 hours. The filling continues to set as it cools — it is still liquid beneath the surface for the first 60 to 90 minutes even though the top looks solid. Cutting at this stage causes the jam to run and the layers to separate.
After 2 hours at room temperature, transfer the entire pan — bars still in it, parchment still in place — to the refrigerator. Chill for 30 minutes. This final chill firms the shortbread base and sets the filling completely, which is what produces the clean 90-degree cut edges visible in the stacked photos.
To cut: lift the bars out of the pan using the parchment overhangs and place them on a cutting board. Use a sharp chef’s knife. Wipe the blade clean with a damp cloth between every cut — raspberry filling on the blade drags and tears the edges of the next cut. Score the surface lightly first to mark your grid before cutting through — 4 cuts in each direction for 16 squares.
To portion: the chilled slab weighs approximately 900–950g total after baking and cooling. Divide into a 4×4 grid — 4 cuts running one direction, 4 cuts running the other — for 16 bars at approximately 56–60g each. Weigh the first bar after cutting to calibrate; if it reads significantly above or below this range, your pan size or pressing thickness was different from the tested recipe. Adjust the remaining cuts accordingly.

The bars are ready to cut when the filling feels completely firm to a gentle press with your fingertip — it should not give or feel liquid beneath the surface. If there is any give, return the pan to the refrigerator for another 15 minutes.
🗒 Luna’s Note: I run the knife under hot water and wipe it dry between cuts rather than a damp cloth — a warm dry blade glides through the chilled filling cleaner than a cold wet one. It takes an extra 10 seconds per cut and the edges on every bar look intentional.
The Science Behind Raspberry Crumble Bars
Why Cold Butter Is the Most Important Variable in This Recipe

I noticed this before I understood why. The first two batches I made used butter that had been sitting on the counter while I prepped everything else — maybe 20 minutes out of the fridge. The crumble topping looked identical to later batches going into the oven. It came out completely different: flat, compressed, uniform. No pebbles. No distinct clumps. Just a smooth sandy layer sitting on top of the filling that had none of the rustic, irregular texture you can see in the photos. I thought I had done something wrong with the ratio. I had not. The butter temperature was the only variable that changed.
Here is why it matters so much in this specific recipe. Butter is an emulsion of water, fat, and milk solids that exists in a semi-crystalline state when cold. When cold butter is rubbed into flour, the fat coats the flour particles in thin, intact sheets — it does not fully incorporate. Those sheets of fat create physical separation between flour particles, which is what produces the crumbly, clumped structure of the finished crumble. When butter is too warm, the fat melts into the flour completely rather than coating it. The result is a uniform, fully incorporated mixture — which bakes into a flat, dense, sandy layer with no structural variation. The cold fat is not just a temperature preference. It is the mechanism that creates the texture you are trying to produce.
This is also why the reserved topping goes straight into the refrigerator while you assemble the bars. Even 10 minutes at room temperature is enough to soften the fat to the point where the clumps compress under their own weight. Cold crumble lands in distinct pebbles. Warm crumble patches itself flat. You can link this directly to what you see in chocolate chip cookie bars — the same cold fat principle applies to any shortbread-style base where texture, not tenderness, is the goal.
How Cornstarch Turns Raw Raspberries Into a Glossy, Sliceable Filling
Raw raspberries are approximately 85% water by weight. Left unbaked with just sugar, that water releases fully into the base during baking and saturates the shortbread layer from below — the result is a soggy, structurally compromised bar that falls apart when lifted. The cornstarch pre-cook solves this in two stages.
Stage one: when cornstarch is combined with the raspberries and sugar over heat, the starch granules absorb the free water released by the fruit as it breaks down. This is starch gelatinization — the granules swell, rupture, and form a continuous gel network that traps the moisture in suspension rather than allowing it to move freely. The visual signal is the shift from the initial cloudy, dull-pink mixture to the clear, glossy, deep ruby filling — that clarity is the starch network forming. Stage two: during baking, the pre-set filling reaches a second boil inside the pan, which further concentrates the sugars and tightens the gel. This is what produces the intensely concentrated color and the slightly caramelized edges visible where the filling meets the pan wall.
The lemon juice is not just flavor. Its acidity stabilizes the cornstarch gel structure — without it, the filling can weep liquid as it cools, producing a wet interface between the filling and the base. One tablespoon is the minimum effective amount for this quantity of fruit.
Why These Bars Have No Leavening — and Why That Is Correct
Baking soda and baking powder produce lift by releasing carbon dioxide gas during baking — those gas bubbles expand and create an open, airy crumb structure. That is exactly what you do not want in a crumble bar. The base needs to be dense, compact, and structurally stable enough to support the weight of the filling and topping without flexing or crumbling when lifted. A leavened shortbread base would produce a soft, cakey layer that absorbs moisture from the filling and loses its structural integrity within hours of baking.
The stability in these bars comes from fat crystallization and gluten development working in a specific balance. The cold butter, pressed firmly into the pan, melts during baking and re-crystallizes as the bars cool — this is what creates the firm, sliceable base. The flour provides just enough gluten network to hold the pressed structure together, but because the fat ratio is high and there is no liquid added to the dough, gluten development is minimal. The result is a base that is tender enough to bite through cleanly but firm enough to hold a 90-degree cut edge when cold — exactly what you can see in the stacked bars photo where the layers sit parallel and intact across three bars stacked on top of each other.
Raspberry Crumble Bars Troubleshooting & Pro-Tips
Common Mistakes
The filling is runny and flows out when the bars are cut
The most common cause is substituting the cornstarch with flour or skipping the pre-cook step entirely. Flour requires a much higher ratio to achieve the same thickening power as cornstarch — approximately 3 tablespoons of flour for every 1 tablespoon of cornstarch — and even at the correct ratio, flour produces a cloudy, pasty filling rather than the clear, glossy set shown in the photos. Arrowroot is equally problematic — it breaks down at sustained oven temperatures and the gel collapses during baking.
The fix if already baked: return the bars to a 325°F (163°C) oven for 10 to 15 minutes, then cool fully again. If the filling is still loose after a second bake, the bars are still edible — serve them chilled directly from the pan with a spoon as a deconstructed crumble dessert over vanilla ice cream. For next time: cook the filling until it is fully glossy and coats the spatula thickly before it goes into the pan, and confirm the filling is actively bubbling at the edges before pulling the pan from the oven.
The base is soggy or the layers have separated
This is a pan preparation failure or a cooling failure — or both. If the parchment was not pressed flat against the base before the dough was pressed in, steam pockets form underneath during baking and create a wet, compressed layer at the bottom. If the bars were cut before the 2-hour room temperature cool plus 30-minute refrigerator chill, the filling was still liquid beneath the set surface and saturated the base when the knife broke through.
Salvage: if the base is soggy but the bars are otherwise intact, place them uncovered in the refrigerator overnight — the cold air draws out surface moisture and the base firms significantly by morning.
For next time: press the parchment completely flat with no air pockets before adding the dough, and do not cut until the filling is firm to a fingertip press with no give.
The crumble topping is flat and sandy rather than pebbled
The butter was too warm when it went into the dry ingredients, or the reserved topping was left at room temperature too long before going onto the filling. When the fat softens past its semi-crystalline state, it incorporates fully into the flour and oat mixture rather than coating the particles in intact sheets — the clump structure collapses.
There is no fix once the bars are baked. The texture will be uniform and dense across the top rather than the irregular, rustic crumble shown in the photos — the flavor is identical, but the visual result is different. For next time: cube the butter directly from the refrigerator and work quickly, refrigerate the reserved topping immediately after the dough is mixed, and assemble the bars without allowing the topping to sit at room temperature.
The shortbread base crumbles apart when the bars are lifted
Two possible causes: the base was not pressed firmly enough, or the bars were cut while still warm. A loosely pressed base has air pockets between the dough particles — when the fat melts during baking, those particles do not bond together and the base stays granular rather than becoming a cohesive slab. Use the flat bottom of a measuring cup and apply firm, even pressure across the entire surface, paying particular attention to the corners.
If the bars are crumbling after cutting: press individual pieces back together gently and return them to the refrigerator for 20 minutes — the fat re-crystallizes and firms the structure. Serve directly from the refrigerator rather than at room temperature if the base continues to be fragile.
The bars stick to the pan and the edges break when lifting
The parchment overhang was too short, was not secured against the sides, or the two unlined sides were not greased. Without the overhang acting as handles, the only way to get the bars out is to cut them in the pan — which means the edge bars lose one clean side. There is no fix mid-session.
For next time: cut parchment strips long enough to extend at least 2 inches above the pan rim on both sides, grease the two unlined sides before lining, and always lift from both overhangs simultaneously — lifting from one side puts lateral pressure on the bars and cracks the base.
The crumble peaks are browning too fast before the filling bubbles
Your oven runs hot, or the pan is too close to the upper heating element. Tent the pan loosely with a sheet of aluminum foil — shiny side up — as soon as the topping reaches a light golden color, and continue baking until the filling is actively bubbling at the edges. Do not pull the bars based on topping color alone. The filling bubbling is the non-negotiable doneness signal — it confirms the cornstarch has activated and the base is fully set.
The crumble topping is very dark and the filling edges look burnt and bitter
The oven ran hot, the pan was on the upper rack, or the bars baked past the correct pull window. Dark, over-caramelized fruit sugars turn bitter — the concentrated crimson you see at the edges in the correct bake becomes near-black and acrid when the sugar burns. Salvage: trim the outermost edge bars (the ones closest to the pan wall where the burning concentrates) with a sharp knife — removing the ¼-inch perimeter of each affected bar removes most of the bitter edge. The interior bars in the 4×4 grid are typically unaffected. The remaining 8–10 interior bars will be fine.
For next time: confirm oven temperature with an oven thermometer before baking, use a light-colored aluminum pan only, and pull the bars the moment the filling is bubbling at the edges regardless of how the topping color looks.
Humidity and altitude note
In high-humidity environments, the oat-flour mixture absorbs ambient moisture during mixing and the dough may feel stickier than expected — work quickly and refrigerate the assembled pan for 10 minutes before baking if the dough feels soft. At high altitude (above 3,500 feet / 1,067m), reduce the baking sugar in the filling by 1 tablespoon and increase bake time by 3 to 5 minutes — reduced atmospheric pressure causes liquid to boil at a lower temperature, which means the filling reaches its bubbling visual cue earlier than it has fully set.
Expert Pro-Tips
Weigh the dough split rather than eyeballing it. The two-thirds / one-third split between base and topping is critical to the layer ratio visible in the photos — too much topping and the base becomes thin and fragile, too little and the crumble layer looks sparse. Place your bowl on the scale after mixing, note the total dough weight, and calculate the exact split. Transfer two-thirds to the pan and return the remaining one-third to the bowl for refrigerating. This takes 30 extra seconds and guarantees the same layer ratio every time.
Score the surface before cutting all the way through. Use the tip of your knife to lightly mark the 4×4 grid on the surface of the chilled bars before making full cuts. A scored line gives the knife a channel to follow and prevents the blade from dragging sideways through the crumble topping — which is what causes uneven, jagged edges. Score first, then cut through in one firm downward motion per line. Do not saw.
Use frozen raspberries for a more intensely flavored filling. Frozen raspberries are picked and frozen at peak ripeness — they often have a deeper, more concentrated flavor than out-of-season fresh raspberries and release more juice during cooking, which means the filling reduces to a more intense color and flavor. Do not thaw them before cooking — add them directly to the saucepan frozen. The filling will take an extra 1 to 2 minutes to reach the simmer point but the result is worth it.
Chill the knife between cuts for the cleanest edges. Run the blade under cold water, wipe it dry, and make the cut immediately. A warm blade softens the chilled filling slightly on contact and the edges compress rather than cut clean. The difference between a warm blade and a cold blade on a chilled bar is visible — one produces a compressed, dragged edge, the other produces the sharp, defined layers shown in the stacked photos.
I use a bench scraper rather than a chef’s knife for the first score pass. The flat straight edge gives a cleaner line across the full surface in one motion than the pointed tip of a knife, which tends to catch on the crumble clumps and drag. The actual through-cut still goes to the chef’s knife — but the scoring step is faster and more accurate with the scraper. This is a tool preference, not a technique requirement. The knife works fine.
How to Store Raspberry Crumble Bars
Room Temperature
Raspberry crumble bars can be stored at room temperature for up to 2 days. Place the cut bars in a single layer in a hard-sided lidded container with a sheet of parchment paper beneath them. Do not stack them at room temperature — the weight of the upper bars compresses the crumble topping on the lower bars and the texture flattens. Do not use zip-lock bags — the soft sides press against the crumble and flatten the topping within a few hours. Keep the container away from direct sunlight and heat sources. Above 75°F (24°C), the butter in the shortbread base begins to soften and the bars lose structural integrity — refrigerate if your kitchen runs warm.
🗒 Luna’s Note: I keep these in a lidded glass container rather than plastic. The rigid sides protect the crumble topping from being compressed, and I can see exactly how many are left without opening the lid. Small thing, but it matters when the topping texture is half the point of the recipe.
Refrigerator
Refrigeration is recommended for storage beyond 2 days. The raspberry filling contains cooked fruit and sugar — while the sugar acts as a mild preservative, the filling will begin to ferment at room temperature past the 48-hour mark in a warm kitchen. Store cut bars in a hard-sided lidded container with parchment between layers — you can stack two layers in the refrigerator since the cold firms the base and topping enough to hold under light weight. Bars keep refrigerated for up to 5 days with no significant texture loss. The shortbread base actually firms slightly in the refrigerator, which some people prefer — it becomes more compact and sliceable. Pull bars from the refrigerator 15 minutes before serving to take the chill off — cold filling straight from the fridge has less aromatic intensity than filling at a slightly warmer temperature.
Freezer — Baked
These bars freeze well. Wrap each bar individually in a layer of plastic wrap, pressing the wrap against all surfaces to exclude air. Place the individually wrapped bars in a zip-lock freezer bag or a hard-sided freezer container. Freeze for up to 2 months. To thaw: transfer individual bars to the refrigerator and thaw overnight — minimum 8 hours. Do not thaw at room temperature. Room temperature thawing causes condensation to form on the cold filling surface, which softens the crumble topping and makes it lose its texture. The texture of frozen-and-thawed bars is approximately 90% of fresh — the crumble topping loses a small amount of its crunch but the filling and base are unchanged. For best results, eat within 24 hours of thawing.
Freezer — Unbaked
The assembled unbaked pan can be frozen before baking. Assemble the bars completely — pressed base, filling, crumble topping — then wrap the entire pan tightly in two layers of plastic wrap and freeze for up to 1 month. Bake directly from frozen at 350°F (175°C) — add 10 to 12 minutes to the standard bake time and watch for the same doneness cues: medium golden crumble peaks and actively bubbling filling at the edges. Do not thaw before baking — a thawed assembled pan releases excess moisture from the filling into the base before baking begins, which produces a soggy bottom layer.
The uncooked dough portion alone can also be frozen separately. Press it into a flat disk, wrap tightly in plastic wrap, and freeze for up to 2 months. Thaw overnight in the refrigerator before using.
Serving Suggestion
Serve these bars at room temperature or slightly chilled — not warm. Warm bars have not finished setting and the filling will not hold its shape when bitten into. The ideal serving temperature is about 15 minutes out of the refrigerator: the filling is firm but not hard, the butter in the shortbread has relaxed slightly from fully chilled, and the raspberry flavor is at its most aromatic.
I serve these with a strong black coffee — no milk, no sugar. The bitterness cuts directly through the sweetness of the filling in a way that tea does not, and the contrast makes the tartness of the raspberry more pronounced. If coffee is not your thing, a plain sparkling water with a squeeze of lemon works for the same reason — acidity against sweetness.
This is the recipe I make when someone asks me to bring something and I want it to look like I put in more effort than I did. The bars stack cleanly, they travel well in a hard-sided container, and they look intentional in a way that a pan of brownies does not. One batch makes sixteen — enough for a gathering without making two pans of anything.
Day 2 is genuinely better than Day 1. Overnight, the moisture from the filling migrates very slightly into the base, which softens the shortbread layer from a firm press to something closer to a dense, buttery crumb. The crumble topping firms further in the refrigerator and has a slightly more pronounced crunch the next day. The raspberry flavor deepens and concentrates as the sugar continues to set. I make these the evening before I need them specifically because of this.
These do not work as a warm dessert. If you are planning to serve them straight from the oven or slightly warm at a dinner party, this is not the right recipe — a warm crumble baked in a dish and served with cream is a better choice for that context. These bars need the chill. That is the arrangement.
Frequently Asked Questions About Raspberry Crumble Bars
Can I use frozen raspberries instead of fresh for raspberry crumble bars?
Yes — frozen raspberries work excellently in this recipe and are often the better choice. Frozen raspberries are picked and frozen at peak ripeness, which means their flavor is more concentrated and consistent than out-of-season fresh raspberries. Add them directly to the saucepan from frozen without thawing — thawed raspberries release excess liquid all at once before cooking begins, which makes the filling harder to control. The filling will take an extra 1 to 2 minutes to reach a simmer from frozen, but the cornstarch will activate and set correctly at the same visual cue — glossy, deep ruby, coating the spatula thickly. Do not increase the cornstarch quantity when using frozen raspberries — the ratio is calibrated for the total moisture content of both fresh and frozen fruit at this quantity.
Can I use raspberry jam instead of fresh or frozen raspberries?
Technically yes, but the result is significantly different from what is shown in the photos. Commercially produced raspberry jam is already fully sweetened and set — spreading it directly onto the base without cooking produces a filling that is flat in flavor, overly sweet, and does not bubble and concentrate during baking the way a fresh-fruit filling does. The deep, intensely tart ruby filling with visible seeds that you can see in the cross-section is only achievable with whole raspberries cooked down. If jam is your only option, use a high-fruit-content seedless raspberry jam, reduce the quantity to ¾ cup (240g), skip the cornstarch and sugar entirely, and spread it cold directly onto the pressed base. The filling will not bubble at the edges during baking — use the crumble topping color as your only doneness signal instead. Expect a sweeter, less complex result.
How do you keep crumble bars from falling apart when you cut them?
The refrigerator chill drops the butter in the shortbread base back below its melting point — the fat re-crystallizes into a solid structure, which is what gives the base the rigidity to hold a 90-degree cut edge without crumbling. Above 65°F (18°C), that fat is semi-soft and the base compresses under knife pressure rather than shearing cleanly.
Do raspberry crumble bars need to be refrigerated?
Not for the first 2 days if your kitchen is below 75°F (24°C). Beyond 48 hours, refrigeration is recommended — the cooked raspberry filling contains fruit sugars that begin to ferment at room temperature in a warm kitchen past the 2-day mark. Store at room temperature in a hard-sided lidded container for up to 2 days, or refrigerate in the same container for up to 5 days. The bars actually improve in the refrigerator — the filling firms and the flavor concentrates overnight. Pull them out 15 minutes before serving so the filling has time to lose its hard-cold texture and the raspberry aroma comes forward. If you are in any doubt about room temperature conditions, refrigerate from day one. The texture holds well either way.
What is the difference between crumble bars and a fruit crumble?
A fruit crumble is a loose, spoonable baked dessert — fruit on the bottom, streusel topping on top, served warm directly from the baking dish with cream or ice cream. It has no structural base and is not designed to hold its shape when lifted. Crumble bars use the same flavor concept but with a pressed shortbread base that creates a three-layer structure — base, filling, topping — that is firm enough to be lifted, stacked, and eaten by hand. The technique is also different: crumble bars use the same dough for both the base and the topping, split and used two ways, while a fruit crumble typically uses a separate streusel mixture with no pressed base component. If you enjoy these bars, you might also like oatmeal chocolate chip bars — the same reserved-dough method applied to a chocolate chip variation.
Can I make raspberry crumble bars ahead of time?
Yes — and they are genuinely better made ahead. The flavor of the filling deepens overnight as the fruit sugars continue to concentrate in the set gel, and the texture of the base transitions from firm-pressed to a denser, more cohesive crumb by Day 2. Make the bars the evening before you need them, cool completely, refrigerate overnight in the pan, and cut them the next morning. They will be at their best between 12 and 36 hours after baking. For longer make-ahead: bake, cool completely, cut, wrap individually, and freeze for up to 2 months — thaw overnight in the refrigerator before serving.
Can I double this recipe, and does anything change?
Yes, the recipe doubles cleanly to a 9×13 inch (23×33cm) pan. Double every ingredient quantity exactly. The bake time increases by 5 to 8 minutes — begin checking at 40 minutes and use the same doneness cues: medium golden crumble peaks and actively bubbling filling at the edges. Note that the cornstarch quantity does not scale perfectly linearly at very large batches — if you are tripling or quadrupling the recipe, add the cornstarch at the standard doubled rate first and assess the filling consistency during cooking before adding more. At double quantity the ratio holds correctly. The cooling and chilling times remain the same regardless of pan size — do not reduce them for a larger batch.
Do I need to adjust this recipe for high altitude or high humidity?
At high altitude (above 3,500 feet / 1,067m), reduce the granulated sugar in the filling by 1 tablespoon — reduced atmospheric pressure lowers the boiling point of liquid, which means the filling reaches its visual bubbling cue before the sugars have fully concentrated. The lower sugar quantity compensates. Increase bake time by 3 to 5 minutes and rely on the filling color rather than the bubbling cue alone. In high-humidity environments, the oat-flour dough absorbs ambient moisture during mixing and may feel stickier than expected — work quickly and refrigerate the assembled pan for 10 minutes before baking to re-firm the butter in the crumble topping.
More Bars You’ll Love
These recipes use the same bar-format method and are worth bookmarking alongside this one.
Salted Caramel Chocolate Chip Cookie Bars — A buttery bar base with a caramel layer and chocolate chips pressed on top. For when you want something more indulgent than a standard bar.

Raspberry Crumble Bars Recipe
Ingredients
Equipment
Method
- Preheat oven to 350°F (175°C) and position rack in the middle. Line an 8×8 inch (20×20cm) light-colored aluminum baking pan with parchment paper leaving 2 inches of overhang on two opposite sides. Lightly grease the two unlined sides.
- In a medium saucepan combine 3 cups (360g) raspberries, ⅓ cup (67g) granulated sugar, 2 tablespoons (16g) cornstarch, 1 tablespoon (15ml) lemon juice, and a pinch of fine sea salt. Stir to combine and cook over medium heat, stirring constantly, for 4 to 5 minutes until the mixture reaches a full simmer, turns deep ruby-red, and coats the back of the spatula thickly. Remove from heat and set aside to cool.
- In a large mixing bowl whisk together 1½ cups (180g) all-purpose flour, 1½ cups (135g) old-fashioned rolled oats, ¾ cup (165g) packed light brown sugar, and ½ tsp (3g) fine sea salt until evenly combined. Add 1 tsp (5ml) pure vanilla extract and stir through. Add ¾ cup (170g) cold cubed unsalted butter and rub into the dry ingredients using your fingertips until the mixture resembles coarse damp sand with no butter pieces larger than a pea and irregular clumps that hold when squeezed.
- Measure out two-thirds of the dough (approximately 360g) and press it firmly and evenly into the prepared pan using the flat bottom of a measuring cup. Press the edges slightly up against the parchment walls. Place the remaining one-third of the dough (approximately 180g) in the refrigerator immediately.
- Pour the cooled raspberry filling over the pressed base and spread into an even layer using a silicone spatula, taking it all the way to the edges with a ¼-inch margin at the pan walls.
- Retrieve the chilled crumble topping from the refrigerator. Scatter it in small pinches across the surface of the filling from about 2 inches above, working from the edges inward. Do not press it down.
- Bake at 350°F (175°C) on the middle rack for 35 to 38 minutes until the crumble peaks are medium golden brown and the filling is actively bubbling and deep crimson at the edges. Do not pull based on topping color alone — the filling must be visibly bubbling.
- Remove from oven and place on a wire cooling rack. Cool completely at room temperature for a minimum of 2 hours without disturbing. Transfer the pan to the refrigerator and chill for a further 30 minutes.
- Lift the bars from the pan using the parchment overhangs and place on a cutting board. Score the surface lightly into a 4×4 grid, then cut through using a sharp chef’s knife wiped clean between every cut. Yield: 16 bars.