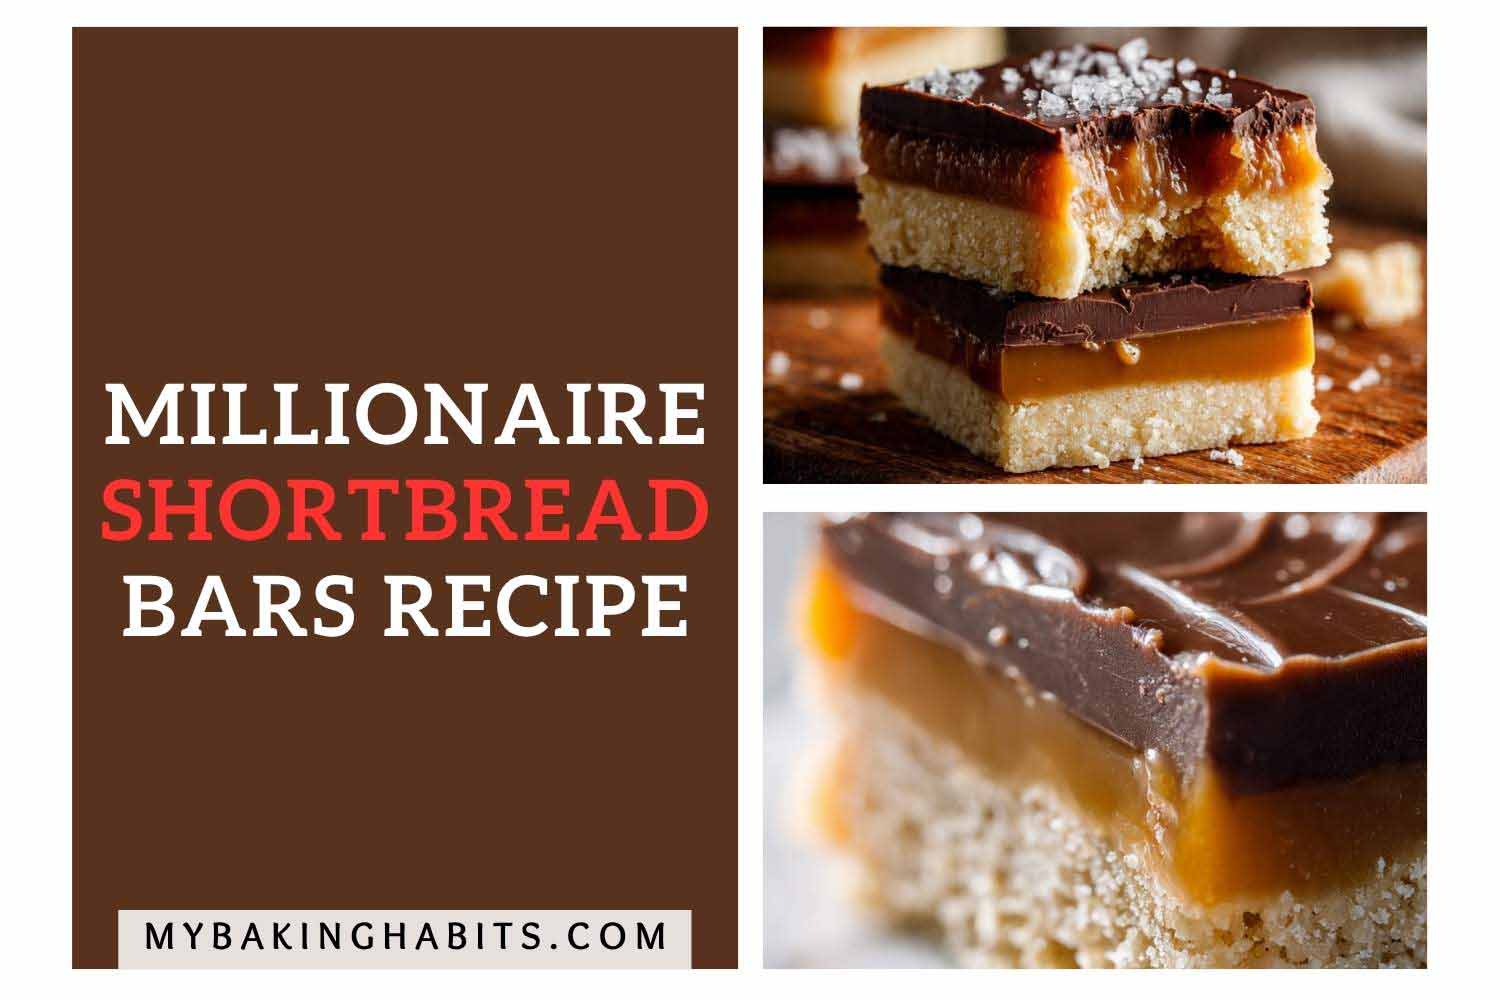
Millionaire Shortbread Bars Recipe
Millionaire shortbread has a reputation for being a project. Three separate steps, two cooling periods, a knife you have to warm before you cut. I made it ten times before I decided it was worth the effort. Then I decided it was one of the best things I make.
The thing I kept getting wrong early on was the shortbread base. I was pulling it out when the top looked done — pale golden across the whole surface. That batch was fine. But when I chilled it and cut it, the base was dense and brittle instead of sandy and crumbly. Batch six, I pulled it ten minutes earlier than felt right, when the top was still cream-colored and only the very bottom edges had turned gold. That base was right. The visual cue is counterintuitive and it matters every time.
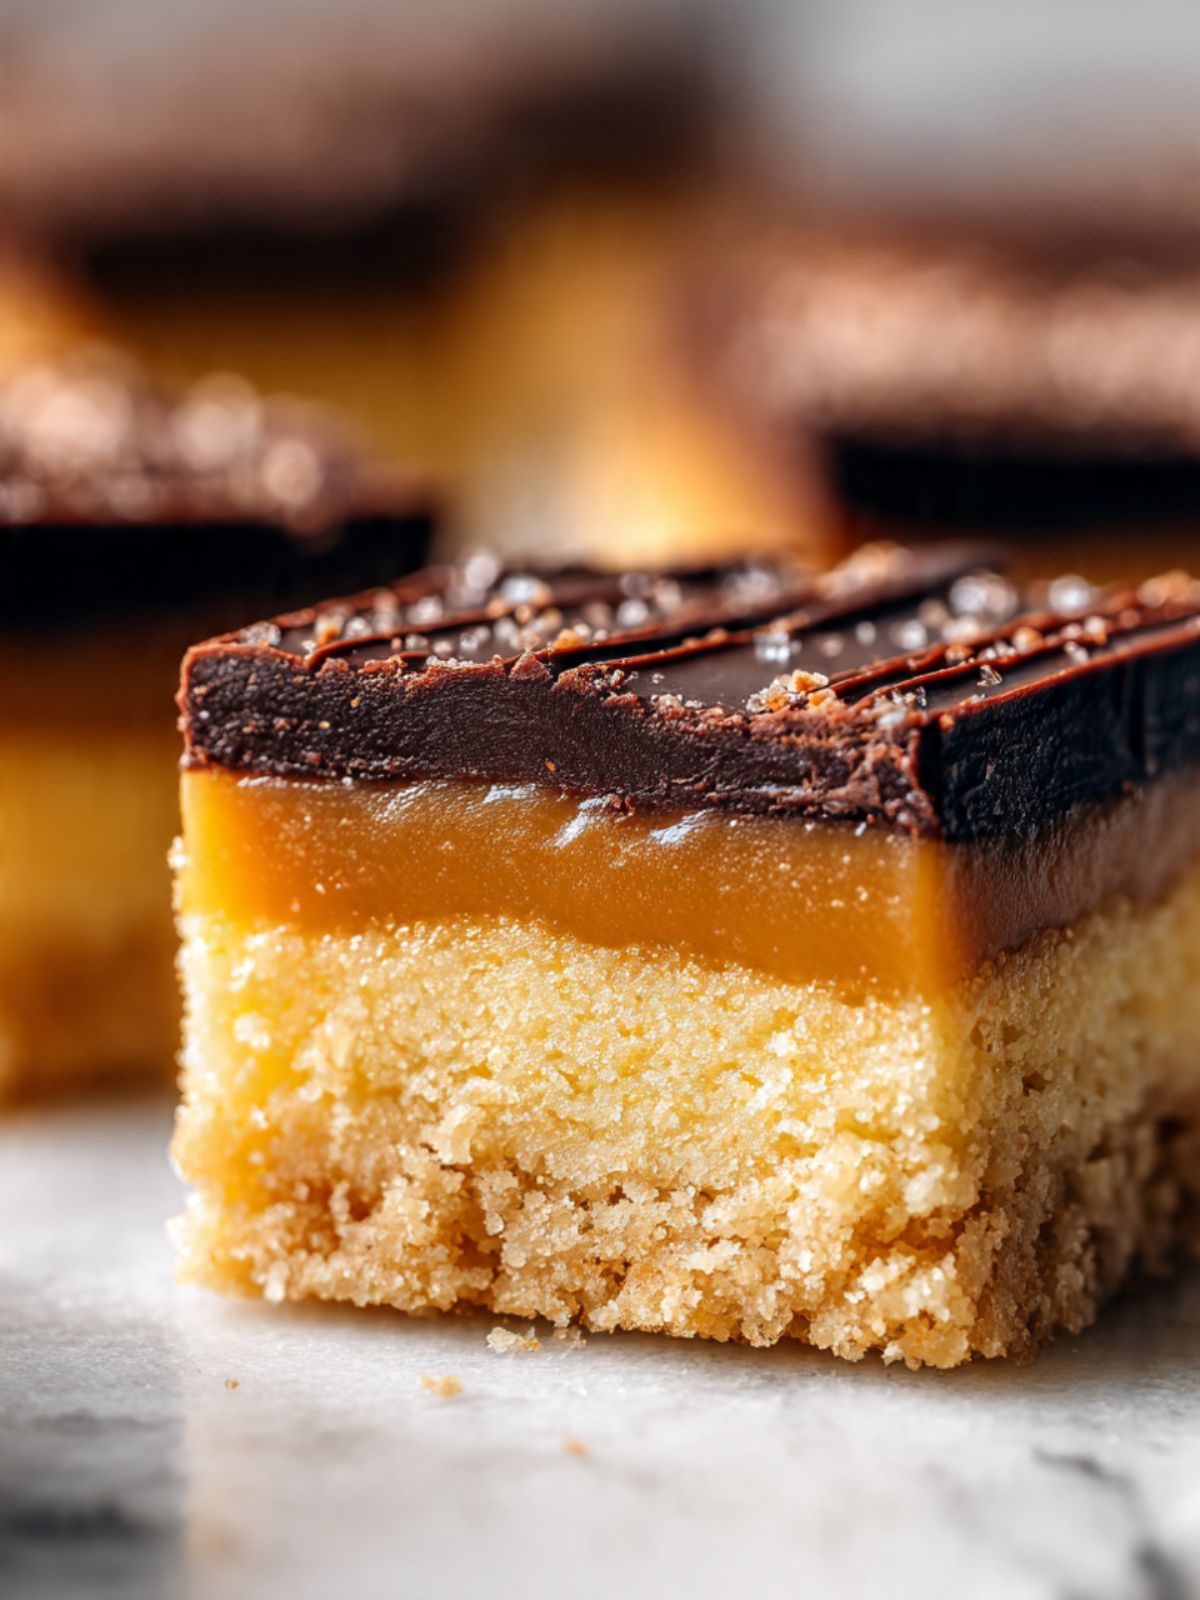
What you get from this recipe is a thick, sandy shortbread base that breaks away in buttery crumbles, a layer of amber caramel that is yielding and smooth without being sticky or grainy, and a dark chocolate top that snaps cleanly with each cut. The salt is not decorative. It changes the way the caramel tastes in a way that makes you want another piece immediately.
I tested the caramel with both salted and unsalted butter. Three batches each. Unsalted butter with measured fine sea salt in the caramel produced a more controlled, balanced flavor — the salt was distributed throughout rather than hitting in patches. I kept the unsalted version.
I tested the chocolate layer with and without a small amount of refined coconut oil added to the melt — four batches total, two each way. Without oil, the chocolate set brittle and cracked at the edges when cold — the caramel layer compressed slightly under the knife and the chocolate split rather than cut. With one teaspoon of coconut oil added to the melt, the layer was firm enough to hold structure but yielding enough to slice clean. The difference is visible in every cut.
This recipe uses a mixer for the shortbread base — a food processor makes the process faster but is not required. The caramel is stovetop with a candy thermometer or a cold water test. The whole project takes about 3 hours including chilling time, with about 40 minutes of active work. No shortcut on the chilling time — the structure depends on it.
| Prep Time | Cook Time | Chill Time | Total Time | Yield | Difficulty |
|---|---|---|---|---|---|
| 20 min | 30 min | 2 hrs | 2 hrs 50 min | 16 bars | Intermediate |
| Calories | Fat | Carbs | Sugar | Protein | Sodium |
|---|---|---|---|---|---|
| ~382 kcal | ~22g | ~42g | ~27g | ~5g | ~115mg |
Macros are approximate and vary based on ingredient brands and exact serving size.
Ingredients & Tools for Millionaire Shortbread Bars Recipe
For the Shortbread Base
- 2 cups (240g) all-purpose flour (spooned into the measuring cup and leveled — or weighed at 240g on a kitchen scale)
- ¾ cup (170g) unsalted butter, cold and cut into ½-inch (1.25cm) cubes — do not soften
- ½ cup (60g) powdered sugar (also called confectioners sugar or icing sugar), sifted
- ¼ tsp (1.5g) fine sea salt
For the Condensed Milk Caramel
- 1 can (14 oz / 396g) sweetened condensed milk (full-fat, not evaporated milk — they are completely different products and cannot be swapped)
- ½ cup (113g) unsalted butter, cut into tablespoon-sized pieces
- ½ cup (100g) packed light brown sugar — check for hardening before measuring
- 1 tsp (5ml) pure vanilla extract
- ¼ tsp (1.5g) fine sea salt
For the Chocolate Top
- 8 oz (227g) bittersweet chocolate (60–70% cacao), finely chopped — use a bar, not chips; chips contain stabilizers that prevent smooth melting
- 1 tsp (5ml) refined coconut oil (neutral-flavored — not unrefined/virgin coconut oil, which has a strong coconut taste that will come through in the finished chocolate layer) or unsalted butter
For the Topping
- 1 tsp flaked sea salt (Maldon or similar large-crystal brand) — applied immediately after pouring the chocolate while the surface is still tacky
Before You Start
Butter state: The shortbread butter must be cold — straight from the fridge, cubed right before use. Cold butter rubbed or cut into flour creates small pockets of fat that melt during baking and produce the sandy, crumbly texture visible in the cross-section photos. Room-temperature or softened butter will produce a dense, bread-like base instead. The caramel butter can be at any temperature — it is going straight into a hot pan.
Condensed milk vs. evaporated milk: These two cans look almost identical on grocery store shelves. Sweetened condensed milk is thick, very sweet, and syrupy. Evaporated milk is thin and unsweetened. If you use evaporated milk in the caramel, the layer will not set and the whole batch cannot be saved. Check the label before you open the can.
Chocolate bar vs. chips: The chocolate layer in this recipe uses chopped baking chocolate, not chips. Chocolate chips are formulated with stabilizers that keep them from melting fully in a hot oven — the same stabilizers that hold their shape in a cookie. In this recipe, those stabilizers create a grainy, uneven layer that does not spread flat. Use a baking bar at 60–70% cacao, finely chopped, for a smooth melt that sets with the satin finish visible in these photos.
Brown sugar: If your brown sugar has hardened in the bag, place a damp paper towel over it and microwave in 20-second increments until it is pliable before measuring. Hard brown sugar cannot be packed accurately and will throw off the caramel ratio.
Pan prep — do this before anything else: Line an 8×8 inch (20×20cm) light-colored aluminum baking pan with two overlapping strips of parchment paper, leaving at least 2 inches (5cm) of overhang on all four sides. This overhang is the only way to lift the finished bars cleanly out of the pan before cutting. If you skip the overhang, the bars will need to be cut in the pan and the edges will crumble. Lightly grease the pan before laying the parchment — this holds the paper in place while you press in the shortbread.
Pan size and material: This recipe was tested in an 8×8 inch (20×20cm) light-colored aluminum pan. A 9×9 inch (23×23cm) pan works but the layers will be thinner and the base will bake faster — reduce the shortbread bake time by 3–4 minutes and watch the edges closely. A dark non-stick pan absorbs more heat and will brown the shortbread base faster than the recipe calls for — if that is all you have, reduce the oven temperature by 25°F (15°C). Glass and ceramic pans retain heat longer and require the same 25°F (15°C) reduction.
Gram weight priority: For the most consistent results, use a kitchen scale set to grams. Volume measurements like cups and tablespoons can vary by 20–30% depending on how ingredients are scooped or packed. The gram weights in this recipe are the numbers I tested with — they are the most reliable way to get the same result.
Flour measuring: Spoon the flour into your measuring cup using a separate spoon and level it off with a straight edge. Do not scoop the cup directly into the flour bag — scooping packs in 20–30% more flour than the recipe needs and will make the shortbread base dense and dry rather than sandy. For guaranteed accuracy, weigh the flour at 240g on a kitchen scale.
Mixing method: The shortbread base in this recipe comes together with a food processor, a stand mixer fitted with the paddle attachment, or just your hands and a large mixing bowl. No method is wrong. The food processor is fastest — 8 to 10 pulses and the dough is ready. By hand is the most tactile — you can feel when the butter is the right size. The caramel requires only a medium saucepan and a wooden spoon or heat-resistant silicone spatula. The chocolate layer requires a heatproof bowl and either a double boiler setup or a microwave.
Total time: This recipe has approximately 40 minutes of active work and requires a minimum 2-hour refrigeration period before the bars can be cut. Plan accordingly — these cannot be made and served within the hour. Make them the day before if your timeline allows.
Oven position: Position your oven rack in the middle of the oven before preheating. The top rack will brown the surface of the shortbread before the base is baked through. The bottom rack will over-brown the bottom before the center sets.
Necessary Tools
Required:
- Kitchen scale (strongly recommended — gram weights are more accurate than volume for all three layers)
- 8×8 inch (20×20cm) light-colored aluminum baking pan
- Parchment paper — two strips with overhang
- Food processor, stand mixer with paddle attachment, or large mixing bowl and fingertips
- Medium heavy-bottomed saucepan (for the caramel)
- Wooden spoon or heat-resistant silicone spatula
- Candy thermometer or instant-read thermometer (for caramel temperature verification)
- Heatproof bowl (for melting chocolate)
- Offset spatula or back of a spoon (for spreading chocolate layer evenly)
- Sharp chef’s knife
Optional:
- Oven thermometer — recommended; most home ovens run 15–25°F (8–14°C) off and the shortbread base is sensitive to temperature
- Bench scraper — useful for scoring even bar portions before the final cut
- Small bowl of warm water — for warming the knife blade between cuts
How to Make Millionaire Shortbread Bars
Step 1: Preparing the Pan and Preheating the Oven
This recipe uses a three-stage sequential method: a cold-fat rubbed shortbread base baked first, a stovetop condensed milk caramel poured second, and a melted chocolate layer set third. Each stage must be fully complete before the next begins.
Position your oven rack in the middle of the oven and preheat to 325°F (165°C). Most home ovens run 15–25°F (8–14°C) off — if you have an oven thermometer, confirm the actual temperature before the pan goes in. A hotter oven will brown the shortbread surface before the base is fully baked through, which produces a base that is too hard to slice once chilled.
Line your 8×8 inch (20×20cm) light-colored aluminum baking pan with two overlapping strips of parchment paper, running them perpendicular to each other so all four sides have overhang. Lightly grease the bare pan with a thin layer of butter or non-stick spray before laying the parchment down — this holds the paper flat while you press the shortbread. The overhang needs to be at least 2 inches (5cm) on every side. The parchment should lie flat against all four walls with no large air gaps between the paper and the pan — gaps allow the shortbread to creep under the paper and stick.
Set the pan aside and move directly to the shortbread.
Step 2: Making the Shortbread Base — Rubbing in the Cold Butter
In a large mixing bowl (or the bowl of your food processor), combine your 2 cups (240g) all-purpose flour, ½ cup (60g) sifted powdered sugar, and ¼ tsp (1.5g) fine sea salt. Whisk them together briefly — 10 seconds — to distribute the salt and sugar evenly through the flour before the butter goes in.
Add your ¾ cup (170g) cold cubed unsalted butter all at once. The butter must be cold — this is not optional. Cold butter rubbed into flour stays in small, distinct pockets of fat rather than blending fully into the dough. Those fat pockets melt during baking and create the sandy, crumbly texture you can see in the cross-section. Room-temperature butter integrates too completely and produces a dense, paste-like base.
If using a food processor: Pulse 8 to 10 times in 1-second bursts. Stop when the mixture looks like coarse, damp sand with some pea-sized butter pieces still visible. Do not over-pulse — if the mixture starts clumping into a ball inside the processor, you have gone too far.
If using a stand mixer: Use the paddle attachment on low speed for 2 to 3 minutes, stopping to scrape the bowl once halfway through, until the mixture looks sandy and just begins to hold together when you press a pinch between your fingers.
If working by hand: Use your fingertips only — not your palms, which are too warm. Rub the butter pieces into the flour with a quick snapping motion, flattening each piece and breaking it down until no butter pieces larger than a small pea remain. Work quickly — under 3 minutes — to keep the butter cold throughout.
The mixture should look like coarse, damp sand — pale yellow, slightly crumbly, and holding together when you press a small handful firmly between your fingers. If it looks completely dry and powdery and does not hold at all, add 1 teaspoon (5ml) of cold water and pulse or mix for another 5 seconds. It should not look like dough — it should look barely held together.
Transfer the mixture into your prepared pan and distribute it roughly evenly across the surface.
Step 3: Pressing the Base and Baking Until the Edges Are Just Gold
Press the shortbread mixture firmly and evenly into the pan using the flat bottom of a measuring cup or drinking glass. Apply firm, even pressure across the entire surface — the goal is a uniformly dense base with no thin spots at the edges or thick mounds in the center. Pay particular attention to the corners, which tend to stay loose if you only press from the center outward. The pressed base should be smooth and level across the top, approximately ½ inch (1.25cm) thick, with no visible cracks or gaps at the edges where it meets the parchment.
I use the bottom of a flat-bottomed drinking glass rather than a measuring cup for this step. The wider base covers more surface area per press and gets the corners more evenly than a narrower measuring cup base does. It is a small thing and either works — I just reach for the glass every time now.
Use a fork to prick the surface of the pressed base all over — approximately 20 to 25 prick marks across the whole surface, spaced about 1 inch (2.5cm) apart. This docking prevents the base from puffing up in the oven as steam builds under the surface.
Bake at 325°F (165°C) for 18 to 22 minutes. Begin checking at 18 minutes. The doneness cue for this shortbread is specific — do not rely on color alone. Pull the pan when the very bottom edges have turned a pale golden color and the surface is set and matte, while the center of the top still looks cream-colored and slightly underdone. Waiting until the top looks fully golden will produce a base that is too dense and hard to slice cleanly once the bars are chilled. The center will finish setting as it cools.
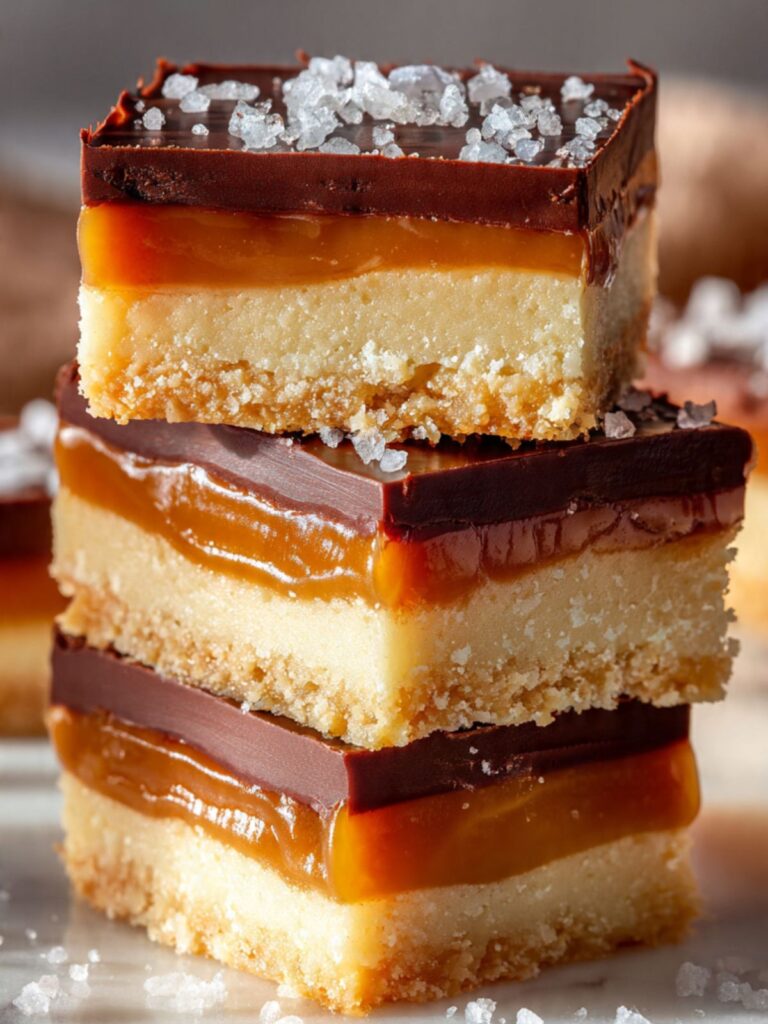
As you can see in the stacked bar photos, the shortbread base holds a clean, sharp edge all the way to the bottom — that structural integrity comes from pulling the base at this exact moment, not earlier and not later.
Remove from the oven and set on a wire cooling rack. The base must cool completely to room temperature before the caramel goes on — approximately 45 to 60 minutes. Do not rush this. When the pan comes out of the oven, the shortbread base continues cooking from the residual heat stored in the pan and in the base itself — this is carryover cooking, and it is what finishes setting the center without drying it out. The base needs this time to release that stored heat fully before it is stable enough to receive a hot caramel layer. Pouring warm caramel onto a warm base also traps steam between the layers and prevents the flat, clean interface visible in the cross-section photos.
Step 4: Making the Condensed Milk Caramel
Once the shortbread base is fully cooled, make the caramel. In a medium heavy-bottomed saucepan over medium heat, combine your 1 can (14 oz / 396g) sweetened condensed milk (full-fat), ½ cup (113g) unsalted butter, ½ cup (100g) packed light brown sugar, and ¼ tsp (1.5g) fine sea salt.
Stir continuously from the moment the butter starts to melt. The condensed milk caramel method does not use a thermometer in the same way a dry sugar caramel does — but the stirring is non-negotiable. Unlike a traditional caramel where stirring causes crystallization, the condensed milk and butter in this recipe require constant movement to prevent the sugars from scorching on the bottom of the pan. A heavy-bottomed pan distributes heat more evenly and gives you more margin — a thin-bottomed pan will have hot spots that scorch the mixture before the rest has cooked.
Cook over medium heat, stirring constantly, for 8 to 12 minutes. The mixture will go through several visible stages: it will look pale and liquid at first, then begin to thicken, then deepen in color from pale gold to a rich amber. Pull the caramel when it is a deep amber color, has visibly thickened to a consistency that falls slowly from the spoon in a thick ribbon, and holds a brief trail across the surface when you drag the spatula through it. If you have a candy thermometer, the target is 225–230°F (107–110°C) — firm enough to set when cold but still yielding when you bite through it.
Remove from heat and stir in your 1 tsp (5ml) pure vanilla extract. The vanilla goes in off the heat — added earlier, the alcohol cooks off and the flavor flattens.
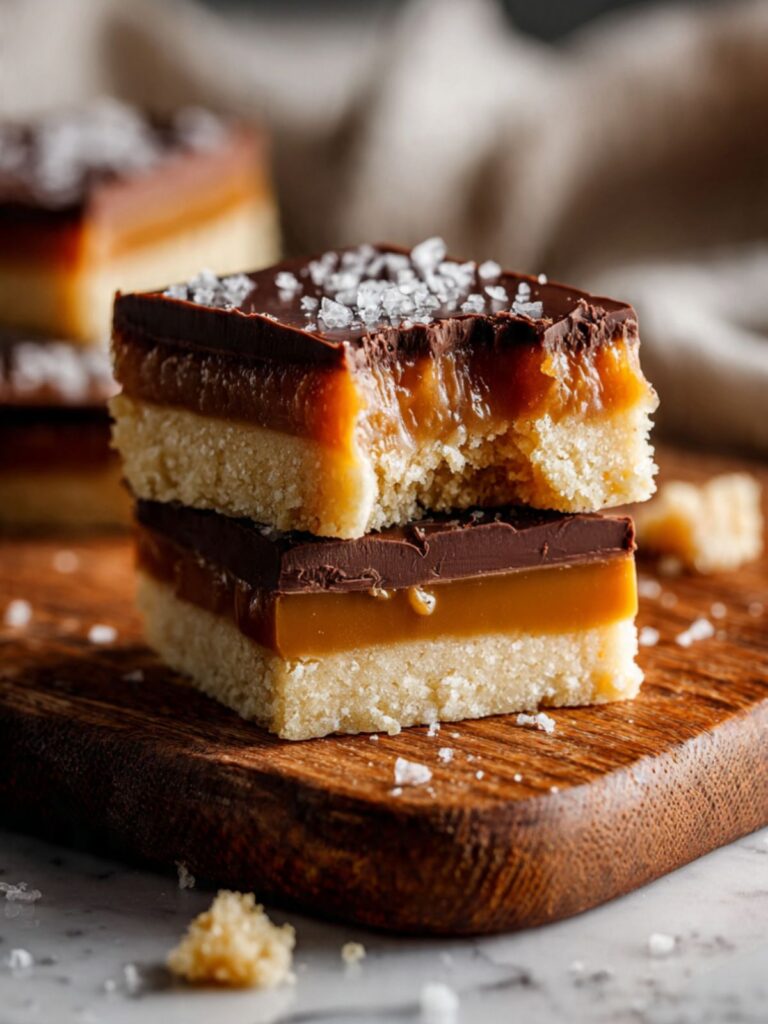
Pour the hot caramel immediately over the cooled shortbread base. Use an offset spatula to spread it evenly to all four corners, working quickly before the caramel begins to set against the cool shortbread. The caramel layer should be level, glossy, and deep amber — as visible in the close-up cross-section photo showing the three distinct layers stacked cleanly. Set the pan on the cooling rack and allow the caramel to cool and firm at room temperature for 30 minutes before the chocolate goes on. Do not refrigerate the caramel layer at this stage — a cold caramel surface causes the chocolate to set unevenly.
Step 5: Melting the Chocolate and Setting the Top Layer
Once the caramel has firmed and is no longer liquid to the touch — it should feel tacky but not sticky when you lightly press the surface with a fingertip — make the chocolate layer.
Combine your 8 oz (227g) finely chopped bittersweet chocolate (60–70% cacao) and 1 tsp (5ml) refined coconut oil or unsalted butter — refined coconut oil has no coconut flavor; unrefined/virgin coconut oil does, and it will come through in the finished chocolate layer in a heatproof bowl.
Microwave method: Microwave in 30-second intervals at 50% power, stirring between each interval. Do not rush this with full power — chocolate scorches without visible warning and there is no saving scorched chocolate. After the second interval it will still look mostly solid but will be soft underneath — stir vigorously between each interval and you will see it come together. It typically takes 3 to 4 intervals total. The finished chocolate should be completely smooth, glossy, and fluid enough to pour — if any lumps remain, return for one more 20-second interval at 50% power and stir again.
Double boiler method: Set the heatproof bowl over a saucepan containing 1 to 2 inches (2.5–5cm) of barely simmering water, making sure the bottom of the bowl does not touch the water. Stir continuously until completely melted and smooth — approximately 4 to 5 minutes. Remove from heat the moment the last solid piece disappears.
Baker's Warning — double boiler method: Make sure the bottom of the heatproof bowl does not touch the water surface, and that the water is at a bare simmer — not a rolling boil. Steam from boiling water will condense on the underside of the bowl and drip into the chocolate. Even a single drop of water causes chocolate to seize — it will instantly turn from smooth and glossy to a thick, grainy, unworkable paste. If seizing occurs, the chocolate cannot be recovered for this application. Start with fresh chocolate.
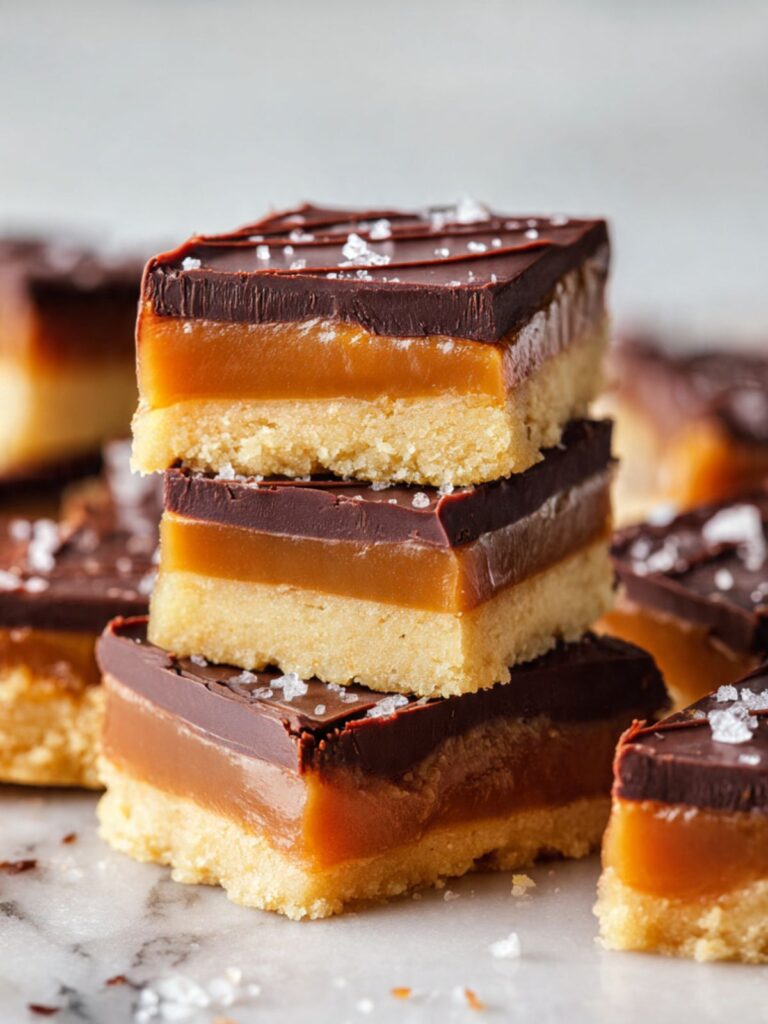
Pour the melted chocolate over the caramel layer and use an offset spatula to spread it in a smooth, even layer all the way to the edges. Work with light, deliberate strokes — pressing too hard will drag the caramel layer underneath. The chocolate should cover the caramel completely with no gaps, and the surface should look smooth and level — the dark espresso-brown satin finish visible on the top layer of every bar in the stacked photos is exactly what a correctly set, fat-stabilized chocolate layer looks like. If your surface looks patchy or has drag marks from the spatula, smooth it again with one or two light passes before it begins to set.
Immediately — while the chocolate is still fluid and glossy — scatter your 1 tsp flaked sea salt (Maldon) evenly across the entire surface. The salt must go on while the chocolate is still tacky so the flakes adhere as the chocolate sets. If you wait until the chocolate has begun to firm, the flakes will sit on top without bonding and will fall off when the bars are cut or handled.
The finished top should look exactly like the bars in the photos — dark, satin-finish chocolate with irregular white salt flakes pressed lightly into the surface, the caramel peeking at the edges.
Transfer the pan to the refrigerator and chill for a minimum of 2 hours, or up to overnight. Do not cut before the full 2 hours — the caramel is still soft beneath the surface and will collapse into a gummy mess under the knife before it has fully set.
Step 6: Slicing the Bars Cleanly
This step is the difference between bars that look like the photos and bars that look like a construction site. The fully set slab weighs approximately 1,000–1,050g total. Cut into 16 bars (4 columns × 4 rows), each bar is approximately 62–65g. Weigh the first bar after cutting as a calibration check — if it is significantly over or under, adjust your cut lines before completing the grid.
Remove the pan from the refrigerator. Use the parchment overhang to lift the entire slab cleanly out onto a cutting board. Peel back the parchment from the sides.
Fill a tall glass or pitcher with hot water. Submerge your sharp chef’s knife blade in the hot water for 20 to 30 seconds, then dry it completely with a clean kitchen towel before each cut. A warm, dry blade glides through the chilled chocolate and caramel without cracking the chocolate or dragging the caramel. A cold blade will shatter the chocolate top on contact. Do not skip the drying step — a wet blade causes the chocolate to seize on contact.
Score the slab lightly before committing to full cuts — mark 4 even columns and 4 even rows for 16 bars, or 3 columns and 4 rows for 12 larger bars. Apply firm, even downward pressure with the full length of the blade rather than a sawing motion. Reheat the knife in the hot water and dry it between every single cut — this is not optional. The chocolate layer will crack at the edges if the blade cools between cuts.
Each finished bar should show three clean, distinct layers — the pale cream shortbread base, the deep amber caramel, and the dark chocolate top — with no compression, no caramel squeeze-out, and no chocolate cracking. This is exactly what is visible in the close-up cross-section photo.
The bars can be served immediately from the refrigerator or allowed to come to room temperature for 15 minutes, which softens the caramel to the yielding, pull-apart texture shown in the bite photo.
The Science Behind Millionaire Shortbread Bars
Why Cold Butter Produces Sandy Shortbread — and Room-Temperature Butter Ruins It

I did not fully understand what was happening inside the shortbread base the first few times I made this. I kept getting a base that was slightly too dense — still edible, still buttery, but missing that crumbling, sandy quality that makes the layer distinct from the caramel above it. The texture I was getting was closer to a pressed cookie than a true shortbread. It took me four batches to isolate the variable. It was always the butter temperature.
Here is what is actually happening: when cold butter is rubbed into flour, it does not fully integrate. It stays in small, discrete pockets distributed through the flour mixture. Those fat pockets coat the flour particles and physically block water absorption — which means gluten cannot develop. No gluten development means no elasticity, no chew, no structure in the traditional baked-good sense. What you get instead is a crumb that holds together purely through fat cohesion and compaction, then breaks apart in small sandy pieces when you bite through it. This is the exact texture visible in the cross-section photos — short, crumbly, with no stretchy or bread-like quality.
Room-temperature butter behaves entirely differently. Soft butter integrates into the flour rather than staying separate. It distributes evenly, which means the flour particles are coated more completely — and some water absorption still occurs, which means some gluten does develop. The result is a denser, slightly tougher base that holds its shape but loses the sandy, melt-in-your-mouth quality that makes millionaire shortbread worth the effort. The difference between the two is not subtle. You can feel it in the first bite.
This is also why the recipe uses powdered sugar rather than granulated sugar in the base. Granulated sugar crystals are coarse enough to add friction during mixing — they interfere with the fat coating the flour particles. Powdered sugar is fine enough to blend invisibly into the fat without disrupting the texture. The result is a smoother, more tender crumb with no graininess from undissolved sugar crystals.
The Condensed Milk Caramel — Why This Method Sets Differently Than Traditional Caramel
Traditional caramel is made by cooking pure sugar to a specific temperature — the sugar molecules break down through pyrolysis and recombine into hundreds of new flavor compounds. It is sensitive, prone to crystallization, and the window between perfect amber and burnt is narrow. The condensed milk caramel in this recipe works on a completely different mechanism, and understanding the difference is why you stir this one constantly instead of leaving it alone.
Sweetened condensed milk is already a cooked product — it is whole milk with about 60% of its water removed and a significant amount of sugar added before canning. When you heat it with butter and brown sugar, you are triggering the Maillard reaction between the milk proteins and the sugars — the same reaction that browns meat, toasts bread, and creates roasted flavor compounds. This is what produces the deep amber color and complex flavor visible in the caramel layer. It is not pyrolysis — it is protein-sugar browning. The two reactions look similar from the outside but behave very differently.
Because this caramel contains milk proteins and fat alongside the sugar, it is significantly more forgiving than a pure sugar caramel. Crystallization is not a risk — the milk proteins and fat interrupt the sugar crystal network. But scorching is a real risk, which is why the constant stirring matters. The proteins in the condensed milk are the same proteins that scorch on the bottom of a pot of milk if you walk away from it. Constant movement keeps those proteins in suspension and prevents them from settling and burning against the hot pan surface. For the same reason, a heavy-bottomed pan is not optional — thin pans create uneven hot spots that scorch one section of the caramel before the rest has cooked through.
The internal linking note: if you want to understand how caramel behaves in a bar recipe with a different base structure, the salted caramel chocolate chip cookie bars on this site use a poured caramel layer over a cookie bar base — a useful comparison for seeing how caramel interacts with different textures underneath it.
Why the Chocolate Layer Needs Fat Added — and What Happens Without It
The chocolate top on millionaire shortbread is not a ganache — there is no cream in it. It is melted pure chocolate with a very small amount of added fat, and that single teaspoon makes a structural difference that shows up every time you cut the bars.
Pure melted chocolate, poured and set without any added fat, sets hard. The cocoa butter in the chocolate crystallizes into a rigid network as it cools — the same crystallization that gives properly tempered chocolate its sharp snap and glossy finish. In a bar recipe, that rigidity becomes a problem. When a cold blade presses down through a hard chocolate layer sitting on top of a yielding caramel, the caramel compresses slightly before the chocolate gives way — and the chocolate cracks rather than cuts. You end up with a clean caramel-shortbread layer and a shattered chocolate top, which is not what the photos show.
Adding one teaspoon of neutral coconut oil or butter to the melt slightly disrupts the cocoa butter crystallization network. The fat molecules insert themselves between the forming crystal structures and prevent them from locking into a fully rigid lattice. The result is a set chocolate layer that is firm enough to hold its shape and give a clean top surface, but with enough plasticity to yield under a warm blade rather than fracture. This is a small intervention with a visible consequence — the bars in these photos have clean, uncracked chocolate edges because of that single teaspoon.
Millionaire Shortbread Bars Troubleshooting & Pro-Tips
Common Mistakes
1. Using evaporated milk instead of sweetened condensed milk
Symptom: The caramel layer never thickens during cooking and pours onto the base like thin liquid. After chilling, it either does not set at all or sets into a rubbery, separated layer with visible fat pooling on the surface.
Cause: Evaporated milk is unsweetened and contains significantly more water than sweetened condensed milk. It does not have the sugar concentration or reduced water content required for the Maillard reaction to occur at stovetop temperatures, and it will not produce a set caramel layer regardless of how long you cook it.
Fix: There is no saving this batch once the wrong ingredient is in the pan. Discard the caramel, check your can, and start again with the correct product — sweetened condensed milk (full-fat), which is thick, very sweet, and pours slowly from the can. Prevention: Read the label before opening. Both cans are the same size and live on the same grocery shelf. “Sweetened condensed milk” and “evaporated milk” are printed in large type — check it.
2. Using a dark non-stick pan or glass pan without adjusting the temperature
Symptom: The bottom of the shortbread base is deep brown to dark at the edges before the top has set, or the base is hard and brittle rather than sandy when cut. Cause: Dark non-stick pans absorb more radiant heat than light-colored aluminum and transfer it more aggressively to the base of whatever is inside. Glass and ceramic pans retain heat longer and continue cooking the base after the pan leaves the oven. Fix: If the base has over-browned on the bottom, the shortbread texture will be harder than ideal but the bars are still usable. The caramel and chocolate layers will mask most of it. Slice thinner bars to reduce the proportion of base in each bite. Prevention: Use a light-colored aluminum pan at 325°F (165°C) as tested. If using a dark non-stick pan, reduce the oven temperature to 300°F (150°C). If using glass or ceramic, reduce the oven temperature to 300°F (150°C) and start checking at 16 minutes.
3. Pulling the shortbread base too late — waiting for the top to look fully golden
Symptom: The finished bars have a base that is hard, dense, and difficult to bite through — more like a firm biscuit than a crumbly shortbread. The knife meets resistance at the base during cutting even when warm.
Cause: Shortbread continues to firm as it cools. A base that looks correctly done in the oven — golden across the whole top surface — has already developed more structure than needed. By the time it is chilled with two layers on top, it is too hard to eat comfortably.
Fix: The bars are still edible. Serve at room temperature rather than cold — warmth softens the base slightly and makes it easier to bite through. For the most forgiving presentation, slice the bars slightly thinner than intended (half the normal width) so there is less dense base in each bite. Alternatively, crumble the shortbread base layer into a bowl, layer with the caramel and chocolate broken into shards, and serve as a deconstructed millionaire shortbread trifle with a scoop of vanilla ice cream. No one will know it was not intentional.
Prevention: Pull the shortbread when the very bottom edges show pale gold and the top surface is still cream-colored and matte. This is the correct visual cue. It feels wrong. Pull it anyway.
4. Caramel scorching on the bottom of the pan
Symptom: The caramel develops dark brown or black flecks throughout, or has a bitter, burnt undertone in the finished bars.
Cause: Heat too high, thin-bottomed pan with hot spots, or insufficient stirring allowing the milk proteins in the condensed milk to settle and scorch against the pan surface.
Fix: If you catch it early — visible darkening at the pan bottom with no bitter smell yet — immediately pour the caramel into a clean bowl and assess. Small brown flecks that are not bitter can be strained out through a fine mesh sieve and the caramel used. If the flavor is bitter, discard and start again.
Prevention: Use a heavy-bottomed saucepan. Cook over medium heat only — not medium-high. Stir continuously without stopping from the moment the butter melts until the caramel is poured. A silicone spatula with a flat edge lets you scrape the bottom of the pan with every stroke, which is more effective than a round wooden spoon for preventing scorching.
5. Caramel too soft — does not hold a clean layer when cut
Symptom: The caramel layer squeezes out from between the shortbread and chocolate when the knife presses down, or remains sticky and liquid at the center even after 2 hours of chilling.
Cause: The caramel was not cooked long enough or to a high enough temperature — the sugar concentration did not reach the point required for the layer to set firm.
Fix: If the bars have already been cut and the caramel is oozing, refrigerate the cut bars for another hour and serve cold rather than at room temperature. Cold caramel holds its shape better than room-temperature caramel. The texture will be firmer but the bars are still presentable.
Prevention: Cook the caramel until it reaches 225–230°F (107–110°C) on a candy thermometer, or passes the cold water test — drop a small amount into a bowl of cold water; it should form a soft, pliable ball that holds its shape briefly. Do not pull it early because it looks thick — it needs to reach temperature.
6. Chocolate cracking across the top when cut
Symptom: The chocolate layer shatters or develops jagged cracks along the cut line rather than slicing clean, leaving a ragged top edge on every bar.
Cause: Either the chocolate was not given the added fat (coconut oil or butter) during melting, the knife was cold, or the bars were cut directly from the refrigerator without being allowed to rest for a few minutes.
Fix: If the chocolate has already cracked on the finished bars, press the broken pieces gently back into place and refrigerate for 10 minutes to re-adhere. Most cracks along the cut line are not visible from the top once the bars are plated — what you see from the side is the cross-section anyway.
Prevention: Always add 1 tsp (5ml) of coconut oil or butter to the chocolate melt. Warm the knife blade in hot water and dry it completely between every cut. If the bars came straight from the refrigerator, allow them to sit at room temperature for 5 minutes before cutting — the chocolate is at its most brittle when coldest.
7. Salt flakes falling off the finished bars
Symptom: The flaked sea salt sits loosely on the chocolate surface and falls off when the bars are handled, cut, or plated.
Cause: The salt was applied after the chocolate had already begun to set — the surface was no longer tacky enough to bond with the salt crystals.
Fix: The salt is still functional as a garnish — scatter additional flakes over the bars just before serving. They will not be embedded in the chocolate surface but the visual effect is nearly identical.
Prevention: Apply the flaked salt immediately after spreading the chocolate layer, while the surface is still fluid and glossy. Do not wait. The window is approximately 60 to 90 seconds from the moment the chocolate is spread before the surface begins to skin over.
8. Altitude and humidity adjustments
High altitude (above 3,500 feet / 1,065m): The shortbread base is largely unaffected by altitude — there is no leavening to over-expand. The caramel requires closer attention: water boils at a lower temperature at altitude, which means the caramel reaches the correct sugar concentration at a lower thermometer reading. Reduce the target temperature by approximately 2°F (1°C) for every 1,000 feet (305m) above sea level. At 5,000 feet (1,525m), pull the caramel at approximately 221°F (105°C) rather than 225°F (107°C).
High humidity: The shortbread base is hygroscopic — the powdered sugar in the dough will absorb ambient moisture and cause the pressed, cooled base to feel slightly soft or tacky on the surface before the caramel goes on. This is cosmetic only and does not affect the finished bars. The chocolate layer is more sensitive — in a very humid environment, the set chocolate surface may develop bloom (a dull, streaky white film) more readily. Storing the finished bars in the refrigerator in a covered container minimizes this.
9. Caramel layer separating from the shortbread base when cut
Symptom: When the bars are cut or bitten into, the caramel layer slides cleanly off the top of the shortbread base rather than pulling together as one cohesive piece. The interface between the two layers looks wet or greasy.
Cause: The shortbread base was not fully cooled before the caramel was poured, or the base surface had excess loose flour dust on top that prevented adhesion. A warm base causes the bottom of the caramel to set too fast against a hot surface without bonding properly. Loose flour on the surface acts as a release layer.
Fix: If the bars are already cut and the layers are separating, press each bar back together firmly and refrigerate for 30 minutes — the cold caramel will grip the shortbread surface as it re-firms. The bond will not be as strong as a correctly made batch but the bars will hold together well enough to eat.
Prevention: Cool the shortbread base to full room temperature — touch the pan bottom; it should feel completely neutral, not warm. Before pouring the caramel, use a pastry brush or a dry paper towel to lightly brush away any visible loose flour dust from the surface of the baked base.
Expert Pro-Tips
1. Score the shortbread base before baking for cleaner internal structure. After pressing the base into the pan and before it goes into the oven, use a sharp knife to lightly score the surface into your intended bar portions — 4 columns and 4 rows for 16 bars. Do not cut all the way through. This creates pre-weakened lines in the shortbread that align with your final cuts, reducing the resistance the knife meets at the base layer and making the finished cuts cleaner across all three layers simultaneously.
2. Use the cold water test alongside a thermometer for the caramel. Candy thermometers can be calibrated incorrectly or read differently at altitude. The cold water test costs five seconds and confirms what the thermometer says: drop a small amount of caramel into a bowl of cold water and reach in to feel it. At the correct stage, it forms a soft, pliable ball — not liquid, not hard. If it dissolves immediately, keep cooking. If it forms a hard ball, you have gone past the target temperature and the caramel will set too firm. This double-check has saved more batches than any single thermometer reading.
3. Line the knife score marks in the shortbread up with your final cuts. When you lift the chilled slab out and position it on the cutting board, align your knife with the faint score lines baked into the shortbread surface. Cutting through pre-scored lines reduces the lateral force needed at the base layer — which is the layer most likely to crumble or shift under pressure — and keeps all three layers moving together under the blade.
4. Rest the bars at room temperature for exactly 10 to 15 minutes before serving. The caramel layer, visible in the close-up cross-section showing the amber middle layer between shortbread and chocolate, has the texture in the photos at approximately 65°F (18°C) — slightly below room temperature. Served directly from the refrigerator, the caramel is firmer and less yielding than shown. Ten to fifteen minutes of resting brings the caramel to the pull-apart, soft-set texture that makes each bite distinct from the layers above and below it.
How to Store Millionaire Shortbread Bars
Room Temperature
Store cut bars in a single layer in a lidded hard-sided container — not a zip-lock bag, which compresses the chocolate top and causes the layers to shift. Place a sheet of parchment paper between layers if stacking is necessary, though a single layer is always preferable for these bars because the caramel layer is soft enough to deform under weight at room temperature. Keep the container in a cool spot away from direct sunlight and heat sources.
Room temperature storage works well for up to 3 days. On Day 1, the chocolate top is at its cleanest and the caramel has the most distinct texture contrast with the shortbread base. On Day 2, the caramel softens very slightly and the layers begin to meld at the interfaces — the shortbread base absorbs a small amount of fat from the caramel directly above it, which deepens the flavor. Day 2 is my preferred eating day. Day 3 is still good. Beyond that, the base starts to lose its sandy quality and the caramel becomes softer than ideal.
Do not store at room temperature in a warm kitchen — above 75°F (24°C), the caramel layer softens to the point of oozing and the chocolate top may begin to lose its set. In a warm environment, refrigerate instead.
Refrigerator
Refrigerator storage is recommended if your kitchen runs warm, if you are storing the bars beyond 3 days, or if you prefer a firmer caramel texture. Store in a lidded hard-sided container with parchment between layers. The bars keep well in the refrigerator for up to 7 days with no meaningful quality loss.
Cold bars straight from the refrigerator have a firmer, denser caramel — it holds its shape completely and does not pull when you bite through. This is a different eating experience from the room-temperature version, not a worse one. Pull the bars from the refrigerator 10 to 15 minutes before serving to bring the caramel back toward the soft-set texture shown in the photos.
One thing worth noting: do not store the bars uncovered in the refrigerator. The chocolate top will absorb refrigerator odors and develop a dull surface bloom over time. A lidded container or a layer of plastic wrap pressed directly over the top of the slab before the lid goes on keeps the chocolate surface clean.
Freezer — Baked
These bars freeze well. Cut them into individual portions first, then wrap each bar individually in plastic wrap — two layers — and place the wrapped bars in a zip-lock freezer bag or a lidded freezer-safe container. The individual wrapping prevents the bars from fusing together and protects the chocolate surface from freezer burn. Freeze for up to 2 months.
To thaw: transfer the individually wrapped bars to the refrigerator overnight. Do not thaw at room temperature — the condensation that forms as the cold bar meets warm air will cause the chocolate top to bloom and the caramel layer to weep. Slow thawing in the refrigerator keeps all three layers stable. Once thawed, allow 10 to 15 minutes at room temperature before serving, same as freshly made bars.
The texture after freezing and thawing is very close to fresh — the shortbread base remains sandy, the caramel holds its set, and the chocolate top does not suffer visibly. The one difference is that the salt flakes on top may dissolve slightly during the thaw cycle. Add a fresh pinch of flaked sea salt after thawing if the original flakes have lost their texture.
Freezer — Unbaked
The shortbread base can be pressed into the lined pan, wrapped tightly in two layers of plastic wrap, and frozen unbaked for up to 1 month. Bake directly from frozen at 325°F (165°C) — add 5 to 7 minutes to the bake time and watch the edges for the same visual cue: pale golden at the very bottom edges, cream-colored top surface. The caramel and chocolate layers cannot be made ahead and frozen separately — they must be made fresh and applied to a fully baked, cooled base.
Serving Suggestion
Serve these bars at cool room temperature — pulled from the refrigerator 10 to 15 minutes before plating. This is the temperature at which the caramel has the texture shown in the photos: firm enough to hold a clean edge, soft enough to yield when you bite through it. Serving directly from the refrigerator makes the caramel too firm and the shortbread too hard to appreciate properly.
I serve these with a strong black coffee — no milk, no sugar. The bitterness cuts through the caramel in a way that makes the whole thing taste more balanced than it does on its own. A cup of dark tea works the same way. I would not serve these with anything sweet alongside them.
This is the recipe I make when someone asks me to bring something and I want them to remember what I brought. It travels reasonably well if kept cold during transport — a small insulated bag with an ice pack underneath the container keeps the caramel from softening in transit. I do not recommend making these for outdoor summer events where the bars will sit at ambient temperature for more than 30 minutes.
On Day 2, these are better than Day 1. The caramel deepens slightly, the fat from the caramel migrates into the bottom of the shortbread layer, and the whole thing becomes more cohesive without losing the distinct layer contrast. I always make these the day before I need them if the timeline allows.
The honest limitation: these do not scale down gracefully. A half batch in a smaller pan produces a thinner shortbread base that bakes and sets differently from what is tested here. If you need fewer bars, make the full batch and freeze half.
Frequently Asked Questions About Millionaire Shortbread Bars
Can I make millionaire shortbread ahead of time?
Yes — and I would actively recommend it. These bars are better on Day 2 than Day 1, which makes them one of the more genuinely make-ahead friendly recipes on this site. The full slab can be made, chilled, and stored uncut in the refrigerator for up to 2 days before slicing — keeping it uncut preserves the moisture balance in all three layers and prevents the shortbread edges from drying out. When you are ready to serve, lift the slab out using the parchment overhang, warm your knife, and cut as directed. The caramel sets more completely overnight, which actually makes the slicing cleaner than cutting on the same day the bars were made.
Can I use salted butter instead of unsalted butter in millionaire shortbread?
You can use salted butter in both the shortbread base and the caramel, but you need to adjust. Salted butter contains approximately ¼ tsp (1.5g) of salt per ½ cup (113g) — which means if you substitute salted butter in the caramel without removing the measured fine sea salt from the recipe, the caramel will be noticeably over-salted. The salt in this recipe is calibrated for unsalted butter — it is there to enhance flavor, not to dominate it. If using salted butter, omit the measured fine sea salt from both the shortbread base and the caramel entirely, then taste the caramel just before pouring and add a small pinch if needed. The result is acceptable but less precise than the unsalted version with measured salt.
Why is my caramel grainy or crystallized?
Grainy caramel in a condensed milk recipe is caused by one of two things: undissolved brown sugar crystals that were not fully melted into the mixture before the temperature climbed, or the caramel cooling too quickly in the pan before being poured. Unlike a dry sugar caramel where crystallization is triggered by stirring, the condensed milk caramel in this recipe is protected from crystallization by the milk proteins and fat — but undissolved sugar crystals from the brown sugar can still create a grainy texture if the mixture was not brought to temperature slowly enough at the start.
The fix for next time is to start over medium-low heat for the first 3 to 4 minutes, stirring until every visible sugar crystal has dissolved before increasing to medium. If the finished caramel layer in the bars is slightly grainy but fully set, the texture is the only issue — the flavor is unaffected and the bars are still worth eating. If the finished bars are already set and the caramel layer has a slightly gritty texture throughout, the bars are still worth eating — the flavor is unaffected and the texture difference is subtle once the chocolate and shortbread layers are eaten together in the same bite.
How do I know when the caramel is done?
The caramel is done when it reaches 225–230°F (107–110°C) on a candy thermometer and passes the cold water test simultaneously. The cold water test is the more reliable of the two: drop a half teaspoon of the hot caramel into a small bowl of cold water and reach in to feel it after 10 seconds. At the correct stage, it forms a soft, pliable ball that holds its shape when you roll it between your fingers but flattens under gentle pressure. If it dissolves into threads, keep cooking. If it forms a firm ball that resists pressure, you have gone slightly past the target — the finished caramel will be firmer than ideal but still sliceable. Visual cues alone — color and thickness — are useful guides but not sufficient on their own because the color development depends on your specific pan and heat source. Temperature plus tactile test together give you the most reliable result.
If you want to see how a similar set caramel layer behaves in a different bar format, the chocolate chip cookie bars on this site use a poured caramel layer and are a useful side-by-side reference for understanding how caramel sets against different base textures.
Can I use milk chocolate or semi-sweet chocolate instead of bittersweet for the top layer?
Yes, with trade-offs. Milk chocolate (30–40% cacao) produces a sweeter, softer top layer that sets less firmly than bittersweet — the finished bar will be noticeably sweeter overall since the caramel and shortbread are already rich and buttery. The chocolate layer may also be slightly more prone to fingerprints and surface marks because milk chocolate has a lower melting point. Semi-sweet chocolate (45–55% cacao) is a reasonable middle ground — slightly sweeter than the bittersweet version tested here but with enough cocoa content to set with a similar firmness and the same satin finish. The dark, espresso-brown color of the chocolate top visible in the photos is specific to 60–70% bittersweet chocolate — milk or semi-sweet will produce a lighter brown top that changes the visual contrast between the layers.
Can I double this recipe?
You can double the recipe but the execution changes in one important way: you cannot simply double the pan size and expect the same result. A doubled batch baked in a 9×13 inch (23×33cm) pan produces a thinner shortbread base than the 8×8 inch (20×20cm) version — approximately 30% thinner — which bakes faster and produces a slightly different layer ratio than shown in the photos. For a doubled batch that matches the layer proportions here, bake two separate 8×8 inch (20×20cm) pans simultaneously rather than scaling up to one larger pan. The caramel doubles linearly without any adjustment needed. The chocolate layer doubles linearly as well — melt in two separate batches to avoid overloading the bowl and getting uneven melting.
How do I adjust this recipe for high altitude or high humidity?
At high altitude, the shortbread base requires no adjustment — there is no leavening to over-expand. The caramel is the sensitive element: water boils at a lower temperature at altitude, so the sugar concentration you need for a firm-set caramel is reached at a lower thermometer reading. Reduce the target temperature by 2°F (1°C) for every 1,000 feet (305m) above sea level — at 5,000 feet (1,525m), pull the caramel at approximately 221°F (105°C). Always verify with the cold water test regardless of altitude.
In high humidity, the shortbread base may feel slightly soft on the surface before the caramel goes on — this is the powdered sugar absorbing ambient moisture and is cosmetic only. The chocolate layer is the most humidity-sensitive element: store finished bars in a covered container in the refrigerator in very humid conditions to prevent bloom developing on the chocolate surface.
More Bars You’ll Love
- Shortbread Cookies Recipe — the same buttery, sandy shortbread base from this recipe, made as standalone cookies with no caramel or chocolate — useful if you want to understand how the base behaves on its own before making the full millionaire version.
Millionaire Shortbread Bars Recipe
Ingredients
Equipment
Method
- Position oven rack in the middle and preheat to 325°F (165°C), then line an 8×8 inch (20×20cm) light-colored aluminum pan with two overlapping strips of parchment paper leaving at least 2 inches of overhang on all sides, and lightly grease the pan before laying the parchment down.
- Whisk together the 2 cups (240g) all-purpose flour, ½ cup (60g) sifted powdered sugar, and ¼ tsp (1.5g) fine sea salt in a large bowl, then add the ¾ cup (170g) cold cubed unsalted butter and rub it into the flour mixture using a food processor (8–10 pulses), stand mixer on low (2–3 minutes), or fingertips until the mixture resembles coarse damp sand with no butter pieces larger than a small pea.
- Transfer the mixture to the prepared pan and press firmly and evenly into the base using the flat bottom of a measuring cup, paying particular attention to the corners, then prick the surface all over with a fork approximately 20–25 times spaced 1 inch apart.
- Bake at 325°F (165°C) for 18 to 22 minutes until the very bottom edges are pale golden and the top surface is still cream-colored and matte — do not wait for the top to look golden — then transfer to a wire rack and cool completely, approximately 45 to 60 minutes.
- Once the base is fully cooled, combine the 1 can (14 oz / 396g) sweetened condensed milk, ½ cup (113g) unsalted butter, ½ cup (100g) packed light brown sugar, and ¼ tsp (1.5g) fine sea salt in a medium heavy-bottomed saucepan over medium heat, stirring continuously from the moment the butter begins to melt.
- Cook the caramel over medium heat, stirring constantly and scraping the bottom of the pan with every stroke, for 8 to 12 minutes until the mixture reaches 225–230°F (107–110°C) on a candy thermometer and a small amount dropped into cold water forms a soft pliable ball, then remove from heat and stir in the 1 tsp (5ml) pure vanilla extract.
- Pour the hot caramel immediately over the cooled shortbread base, spread to all four corners with an offset spatula, and allow to cool at room temperature for 30 minutes until the surface is firm and tacky but no longer liquid.
- Combine the 8 oz (227g) finely chopped bittersweet chocolate and 1 tsp (5ml) coconut oil or butter in a heatproof bowl and melt in the microwave in 30-second intervals at 50% power, stirring between each interval, until completely smooth and fluid — approximately 3 to 4 intervals.
- Pour the melted chocolate over the set caramel layer, spread evenly to the edges with an offset spatula using light strokes, then immediately scatter the 1 tsp flaked sea salt evenly across the surface while the chocolate is still fluid and glossy.
- Transfer the pan to the refrigerator and chill for a minimum of 2 hours or overnight until all three layers are fully set.
- Lift the slab from the pan using the parchment overhang and place on a cutting board, then warm a sharp chef’s knife in hot water, dry it completely, and cut into 16 bars using firm downward pressure — rewarming and drying the knife between every single cut.