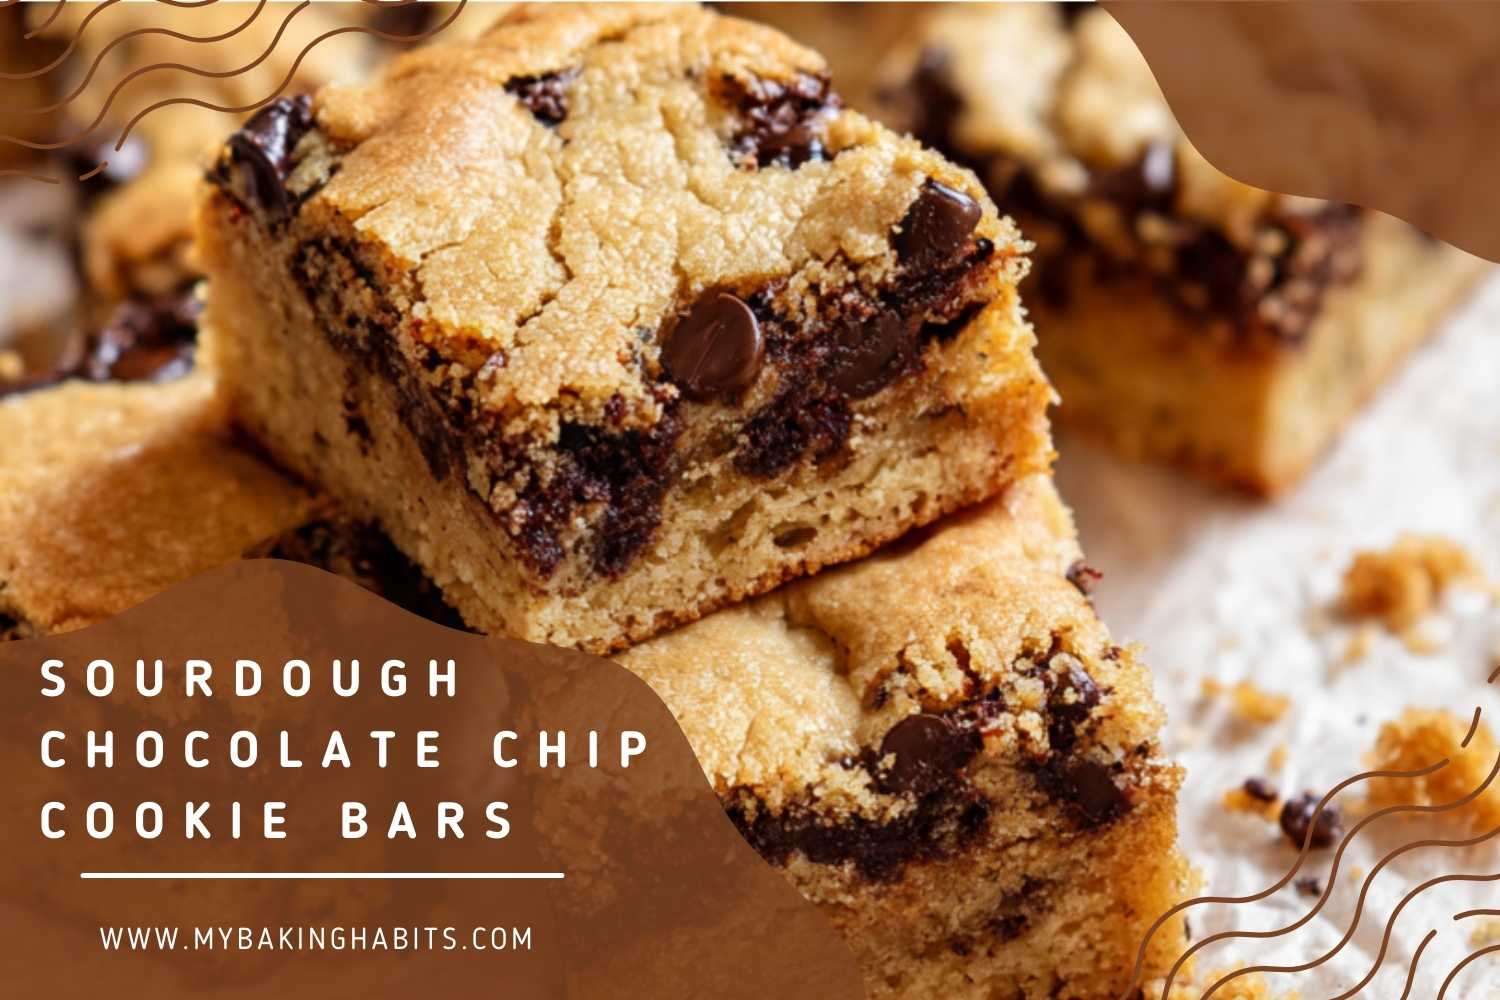
Sourdough Chocolate Chip Cookie Bars
The first time I made sourdough chocolate chip cookie bars, I was trying to use up a jar of discard that had been sitting in the back of my fridge for ten days. I was not expecting much. I have now made this specific recipe more than thirty times across four months of testing, and it is the bar I reach for every single time I have discard ready and a gathering coming up.
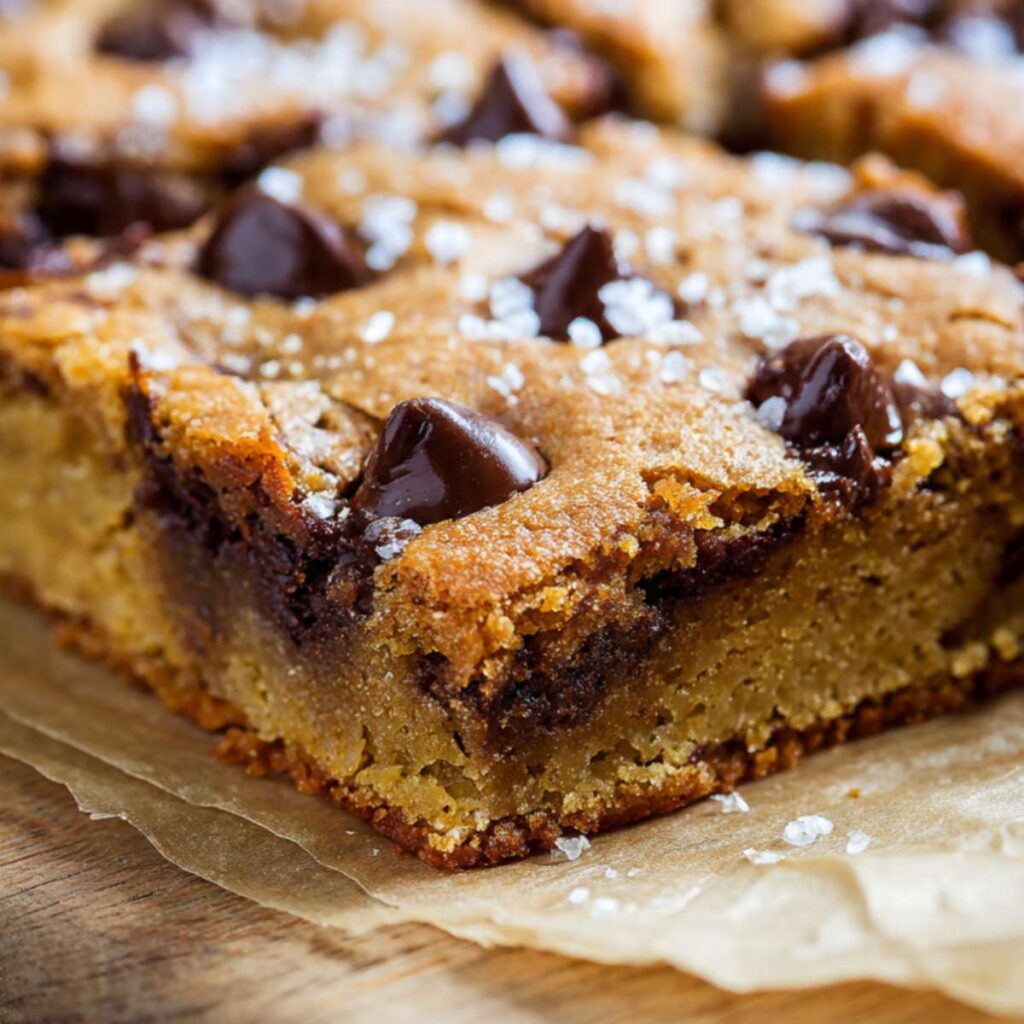
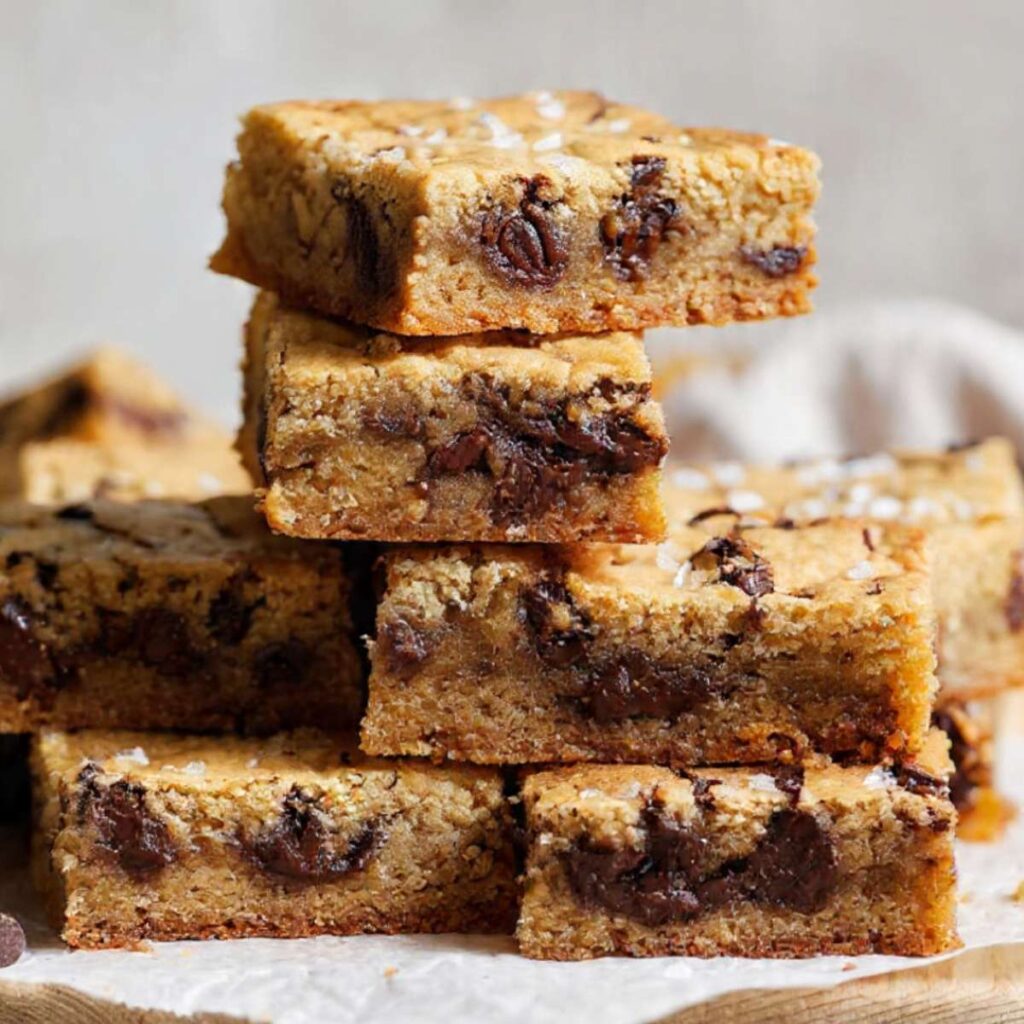
What you get: bars that are thick, dense, and deeply chewy with fudgy chocolate pockets running through every layer. The edges set with a defined golden crust that holds its shape cleanly when cut. The centers stay soft and almost gooey — that particular chew that only melted butter and a heavy hand with brown sugar can produce. The flaked sea salt on top is not decoration. It is what makes the chocolate taste more like chocolate and pulls the brown sugar caramel notes forward in every bite. Those glossy salt crystals visible on the surface in the close-up photo are on every single bar — that finish is built into the method, not an afterthought.
The sourdough discard is doing something specific here. It is not there to make these bars taste like sourdough bread. Unfed discard that has been sitting in the fridge for one to fourteen days contributes mild lactic acid fermentation notes that deepen the brown sugar flavor and add a very faint background complexity — the kind of depth that makes someone take a second bite before they have finished the first one. These bars do not taste sour. They taste like a better version of the chocolate chip cookie bar you already know.
I tested this with active fed starter versus unfed discard at multiple ages. Fed starter — refreshed within the last twelve hours — produced a noticeably tangy bar where the fermentation flavor competed with the chocolate. Discard between one and fourteen days old, pulled straight from the fridge and brought to room temperature, hit the flavor balance in every single batch. Discard older than two weeks produced a sharp, vinegary edge. The one-to-fourteen-day window is not a rough guideline — it is the specific range that works.
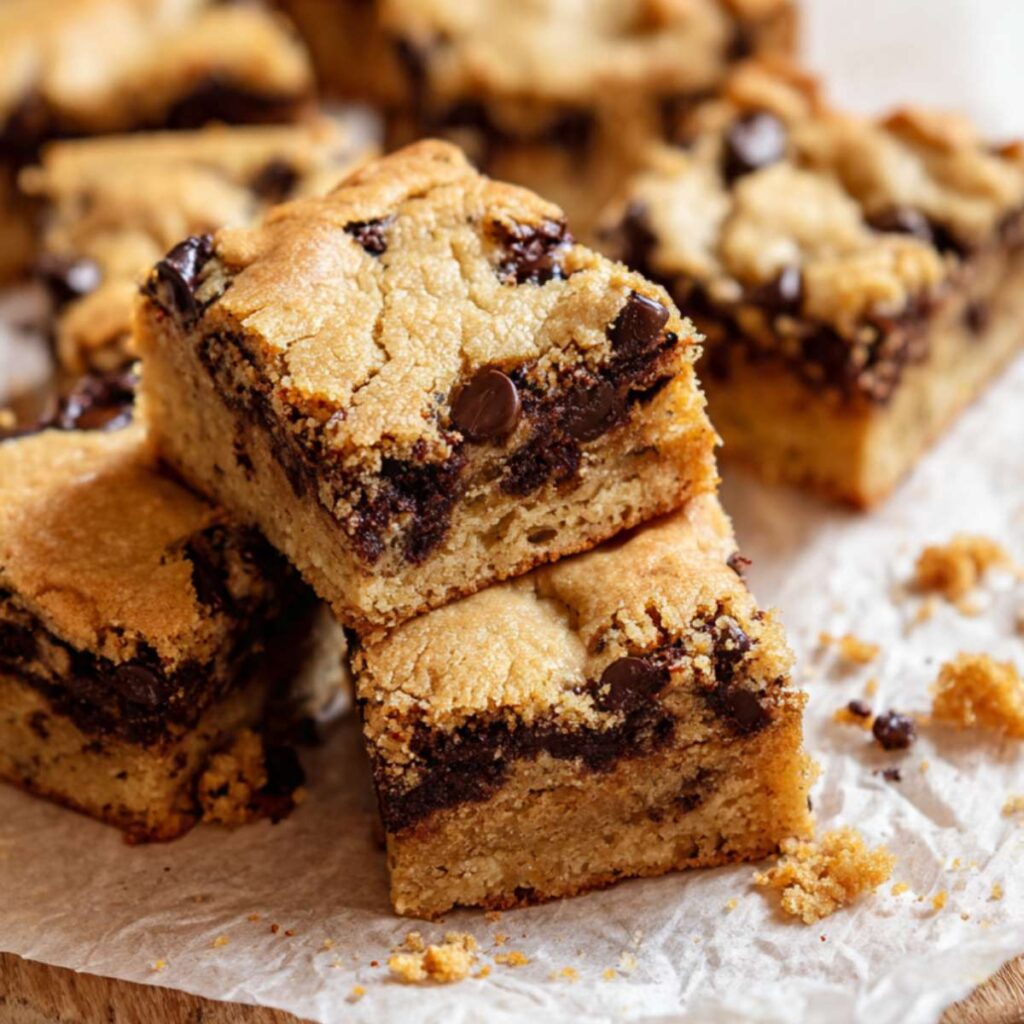
I tested butter quantities from ½ cup to 1 cup (113g to 227g) per batch. At ½ cup (113g) the bars were dense but the edges dried out by day two. At 1 cup (227g) the slab spread too thin in the pan and lost the height visible in the stacked photos. Three-quarters cup (170g) produced the balance — enough fat for the chewy, fudgy interior shown in the cross-section images without sacrificing thickness or clean-cut edges.
I tested the brown-to-white sugar ratio across four combinations. One hundred percent brown sugar produced a deeply soft bar with almost no defined edge and a uniform, borderline gummy texture throughout. The small addition of ¼ cup (50g) white sugar brought just enough structure to the edges to produce the contrast visible in the stacked bar photos — a slightly firmer golden border against a softer center — without introducing any surface crackle.
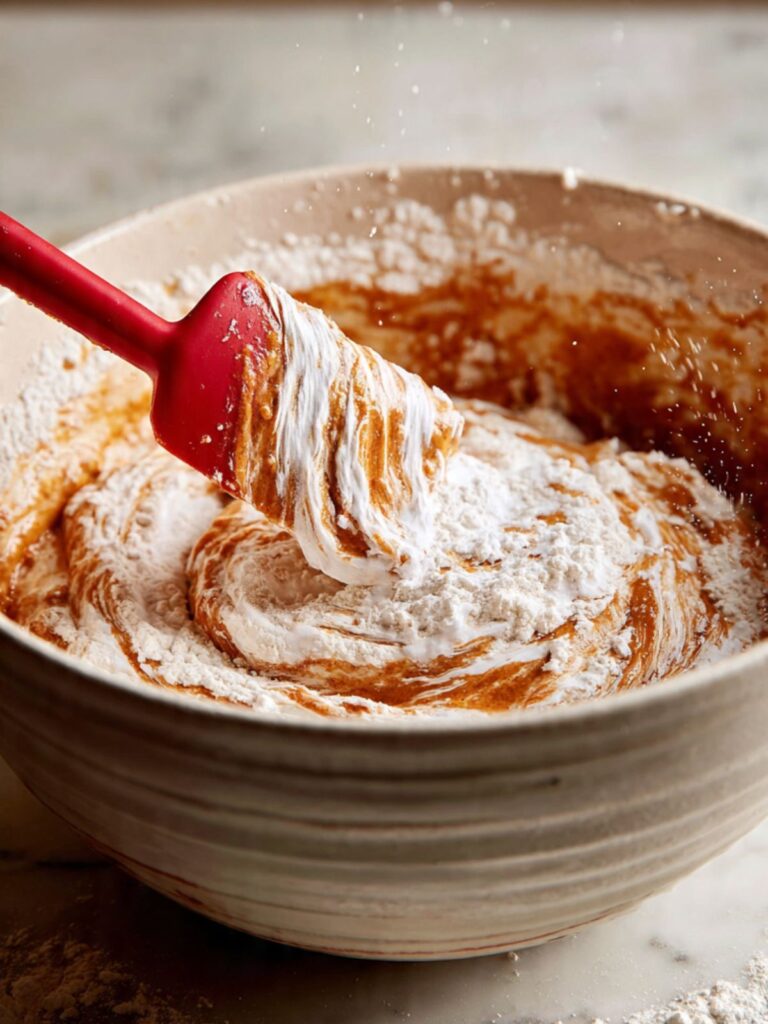
No mixer required. No chilling. One bowl and a silicone spatula. The batter comes together in about ten minutes and the bars are done in under thirty.
🗒 Luna’s Note: I always add a handful of extra chips pressed directly onto the surface of the batter before it goes into the oven. The chips folded into the dough get partially swallowed as the bars bake — pressing extras on top is what creates those glossy, intact chip pools visible on the surface in the close-up photo.
| Prep Time | 15 minutes |
| Bake Time | 25–28 minutes |
| Cool Time | 2 hours minimum before cutting |
| Total Time | approximately 2 hours 45 minutes |
| Yield | 24 bars (cut 4×6 from a 9×13 pan) |
| Pan | 9×13 inch light-colored aluminum pan |
| Oven Temp | 350°F (175°C) |
| Method | Melt-and-mix, one bowl |
| Skill Level | Beginner |
| Nutrient | Per Bar |
|---|---|
| Calories | ~239 kcal |
| Fat | ~11g |
| Carbohydrates | ~33g |
| Protein | ~3g |
| Sugar | ~21g |
| Sodium | ~135mg |
Ingredients & Tools
For the Bars
- 2¼ cups (270g) all-purpose flour, spooned into the measuring cup and leveled — or weighed
- ½ tsp (3g) baking soda, checked for freshness before using
- ¾ tsp (4g) fine sea salt
- ¾ cup (170g) unsalted butter, melted and cooled to room temperature
- 1½ cups (300g) packed light brown sugar — if your brown sugar has hardened, break it up completely before measuring; compacted lumps throw off the packed weight
- ¼ cup (50g) plain white granulated cane sugar
- 2 large eggs plus 1 egg yolk, room temperature
- 2 tsp (10ml) pure vanilla extract
- ½ cup (120g) unfed sourdough discard, room temperature
- 2 cups (340g) semi-sweet chocolate chips (45–55% cacao — Nestlé Toll House or Guittard work well), plus ¼ cup (43g) reserved for pressing on top
For the Finish
- ½ tsp flaked sea salt (such as Maldon) — for scattering on top immediately after baking. Measure this out and have it ready beside the oven before the pan goes in — you have a 30-second window after pulling to apply it.
Before You Start
Read through these notes before you touch a single ingredient. Each one addresses a specific failure point.
No chilling required. The dough goes straight from the bowl into the pan and into the oven. This is not a recipe that needs to rest — the brown sugar and discard ratio is calibrated to produce the thick, chewy result shown in the photos at room temperature dough. Do not refrigerate the batter before baking.
Gram weights take priority over volume measures. The single most common reason bars come out too dry or too dense is a mismeasured cup of flour. Spooning flour into the measuring cup and leveling it gives a better result than scooping, but a kitchen scale gives a precise result every time. If you have one, use it.
Your sourdough discard must be unfed and at room temperature. Fed starter — discard that has been refreshed with fresh flour and water in the last 12 hours — is too active and too tangy. It will overpower the chocolate and make the bars taste sour rather than complex. Unfed discard that has been sitting in the fridge for anywhere from 1 day to 2 weeks works perfectly. Pull it out of the fridge and let it sit on the counter for 30–45 minutes before mixing. Cold discard incorporated into melted butter will cause the butter to seize and the batter will look broken.
Your butter must be melted and fully cooled before the eggs go in. Melted butter that is still warm — above 85°F (29°C) — will begin to cook the eggs the moment they hit the bowl. The result is scrambled protein threads running through the batter and bars that bake up grainy rather than smooth and chewy. Melt the butter first, then set it aside while you measure everything else. By the time you need it, it will be at the right temperature.
Your eggs and egg yolk must be at room temperature. Cold eggs mixed into cooled melted butter cause the fat to solidify in uneven clumps, producing a broken, greasy batter. Pull eggs from the fridge when you pull the discard — 30 minutes on the counter is enough.
Check your baking soda for freshness. Drop ½ tsp into 2 tablespoons of hot water. If it bubbles vigorously, it is fresh. If it barely reacts, replace it — old baking soda produces flat, dense bars with no lift at the edges.
Have your flaked sea salt measured and positioned beside the oven before the pan goes in. The salt must be scattered across the surface within 30 seconds of pulling the pan from the oven — the residual surface heat is what allows the crystals to adhere. If the salt is not within reach the moment the pan comes out, the window closes and the crystals will not stick.
Use a 9×13 inch light-colored aluminum pan. Dark non-stick pans absorb more heat and will overbake the bottom and edges before the center is done. Glass pans bake slower and unevenly and require a reduced oven temperature and extended bake time. If a glass pan is all you have, reduce the oven to 325°F (163°C) and add 5–7 minutes to the bake time.
Line the pan with parchment paper and leave overhang on the two long sides. This is your handle for lifting the full slab out of the pan before cutting. Bars cut in the pan always compress at the edges — lifting the whole slab gives you clean, even cuts from edge to edge.
Position your oven rack in the middle before preheating. Middle rack position ensures even heat distribution across the full 9×13 slab. The top rack runs hotter and will overbrown the surface before the center sets. The bottom rack will overbake the base.
Necessary Tools
- Kitchen scale (strongly recommended)
- 9×13 inch light-colored aluminum baking pan
- Parchment paper
- Large mixing bowl
- Silicone spatula
- Whisk
- Wire cooling rack
- Oven thermometer (optional but recommended — most home ovens run 15–25°F off from the dial reading)
How to Make Sourdough Chocolate Chip Cookie Bars
Step 1: Setting Up the Pan and Preheating the Oven
Position your oven rack in the middle position and heat your oven to 350°F (175°C). Most home ovens run 15–25°F (8–14°C) off from what the dial reads — if you have an oven thermometer, confirm the actual temperature before the pan goes in. A low oven is the most common reason bar cookies come out pale on top and undercooked through the center even when the timer says they should be done.
Line your 9×13 inch light-colored aluminum pan with parchment paper, pressing it into the corners and leaving at least 2 inches (5cm) of overhang on both long sides. Do not grease the pan underneath the parchment — the overhang handles are what allow you to lift the full slab cleanly after cooling. Foil is not a substitute — it conducts heat differently and the bars will develop a tougher bottom crust.
The pan should be fully lined and sitting on the counter before you start mixing — once the batter comes together it needs to go straight into the pan.
Do not open the oven door before 22 minutes into the bake — the sudden temperature drop causes the center of the slab to sink and the bars will have a dense, compressed center layer instead of the even chewy crumb visible in the cross-section photos.
Your pan is lined and the oven is heating — melt the butter now so it cools in time.
Step 2: Melting the Butter and Combining the Sugars
In your large mixing bowl, melt your ¾ cup (170g) unsalted butter completely — either in the microwave in 30-second bursts or in a small saucepan over low heat. Pour it into the large mixing bowl and set it aside for 8–10 minutes. The butter should feel neutral to the touch — not warm, not cool. If you press the back of your hand to the outside of the bowl and the bowl feels warm, wait another 5 minutes.
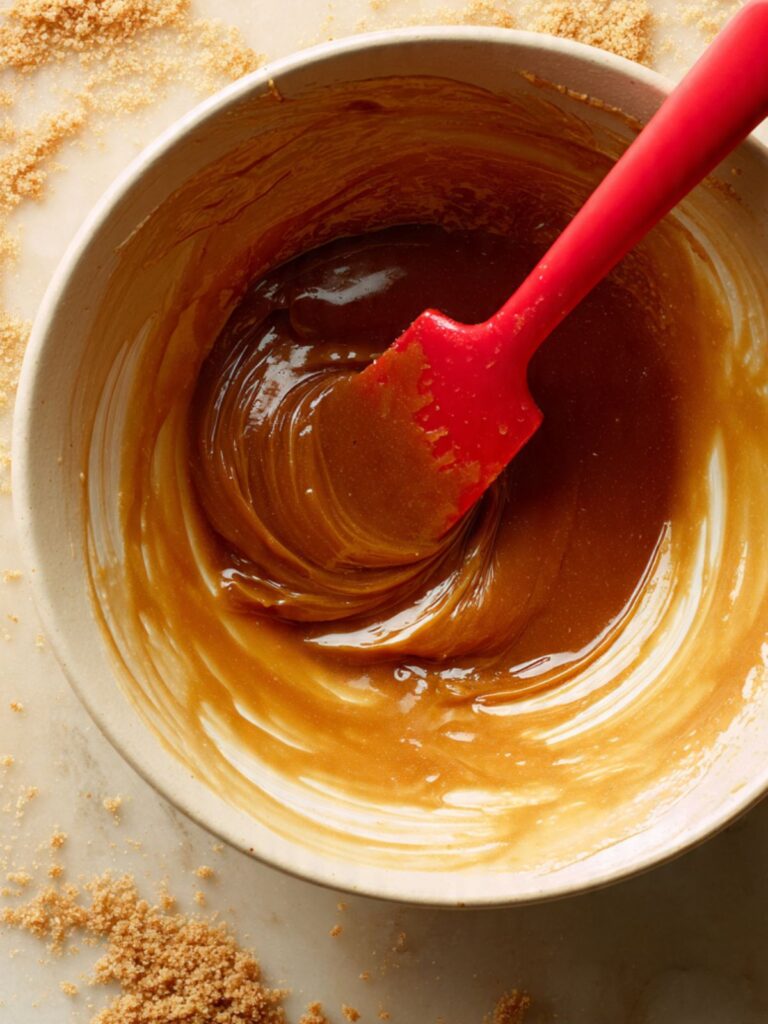
Once the butter has cooled, add your 1½ cups (300g) packed light brown sugar and ¼ cup (50g) plain white granulated sugar directly into the bowl with the butter. The brown sugar is what drives the density, chew, and deep caramel undertone in these bars — it holds significantly more moisture than white sugar and that retained moisture is what keeps the centers soft for days after baking. The white sugar adds just enough structure to the edges to give them definition without creating surface crackle.
Using your whisk, stir from the bottom of the bowl upward in wide circular strokes — approximately 30 strokes — until the sugars are fully absorbed into the butter and the mixture looks uniform, glossy, and slightly thickened.
The mixture should look like a thick, smooth paste — deep amber in color with no visible dry sugar pockets and no greasiness floating on the surface. If you see a shiny butter layer sitting on top of the sugar, whisk for another 10 strokes.
The sugar-butter base is ready — add the eggs next, one at a time.
Step 3: Adding the Eggs, Yolk, Vanilla, and Sourdough Discard
Crack your 2 large eggs plus 1 egg yolk into the sugar-butter mixture one at a time, whisking each one in completely before adding the next. Adding all the eggs at once introduces too much liquid too quickly and can break the emulsion — you will see this as a greasy, separated batter that never fully comes together. The extra yolk adds richness and contributes to the fudgy, dense interior — it is not optional.
Add your 2 tsp (10ml) pure vanilla extract and whisk until incorporated.
Now add your ½ cup (120g) unfed sourdough discard at room temperature. Switch from the whisk to your silicone spatula and fold the discard in with slow, deliberate strokes from the bottom of the bowl upward — approximately 15 strokes — until no white streaks remain. The discard contributes mild lactic acid fermentation notes that deepen the brown sugar flavor and add a very faint tang that reads as complexity rather than sourness. It also adds a small amount of hydration and structure from its existing flour content, which is why the flour quantity in this recipe is slightly lower than a standard bar cookie.
🗒 Luna’s Note: I keep a dedicated jar of sourdough discard in the back of my fridge specifically for baking. I never let it go more than two weeks without using or refreshing it — past that point the acidity gets sharp enough to compete with the chocolate rather than complement it.
The batter at this stage should look smooth, glossy, and unified — a deep amber color with no streaks of discard visible and no separation. If the batter looks broken or greasy, your butter was still too warm when the eggs went in. The bars will still bake but the texture will be slightly greasy rather than clean and chewy.
The wet ingredients are fully combined — fold in the dry ingredients next.
Step 4: Adding the Dry Ingredients Without Developing Gluten
Add your 2¼ cups (270g) all-purpose flour, spooned and leveled, ½ tsp (3g) baking soda, and ¾ tsp (4g) fine sea salt directly to the bowl. Do not whisk — switch to your silicone spatula and fold with slow strokes from the bottom of the bowl upward. Count your strokes. Stop at 20 strokes and assess — the flour should be almost fully incorporated with just a few streaks remaining. Give it 5 more strokes maximum to finish.
The baking soda reacts with the mild acidity in the sourdough discard and the brown sugar to create a small amount of lift at the edges — this is what gives the bars their defined border and prevents the entire slab from baking flat and dense from edge to center. It is not enough leavening to make the bars cakey — the ratio is calibrated specifically to produce lift at the edges only.
Overmixing past full flour incorporation develops gluten strands that tighten the crumb — the bars will bake up tough and rubbery in the center rather than soft and chewy. 25 strokes total from the moment the flour hits the batter is the maximum.
The dough should look thick, uniform, and slightly sticky — it will pull away from the sides of the bowl in one mass when you drag the spatula through it. If it looks wet or pourable, the flour was under-measured. If it looks dry and crumbly, the flour was over-measured. Both are correctable before baking — add flour 1 tablespoon at a time for wet dough, or 1 tablespoon of discard for dry.
The dough is ready — fold in the chocolate chips and transfer to the pan.
Step 5: Folding In the Chocolate Chips and Filling the Pan
Add your 2 cups (340g) semi-sweet chocolate chips to the bowl and fold them in with your silicone spatula using the same bottom-upward stroke — approximately 10 strokes, just until the chips are evenly distributed. Do not stir in circles — circular stirring at this stage breaks the chips down and smears chocolate through the batter rather than leaving intact pockets.
Transfer the dough into your parchment-lined 9×13 inch pan. The dough is thick — use the spatula and damp fingertips to press it into an even layer all the way to the corners. Uneven thickness means uneven baking: thin corners will overbake before the thick center is done. Do not leave the corners thinner than the center — the edges will bake through completely and turn dry and crumbly while the center is still underdone, and no amount of extra bake time will fix both problems simultaneously once the batter is set.
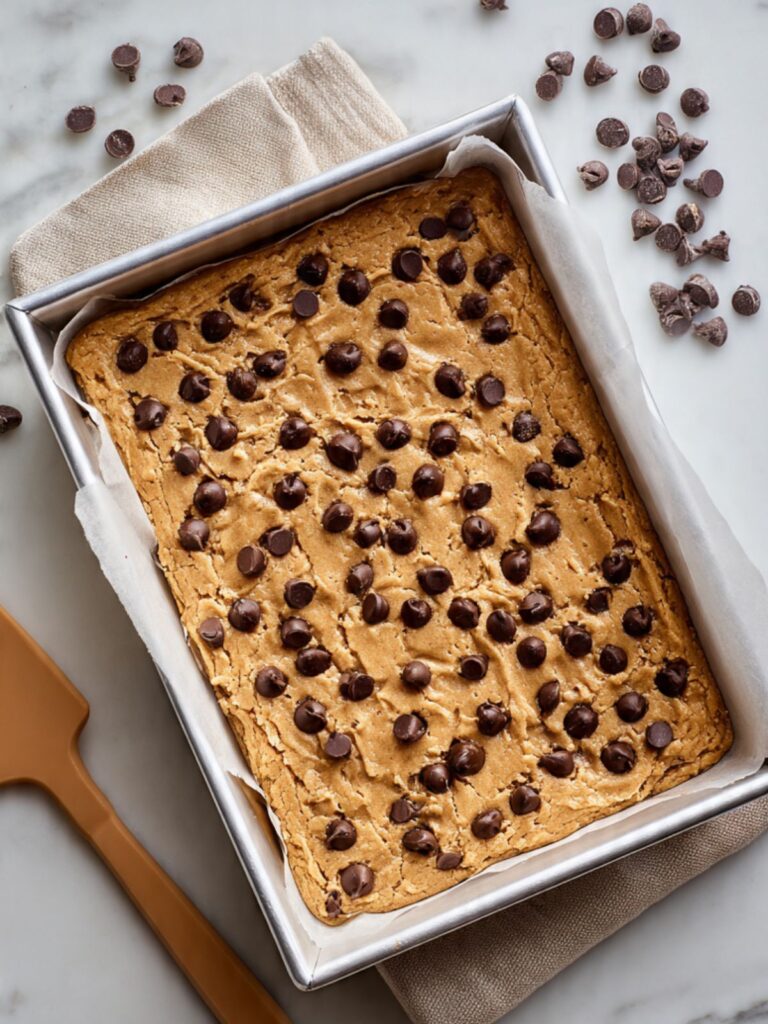
Scatter your reserved ¼ cup (43g) semi-sweet chocolate chips evenly across the top surface and press them in gently with your fingertips. As you can see in the close-up image above, these surface chips stay intact and glossy through the bake — they are what create the visible chocolate pools on top of the finished bars. Chips folded only into the interior get partially submerged as the batter rises — pressing extras on top guarantees that glossy, chocolate-studded surface.
The batter should fill the pan in an even layer approximately ¾ inch (2cm) deep before baking, with chips visible and evenly spaced across the top surface. If the center looks significantly thicker than the corners, redistribute before the pan goes in.
The pan is ready — into the oven now.
Step 6: Baking to the Correct Doneness
Place the pan on the middle rack of your preheated 350°F (175°C) oven. Set a timer for 22 minutes and do not open the door before it goes off.
At 22 minutes, open the oven and check: the edges should look set, golden-brown, and pulling very slightly from the parchment. The center should still look slightly underdone — matte on the surface but with a very faint jiggle if you carefully shake the pan. This is the correct moment to keep watching.
Continue baking for 3–6 more minutes, checking every 2 minutes. Pull the pan the moment the surface across the full slab looks matte and set — not shiny, not wet-looking in the center. The bars will look slightly underdone through the center at pull time. That is correct. Carryover heat from the pan will continue cooking the center for the full 2 hours of cooling — bars pulled at the moment they look perfectly done in the oven will be overbaked and dry by the time they are cut.
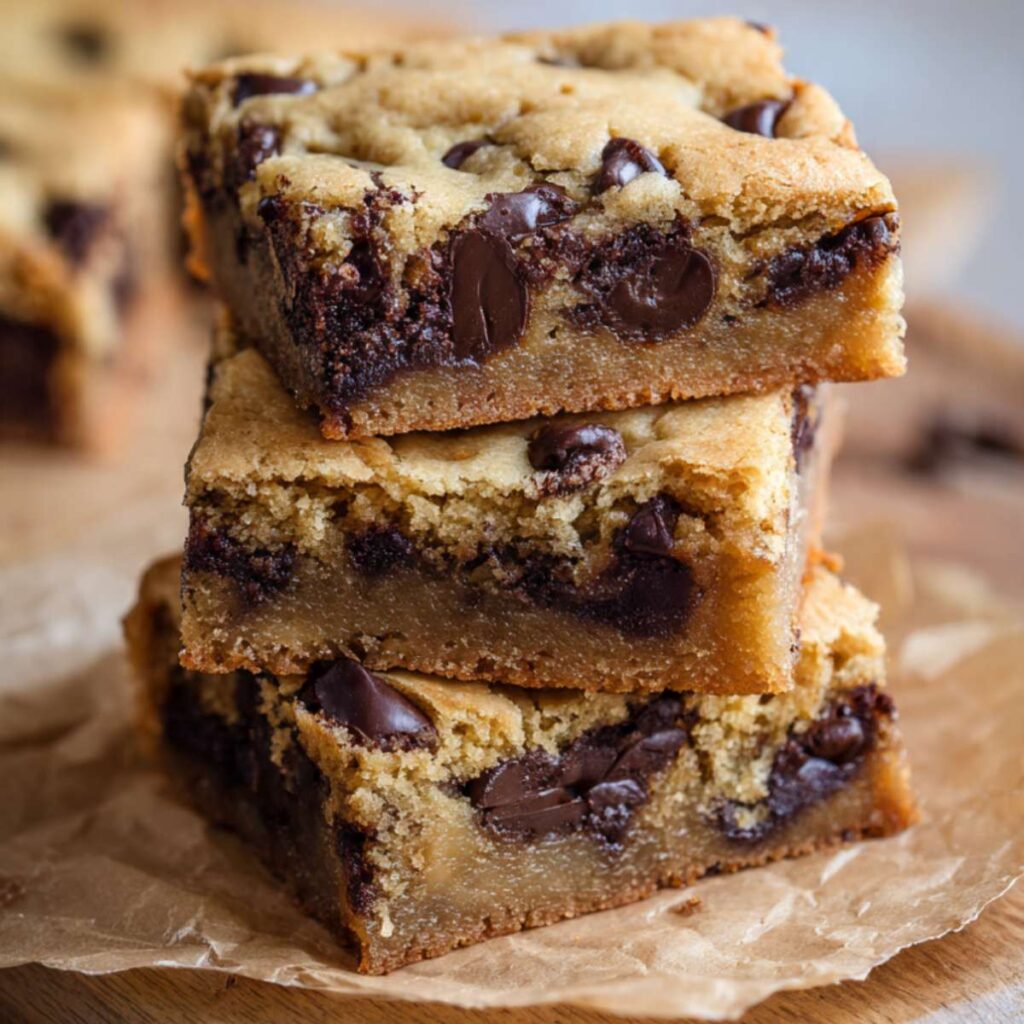
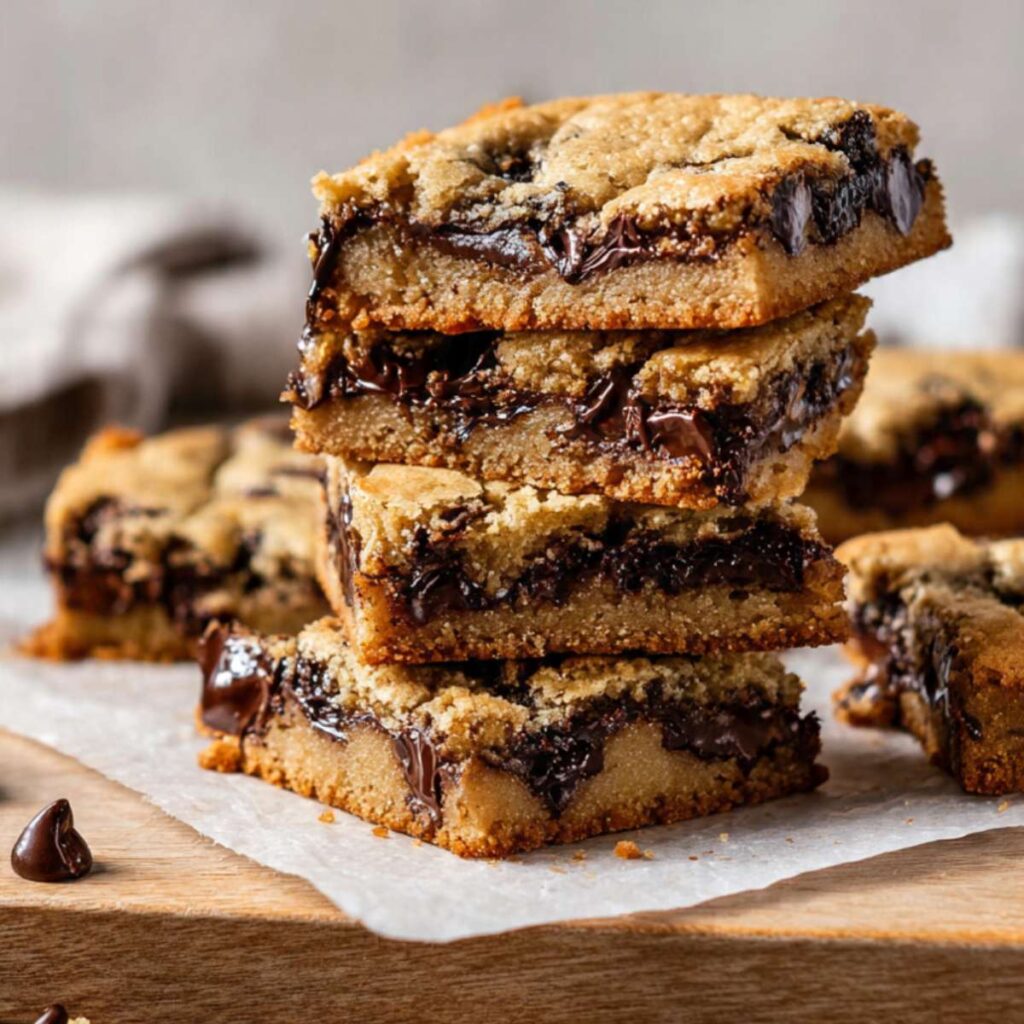
As you can see in the stacked bar photos, the interior shows a dense, fudgy crumb with intact chocolate pockets throughout — that texture is only achievable with an early pull. Bars left in the oven until the center looks fully set will have a drier, more compressed crumb and the chocolate will bake into the dough rather than staying as distinct pockets.
At pull time the edges will look set and golden and the center surface will look matte but may still have a very slight give when the pan is gently shaken. The top will not be shiny. If the entire surface is shiny and the center visibly jiggles like liquid, give it 3 more minutes and check again.
The pan is out — scatter the flaked salt across the surface within 30 seconds.
Step 7: Finishing with Flaked Sea Salt and Cooling Before Cutting
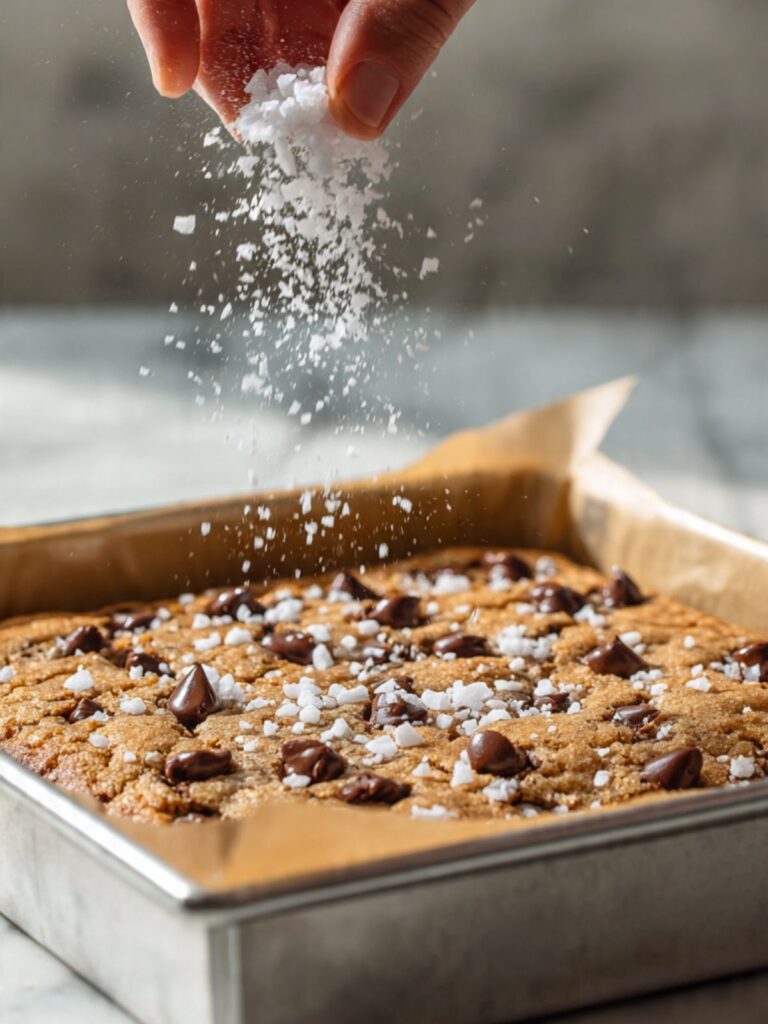
The moment the pan comes out of the oven, scatter your ½ tsp flaked sea salt evenly across the entire top surface. The residual heat from the bars helps the salt crystals adhere lightly to the surface — salt added after cooling sits on top and falls off when the bars are handled. Use Maldon or any large-flake finishing salt. Fine sea salt is not a substitute — it dissolves into the surface and disappears rather than delivering the visible crystals and burst of salinity visible in the hero photos.
Place the pan on a wire cooling rack. Leave it completely undisturbed for a minimum of 2 hours at room temperature before cutting. The bars will look and feel fully set on the surface long before the interior has finished setting — the center is still molten underneath that set surface for at least 90 minutes after pulling from the oven.
Do not cut the bars before the full 2 hours. If you cut early, the centers will collapse into a gummy, molten layer that cannot be recovered — the bars will look underbaked even though they are not. The 2-hour wait is the final step of the bake, not optional cooling time.
After 2 hours, use the parchment overhang to lift the full slab onto a cutting board. Cut into 24 bars using a sharp chef’s knife — 4 cuts along the short side and 6 cuts along the long side. Wipe the knife clean between cuts for the cleanest edges.
🗒 Luna’s Note: I run my knife under hot water and dry it before the first cut and between every second cut after that. A warm, dry blade moves through the chocolate pockets cleanly — a cold or wet blade drags and compresses the edges.
The finished bars should look exactly like the stacked photos above — golden-brown edges, matte top surface with visible flaked salt crystals and glossy chocolate chips, and a dense, fudgy interior when viewed from the cut side. A bar that looks pale on the edges and wet in the cross-section needed more time. A bar that looks dry and crumbly in the cross-section was either overbaked or cut too early.
The bars are cut and ready — store in a lidded hard-sided container with parchment between layers.
The Science Behind Sourdough Chocolate Chip Cookie Bars
Why Sourdough Discard Makes These Bars Taste Different From Every Other Bar Cookie
Sourdough discard is not just a use-it-up ingredient. It is an active flavor contributor that changes the finished bar in two measurable ways. First, the lactic and acetic acids produced during fermentation deepen the caramel notes in the brown sugar — the same way a small amount of acid brightens and sharpens every other flavor around it.
Second, the existing gluten network in the discard’s flour content contributes a small amount of additional structure without requiring extra dry flour, which keeps the crumb dense and chewy rather than starchy and thick. The result is a bar that tastes more complex and layered than a standard chocolate chip bar made with an identical ingredient list minus the discard — not sour, not tangy, but noticeably deeper.
The key variable is fermentation state. Unfed discard has completed its active rise and fall cycle — the yeast activity has slowed and the acid content has stabilized. This is the flavor sweet spot. Fed starter is still in active fermentation, producing CO₂ and accumulating more acid by the hour. Added to a bar batter, fed starter produces a noticeably sour finished bar and introduces unpredictable leavening that can cause the center to dome and then sink as the CO₂ escapes during baking. Unfed discard contributes the flavor benefit without the structural risk. See my chocolate chip cookie bars article for a full breakdown of how the base bar ratio behaves without discard — the comparison makes the discard effect easy to see.
🗒 Luna’s Note: I keep a dedicated jar of sourdough discard in the back of my fridge specifically for baking. I never let it go more than two weeks without using or refreshing it — past that point the acidity gets sharp enough to compete with the chocolate rather than complement it.
Why Brown Sugar and Melted Butter Produce a Chewy, Fudgy Bar — Not a Crispy One
Brown sugar is white sugar with molasses reintroduced — typically 3.5% molasses for light brown and 6.5% for dark brown. That molasses content is hygroscopic, meaning it actively attracts and holds moisture from the surrounding environment. In a baked bar, this retained moisture is what keeps the crumb soft and pliable days after baking — the molasses acts as a built-in humectant.
The ratio in this recipe — 1½ cups brown to ¼ cup white — is calibrated deliberately. All brown sugar produces a bar so soft it lacks structural definition at the edges. The small white sugar addition drives just enough moisture evaporation at the edges during baking to give them a slightly firmer, more defined border — the contrast visible in the stacked bar photos between the golden edge and the softer center.
Melted butter reinforces this mechanism from a different direction. Creaming softened butter with sugar incorporates air into the fat — those air pockets expand in the oven and produce a lighter, more open crumb. Melted butter contains no trapped air. It coats the flour proteins evenly before gluten has a chance to develop, which produces a tighter, more compact crumb structure. Liquid fat also coats the flour proteins faster and more completely than softened butter does, reducing their ability to link into long gluten chains. Less gluten development equals a more tender, dense result — the same mechanism behind the chewiness in brownies, which also use melted butter or melted chocolate as the primary fat.
The extra egg yolk reinforces this further: yolks contain fat and lecithin, an emulsifier that strengthens the bond between the fat and water phases of the batter, adding richness and keeping the crumb cohesive rather than dry.
Why Pulling the Bars Early Is the Most Important Step in the Entire Recipe
Carryover cooking is the continuation of heat transfer after a baked good is removed from the oven. The pan, which has been absorbing heat at 350°F (175°C) for 25–28 minutes, continues conducting that stored heat into the bottom and sides of the bars for the full duration of cooling. In a 9×13 pan with a bar this thick, that carryover effect raises the internal temperature of the center by approximately 10–15°F (5–8°C) after the pan leaves the oven.
A bar pulled when the center looks and feels completely done in the oven has already absorbed enough carryover heat to overbake by the time it reaches room temperature. The interior will be drier, more compressed, and the chocolate pockets will be fully absorbed into the crumb rather than staying as distinct melted pools — the gooey chocolate visible in the cross-section photos disappears entirely in an overbaked bar. Pulling at the moment the surface looks matte and set — even when the center still has a faint give — allows carryover heat to finish the job without crossing into overbaked territory.
This is not underbaking. It is precision baking. The 2-hour cooling window is the final phase of the bake. Cutting before it is complete interrupts that process and collapses the still-molten center.
Sourdough Chocolate Chip Cookie Bars Troubleshooting & Pro-Tips
The Bars Have an Overpowering Sour or Tangy Flavor
The finished bars taste sharp or fermented rather than deeply caramel and chocolatey. This is a discard state problem — the single most recipe-specific ingredient failure in this recipe. Freshly fed discard refreshed within the last 12 hours is still in active fermentation with an unstable, rising acid content. That acidity bakes directly into the bars and competes with the chocolate rather than supporting it. Discard older than 2 weeks has swung the other direction — the acetic acid (vinegary side of sourdough flavor) dominates over the milder lactic notes this recipe is built around.
The correct discard is unfed, 1 to 14 days old, stored in the fridge, and brought to room temperature before use. Cold discard incorporated directly from the fridge does not blend smoothly into the batter and can deliver uneven pockets of concentrated discard flavor in the finished bar rather than an even background note.
If all you have is freshly fed starter, reduce the quantity to ⅓ cup (80g), add 2 tablespoons (16g) of extra flour to compensate for the higher hydration, and expect a slightly tangier flavor profile.
Prevention: label your discard jar with the date of the last feeding. Use it between day 1 and day 14. Pull it from the fridge 30–45 minutes before it goes into the batter.
The Bars Are Gummy and Underbaked in the Center
The surface looks set but cutting into the bars reveals a raw, gummy center layer that does not hold its shape. This is a pan problem or a cut-time problem — not a recipe problem.
A dark non-stick pan or a glass pan bakes the edges faster than the center, creating a false doneness signal at the edges while the center remains underbaked. The edges look golden and set at 22 minutes but the center is still 10°F (5.5°C) below the temperature needed to set the egg proteins. By the time the center is done, the edges are overbaked. The fix is a light-colored aluminum pan, which distributes heat evenly across the full surface.
Cutting before the 2-hour cooling window is the second cause. The center of a bar this thick is still molten at 90 minutes post-bake even when the surface feels firm. Cutting at 60 minutes exposes that molten layer and the bars collapse inward at the cut edge. If this has already happened, place the cut bars back in a 300°F (150°C) oven for 8–10 minutes to finish setting the center.
Prevention: use a light-colored aluminum pan, pull at the correct visual cue, and wait the full 2 hours before cutting.
The Bars Came Out Cakey and Dry Instead of Dense and Chewy
The crumb is open and dry rather than tight and fudgy. Over-measured flour is the most common cause. A scooped cup of all-purpose flour can weigh anywhere from 130g to 165g depending on how compacted the bag is — the recipe calls for 270g total. At 165g per cup, two scooped cups puts you at 330g, which is 60g over. That excess flour absorbs the moisture the brown sugar and discard were supposed to retain, producing a drier, more bread-like crumb. Weigh the flour. If you do not have a scale, spoon it into the measuring cup and level with a straight edge — never scoop directly from the bag.
Overbaking is the second cause. If the bars looked fully set in the center before you pulled them, they were already past the correct pull point. The fix for next time: pull the moment the surface looks matte across the full slab, even when the center still has a faint give when the pan is gently shaken.
Old or weak baking soda is the third cause. Baking soda that has lost its potency produces no edge lift — the bars bake flat and dense from edge to center with none of the slight golden border visible in the photos. Test it before every batch: drop ½ tsp into 2 tablespoons of hot water. If it does not bubble vigorously within 5 seconds, replace it.
Prevention: weigh every ingredient, test the baking soda, pull early, and allow the full 2-hour cooling window before cutting.
The Batter Looks Broken, Greasy, or Separated
The batter has a greasy sheen and the fat appears to be separating from the rest of the mixture rather than combining into a smooth, cohesive mass. This is a temperature problem — the butter was still too warm when the eggs went in, or the eggs were too cold when they hit the butter.
Warm butter begins to cook the egg proteins on contact, causing them to seize and clump rather than emulsify smoothly into the fat. The result is a batter with visible protein streaks and a layer of fat sitting on the surface that no amount of mixing will fully incorporate. Cold eggs dropped into melted butter cause the fat to solidify in uneven clumps around the cold proteins, producing the same broken appearance.
If the batter looks broken but has not yet had the flour added, place the bowl over a pan of warm (not hot) water for 60 seconds and stir gently — gentle warmth can re-emulsify a mildly broken batter. If the flour is already in, proceed with baking — the bars will still set and taste correct, but the texture will be slightly greasier than the intended result.
Prevention: melt the butter first, let it cool for a full 8–10 minutes until neutral to the touch, and pull eggs from the fridge at the same time you pull the discard — 30 minutes at room temperature before they go into the batter.
The Flaked Sea Salt Sank Into the Surface and Is Not Visible
The salt crystals dissolved into the top of the bars rather than sitting on the surface as the distinct visible flakes shown in the close-up photos. This happens when the salt is added too late — after the surface has cooled and lost the slight tackiness that allows salt crystals to adhere — or when fine sea salt or kosher salt is used instead of flaked sea salt.
Fine salt dissolves on contact with the warm surface and disappears completely. Kosher salt partially dissolves and leaves an uneven, gritty residue rather than clean, visible crystals. Maldon or any large-flake finishing salt is the correct choice — the flat, irregular crystals adhere to the warm surface, stay intact through cooling, and deliver the burst of salinity and visual contrast visible in the photos.
The salt must go on the moment the pan comes out of the oven — within 30 seconds. The residual surface heat is what creates the adhesion. After 2 minutes of cooling the surface loses enough heat that salt crystals will not adhere and will fall off when the bars are handled or cut.
Prevention: have the flaked salt measured and ready beside the oven before the pan goes in, and scatter it within 30 seconds of pulling.
Pro-Tips
Cut with a warm knife for clean edges. Run the blade under hot water, dry it completely, and make each cut in one smooth downward press — do not saw. The warm blade moves through the chocolate pockets without dragging or compressing the crumb. Wipe and rewarm the blade every 2–3 cuts.
For even thicker, fudgier bars, use an 8×8 inch pan. The same batter baked in an 8×8 produces bars approximately 1.75 inches (4.5cm) thick. Increase the bake time to 32–36 minutes and check doneness at 32. The cooling time extends to 3 hours minimum — the thicker slab holds heat longer and needs more time for the center to set completely.
Humidity and altitude adjustments. In high-humidity environments, the discard absorbs ambient moisture and the batter can become slightly wetter than intended — add 1 extra tablespoon (8g) of flour if the batter looks pourable rather than thick and scoopable. At high altitude above 3,500 feet (1,067m), reduce the baking soda by ⅛ tsp and increase the oven temperature to 360°F (182°C) — the reduced air pressure causes leavening to act more aggressively, which can produce a domed center that falls as the bars cool.
How to Store Sourdough Chocolate Chip Cookie Bars
Room Temperature
Store cut bars in a lidded hard-sided container — a plastic storage container or a tin with a tight-fitting lid. Layer the bars with a sheet of parchment paper between each layer to prevent them from sticking together at the chocolate contact points. Do not use zip-lock bags — the bars compress under their own weight inside a bag and the edges flatten and lose their definition within a few hours.
These bars keep at room temperature for up to 5 days. The brown sugar and sourdough discard work together as moisture retainers — the bars are actually at their best on day 2 and day 3, when the crumb has had time to fully settle and the brown sugar has redistributed its moisture evenly through the bar. Day 1 bars are excellent. Day 2 bars are noticeably chewier and the flavor has deepened. Do not refrigerate unless your kitchen runs very warm — refrigeration dries out the crumb faster than room temperature storage does and mutes the brown sugar and chocolate flavors.
Keep the container away from direct sunlight and heat sources. A warm kitchen — above 80°F (27°C) — will soften the chocolate pockets to the point where the bars become difficult to handle cleanly. If your kitchen is very warm, refrigerate and bring individual bars to room temperature for 20 minutes before serving.
Refrigerator
Refrigeration is not recommended for day-to-day storage. Cold temperatures cause the butter fat in the bars to solidify and the crumb to firm up significantly — a bar pulled straight from the fridge has a denser, more compressed texture and muted flavor compared to the same bar at room temperature. The flaked sea salt also loses its burst quality when the bar is cold.
If you need to refrigerate — for example, if the bars will not be eaten within 5 days or if your kitchen runs above 80°F (27°C) — store them in a lidded hard-sided container with parchment between layers and bring each bar to room temperature for at least 20 minutes before serving. Do not microwave refrigerated bars to warm them — microwaving softens the chocolate pockets but simultaneously dries the surrounding crumb, producing an uneven texture. A 300°F (150°C) oven for 5 minutes returns a refrigerated bar to something very close to fresh-baked quality.
Freezer — Baked Bars
Baked bars freeze exceptionally well for up to 2 months. The brown sugar and discard hydration means the crumb retains moisture through the freeze-thaw cycle better than a standard bar cookie with a higher white sugar ratio.
Wrap each bar individually in a layer of plastic wrap — pull the wrap tight so there is no air gap between the wrap and the bar surface. Place the wrapped bars in a zip-lock freezer bag or a lidded freezer-safe container, squeeze out as much air as possible, and freeze flat. Do not stack unwrapped bars in a container — they will fuse at the chocolate contact points and break apart when separated.
To thaw: transfer individual bars from the freezer to the counter and leave at room temperature for 45–60 minutes. Do not thaw in the fridge — the slow temperature change draws moisture out of the crumb and the bars come out drier than when they went in. Do not microwave from frozen — the chocolate pockets superheat while the surrounding crumb stays cold, producing uneven texture. For the closest result to fresh-baked, thaw at room temperature and then place in a 300°F (150°C) oven for 5–6 minutes.
Freezer — Unbaked Dough
The assembled, unbaked dough freezes well directly in the pan for up to 1 month. Press the dough into the parchment-lined pan as normal, scatter the surface chips and flaked salt, then wrap the entire pan tightly in two layers of plastic wrap and freeze flat.
To bake from frozen: remove the pan from the freezer and place it directly into a cold oven. Set the oven to 350°F (175°C) and allow the oven to preheat with the pan inside — this gradual warm-up prevents the frozen dough from cracking as it comes to temperature. Once the oven reaches 350°F (175°C), begin timing and bake for 32–38 minutes, checking at 32. The doneness cues are the same: matte surface across the full slab, edges set and golden, faint give in the center when the pan is gently shaken. Add the flaked salt immediately after pulling if it was not added before freezing. Cool for the full 2 hours before cutting.
Serving Suggestion
I serve these bars at room temperature — never cold, never reheated unless they have been frozen. The chocolate pockets are at their best when the bar has had a full 2 hours to set and then been left alone. The flaked salt is most pronounced in the first few days, so these are best shared quickly.
My go-to pairing is a tall glass of cold whole milk or a double shot of espresso over ice — the bitterness cuts through the brown sugar density in a way that makes each bar taste cleaner and lighter than it actually is. These are the bars I bring to weekend gatherings when I want something that looks and tastes like it took more effort than it did — a 9×13 pan cuts into 24 pieces, which is enough for a crowd without requiring two batches.
🗒 Luna’s Note: I always cut the full slab into bars before I serve any of them — even if I am only serving a few. Bars cut from a full slab have cleaner edges and hold their shape better than bars cut from a slab that has already had pieces removed from it. The structural integrity of the remaining slab drops significantly once you start cutting from the middle.
Frequently Asked Questions About Sourdough Chocolate Chip Cookie Bars
What does sourdough discard do in cookies?
Sourdough discard adds mild lactic acid fermentation notes that deepen and sharpen the flavors around it — particularly caramel notes from brown sugar and the bitterness of chocolate — without making the finished bar taste sour. It also contributes a small amount of hydration and existing gluten structure from its flour content, which keeps the crumb dense and chewy rather than starchy. The effect is subtle but measurable: a bar made with discard tastes more complex and layered than one made without it.
Can I use sourdough starter instead of sourdough discard?
Active fed starter will work in terms of structure, but it will make these bars noticeably tangier than intended and can introduce unpredictable leavening that causes the center to dome and collapse during baking. The recipe is calibrated for unfed discard — 1 to 14 days old, stored in the fridge, at room temperature before use. If active starter is all you have, use it but reduce the quantity to ⅓ cup (80g) and add 2 tablespoons (16g) of extra flour to compensate for the higher hydration. Expect a slightly more sour flavor profile. For more sourdough discard baking ideas, my sourdough chocolate chip cookies article covers how discard behaves differently in a drop cookie versus a bar format.
How do I know when cookie bars are done?
Cookie bars are done when the surface looks matte and set across the full slab and the edges are golden-brown and pulling very slightly from the parchment — but the center still has a faint give when the pan is gently shaken. A fully set center in the oven means overbaked bars on the cooling rack. The egg proteins and gluten structure continue setting during the 2-hour cooling window via carryover cooking — the pan retains enough heat to raise the internal temperature of the center by 10–15°F (5–8°C) after it leaves the oven. Pull early, cool fully, cut at 2 hours.
Can I make sourdough chocolate chip cookie bars ahead of time?
Yes — these bars are an excellent make-ahead option because they genuinely improve after the first day. Bake the full batch, cool for 2 hours, cut into bars, and store in a lidded hard-sided container with parchment between layers at room temperature for up to 5 days. The brown sugar and discard hydration keep the crumb soft and chewy through day 3 without any noticeable quality drop. For longer make-ahead, freeze individually wrapped bars for up to 2 months and thaw at room temperature for 45–60 minutes before serving. The unbaked dough can also be frozen directly in the lined pan for up to 1 month and baked from frozen with an extended bake time of 32–38 minutes.
Why are my cookie bars cakey instead of chewy?
Cakey bars almost always come down to the fat state or the sugar ratio — not just flour measurement or bake time. Butter that was still slightly warm when the sugars went in begins to melt the sugar crystals prematurely, which changes how they interact with the flour during baking and produces a more open, cake-like crumb structure instead of the tight, dense one that comes from properly cooled melted butter.
Similarly, if the brown-to-white sugar ratio shifts — for example, substituting additional white sugar because the brown has run out — the hygroscopic molasses content drops and the bars lose the moisture-retention mechanism that keeps the crumb chewy through day three. Check that your butter was fully cooled before mixing, that your brown sugar was packed correctly at 300g, and that the discard was at room temperature so it incorporated evenly rather than creating cold pockets in the batter.
Can I double this sourdough chocolate chip cookie bars recipe?
Doubling the ingredient quantities works for everything except the baking soda — do not simply double it. Leavening does not scale linearly: double the baking soda in a doubled batch produces excessive lift that causes the bars to dome dramatically and then sink as they cool, leaving a compressed, gummy center layer. For a doubled batch, increase the baking soda by 50% only — from ½ tsp to ¾ tsp total. Bake in two separate 9×13 pans rather than one larger pan — a deeper pan changes the heat distribution and requires significant bake time adjustments that are difficult to calibrate without testing. Bake time remains the same: 25–28 minutes per pan, one pan on the middle rack at a time.
How does altitude or humidity affect these bars?
At high altitude — above 3,500 feet (1,067m) — reduced air pressure causes the baking soda to act more aggressively, which can produce a domed center that collapses as the bars cool. Reduce the baking soda by ⅛ tsp and increase the oven temperature to 360°F (182°C) to set the structure faster. In high-humidity environments, the sourdough discard absorbs ambient moisture and the batter can become wetter than intended — add 1 extra tablespoon (8g) of flour if the batter looks pourable rather than thick and scoopable before it goes into the pan. The doneness cues remain the same regardless of environment: matte surface, set edges, faint center give.
More Cookie Bars You’ll Love
- Salted Caramel Chocolate Chip Cookie Bars — the same chewy bar base layered with a thick ribbon of homemade salted caramel running through the center
- Nestle Toll House Cookie Bars — the classic pantry-ingredient bar with the original Toll House ratio, baked thick in a 9×13 pan
- Oatmeal Chocolate Chip Bars — a heartier bar with rolled oats adding texture and chew alongside semi-sweet chocolate chips

Sourdough Chocolate Chip Cookie Bars
Ingredients
Equipment
Method
- Position the oven rack in the middle position and heat the oven to 350°F (175°C), then line a 9×13 inch light-colored aluminum pan with parchment paper leaving 2 inches of overhang on both long sides.
- Melt the butter in a large mixing bowl, then set aside for 8–10 minutes until neutral to the touch — not warm, not cool.
- Add the packed light brown sugar and granulated white sugar to the cooled melted butter and whisk in wide circular strokes for approximately 30 strokes until the mixture looks smooth, glossy, and uniform with no visible dry sugar pockets.
- Add the eggs and egg yolk one at a time, whisking each in completely before adding the next, then whisk in the pure vanilla extract until fully incorporated.
- Add the unfed sourdough discard at room temperature and fold with a silicone spatula in slow bottom-upward strokes for approximately 15 strokes until no white streaks remain and the batter looks smooth and unified.
- Add the all-purpose flour, baking soda, and fine sea salt to the bowl and fold with the silicone spatula using bottom-upward strokes — 25 strokes maximum from the moment the flour touches the batter — until just incorporated with no dry streaks remaining.
- Add 2 cups (340g) of the semi-sweet chocolate chips and fold in with approximately 10 bottom-upward strokes until evenly distributed, then transfer the dough to the prepared pan and press into an even layer using the spatula and damp fingertips.
- Scatter the reserved ¼ cup (43g) chocolate chips evenly across the top surface and press in gently, then place the pan on the middle rack of the preheated oven.
- Bake at 350°F (175°C) for 25–28 minutes until the surface looks matte and set across the full slab and the edges are golden-brown, checking at 22 minutes — the center should still have a faint give when the pan is gently shaken at pull time.
- Remove the pan from the oven and immediately scatter the flaked sea salt evenly across the entire top surface within 30 seconds of pulling.
- Place the pan on a wire cooling rack and leave completely undisturbed for a minimum of 2 hours before cutting, then use the parchment overhang to lift the full slab onto a cutting board and cut into 24 bars with a sharp knife wiped clean between cuts.